Hummus Two Ways
Super creamy Hummus Two Ways is just so much better home made than store bought!
This one is based on the fantastic version from Cookie and Kate, who did the research to find all the tricks for you.
I’m adding Beetroot to the basic version here, which gives it not just a lovely pink colour, but also an earthy sweetness that goes so well with the chickpeas.

This post may contain referral links for products I love. For The Pleasure Of Eating earns a small commission on these links at no cost to you, and the links will always be marked with an asterisk* or highlighted in pink.
Why You Will Love This
TL;DR
The secret to the smoothest hummus you will ever have is to boil the chickpeas with baking soda until they are basically falling apart, then blend in a food processor with tahini, lemon juice, olive oil and iced water.
You can include different flavor additions like beetroot, to vary this protein rich snack.
Create Your Own Mezze Feast
In the next weeks, I will be posting a series of recipes that can be mixed and matched to create your very own Mezze Feast. Perfect for the upcoming holidays, each recipe can be prepared ahead of time, so you don’t have to stress when your guests are arriving.
Deliciously Creamy and Healthy Snack
There is a reason Hummus is so incredibly popular, and its not the stuff you buy in the shops that is responsible for it. While some of the versions you can buy are decent, I have yet to come across one as creamy and dreamy as this. And that’s after I made countless versions including the one from Ottolenghi at home.
But after trying the incredibly well researched one from Cookie + Katie, I don’t think I ever need another recipe. Please visit her blog for the in-depth details. I don’t want to take away from the work she has done.
If made the right way, there is nothing dry or grainy about it. Just a creamy sesame laced fluffy mousse you want to eat with everything from carrots (my favourite way) over any other crudites to flatbread and falafel.

Protein and other Benefits
For the rather impressive health benefits of Chickpeas, check here.
For me, the fact that they contain protein is particularly important, as I eat very little meat, so I struggle to get my recommended amount every day. Hummus makes it a lot easier, as I can just snack on it or have it as part of a…do I say it? Girl Dinner, or as we call it in Germany: Abendbrot in the evening, when I can’t be bothered to cook.
What Is Different About This Hummus
For detailed information please check Cookie+ Katies post.
But in short:
- Excellent Quality Tahini that gets whipped thoroughly in the blender with ice cold water.
- Garlic steeped in lemon juice and salt, to take off the edge and mellow its bite
- Overcooked Chickpeas, boiled with baking soda to soften the skins. They are the key here.

My Tiny Adaptation of Katies original
I decided to mash the garlic clove instead of chopping it in the food processor, as I found that still leaves too many noticeable pieces, no matter how long I let it run. Chopped garlic always remains chopped garlic, no matter how finely you chop it. While mashing it in the garlic press, grating it or with salt and a knife on a chopping board will give you an even smoother experience.
My Beetroot Version
I’ve tried a few shop bought versions of hummus with beetroot and while they were ok, they were never that creamy. That’s what we are solving with this method.
I’m pre-processing the beetroot together with the garlic, which gets smashed, then pureed even finer in the food processor until incorporated with the lemon juice.
I’ve tried to add the beetroot later with the chickpeas and found, that while it gets decently creamy, it never reaches this super fluffy stage we are aiming for, but leaves little beet chunks, which is exactly what we are trying to avoid here.
Sweet and Savoury at Once
The end result is a Beetroot Hummus that is savoury and sweet at once, extremely pretty and goes with anything your standard version works well with. I honestly prefer it to the plain version.

Ingredient Notes

- Tahini – See note below.
- Chickpeas – You can use either canned or dried chickpeas here, as long as you make sure to literally cook them until mushy. I mean falling apart soft.
- This is achieved by adding baking powder, which will dissolve the skin, that is responsible for the hard bits in most kinds of hummus.
- Lemon Juice – Use freshly squeezed lemon juice. Please. Don’t use the bottled stuff. I’m all for shortcuts, but lemon is a main component in a dish that has so very few of them, so use the best quality you can get. Which is fresh.
- Beetroot – Now this is my time for shortcuts. I have actually used the steamed or boiled ones from a packet. I found they are just right and don’t require you to roast and peel or cook. Plus they last for ages, so you can always have them around when you are craving some Beetroot Hummus.
- Date Syrup – I added a bit of date syrup to the beetroot version, to emphasize the sweetness and bring out more of the fruity flavour. If you don’t have date syrup, pommegranate molasses would be lovely or just a bit of maple syrup with lemon juice in a pinch. This might not give you the extra fruityness, but will bring out the sweetness of the beets.
- Cumin – Now this one is optional. I know it’s very traditional in Hummus and pretty much every recipe has it, but I have an adverse reaction to it (feeling sick and getting headaches), so I leave it out. I love using ground coriander instead. Include or leave out according to your preference.
A Word on Tahini
Whatever you do, please don’t use the classic supermarket version of Tahini here, which you will recognise by the firm and hard to scoop paste in a jar topped with a thick layer of oil. I found they are at best just hard to work with, worst case add a horrible, bitter note to your recipes.
What we are after is creamy, easy to pour, and lovely sesame flavoured Tahini.
Israeli, Lebanese and Palestinian versions offer it, like “Al Nakhil”, which is the one I’m using.
Admittedly I have to order it online and it is often sold out in Ireland. So when I spot it, I tend to order several containers, for fear of running out. I get it at the Asia Market or Fallon & Byrne in Ireland. But if you live elsewhere in the world, check for the above countries of origin and you should be fine.
How to Make this
Equipment Used
 Buy Now →
  Buy Now →
  Buy Now →
 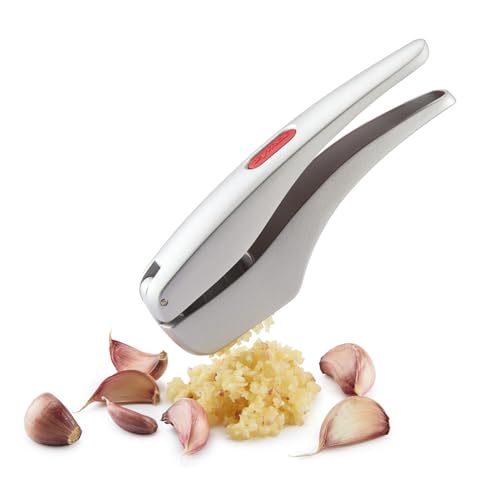 Buy Now →
  Buy Now →
 Chickpeas
Being the main component of Hummus, this is the most important part to get right. But all the details matter, so let’s start with Chickpeas.
If you use dried, pre-soak overnight, then cook with the baking powder until super soft and easy to mash with a spoon. Some of them should literally dissolve. How long this takes depends on how old your chickpeas are. I’ve cooked some fairly old ones for over 1h before getting even close to done. So plan accordingly.

For the canned or jarred version: Cook in water for about 20 minutes, which should have them mushy enough. But try to smash them before switching off the hob. If they don’t mash very easily, boil a little longer.
Do not add salt here, or they might take longer to cook or not get as soft.
Garlic
As briefly mentioned above, my small change to the original is, that I use a garlic press here, to smash the garlic. Or use the flat side of your knife with some salt. Or a micro plane grater. I don’t feel a food processor does a particularly good job of chopping garlic into the fine mash we are looking for here. The blades just smash it against the walls of the bowl in still far too big chunks. And we want the creamiest hummus we can get.

Once is satisfyingly pureed, do add it to your food processor* and top with the salt and (fresh) lemon juice, to let it mellow a little, while you get on with the rest.
Beetroot Version
If you are just making basic hummus, skip this step.
For those of you that want the lusciously creamy pink beauty of it, add your cooked and roughly chopped beetroot to the food processor now and puree it as fine as you possibly can. This may take a few minutes. I have a rather powerful Sage (Breville in the US) processor* and it took about 1.5 minutes, to get it to a reasonably pureed stage.

Tahini
Onto the second main ingredient. And I’m not saying this lightly. Tahini is the main flavour component. And before I followed katies recipe for the first time, I always thought it’s a bit silly to specify adding iced water to your hummus.

Most recipes do that towards the end, but similar to pre-whipping your butter and sugar for a sponge cake, processing the Tahini together with the garlic (and beetroot if using) while slowly drizzling in iced water, makes a huge difference in the texture. It should become rather light in colour and really fluffy. More like a mousse, than the fairly dense texture of Tahini. Which is where the quality of it comes into play. Starting with big “chunks” of really firm Tahini will probably not get you the results we are looking for here.

So: With the added tahini after the garlic (and beetroot) have been sufficiently pulverized, let the processor run and slowly add spoons of iced water until really light and creamy. It should look roughly as in the picture above. See the colour and texture change from the picture with the unwhipped Tahini and the whipped? That is what we are looking for.
Back to the Chickpeas
You can see the cooked texture we are aiming for above in the picture with the Tahini. The skins are very soft, so no need to remove them.
Now it’s time to add the cooked chickpeas to your already stunning looking mousse. And continue processing until really creamy. Towards the end, drizzle in some olive oil. It adds extra creaminess to the Hummus.
Once you have a super fluffy, irresistibly silky cream, give it a try. Maybe add some more lemon juice, salt and cumin (or coriander) if you like.
The Plain Hummus Version:

The Beetroot Hummus Version:

And it’s time to enjoy. Grab some warm Flatbread (a sourdough recipe for a rather incredible one is in preparation), dip and enjoy a really good hummus.

Variations
I think there is as many different recipes for hummus as there is families in the middle east. Apparently there are heated discussions about its origin and what the “correct” recipe is.
Thankfully I’m not overly concerned with that part and just enjoy different variations.
If you are of the same mindset, feel free to add things like sweet chili sauce, all kinds of soft herbs, caramelised onions, peppers, roasted carrots, roasted tomatoes or similar to it and enjoy the flavour explosions those will give you.
Or use another legume as a base, while following the same process. I found butter beans really enjoyable.

Meal Prep
I found making hummus at the start of my week and enjoying it on my workdays with all sorts of things is pretty perfect. Classic hummus should keep for about 5 days in a lidded container in the fridge.
If you add any more acidic components, like, for example beetroot, it might shorten that timeframe slightly.
Vegetarian Mezze Feast
Here is the full Vegetarian Mezze Feast. Mix and match whatever you like, use just one as super quick snack or dinner or all of them for one stunning feast:

Now I’d love to hear from you in the comments!
Have you tried this? Did you enjoy it?
What other recipes would you like to see?
And if you enjoyed this recipe, please consider rating, sharing, or leaving a comment – your feedback truly helps my blog grow!

Hummus Two Ways
- Total Time: 30 minutes
- Yield: 8 1x
- Diet: Vegan
Description
Super creamy Hummus Two Ways is just so much better home made than store bought!
This one is based on the fantastic version from Cookie and Kate, who did all the research to find all the tricks for you.
I’m adding Beetroot to the basic version here, which gives it not just a lovely pink colour, but also an earthy sweetness that goes so well with the chickpeas.
Ingredients
- 1 can (15 ounces chickpeas, rinsed and drained, or 1 1/2 cups cooked chickpeas)
- 1/2 teaspoon baking soda (For cooking the chickpeas)
- 1/4 cup lemon juice (from 1 1/2 to 2 lemons, more to taste)
- 1 medium-to-large clove garlic (roughly chopped)
- 1/2 teaspoon fine sea salt (to taste)
- 1/2 cup tahini
- 2 to 4 tablespoons ice water (or more as needed)
- 1/2 teaspoon ground cumin
- 1 tablespoon extra-virgin olive oil
For the Beetroot version:
- 1 medium sized cooked and peeled beetroot
- 1.5 tbsp Date Syrup (Or Pommegranate Molasses)
Instructions
Garlic:
- Use a garlic press or the flat side of a knife with a pinch of salt to mash the garlic. A fine garlic mash is what you’re aiming for, and a food processor may not achieve this.
- Once the garlic is finely pureed, add it to your food processor and top it with salt and fresh lemon juice. Let it sit for a few minutes to mellow while you cook the chickpeas.
Chickpeas:
- If using dried chickpeas, soak them overnight, then cook with baking soda until they are super soft and easy to mash with a spoon. Some of them should literally dissolve. The cooking time may vary depending on the age of your chickpeas, so be patient.
- For canned or jarred chickpeas, cook for about 20 minutes until they are mushy enough. Try to mash them before switching off the heat. If they don’t mash easily, boil them a little longer. Do not add salt during this step as it can make them take longer to cook or not get as soft.
Beetroot Version (Optional):
- If you’re making the beetroot hummus, add your cooked and roughly chopped beetroot to the food processor. Puree it as finely as possible, which may take a few minutes.
- Add the date Syrup
Tahini:
- Tahini is a crucial flavour component. For the creamiest texture, process the tahini with the garlic (and beetroot if using) while slowly drizzling in iced water. The mixture should become light in colour and fluffy, resembling a mousse.
- The quality of tahini matters. Starting with a high-quality, smooth tahini will yield better results. Process until you achieve the desired consistency.
Back to the Chickpeas:
- Add the cooked chickpeas to your tahini mixture and continue processing until it’s smooth and creamy.
- Drizzle in the extra-virgin olive oil towards the end. This will enhance the creaminess of the hummus.
- Taste the hummus and adjust with more lemon juice, salt, and ground cumin (or coriander) to your liking.
- You now have a super fluffy, irresistibly silky hummus. It’s ready to enjoy.
Serving:
- Serve the hummus with warm flatbread or your choice of dipping items. This creamy and flavourful hummus is perfect for snacking or as a delicious side dish. Enjoy!
Notes
The equipment section may contain affiliate links to products I know and love.
- Prep Time: 10 minutes
- Cook Time: 20 minutes
- Category: Appetizer, Side Dish, Snack, spread
- Method: Blend
- Cuisine: Middle Eastern
Nutrition
- Calories: 119
- Sugar: 2
- Sodium: 228
- Fat: 10
- Saturated Fat: 1
- Carbohydrates: 7
- Fiber: 1
- Protein: 3


I have been looking for a homemade hummus recipe and this one is perfect! My toddler loves this for snacktime, too!
Your toddler has quite the sophisticated taste! My kids never touched stuff like hummus when they were little!
I make hummus all the time, so I tried the beetroot version. It’s amazing!
Thank you. Beetroot is my favourite too. 🙂
Oh I love your versions of Hummus! I am always on the lookout for different recipes, and am very fond of your version!
Thank you. 🙂
I love hummus as a healthy snack! Both your versions are winners!
Thank you. 🙂
Great hummus! I loved the beetroot version (we used pomegranate molasses in it). Addinf ice cold water really makes a difference to the texture – it was silky smooth!
Thank you, so happy it came out well for you. 🙂