Wholewheat Sourdough Sandwich Bread
Wholewheat Sourdough Sandwich bread – A flavourful and healthier alternative to supermarket bread. Or even artisan bakery bread since it’s so easy to make. Most of the work is done by the sourdough, as you just have to mix it together and stretch it a few times. The result is a soft, chewy and fine crumbed bread, holding up to all sorts of toppings.

This post may contain referral links for products I love. For The Pleasure Of Eating earns a small commission on these links at no cost to you, and the links will always be marked with an asterisk* or highlighted in pink.
Why You Will Love This
TL;DR
- Soft, Chewy & Flavourful – A healthier take on sandwich bread with a fine, tender crumb that holds up to any topping.
- Sourdough Does the Heavy Lifting – Mix, stretch a few times, and let time do the work. Low effort, big payoff.
- Better Than Supermarket Bread – No fluff, no blood sugar spikes. Just satisfying, real bread with staying power.
- Balanced Flour Mix – Mostly whole wheat with a bit of white flour for that ideal softness. 3:1 ratio works best.
- Meal-Prep Friendly – Start in the morning or prep the dough overnight—either way, fresh bread is ready when you are.
- Perfect for ‘Girl Dinner’ or Abendbrot – Cheese, charcuterie, leftover roast chicken…whatever’s in the fridge, this bread makes it feel like a meal.
Nutritious, incredibly simple, and versatile enough for everyday meals or something a bit more special. Once you try it, store-bought bread just won’t cut it anymore.
Amazing Fresh Bread for Dinner
I particularly love this as quick dinner (Abendbrot as we say in Germany. Or “Girl Dinner”, according to the newest TikTok trend) with any cheese or charcuterie I have in the fridge. Or leftover Black Garlic Roast Chicken, layered on Black Garlic Aioli, together with crunchy lettuce and tomatoes. Maybe a few olives or fruit on the side and you have yourself a feast. Ok, now I’m hungry.
Why Wholewheat and Sourdough?
Being German, I had a strange fascination at first, with the super soft white sandwich bread you get in Ireland (and probably pretty much anywhere except Germany): You squish it all the way together and it just bounces back. Weird. It also basically melts away when you eat it, not really satisfying your hunger or any of your bodies needs for nutrition but pretending to be basic bread and giving you instant glucose spikes. How that can impact your weight is explained very well in The Obesity Code* from Dr. Jason Fung.
After reading the above, I decided to lower both sugar and white flour intake, and if white flour, use it mainly with sourdough, to limit my bodies fat storage response, helping me to lose weight.
Now with sandwich bread in particular, you still want a certain softness, to wrap nicely around your toppings, which meant I had to use parts white flour and add whole wheat as much as possible. From my trials, the below ratio of 3:1 works best for this.
It’s easy. Really. Try it. I promise you won’t look back.
Don’t be intimidated by the long seeming recipe. There is very little active work involved, as the sourdough bacteria do most of the job for you. All they need is time.
You can start this in the morning and bake in the evening, to have with dinner. Or start in the afternoon, then leave overnight in the fridge, take out in the morning to come to room temperature and have freshly baked bread for breakfast or lunch. The toppings can be any seeds you enjoy, and you could even throw in some add-ins like seeds or crispy onions for more flavour, say to accompany a freshly made soup. Or just leave them out, to have a classic looking bread.
Ingredient Notes
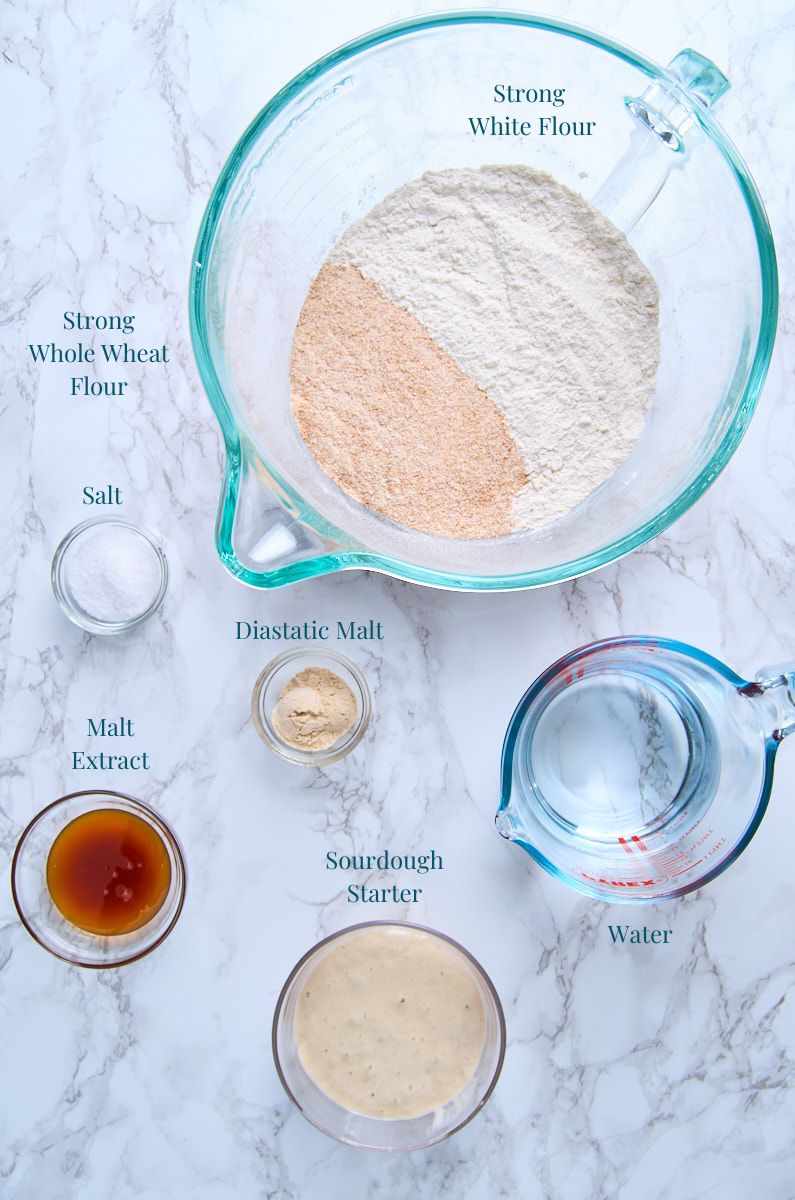
- Sourdough starter – fed and active
- White Bread Flour – Also called “Strong Flour”. It has a higher protein content, which helps the gluten to develop and give us a high rise
- Whole wheat bread flour – Also called “Strong whole wheat flour” for again, it’s high protein content
Note:
Cups, due to the possibility of compacting the flour while dragging the container through it, can give you wildly different results. Use a tablespoon to gently fill the cup with flour, then drag the back of a knife over it to level. This should give you the closest to the standard 120g per cup of flour.
Alternatively, if you have kitchen scales, assume 120g flour per cup and weigh it out.
In many of my recipes I will give gram measurements for this reason, but you can always switch to the american measurements in the recipe card.
- Salt – I’m using kosher salt. If you are using sea salt, halve the given amount
My “Secret” Ingredients
As with most of my bread recipes, I add a few “secret” ingredients, to increase the malty flavour I love so much and give my bread an irresistably crunchy crust.
- Diastatic malt powder, made from barley for flavour and a crunchier crust (optional but encouraged if you can find it).
- Malt extract*, replacing the usual honey or sugar, to add more malt layers.
- And, last but not least my most recent discovery: Pure Vitamin C powder*, which lends more structure to the bread by helping to develop the gluten, resulting a better rise, which helps especially when you use heavier flours such as wholewheat or rye (in my Wholewheat Sourdough Pretzel Buns for example). It also adds even more crunch to the crust, which is always a win in my eyes.
Tip:
A note on Yeast: I often add a tiny bit to any bread with a heavier type of flour like whole wheat or rye, since it gives a little more lift to the loaf. You can leave it out if you let the bread rise overnight or if your sourdough starter is super active and bubbly.
Equipment Used
 Buy Now →
  Buy Now →
  Buy Now →
  Buy Now →
 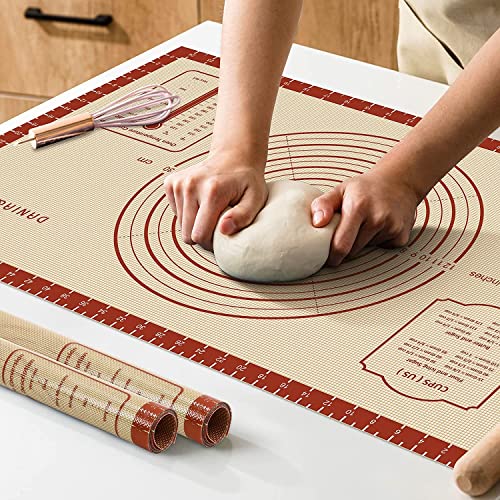 Buy Now →
  Buy Now →
 How to Make this
Mix ingredients
- In a large mixing bowl* or the bowl of a stand mixer* combine the sourdough starter and water. Stir well to incorporate.
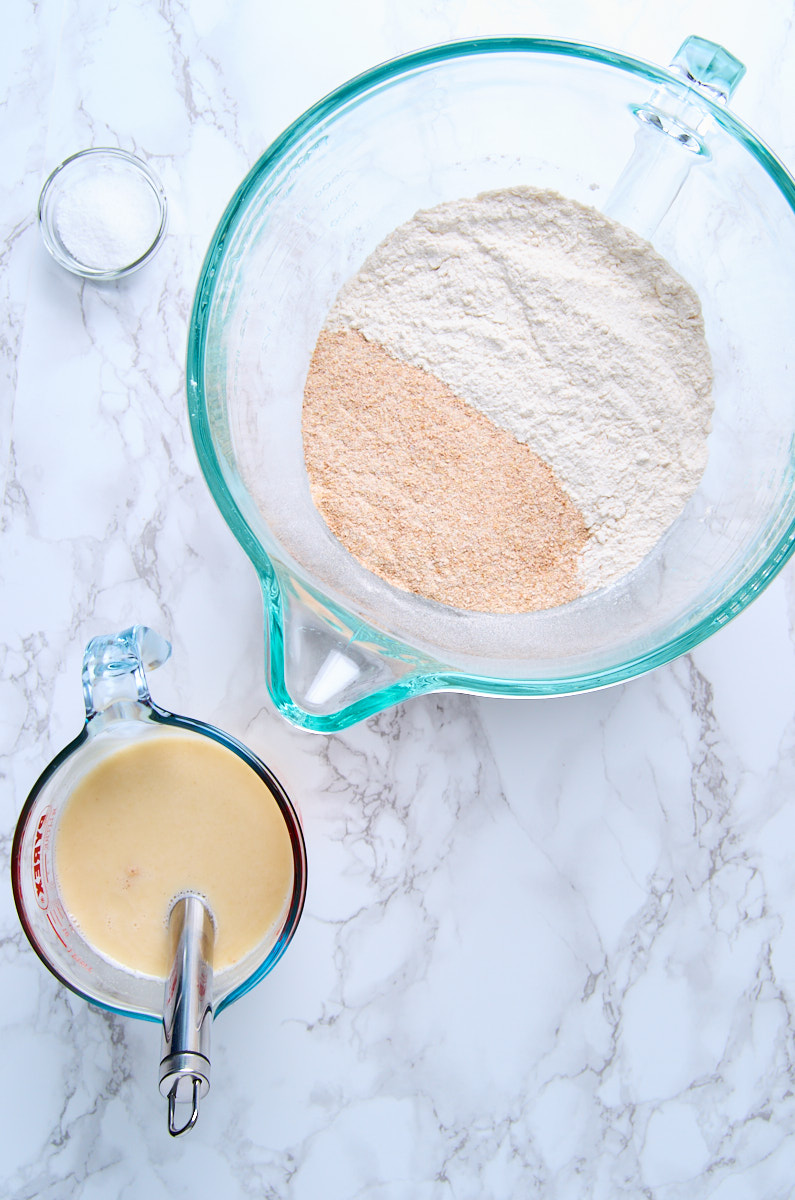
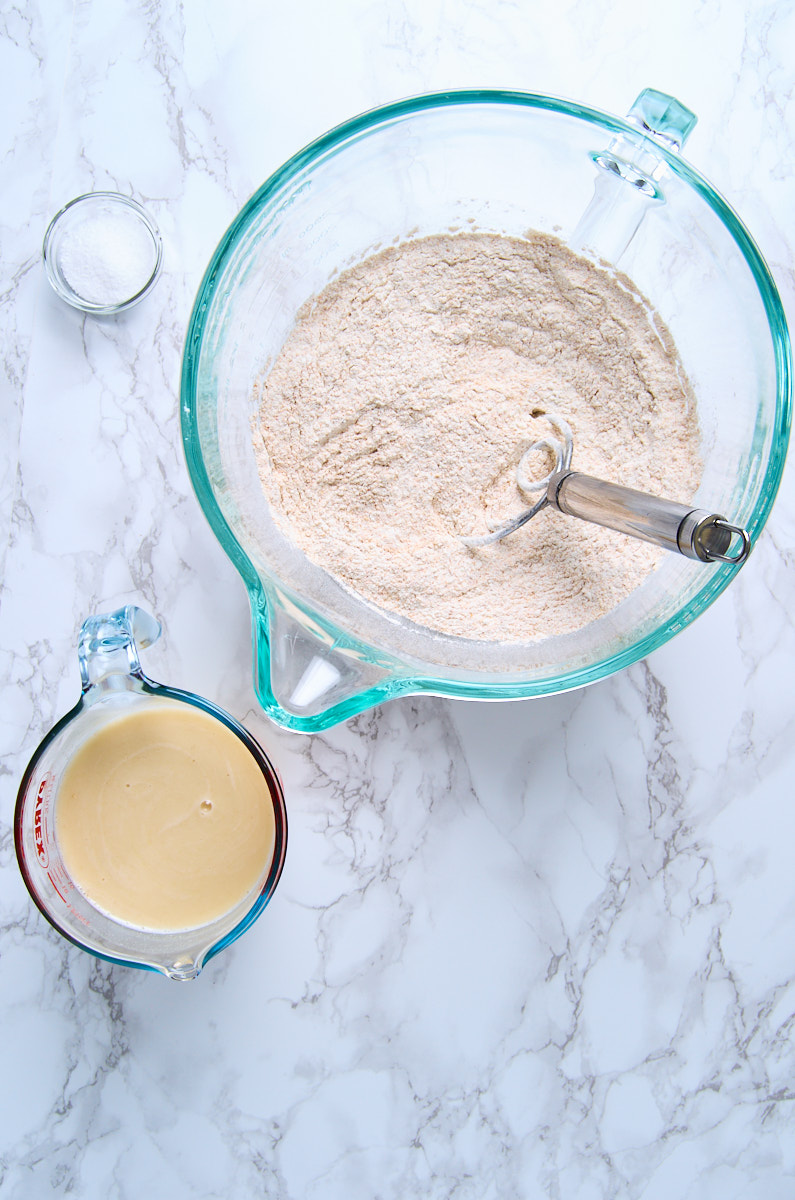
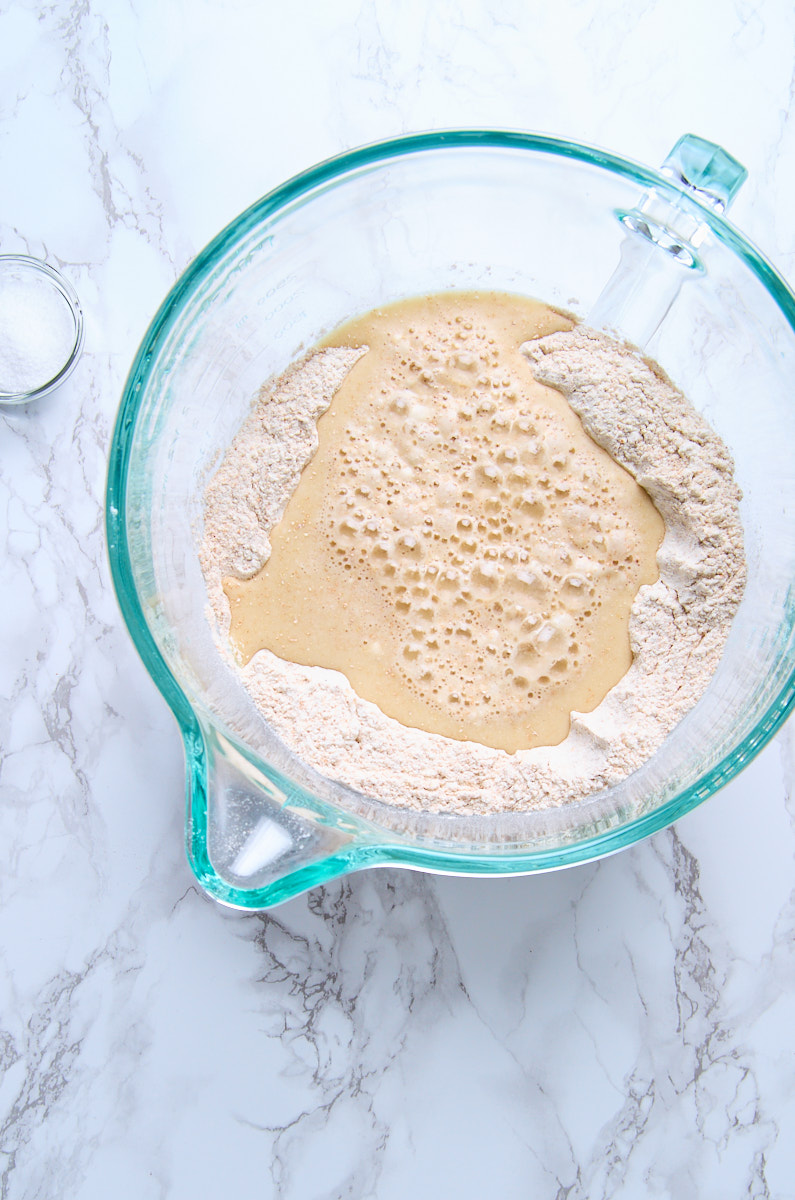
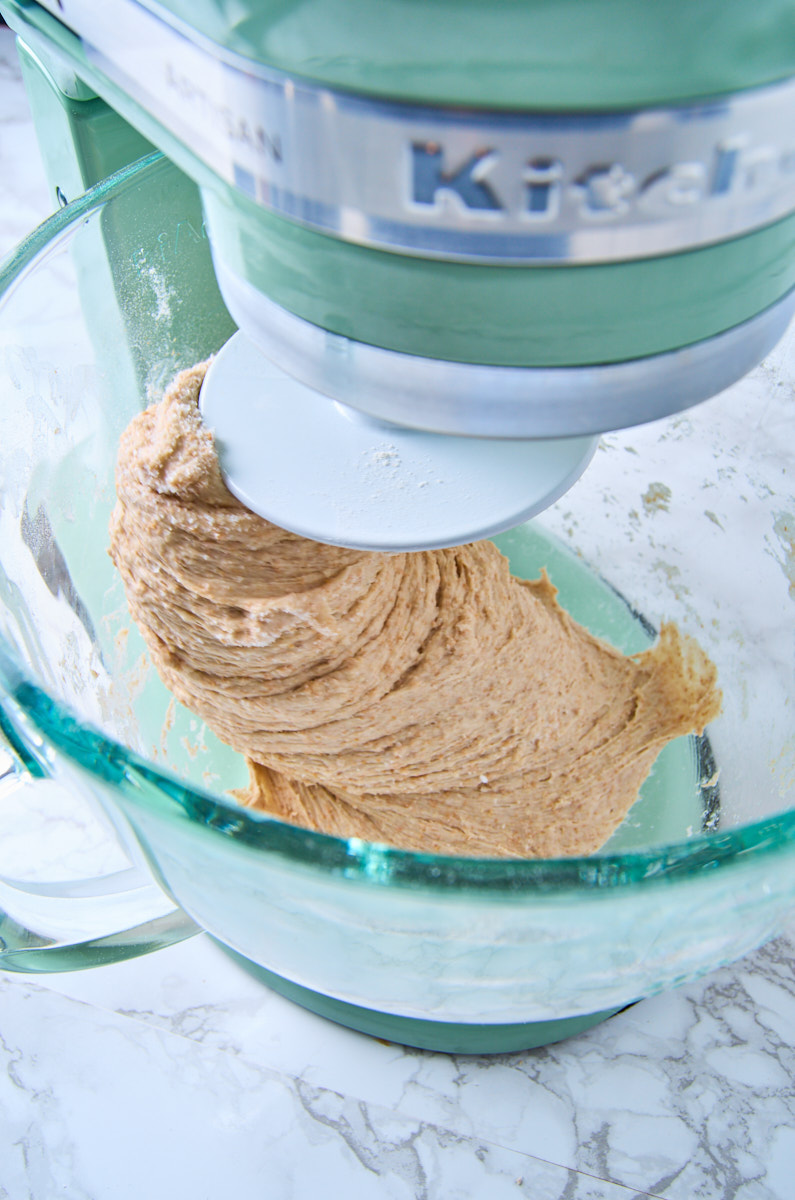
- Add the white bread flour, fine wholewheat flour, kosher salt, barley malt extract, baking malt powder, and yeast to the bowl. Mix everything together until a shaggy dough forms.
Rest
- Cover the bowl with a damp clean kitchen towel or plastic wrap and let it rest for 30 minutes to 1 hour. This step is called autolyse and helps the gluten develop.
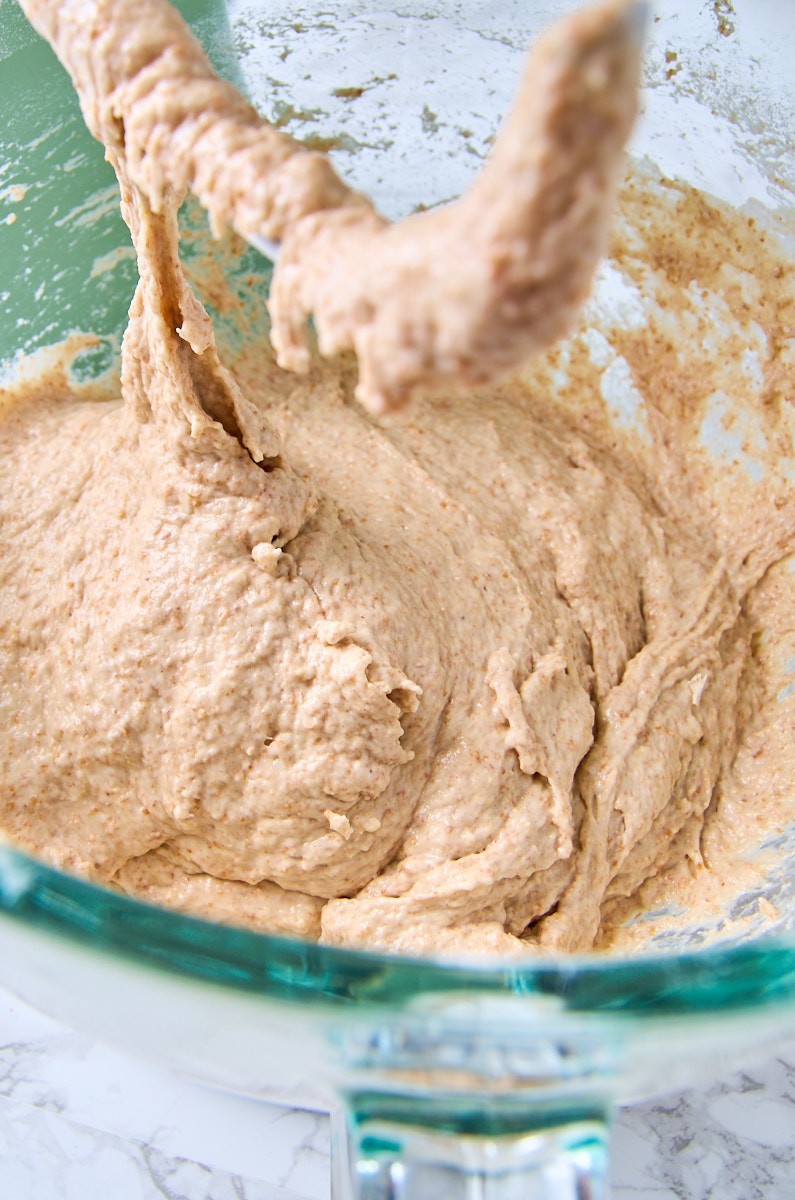
- Stretch and fold
- After the autolyse, perform a series of stretch and folds on the dough. To do this, wet your hands and reach underneath the dough, gently stretching one side up and over the rest of the dough. Repeat this process, rotating the bowl each time, until you’ve done this stretch and fold process 4-5 times.
Repeat
- Cover the bowl again and let the dough rest for 30 minutes.
- Perform another series of stretch and folds on the dough, just like in step 4. Cover the bowl and let it rest for another 30 minutes.
- Repeat the stretch and fold process for a third time, cover the bowl, and let it rest for another 30 minutes.
- After the third set of stretch and folds, let the dough rise at room temperature for about 2-3 hours, or until it has visibly expanded and feels light and airy.
Shape and Bake
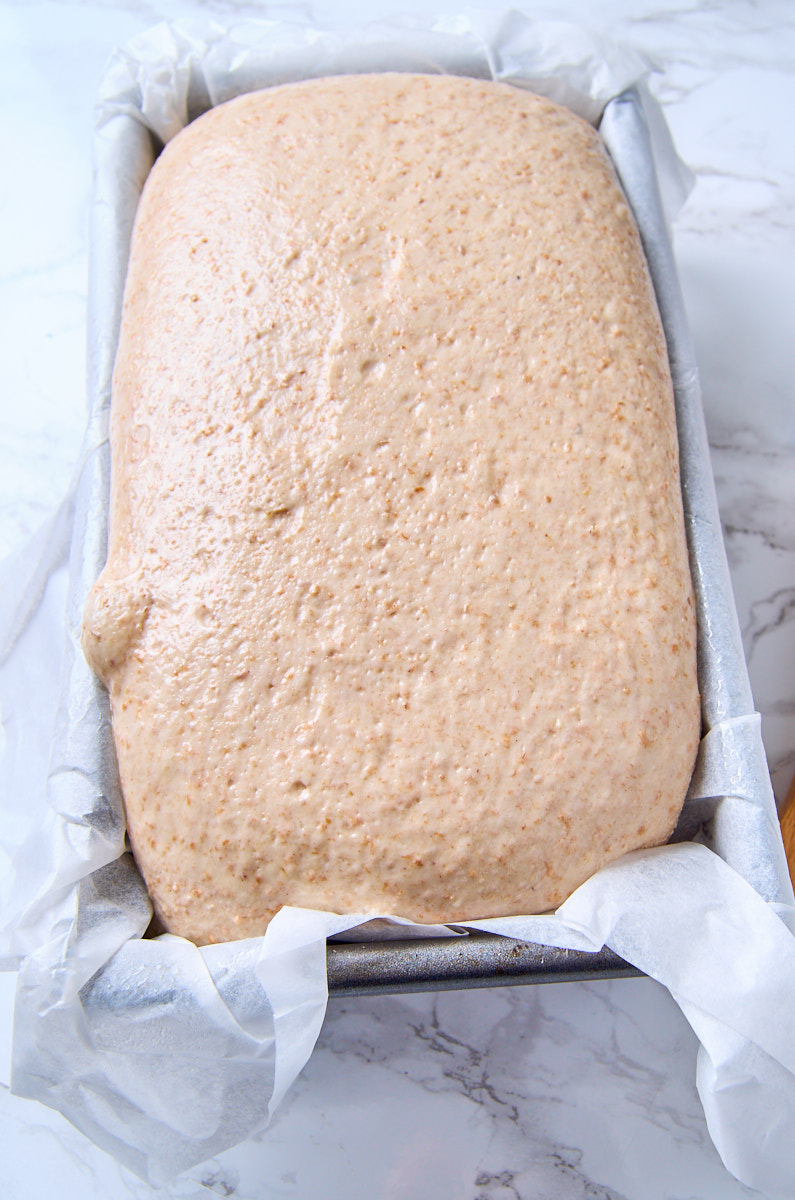
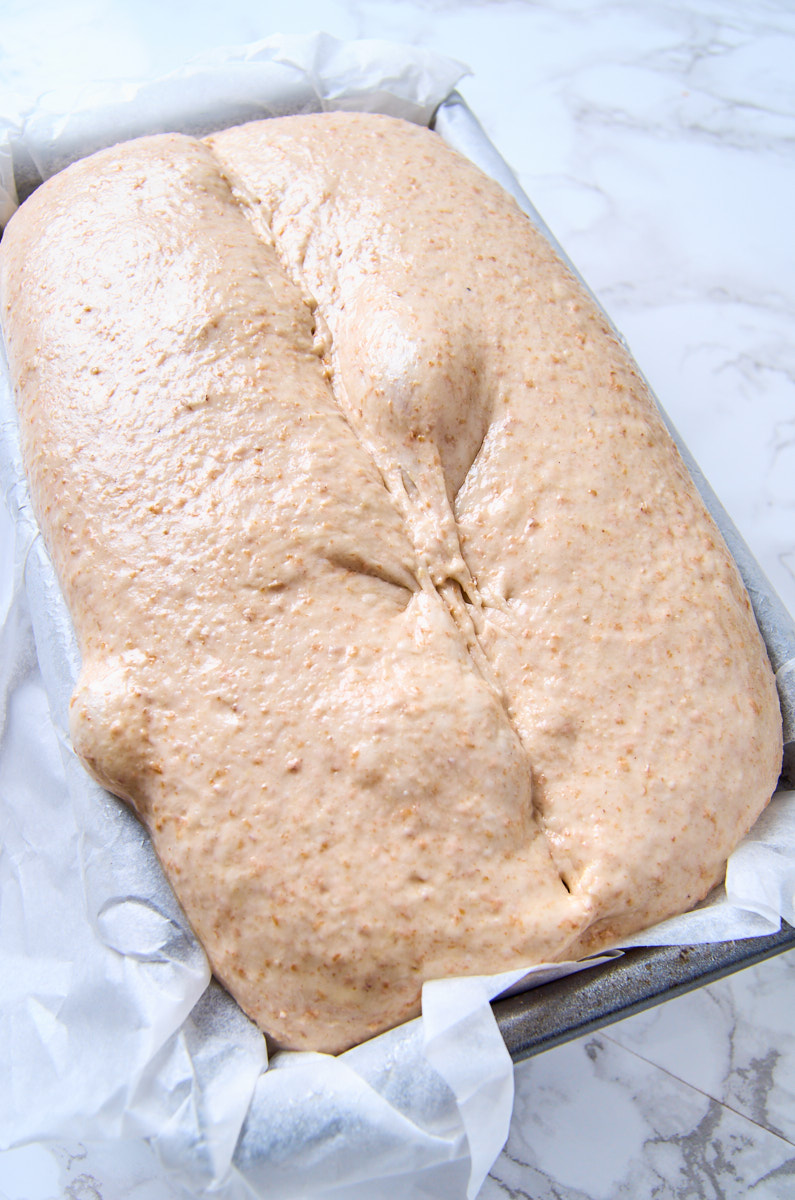
- Line a loaf pan with baking parchment for easy removal later.
- Gently transfer the dough onto a lightly floured surface. Shape it into a long loaf, the shape of your baking tin, by folding the edges towards the centre, creating tension on the surface of the dough.
- Place the shaped dough into your loaf tin. Cover it and let it rise at room temperature for another 1-2 hours, or until it has visibly risen and feels puffy. Alternatively, you can leave it overnight in the fridge at this point, to take it out a few hours before you want to bake it in the morning, to let it come to room temperature.
- Preheat your oven to 450°F (230°C).
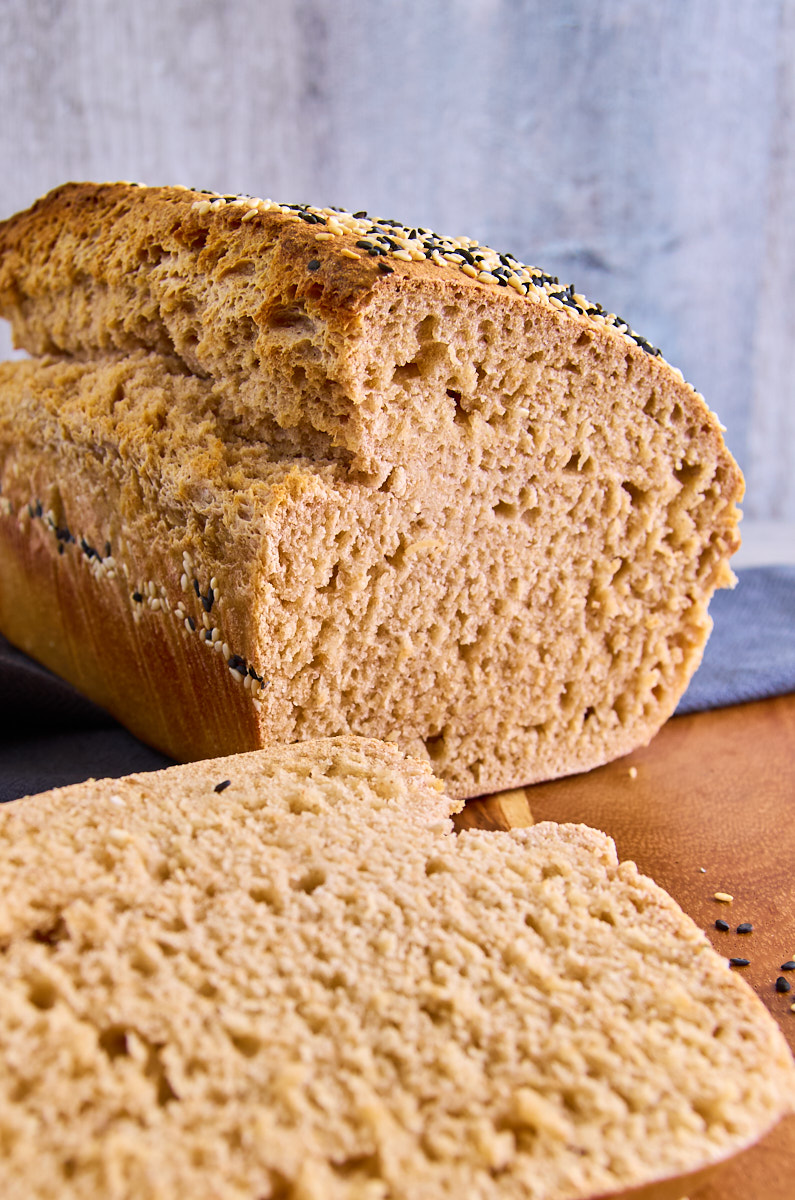
- Once the oven is preheated, score the top of the dough with a sharp knife or a bread lame (You could skip this step like I did, but your bread will randomly rise on whatever side it feels like), brush with a little water and add any seeds you might like to the top.
- Bake the bread uncovered for 20 minutes. Check for browning and cover loosely with aluminium foil, if it’s already golden brown, bake for another 20-25 minutes, or until the bread sounds hollow when tapped on the bottom.
- Once baked, remove the bread from the oven and tin right away and let it cool on a wire rack before slicing.
Meal Prep
The result will be a Wholewheat Sourdough Sandwich bread that is moist, denser than your usual sandwich bread, but with so much more flavour and health benefits. I personally prefer the structure of this over the soft, barely-there feel of supermarket breads. It is satisfying both as a meal of its own or to accompany any meal you choose. It keeps well in a bread tin for a few days, toasts beautifully golden and what you don’t eat quickly enough makes delicious croutons to use for example in my Black Garlic Roast Chicken Summer Salad.
Other recipes you might enjoy


The perfect No Yeast Sourdough Wholewheat Pizza Crust

The perfect way to use up stale sourdough bread: Pangrattato with Herbs and Lemon Zest

One of the million ways to use sourdough discard: Lemon Poppy Sourdough Zucchini Bread with Protein
Now I’d love to hear from you in the comments!
Have you tried this? Did you enjoy it?
What other recipes would you like to see?
And if you enjoyed this recipe, please consider rating, sharing, or leaving a comment – your feedback truly helps my blog grow!

Wholewheat Sourdough Sandwich Bread
- Total Time: 9 hours 15 minutes
- Yield: 12 Slices 1x
Description
A flavourful and healthier alternative to supermarket bread. Or even to artisan bakery bread, since it’s so easy to make. Most of the work is done by the sourdough, as you just have to mix it together and stretch it a few times. The result is a soft, chewy and fine crumbed bread, holding up to all sorts of toppings.
Ingredients
- 1/2 cup sourdough starter (fed and active)
- 1 1/3 cups water
- 3 cups white Bread Flour
- 1 cup whole wheat Bread Flour
- 3 tsp salt
- 2 tbsp malt extract ( (Health food shops usually have it and I find it very worth adding. Or honey if you can’t find it.))
- 2 tsp diastatic malt powder (I found mine on Amazon DE and a local flour shop stores it now too.)
- 1 tsp yeast (I tend to add a little yeast to wholewheat breads, as it’s a little heavier and the yeast helps with the rise. It’s optional though)
- 2 tsp Vitamin C (optional, lends structure and crunch)
Instructions
Mix ingredients
- In a large mixing bowl or the bowl of a stand mixer combine the sourdough starter and water. Stir well to incorporate.
- Add the white bread flour, fine wholewheat flour, kosher salt, barley malt extract, baking malt powder, and yeast to the bowl. Mix everything together until a shaggy dough forms.
Rest
- Cover the bowl with a damp clean kitchen towel or plastic wrap and let it rest for 30 minutes to 1 hour. This step is called autolyse and helps the gluten develop.
Stretch and fold
- After the autolyse, perform a series of stretch and folds on the dough. To do this, wet your hands and reach underneath the dough, gently stretching one side up and over the rest of the dough. Repeat this process, rotating the bowl each time, until you’ve done this stretch and fold process 4-5 times.
Repeat
- Cover the bowl again and let the dough rest for 30 minutes.
- Perform another series of stretch and folds on the dough, just like in step 4. Cover the bowl and let it rest for another 30 minutes.
- Repeat the stretch and fold process for a third time, cover the bowl, and let it rest for another 30 minutes.
- After the third set of stretch and folds, let the dough rise at room temperature for about 2-3 hours, or until it has visibly expanded and feels light and airy.
Shape and bake
- Line a loaf pan with baking parchment for easy removal later.
- Gently transfer the dough onto a lightly floured surface. Shape it into a long loaf, the shape of your baking tin, by folding the edges towards the centre, creating tension on the surface of the dough.
- Place the shaped dough into your loaf tin. Cover it and let it rise at room temperature for another 1-2 hours, or until it has visibly risen and feels puffy. Alternatively, you can leave it overnight in the fridge at this point, to take it out a few hours before you want to bake it in the morning, to let it come to room temperature.
- Preheat your oven to 450°F (230°C).
- Once the oven is preheated, score the top of the dough with a sharp knife or a bread lame (You could skip this step like I did, but your bread will randomly rise on whatever side it feels like), brush with a little water and add any seeds you might like to the top.
- Bake the bread uncovered for 20 minutes. Check for browning and cover loosely with aluminium foil, if it’s already golden brown, bake for another 20-25 minutes, or until the bread sounds hollow when tapped on the bottom.
- Once baked, remove the bread from the oven and tin right away and let it cool on a wire rack before slicing.

Notes
The equipment and ingredient section may contain affiliate links to products I know and love.
I particularly love this as quick dinner (Abendbrot as we say in Germany. Or “Girl Dinner”, according to the newest TikTok trend) with any cheese or charcuterie I have in the fridge. Or leftover roast chicken, layered on black garlic aioli, together with crunchy lettuce and tomatoes. Maybe a few olives or fruit on the side and you have yourself a feast.
This bread freezes beautifully. Either sliced, so you can take them out and just toast, or, as I usually do, cut in half, so you can have each half at its best.
The below is based on the estimation of about 12 slices. Which depends very much on your slice preference. Mine are about 80-100g per slice. Not that I weigh them every time, but that is the average when I did.
- Prep Time: 30 minutes
- Fermentation Time: 8 hours
- Cook Time: 45 minutes
- Category: Breakfast, Dinner, Side Dish
- Method: Bake
- Cuisine: American
Nutrition
- Calories: 161
- Sugar: 1
- Sodium: 588
- Fat: 1
- Saturated Fat: 0.2
- Carbohydrates: 33
- Fiber: 2
- Protein: 6
- Cholesterol: 0.2


This sourdough was amazing!! I’ve tried many bread recipes but this one really stood out to me.
Aww, thanks so much! Happy you liked it. 🙂
This wheat sourdough bread is delicious! I also loved how simple and easy the instructions were. I will be making this again!
Oh great! Thanks a lot for letting me know. So happy you enjoyed it. 🙂
This sourdough was delicious!! I’d never made a whole wheat versions, but this is one of my new favorite bread recipes.
Thanks so much for letting me know. So happy you enjoyed it. 🙂
This wheat sourdough is so much better than the classic. It has a fuller flavor that I love for sandwiches.
Thanks a lot! I feel the same way. 🙂
We have been trying to bake more bread at home instead of getting them from the supermarket. This was great and the sandwiches we made with them were fantastic!
This worked exactly as written, thanks!
This recipe is so easy to follow, which I appreciate! The bread was also delicious and had everyone asking for seconds!
Obsessed with this recipe! It took a little extra time to rise, but totally worth the wait. Now the hard part is deciding what to put on my first sandwich… 🙂
That’s always my problem too! So I make at least 2.
First of all, thanks for sharing this with us! As a bread lover this is an instant favorite for me! Definitely an awesome alternative bread for everyone to love and enjoy! This looks absolutely delicious! Perfect for breakfast! Totally love this!
Thank you, glad you enjoyed it. 🙂