
Description
If you’ve been looking for a way to hit your protein goals without eating another dry chicken breast or a chalky protein bar, these biscuits are for you. We’re taking everything you love about a classic, flaky sourdough biscuit—the tang, the buttery layers, and the cheesy goodness—and giving it a major nutritional upgrade. By swapping buttermilk for cottage cheese and adding a boost of whey, I’ve created a savory, garlicky biscuit that feels like a total indulgence but packs a serious protein punch.
Ingredients
Units
Scale
Biscuit Dough
- 1 cup (225g) cottage cheese, at room temperature, blended smooth
- 1 cup (225g) sourdough starter, active
- 2 tablespoons (25g) sugar
- 1/2 cup (60g) whey protein, unflavored
- 2 cups (240g) all-purpose flour, plus more for kneading and rolling
- 1/4 cup (60g) unsalted butter, cut into pieces, chilled
- 7 oz (200g) grated firm cheese, I used Comté
- 1 teaspoons (3g) kosher salt
Compound Butter For Laminating
(Make 2 tablespoons more of this garlic butter for brushing the tops after baking if you like)
- 1 stick butter at cool room temperature
- 1 clove fresh garlic
- 1 teaspoon Garlic powder
- 2 Tablespoons Fresh rosemary
- 1 Teaspoon onion powder
- 1 teaspoon salt or more to taste
- 1/2 teaspoon ground pepper or more to taste
Topping Before Baking
- 2 tablespoons (30g) melted butter, for brushing the tops before baking
Instructions
Gather your ingredients and equipment.
Blend The Cottage Cheese And Mix With Sourdough Starter
- The main step that gives you smooth looking biscuits is to get your cottage cheese blended really smooth, so you don’t have blobs of curd. It acts as liquid for the dough, which works best if it’s creamy.
- Using a Nutribullet, you might have to scrape down the sides a few times and bang the cup on the counter, to get the cottage cheese into the blades.
- Once you have a smooth mass, stir in your sourdough starter, just using a spoon or spatula. You don’t want to blend it to not break the delicate gluten structure.
Process the Flour and Butter
- Add the flour and cold butter for the dough to your food processor and just pulse a few times until you have about lentil sized bits of butter in the flour.
- Alternatively rub the flour into your butter by hand, aiming for the same result.
Grate The Cheese Into the Flour Mix
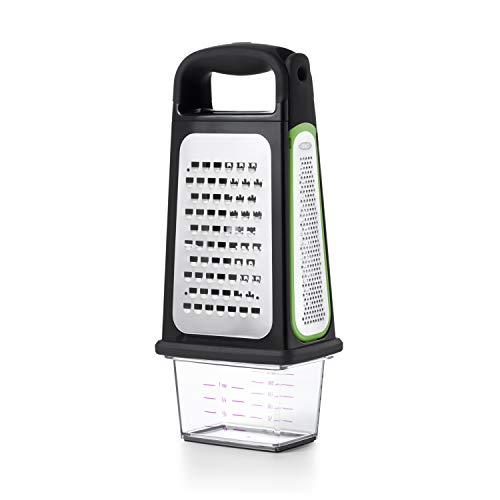
- Using the coarse side of your box grater, grate your chosen cheese into your flour. I saw Claire dipping her chunk of cheese into the flour, which is usually done by pastry chefs to keep grated butter bits separated, but I found it super helpful for getting a better grip on the block!
- Briefly mix the grated cheese into the flour, so it’s all coated. This prevents big chunks from forming and gives you an even distribution of cheesy flavor.
Add Your Wet Mixture To The Dry Ingredients
- Now add the cottage cheese with sourdough, protein powder, salt and sugar (these biscuits aren’t sweet, but it balances the flavor) to your flour-cheese mix and just stir until you have a shaggy dough. Don’t overwork this. You just want it to come together.
- Cover the bowl and allow to bulk ferment at cool room temperature for 4-6 hours or until risen by about 50 -100%. When it’s ready, it should spring back slowly when you poke it with your finger.
Mix The Flavored Butter
- If you decided you want to brush the tops of your biscuits with garlic butter after baking, add 2 tbsp butter to the basic amount.
- If you are using a food processor, simply add all the laminating butter ingredients (roughly chopped garlic and rosemary needles removed from the stems) to it and pulse until you have a uniformly mixed butter.
- If mixing by hand, finely chop the fresh rosemary. Grate or press your garlic clove into the butter for laminating. Add chopped rosemary and seasonings and mash with a fork until combined and soft.
- You’ll want this spreadable and at room temperature, but not half melting.
Roll Out The Dough
- Flour your work surface and rolling pin.
- Turn the dough out onto the floured surface and dust with a little more flour. It shouldn’t be very sticky at this point and fairly soft.
- Use your floured hands to pat it out into a rectangular shape, tugging on the corners gently. Flip it over, using a little more flour underneath, to stop it from sticking to the worktop.
- Now start gently rolling it out into said roughly rectangular shape until it’s about 3/8 inch (1cm) thick.
Laminating The Biscuit Dough
- If you want to brush the tops of the biscuits with garlic butter later, keep 2 tbsp of it in a small bowl.
- Get an offset spatula ideally or a silicone spatula and spread the butter over the lower 2/3 of your dough rectangle. Keep the top 1/3 uncovered. Use the offset spatula to get it as even as you can, spreading it all the way into the corners.
- Now fold the top third over the middle third, covering the butter, then the bottom third over the folded part, creating a sort of envelope shape with butter between each layer. Try to gently tug the corners, so they fit neatly on top of each other. It doesn’t have to be perfect. This will create the buttery flavored layers in the biscuits.
- Rotate your dough envelope by 90 degrees, using more flour as needed to prevent sticking and roll it out again, to about the same size as before and fold it in the same way once more.
- Try to keep the rectangular shape as much as possible. I often push the sides with the rolling pin a bit, to straighten them.
- Wrap in clingfilm or a large freezer bag and put into the fridge for about 30 minutes.
- Repeat the rolling process as above, paying attention to the shape in the last step in particular, as this will be your last rollout, getting the dough to the size you want to make 12 biscuits each about 2 inches square or slightly rectangular.
- The final measurement of your dough rectangle should be around 8×6 inch.
Cold Fermentation
- Wrap your dough loosely, so it can expand and slide it onto a sheet pan or large flat board that fits into your fridge, so the dough keeps it’s shape. Allow to cold ferment about 8h or overnight.
- At this point you could leave them in the fridge for up to 3 days and they will only deepen in flavor and get more delicious.
Cut Your Flaky Protein Sourdough Biscuits
- Line a sheet pan with baking parchment. For this recipe, as it’s very buttery, parchment works best as it absorbs any leaking butter, stopping the bottoms from being greasy.
- Once the dough had it’s fridge time, you can cut your biscuits. While you can of course cut round ones if you like, I feel rectangles lead to better results, as you don’t have to re-roll scraps of dough and get the optimal flakiness in every single piece.
- Get a large sharp knife and cut a small slice off each side, to get the perfect flaky layers exposed. This is optional but gives you the best defined look. You can bake the leftovers with the biscuits as bakers snack or even push them together as a sort of scraggly 13th bonus biscuit.
- I’m not very good at estimating, so I either use a ruler or just live with uneven sized biscuits, depending on mood and energy. Mark the dough so you get 3×4 biscuits out of it and cut them, placing them a bit apart on your sheet pan.
- Cover with clingfilm, giving them a bit of room to expand upwards and allow to rest for 2-3 hours at cool room temperature (you don’t want the butter to melt! So if your kitchen is very warm, find a cooler spot) until they have risen and are slightly domed on top.
Bake The Cheesy Garlic Biscuits
- Preheat your oven to 400°F/200°C.
- Melt the butter for brushing the tops and brush each biscuit. This will give you an incredibly flaky, crisp top.
- Bake on the center rack for 15-20 minutes, or until they are golden brown, puffy, and show distinct layers.
Optional Garlic Butter Brushing
- Soften the remaining garlic butter slightly in the microwave, then brush it over the top of your freshly baked flaky biscuits.
- Allow them to cool just a bit. They are absolutely fabulous while still warm. Pull one apart, admiring those perfect lacy layers you created. Enjoy with dinner or just as a snack with a nice glass of wine.


Notes
How To Store
- These Buttery flaky biscuits can be prepared ahead of time and stored at different stages:
- The dough can be kept for up to 3 days in the fridge. The ready cut biscuits for up to 2 days (as they already had a full day of proofing).
- You can freeze the cut biscuits raw for up to 3 months and just bake them when you need them from frozen, for about 1-2 minutes longer.
- After baking they keep in an airtight container on the counter for about 3 days, up to 5 in the fridge.
- You can freeze them for up to 3 months in a freezer proof container or freezer bags.
- Personally I love them even more when re-heated, especially after brushing with the garlic butter, as the tops get even flakier with little blisters. The air fryer or oven work well for this at 350°F/175°C for 5 minutes in the air fryer, a bit longer in the oven.
- Prep Time: 50 minutes
- Fermentation/Rise: 16 Hours
- Cook Time: 20 minutes
- Category: Sourdough Bread
- Method: Bake
- Cuisine: American


