Description
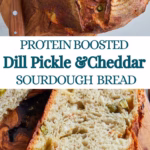
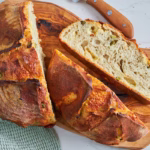
If you want to master adding mix-ins to your bread without ruining the dough structure, this post serves as both a practical guide to sourdough inclusions and a recipe for a savory dill pickle and cheddar loaf. Built on the back of my Easy Protein Sourdough, this recipe shows you how to safely add wet and dry ingredients using a simple lamination technique. It delivers the comforting flavors of a classic German Abendbrot with an extra hit of protein, requiring only about 30 minutes of hands-on work.
Ingredients
- 1 Portion Easy High-Protein Sourdough - Right after the bulk ferment
- 1 teaspoon dried dill or 1 tablespoon fresh dill
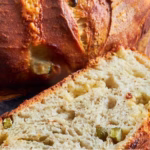
- 1/2 cup (70 grams) dill pickles
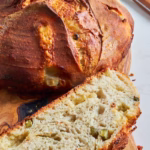
- 1 cup (115g) sharp cheddar
Instructions
How to Make This
- Since this Dill Pickle and Cheddar Sourdough recipe is made from the Easy High Protein Sourdough and we simply add the inclusions, we are starting after the bulk fermentation.
- So you’ll need to start by feeding your starter 3 days before you want to bake bread and mix the dough on day 2, to have it ready for baking on day 3.
- You can do the cold fermentation either before or after shaping, depending on your schedule and needs.
- I usually do my cold fermentation after shaping and take the loaf out of the fridge for the last rise if still needed.
Prepare Your Inclusions
- Chop your pickles into about ¼ in/ 7mm pieces. I used small gherkins, so mine where slices. If your pickles are bigger, you may want to halve or quarter them.
- Cube your cheddar to around the same size or up to ½ in/ 1 cm, if you’d like slightly bigger melted cheese bits or grate it coarsely, if you want an even dispersion throughout your dough.
- For the dill: Season with your heart. I noted 1 teaspoon dried in the recipe, as that is the measurement most commonly used for dried herbs and apparently sensible. But frankly I added a heaped tablespoon to my dough as I just adore its fresh herbaceous flavor. I feel it nearly tastes buttery in this bread, without adding any butter. Maybe that’s from my compound butter taste memory, which in Germany often has lots of dill.
Add your Dill, Pickles and Cheddar and Shape
- Prepare a banneton by misting it with a bit of water and dusting with rice flour. Rice flour, as opposed to wheat flour doesn’t get absorbed by the dough, so it works much better as effective non-stick layer.
- Turn your proofed dough onto a lightly floured work surface.
- Use your hands to gently pull it out into a square about 11 in/ 30cm on both sides. This doesn’t have to be exact. We just want as much surface area as we can get to scatter the inclusions over without ripping the dough and pushing too much of the trapped air out. So no rolling pin needed.
- Scatter half of your pickles, cheese and dill over the dough.
- Fold the top part of the dough toward the center, then the bottom part.
- Scatter half of the remaining inclusions over the folded dough.
- Fold the dough in half, so you have a square shape.
- Scatter over the rest of the dill, cheese and pickles.
- Grab the opposing corners of the dough piece and pull them over the middle. Do the same with the remaining corners and pinch close.
- If any bits fall out during this process, just push them back into the dough, ideally while rolling up, so you don’t break the top afterwards.
- Flip the dough over, so the seam points down and gently shape into a round or oval by pushing it under itself with the sides of your palms while rotating it against the worktop. Be very gentle.
- Because the cheese and pickles have edges, you’ll need to be a little more careful than with your standard loaf, so the top doesn’t rip too much from poking bits. A few small holes are expected though and will give you lovely browned and crispy cheese pockets.
- Transfer your loaf top side down into your prepared banneton.
Last Rise
- I like to put the banneton with the shaped loaf into a slightly inflated, clean plastic bag that I clip close, to keep it warm and moist during the rise. Clingfilm will also work for the most part but often leaves gaps and with that dry bits on the dough.
- Here is your next bit of flexibility: You can either go straight to letting your dough rise for about 3 hours or until nice and puffy and jiggly and then bake it right away.
- Or you can cold ferment at this point (if it wasn’t already in the fridge for 3 days) and leave the rise for the next day. Be aware though that the rise, coming out of the fridge, will take a little longer as the dough needs to come back to room temperature for the bacteria to get back to peak activity.
- I often put my shaped loaf into the fridge and take it out about 5 hours before I want to bake, anywhere up to 3 days after shaping. The longer you leave it to ferment, the stronger the sourdough flavor and the easier it is to digest.
Score Your Loaf and Pre-heat The Oven
- With your Dutch Oven inside, pre-heat your oven to 475°F/245°C for 30 minutes to 1 hour.
- It may show pre-heated before, but the Dutch oven won’t be and the heat evens out after about 30 minutes. The high temperature at the start gives you the best oven spring.
- Right after switching on the oven put your banneton into the freezer for about 30 minutes for a cleaner score. I honestly often forget this or simply don’t have room in my freezer, so my scores are not those beautiful IG patterns.
- I mainly see them as functional, to enable the bread to expand and spring up nicely.
- When ready to bake, flip your loaf onto a piece of baking parchment and score it with a sharp knife or lame. You can use any pattern you like, just make sure you score deep enough. About ½ inch/ 12mm deep at a 45 degree angle with one long confident slice gives you the best results.
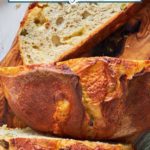
- If you are not keen on that “ear” you could do a cross and then cut your loaf in quarters along those lines later for easy slicing, which is what I’m doing for this loaf.
Bake your Dill Pickle Cheddar Protein Sourdough Bread
- Use your parchment to transfer your bread into the hot Dutch oven, put the lid on and bake at 475°F/245°C for 30 minutes.
- Lower the temperature to 440°F/225°C, take the lid off (temperature down before opening the door, so some heat can escape) and bake for another 15-20 minutes or until deep golden brown with the scored and risen bits a bit darker or until baked through.
- I rarely check the internal temperature of this loaf, as it comes out so consistently well baked, but if you’d like to be sure you can either tap the bottom, which should sound hollow when baked through or use an instant read thermometer to check the temperature at the center. It should be around 208°F/98°C for the crumb to be fully set and excess moisture having evaporated.
- Since this has fairly high moisture due to the inclusions, you’ll want to err on the side of baking a little longer rather than shorter to give it a chance to set perfectly.
- Take out of the oven and transfer to a cooling rack. Allow to cool at least a few hours, as you otherwise risk too much steam (aka moisture) to escape too early and with that a gummy, sticky or doughy texture.


Notes
Top Tips For Success
- Pat dry wet ingredients – Any inclusion like pickles or berries that is, by nature rather wet, is best added after patting dry a little with paper towels. Adding too much moisture can lead to a flat loaf.
- Your Bread won’t rise as much as without inclusions – This is working as intended and to be expected, as the dough has to “lift” additional weight. It will still be beautiful and utterly delicious in its own right.
- Try to keep inclusions inside of the dough – This is why I sprinkle mine over the stretched out dough in a way of lamination. Anything on top of your bread is more likely to burn. A bit of cheese on top will be delicious, as it has enough fat to simply crisp up and brown, but a tiny half burned pickle might not be great. So if they fall out, tuck them back into the dough.
How To Serve This Sourdough Loaf
While this bread is absolutely incredible on its own due to the cheesy pickle flavors (just a dab of fresh cold butter is heaven!), it’s even more delicious as a sandwich or used to mop up dressing or sauce. Think the cashew pickle ranch dressing from my Spring Salad with Pickles and Pretzels or drag it through some Creamy Cottage Cheese Pickle Dip, adding proper oomph to the flavor combo.
How To Store
- Homemade sourdough bread is incredibly meal prep friendly:
- You can prepare it the day before and just push it into the oven in the morning or 3 hours before you’d like to eat it. Or prepare the dough up to 3 days in advance and leave it in the fridge. The sourdough flavor will get more pronounced the longer it ferments.
- All of these breads keep well in a bread tin for about 3 days or up to 5 in the fridge.
- They freeze perfectly for up to 6 months and are excellent toasted.
- Prep Time: 30 minutes
- Rise/Overnight Ferment: 12 hours
- Cook Time: 1 hour
- Category: Bread, Bread & Sourdough, Breakfast, Dinner, Lunch, Protein Sourdough, Protein Sourdough Recipes
- Method: Baking
- Cuisine: American