
Description
Imagine a homemade sourdough bread that not only boasts that signature crispy crust, beautiful open crumb, and the rich, complex flavor of slow fermentation, but also packs a powerful protein punch.
This Simple High Protein Sourdough Bread is exactly that – your new go-to recipe that elevates your everyday loaf. It offers double the protein compared to a classic sourdough, with the added benefit of enhanced bioavailability. That’s right, sourdough isn’t just about taste; it also helps break down proteins into smaller, more easily digestible molecules, giving your body more of the nutrients it needs.
Ingredients
Sourdough starter (Levain)
10g unfed starter
60g all-purpose flour (or bread flour)
45g filtered water
Dough
500 grams strong white bread flour
7g salt
100 grams starter, active and bubbly
300 grams water
125g cottage cheese
30g protein powder (Whey, Casein or Barley all work)
Instructions
I’ll assume you have an existing sourdough starter. If not, you’ll need to start seven days earlier by creating one, following the steps in this recipe. It works just as well with white or rye flour.
2 days before you plan to bake your bread (or the morning before, if your kitchen is very warm)
- Take 10g of your existing sourdough starter (you can use 5g to slow the fermentation down a bit). Add 60g all-purpose flour (or bread flour) and 45g filtered water (or good quality drinking water).
- Your mix, contrary to the typical ratio, should be relatively firm and a bit harder to stir.
- Leave it in a loosely covered container on your kitchen counter until the next day. If your kitchen is particularly warm, especially in summer, preparing it the morning before baking might be best.
- I use my starter somewhere between peak and up to a day later, as higher flour to water ratio means it stays at peak much longer than your classic 1:1:1 starter. You can see above how active it was and that it has sunken already a little, but I found with this ratio that works perfectly fine, giving you a lot of flexibility in when you want to mix and bake.
- Note: You can absolutely use a 1:1:1 active starter if that’s what you have and use. Just use about 30ml less water in the final dough.
1 day before baking
Blend the wet ingredients
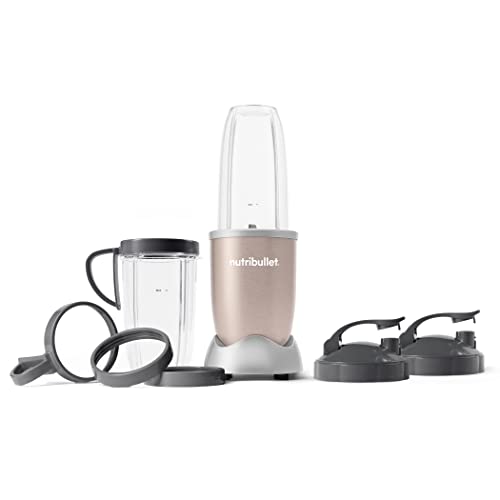
- In the afternoon start by blending the cottage cheese with some of the water and the protein powder until smooth.
- Using a bread whisk, stir in the remaining water and 100g of the sourdough starter.
- You could blend it, but I’m trying to be respectful of the little sourdough bacteria and treat them gently. Not everyone appreciates the wild ride in a blender!
- Keep the remaining starter for your next bread. You can keep it in the fridge if you like. My starter is fairly established and lives there sometimes for weeks without feeding, until I need it.
- If your starter is very young, aim for one feed a day to keep it happy and active. A few hours on the counter until you see peak activity, then back into the fridge, so it doesn’t get too hungry due to high activity worked best for me.
Mix the dry and wet ingredients
- In a large bowl stir together the bread flour and salt. I’m using kosher salt, which has a higher volume per gram, so for me this is 2 tsp. If you are using sea salt, use 1 tsp.
- While autolyse without salt (mixing the flour with the liquid without salt first, to absorb the flour) then adding the salt is an option, I never felt any difference when I tried it, so now I simply mix it right into the flour.
- Stir the wet into the dry ingredients using your dough whisk or spoon, make a little well in the middle of your flour then pour in your wet ingredient blend, stirring as you go. Mix until no dry flour patches remain.
- The dough will be very sticky and lumpy at this point, that’s totally fine.
- Leave it to rest for 30 minutes to 1h for the autolyse, allowing the flour to hydrate.
Stretch and Folds: Building Structure
- This part, while flexible in the timing, helps developing the gluten rapidly during the bulk ferment, gives the dough structure and helps trapping air inside for those large bubbles you keep seeing in the pictures of sourdough bread. I also find it very satisfying.
- I have left it out when making for example my German Rye Beer bread, which has a high rye flour content and won’t be as bubbly even if I kept stretching and folding all day long. But for this bread I would highly recommend it.
How To Do Stretch And Folds
- Wet your hands. This will mostly prevent the sticky dough fingers. Contrary to flour, which makes them worse.
- Push both hands under the dough and lift one side up. Stretch it until nearly the whole dough is lifted out of the bowl, then fold it over itself. Turn the bowl by 90 degrees and repeat. Do this 4 times, until the bowl has turned back full circle. Cover.
- The pictures above in the post are the results right after the first stretch and fold. You can see how fast this develops the gluten structure.
- Repeat the process 2-3 more times after 30 minutes each, until you feel the dough is much smoother, easier to handle and shapes into a neat (if wobbly) loaf.
Bulk Fermentation
- After the last stretch and fold, allow it to bulk ferment covered on the counter. I love my bowl with a lid for this, but in doubt cling film or a plastic bag around the bowl will do. I’m not a fan of towels, as I found the dough just dries out too fast.
- The Bulk ferment will take anywhere from 3-6 hours, depending on your starter and room temperature. So read your dough, not the clock. By the time it’s ready, it should have risen around 50-70% (sometimes more), feel light and jiggly and show some bubbles pn the sides and a few on top.
- The top should be domed. If it has fallen, it is overproofed, but worry not, it’s still edible!
- I love using a glass bowl, as I can see how it looks underneath the surface.
- One more thing: Don’t worry too much. It’s just bread. It’ll taste great. If the final texture isn’t what you wanted, you try a different bulk proof time the next time. Bread is a process, not immediate “perfection”!
- And if it has gone way too far, you can still make Focaccia!
Cold Fermentation – Or: Make Sourdough Work for Your schedule!
- After your dough had it’s bulk ferment and looks nice and risen, in warmer countries even at about 60% of the bulk ferment, to slow it down a little, you can pop your sourdough into the fridge for the cold fermentation.
- This is where the incredible flavor develops and you get the most benefits in terms of gut friendly bacteria, digestibility and protein absorbtion. You could skip it if you are really in a hurry, but it really makes a huge difference in flavor and effect!
- The bonus is: You can arrange it around your schedule. A mixed sourdough can stay in the fridge for up to 3 days and only gets better! Make it work for you by mixing it quickly when you have time, shape when you still have about 6h for the last rise. Or shape first then pop into the fridge, letting it rise either over time very slowly (I found it needs a bit of a headstart outside the fridge to make that happen) or shape and take out when you have time to let it come to room temperature and rise. All of that is flexible, as long as you allow said last rise an are patient until it’s done.
Prepare Your Banneton
- Or maybe I should say banneton or bowl with towel, as you can use either. I have both the classic type of banneton made from rattan and a set of silicone bannetons and love both.
- Whichever type you use, you’ll want to spray it with a bit of water and then sprinkle with some rice flour, spreading it around by turning the banneton (over the bin, to save you a mess if you like).
- Rice flour, contrary to AP flour won’t be absorbed by your bread, creating a nice stick-proof barrier that allows your risen loaf to pop out cleanly later.
Shape Your Sourdough Protein Loaf
- Timing: Either right after the bulk ferment or after the cold fermentation
- On a floured surface, tip your dough out of the bowl.
- Gently stretch it into a rough rectangle, keeping as much air as you can trapped inside. Though if you like a finer crumb, you could pop the biggest bubbles with a toothpick.
- Now grab the bottom two corners and fold one third of your dough over the center, creating an “open envelope” shape. Gently pat it down a little with your palms, so you don’t have huge air gaps.
- Now grab the top two corners and fold over the center, repeating the patting. Gently.
- Rotate the dough by 90 degrees, pull it a little wider without ripping, then starting on the short side, roll it up into a log. This will give you a more even crumb than most other shaping method and a good bit of tension to the dough, enabling it to hold its shape while rising.
- Flip your loaf with the seam facing you and use a knitting motion to pinch the seams close. For the ends, showing the layers, tuck them in a bit, then knit those close too.
- Flip the dough ball back onto its seam and start rotating it using a pushing motion with the side of your hand, tucking it underneath itself and creating surface tension against your worktop, until you have a nice and smooth round or oval shape, depending on your banneton/Dutch oven you are planning to use.
Last Rise
- Transfer to your floured banneton, seam side up and either cover with a shower cap or, what I love to do these days, push it into a clean plastic bag that you slightly inflate and seal, to keep it moist and warm during the last rise.
- When ready, it should have visibly risen, feel light and puffy and jiggle noticably.
Measure out Baking Parchment
(Optional but practical)
- I started doing this after one of my earlier rye breads got stuck on the bottom and it was a mess to clean up. Using parchment or a silicone baking mat helps keep the pot clean and your bread come out easily. Even when it, for whatever reason, didn’t work perfectly well.
- Turn your Dutch oven upside down on your worktop.
- Get a piece of baking parchment that’s about 2cm/1in wider than your Dutch Ovens bottom.
- Fold in half, then in half again and keep folding into a triangle about 2-3 times.
- Hold it on top of your pots bottom with the tip roughly in the middle of it. Fold it over the edge to measure about 2cm/1in down the side and cut the rest off with a pair of scissors.
- Open out and admire your perfectly measured baking parchment, ready to hold your dough.
Pre-heat Oven
- With the Dutch oven inside, pre-heat your oven to 475°F/245°C for 30 minutes to 1h.
- Even if is shows as pre-heated after a shorter time, this is when the temperature evens out and reaches the optimal temperature.
- Score Your Bread
- While the oven heats up, carefully tip your dough onto the center of the prepared baking parchment. If necessary, gently push it back into shape. Sprinkle the top with a little flour, then, using a lame or a sharp knife, score your bread.
- You can get as creative or simple as you like.
- For the perfect scoring patterns you see online, you can freeze your bread for 10-20 minutes, which hardens the surface and makes precise scoring much easier. I admit I usually don’t bother.
- One long score, about 1cm deep, at about a 45-degree angle slightly towards the side of the bread gives you the “classic” opening flap when the bread rises in the oven. Without scoring it would just break wherever it wants under the surface tension and might not rise as high. So one score is a good idea. Anything else is decoration.
Bake
- Using oven gloves, take your pot out of the oven onto a heat proof surface. Take off the lid. Be mindful about where you put this. I managed to burn a dark ring into a wooden chopping board. Ever since I put it either directly on my hob or an oven tray.
- Using the edges of the baking parchment, carefully lower your loaf into the Dutch oven. Close the lid and put it back into the oven.
- Bake with lid for 30 minutes.
- Lower the temperature to 440°F/225°C and take the lid off.
- Bake for 15-25 minutes longer or until deep golden brown with darker edges on the scored parts, where it puffs up.
Cool
- Remove the bread from the oven. You can allow it to rest for about 20-30 minutes inside the Dutch oven. After that transfer to a cooling rack to avoid condensation and soggy crust.
- Now comes the hard part. I know this smells really, really good and you want a slice right now!
- But be patient. Leave to cool for at least 2 hours, to get a nice clean cut.
- Enjoy your bread with some creamy cold butter.


Notes
How To Store
Homemade sourdough bread is incredibly meal prep friendly:
All of these breads keep well in a bread tin for about 3 days.
They freeze perfectly for up to 6 months and are excellent toasted.
Tip:
If you only made yeasted bread before, this dough will seem way too wet and sticky and you’ll be tempted to through a cup of flour into it, thinking the recipe is totally off and can’t work.
Resist the temptation and trust the process.
- Prep Time: 30 minutes
- Fermentation Time: 24 Hours
- Cook Time: 1 hour
- Category: Sourdough Bread
- Method: Bake
- Cuisine: German


