Description
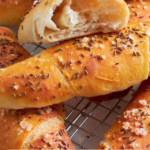
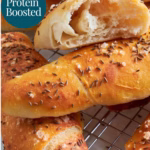
If you have ever stepped into an Austrian bakery, the scent of toasted caraway from fresh Salzstangerl is unmistakable. These rustic breadsticks are a staple for a reason: they offer the perfect contrast between a crispy exterior and a soft, pillowy middle. By using my favorite high-protein sourdough base, we are giving this traditional bake a modern upgrade. It is the same deep, tangy flavor you love, but with an extra boost of protein that makes it a satisfying addition to any breakfast spread or evening snack.
Ingredients
Scale
- 1 portion Easy Sourdough Protein Bread Dough, bulk fermentation completed
- 2 tablespoons caraway
- 1 tablespoon Flaky or coarse sea salt (I used Maldon salt)
Instructions
Preparation
- Line two sheet pans with baking parchment.
- Get two large, clean plastic bags that will fit the sheet pans and not touch the top when you slightly inflate them. These will protect the breadsticks from drying out during the cold ferment and last rise.
- Get a bench scraper, flour and a rolling pin ready.
- Lightly flour your work surface.
Shaping The Sourdough Breadsticks
- Cut your dough into 12 equal pieces. You can eyeball it or use digital scales to get them to the same weight. Each piece with be around 94g.
- Your dough will be very soft and a little tacky but should still be pretty easy to work with.
- Take each piece and shape it into a ball by grabbing the corners, pulling them up into a garlic bulb type situation. Flip that over, so the tips are on your work surface.
- Cup your hand loosely over the ball and start making rapid little circles until the dough ball looks smooth and has some good tension.
- Dust each of the little balls and your rolling pin with a bit of flour, then roll it out into a rough triangle of about 8in/20cm.
- Take hold of the widest parts on the top of the triangle and gently expand them a little, pulling them into more of a pronounced shape. Then gently pull the bottom end into more of a tip.
- Starting at the wide end on top, start rolling up your dough using your palm, think croissant shape, but straight, though your dough will be softer than croissant dough.
- Flour lightly as needed if it gets too sticky and use your bench scraper in case it gets stuck to the work surface. The bulk ferment should have gotten rid of most of the stickiness, but this is still a high hydration sourdough which shapes a little different than the classic recipe.
- Keep pulling gently at the tip, shortly before you roll it all the way up.
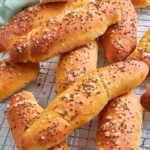
- To finish the shaping, use both of your palms to roll the breadstick back and forth a little, until you have the thickness you are aiming for. The thicker, the softer it will be, the thinner the crispier.
- Transfer to the sheet pan, arranging six of the sticks per tray, leaving plenty of room between them to expand.
- Continue until all twelve are shaped. The first few will look a bit rougher, but you’ll get the hang of it. The last rise will even out the shaping and make them look beautiful, so don’t worry about their look at this point.
Last Rise and Cold Fermentation
- Now get your clean plastic bag, push the sheet pan inside, inflate it a little by blowing inside, then seal with a clip or knot.
- At this point you can either put them straight into the fridge for the cold fermentation for up to 3 days, then assess how much rising they need after, if any. Or let them do their last rise at room temperature before baking them.
- Cold fermentation will develop the flavor further, leading to more of that characteristic sourdough flavor and give you all of the sourdough benefits like higher nutrient availability, more good gut bacteria and easier digestibility.
- For the last rise calculate about 3-6 hours, depending on room temperature, until your breadsticks look nice and puffy and when you gently poke them with an oiled finger the dent springs back slowly.
- They should feel and look very airy when they are ready to bake.
Bake your Rustic High Protein Breadsticks
- Preheat your oven to 410°F/210°C.
- I usually bake one pan at a time to get the best results.
- Add a heat resistant (ideally metal) tray to the bottom of the oven while pre-heating, so it gets nice and hot. This will give you the perfect steam you need when baking.
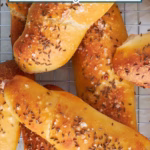
- Take the sheet pans out of their bags, spray the sticks with some water (I use a small spray bottle for a really fine mist), then sprinkle with Maldon or coarse sea salt and some caraway seeds. Use as much or as little as you like. Your sticks, your rules.
- Push the first pan into the oven, pour about 1 cup of water into the metal pan or tray at the bottom and bake for 15 minutes.
- Open the door to let the steam out and remove the pan from the bottom if there is still water left in it.
- Rotate your sheet pan with the bread sticks by 180 degrees, to get even browning, as most ovens bake unevenly.
- Bake for another 10-15 minutes or until golden brown and crispy on the outside.
- Remove from the oven, allow to cool on the sheet pan for about 10 minutes while you push the second batch into the oven, then transfer the sticks onto a cooling rack so the bottoms can crisp up too.


Notes
How To Serve
- Enjoy the sticks still warm or cold with some nice cold butter and maybe some cheese if you like. I love them most with nutty-sweet Swiss cheeses like Emmental or Gruyere.
- They are fabulous as breakfast, snack or with a lovely cold beer in summer and will make you feel like you are in an Austrian Beer garden, enjoying a warm evening while watching the world go by.
- Oh and they make fantastic hot dog rolls too! Shape them on the thicker side for that, as you want them a bit softer.
How To Store
- These Sourdough Protein Breadsticks with Caraway keep for up to 3 days in an airtight container at room temperature.
- They also freeze fabulously. I tend to keep 2 at a time in small freezer bags, to throw them in the air fryer (or oven) after briefly swishing them under cold running water, to get the perfect crispy outside and soft, fluffy inside.
- About 8 minutes at 350°F/175°C and you have fresh, crisp Salzstangerl at any time.
- Prep Time: 1 hour
- Fermentation/Rise: 24 hours
- Cook Time: 30 minutes
- Category: Bread, Breakfast, Dinner, Protein Sourdough Recipes
- Method: Baking
- Cuisine: German