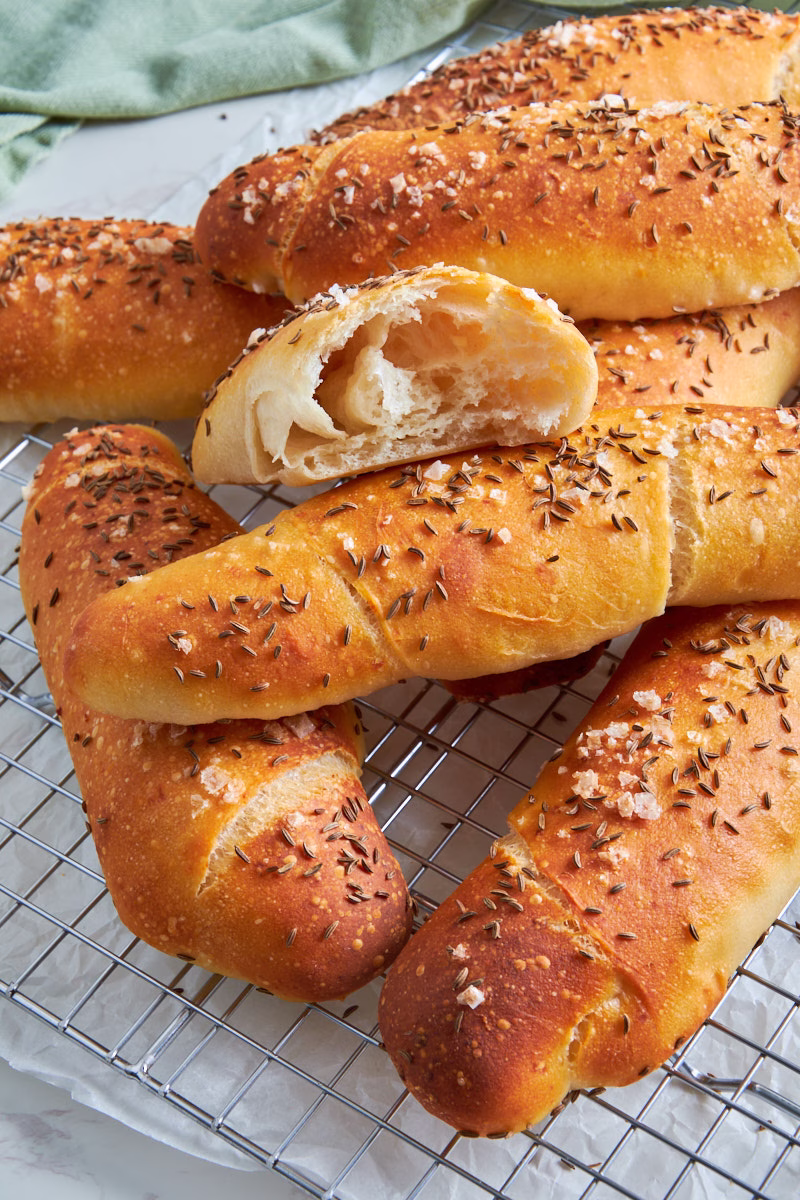
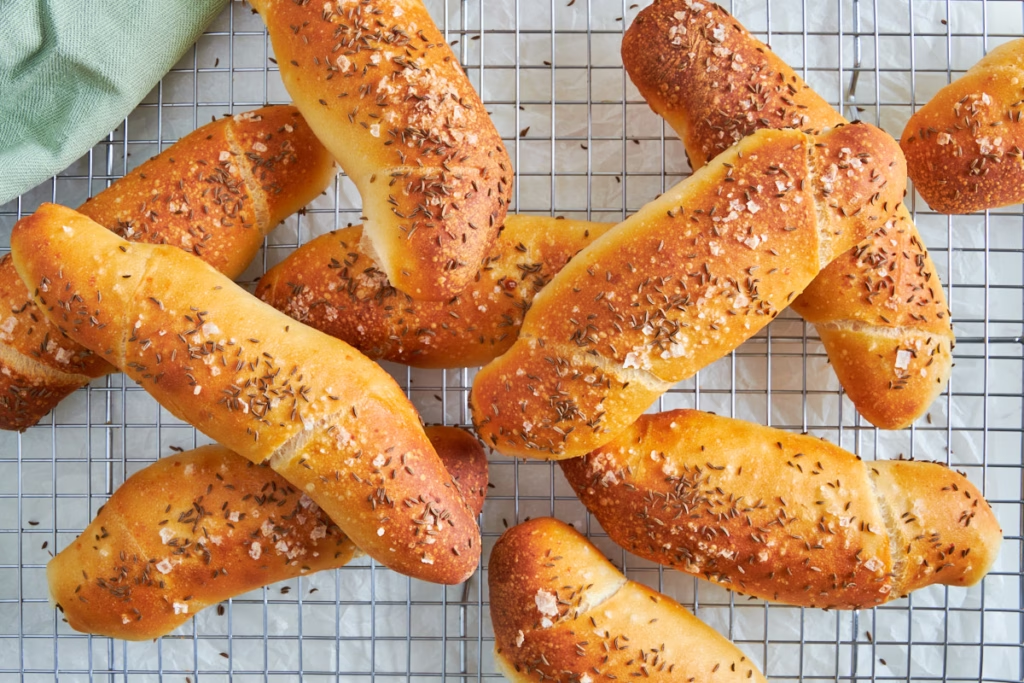
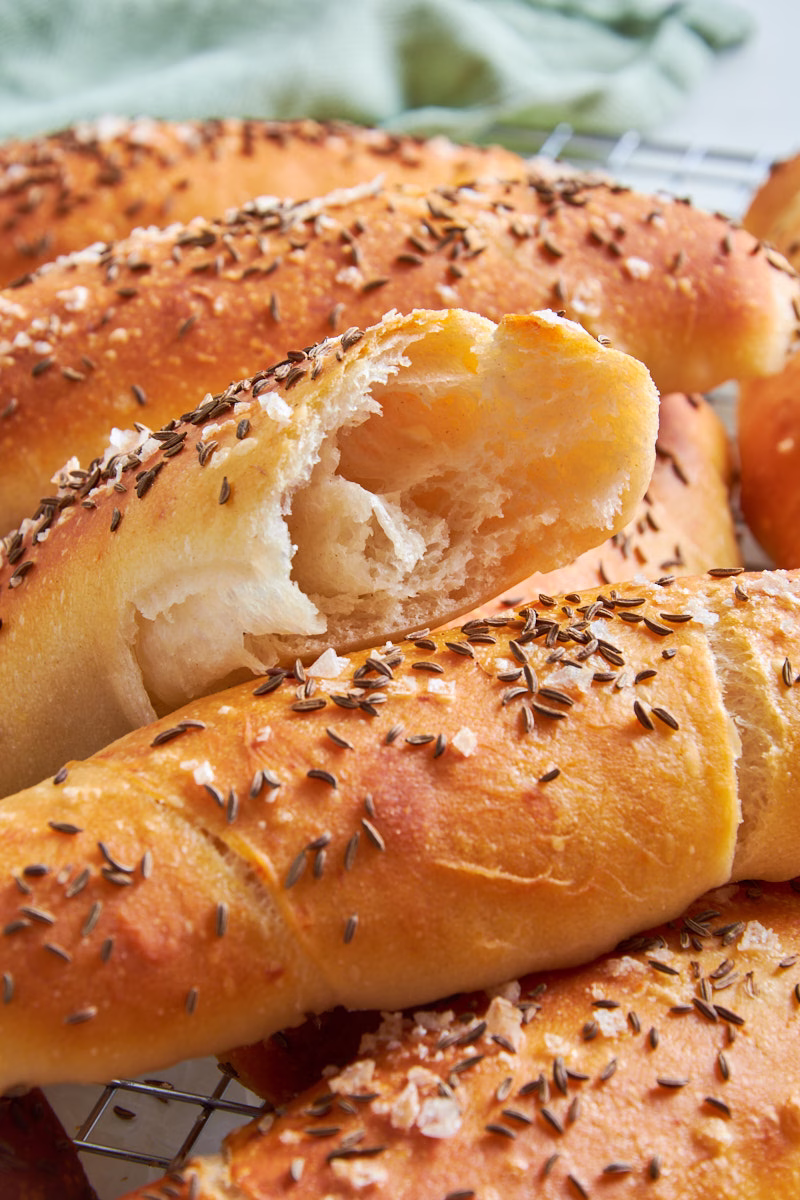
Rustic Sourdough Protein Breadsticks with Caraway & Salt (Salzstangerl)
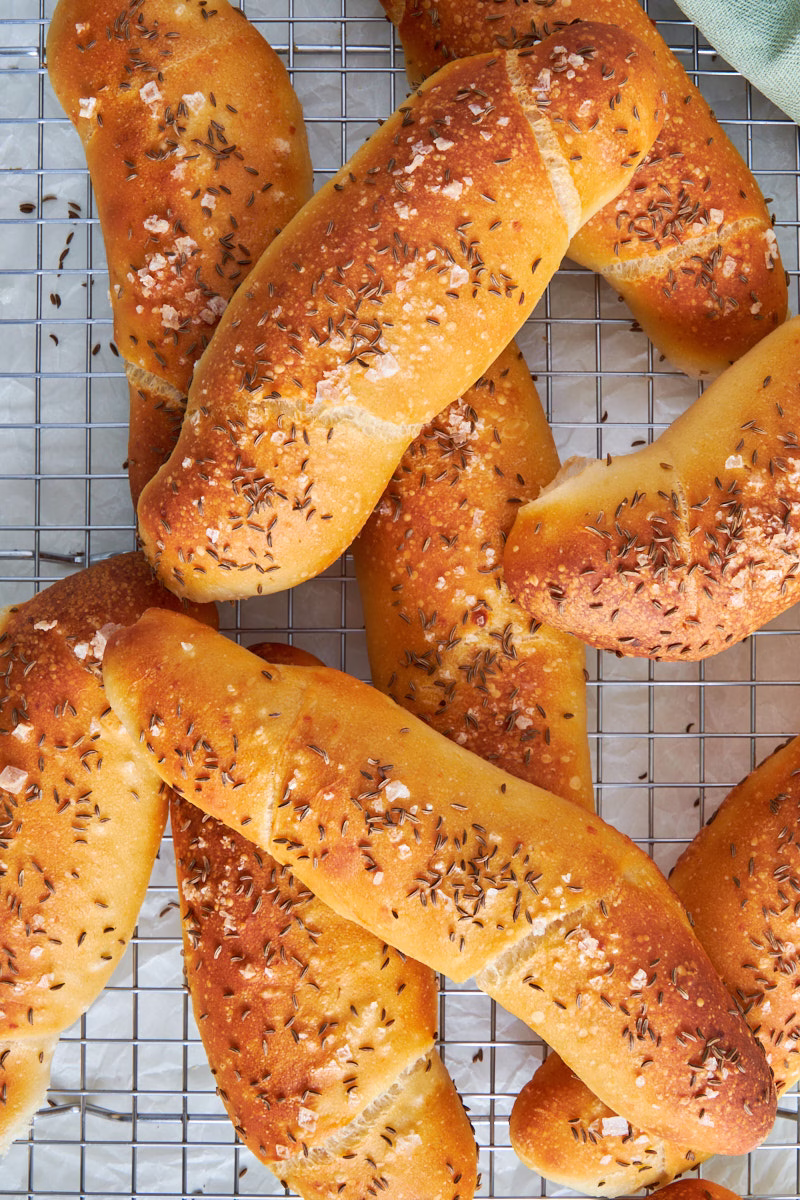
If you have ever stepped into an Austrian bakery, the scent of toasted caraway from fresh Salzstangerl is unmistakable. These rustic breadsticks are a staple for a reason: they offer the perfect contrast between a crispy exterior and a soft, pillowy middle. By using my favorite high-protein sourdough base, we are giving this traditional bake a modern upgrade. It is the same deep, tangy flavor you love, but with an extra boost of protein that makes it a satisfying addition to any breakfast spread or evening snack.
This post may contain referral links for products I love.
For The Pleasure Of Eating earns a small commission on these links at no cost to you.
- Why You’ll Love This
- The Ingredients
- Substitutions
- Equipment Used
- How to Make this
- How To Store
- FAQ
- Other Recipes You Might Enjoy
Why You’ll Love This
TL;DR
- Authentic Flavor: A sourdough twist on the classic Austrian Salzstangerl with that signature caraway and salt crunch.
- High Protein: Boosted with cottage cheese and protein powder for a more filling, nutritious snack or breakfast.
- No-Knead & Simple: An easy, high-hydration dough that requires minimal hands-on work—perfect for busy schedules.
- Versatile: Great for charcuterie boards, alongside a cold beer, or even used as a gourmet hot dog bun.
- Gut Friendly: Long overnight fermentation ensures better digestibility and a complex, tangy flavor.
Beloved Austrian Bake
This recipe is derived from the classic Austrian “Salzstangerl”, a salted breadstick usually made from yeasted dough that’s shaped into a medium sized bread stick. The ends tend to be crispy with soft interior, while the top is sprinkled with a mix of coarse salt and caraway.
In Hanover, where I come from, they were sold as Caraway sticks and often eaten for breakfast, as we love our mixed bread baskets to start the day, with a nice charcuterie and cheese platter full of toppings, this has always been my favorite Sunday breakfast.
Make Them With Sourdough And Protein
If you read my blog during the last year, you might have guessed it: I’m transforming these sticks into a sourdough protein version.
This comes with lots of benefits, starting with a much deeper flavor profile. The gentle tang of sourdough goes incredibly well with caraway and basically screams for topping it with cheese or meats, making it the perfect companion for not just breakfast, but a nice cold beer or a party with cheese platter. Of course it’s gut friendly, as we are fermenting it overnight, and it also comes with a boost of protein, thanks to the added cottage cheese (which goes incredibly well with the caraway on top) and protein powder.
One Easy Sourdough, Countless Recipes
While in the last series I went over 5 recipes you can make with my enriched protein sourdough.
This recipe and the upcoming few use my Easy Protein Sourdough, which many of you already know and love. In fact it’s by now the most popular recipe on my blog. So I decided to show you what else you can do with it.
These rustic caraway sticks are just the start. We’ll go over inclusions, Croissant bread and a few other uses that you’ll discover over the next few weeks.
No Knead, Easy To Shape
Since I’m in the middle of moving house, I wanted a recipe that didn’t require fussy, perfect shaping. This is a ‘reality-check’ bake—it shows you exactly how great these can look even on the first try, without needing professional bakery skills.
This dough is no knead, which fits my moving to Spain brain quite well too.
So try it out and see how great your breadsticks look even without much practice.
Sounds good?
Ingredient Notes
You’ll find the Ingredients for the basic dough in the master recipe for the Easy Sourdough Protein Bread.
Caraway Salt Topping

This is as easy as it sounds. You’ll need:
- Salt – I like using Maldon salt for sprinkling. But pretzel salt would be more original. Personally I just feel it’s a bit too intense.
- Caraway – This spice is just a perfect companion for anything cheesy. There is some magic in the combo of warm, earthy and gently anise flavors with hints of citrus caraway brings to the table when you top it with cheese. In Germany we even make a famous (very stinky) “Harzer Roller” that is topped with caraway for the ultimate dream team.
Obviously you could leave it out or swap for any other seeds you like. But why would you?
substitutions
- Salt – Entirely optional. If you are on a low sodium diet, leave it off.
- Caraway – Also optional (though not if you ask me…). Use any seeds you enjoy. Sesame, poppy, pumpkin, sunflower are all delicious.
Top Tips For Success
- Give It Time – I keep saying it: Sourdough doesn’t take much work, but it does take time. Let the little bacteria do their job while you go about your day. It makes all the difference. I tend to plan with 3 days, to get the best results with my sourdough bakes. But it only takes a few minutes on each of those days of hands-on work and leaves me relaxed without constantly watching my sourdough like a hawk, to squeeze it all into 2 days.
- Don’t look for perfection when shaping – Rolling up high hydration sourdough to neat sticks looks, at first glance, near impossible. But only if you go at it with a “yeasted dough” mindset. Yeasted dough has lower hydration and with that looks much smoother while shaping.
- Sourdough however, especially our beloved high hydration types, that give us the light and fluffy results, are sticky and shaggy when shaping.
- The magic happens during the last rise and then the bake, when even the seemingly imperfect sticks suddenly look smooth and beautiful.
- Shape for your favorite texture – Personally I prefer the soft interior over crunchy ends, so my sticks are on the chunky side. But if you love the crispy bits most, simply roll them a little longer and thinner, to get exactly what you enjoy most.
Equipment Used
- Dough/bench Scraper – For dividing the dough and transferring the shaped sticks.
- Rolling pin – For quickly rolling the dough into long ovals. You could also stretch them with your hands. Both methods work.
- Sheet pan – Two of them, for the last rise and baking.
- Large Plastic Bags – I’ve started putting all my sourdough bakes into slightly inflated large plastic bags for their last rise. This keeps them perfectly moist and warm where towels or clingfilm would lead to drying out (even with the best seal of cling film, there is always that one gap giving you dried edges!).
 Buy Now →
  Buy Now →
  Buy Now →
 How to Make this
Since this sourdough breadsticks recipe is made from the Easy High Protein Sourdough and just the shaping and baking methods are different, we are starting after the bulk fermentation.
So you’ll need to start by feeding your starter 3 days before you want to bake these and mix the dough on day 2, to have them ready for baking on day 3.
You can do the cold fermentation either before or after shaping, depending on your schedule and needs.
I usually do my cold fermentation after shaping and take them out of the fridge for the last rise.
Preparation
- Line two sheet pans with baking parchment.
- Get two large, clean plastic bags that will fit the sheet pans and not touch the top when you slightly inflate them. These will protect the breadsticks from drying out during the cold ferment and last rise.
- Get a bench scraper, flour and a rolling pin ready.
- Lightly flour your work surface.
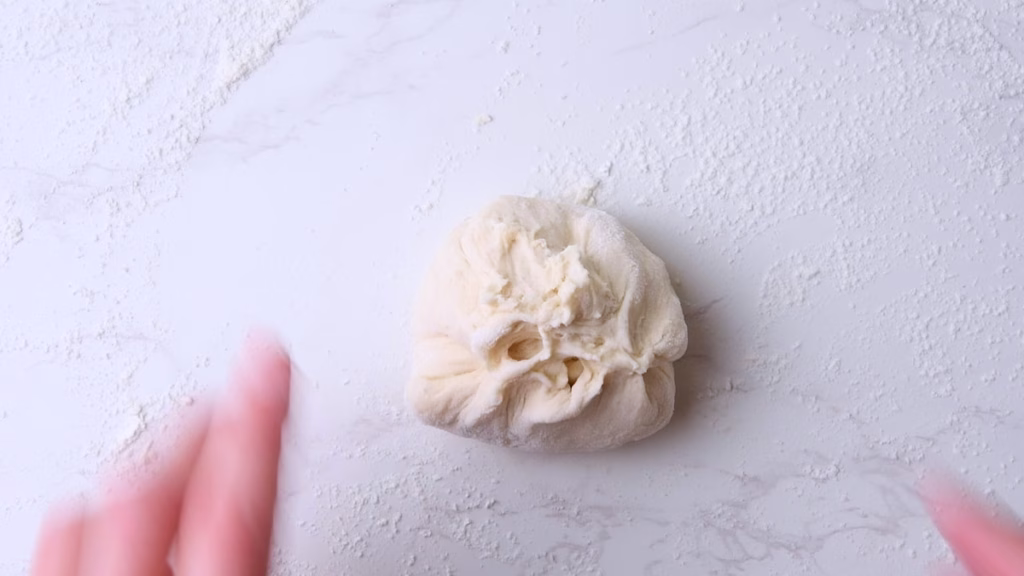
Divide the Dough
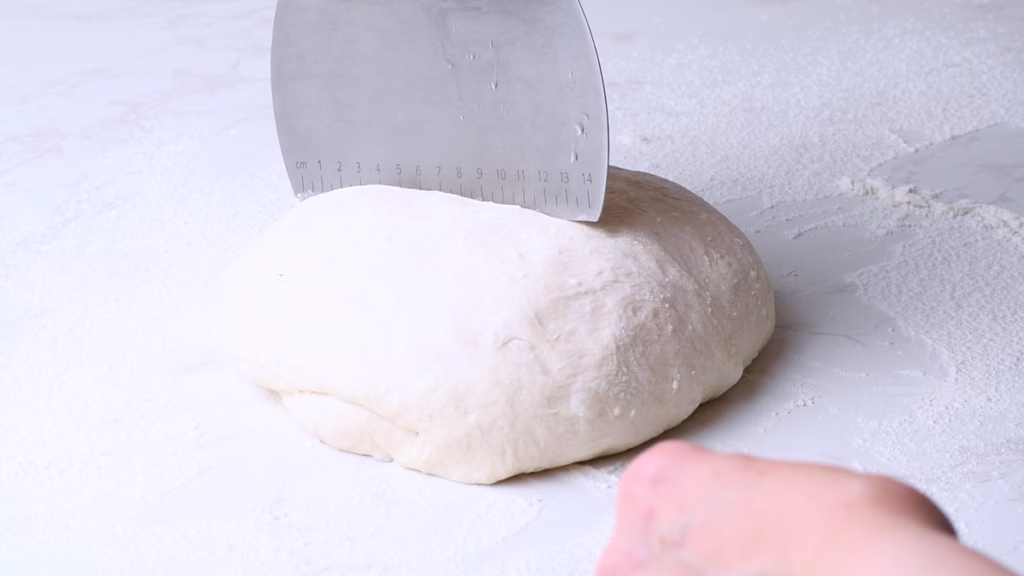
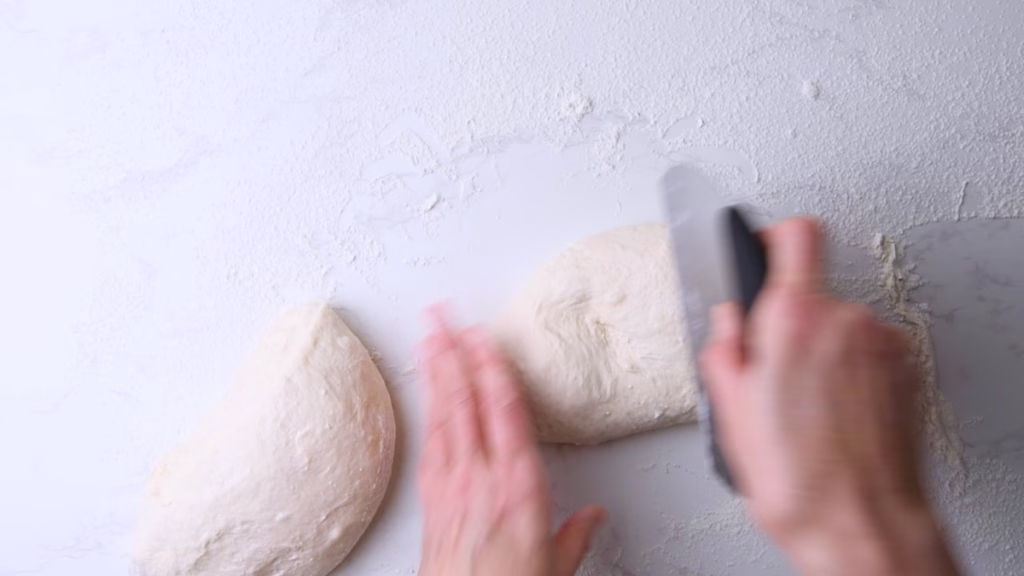

- Cut your dough into 12 equal pieces. You can eyeball it or use digital scales to get them to the same weight. Each piece with be around 94g.
- Your dough will be very soft and a little tacky but should still be pretty easy to work with.
Shape Into Balls
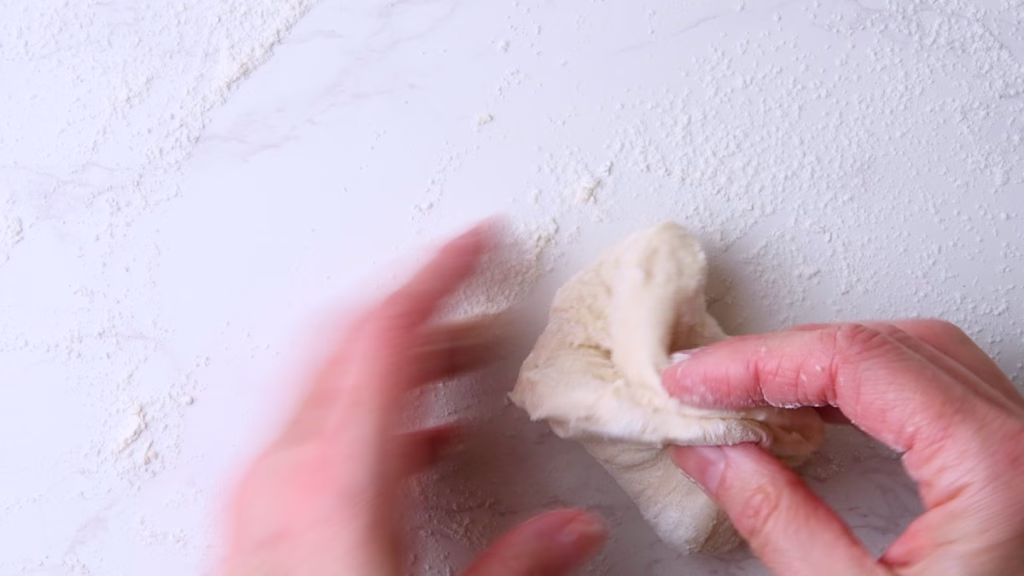
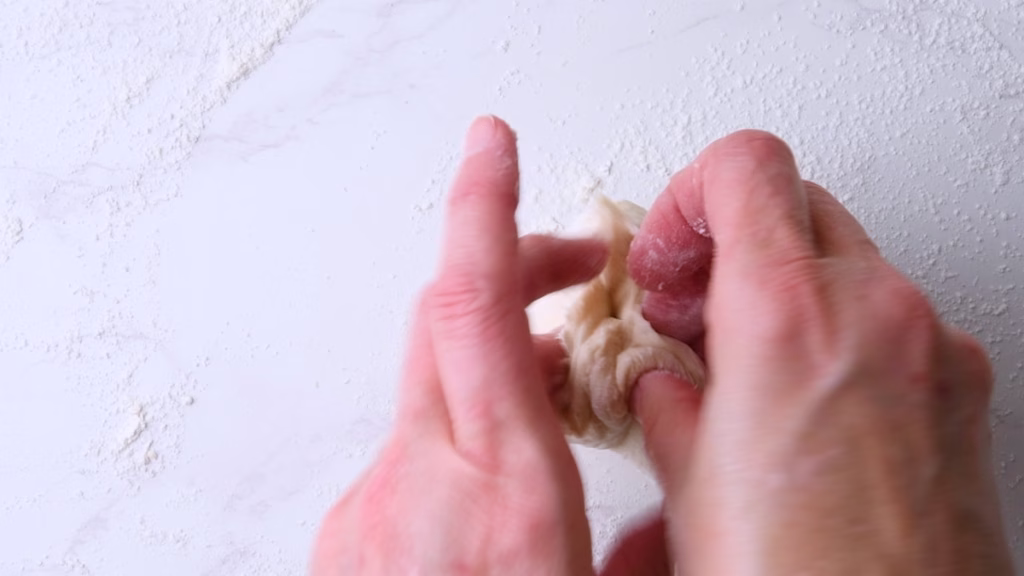
- Take each piece and shape it into a ball by grabbing the corners, pulling them up into a garlic bulb type situation. Flip that over, so the tips are on your work surface.
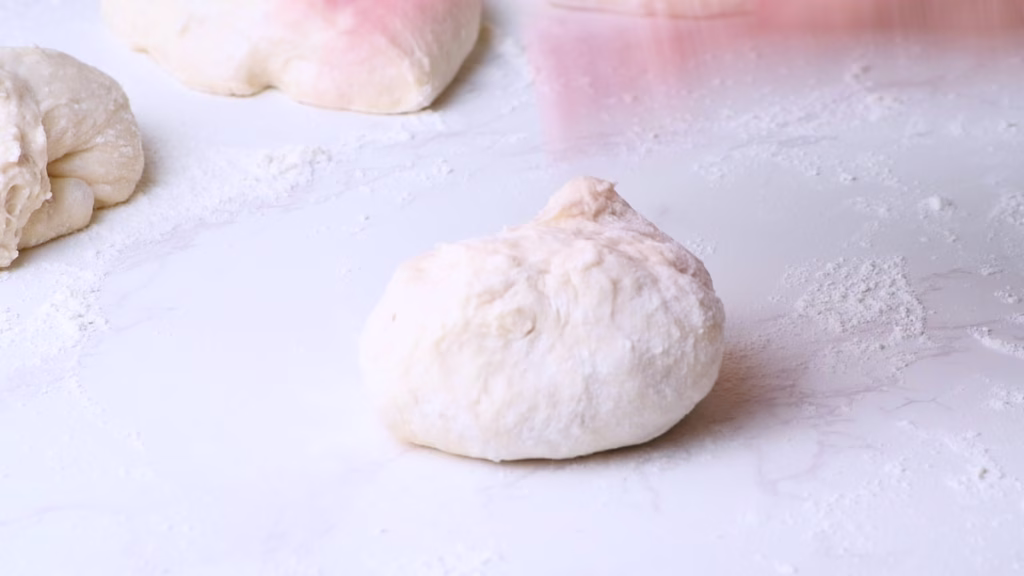
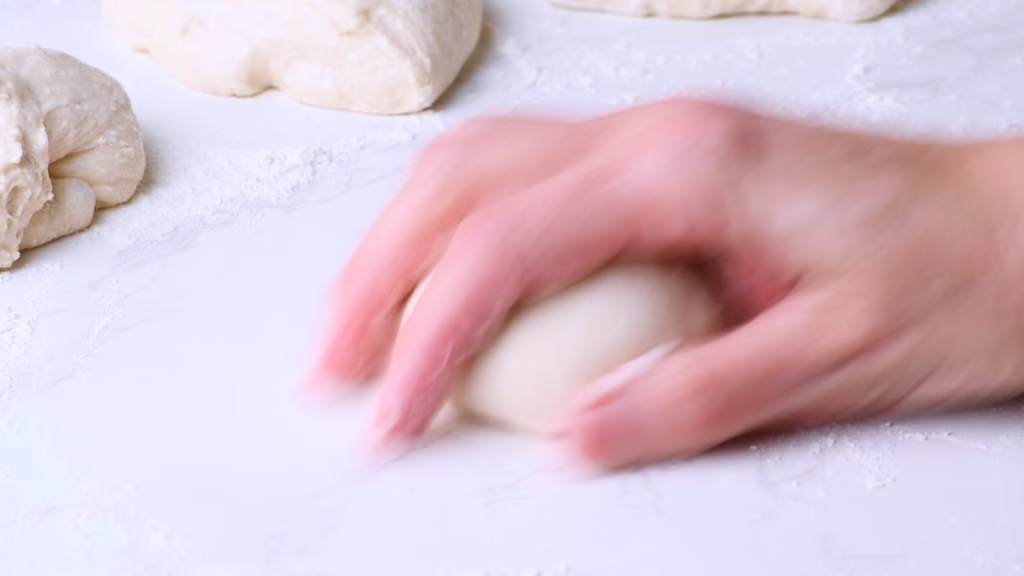
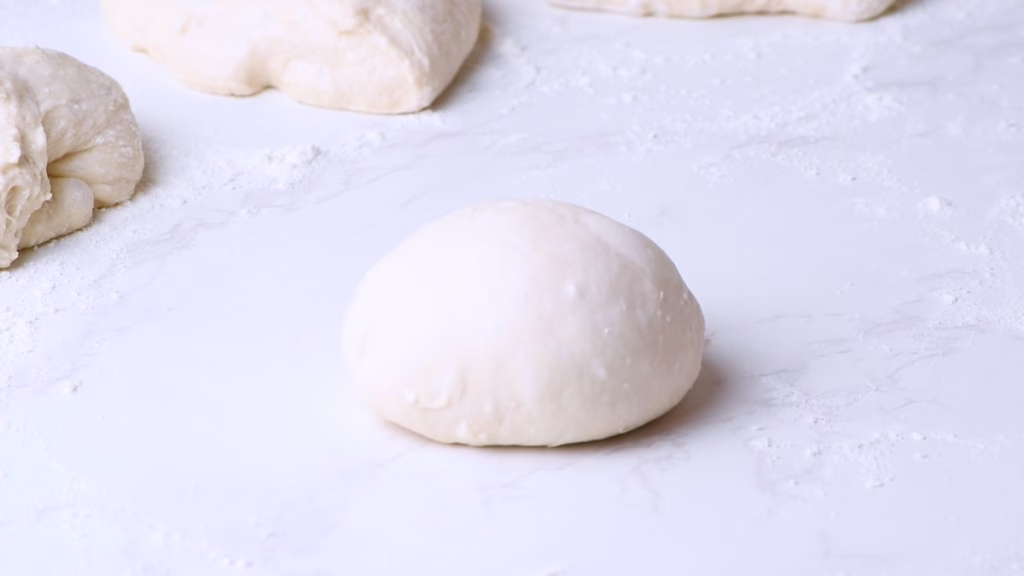
- Cup your hand loosely over the ball and start making rapid little circles until the dough ball looks smooth and has some good tension.
- Allow the dough balls to rest and relax for a few minutes.
Roll Into Triangles
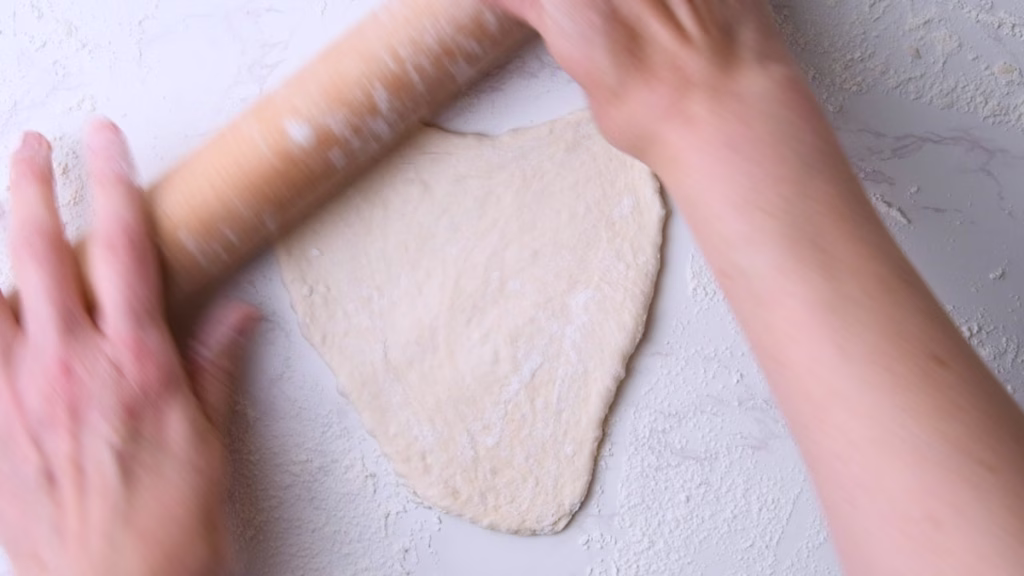

- Dust each of the little balls and your rolling pin with a bit of flour, then roll it out into a rough triangle of about 8in/20cm.
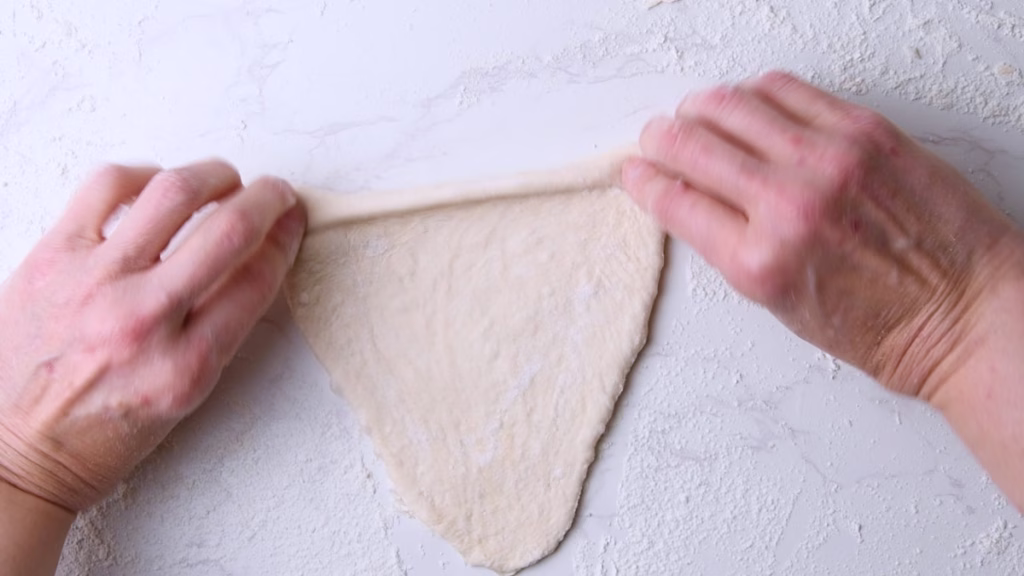
- Take hold of the widest parts on the top of the triangle and gently expand them a little, pulling them into a more pronouced shape. Then gently pull the bottom end into more of a tip.
Shape The Sourdough Protein Breadsticks
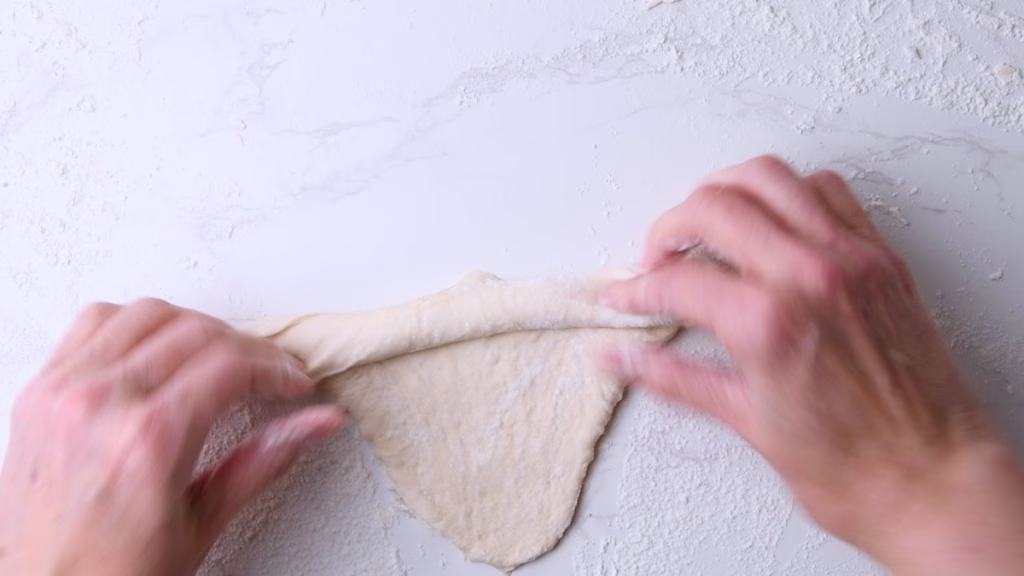
- Starting at the wide end on top, start rolling up your dough using your fingers and palms, think croissant shape, though your dough will be softer.
- Flour lightly as needed if it gets too sticky and use your bench scraper in case it gets stuck to the work surface. The bulk ferment should have gotten rid of most of the stickiness, but this is still a high hydration sourdough which shapes a little different compared to the classic recipe.
- Keep pulling gently at the tip, shortly before you roll it all the way up.
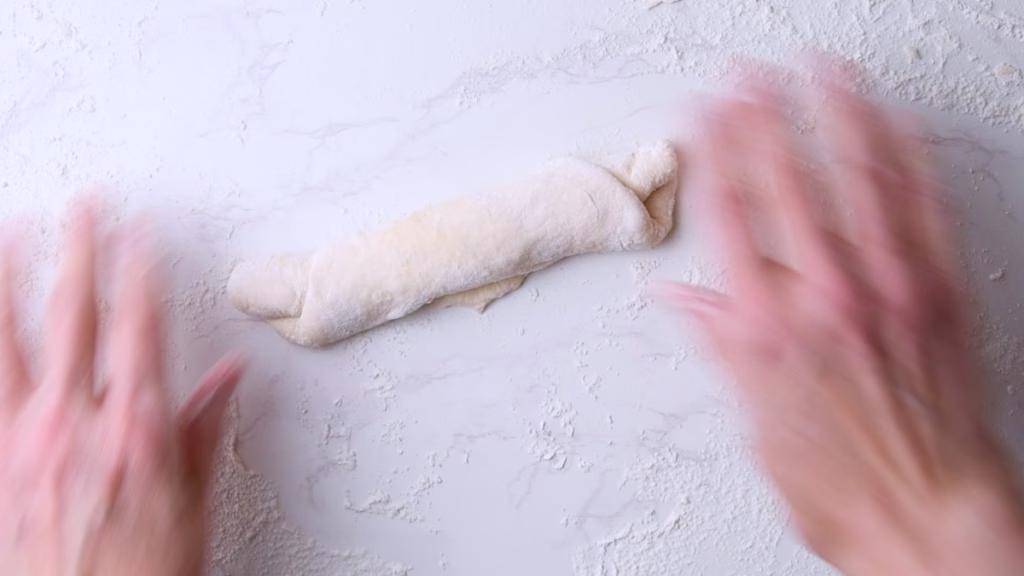
- To finish the shaping, use both of your palms to roll the breadstick back and forth a little, until you have the thickness you are aiming for. The thicker, the softer it will be, the thinner the crispier.
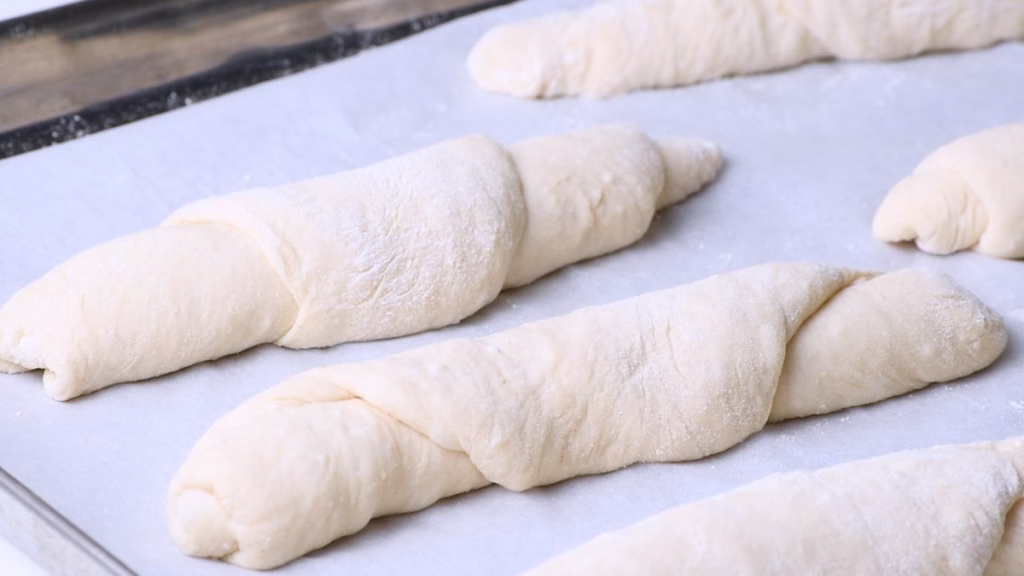
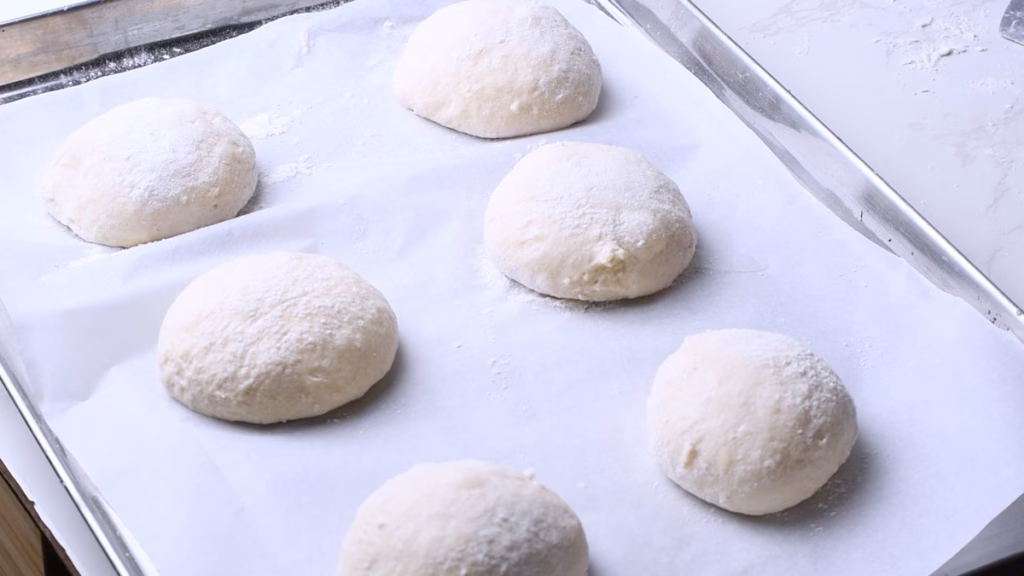
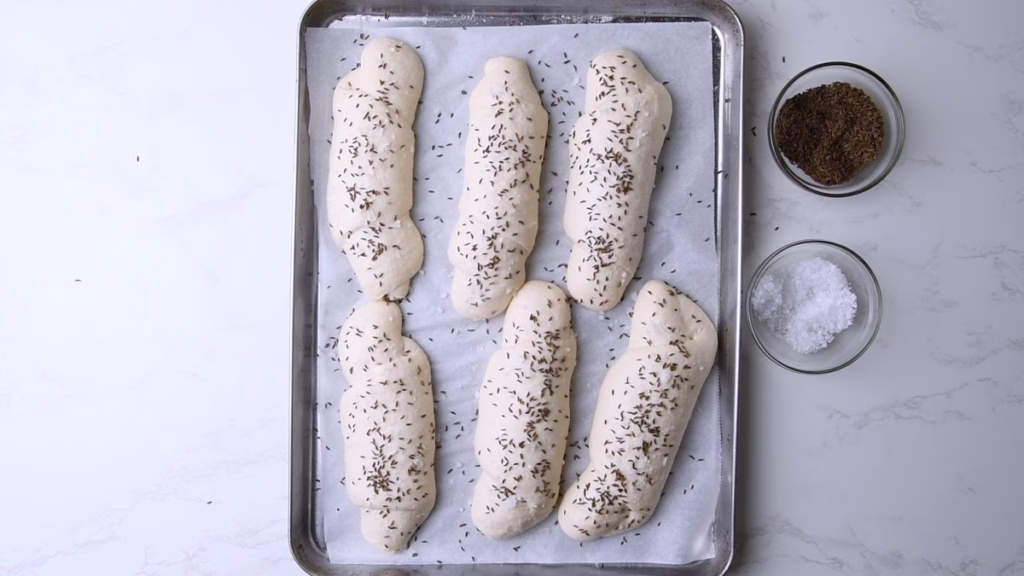
- Transfer to the sheet pan, arranging six of the sticks per tray, leaving plenty of room between them to expand.
- Continue until all twelve are shaped. The first few will look a bit rougher, but you’ll get the hang of it. The last rise will even out the shaping and make them look beautiful, so don’t worry about their look at this point.
Last Rise and Cold Fermentation
- Now get your clean plastic bag, push the sheet pan inside, inflate it a little by blowing inside, then seal with a clip or knot.
- At this point you can either put them straight into the fridge for the cold fermentation for up to 3 days, then assess how much rising they need after, if any. Or let them do their last rise at room temperature before baking them.
- Cold fermentation will develop the flavor further, leading to more of that characteristic sourdough flavor and give you all of the sourdough benefits like higher nutrient availability, more good gut bacteria and easier digestibility.
- For the last rise calculate about 3-6 hours, depending on room temperature, until your breadsticks look nice and puffy and when you gently poke them with an oiled finger the dent springs back slowly.
- They should feel and look very airy when they are ready to bake.
Bake your Rustic High Protein Breadsticks
- Preheat your oven to 410°F/210°C.
- I usually bake one pan at a time to get the best results.
- Add a heat resistant (ideally metal) tray to the bottom of the oven while pre-heating, so it gets nice and hot. This will give you the perfect steam you need when baking.
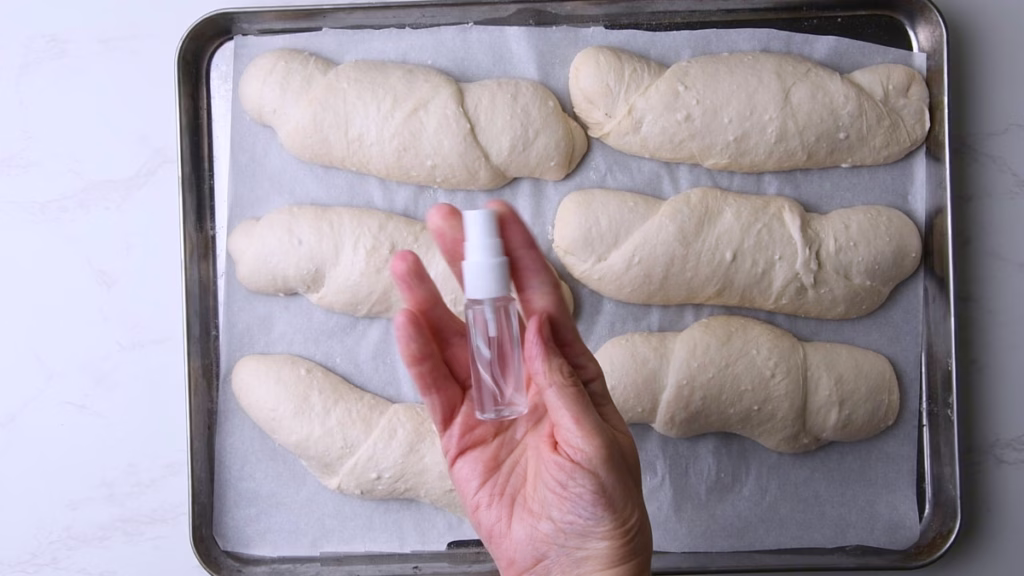
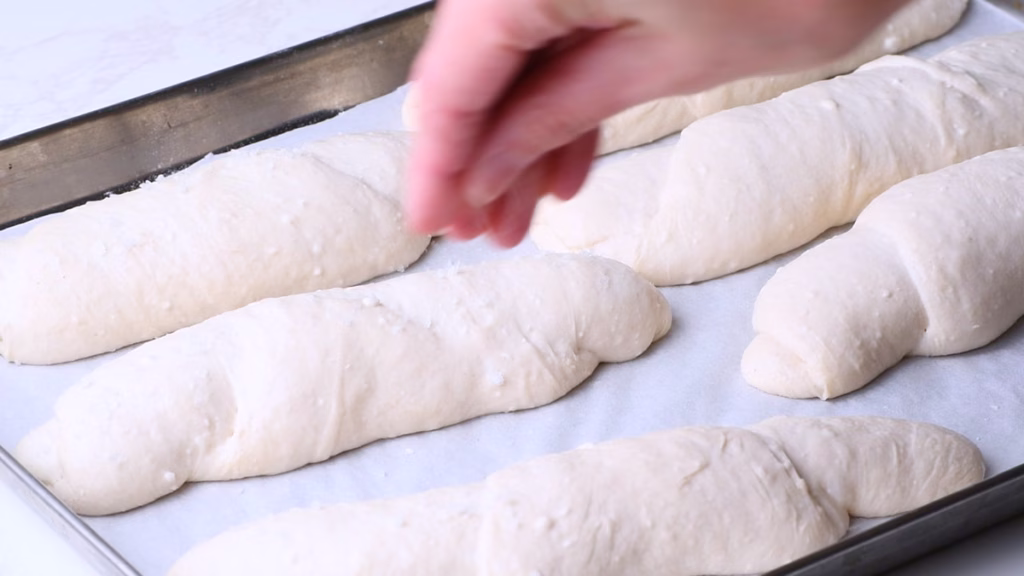
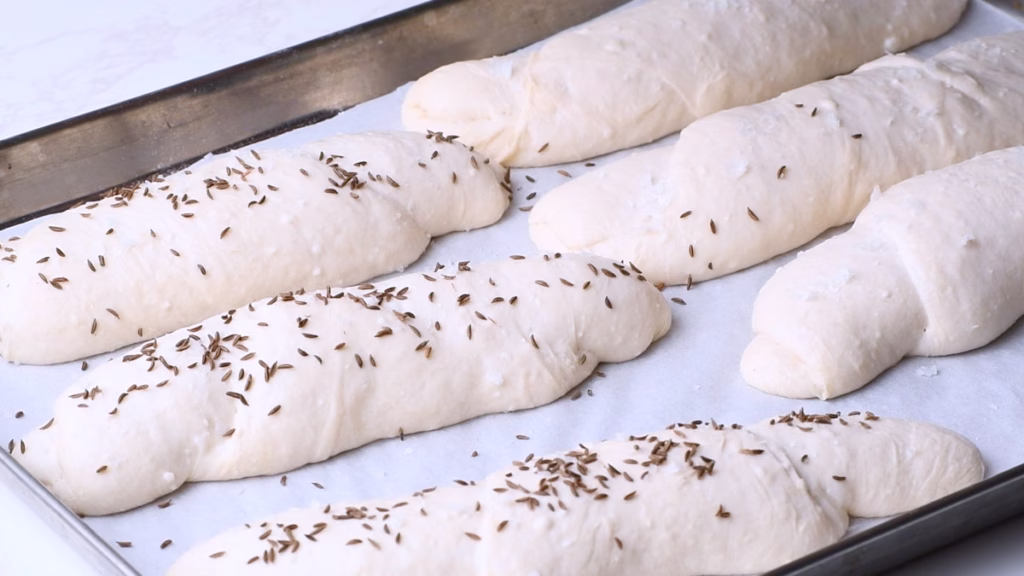
- Take the sheet pans out of their bags, spray the sticks with some water (I use a small spray bottle for a really fine mist), then sprinkle with Maldon or coarse sea salt and some caraway seeds. Use as much or as little as you like. Your sticks, your rules.
- Push the first pan into the oven, pour about 1 cup of water into the metal pan or tray at the bottom and bake for 15 minutes.
- Open the door to let the steam out and remove the pan from the bottom if there is still water left in it.
- Rotate your sheet pan with the bread sticks by 180 degrees, to get even browning, as most ovens bake unevenly.
- Bake for another 10-15 minutes or until golden brown and crispy on the outside.
- Remove from the oven, allow to cool on the sheet pan for about 10 minutes while you push the second batch into the oven, then transfer the sticks onto a cooling rack so the bottoms can crisp up too.
How To Serve
- Enjoy the sticks still warm or cold with some nice cold butter and maybe some cheese if you like. I love them most with nutty-sweet Swiss cheeses like Emmental or Gruyere.
- They are fabulous as breakfast, snack or with a lovely cold beer in summer and will make you feel like you are in an Austrian Beer garden, enjoying a warm evening while watching the world go by.
- Oh and they make fantastic hot dog rolls too! Shape them on the thicker side for that, as you want them a bit softer.
How To Store
- These Sourdough Protein Breadsticks with Caraway keep for up to 3 days in an airtight container at room temperature.
- They also freeze fabulously. I tend to keep 2 at a time in small freezer bags, to throw them in the air fryer (or oven) after briefly swishing them under cold running water, to get the perfect crispy outside and soft, fluffy inside.
- About 8 minutes at 350°F/175°C and you have fresh, crisp Salzstangerl at any time.
FAQ
Absolutely. While I love the flaky crunch of Maldon, you can use pretzel salt for a more traditional look or even a smoked sea salt for extra depth. If you’re watching your sodium, feel free to skip the salt on top entirely—the dough itself has plenty of flavor.
Definitely! You can gently stretch and flatten the dough ovals with your hands. They might look a bit more “rustic,” but the taste will be exactly the same. In a pinch, a smooth wine bottle works as a great makeshift rolling pin too.
The steam (from pouring water into that hot tray) keeps the surface of the dough moist during the first few minutes of baking. This allows the breadsticks to expand fully without the crust setting too early, resulting in a better rise and that characteristic shiny, crispy finish.
You can, but then we can’t call them Salzstangerl! In all seriousness, caraway is a “love it or hate it” spice. If it’s not for you, try poppy seeds, sesame seeds, or even everything bagel seasoning.
High hydration sourdough is a bit of a workout for your patience. Use a light dusting of flour on your hands and the work surface, and rely on your bench scraper to help “scoot” the dough along. Remember: sticky dough leads to a fluffier interior!
This shaping and baking method works for almost any sourdough dough. However, the timing for the rise might vary slightly if you aren’t using the cottage cheese/protein powder base, as the inclusions in the master recipe affect how the dough ferments.
Now I’d love to hear from you in the comments!
Have you tried this? Did you enjoy it?
What other recipes would you like to see?
And if you enjoyed this recipe, please consider rating, sharing, or leaving a comment – your feedback truly helps my blog grow!
Other recipes you might enjoy

This super creamy Cottage cheese pickle dip makes a perfect high protein snack together with these Healthier bread sticks.
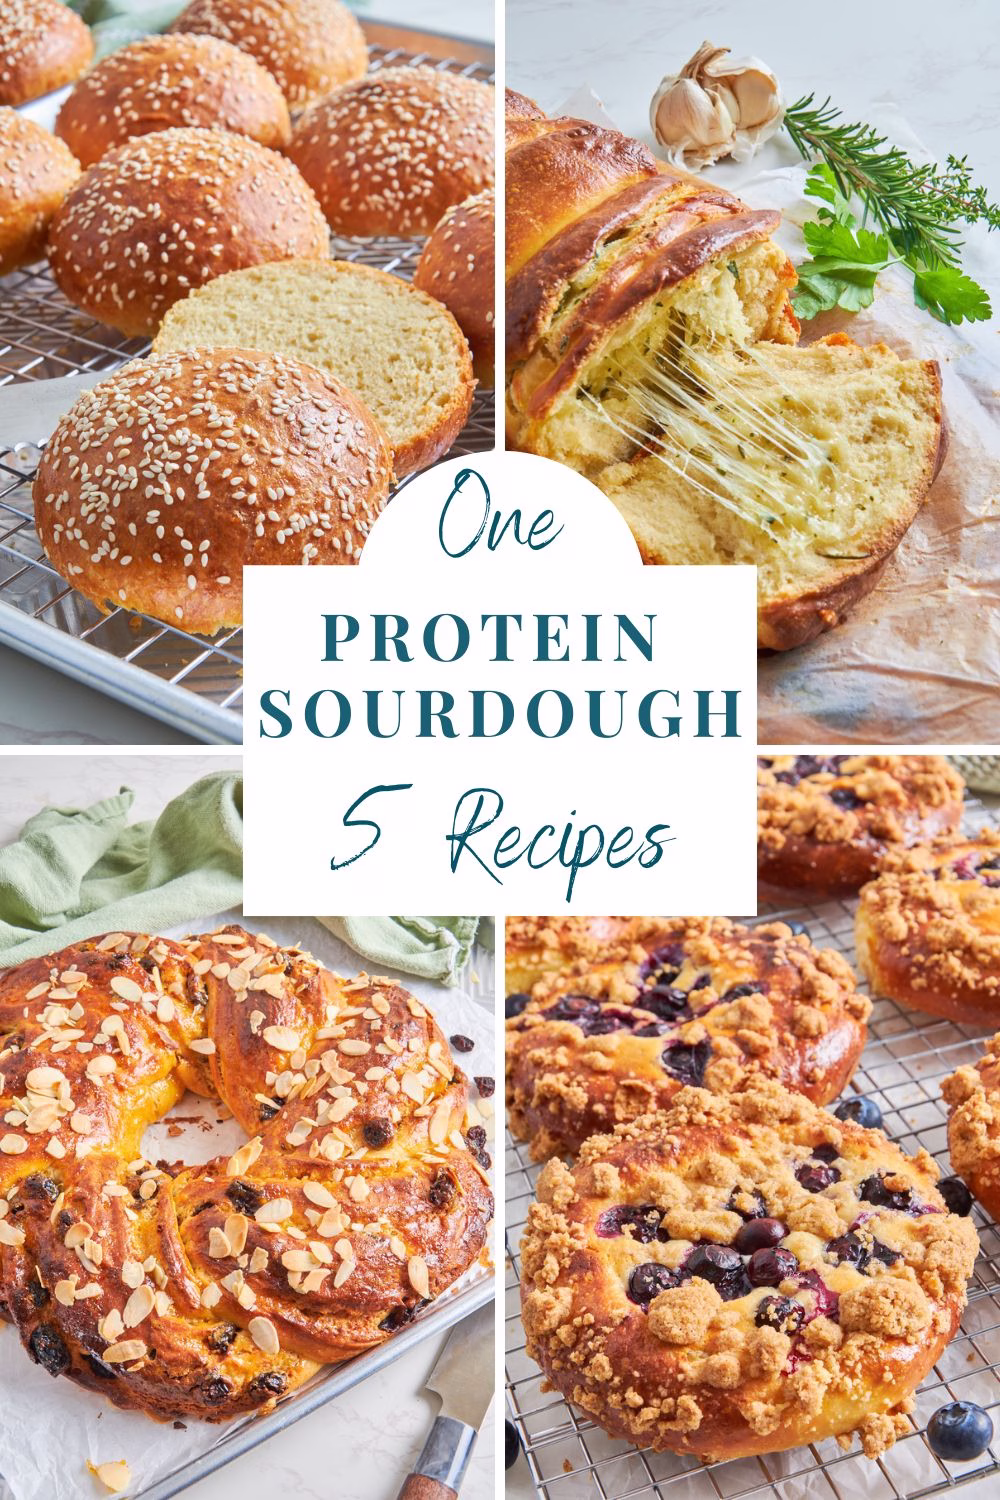
Another Multi-Purpose Protein sourdough recipe, coming with 5 variations for one enriched dough.
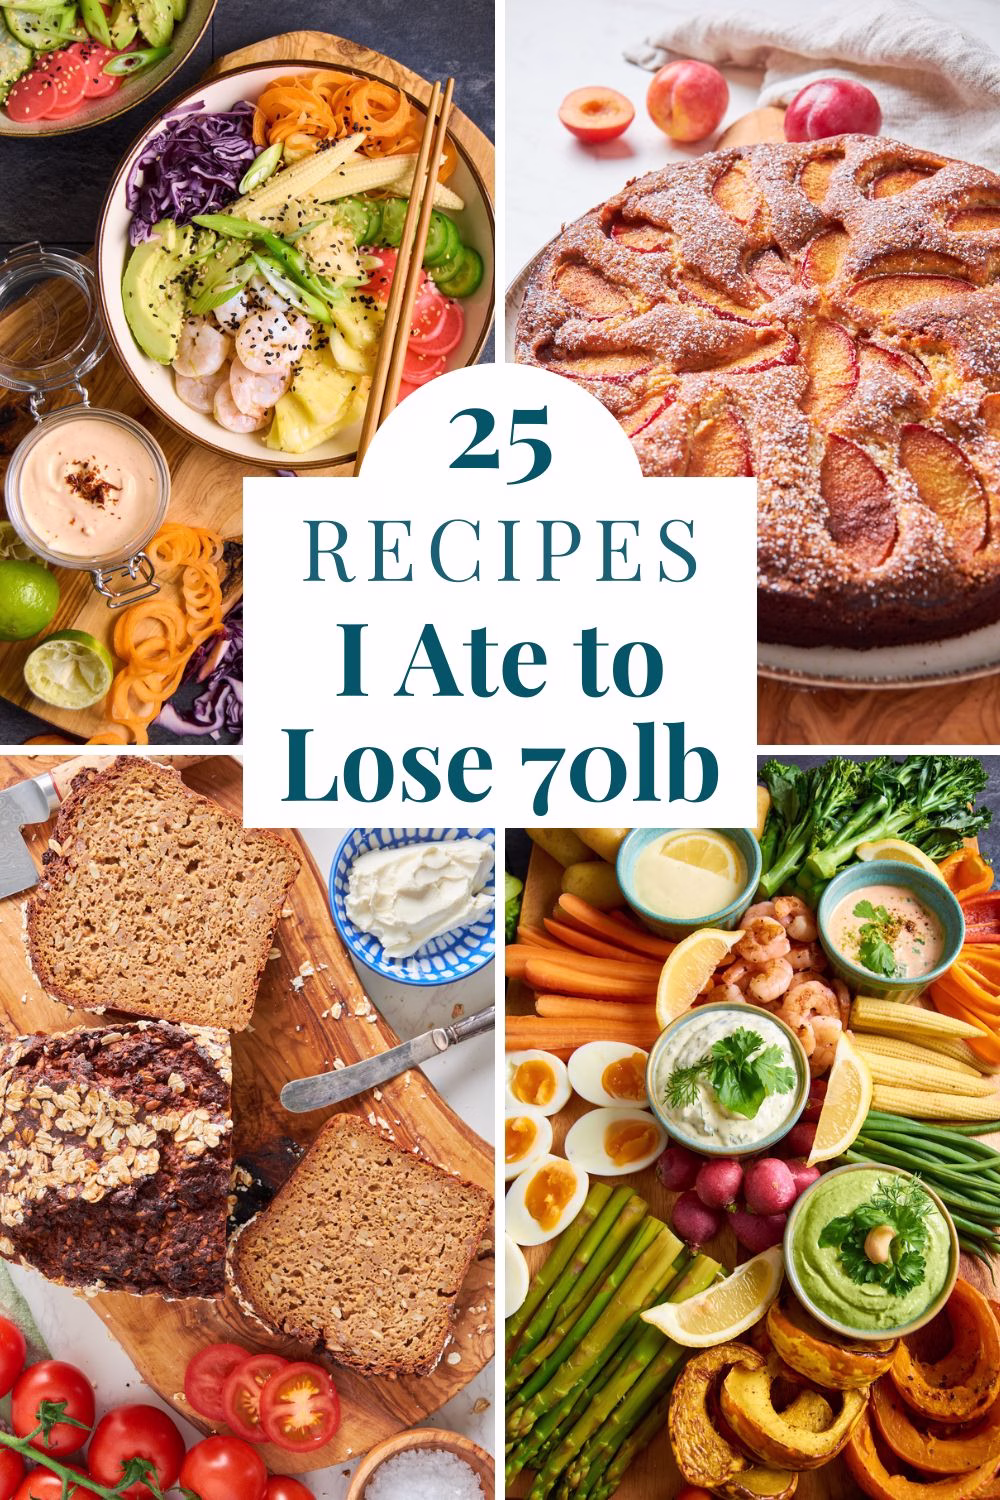
Want to know how I ate to loose 70lb within one year? Check out this post showing you 25 recipes I ate and read more about the method I used.
Rustic Sourdough Protein Breadsticks with Caraway & Salt (Salzstangerl)
- Total Time: 2 days
- Yield: 12 1x
Description
If you have ever stepped into an Austrian bakery, the scent of toasted caraway from fresh Salzstangerl is unmistakable. These rustic breadsticks are a staple for a reason: they offer the perfect contrast between a crispy exterior and a soft, pillowy middle. By using my favorite high-protein sourdough base, we are giving this traditional bake a modern upgrade. It is the same deep, tangy flavor you love, but with an extra boost of protein that makes it a satisfying addition to any breakfast spread or evening snack.
Ingredients
- 1 portion Easy Sourdough Protein Bread Dough, bulk fermentation completed
- 2 tablespoons caraway
- 1 tablespoon Flaky or coarse sea salt (I used Maldon salt)
Instructions
Preparation
- Line two sheet pans with baking parchment.
- Get two large, clean plastic bags that will fit the sheet pans and not touch the top when you slightly inflate them. These will protect the breadsticks from drying out during the cold ferment and last rise.
- Get a bench scraper, flour and a rolling pin ready.
- Lightly flour your work surface.
Shaping The Sourdough Breadsticks
- Cut your dough into 12 equal pieces. You can eyeball it or use digital scales to get them to the same weight. Each piece with be around 94g.
- Your dough will be very soft and a little tacky but should still be pretty easy to work with.
- Take each piece and shape it into a ball by grabbing the corners, pulling them up into a garlic bulb type situation. Flip that over, so the tips are on your work surface.
- Cup your hand loosely over the ball and start making rapid little circles until the dough ball looks smooth and has some good tension.
- Dust each of the little balls and your rolling pin with a bit of flour, then roll it out into a rough triangle of about 8in/20cm.
- Take hold of the widest parts on the top of the triangle and gently expand them a little, pulling them into more of a pronounced shape. Then gently pull the bottom end into more of a tip.
- Starting at the wide end on top, start rolling up your dough using your palm, think croissant shape, but straight, though your dough will be softer than croissant dough.
- Flour lightly as needed if it gets too sticky and use your bench scraper in case it gets stuck to the work surface. The bulk ferment should have gotten rid of most of the stickiness, but this is still a high hydration sourdough which shapes a little different than the classic recipe.
- Keep pulling gently at the tip, shortly before you roll it all the way up.
- To finish the shaping, use both of your palms to roll the breadstick back and forth a little, until you have the thickness you are aiming for. The thicker, the softer it will be, the thinner the crispier.
- Transfer to the sheet pan, arranging six of the sticks per tray, leaving plenty of room between them to expand.
- Continue until all twelve are shaped. The first few will look a bit rougher, but you’ll get the hang of it. The last rise will even out the shaping and make them look beautiful, so don’t worry about their look at this point.
Last Rise and Cold Fermentation
- Now get your clean plastic bag, push the sheet pan inside, inflate it a little by blowing inside, then seal with a clip or knot.
- At this point you can either put them straight into the fridge for the cold fermentation for up to 3 days, then assess how much rising they need after, if any. Or let them do their last rise at room temperature before baking them.
- Cold fermentation will develop the flavor further, leading to more of that characteristic sourdough flavor and give you all of the sourdough benefits like higher nutrient availability, more good gut bacteria and easier digestibility.
- For the last rise calculate about 3-6 hours, depending on room temperature, until your breadsticks look nice and puffy and when you gently poke them with an oiled finger the dent springs back slowly.
- They should feel and look very airy when they are ready to bake.
Bake your Rustic High Protein Breadsticks
- Preheat your oven to 410°F/210°C.
- I usually bake one pan at a time to get the best results.
- Add a heat resistant (ideally metal) tray to the bottom of the oven while pre-heating, so it gets nice and hot. This will give you the perfect steam you need when baking.
- Take the sheet pans out of their bags, spray the sticks with some water (I use a small spray bottle for a really fine mist), then sprinkle with Maldon or coarse sea salt and some caraway seeds. Use as much or as little as you like. Your sticks, your rules.
- Push the first pan into the oven, pour about 1 cup of water into the metal pan or tray at the bottom and bake for 15 minutes.
- Open the door to let the steam out and remove the pan from the bottom if there is still water left in it.
- Rotate your sheet pan with the bread sticks by 180 degrees, to get even browning, as most ovens bake unevenly.
- Bake for another 10-15 minutes or until golden brown and crispy on the outside.
- Remove from the oven, allow to cool on the sheet pan for about 10 minutes while you push the second batch into the oven, then transfer the sticks onto a cooling rack so the bottoms can crisp up too.
Notes
How To Serve
- Enjoy the sticks still warm or cold with some nice cold butter and maybe some cheese if you like. I love them most with nutty-sweet Swiss cheeses like Emmental or Gruyere.
- They are fabulous as breakfast, snack or with a lovely cold beer in summer and will make you feel like you are in an Austrian Beer garden, enjoying a warm evening while watching the world go by.
- Oh and they make fantastic hot dog rolls too! Shape them on the thicker side for that, as you want them a bit softer.
How To Store
- These Sourdough Protein Breadsticks with Caraway keep for up to 3 days in an airtight container at room temperature.
- They also freeze fabulously. I tend to keep 2 at a time in small freezer bags, to throw them in the air fryer (or oven) after briefly swishing them under cold running water, to get the perfect crispy outside and soft, fluffy inside.
- About 8 minutes at 350°F/175°C and you have fresh, crisp Salzstangerl at any time.
- Prep Time: 1 hour
- Fermentation/Rise: 24 hours
- Cook Time: 30 minutes
- Category: Bread, Breakfast, Dinner, Protein Sourdough Recipes
- Method: Baking
- Cuisine: German