High Protein Sourdough Baguette (27g Protein)
If you’ve ever tried a high-protein bread that felt more like a chore to chew than a treat to eat, this recipe is for you. I’ve taken the classic, airy sourdough baguette and fortified it with cottage cheese and whey to hit 27g of protein per medium sized loaf—but I refused to compromise on that signature shattering crust and fluffy interior. Whether you’re a sourdough purist looking for more satiety or just want a better vessel for your next Banh Mi, this ‘best of both worlds’ baguette delivers the macros without sacrificing the craft.
This post may contain referral links for products I love.
For The Pleasure Of Eating earns a small commission on these links at no cost to you.
- Why You’ll Love This
- The Ingredients
- Substitutions
- Equipment Used
- How to Make this
- How To Store
- FAQ
- Other Recipes You Might Enjoy
Why You’ll Love This
TL;DR
- Protein Packed: 27g of protein per baguette without the “rubbery” texture of most protein breads.
- The Perfect Hybrid: Combines the tangy flavor of sourdough with a thinner, crispy crust closer to a Banh Mi roll.
- Easier Digestion: Sourdough enzymes break down the added whey and cottage cheese proteins, making them more bioavailable.
- Beginner Friendly: No stand mixer required, and I’ve included “cheats” for perfect shaping and scoring.
- Dual Method: Tested for both Dutch ovens and baguette pans so you can use what you have.
27g Protein per Medium Baguette
I rarely call my recipes “High Protein” as I tend to go for a protein content that, while it is 50%-100% higher than your classic recipe, is lower than those dedicated protein sites because I prioritize flavor and texture over macros.
And while I still do that with this recipe, because I want a proper sourdough baguette, it did end up jumping from 6g in the original recipe to a rather stunning 27g of protein per Baguette when I made my usual small swaps of adding cottage cheese in place of part of the water and whey concentrate for part of the flour. So for this one, I feel the honorary title is very justified!
Thin, Crisp Crust. Fluffy& Chewy Insides
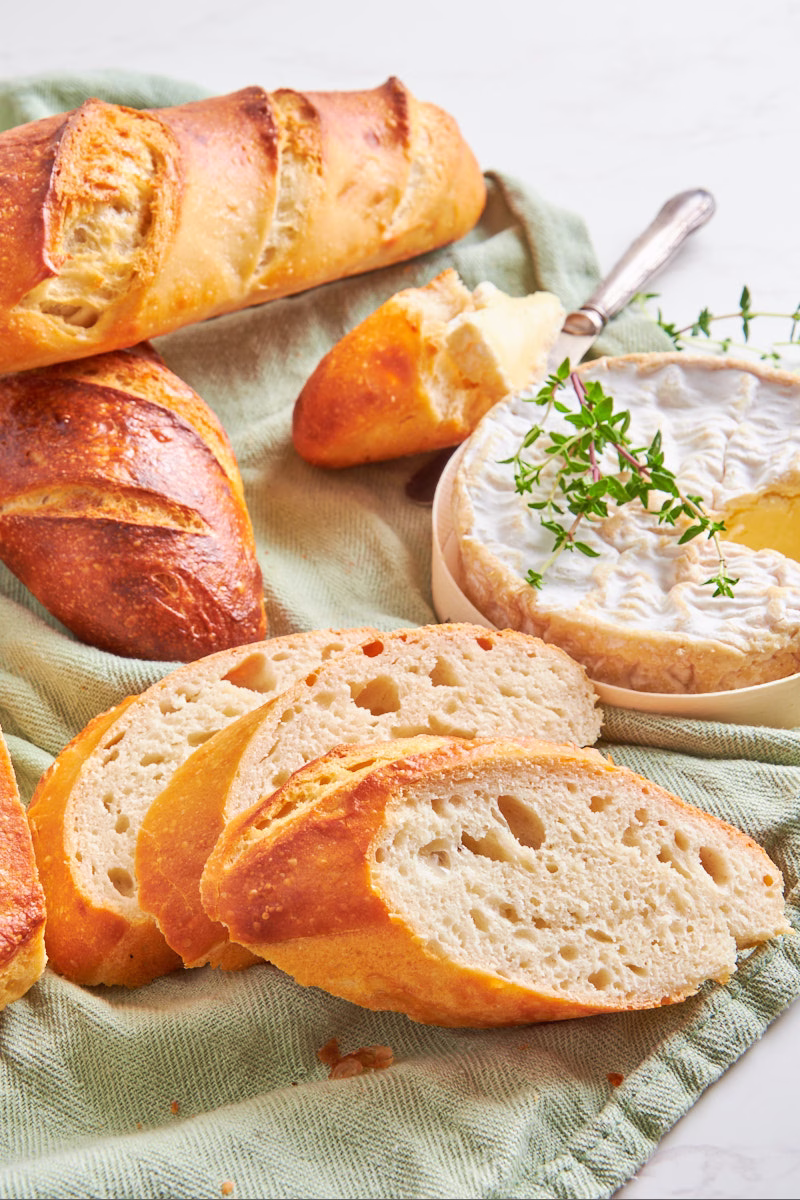
Now you (and me too when I put it together for the first time) might think this comes out like your viral, but rather chewy and tough cottage cheese bread. Surprisingly it does no such thing. Rather it feels to me like an improved version of your classic sourdough baguette, which often has a fairly thick and crunchy crust and a Very! Open crumb with lots of huge air bubbles.
Sourdough is at work in our favor here, tenderizing the protein structures, holding moisture in the dough, which, with protein powder, can dry out if it’s not balanced. The acidity of the cottage cheese helps with this too. The very open crumb you’d usually get from sourdough alone is tamed by the slight enrichment of the dough and the protein powder soaking up a bit more moisture than flour.
I don’t know about you, but I prefer my baguette somewhere between the sourdough with its slightly chewy and satisfying crumb and Banh Mi buns, which have a finer, fluffier crumb (less air holes!) and a very thin, crisp crust. A happy medium as such. Which is exactly what you are getting with this recipe: The best of both worlds.
Fabulous Sourdough Baguette Flavor
And if we are talking about texture, we can’t forget the flavor. Sourdough on its own adds of course the classic tang and moreish layers of flavor, laced with hints of maltiness. The low percentage of cottage cheese adds another one to it: A gentle savory edge, fresh lactic notes, which mingle with the lactic acid of the sourdough as if they’ve been best friends forever.
Why Go Through The Trouble Of Creating a Sourdough Protein Baguette?
I have written a whole post on the topic of sourdough baking with added protein, including the relevant links to studies and science behind it, but here is the gist of it:
- The sourdough starter contains and produces a wide variety of enzymes, including proteases. These proteases are enzymes that break down protein molecules into smaller peptides and individual amino acids, which our bodies can more easily absorb than their bigger counterparts.
- The process works both on protein within the flour and added whey protein in the form of powder and any other milk or grain products.
- This means you get more bang for your buck from the protein you are adding to sourdough when allowing it to long ferment.
Plus, we all love a good baguette, don’t we?
Why not combine it with more of what we need?
Really Easy To Make
I adapted this recipe from the great “Beginner’s Sourdough Baguette” from Kate and she really nailed the method, making baguette accessible for everyone.
My version is just as easy to make, with only one extra step of blending the cottage cheese smooth and comes together in minutes without a stand mixer.
I will give you options of baking it in your Dutch oven or a baguette pan (which is available very cheap on Amazon if you fall in love with making baguettes and want the perfect shape.)
The shaping, which looks intimidating to some, is in fact very easy and done in 4 steps that I’ll show you in detail, so you get your dream baguette at home. Will the first few come out with the perfect shape? Maybe not. Will they look and taste incredible? Absolutely!
And while you are at it, try using them as Banh Mi buns, with my recipe that uses leftover pork shoulder roast, that I made in my air fryer.
A Comparison In Method and Recipe
Baking Methods
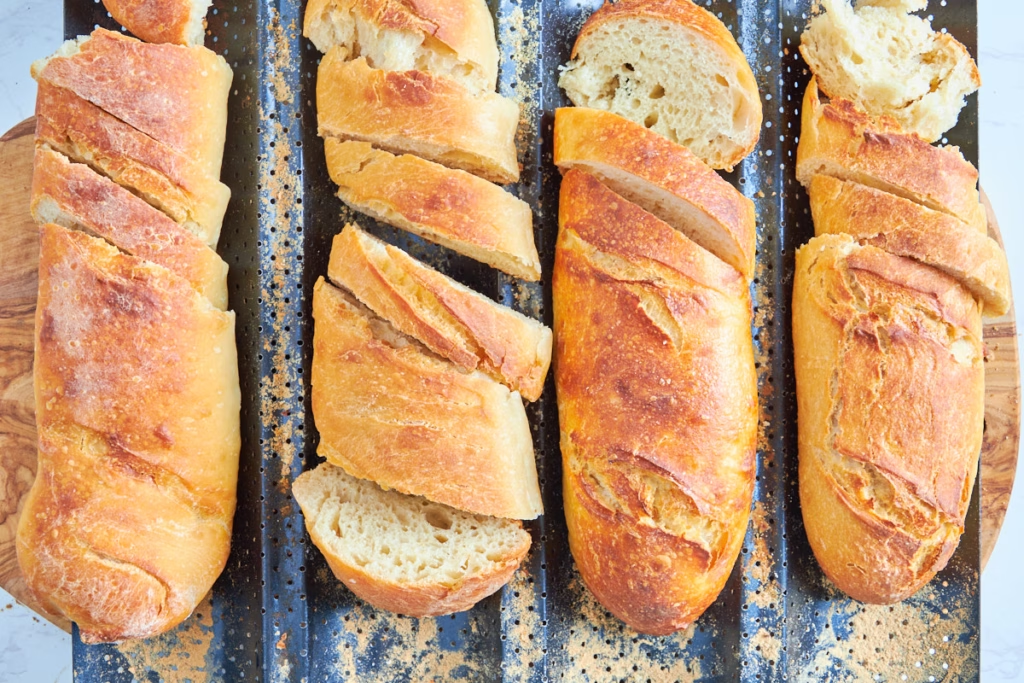
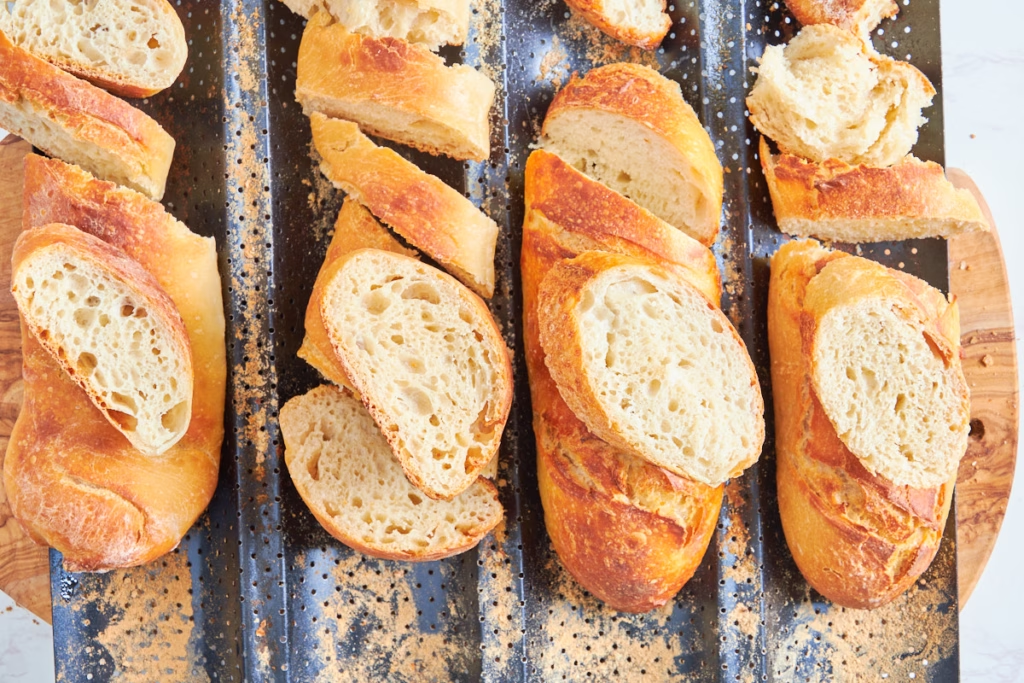
While I was testing how these baguettes would turn out in baguette pan and Dutch oven, I figured I’d also do a side by side test, to see if I can get the crumb even finer and the crust crisper.
Recipes
To achieve the crisper crust, I borrowed a trick from Huy Nguyen and his Banh Mi Bun recipe, integrating a tiny bit of vitamin C powder into my dough. Aiming for a finer (less bubbly) crumb, I added one tablespoon of olive oil to the dough. The other half of the recipe I kept with the original I’m giving you here.
Results
Those 2 small changes did give me the intended changes, but I felt they weren’t dramatic enough to adjust my recipe, adding more ingredients to it. I figured though that you might be interest to see how my side by side tests turned out, so here they are.
This was the first test bake of the baguettes, so I hadn’t yet figured out how sticky they are and that I need to use baking parchment in the baguette pan. You’ll also notice my rather imperfect shape after transferring the baguettes to the Dutch oven. But you’ll also see the small differences in shape and texture.
On the far left you see the recipe I’m giving you, baked in the Dutch oven. Second from left is the recipe with olive oil and vitamin C. You can see the slightly finer crumb.
Third from the left is this recipe baked in the baguette pan and on the right is the baguette pan bake with Vit C and olive oil.
What you’ll also notice is, that the Dutch oven bakes have a flatter bottom than the baguette pan version and the crust isn’t as shiny. This is expected from the Dutch oven version and the main reason I loved the baguette pan so much. The crust and crumb texture is also more even on the baguette pan.
All of them tasted very similar and delicious. So it’s up to you, if you’d like to play around with the recipe a bit.
Ingredient Notes

Dry Baguette Ingredients
- Bread Flour – I use white bread flour here for the classic texture and flavor. It also has slightly more protein than all-purpose flour, which is always good in my book.
- Whey Protein Concentrate – Unflavored to be exact. Mine is from MyProtein.
- This is neither affiliated nor sponsored. Just the powder I found to taste best after trying a fair few. If you never found one you actually enjoy, give this one a try. Though any unflavored whey concentrate will work.
- Salt- Not only for flavor (though that’s of course important), but to control the fermentation rate and give it time to develop.
- I use Diamond Crystal in all my cooking and baking. It has a very fine structure, so it has less saltiness in volume than, say sea salt (but the same by weight). If you use sea salt, use half the amount in volume than given in the recipe.
Wet Baguette Ingredients
- Cottage Cheese – Mine is from Milbona, which I get at Lidl. It has only 2.8% fat yet comes with 12.5% protein and is lovely and creamy in texture when blended. Use any cottage cheese you like. It’ll be fine.
- Sourdough Starter – If you have no starter yet, follow my recipe to make your own.
- You want it to be active and bubbly for baguette. I’m using a slightly different feeding ratio of 1:7:6 these days, which keeps my sourdough active for longer, giving me more flexibility in my baking schedule and leading to a very strong starter. This ratio also leads to a less acidic outcome, which, in baguettes is lovely, as you want them a bit more neutral tasting than, say, rye bread.
And that is already it ingredients wise. Told you it’s easy!
substitutions
Dry Baguette Ingredients
- Bread Flour – You can absolutely use all-purpose flour 1:1 here. I tried it out and it leads to a slightly finer and more tender crumb. If you’d compare them side by side that is. On its own, you probably won’t even notice.
- Whey Protein Concentrate – Casein powder works well, but needs about 1-2 tbsp added water. So does upcycled (unflavored) Barley protein, which needs 1-2 tbsp less water.
- I have not tried to bake with any pea based vegan protein powders, as I deeply dislike the flavor and texture of them to begin with, so I’d rather not have them in my baked goods. If you give it a try, please tell me what you think! You’ll likely need to add 1-2 tbsp water, as they do soak up more than whey concentrate.
- I would not recommend using whey isolate, as it has a much stronger drying effect.
- If you’d like to make this recipe without protein powder, simply replace 1:1 with more flour.
Wet Baguette Ingredients
- Cottage Cheese – Low or 0% fat Greek yoghurt will work as substitute. A vegan version of it should too, though I didn’t try that one personally, as the ones we get here all taste weirdly sweet. Check the ingredient list, to make sure yours has no added sugar.
- If you’d like to make this without cottage cheese, simply replace 1:1 with more water. This might sound weird but will work fine due to the fairly low amount I added.
- Sourdough Starter – Now in theory you could make these baguettes with instant yeast. Replace the amount of sourdough with 25g flour, 25g water and ½ tsp instant yeast. Your rising and fermentation time will be about halved. You can still do a cold ferment in the fridge overnight though and it’ll improve even a yeasted dough’s flavor. You may have to add a little more flour if using only yeast, as it can’t handle the amount of moisture sourdough can.
Equipment Used
- Blender – While I use my Nutribullet to get the cottage cheese really smooth, you could certainly use the food processor (the small bowl in that case) for this step. I find mine a bit too large though, leaving too many curds intact for my liking.
- Large bowl – For the remaining dough mixing steps
- Dough Whisk – Fantastic for mixing sourdough and my personal tool of the year after getting one in 2025.
- Baguette Pan – Or Dutch oven. You can use either for this recipe and I’ll show you how they influence the final shape of your protein baguettes.
- If you want to use said Dutch oven, it would have to be an oval one like this, to fit the length of the baguettes.
- Just in case you have to buy either one of them to get started: The Dutch oven is a bit of an investment but extremely versatile. If you start using one, you’ll wonder how you ever lived without it. Even more so if you are starting your sourdough journey.
- For the baguette pan: They are much cheaper (mine was around 20€) but only used for baguette. Lovely to bake them, don’t get me wrong, but not very versatile.
- That being said…if you get as obsessed as I did after making this recipe for the first time, it’ll be very much worth the 20€!
 Buy Now →
  Buy Now →
  Buy Now →
 How to Make this
Example Baker’s Schedule
| Time | Action | Note |
| Day 1: 9:00 PM | Feed Levain | Mix your starter. Let it sit at room temp overnight. |
| Day 2: 9:00 AM | Mix Dough | Mix wet ingredients with flour, salt, and starter. |
| 10:00 AM | Stretch & Folds | Perform 3–4 sets of folds every 30 minutes. |
| 12:00 PM | Bulk Ferment | Let the dough sit undisturbed (Counter or Fridge). |
| 8:00 PM | Shape | Shape and place in the Pan/on Parchment/In a banneton |
| 8:30 PM | Cold Proof | Put the bread in the “plastic bag tent” or cover with plastic wrap and into the fridge. |
| Day 3: 8:00 AM | Freezer Chill | Move the pan to the freezer for 30 mins to firm up for scoring. |
| 8:30 AM | Score & Bake | Pre-heat the oven, score, and bake! |
Day 1 – Feeding Your Starter (Levain)
Sourdough Starter (Levain)
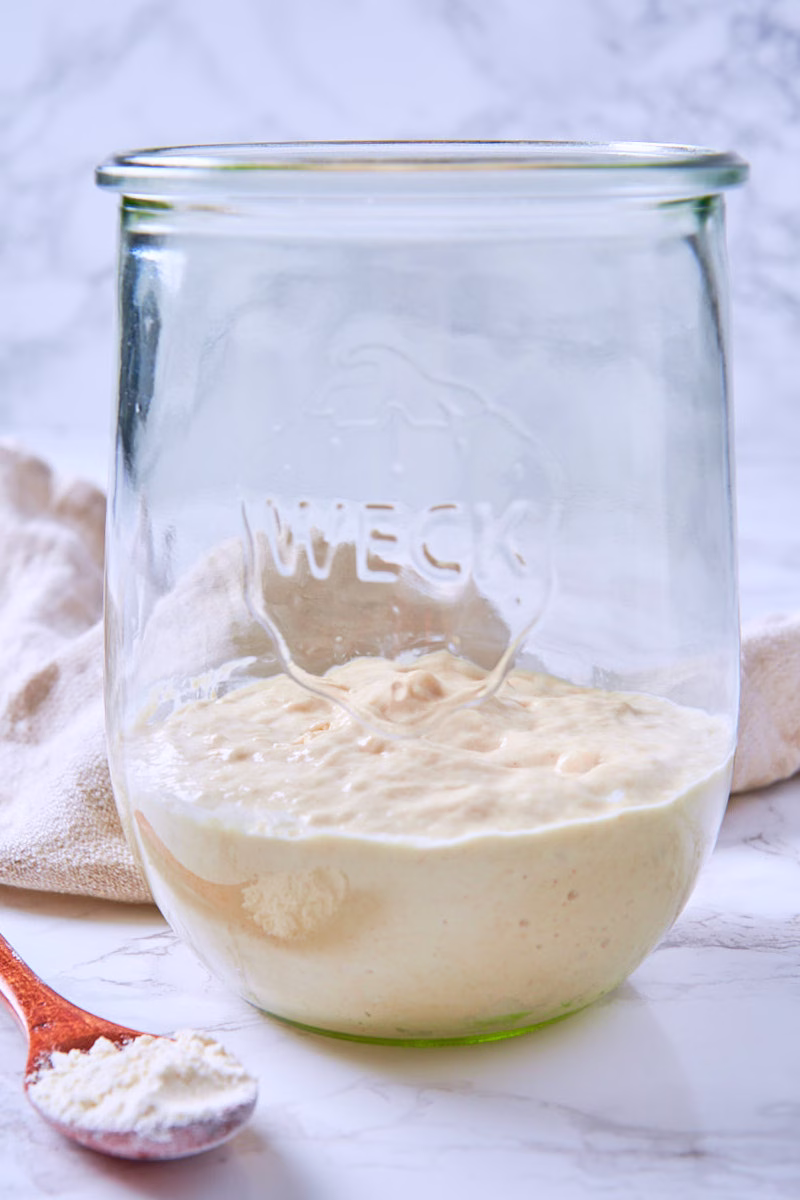
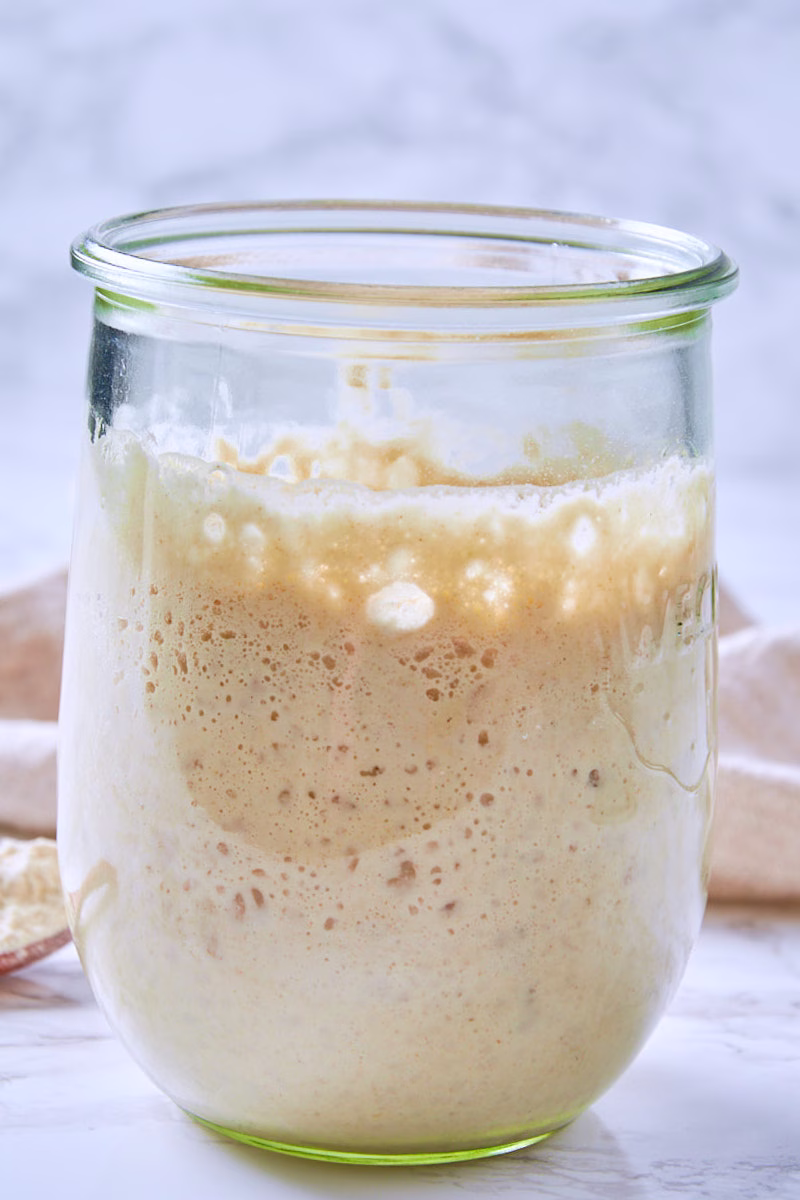
- Using 5g of your existing starter (Levain), feed it with 35g flour and 30g water. Leave it loosely covered overnight until it has doubled in volume, is active, and bubbly.
- If you have no starter yet, here is a link on how to make your own. You just need water and flour.
- How strong your starter is depends on your flour. Use good quality flour to feed it for best results. The consistency should be like very thick, stiff pancake batter.
- How long your starter will take depends on the temperature of your house. In winter it might need longer, in summer significantly shorter.
- To determine if it’s ready check if it has doubled in volume, is actively bubbling, you see nice, strong gluten strands if gently pulling it away from the walls of the jar with a spoon.
- If yours seems too runny, add a bit more flour, until it gets harder to stir and leave for a few more hours.
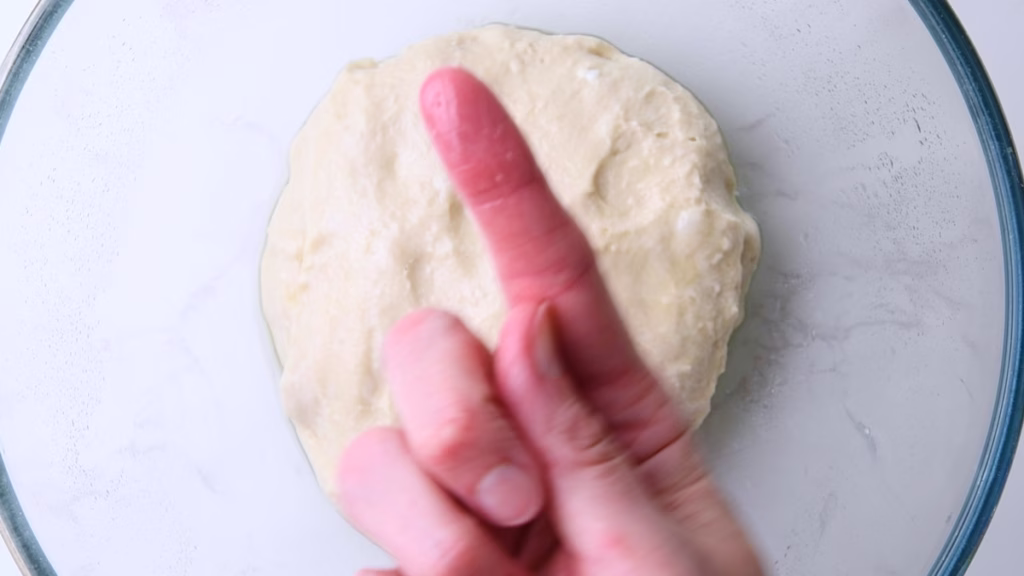
Day 2 – Mixing The Baguette Dough/Bulk Proof
Mix The High Protein Dough
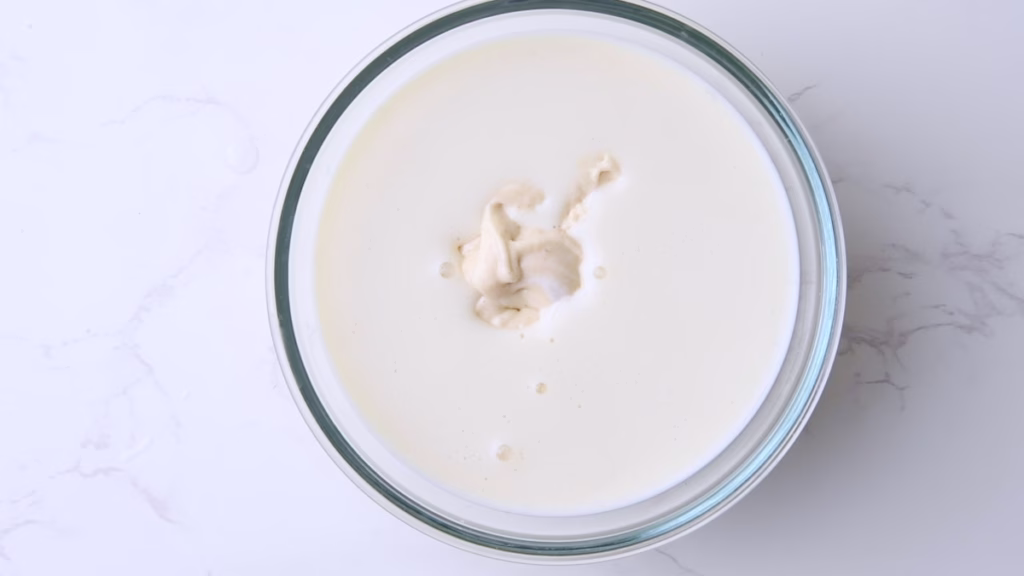
- Check if your sourdough starter is ready by adding a dollop of it to the water. If it floats and is nice and bubbly, it’s ready. Ideally it should just have formed a bit of a dome in its jar, when at peak activity. Though if it just collapsed a bit you’ll be fine too.
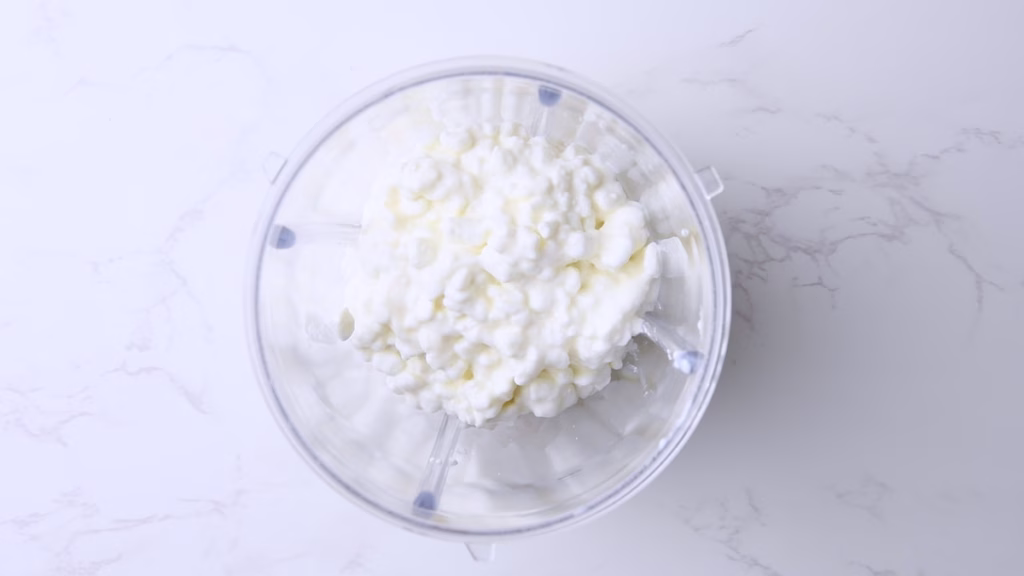
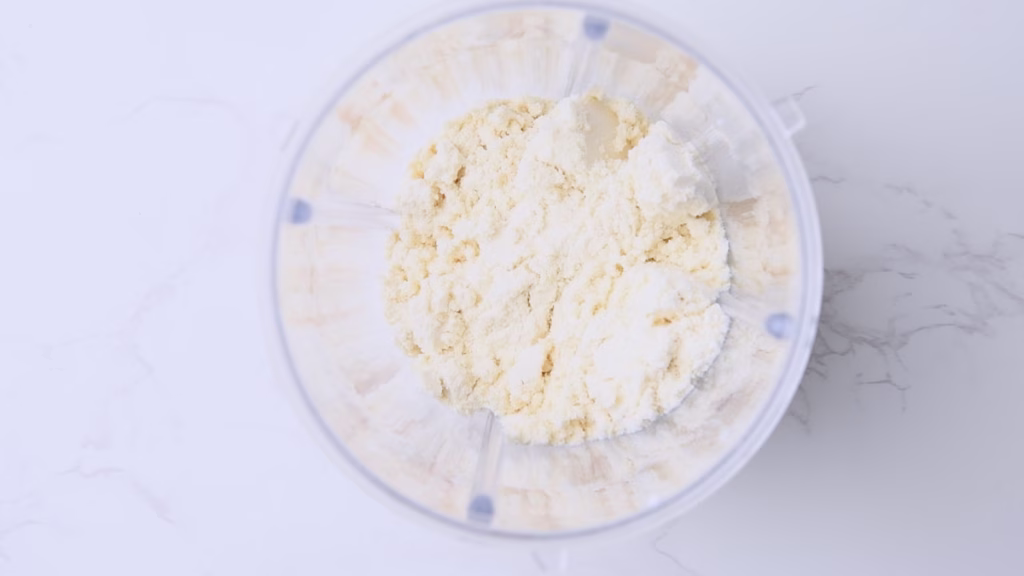
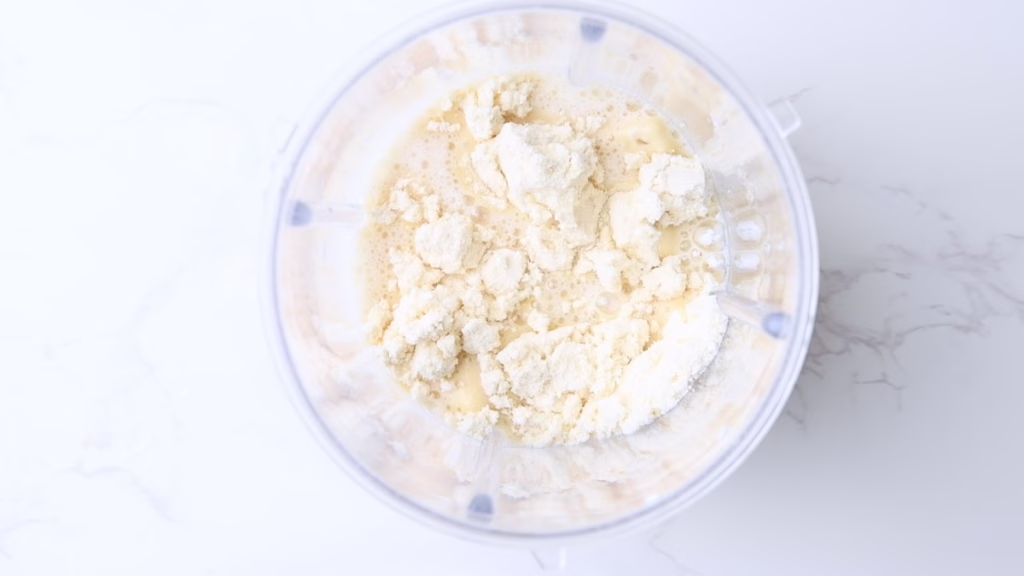
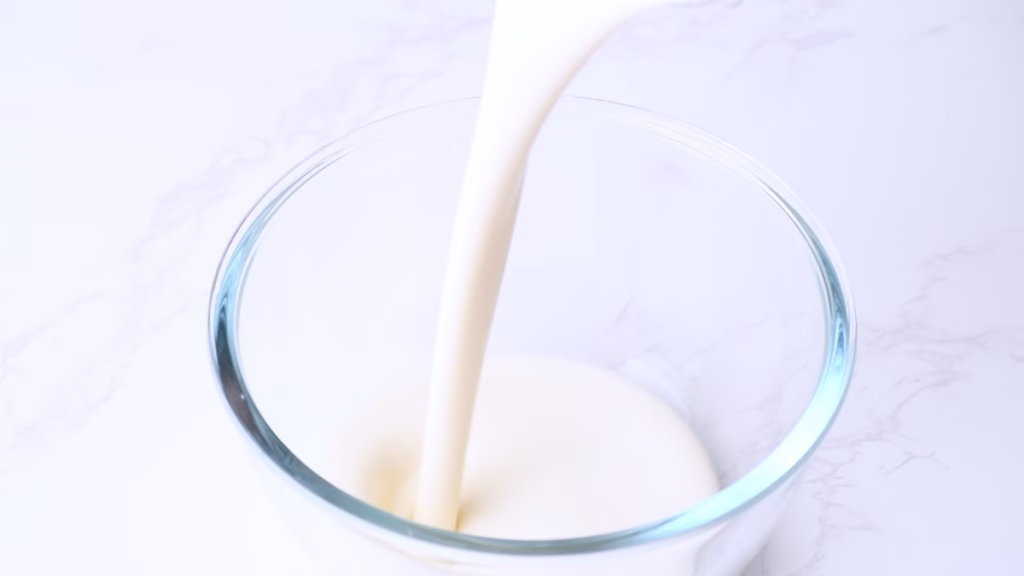
- Blend the cottage cheese and protein powder with some of the water until smooth.
- Add the cottage cheese-protein mix to the sourdough starter together with the remaining water and stir until combined.
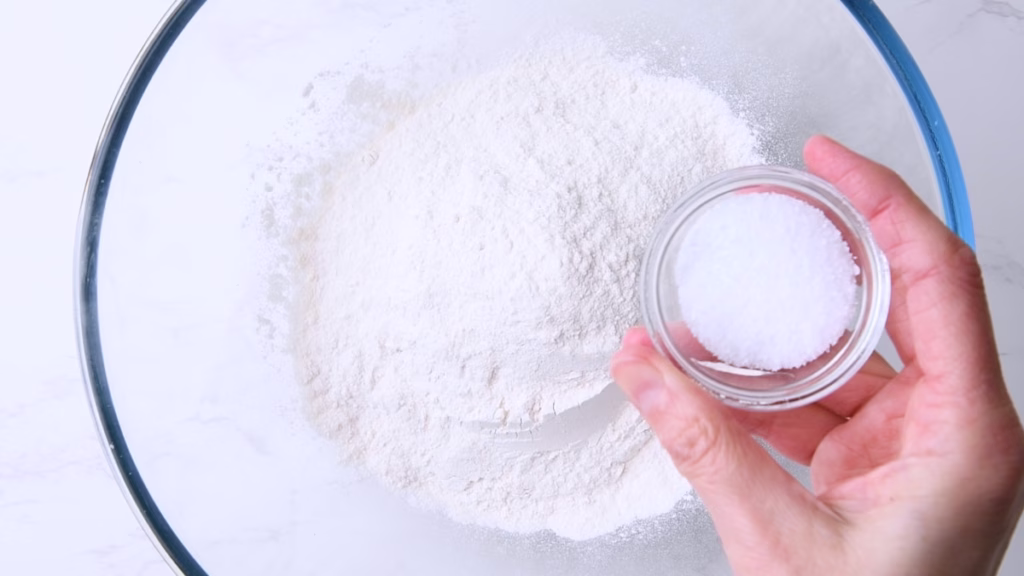
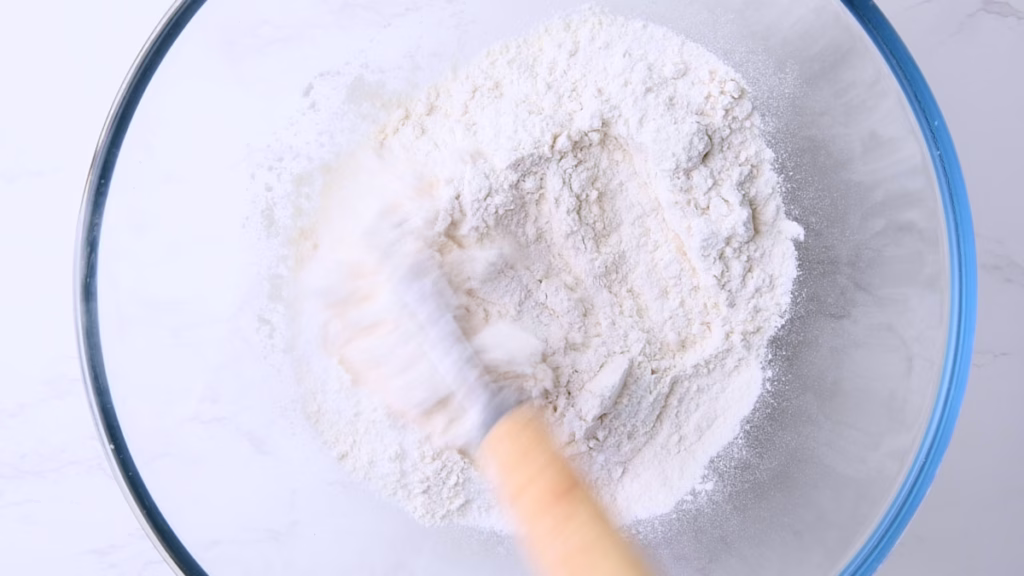
- In a large bowl mix the salt into your flour.
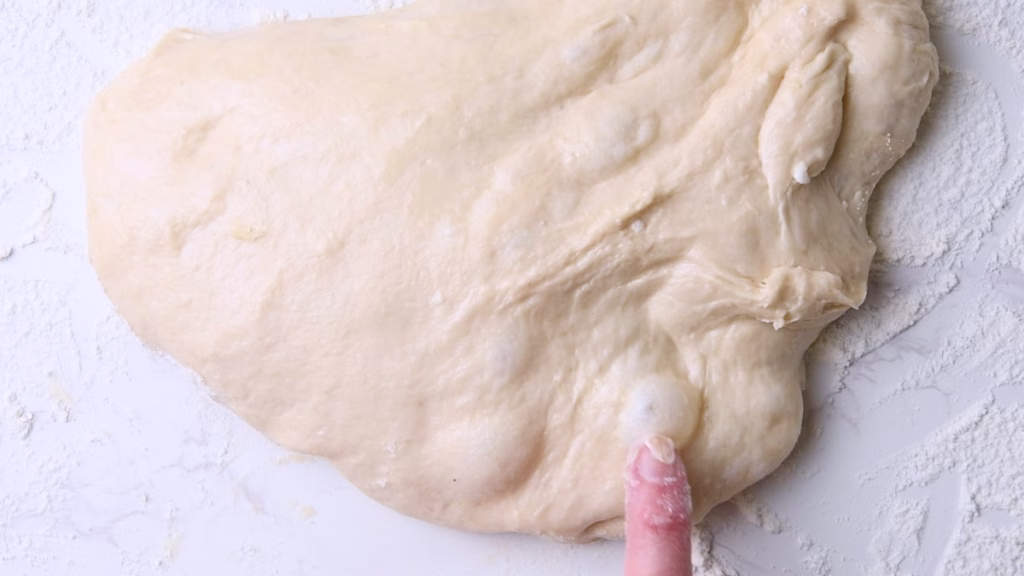
- Pour the liquids into your flour and stir until you have a shaggy dough without any dry flour bits.
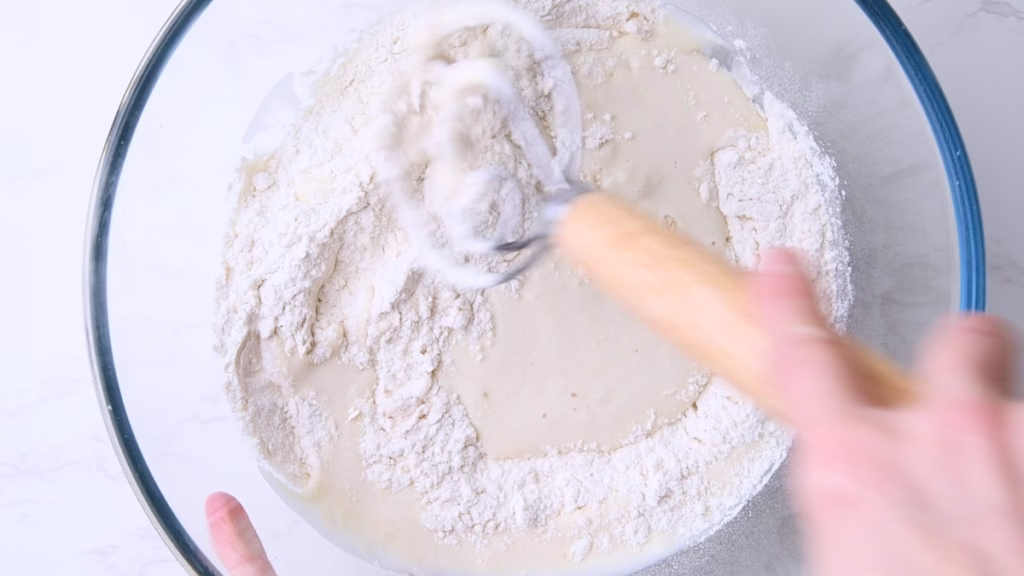

- Your dough will be very wet and sticky at this point. Don’t add more flour. This is working as intended.
- Cover with a lid, plastic wrap, a shower cap or a damp tea towel and let it sit for about one hour.
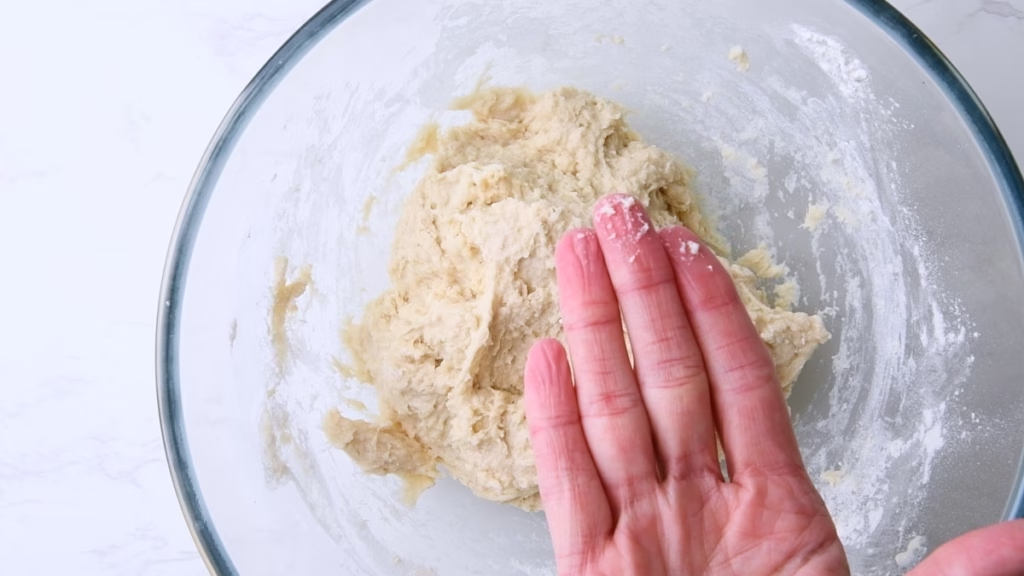
Stretch And Fold
- After the first hour, start a series of 3-4 stretch and folds.
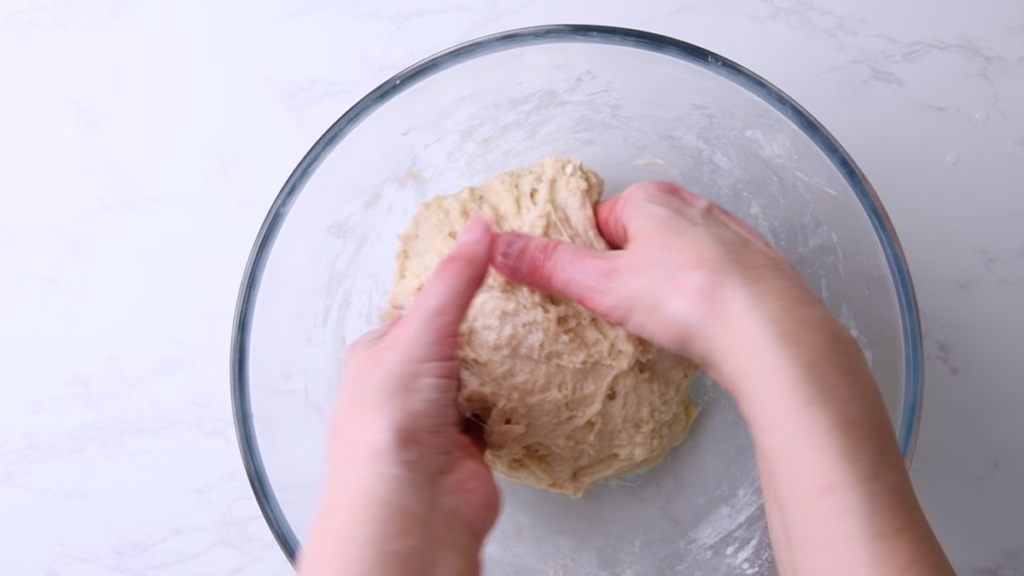
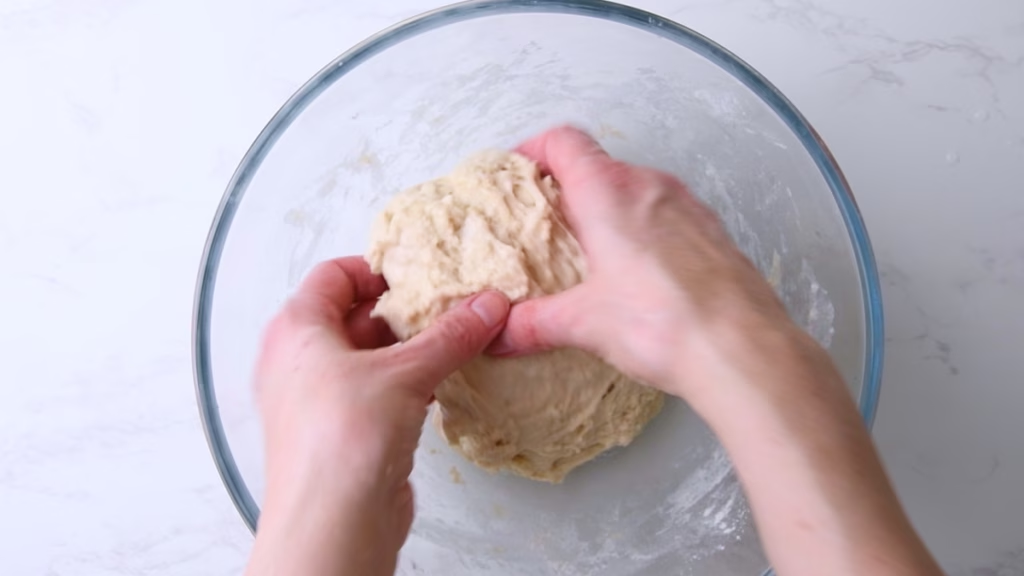
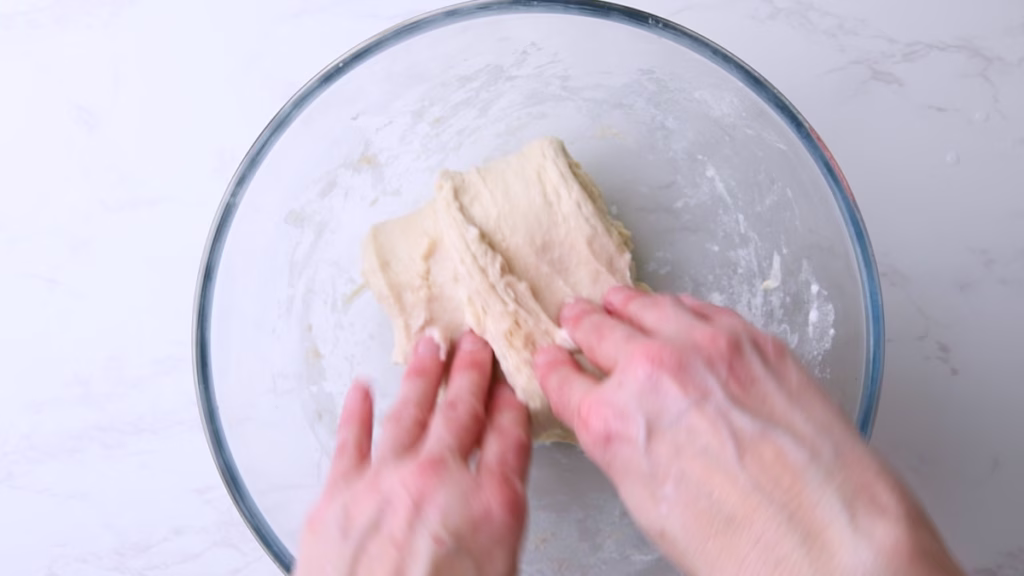
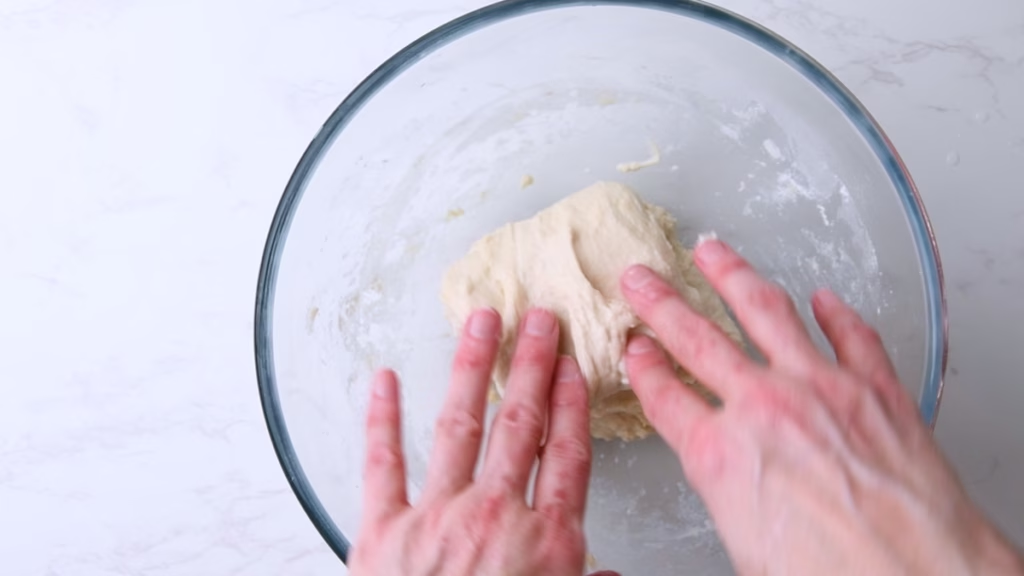
- To do this without too much dough on your fingers, wet your hands lightly.
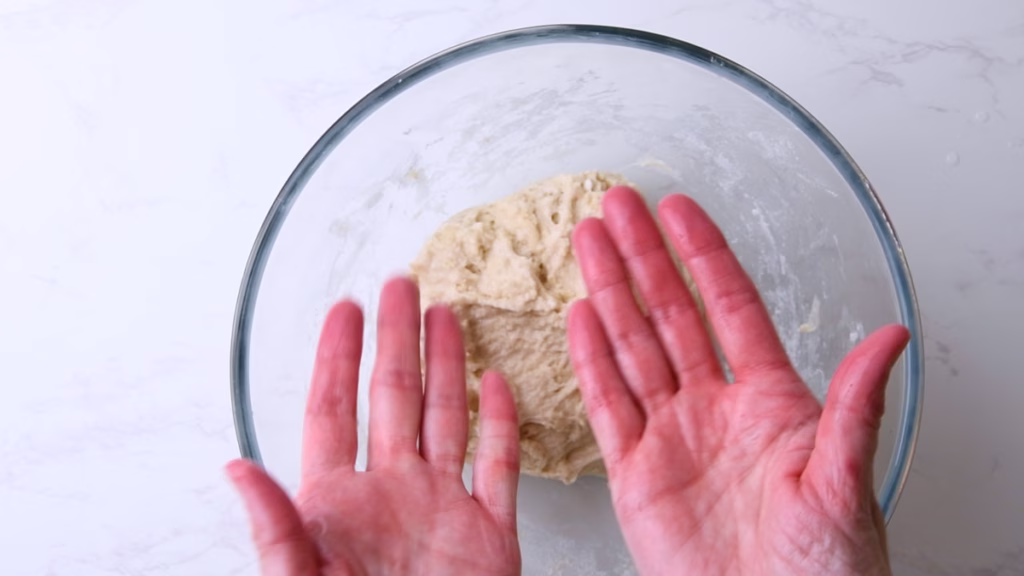
- Push both hands under the dough, pulling it upwards. Then fold it over itself.
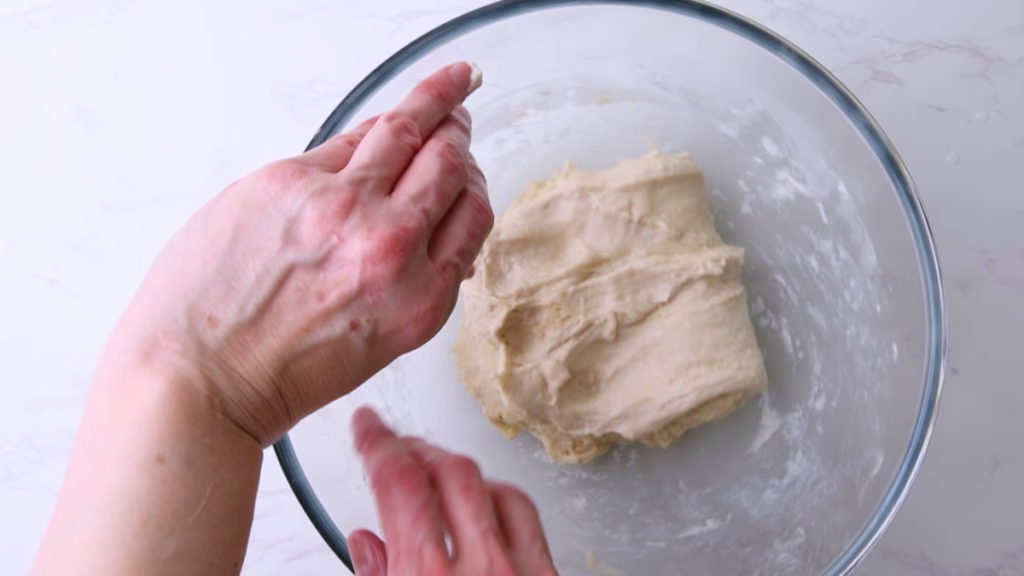
- Turn the bowl 90 degrees and repeat. Do this 4 times until the bowl returns to its starting position and the dough is visibly smoother and stronger.
- Repeat every 30 minutes to 1 hour for 2-4 times or until your dough looks smooth and strong.
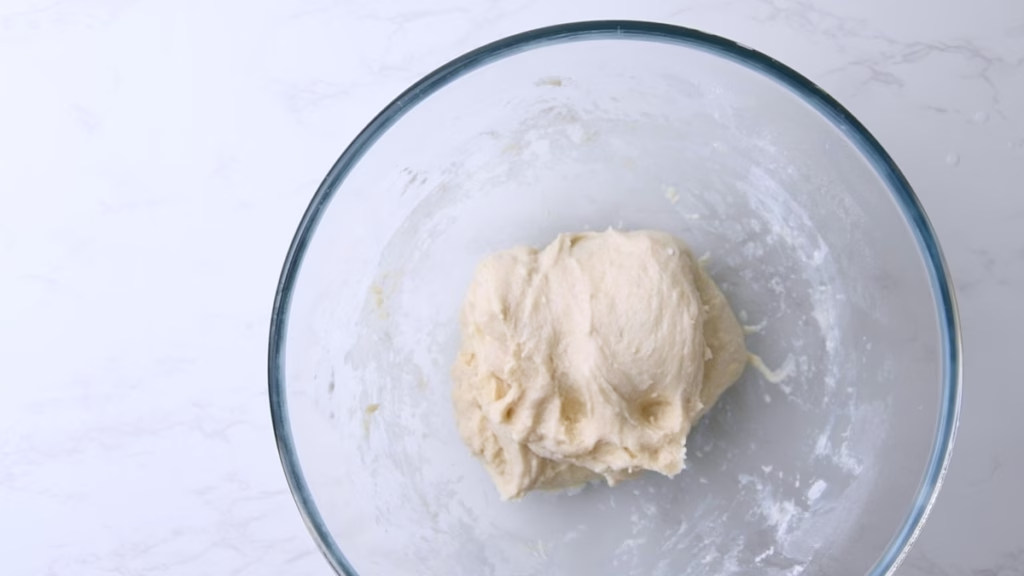
Bulk Ferment
- Allow your protein baguette dough to bulk ferment on the counter for 4-6 hours or until it looks visibly risen and puffy. You should see little bubbles on top and if you used a glass bowl, even more on the sides.
Overnight Fridge Ferment
Now you have two options:
- You can cover your dough and store it in the fridge overnight for a slow fermentation (8-12 hours, or even up to 3 days if you prefer a stronger sourdough flavor or life gets in the way of baking) and shape about 2-3 hours before you want to bake your baguettes.
- Or you can do what I did and go straight to the shaping, allowing them to overnight ferment while shaped.
Shaping The Baguette
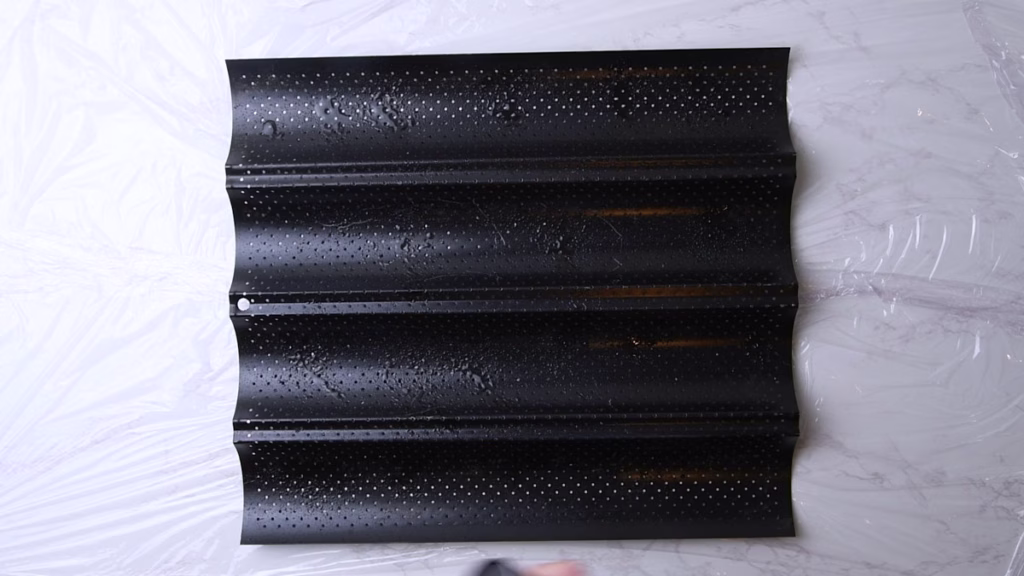
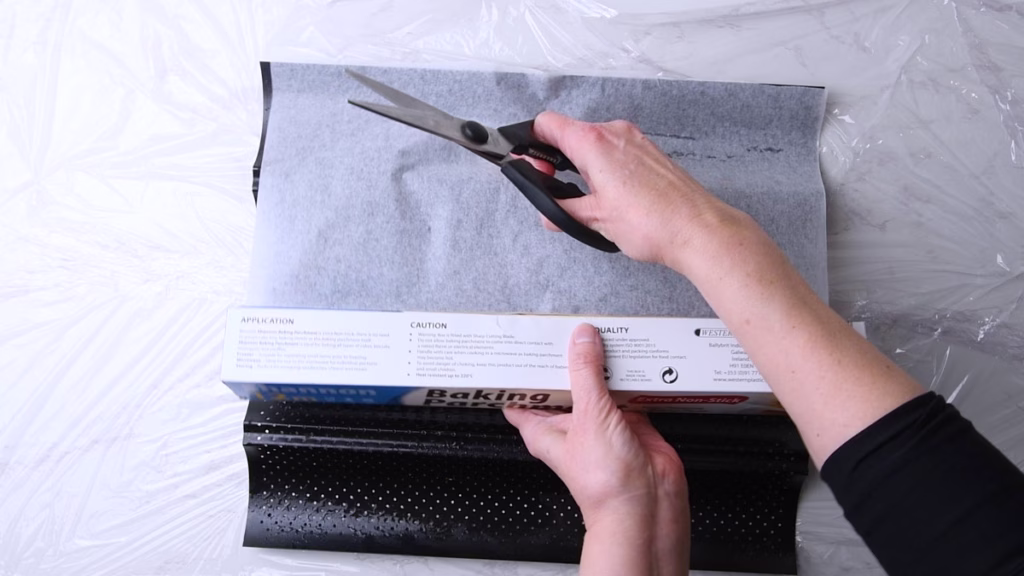
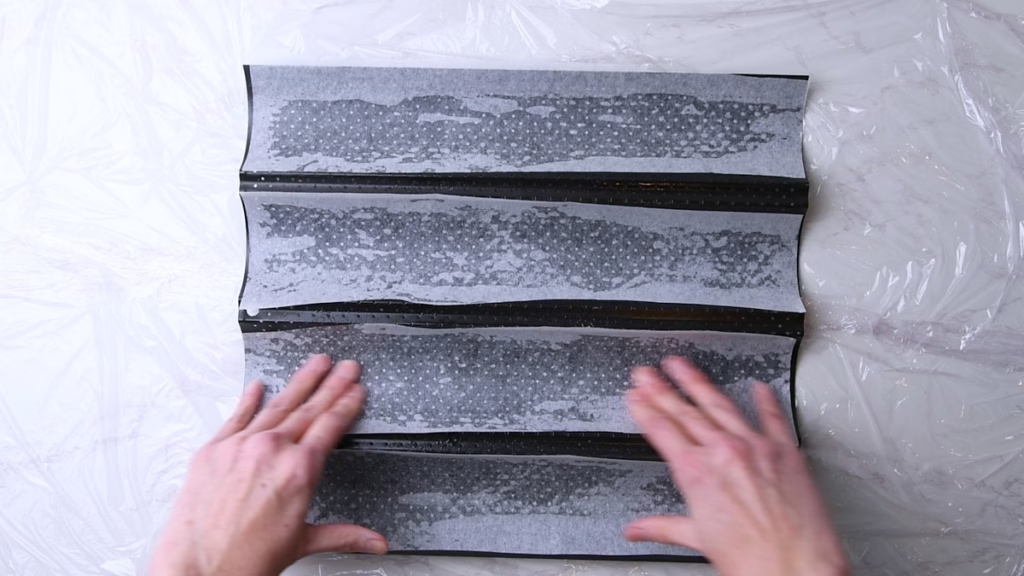
- Oil your baguette pan if you have one and line it with strips of baking parchment. This will prevent the high hydration protein dough to get stuck in the holes and give you a lovely even crust.
- If you are using a Dutch Oven, get a towel, push it into a few long folds, dust them heavily with rice flour.
- Crucial Tip: Use strips of parchment paper even in a non-stick pan. The lactose in the cottage cheese and whey acts like a glue when it carmelizes; the parchment ensures you won’t have to pry your beautiful bread out with a knife.
- After the overnight fermentation (or right after the last stretch and fold, if you go for same day baking) take your dough out your bowl using a dough scraper onto your floured worktop.
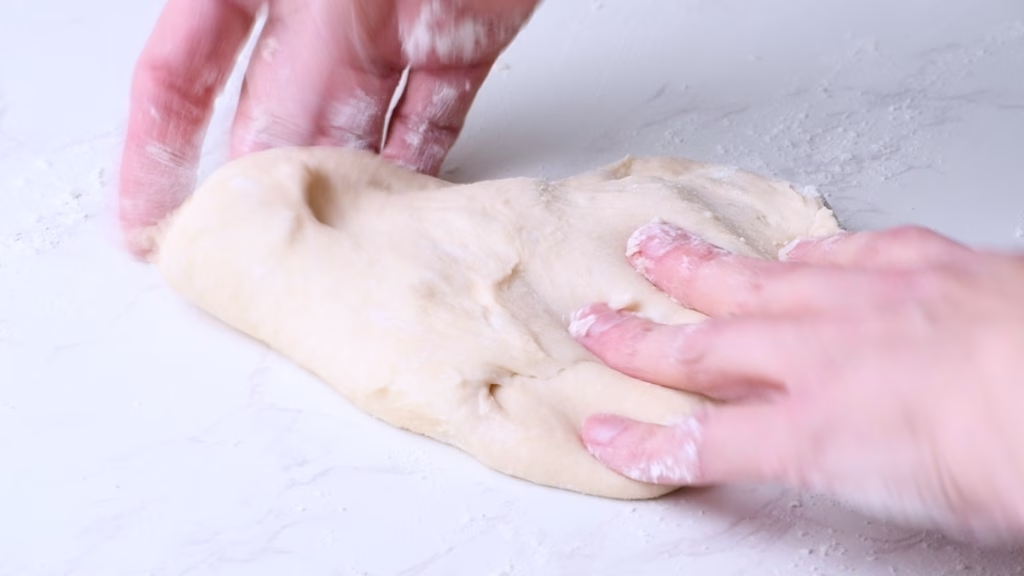
- Shape it into a neat log by doing a “letter fold” to start giving it a bit of tension. For that, stretch the dough gently into a rectangle, fold one third over the center, then the other, essentially ending up with something like a very rough letter shape.
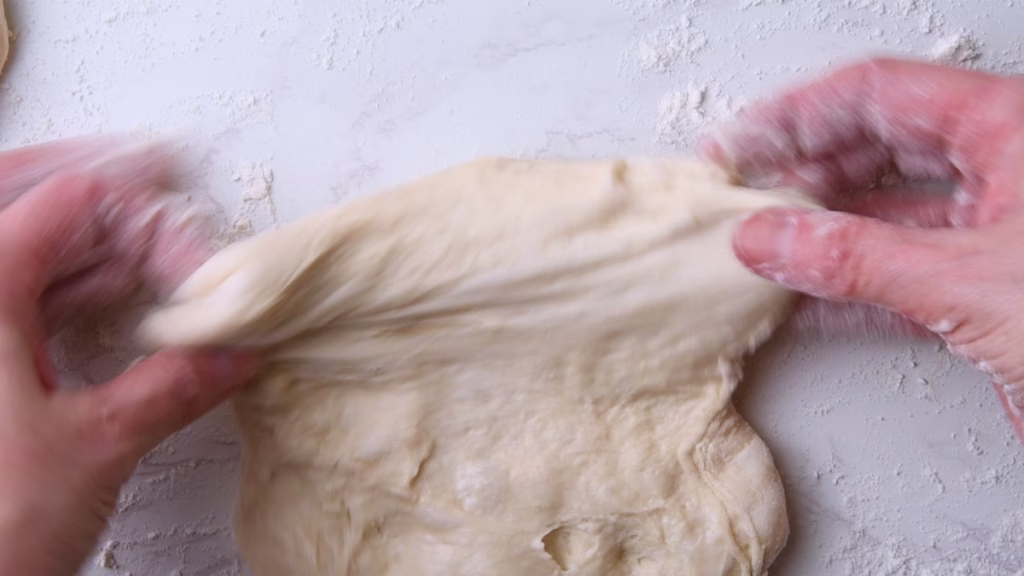
- Use your dough scraper or knife to cut it in half. This recipe makes 2 medium baguettes, meaning it will be easy to handle.
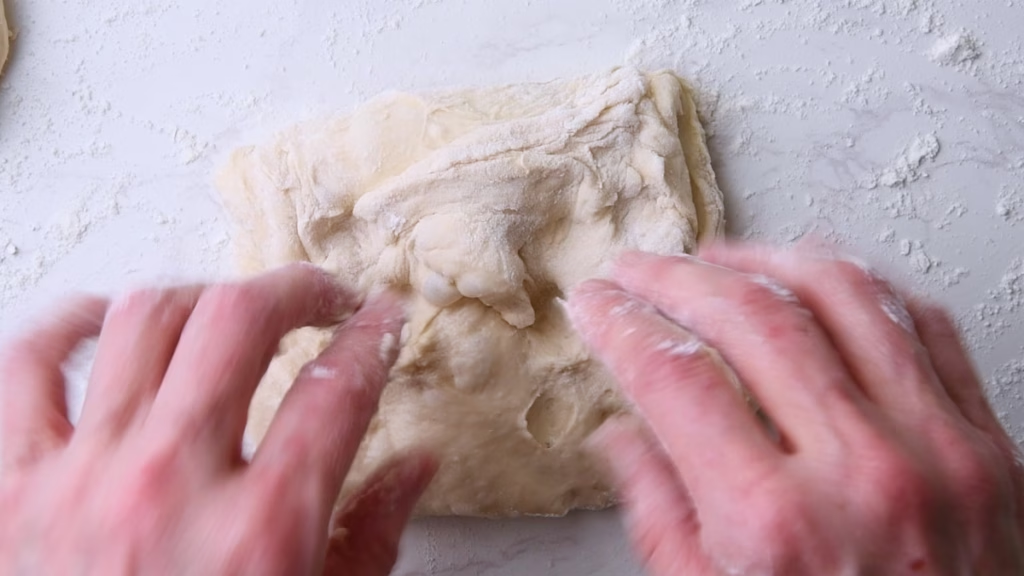
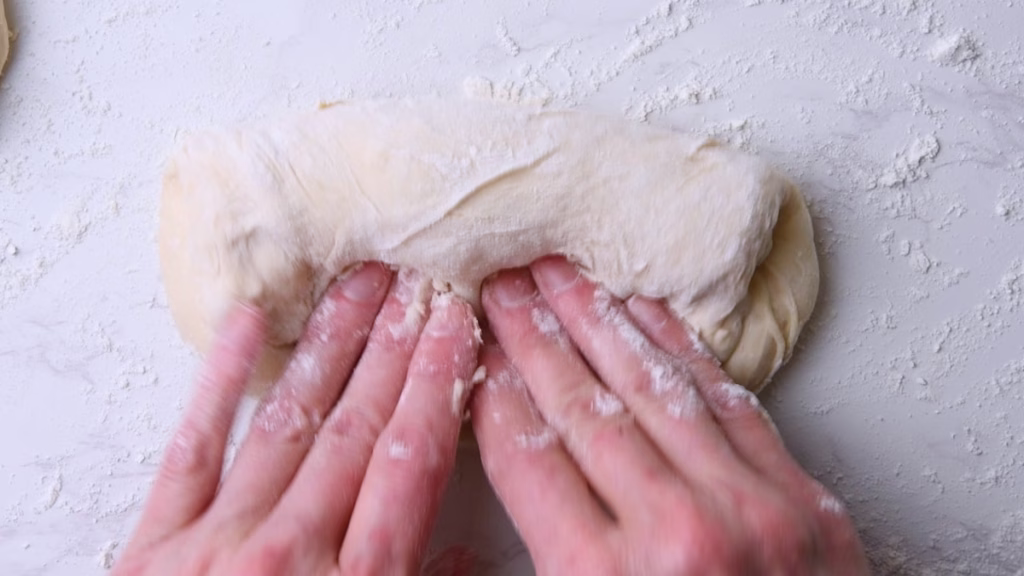
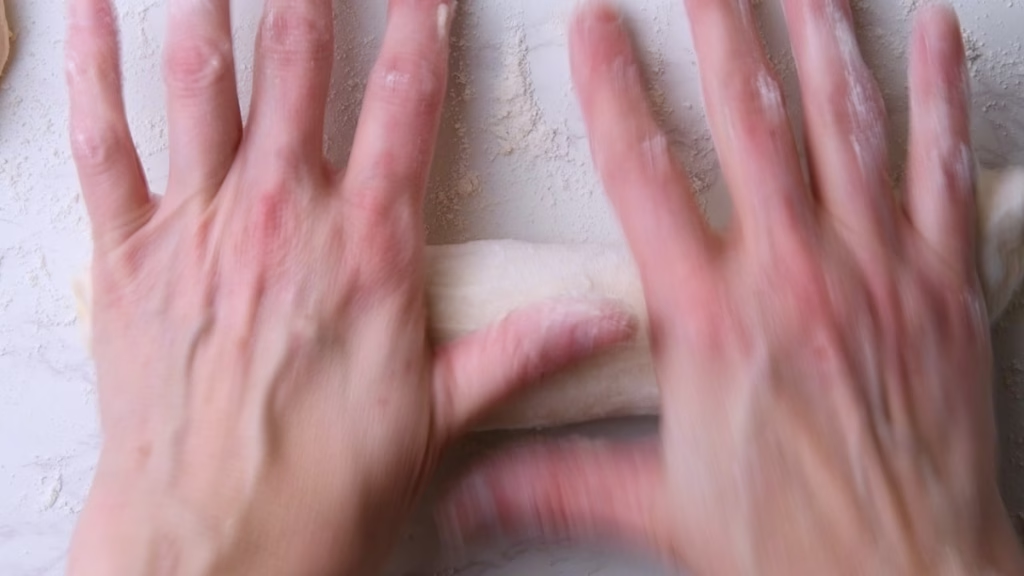
- Stretch each portion gently into a rough rectangle. Then take the top half, fold it over the center and push with your fingertips or side of your hand, to attach it to the bottom part of the dough.
- Then take the bottom corners and fold the lower third over the bit you just attached.
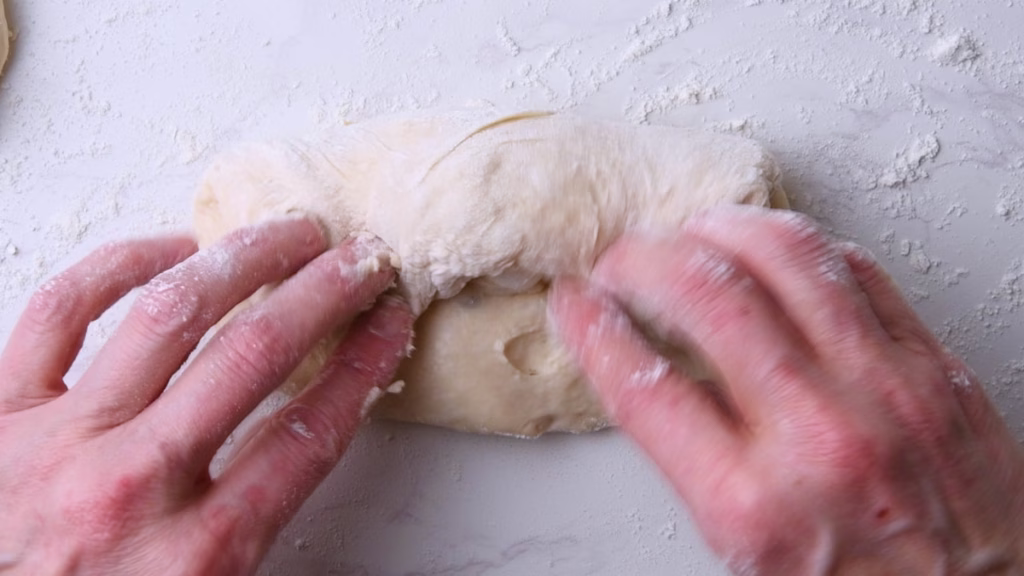
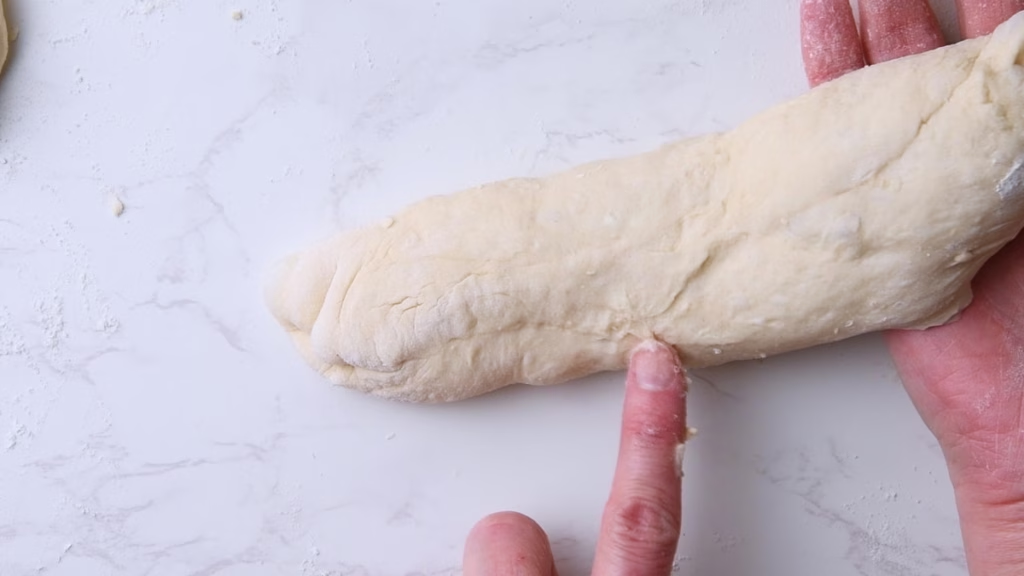
- Using a sort of “knitting” motion with your fingertips, seal the seam.
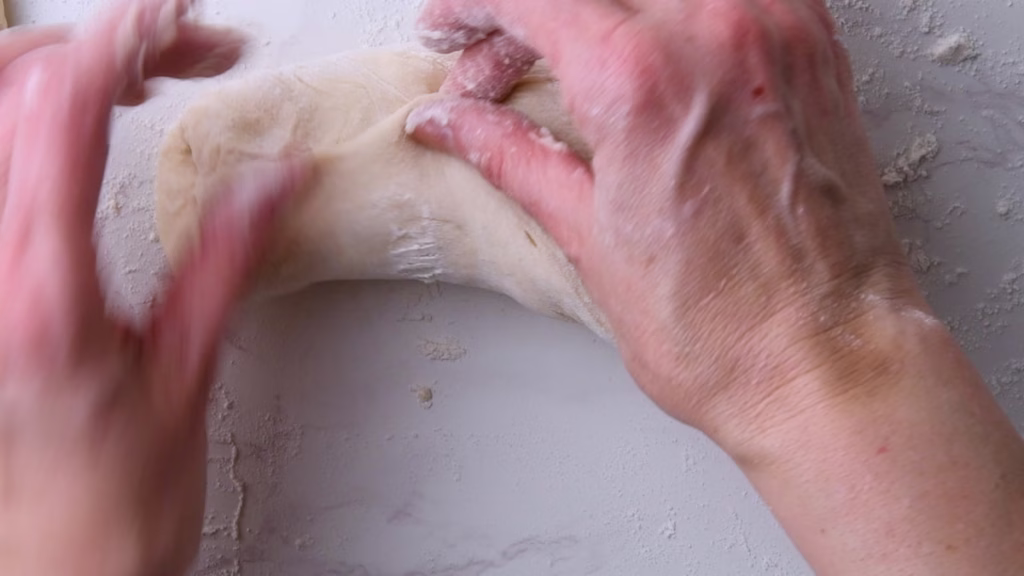
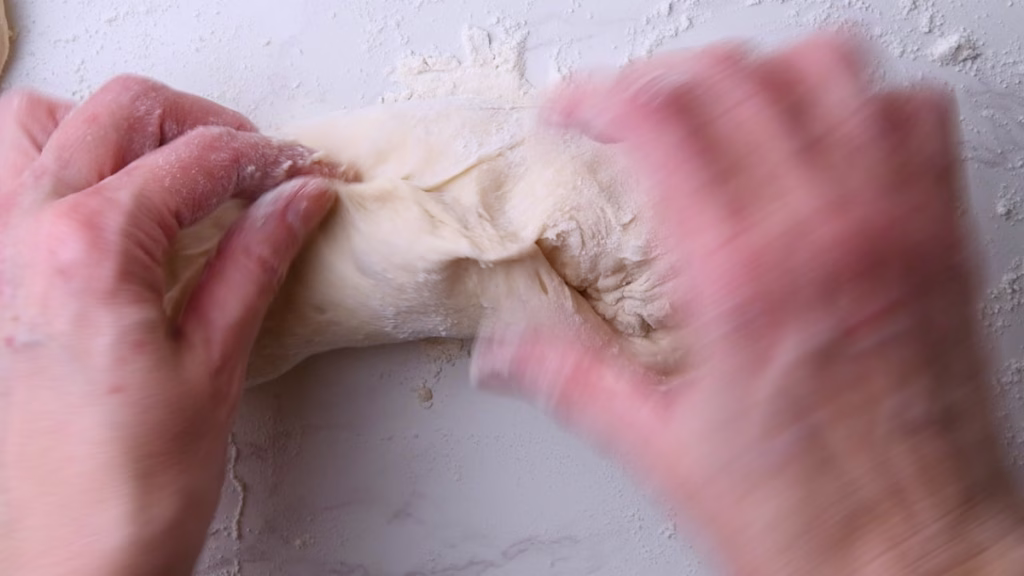
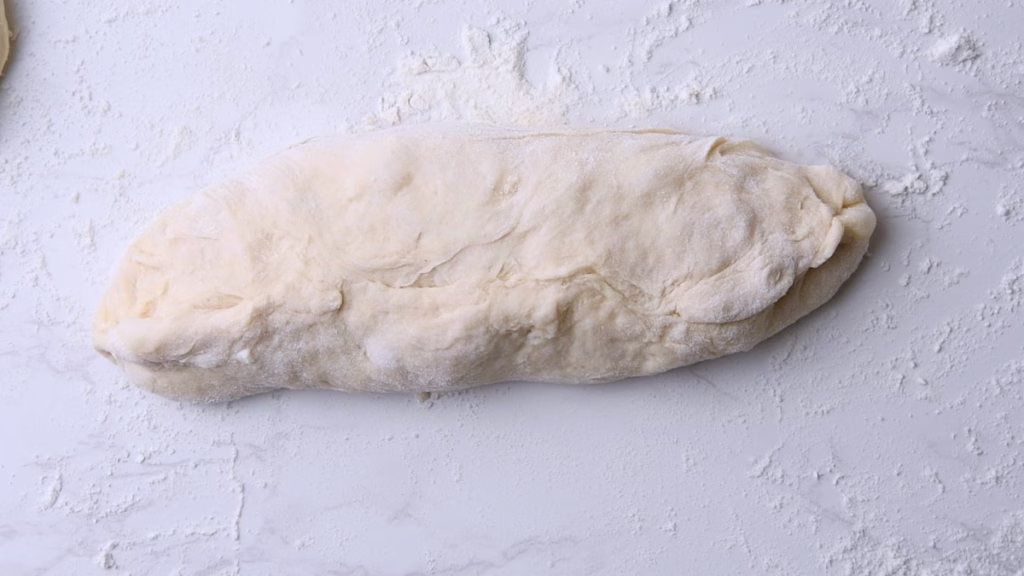
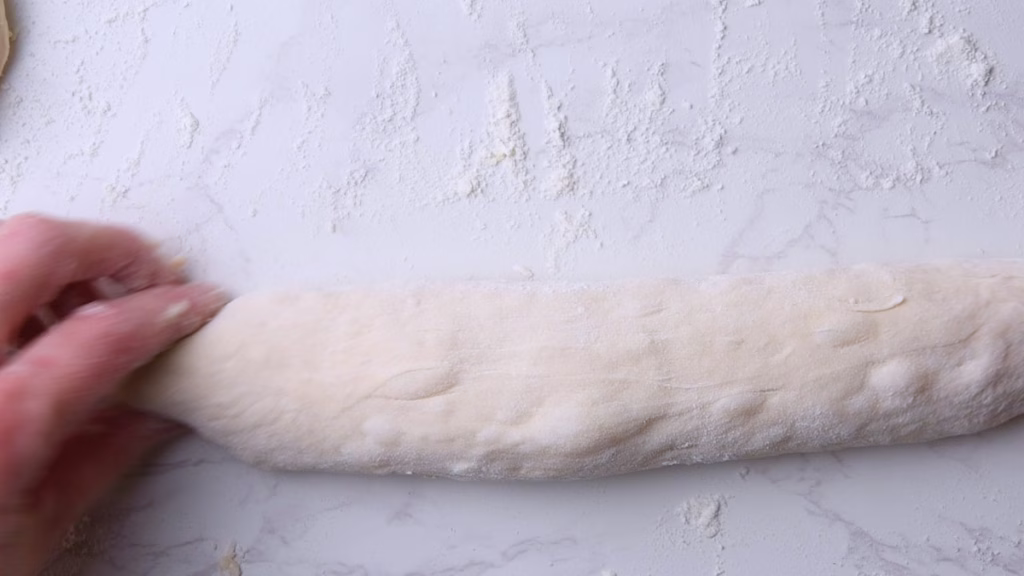
- Use the surface tension from your worktop (and very little flour) to gently roll your baguette into a longer shape, tapering the ends into that classic sourdough tip if you like. I prefer mine more rounded. But you do you.
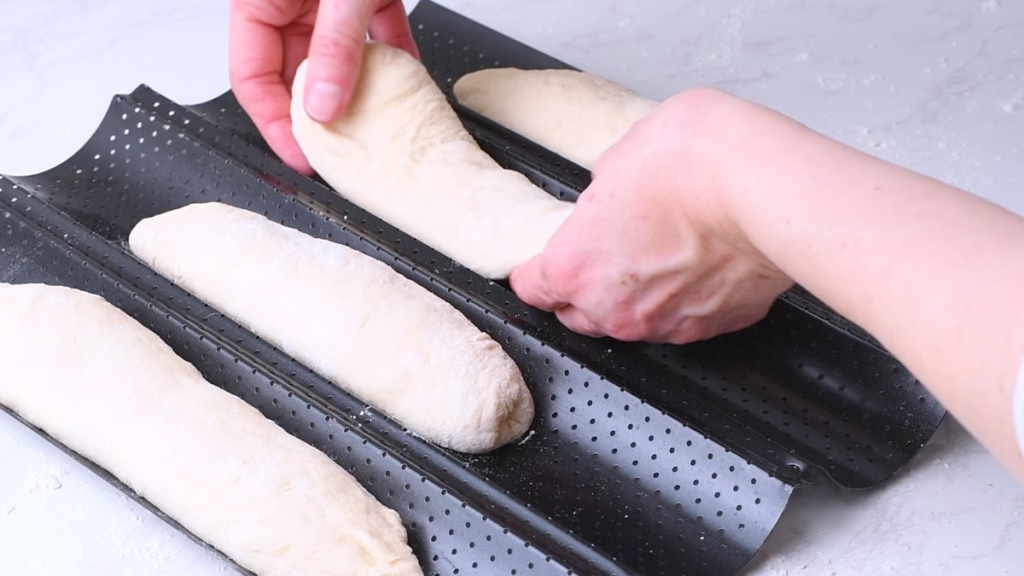
- Gently place the shaped baguette, seam side down, on your baking parchment (Which I didn’t do in my first version! Watch the video to see all of my mishaps…)
Cold Ferment/Last Proof
- I put my baguettes in the fridge overnight at this point and since I don’t want them to dry out and form a skin, which might bake into a very hard crust later, I use a bit of a trick to keep them moist and in perfect shape while giving them time to rise.
- I found towels decidedly too drying (even when damp) and frustratingly sticky and plastic wrap, no matter how carefully I tried to seal it always had air gaps, leading to dry bits plus was too tight to give my baguettes enough room to expand.
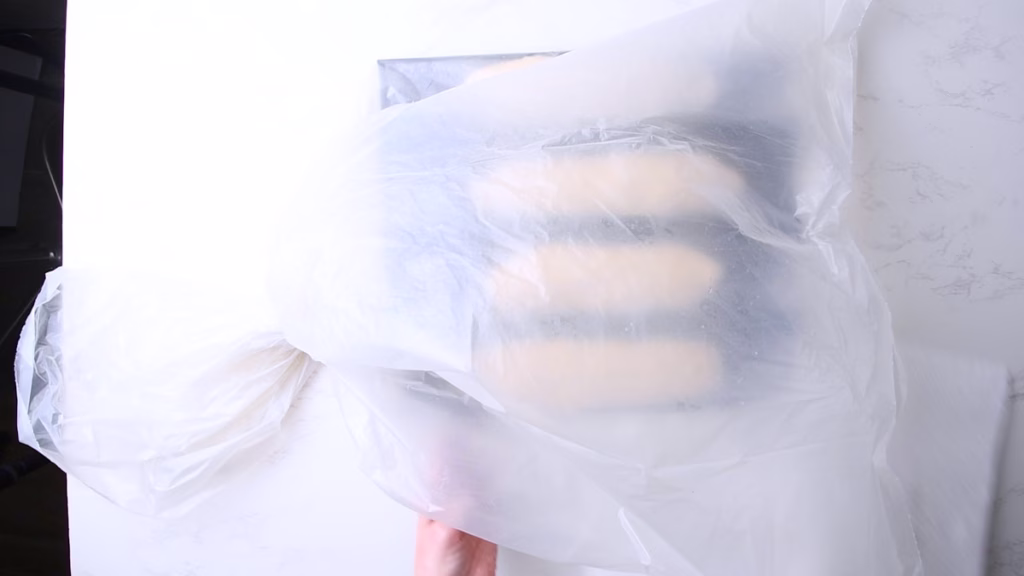
- Hence I started using (clean) large plastic bags, which works marvellously!
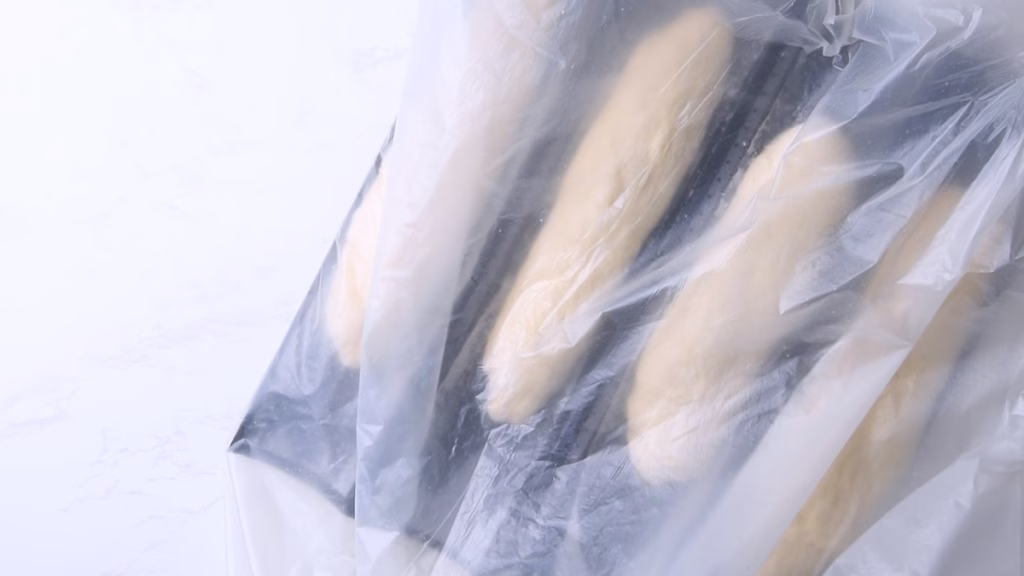

- Transfer whichever proofing surface you chose onto a tray that will fit into your fridge. My baguette pan didn’t really need a tray, as it was sturdy enough.
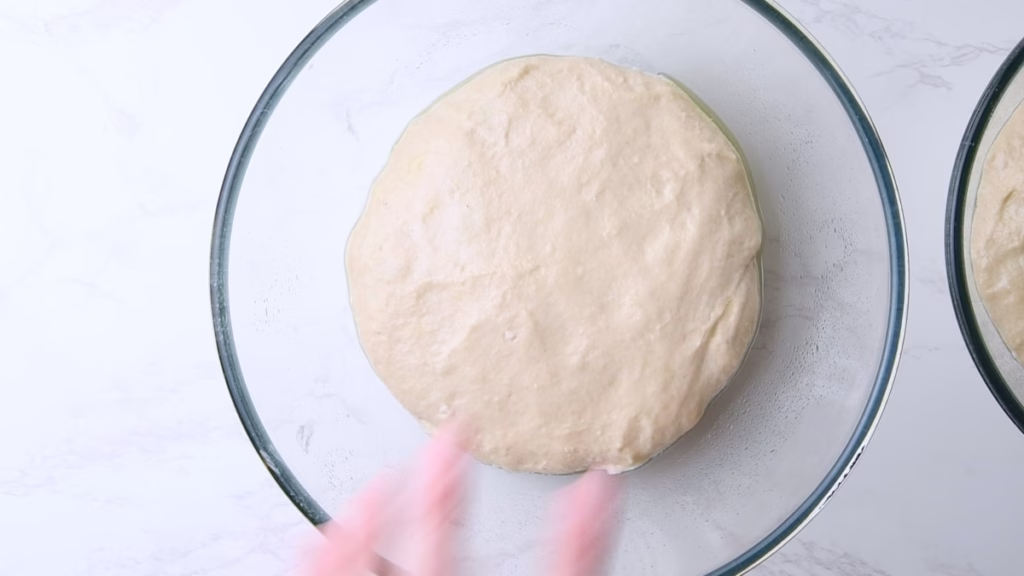
- Spray the baguettes with a little bit of water, to get that crisp, shiny crust. Or flour, if you prefer a thicker, crunchier crust.
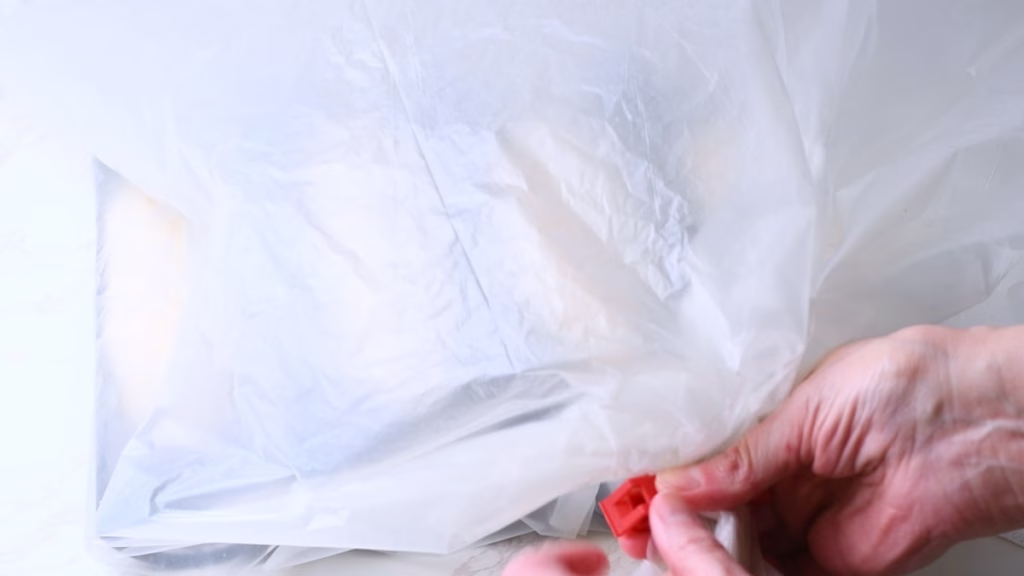
- Push said tray or pan into a large clean plastic bag, blow a bit of air into it, so it puffs up over the baguettes and close it with a clip or knot, to get a relatively airtight seal.
- Move into the fridge and allow to cold ferment/proof for at least 8 hours, to get the full flavor. Up to 2 days works perfect, after that they start to deflate a little.
Day 3 – Scoring and Baking your Sourdough Bread
Scoring your Sourdough Baguette
- Since these baguettes are very soft and well hydrated, they are notoriously hard to score. But if you don’t score them deep enough, they tend to break open along the seams at the bottom/side during baking.
- So I used yet another little trick to get them firm enough for a nice, deep score, leading to the lovely clean shape you see in the pictures: I froze them, still inside the bag, for about 30 minutes, so they could form a harder shell.
- Take them out of the bag.
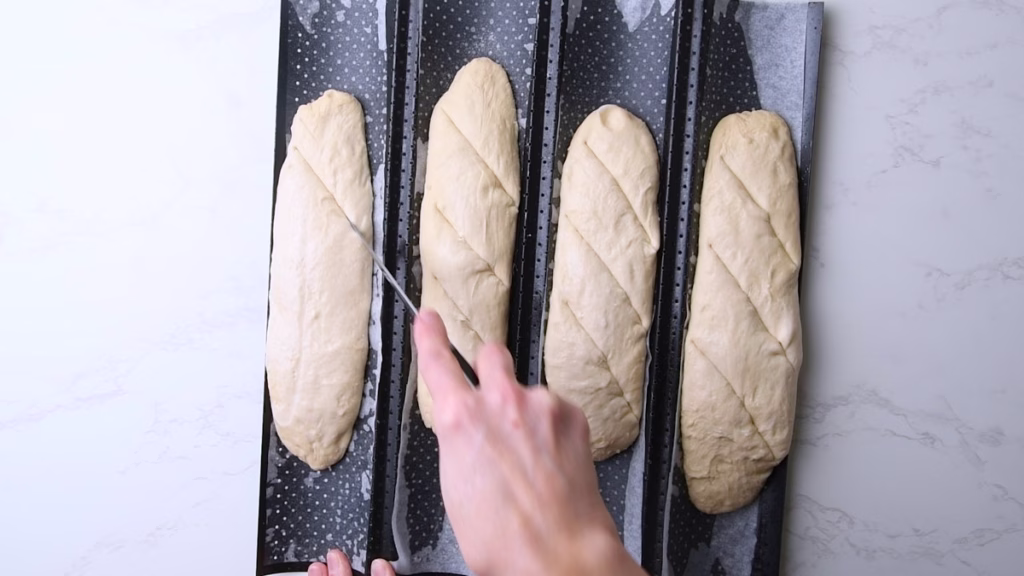
- Then you can use a sharp knife or lame, to make deep cuts (about ½ in/1cm or even a bit deeper) diagonal across the top at an about 45 degree angle. Don’t be shy. The deeper you cut, the bigger they puff up. Anything too deep will simply close. It will look and feel like you are slicing nearly halfway through the dough. That’s the plan.
Baking The Protein Baguettes
- While your baguette is developing its frozen shell and you are scoring, pre-heat your oven depending on your baking method.
- Pre-heat your oven to 225C/450F.
- If you are using a Dutch oven add that from the start so it gets nice and hot.
- Once it’s nice and hot, either use the parchment strips to gently transfer your baguettes into your Dutch oven (as you can see below, I’m not very talented at said transfer, so mine came out rather crooked) and cover with the lid.
- Bake for 10 minutes with the lid on, then 10-15 Minutes with the lid off at 210C/410F
- For the baguette pan method, put a heat proof container (ideally metal, as we will add cold water to it after heating) to the bottom of the oven. An oven tray works well.
- For the baguette pan method keep the temperature the same during the baking, spray your scored baguettes with a little more water (I use a tiny spray bottle that is usually for makeup, as it gives a really fine mist), push them into the oven and immediately add a cup of water to the container underneath.
- Close the door, bake for about 8 minutes. Rotate the baguette pan if you oven bakes unevenly (mine sure does), take out the pan with water and let the steam release, close the door and bake for another 8-10 minutes or until golden brown and crispy.
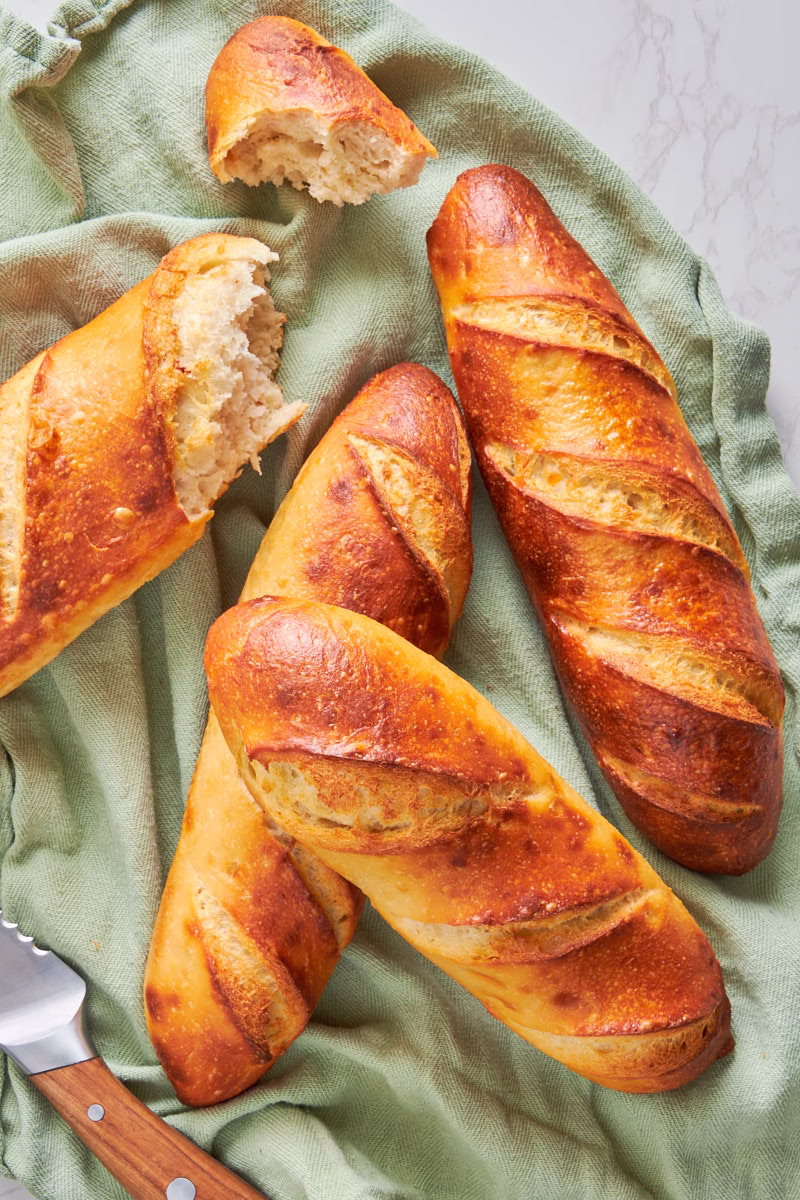
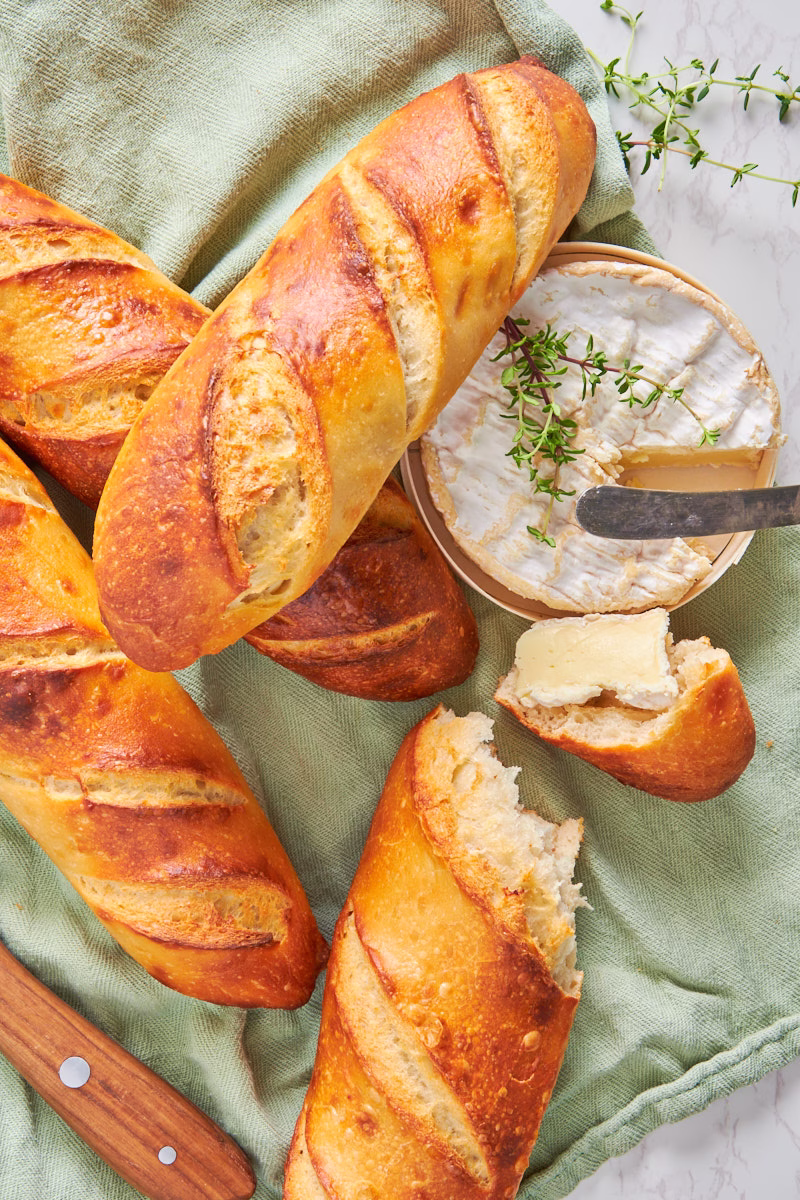
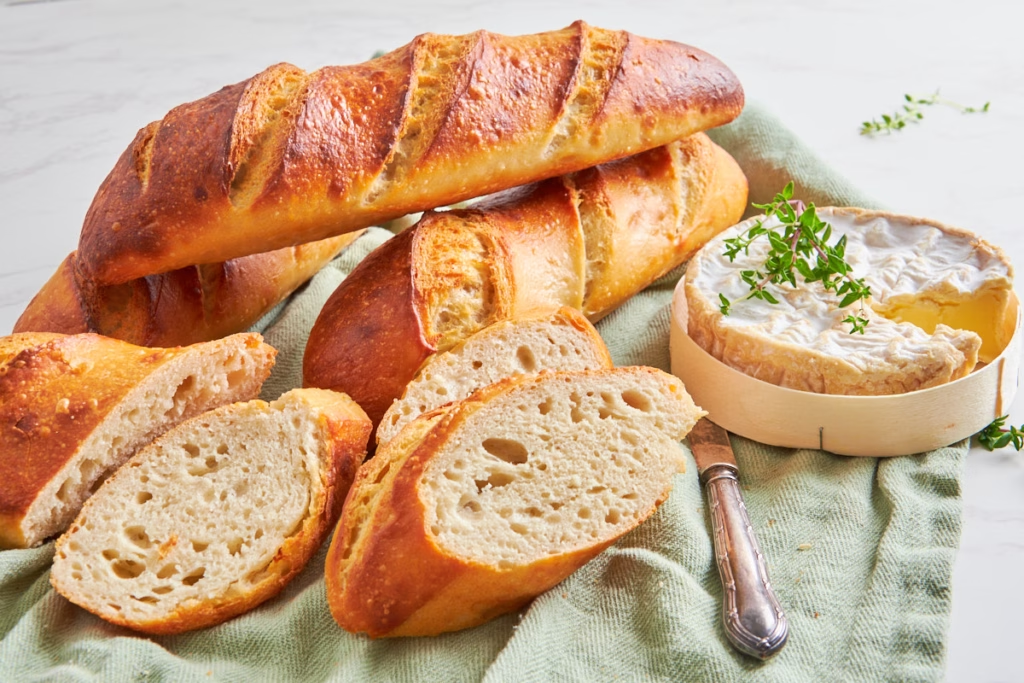
- Remove your amazing baguettes from the oven. Allow to cool for just a few minutes, then rip one apart, marvel at the incredibly fluffy texture and enjoy, very French, with some creamy camembert. (Or whichever topping you want. I’m sure the French will object, but your baguette, your rules! 😉 )
How To Store
- This Protein Sourdough Baguette keeps for maximum 3 days in a lidded bread tin on the counter. Or up to 5 days in the fridge.
- It freezes incredibly well too for up to 6 months and can be easily reheated in the air fryer. I like to dampen it first with a little water, for the perfect freshly baked crispy texture and soft, fluffy insides.
Now I’d love to hear from you in the comments!
Have you tried this? Did you enjoy it?
What other recipes would you like to see?
And if you enjoyed this recipe, please consider rating, sharing, or leaving a comment – your feedback truly helps my blog grow!
FAQ
Not at all. By using unflavored whey concentrate and allowing the sourdough to ferment long and slow, the natural tang of the starter completely masks any “protein” flavor. It just tastes like a really high-quality, slightly savory artisan baguette.
I’d recommend sticking to whey concentrate or casein. I’ve found that pea protein has a very strong, earthy flavor that clashes with the sourdough, and collagen doesn’t provide the same structure. If you do experiment with vegan powders, you’ll likely need to add a bit more water as they are very “thirsty.”
There are a few options I have tried in bread before in the substitutions section though.
? That was my biggest fear too! But thanks to the sourdough proteases (the enzymes that break down the protein) and the bread flour, it stays fluffy and tender. It’s a proper bread with a real crumb, not a rubbery egg-and-cheese sponge.
Absolutely. You can use an oval Dutch oven or even a regular flat baking sheet. If using a baking sheet, you can roll up some kitchen towels and place them under a sheet of parchment paper to create “valleys” that support the baguettes’ shape while they proof. Just remember to remove the towels before they go in the oven!
Yes, but your dough will need a lot more time to get really active and bubbly. So essentially you just decided at what point you give it the time: Before or after mixing.
If you are using fairly old discard, you might run into trouble with the rise altogether. Up to 3 days, especially with the ratio I use, and kept in the fridge, is a pretty safe bet.
If you want that professional, smooth baguette look—yes. If you leave the curds whole, they will create wet spots in your dough and might even brown into little dark spots on your crust. A quick 30-second blitz in the blender makes a world of difference.
This usually means the crust set too quickly or the score wasn’t deep enough. Make sure you use plenty of steam in your oven (the water tray trick!) and don’t be shy with your blade—cut at least half an inch deep. Using the “freezer trick” for 30 minutes before scoring helps get those clean, deep cuts.
Since this bread is lean, it’s best eaten fresh. However, it’s great at reheating. Spritz it with a little water and pop it in the air fryer or a hot oven for 5-7 minutes. The crust will “shatter” again, and the inside will soften right back up.
Other recipes you might enjoy

Looking for more sourdough protein breakfast ideas?
Here are 13 of my most popular!

These buttery, flaky protein biscuits with cheese and garlic butter might tempt you too.

Perfect New York Style Bagels, but with sourdough and protein.
Need something sweet and comforting?
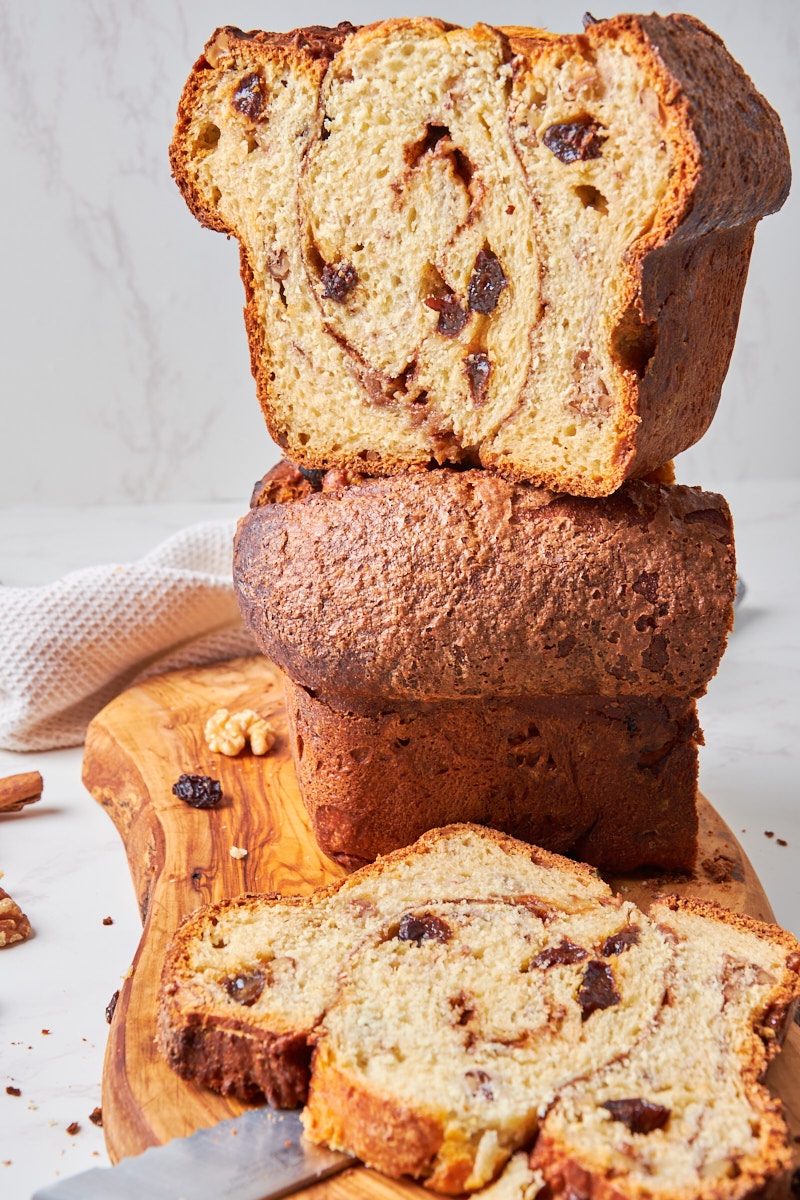
Try this Cinnamon Raisin Swirl Sourdough Protein Bread.

High Protein Sourdough Baguette (27g Protein)
- Total Time: 21 hours
- Yield: 2 medium baguettes 1x
Description
If you’ve ever tried a high-protein bread that felt more like a chore to chew than a treat to eat, this recipe is for you. I’ve taken the classic, airy sourdough baguette and fortified it with cottage cheese and whey to hit 27g of protein per medium sized loaf—but I refused to compromise on that signature shattering crust and fluffy interior. Whether you’re a sourdough purist looking for more satiety or just want a better vessel for your next Banh Mi, this ‘best of both worlds’ baguette delivers the macros without sacrificing the craft.
Ingredients
Sourdough Starter (Levain)
- 1 tbsp (5g) Sourdough Starter
- 1/4 cup (35g) Flour
- 2 tbsp water (30g) Water
Protein Baguette Dough
- 1 1/3 cups (220g) Bread flour
- 1 scoop (30g) whey concentrate, unflavored
- 1/4 cup (60g) cottage cheese
- 1/2 cup + 1 tbsp (140g) Water
- 1/4 cup (50g) Sourdough Starter (Fed and Bubbly. Weigh this as starter varies wildly in weight)
- 6 g Salt (increase or decrease according to your taste)
Instructions
Day 1 – Feeding Your Starter (Levain)
Sourdough Starter (Levain)
- Using 5g of your existing starter (Levain), feed it with 35g flour and 30g water. Leave it loosely covered overnight until it has doubled in volume, is active, and bubbly.
- If you have no starter yet, here is a link on how to make your own. You just need water and flour.
- How strong your starter is depends on your flour. Use good quality flour to feed it for best results. The consistency should be like very thick, stiff pancake batter.
- How long your starter will take depends on the temperature of your house. In winter it might need longer, in summer significantly shorter.
- To determine if it’s ready check if it has doubled in volume, is actively bubbling, you see nice, strong gluten strands if gently pulling it away from the walls of the jar with a spoon and it floats on water.
- If yours seems too runny, add a bit more flour, until it gets harder to stir and leave for a few more hours.
Day 2 – Mixing The Baguette Dough/Bulk Proof
Mix The High Protein Dough
- Check if your sourdough starter is ready by adding a dollop of it to the water. If it floats and is nice and bubbly, it’s ready. Ideally it should just have formed a bit of a dome in its jar, when at peak activity.
- Blend the cottage cheese and protein powder with some of the water until smooth.
- Add the cottage cheese-protein mix to the sourdough starter together with the remaining water and stir until combined.
- In a large bowl mix the salt into your flour.
- Pour the liquids into your flour and stir until you have a shaggy dough without any dry flour bits.
- Your dough will be very wet and sticky at this point. Don’t add more flour. This is working as intended.
- Cover with a lid, plastic wrap, a shower cap or a damp tea towel and let it sit for about one hour.
Stretch And Fold
- After the first hour, start a series of 3-4 stretch and folds (or coil folds, which is what I show here).
- To do this without too much dough on your fingers, wet your hands lightly.
- Push both hands under the dough, pulling it upwards. Then fold it over itself.
- Turn the bowl 90 degrees and repeat. Do this 4 times until the bowl returns to its starting position and the dough is visibly smoother and stronger.
- Repeat every 30 minutes to 1 hour for 2-4 times or until your dough looks smooth and strong.
Bulk Ferment
- Allow your protein baguette dough to bulk ferment on the counter for 4-6 hours or until it looks visibly risen and puffy. You should see little bubbles on top and if you used a glass bowl, even more on the sides.
Overnight Fridge Ferment
Now you have two options:
- You can cover your dough and store it in the fridge overnight for a slow fermentation (8-12 hours, or even up to 3 days if you prefer a stronger sourdough flavor or life gets in the way of baking) and shape about 2-3 hours before you want to bake your baguettes.
- Or you can do what I did and go straight to the shaping, allowing them to overnight ferment while shaped.
Shaping The Baguette
- Oil your baguette pan if you have one and line it with strips of baking parchment. This will prevent the high hydration protein dough to get stuck in the holes and give you a lovely even crust.
- If you are using a Dutch Oven, get a towel, push it into a few long folds, dust them heavily with rice flour.
- Crucial Tip: Use strips of parchment paper even in a non-stick pan. The lactose in the cottage cheese and whey acts like a glue when it carmelizes; the parchment ensures you won’t have to pry your beautiful bread out with a knife.
- After the overnight fermentation (or right after the last stretch and fold, if you go for same day baking) take your dough out your bowl using a dough scraper onto your floured worktop.
- Shape it into a neat log by doing a “letter fold” to start giving it a bit of tension. For that, stretch the dough gently into a rectangle, fold one third over the center, then the other, essentially ending up with something like a very rough letter shape.
- Use your dough scraper or knife to cut it in half. This recipe makes 2 medium baguettes, meaning it will be easy to handle.
- Stretch each portion gently into a rough rectangle. Then take the top half, fold it over the center and push with your fingertips or side of your hand, to attach it to the bottom part of the dough.
- Then take the bottom corners and fold the lower third over the bit you just attached.
- Using a sort of “knitting” or pinching motion with your fingertips, seal the seam.
- Use the surface tension from your worktop (and very little flour) to gently roll your baguette into a longer shape, tapering the ends into that classic sourdough tip if you like. I prefer mine more rounded. But you do you.
- Gently place the shaped baguette, seam side down, on your baking parchment.
Cold Ferment/Last Proof
- I put my baguettes in the fridge overnight at this point and since I don’t want them to dry out and form a skin, which might bake into a very hard crust later, I use a bit of a trick to keep them moist and in perfect shape while giving them time to rise.
- I found towels decidedly too drying (even when damp) and frustratingly sticky and plastic wrap, no matter how carefully I tried to seal it always had air gaps, leading to dry bits plus was too tight to give my baguettes enough room to expand.
- Hence I started using (clean) large plastic bags, which works marvellously!
- Transfer whichever proofing surface you chose onto a tray that will fit into your fridge. My baguette pan didn’t really need a tray, as it was sturdy enough.
- Spray the baguettes with a little bit of water, to get that crisp, shiny crust. Or flour, if you prefer a thicker, crunchier crust.
- Push said tray or pan into a large clean plastic bag, blow a bit of air into it, so it puffs up over the baguettes and close it with a clip or knot, to get a relatively airtight seal.
- Move into the fridge and allow to cold ferment/proof for at least 8 hours, to get the full flavor. Up to 2 days works perfect, after that they start to deflate a little.
Day 3 – Scoring and Baking your Sourdough Bread
Scoring your Sourdough Baguette
- Since these baguettes are very soft and well hydrated, they are notoriously hard to score. But if you don’t score them deep enough, they tend to break open along the seams at the bottom/side during baking.
- So I used yet another little trick to get them firm enough for a nice, deep score, leading to the lovely clean shape you see in the pictures: I froze them, still inside the bag, for about 30 minutes, so they could form a harder shell.
- Take them out of the bag.
- Then you can use a sharp knife or lame, to make deep cuts (about ½ in/1cm or even a bit deeper) diagonal across the top at an about 45 degree angle. Don’t be shy. The deeper you cut, the bigger they puff up. Anything too deep will simply close. It will look and feel like you are slicing nearly halfway through the dough. That’s the plan.
Baking The Protein Baguettes
- While your baguette is developing its frozen shell and you are scoring, pre-heat your oven depending on your baking method.
- Pre-heat your oven to 225C/450F.
- If you are using a Dutch oven add that from the start so it gets nice and hot.
- Once it’s nice and hot, either use the parchment strips to gently transfer your baguettes into your Dutch oven (as you can see below, I’m not very talented at said transfer, so mine came out rather crooked) and cover with the lid.
- Bake for 10 minutes with the lid on, then 10-15 Minutes with the lid off at 210C/410F
- For the baguette pan method, put a heat proof container (ideally metal, as we will add cold water to it after heating) to the bottom of the oven. An oven tray works well.
- For the baguette pan method keep the temperature the same during the baking, spray your scored baguettes with a little more water (I use a tiny spray bottle that is usually for makeup, as it gives a really fine mist), push them into the oven and immediately add a cup of water to the container underneath.
- Close the door, bake for about 8 minutes. Rotate the baguette pan if you oven bakes unevenly (mine sure does), take out the pan with water and let the steam release, close the door and bake for another 8-10 minutes or until golden brown and crispy.
- Remove your amazing baguettes from the oven. Allow to cool for just a few minutes, then rip one apart, marvel at the incredibly fluffy texture and enjoy, very French, with some creamy camembert. (Or whichever topping you want. I’m sure the French will object, but your baguette, your rules! 😉 )
Notes
How To Store/Reheat
- This Protein Sourdough Baguette keeps for maximum 3 days in a lidded bread tin on the counter. Or up to 5 days in the fridge.
- It freezes incredibly well too for up to 6 months and can be easily reheated in the air fryer. I like to dampen it first with a little water, for the perfect freshly baked crispy texture and soft, fluffy insides.
- Prep Time: 35 minutes
- Bulk Proof/Fermentation: 20 hours
- Cook Time: 25 minutes
- Category: Sourdough Protein Recipes
- Method: Bake
- Cuisine: French


This is a new favorite sourdough bread recipe. I loved the flavour and the crusty outside. Will definitely be making this baguette often.
Aww, thanks so much! That really makes my day. 🙂
I’ve been looking for a high-protein breakfast that doesn’t feel like a chore to eat, and this was so good! It kept me full all the way through lunch, which rarely happens. I love how easy it was to prep. Definitely making this a part of my weekly routine.
So many do, don’t they?
Makes me really happy that you like this! Thanks for letting me know. 🙂
This High-Protein sourdough baguette is so good, I made it and enjoyed it with soup and as a sandwich. I am going to make it again.
Excellent. So glad to hear you enjoyed it. 🙂
This high protein sourdough baguette baked up beautifully—crusty outside, soft inside, and surprisingly filling for how light it feels.
Oh good, so happy to hear they came out well for you.
Thanks for letting me know. 🙂
First of all, thank you for all the great protein-rich sourdough recipes – such a great resource! Now, these baguettes are absolutely brilliant – softer, richer, just beautiful! Love the tip on freezing them for a short time before scoring – really helped to reduce the spread!
Aww, thanks so much, that’s very kind of you!
So happy you like them and the tips. 🙂