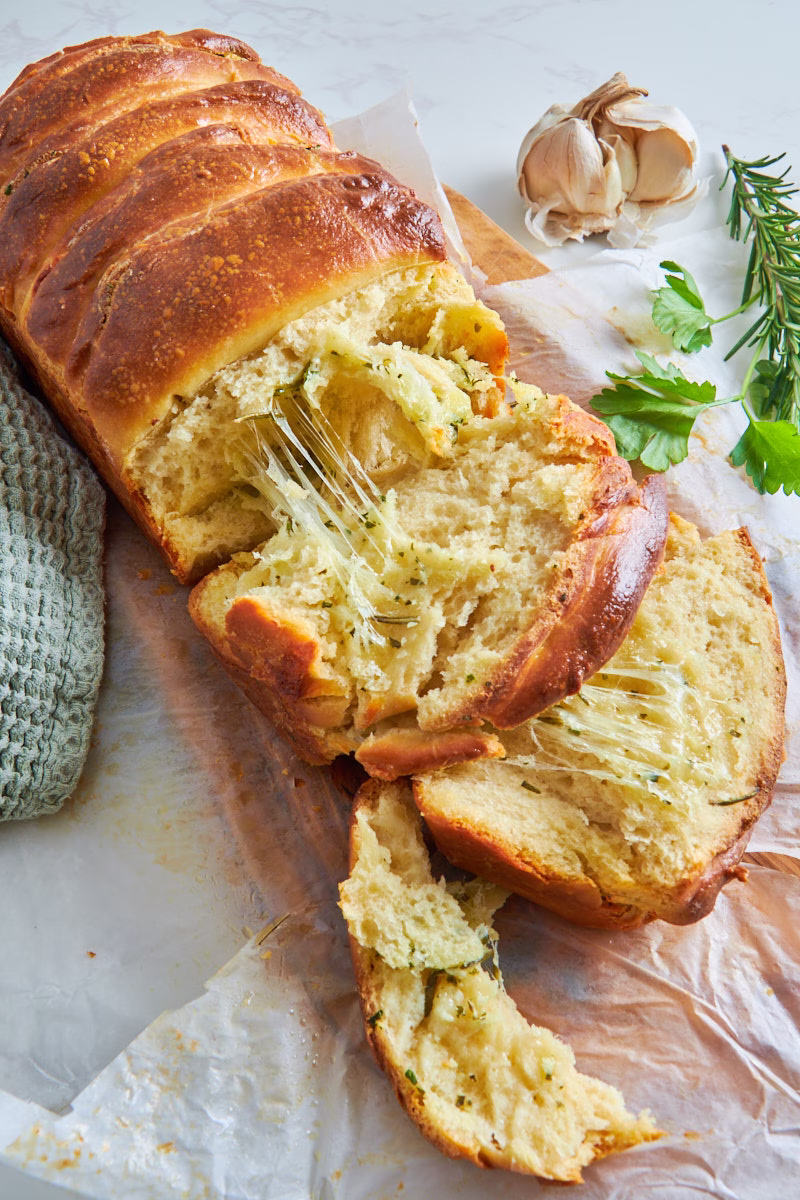
Garlic Cheese Pull-Apart Sourdough Bread With Protein
If you grew up with the classic shop-bought garlic baguette, you know how comforting it is—but you also know it’s mostly just empty calories and butter. This sourdough version keeps that nostalgic flavor while adding a bit more substance. By using my “Everything” sourdough brioche base, you get a pull-apart loaf that is naturally soft and tangy, with the added benefit of 13g of protein per slice thanks to the high protein enriched base dough and cheese. It’s a more sophisticated and made from scratch version as side dish for a family BBQ or a dinner with friends that actually leaves you feeling full.
This post may contain referral links for products I love.
For The Pleasure Of Eating earns a small commission on these links at no cost to you.
- Why You’ll Love This
- The Ingredients
- Substitutions
- Equipment Used
- How to Make this
- How To Store
- FAQ
- Other Recipes You Might Enjoy
Why You’ll Love This
TL;DR
- Protein-Packed: With 13g of protein per slice, it’s a side dish that actually keeps you full and satisfied.
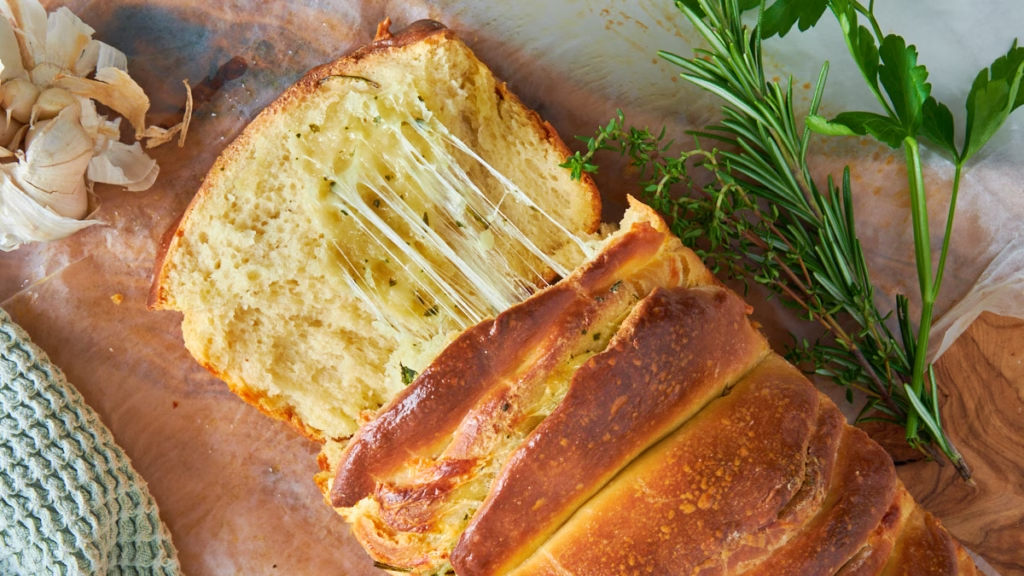
- Unbeatable Texture: The Tangzhong method combined with sourdough creates a pillowy, soft crumb that stays fresh for days.
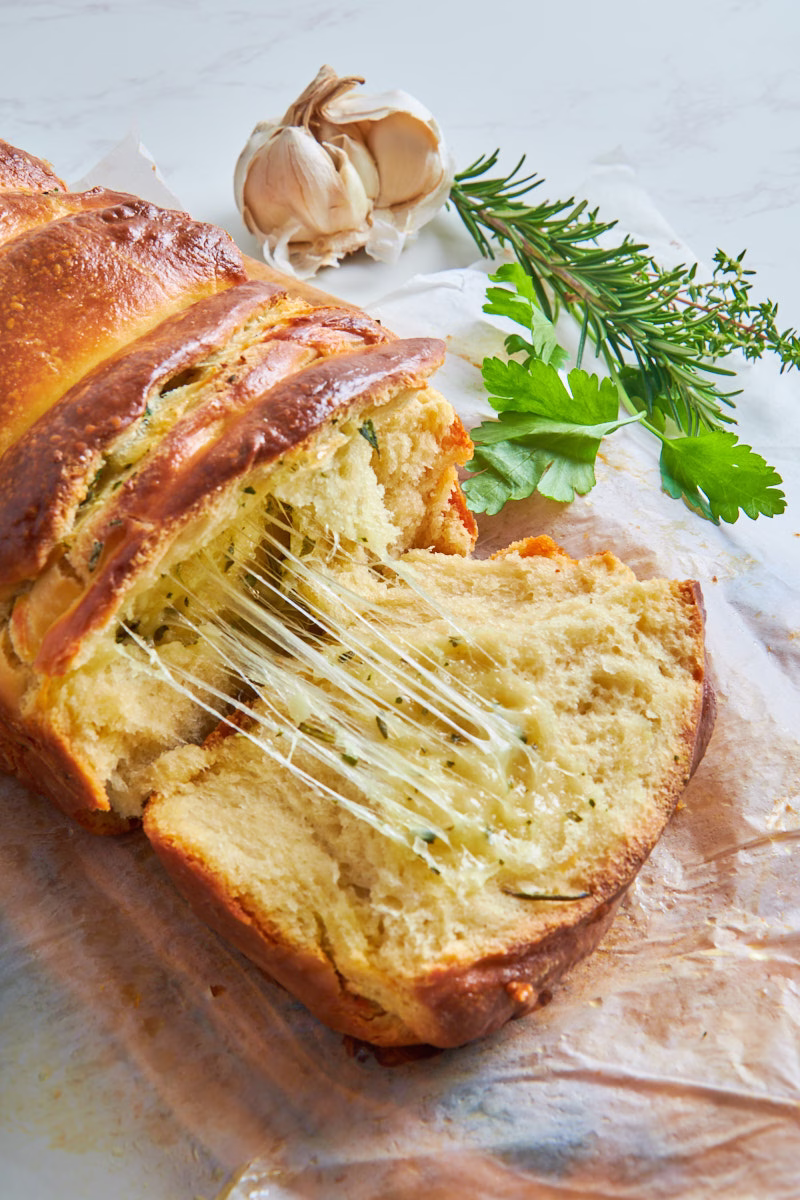
- Pull-Apart Magic: No knife needed—just grab a buttery, cheesy layer and pull.
- Make-Ahead Friendly: The dough thrives on a long cold-ferment, fitting perfectly into a busy schedule.
- Complex Flavor: Sourdough adds a sophisticated tang that cuts through the rich, garlicky butter.
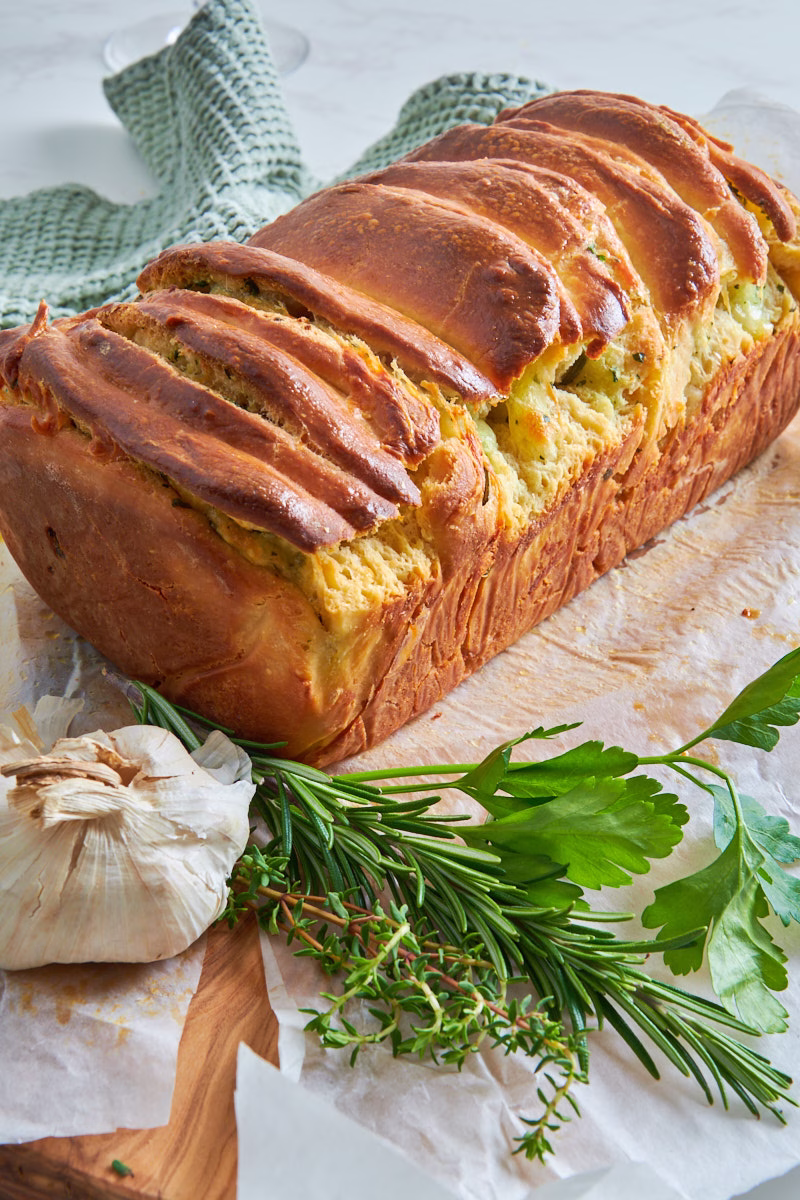
Garlic Cheese Bread With 13g Protein Per Slice
When I was a kid my mom used to host gatherings with her friends and a staple of those was her famous garlic bread. She made it with shop bought baguette filled with homemade garlic butter of course. The classic. And everyone (including me) absolutely adored it.
Unfortunately there were rarely leftovers, and she stubbornly ignored my begging to simply make more. So I swore to myself that when I’m grown up, I’ll make a whole garlic bread just for myself.
And here we are, being grown up, seeing the error of my ways: Why only make basic garlic bread, if I could make it from a stunningly soft homemade brioche dough and add cheese to it together with 13g protein from the combination of eggs, protein powder, and yogurt in the dough and of course cheese, so I feel better about eating said butter drenched bread? Exactly.
Being a grown-up has to have some advantages besides adulting all the darn time!
Buttery and Soft Brioche Dough
Speaking of the buttery dough, this is the fourth recipe from my “Enriched Everything Protein Sourdough” series that started with the basic soft and fluffy Brioche, thanks to using Tangzhong, the base for the famous Japanese Milk Bread, then hopped to the perfect Burger Bun with 15g of protein per piece right to dessert, with a Marzipan Filled German Wreath that has a ridiculous 20g protein per slice, thanks to the almond-protein filling and now Dinner (or BBQ side for that matter) with this Garlic Cheese Pull apart bread. And all from the same soft and buttery dough with the exact texture and flavor you expect from a high quality artisan brioche. Plus Sourdough.
Sourdough For Even More Flavor
Which brings me neatly to my next point: Sourdough.
I mean, we have by now established that sourdough makes everything better. Ok well, every baked good that is. Maybe don’t pour it into your morning coffee? If you do though, please let me know how that went!
But I digress. Enriched dough is traditionally made with yeast. The reasoning going that yeast is neutral enough to not “distract” from the rich buttery flavor. But is that true?
If you have tried yeasted bread, it does have a rather distinct flavor and, unfortunately, dries out pretty quickly. Personally I’m not a big fan of it (no surprise here, since I bake with sourdough all the time) and find it a bit…uhm…stodgy? I honestly don’t know how to better describe it. It’s just a very dull flavor it imparts to everything it touches. Or is that just me?
Contrary to sourdough, which has a complex, slightly tangy, malty, sometimes even fruity and lactic flavor profile that seems to lift any baked good it touches to new heights. Apart from being healthier when slow fermented as we do here of course and coming with lots of gut friendly bacteria. Oh, yeah and it breaks down protein into easier digestible molecules thanks to enzymes called proteases it contains. More on that in my blog post on baking with sourdough and protein.
Long story short: I feel it dramatically improves the classic Brioche and for this Garlic Cheese Bread I feel sourdough works even better. Keeps it moist for longer too, thanks to the sourdoughs ability to hold moisture.
Easy To Make
Now notice me not saying it’s quick. If you want a quick garlic cheese bread, use the garlic herb butter recipe below with a store-bought loaf. But there is something just incredibly special about making your bread from scratch, that, once you’ve tried it, is really hard to settle for shop bought again after.
So, yes it does take time, as all good sourdough bread does. But most of that time is hands off and letting the little bacteria do their thing to get your dough all fluffy and flavorful and perfect.
As for the kneading: A stand mixer will make your job really easy and the shaping, complicated as it may look when you see the bread first, is simply a rough rolling out of 8-12 (depending on how buttery you like the result to be) pieces of dough into rough ovals, no precision required, topping them with a smear of fragrant herb flecked butter and a sprinkle of your favorite cheese then slapping them into a loaf pan. A bit more rising and baking time and you have the perfect party side dish. Or, if you are like me, finally get to have your very own Garlic Cheese Bread. No sharing required.
Note On The Dough Amount

This recipe, to makes one large loaf with about 10-12 pieces and uses only half a portion of the “Everything Sourdough Protein Dough”.

You could of course halve it, but with it having 5 eggs for the exactly right hydration (I tried other amounts and it failed miserably) this gets a little tricky. Now, if you really want to halve it, weigh one egg in a bowl, whisk it vigorously and add exactly half of that to your wet ingredients. Use the other half for scrambled eggs.

But here is a better idea: With this dough being so versatile, make the full amount and bake one half as Brioche from the base recipe or Burger Buns or German Marzipan Wreath (or make 2 loaves of Garlic Cheese bread and freeze one!) or make the Blueberry Cheesecake Danishes I will soon post. I promise you’ll be happy you made it all!
Ingredient Notes
The list here is relatively short, as I covered the dough ingredients in the master recipe. So here I’m just talking about the filling for the Garlic Cheese Loaf.
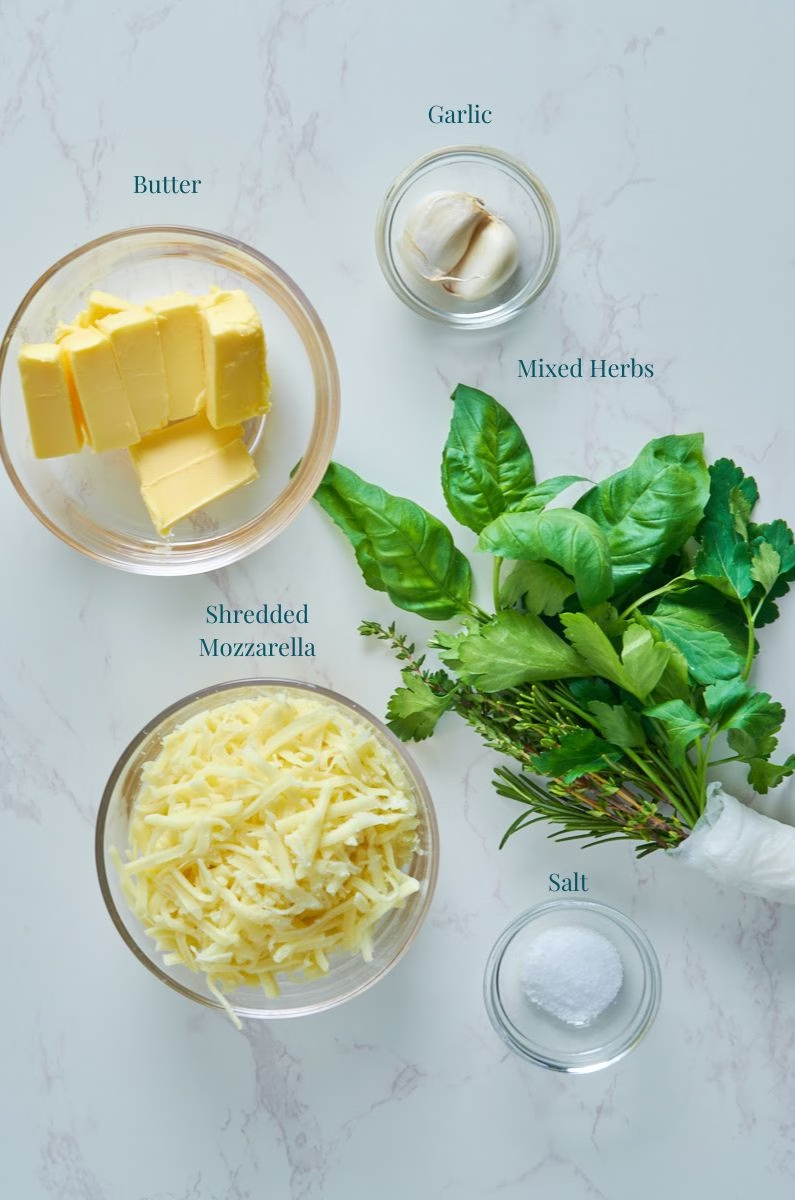
- Butter – With this being the main flavor ingredient you’ll want to use the best you can afford. Can’t go wrong with Irish butter of course. But use whichever you enjoy.
- Herbs – I used rosemary, parsley and basil, but frankly use whatever you enjoy! Thyme is always welcome, cilantro can be nice (unless you have the soap-gene that is), oregano is great too. Fresh is best, but in a pinch dried will do. I give amounts as guidelines, but frankly I vary them a lot depending on what I have and how I feel.
- Garlic – Fresh is best, for the classic punchy flavor. Or make my Black Garlic Butter with Lemon, which is rather addictive! In a pinch use about 1/2 teaspoon of garlic powder.
- Cheese – while I used shredded mozzarella (the type you can grate or buy ready grated, not the balls, which would be a bit too wet for this) you can use any shredded cheese you like. Sharp cheddar would be lovely, or parmesan or a mix of different cheeses. And yes, grating yourself would be best, but honestly, readily grated works just fine.
substitutions
- Butter – You can use vegan butter here. But with all the eggs in the dough it does feel a bit…futile for this recipe. Though for lactose intolerance it’s a good option.
- Herbs – As mentioned above most herbs will make a lovely ingredients for the butter. Or just use garlic if you don’t have any. It adds plenty of punch.
- Garlic – if for some reason you don’t like garlic (who are you and why are you reading this recipe?) feel free to use just the herbs in the butter. Or just the butter and cheese. I mean…buttered cheesy brioche? It could be worse, right?
- Cheese –Vegan cheese that is melty will work for lactose intolerance. Parmesan (or any aged cheese) improves reactions too. Due to the eggs in the dough I for once have no fully vegan recommendation.
Variations
- Spices – Adding different spices to the butter, like smoked paprika, chili or maybe a hint of honey gives you the ability to vary this bread endlessly.
- Cheese – Use different cheese to make this your own. I haven’t tried it yet, but I bet feta and sundried tomato in the butter would make a fabulous combo.
- Or blue cheese and mix a bit of quince paste into the butter? Mmmh, I see future recipes!
- Sweet Version – Frankly, the brioche dough essentially begs for a sweet version! Can you imagine this drenched with whipped honey butter? Or some melting chocolate between the layers? Or is it just me feeling that I need decidedly more chocolate to get through the craziness of the world right now?
Top Tips For Success
- Keep It Cool – This dough is incredibly buttery, so it’s easiest to work when cool, right from the fridge.
- Shaping – I borrowed this method of shaping from Sally’s fabulous recipe, as the folding of the dough pieces means the butter gets trapped inside the bread instead of seeping out and ending up in the loaf pan, like it would if you’d just stack squares.
- Give It Time – As always with sourdough bread, patience is rewarded with incredibly fluffy and flavorful bread. This means you could prepare your loaf up to 3 days ahead of time and simply bake it right before your guests arrive (or you crave garlic cheese bread). This means it fits your schedule however that may look.
Equipment Used
Just the additional Equipment for the Garlic Cheese Protein Bread, as I talked about the dough equipment in the master recipe post.
- Food Processor – Optional but a super quick way to make extra creamy garlic herb butter. If you don’t have one, a fork and elbow grease will do.
- Rolling Pin – Optional. You can absolutely just pat out the dough by hand.
- Loaf Pan – A 9×5 pan works best. Lined with baking parchment, so you don’t have any crispy cheese bits to clean later.
 Buy Now →
  Buy Now →
  Buy Now →
 How to Make this
The Enriched Dough
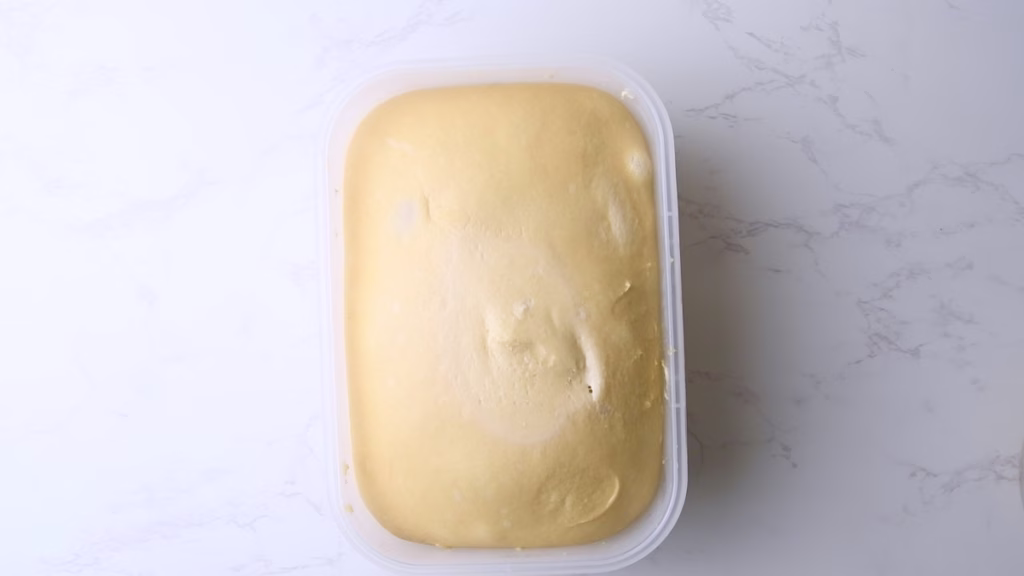
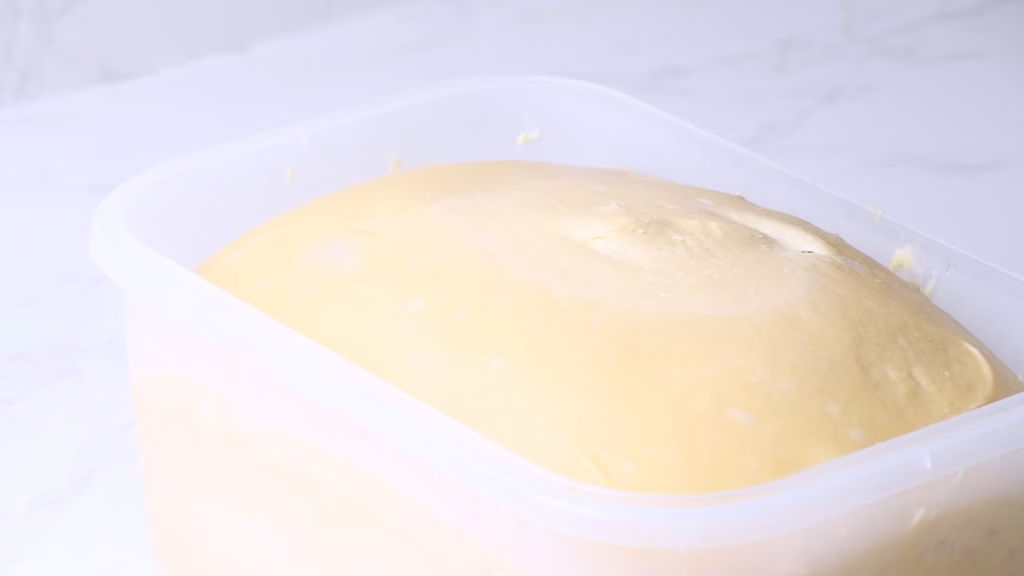
- Start by making the Everything Protein Sourdough following the instructions in the base recipe about 3 days before you want to bake this Garlic Cheese Sourdough Brioche.
- Use half of the recipe for this after the bulk fermentation and fridge time.
- Use the other half for another recipe (like the Brioche from the base recipe or Protein Burger buns or Marzipan Wreath) or make two Garlic Pull Apart Loaves by doubling the butter and cheese from this recipe.
The Garlic Herb Butter
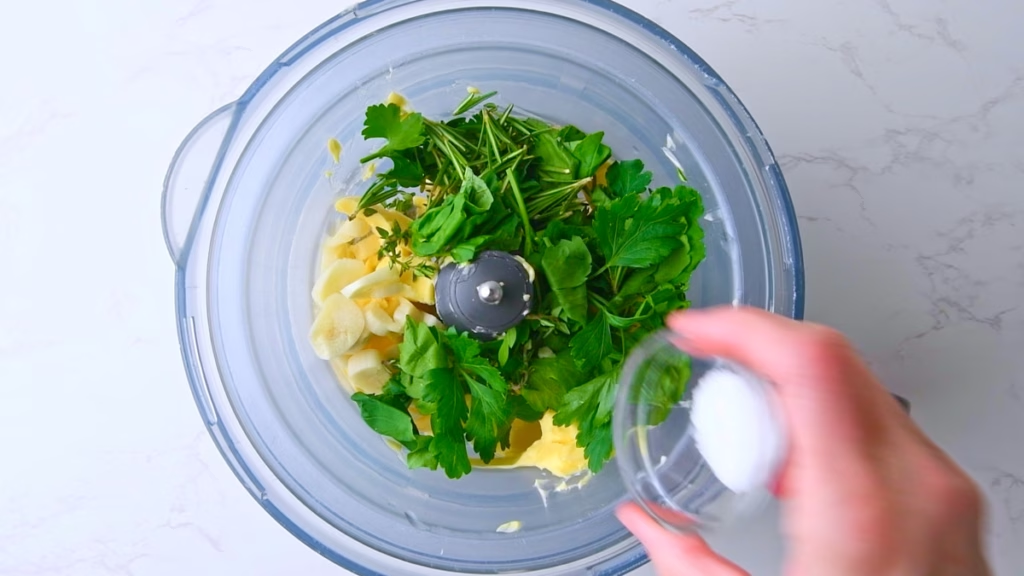
- I used a food processor for this as it’s so quick and easy.
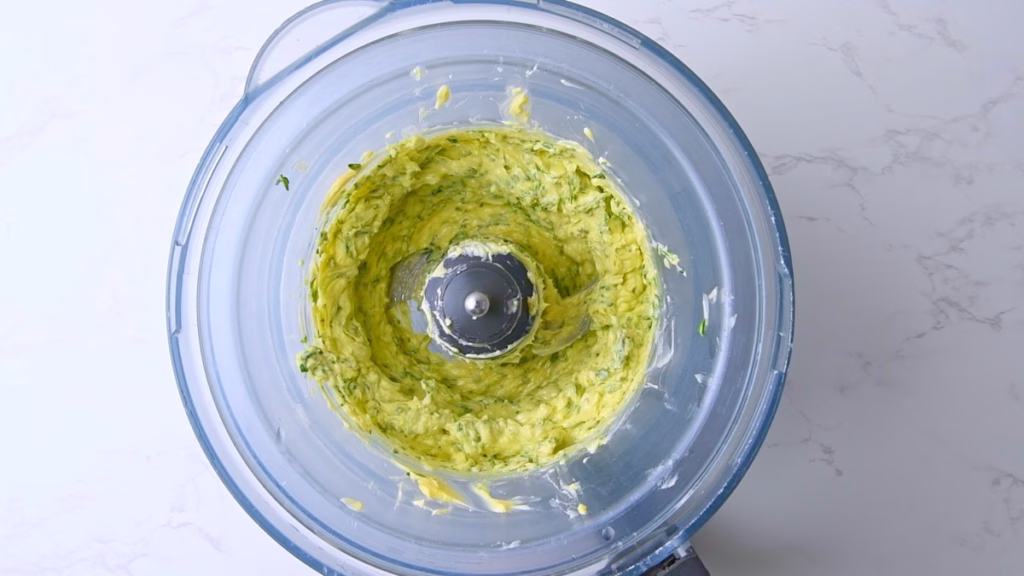
- Simply add all the ingredients roughly chopped to the food processor and run it until you have a creamy, smooth herb flecked compound butter.
- You may have to scrape down the sides a few times to get it all evenly chopped.
- You can prepare the butter up to a week ahead of time and keep it well wrapped in the fridge or even in the freezer for up to 3 months. So a lovely garlic bread is never far away.
- Personally I always make double and freeze half, as it’s so good on all sorts of dishes from the classic steak over fresh bread all the way to baked potatoes.
Preparations
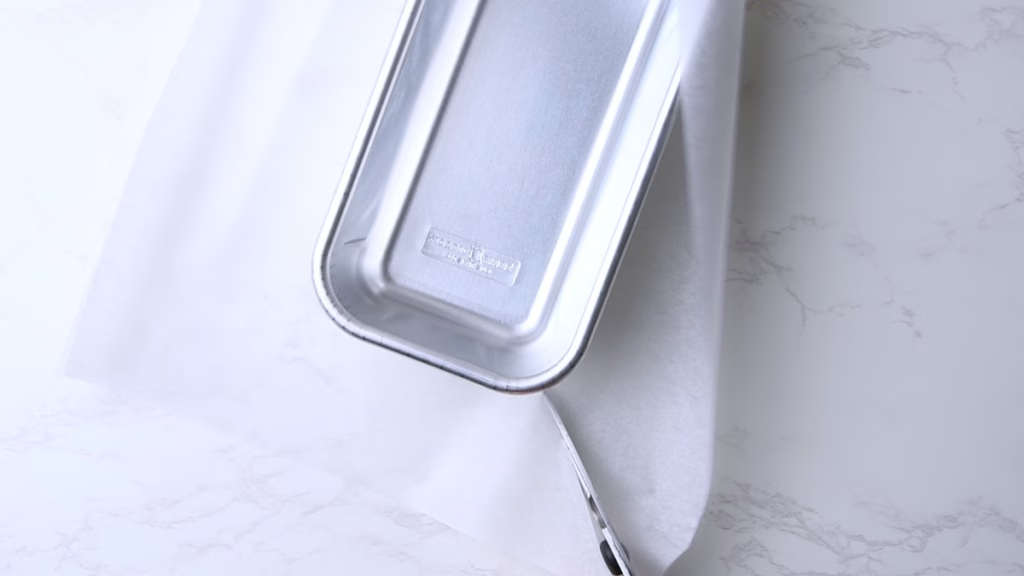
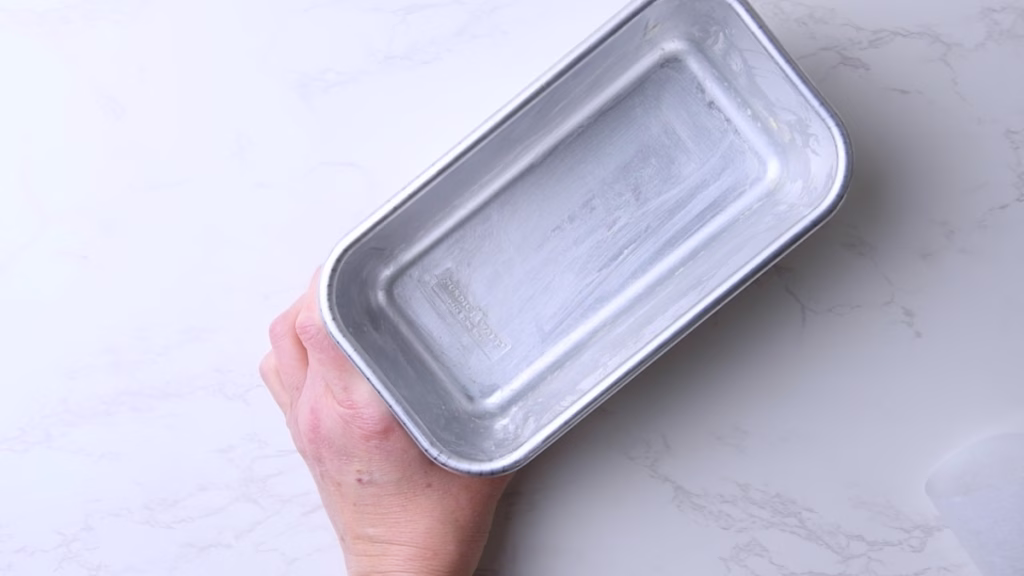
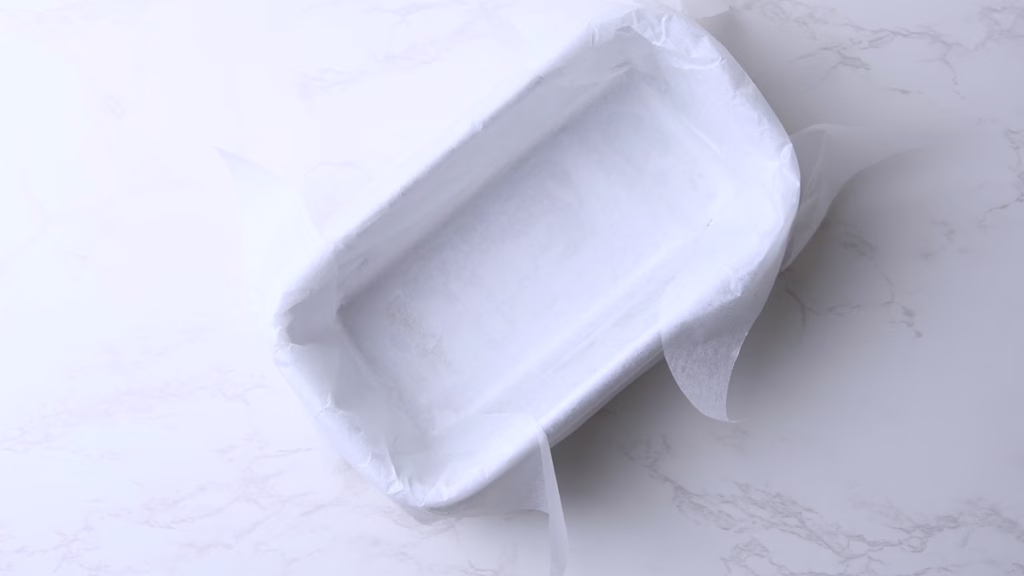
- Grease a 9×5 loaf pan and line it with baking parchment. This will keep the bread and particularly the melting cheese from sticking.
- Get your rolling pin ready and butter softened if you had it in the fridge. It should be easy spreadable for this.
- Lightly flour your worktop and grab a bench scraper or knife to divide the dough.
Shaping The Garlic Butter Pull Apart Bread
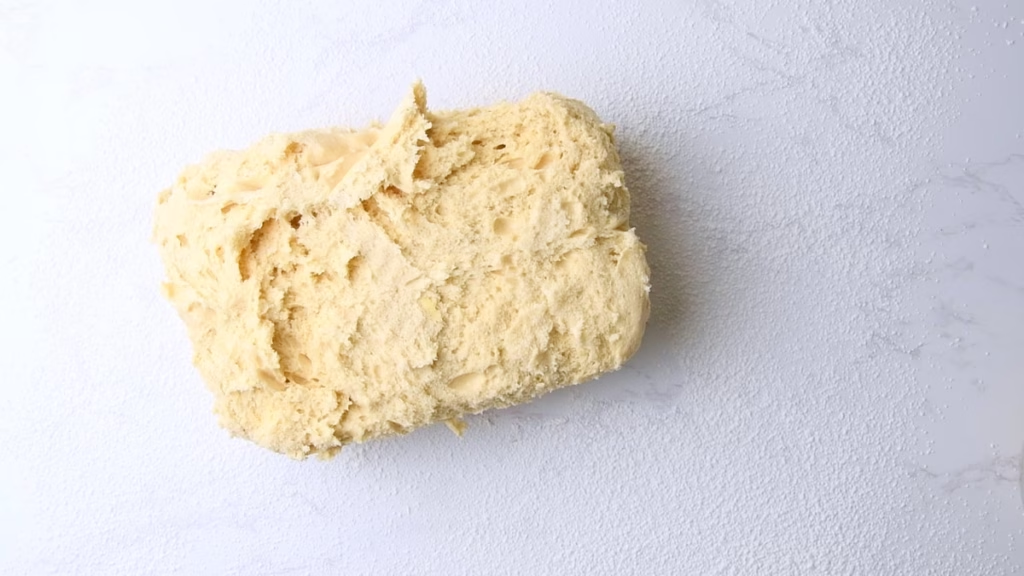

- Get your dough from the fridge when you have everything ready. You want it cold to make shaping easy. Once it warms up, it gets stickier.
- Use half a recipe of the Enriched Everything dough and either make a second Garlic bread with the other half or use it for another recipe.
- Now, you can decide if you want 8 pieces (making 16 slightly thicker layers, lightly buttered) or 12 pieces making 24 layers, which will soak up more butter. I went for 8 and felt that was plenty.
Note:
I specify 10 “slices” in this recipe, even though it’s 8 dough balls making about 16 layers. But in my tests I found when pulling them apart, I was more likely to get around 10 nicely sized portions out of this, as no one will be satisfied with a thin 16th of this delicious bread. Hence realism won in calculating.

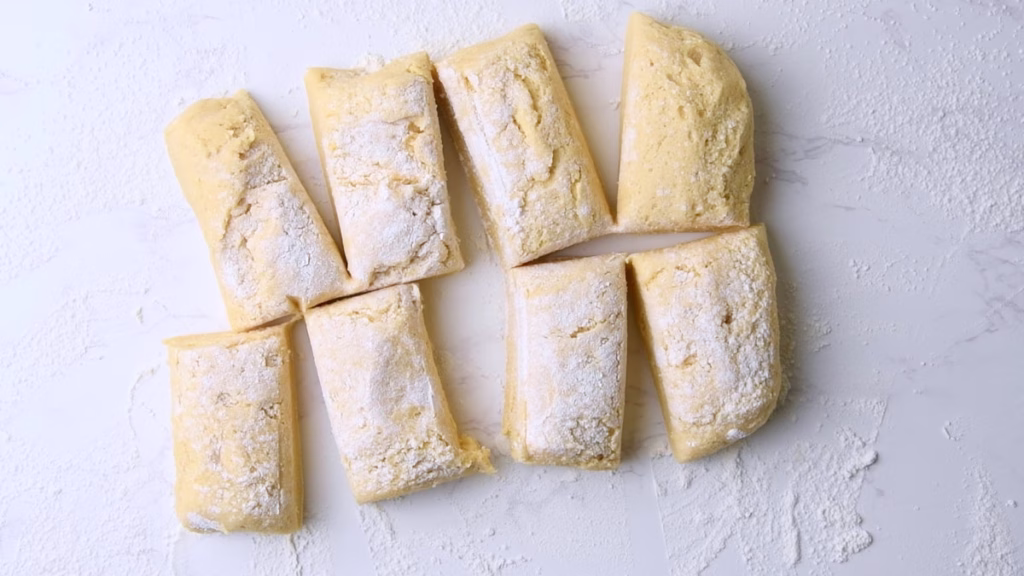
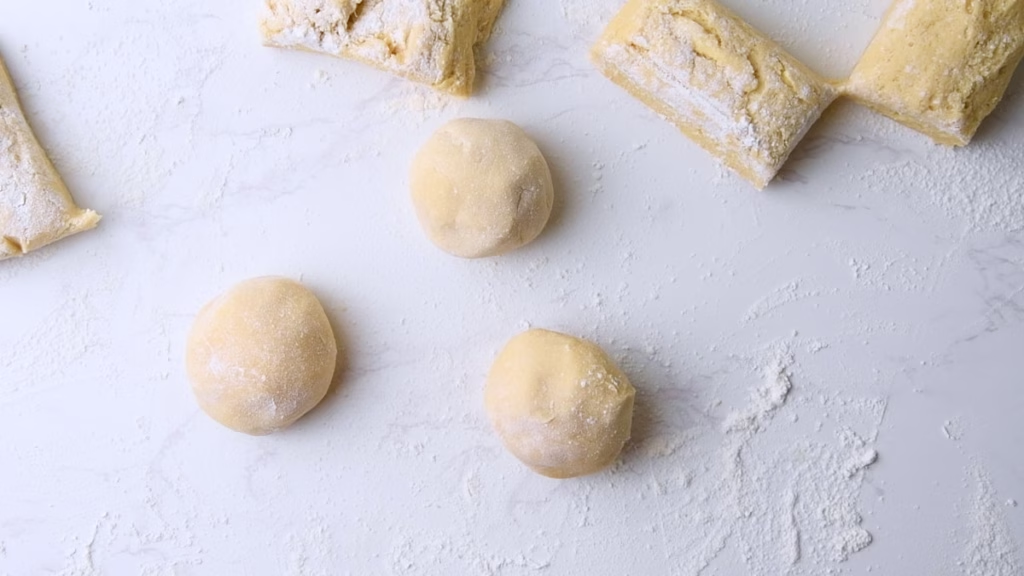
- Divide the dough, shape each piece quickly into a ball, then pat or roll it into an oval shape, about double the length of the height of your loaf pan.
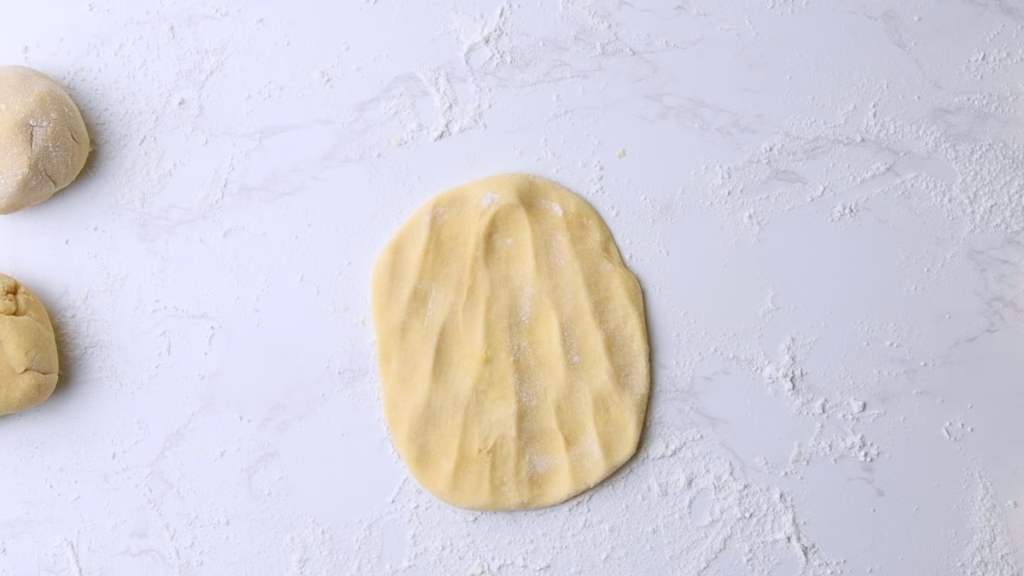
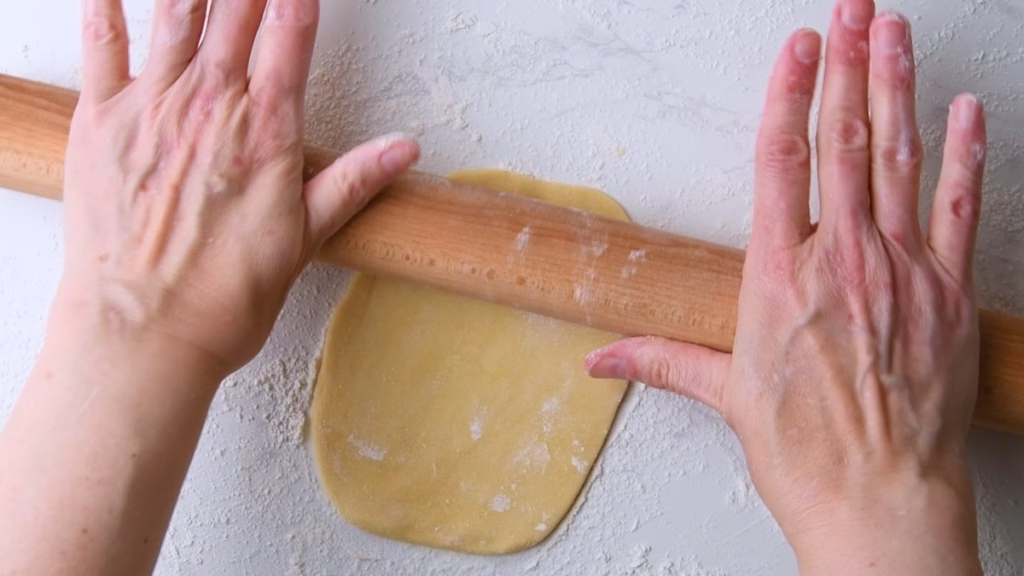
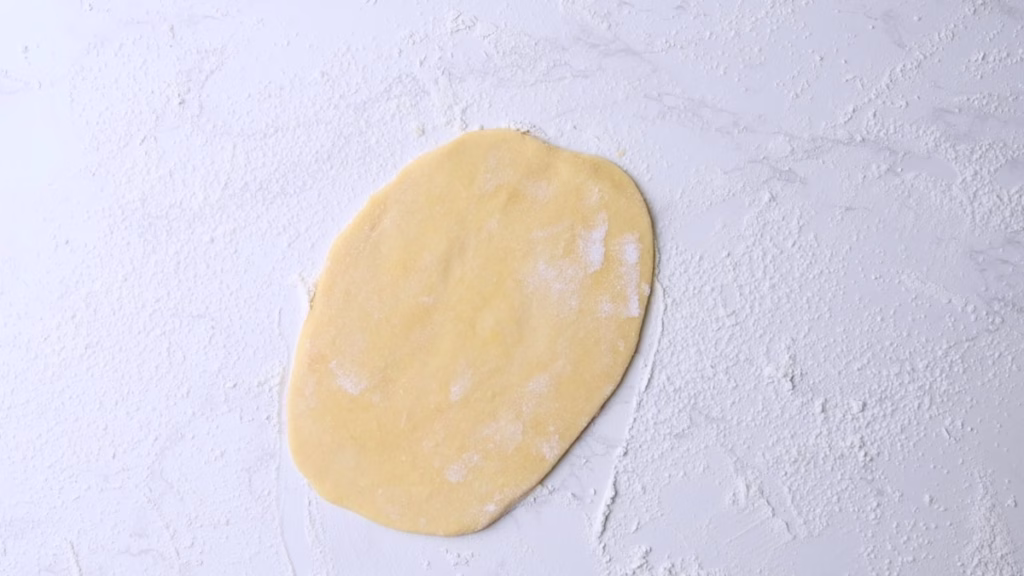
- That sounds complicated…let me explain: You’ll want to be able to fold each piece in half and reach nearly the rim of your loaf pan when standing upright.
Filling The Protein Garlic Cheese Bread
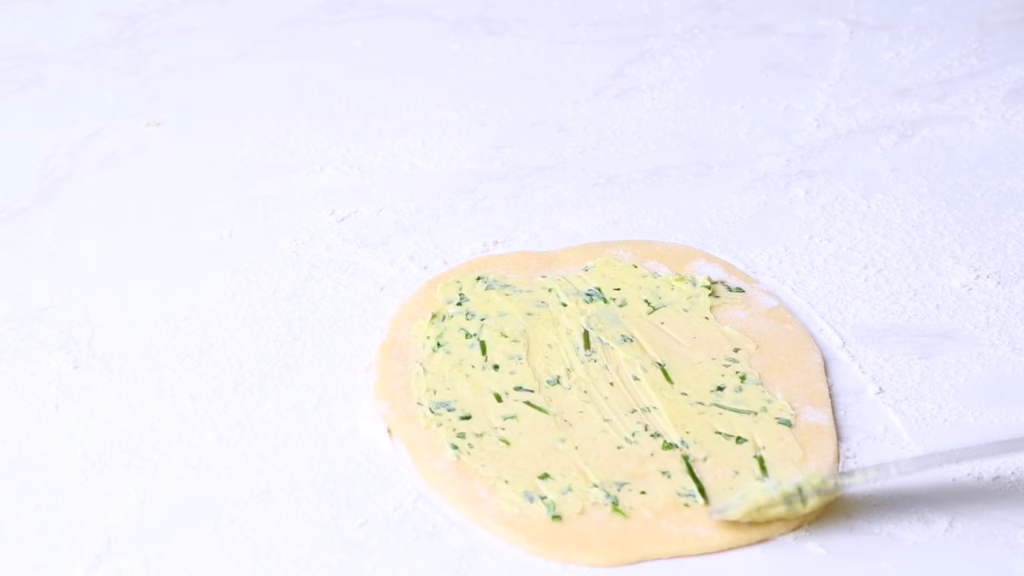
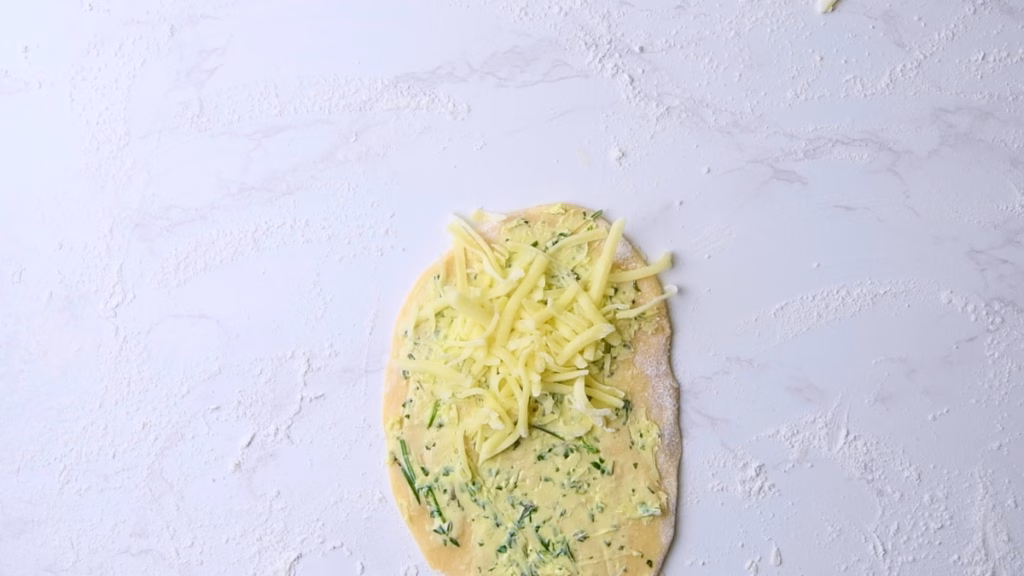
- Spread butter generously over each piece (think about 1/2 tablespoon), then sprinkle about one tablespoon of cheese on one side.
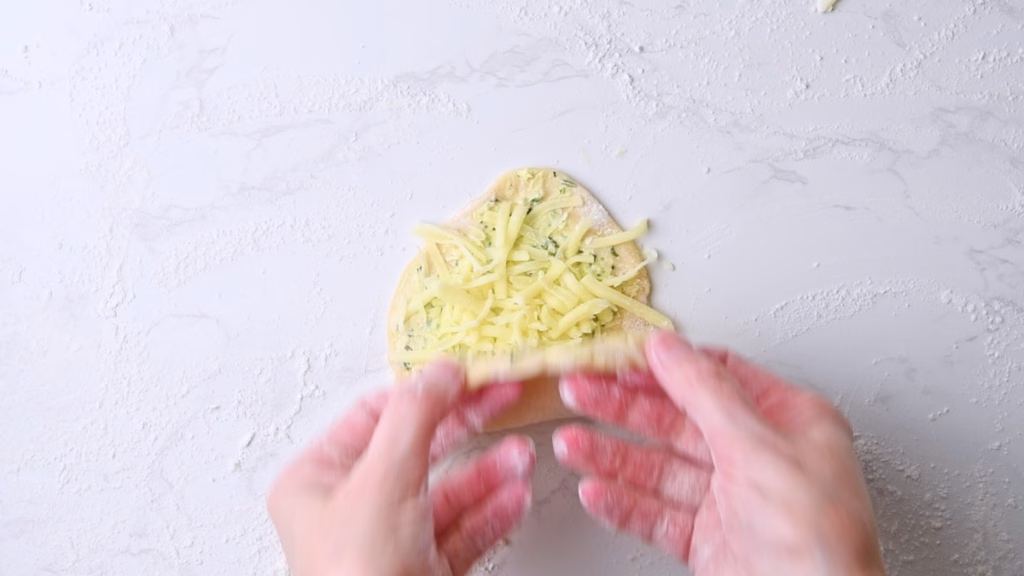
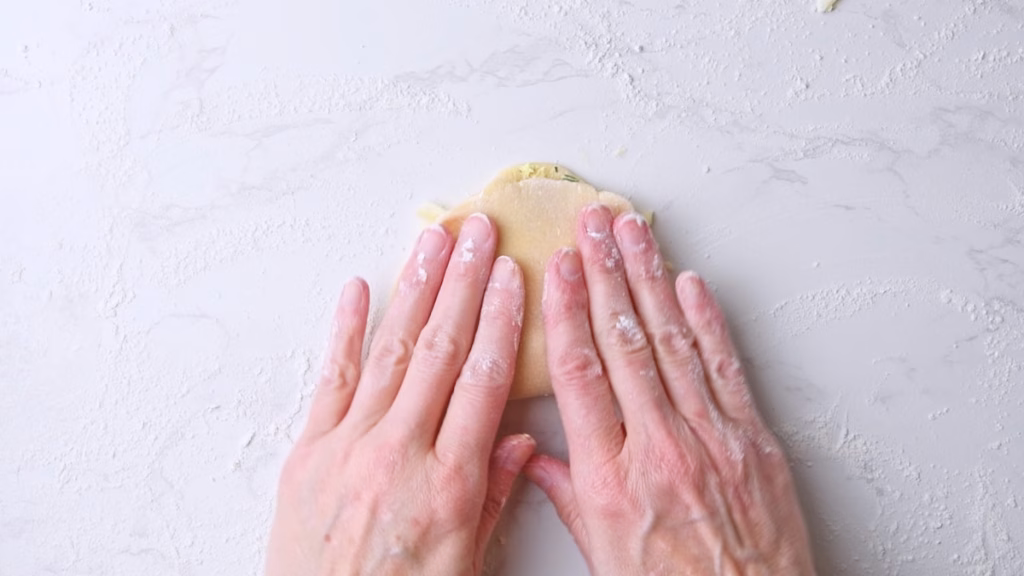
- Fold the non-cheesy side over the cheesy side, gently press the sides together, just so the cheese doesn’t fall out when you move it.

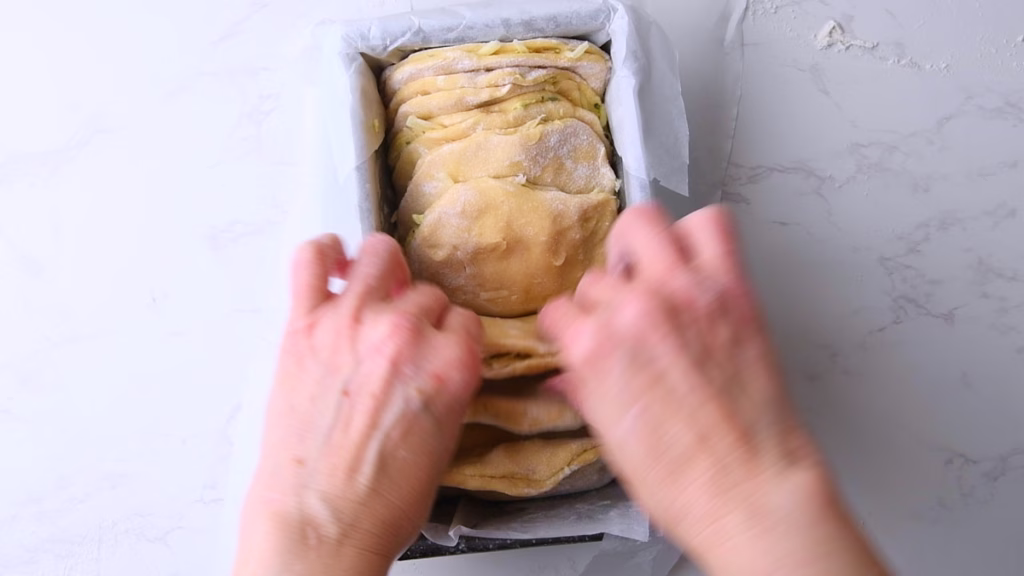
- Transfer upright, with the closed end towards the bottom of the pan to the loaf pan.
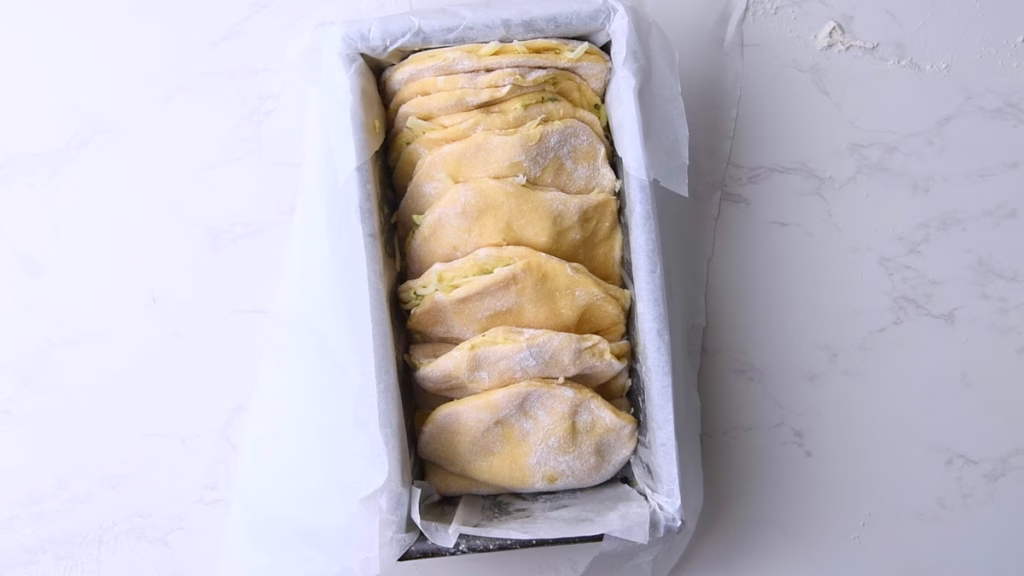
- Repeat will all your dough pieces.
- Your loaf pan will be very loosely filled, but no worries, the dough will expand and fill it completely.
Last Rise
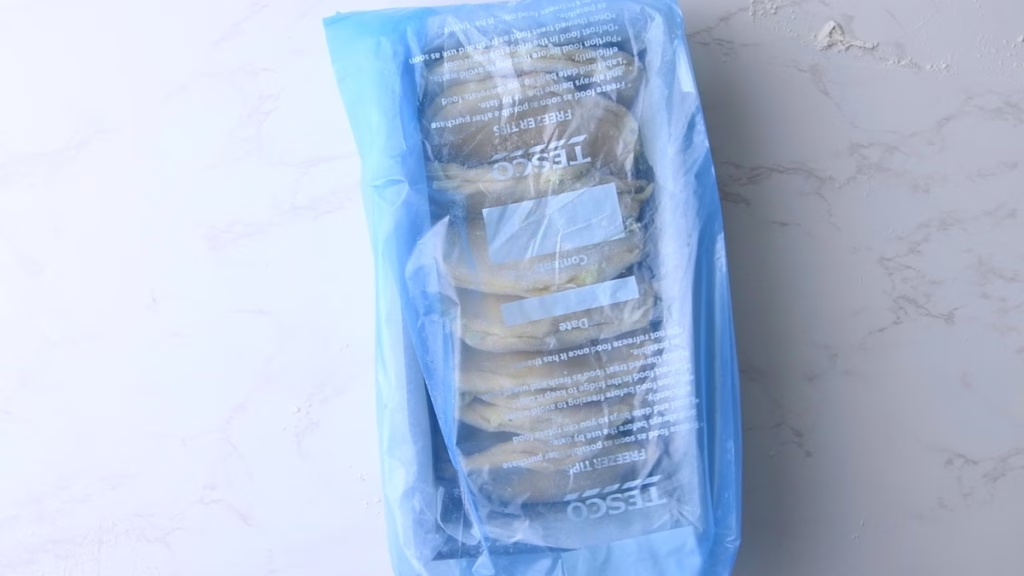
- Transfer your loaf pan into a slightly inflated plastic bag and clip or knot it closed.
- This prevents the dough from drying out during the last rise and keeps it nice and cosy warm.
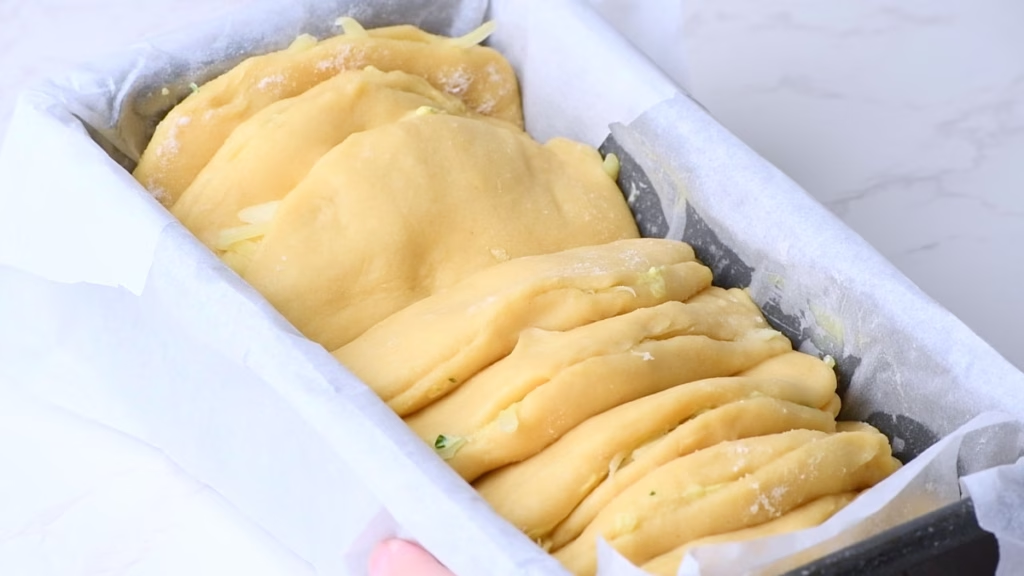
- Allow to rise for 2-6 hours until visibly puffy.
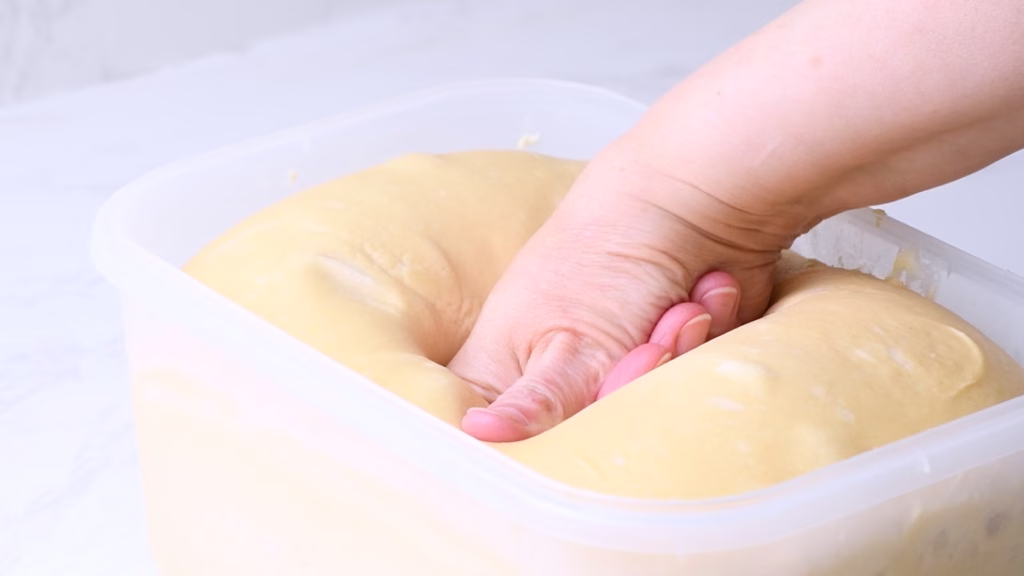
- Test if it’s fully risen by gently poking the dough with an oiled finger. It should feel puffy and leave a dent that springs back very slowly. If it doesn’t, leave it a bit longer.
- In my kitchen, which is around 70°F/21°C this took 6 hours.
- You can, at this point, put it back into the fridge for up to 2 more days and bake whenever you are ready.
Baking Your Garlic Cheese Sourdough Brioche
- Pre-heat your oven to 350°F/175°C
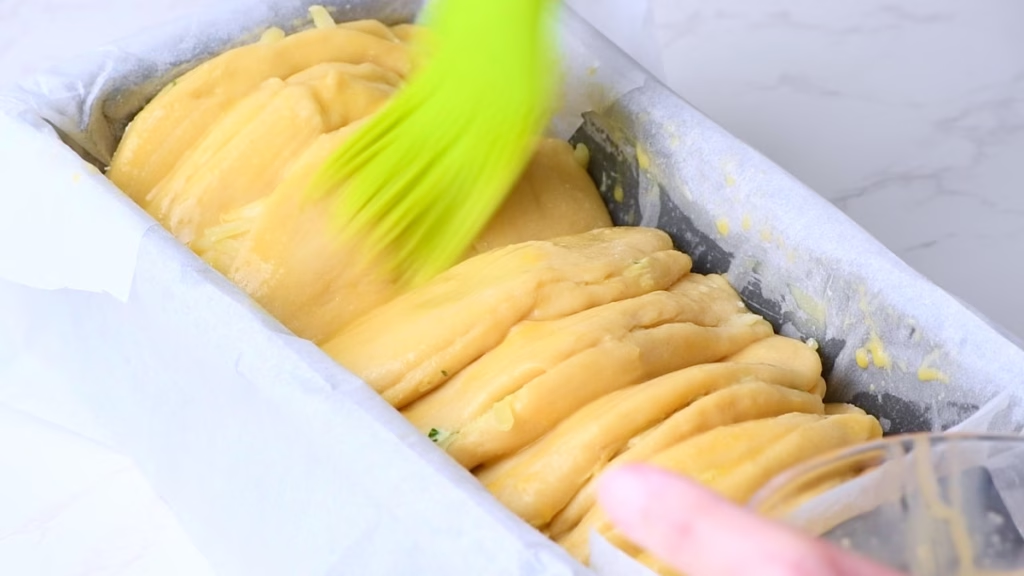
- Whisk the egg with a tablespoon of water until well combined.
- Brush the top of your loaf with the egg wash to get a lovely golden brown and shiny top when baking.
- Bake for 45- 55 minutes or until golden brown and baked through.
- Rotate by 180 degrees after about 25 minutes if you oven bakes unevenly.
- If you want to make sure the center is done, you can check with an instant read thermometer. It should read about 190°F/88°C when the bread is ready.
- If you feel it browns too quickly (mine did) tent with a bit of aluminium foil for the last 15 minutes.
- Take your now utterly delicious smelling bread out of the oven and brace yourself:
- You’ll have to wait another 10 minutes to allow it to cool and firm up a little in the pan.
How To Serve
Take out of the pan by pulling it up with the parchment and serve warm.
It’s fantastic on its own with a nice cool glass of white wine or beer. I honestly don’t need anything else with it. But of course you can serve this as a side with BBQ (the classic), a dinner spread or just a nice plate of dips and nibbles.
For me, this is always the first thing that vanishes. So maybe make two.
How To Store
This Garlic Butter bread, thanks to the Tangzhong stays beautifully soft and moist for up to 3 days in an airtight container at room temperature.
It freezes really well either as whole loaf or in slices separated with parchment for up to 3 months, so you can grab one and warm it up whenever you like.
I found that works best at 350°F/175°C in the air fryer for about 10 minutes (depending on the size of your pieces of course). If you moisten the top a little, it crisps back up perfectly without drying out.
Now I’d love to hear from you in the comments!
Have you tried this? Did you enjoy it?
What other recipes would you like to see?
And if you enjoyed this recipe, please consider rating, sharing, or leaving a comment – your feedback truly helps my blog grow!
FAQ
Since this recipe relies on the sourdough for the rise, it’s best to use an active, bubbly starter. If your discard is very fresh and has been fed recently, it might work, but your rise times will likely be much longer.
You can finely chop the herbs and use a garlic press/grater to finely mince the garlic, then mash the herb butter together with a fork until well combined and soft.
Absolutely. If you want a classic garlic pull-apart bread, just skip the cheese and maybe add a little extra herb butter. The sourdough brioche is flavorful enough to stand on its own.
Enriched doughs (those with eggs, butter, and sugar) brown much faster than standard sourdough. If the top looks dark but the internal temperature hasn’t reached 190°F/88°C simply tent the pan loosely with aluminum foil and continue baking. This protects the crust while the center finishes.
Yes, you can. Just remember that dried herbs are more concentrated than fresh and often taste slightly different. A good rule of thumb is to use about one-third of the amount of dried herbs compared to fresh.
Other recipes you might enjoy

Looking for more Sourdough Protein recipes?
Here are 10 you need to try!

Need a side salad to go with this bread?
This Herbed Cashew Aioli Slaw is an amazing fit!
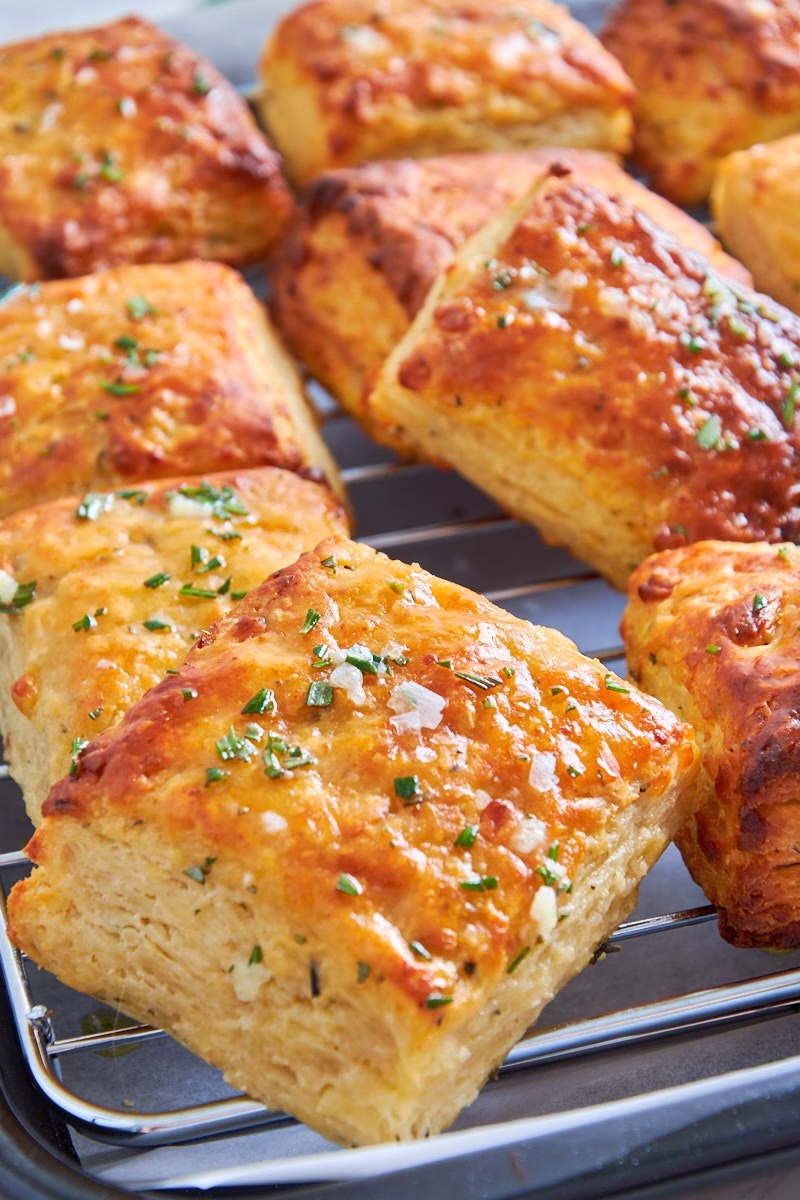
Want Garlic and Cheese but different? These incredible Biscuits are also made with sourdough and protein, but come out perfectly flaky and buttery!

Garlic Cheese Pull-Apart Sourdough Bread With Protein
- Total Time: 3 days
- Yield: 10 pieces 1x
Description
If you grew up with the classic shop-bought garlic baguette, you know how comforting it is—but you also know it’s mostly just empty calories and butter. This sourdough version keeps that nostalgic flavor while adding a bit more substance. By using my “Everything” sourdough brioche base, you get a pull-apart loaf that is naturally soft and tangy, with the added benefit of 13g of protein per slice thanks to the high protein enriched base dough and cheese. It’s a more sophisticated and made from scratch version as side dish for a family BBQ or a dinner with friends that actually leaves you feeling full.
Ingredients
Garlic Butter Cheese Filling
- 5 Tablespoons/71g unsalted butter
- 2 Tablespoons roughly chopped fresh parsley (or 2 teaspoons dried)
- 1 tablespoon fresh basil, roughly chopped (or 1 teaspoons dried)
- 1 tablespoon rosemary needles, stems removed (or 1 teaspoons dried)
- 2 garlic cloves, roughly chopped or 1/2 teaspoon garlic powder
- 1/4 teaspoon salt, or more to taste
- 3/4 cup (95g) shredded mozzarella, or sharp cheddar (or your favorite shredded cheese)
Optional Topping
- 1 egg for egg wash for a golden brown and shiny crust
- Alternatively brush with more butter
Instructions
The Enriched Dough
- Start by making the Everything Protein Sourdough following the instructions in the base recipe about 3 days before you want to bake this Garlic Cheese Sourdough Brioche.
- Use half of the recipe for this after the bulk fermentation and fridge time.
- Use the other half for another recipe (like the Brioche from the base recipe or Protein Burger buns or Marzipan Wreath) or make two Garlic Pull Apart Loaves by doubling the butter and cheese in this recipe card.
The Garlic Herb Butter
- I used a food processor for this as it’s so quick and easy.
- Simply add all the ingredients roughly chopped to the food processor and run it until you have a creamy, smooth herb flecked compound butter.
- You may have to scrape down the sides a few times to get it all evenly chopped.
- You can prepare the butter up to a week ahead of time and keep it well wrapped in the fridge or even in the freezer for up to 3 months. So a lovely garlic bread is never far away.
- Personally I always make double and freeze half, as it’s so good on all sorts of dishes from the classic steak over fresh bread all the way to baked potatoes.
- Preparations
- Grease a 9×5 loaf pan and line it with baking parchment. This will keep the bread and particularly the melting cheese from sticking.
- Get your rolling pin ready and butter softened if you had it in the fridge. It should be easy spreadable for this.
- Lightly flour your worktop and grab a bench scraper or knife to divide the dough.
Shaping The Garlic Butter Pull Apart Bread
- Get your dough from the fridge when you have everything ready. You want it cold to make shaping easy. Once it warms up, it gets stickier.
- Now, you can decide if you want 8 pieces (making 16 slightly thicker layers, lightly buttered) or 12 pieces making 24 layers, which will soak up more butter. I went for 8 and felt that was plenty.
- Divide the dough, shape each piece quickly into a ball, then pat or roll it into an oval shape, about double the length of the height of your loaf pan.
- That sounds complicated…let me explain: You’ll want to be able to fold each piece in half and reach nearly the rim of your loaf pan when standing upright.
Filling The Protein Garlic Cheese Bread
- Spread butter generously over each piece (think about 1/2 tablespoon), then sprinkle about one tablespoon of cheese on one side.
- Fold the non-cheesy side over the cheesy side, gently press the sides together, just so the cheese doesn’t fall out when you move it.
- Transfer upright, with the closed end towards the bottom of the pan to the loaf pan.
- Repeat will all your dough pieces.
- Your loaf pan will be very loosely filled, but no worries, the dough will expand and fill it completely.
Last Rise
- Transfer your loaf pan into a slightly inflated plastic bag and clip or knot it closed.
- This prevents the dough from drying out during the last rise and keeps it nice and cosy warm.
- Allow to rise for 2-6 hours until visibly puffy.
- Test if it’s fully risen by gently poking the dough with an oiled finger. It should feel puffy and leave a dent that springs back very slowly. If it doesn’t, leave it a bit longer.
- In my kitchen, which is around 70°F/21°C this took 6 hours.
- You can, at this point, put it back into the fridge for up to 2 more days and bake whenever you are ready.
Baking Your Garlic Cheese Bread
- Pre-heat your oven to 350°F/175°C
- Whisk the egg with a tablespoon of water until well combined.
- Brush the top of your loaf with the egg wash to get a lovely golden brown and shiny top when baking.
- Bake for 45- 55 minutes or until golden brown and baked through.
- Rotate by 180 degrees after about 25 minutes if you oven bakes unevenly.
- If you want to make sure the center is done, you can check with an instant read thermometer. It should read about 190°F/88°C when the bread is ready.
- If you feel it browns too quickly (mine did) tent with a bit of aluminium foil for the last 15 minutes.
- Take your now utterly delicious smelling bread out of the oven and brace yourself:
- You’ll have to wait another 10 minutes to allow it to cool and firm up a little in the pan.
Notes
How To Serve
- Take out of the pan by pulling it up with the parchment and serve warm.
- It’s fantastic on its own with a nice cool glass of white wine or beer. I honestly don’t need anything else with it. But of course you can serve this as a side with BBQ (the classic), a dinner spread or just a nice plate of dips and nibbles.
- For me, this is always the first thing that vanishes. So maybe make two.
How To Store
- This Garlic Butter bread, thanks to the Tangzhong stays beautifully soft and moist for up to 3 days in an airtight container at room temperature.
- It freezes really well either as whole loaf or in slices separated with parchment for up to 3 months, so you can grab one and warm it up whenever you like.
- I found that works best at 350°F/175°C in the air fryer for about 10 minutes (depending on the size of your pieces of course). If you moisten the top a little, it crisps back up perfectly without drying out.
- Prep Time: 1 hour 30 minutes
- Fermentation/rising time: 24 hours
- Cook Time: 50 minutes
- Category: Bread, Bread & Sourdough, Dinner, Main Course, Protein Sourdough
- Method: Baking
- Cuisine: American