Easy Protein-Boosted Sourdough Croissant Bread
If you love the shatteringly crisp crust and rich, buttery crumb of a fresh croissant but shudder at the thought of spending hours laminating layers of dough, this recipe is for you. I’m combining the effortless “grated butter” method popularized by Amy Bakes Bread with my high-protein sourdough master dough. The result is an incredibly indulgent, flaky sourdough croissant loaf that packs double the protein of a standard slice, giving you the ultimate upgrade to your morning toast or weekend brunch.
This post may contain referral links for products I love.
For The Pleasure Of Eating earns a small commission on these links at no cost to you.
- Why You’ll Love This
- The Ingredients
- Substitutions
- Equipment Used
- How to Make this
- How To Store
- FAQ
- Other Recipes You Might Enjoy
Why You’ll Love This
TL;DR
- Croissant Texture, Less Work: Get that ultra-crisp crust, flaky crumb, and rich, buttery flavor without the tedious hours of traditional laminating and rolling.
- Double the Protein: By using our high-protein master dough, each slice delivers over 8g of protein—more than the equivalent weight of drained butter beans!
- Clever Butter Trick: Grating cold butter directly into the dough during shaping distributes those gorgeous, flaky pockets effortlessly.
- Wonderfully Flexible: Fits right into your schedule with options for long cold fermentations up to 3 days, making it great for meal prep.
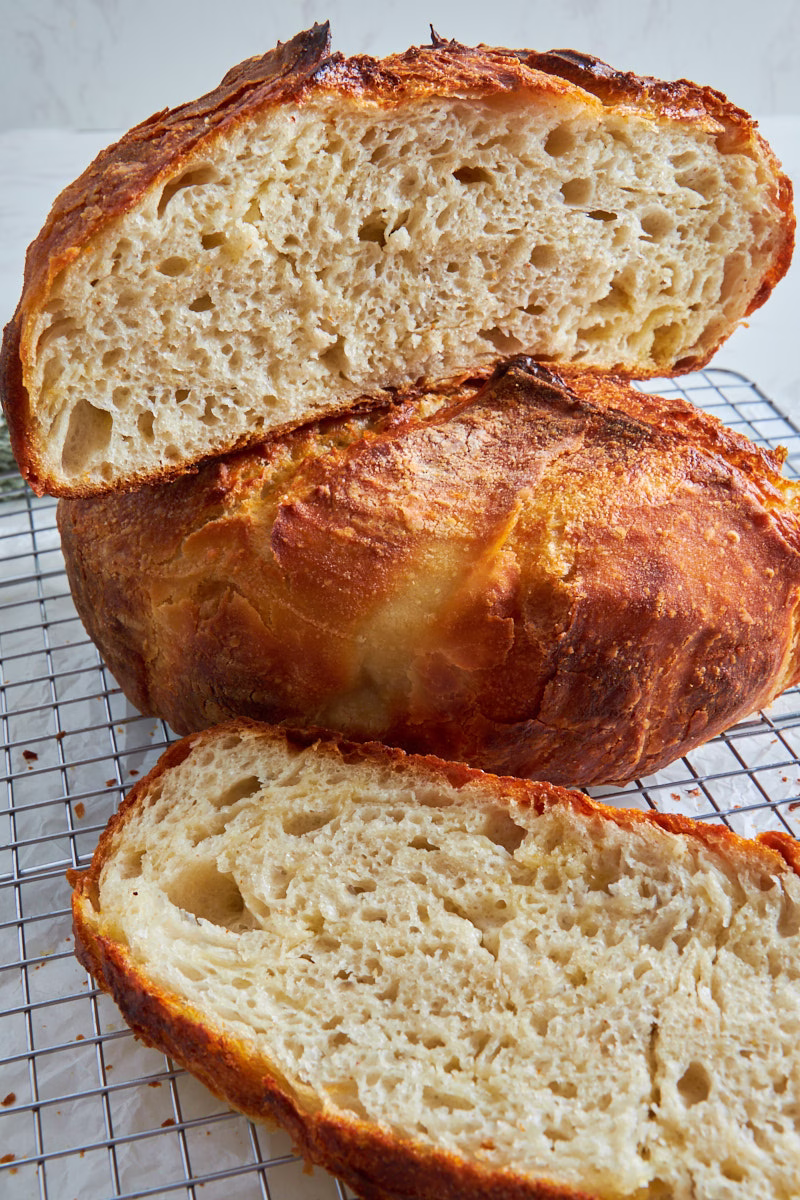
Buttery and Crisp, Perfect For Breakfast
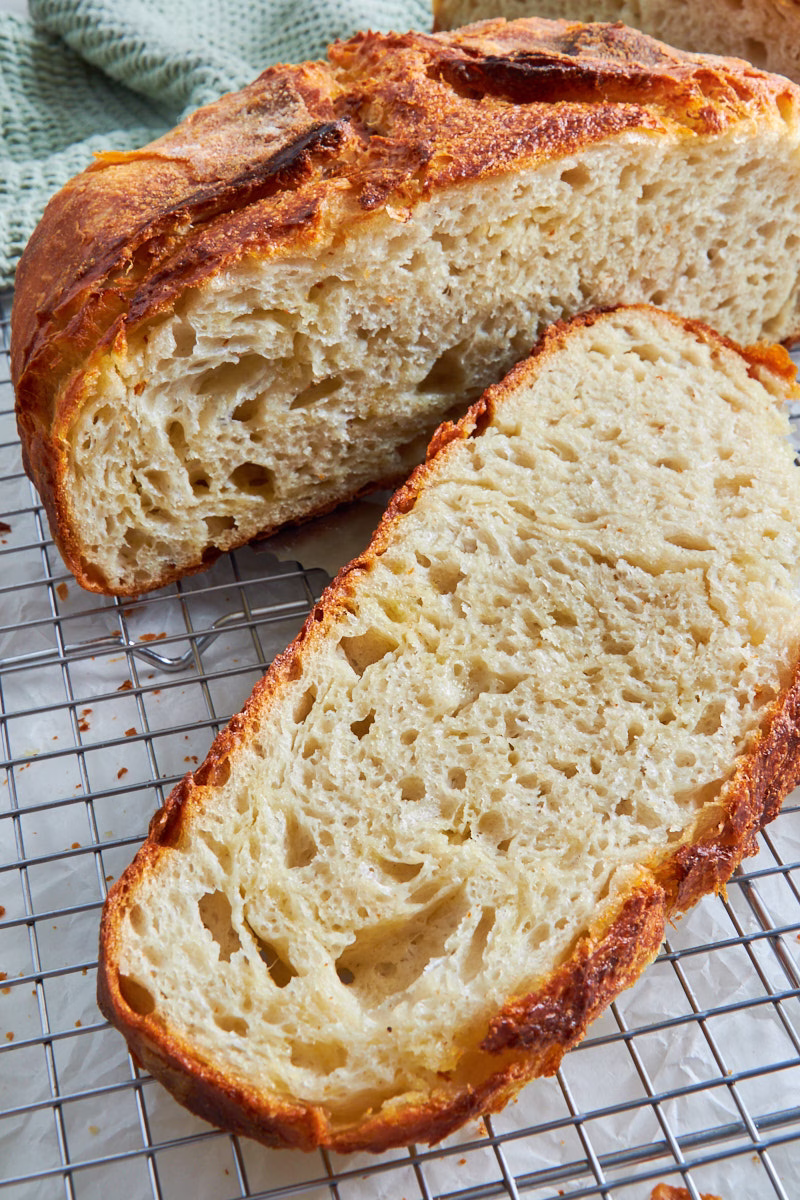
While this bread isn’t a full blown croissant, it has very similar qualities: The super crisp crust, .flaky and tender crumb, plus an irresistible buttery flavor that makes this sourdough croissant bread truly special for your Sunday Breakfast!
Double The Protein of a Typical Sourdough
Thanks to the easy protein master dough, which has whey protein and cottage cheese added to high protein bread flour, this bread contains over 8g protein per slice, which is more than drained butterbeans have at the same weight.

Super Easy To Make
Instead of layers and layers of rolling out a dough with cold butter we are using cold grated butter that gets sprinkled over the dough either during the stretch and folds or during shaping. This way it will dispersed evenly throughout your bread without all the hassle.
This genius idea was made popular by Amy from “Amy Bakes Bread” and I just found it too good not to use in a high-protein sourdough.
Ingredient Notes
You’ll need only two things to get started with this protein sourdough recipe:
- The basic high protein sourdough recipe – Right after the bulk proof
- Butter – Use the best quality you can afford. I love Irish butter. Of course the flavor is important, but also the fact that it stays solid at room temperature.
substitutions
You can use vegan butter here. Just make sure it has a high fat content, so it stays firm.
Variations
If you think about variations you can essentially consider anything that would go into a croissant. Marzipan pieces, chocolate chips, ham and cheese, or even some lovely soft Brie are all fair game.
If you try any of those, I’d love to hear how they came out in the comments!
Top Tips For Success
- Grate your butter coarsely – and keep it in the fridge until you use it, so it’s cool and doesn’t melt back into a lump. I tend to grate mine fresh from the fridge (or even the freezer) right before I use it, so the pieces have as much separation as possible.
- Keep your dough cool – For the perfect texture the butter needs to stay solid. So no quick proofing in a slightly warm oven for this one. You want it to stay around 70°F/21°C, so the butter doesn’t melt into the dough. I admit that’s not ideal for summer, so if you have to pop it into the fridge in between, go right ahead.
- Butter will seep out during baking – This is normal and working as intended. Use baking parchment in your Dutch oven to make cleaning easier.
Equipment Used
The easy protein sourdough equipment plus
A box grater – To grate the butter on.
 Buy Now →
  Buy Now →
 How to Make this
Since this Protein Boosted Sourdough Croissant Bread is made from the Easy High Protein Sourdough and we simply add the butter, we are starting right after the stretch and folds.
So you’ll need to start by feeding your starter 3 days before you want to bake bread and mix the dough on day 2, to have it ready for baking on day 3.
You can do the cold fermentation either before or after shaping, depending on your schedule and needs.
I usually do my cold fermentation after shaping and take the loaf out of the fridge for the last rise if still needed, but for this bread I flipped the schedule and went with cold ferment first, to get the butter cooled all the way down again.
Bakers Schedule
| Time | Action | Note |
| Day 1: 9:00 PM | Feed Levain | Mix your starter. Let it sit at room temp overnight. |
| Day 2: 9:00 AM | Mix Dough | Blend cheese/whey. Mix with flour, salt, and starter. |
| 10:00 AM | Stretch & Folds | Perform 3–4 sets of folds every 30 minutes. |
| 11:30am | Add Inclusions | Shape& Add Inclusions and place in banneton or bowl |
| 12:00 PM | Bulk Ferment | Let the dough sit undisturbed (Counter). |
| 6:30 PM | Cold Proof | Put the banneton or bowl in the “plastic bag tent” and into the fridge. |
| Day 3 7:00 AM | Final Shape and Rise | Re-shape your dough if it lost some tension and let it rise until puffy. |
| 11:00 AM | Pre-heat oven | Check on your bread. If it looks ready to bake, pre-heat your oven If the dough hasn’t risen considerably and is nice and jiggly, allow it to rise at room temperature for a few hours. |
| Freezer Chill | Move the banneton to the freezer for 30 mins to firm up for scoring while your oven pre-heats. | |
| 11:30 AM | Score & Bake | Score your bread and bake. |
Adding The Butter Into Your Sourdough Bread
While Amy adds her butter during the stretch and fold in the original recipe, I found my butter clumps together too much for my liking when I do that, so I prefer to add it right after the stretch and folds, in a sort of pre-shaping before the bulk fermentation, where I have a bit more control over the distribution by using a lamination method.
Grate The Butter
- When your dough is ready to be shaped, coarsely grate your very cold butter into a cool bowl.
- If your kitchen is very warm you may want to use a fridge cold bowl and frozen butter.
- Dipping the stick into a little bit of flour can make grating much easier and prevents a bit of the clumping.
Add The Butter While Pre-Shaping Your Croissant Loaf
- Lightly oil a bowl to make turning your dough out later easier.
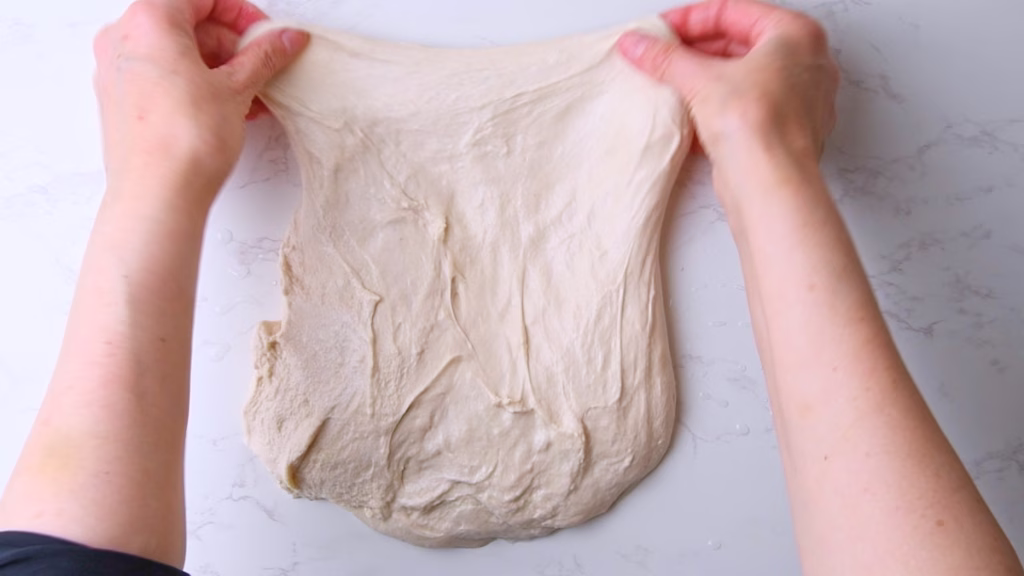
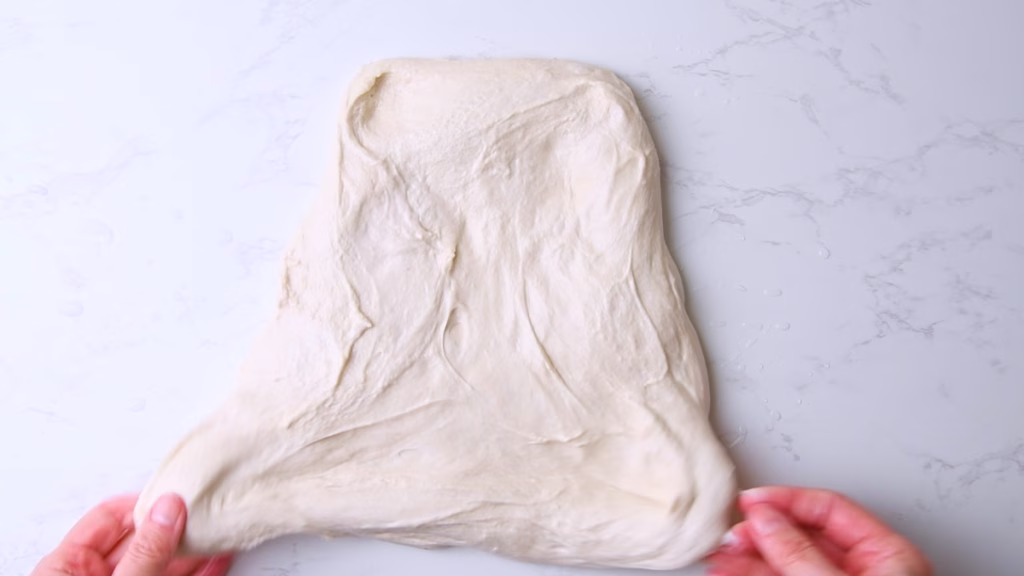
- Turn your stretched and folded dough onto a lightly floured work surface.
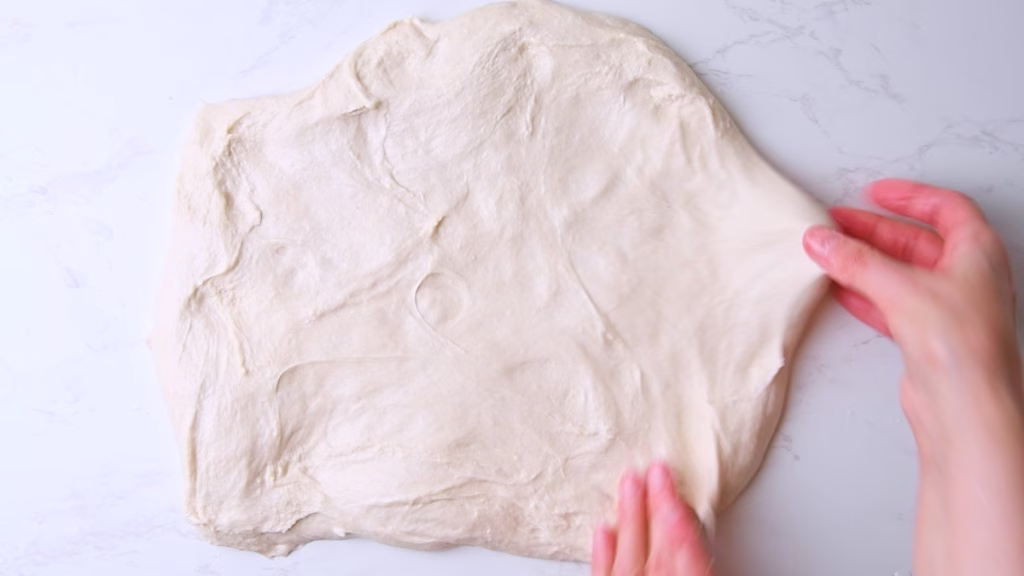
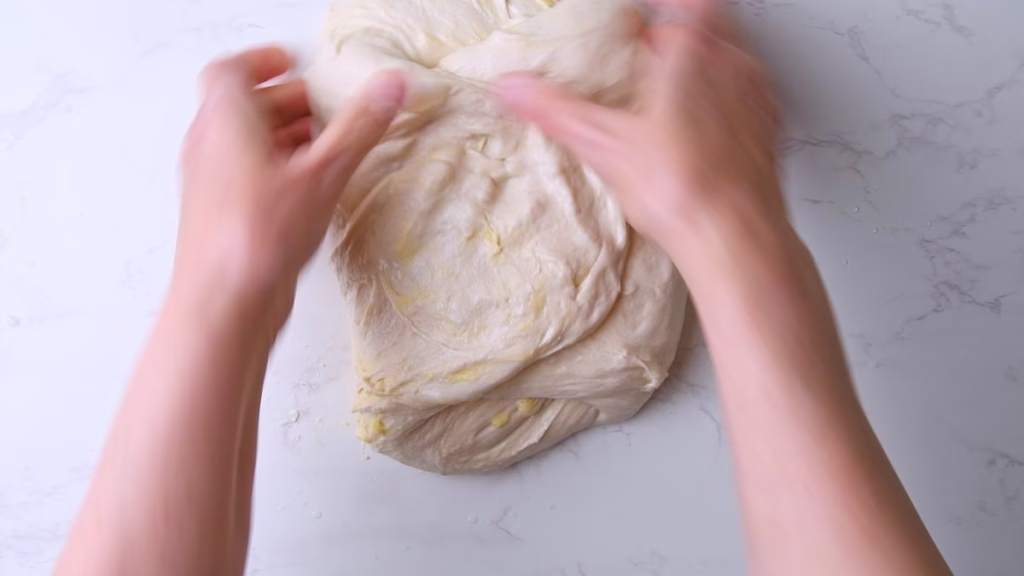
- Use your hands to gently pull it out into a square about 11 in/ 30cm on both sides. This doesn’t have to be exact. We just want plenty of surface area to scatter the butter over without ripping the dough or deflating the trapped air. So no rolling pin needed.
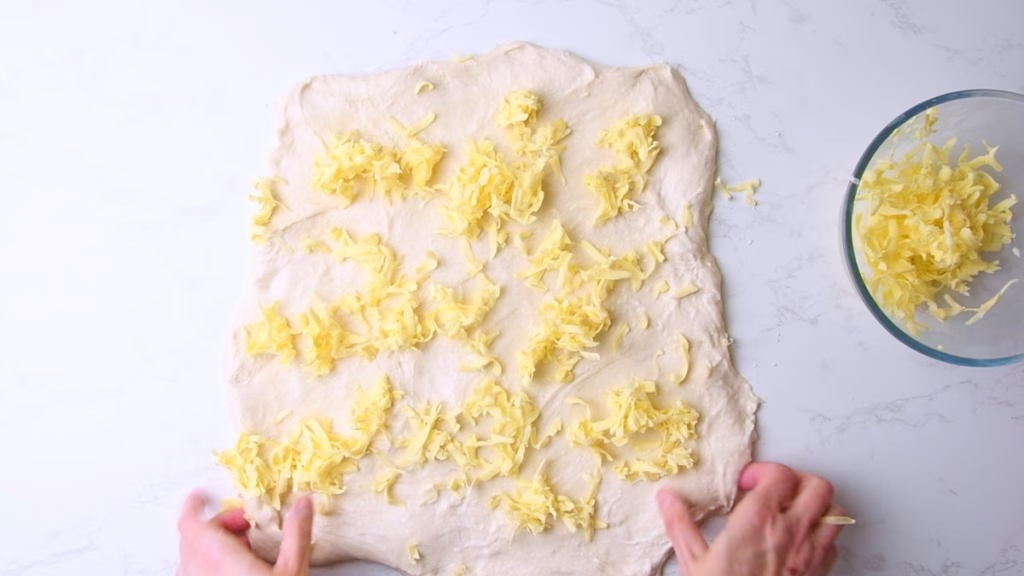

- Scatter half of your butter over the dough.
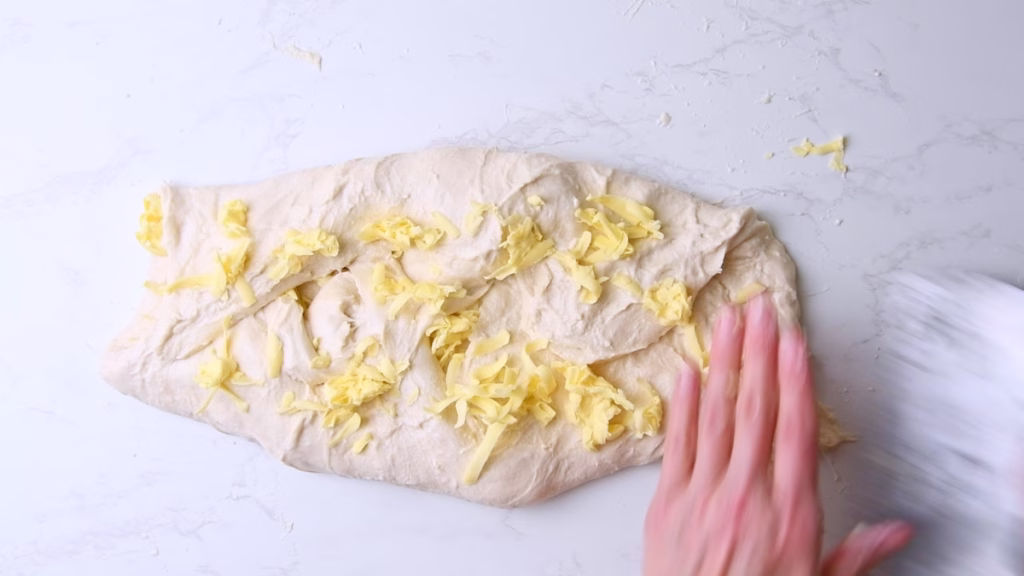
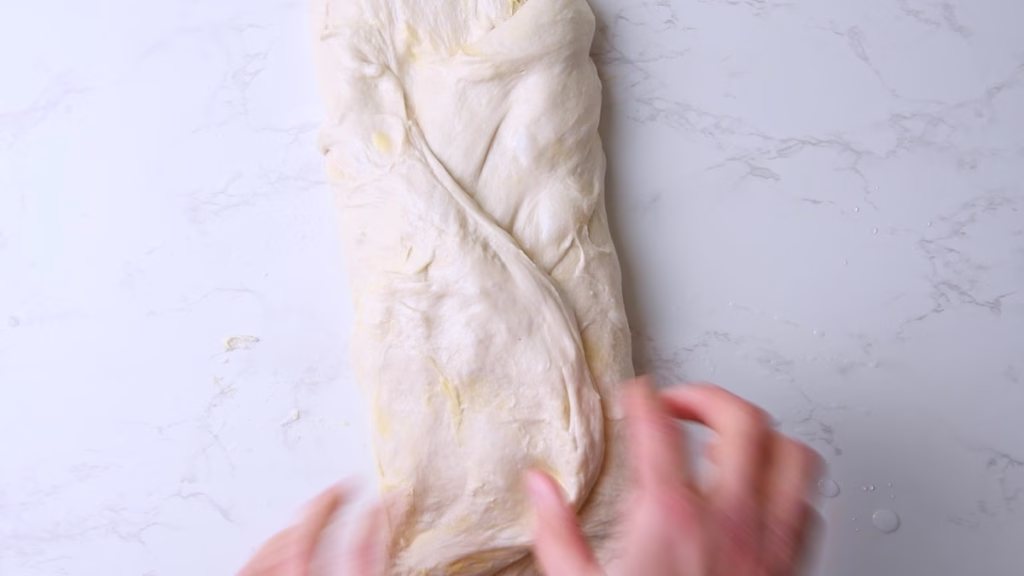
- Fold the top third of the dough toward the center, then the bottom third up.
- Scatter half of the remaining butter over the folded dough.
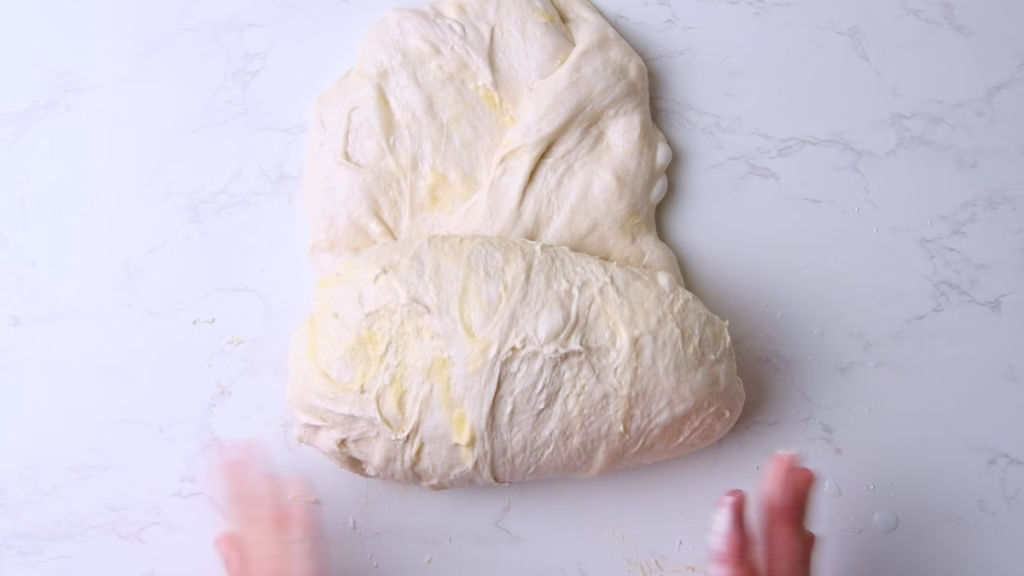
- Fold the dough in half, so you have a square shape.
- Grab the opposing corners of the dough piece and pull them over the middle. Do the same with the remaining corners and pinch to close.
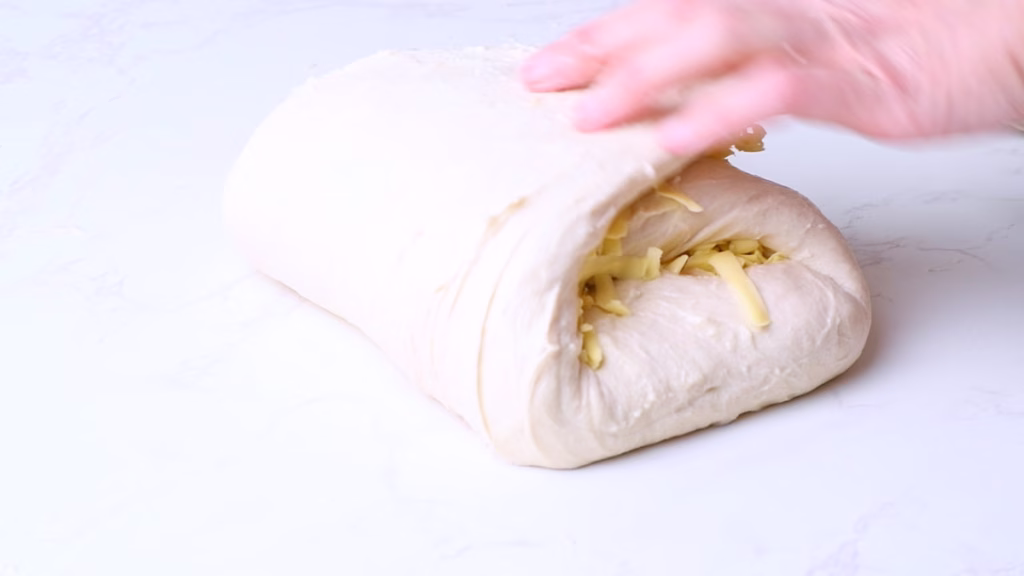
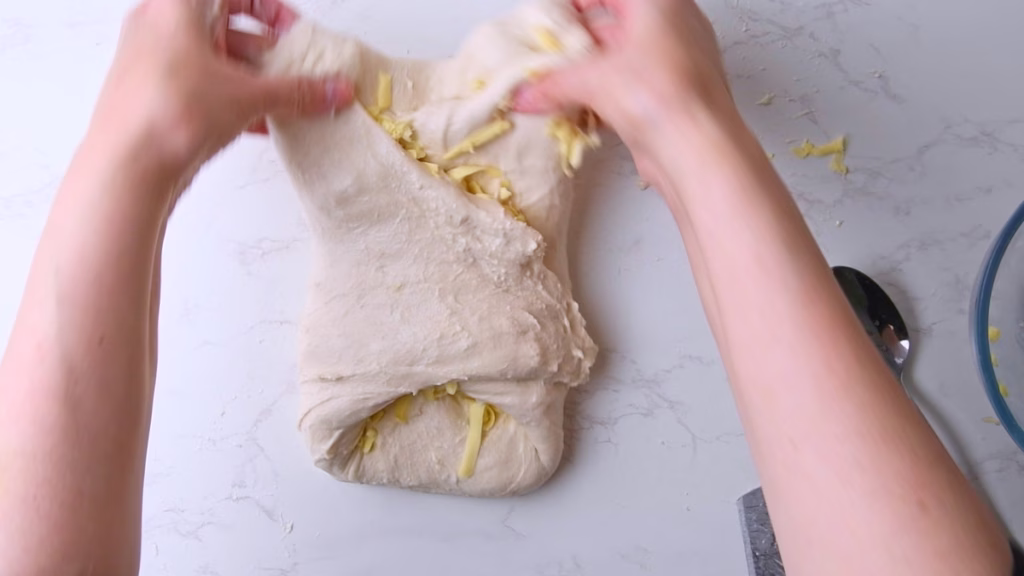
- If any butter bits fall out during this process, just push it back into the dough as best as you can, ideally while rolling up, so you don’t break the top afterwards.
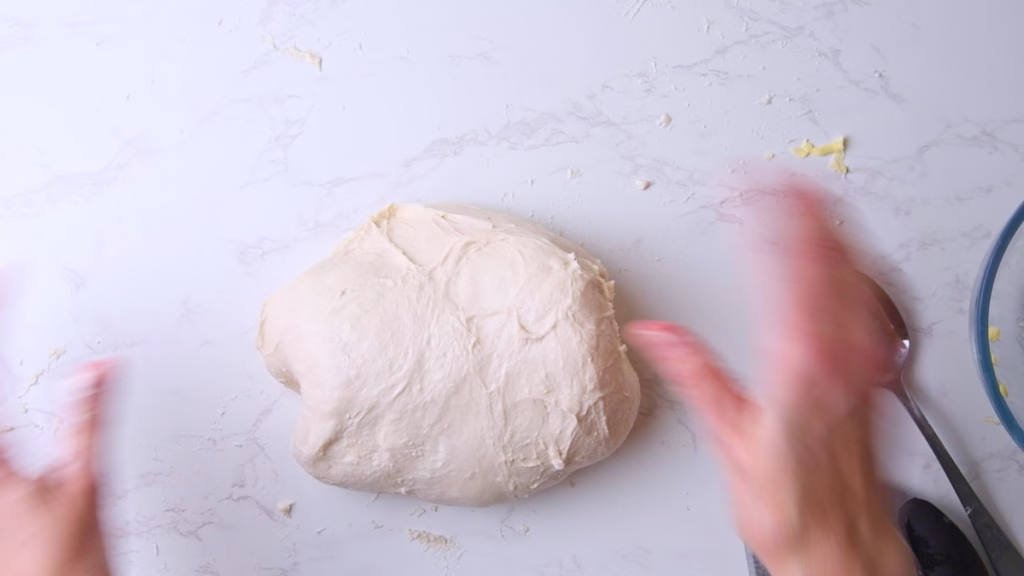
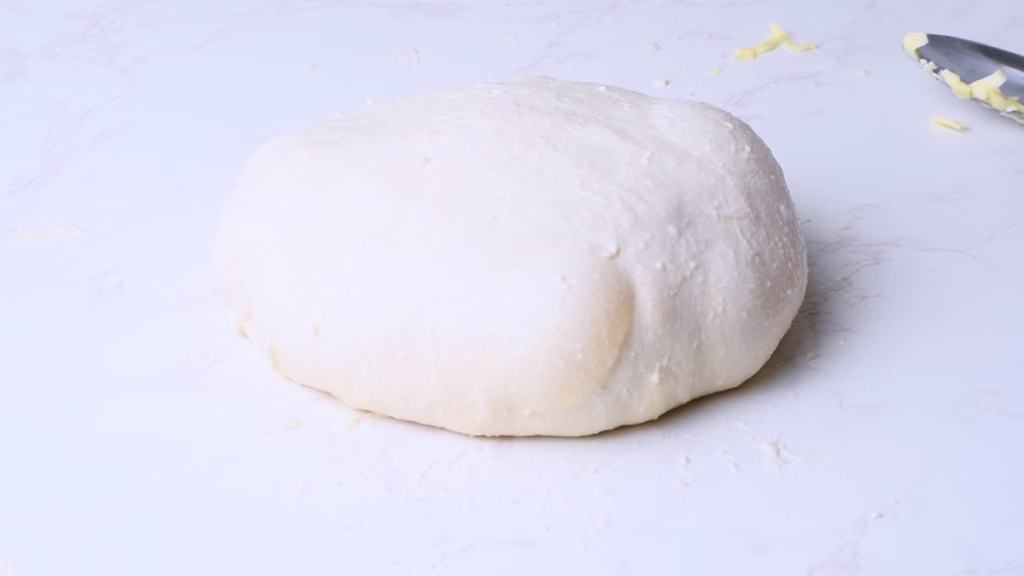
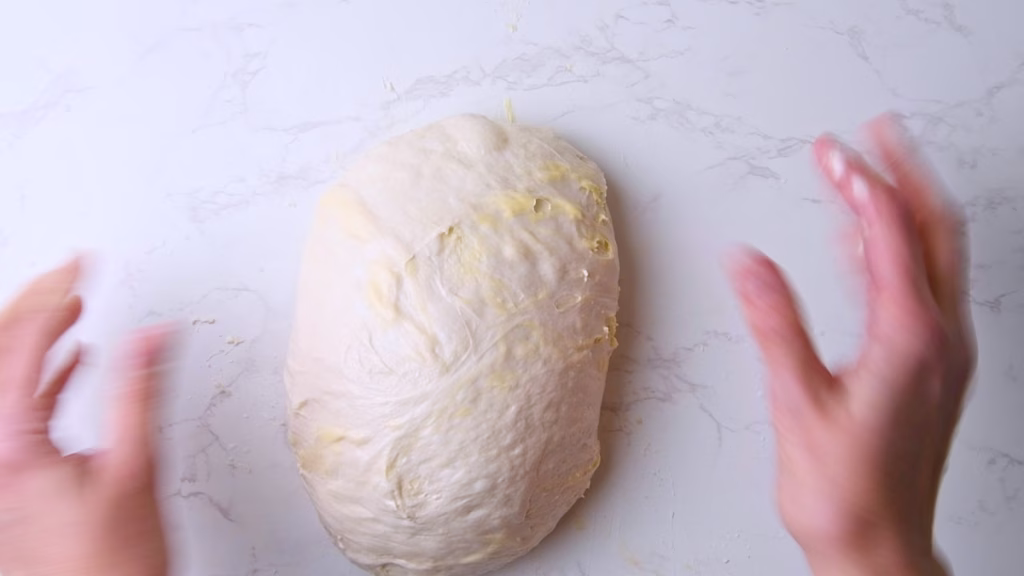
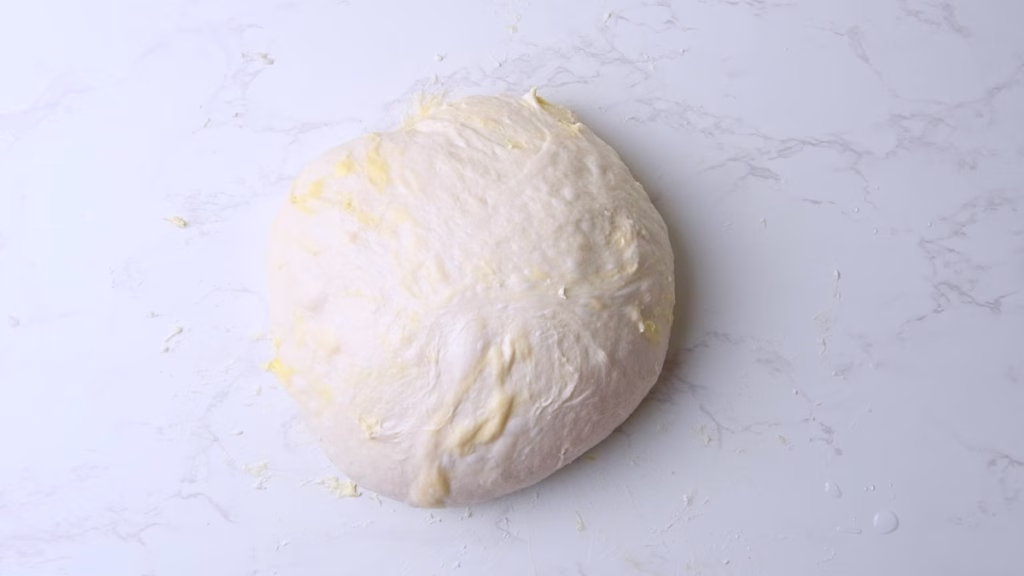
- Flip the dough over, so the seam points down and gently shape into a round or oval by pushing it under itself with the sides of your palms while rotating it against the worktop. Be relatively gentle.
- Transfer your loaf top side down into a lightly oiled bowl.
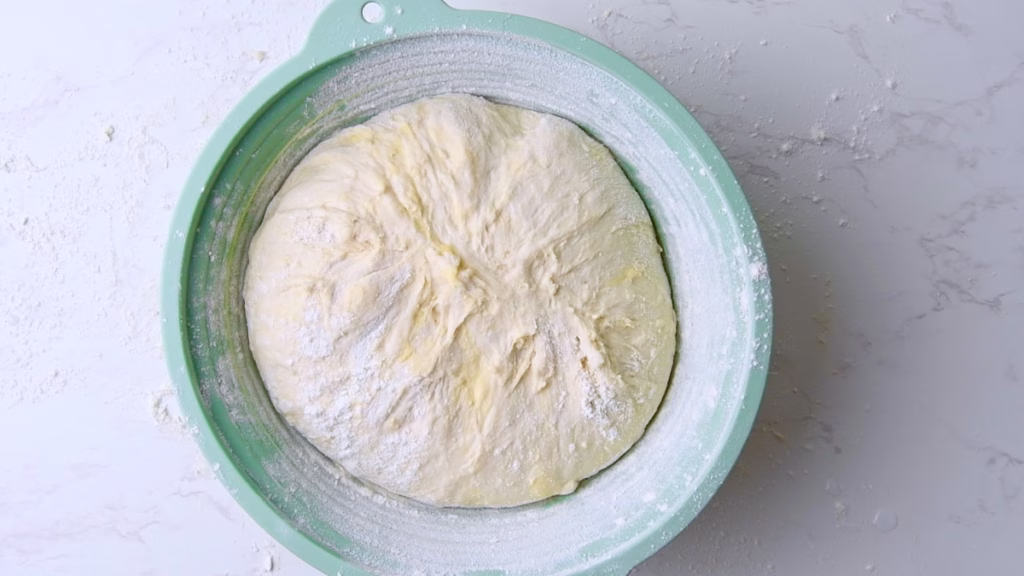
Bulk Fermentation
- I like to put the bowl with the shaped loaf into a slightly inflated, clean plastic bag that I clip close, to keep it moist during the bulk fermentation . Plastic wrap will also work for the most part but often leaves gaps and with that dry bits on the dough.
- Make sure to check the temperature. If the butter gets too soft because your kitchen is warm, pop it into the fridge to cool down a bit.
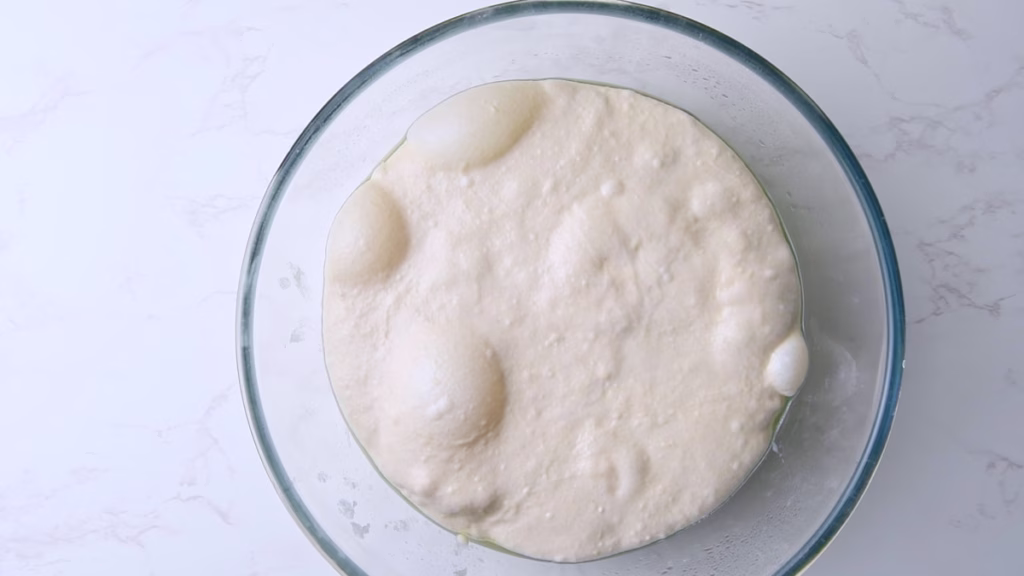
- Here is your next bit of flexibility: You can either go straight to letting your dough rise for about 3 hours or until nice and puffy and jiggly and then bake it right away.
- Or you can cold ferment at this point (if it wasn’t already in the fridge for 3 days) and leave the rise for the next day. Be aware though that the rise, coming out of the fridge, will take a little longer as the dough needs to come back to room temperature for the bacteria to get back to peak activity.
- I often put my shaped loaf into the fridge and take it out about 5 hours before I want to bake, anywhere up to 3 days after shaping. The longer you leave it to ferment, the stronger the sourdough flavor and the easier it is to digest.
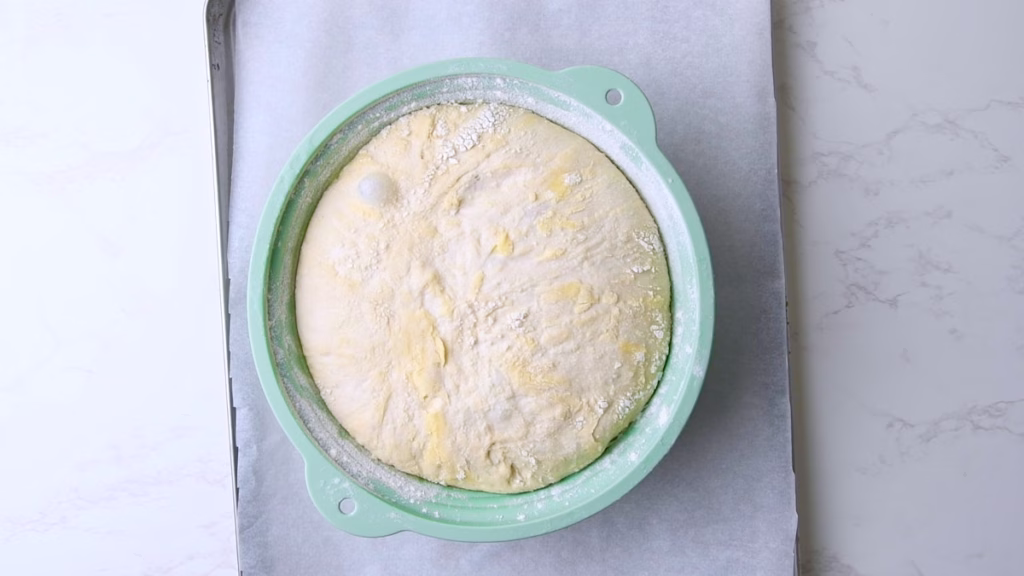
Cold Ferment and Re-shape
Prepare a banneton basket by misting it with a bit of water and dusting with rice flour. Rice flour, as opposed to wheat flour doesn’t get absorbed by the dough, so it works much better as an effective non-stick layer.
- This Croissant Bread in particular does need to be cooled before the final shaping, so the butter starts out cold in the loaf. So I went with the cold fermentation after the bulk fermentation, to re-shape and have the final rise the next morning.
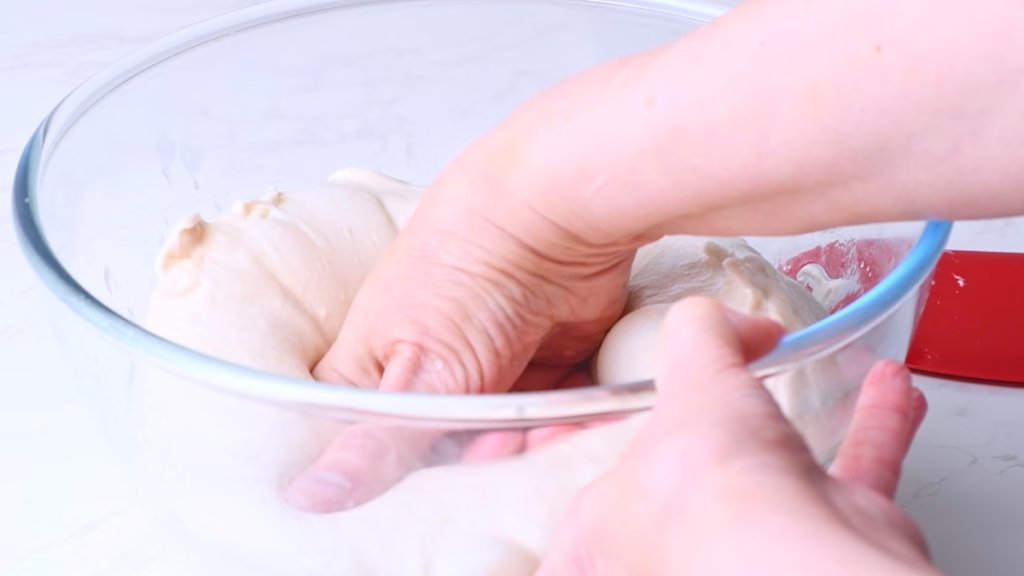
- During the cold ferment the dough relaxes a bit, so I decided to do a bit of a re-shape in the morning.
- I punched the nicely risen dough back, folded it into thirds again, the, repeated the rolling process until I had a lovely loaf with lots of tension.
- The upside of the re-shaping here was that the butter was also even better distributed throughout the dough.
Last Rise
- Add your banneton back into the plastic bag for the last rise, so it doesn’t dry out.
- Allow to rise for 3-6 hours in a relatively cool room.
- For this super buttery bread, you don’t want to speed it up by leaving it in a warm spot, as the butter would just melt into the dough.
- When the dough has visibly risen (not entirely doubled probably, but close), looks puffy and jiggly, it’s ready to bake.
Score Your Loaf and Pre-heat The Oven
- With your Dutch Oven inside, pre-heat your oven to 475°F/245°C for 30 minutes to 1 hour.
- It may show pre-heated before, but the Dutch oven won’t be and the heat evens out after about 30 minutes. The high temperature at the start gives you the best oven spring.
- Right after switching on the oven, put your banneton into the freezer for about 30 minutes for a cleaner score. I honestly often forget this or simply don’t have room in my freezer, so my scores aren’t always those picture-perfect Instagram patterns.
- I mainly see them as functional, to enable the bread to expand and spring up nicely.
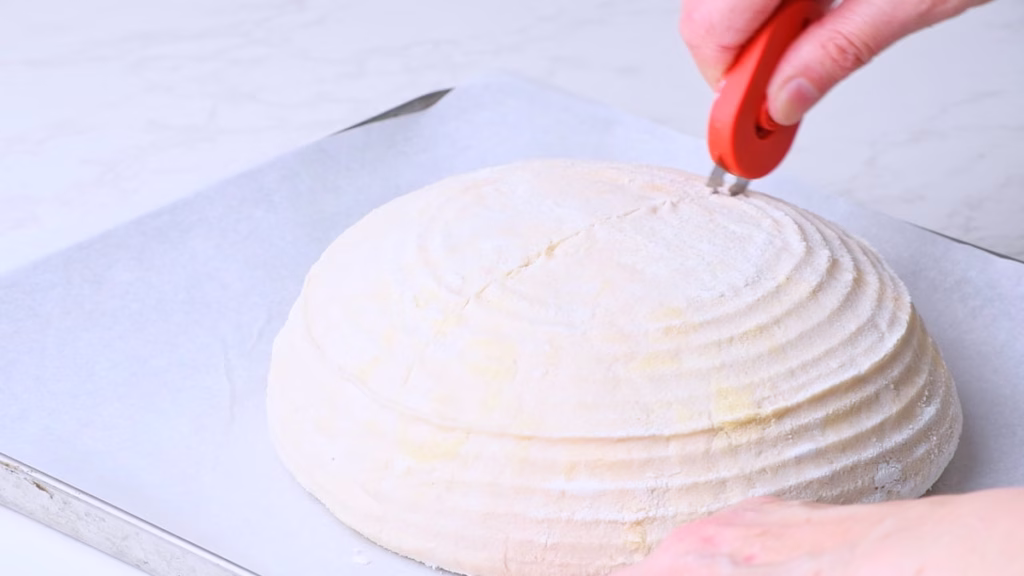
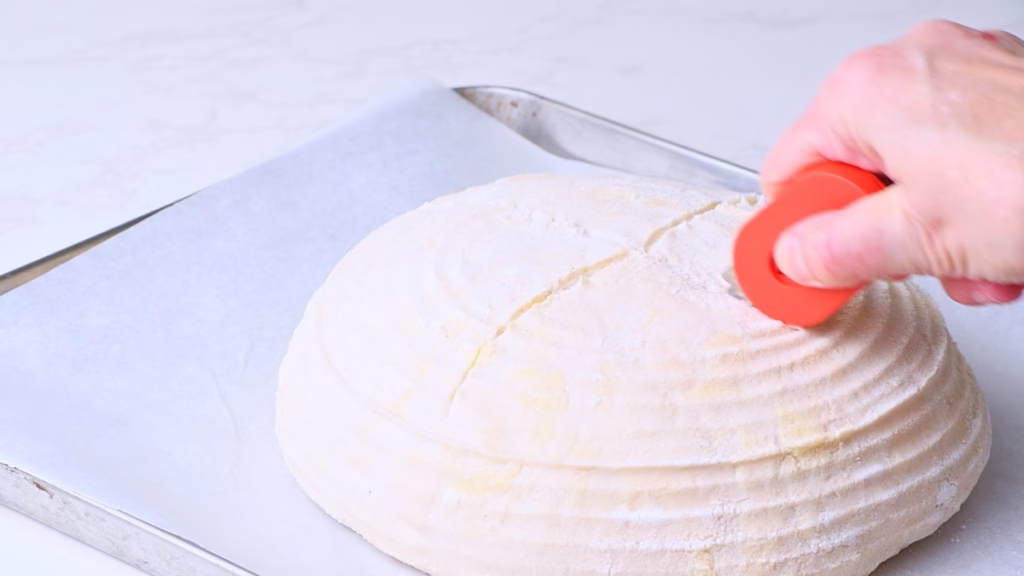
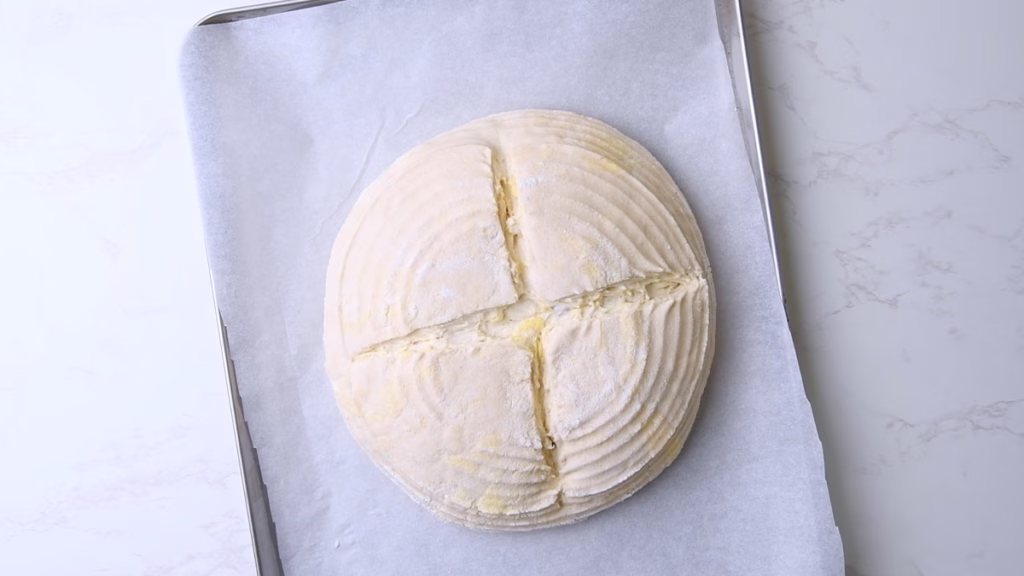
- When ready to bake, flip your loaf onto a piece of baking parchment and score it with a sharp knife or lame. You can use any pattern you like, just make sure you score deep enough. About ½ inch/ 12mm deep at a 45 degree angle with one long confident slice gives you the best results.
- If you are not keen on that “ear” you could do a cross and then cut your loaf in quarters along those lines later for easy slicing, which is what I’m doing for this loaf.
Bake Your High-Protein Sourdough Croissant Loaf
- Use your parchment to transfer your bread into the hot Dutch oven, put the lid on and bake at 475°F/245°C for 30 minutes.
- Lower the temperature to 440°F/225°C, take the lid off, let the excess heat vent for a few seconds (temperature down before opening the door, so some heat can escape) and bake for another 15-20 minutes or until deep golden brown with the scored and risen bits a bit darker or until baked through.
- I rarely check the internal temperature of this loaf, as it comes out so consistently well baked, but if you’d like to be sure you can either tap the bottom, which should sound hollow when baked through or use an instant read thermometer to check the temperature at the center. It should be around 208°F/98°C for the crumb to be fully set and excess moisture having evaporated.
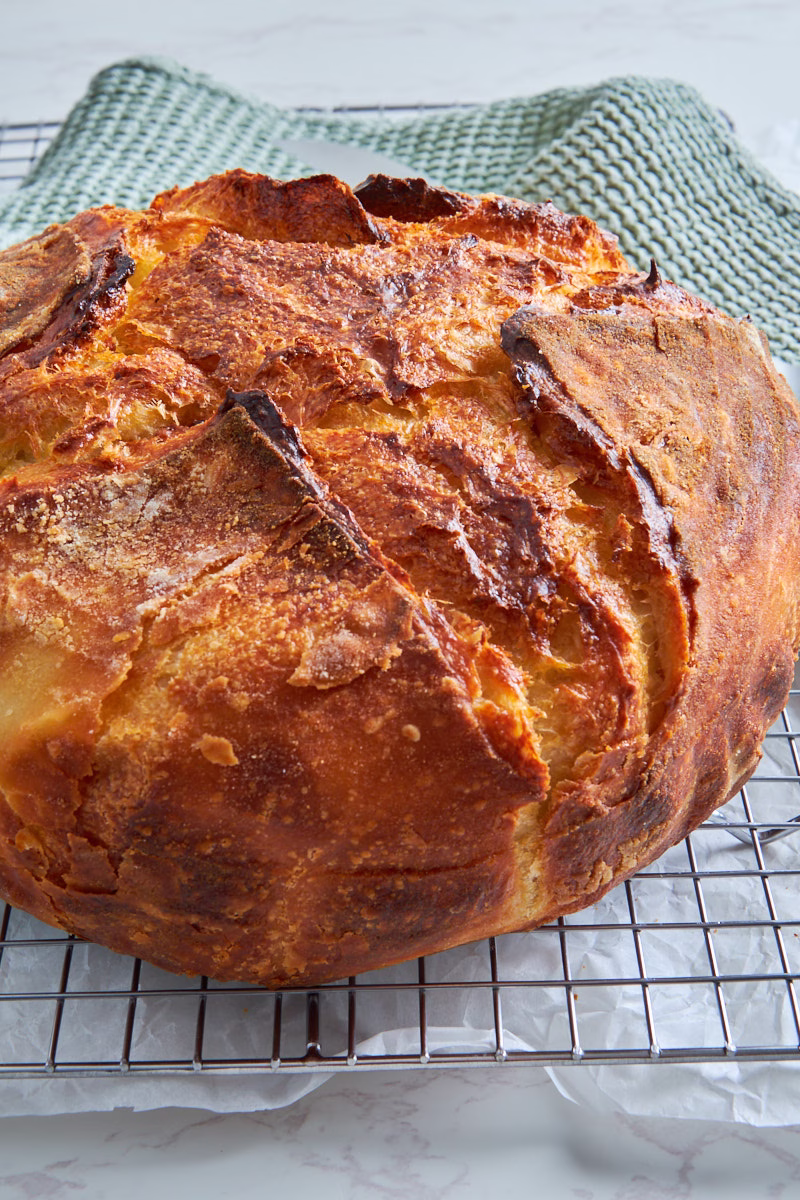
Take out of the oven and transfer to a cooling rack. Allow to cool at least a few hours, as you otherwise, you risk letting too much steam (aka moisture) escape too early, resulting in a gummy or doughy texture.
How To Serve
I love this bread just as it is with a cup of hot coffee. But of course it’s even better with some creamy brie, tangy goats cheese or jam.
Or you could go fully indulgent and slather it with Nutella.
How To Store
Homemade sourdough bread is incredibly meal prep friendly:
You can prepare it the day before and just push it into the oven in the morning or 3 hours before you’d like to eat it. Or prepare the dough up to 6 days in advance and leave it in the fridge for long cold fermentation for up to 3 days. The sourdough flavor will get more pronounced the longer it ferments.
All of these breads keep well in a bread box for about 3 days or up to 5 in the fridge.
They freeze perfectly for up to 6 months and are excellent toasted.
FAQ
Yes, absolutely! While traditional baking often calls for unsalted butter to control the salt content, salted butter works wonderfully here and adds a lovely flavor depth that mimics a classic, rich croissant. If your master dough is already quite salty, you can stick to unsalted, but otherwise, use whichever high-quality butter you prefer.
Warm butter is your enemy here. If the butter is at room temperature, it will turn into a mashed paste on your box grater instead of clean, distinct shreds. Freezing the block for 15 to 30 minutes makes grating effortless and ensures the pieces stay separate when you scatter them onto the dough.
If your kitchen is warm, the shredded butter will want to stick together quickly. Dip your butter stick into flour a few times while grating or toss the grated butter shreds with a tablespoon of flour right after grating—this coats the pieces and stops them from fusing back into a giant lump. You can also pop the bowl of grated butter back into the freezer for 5 minutes before shaping.
If you feel the dough getting greasy or slippery while you are folding in the butter, stop immediately. Transfer the dough (even if it’s only half-shaped) onto a baking sheet lined with parchment paper and place it in the fridge for 10 to 15 minutes. Once the butter firms up, you can finish shaping it and place it into your banneton.
It is best to skip the rolling pin for this specific method. A rolling pin applies heavy, direct pressure that can pop the beautiful air pockets you built up during bulk fermentation, and it might push the grated butter entirely into the dough matrix rather than letting it sit in distinct, flaky layers. Gently stretching the dough with your hands is all it takes.
Not at all—this is completely normal! Because we are pocketing real butter into the dough rather than using a commercial laminating machine, some butter will inevitably melt and seep out onto the parchment paper during the high-heat bake. It actually fries the bottom crust slightly, making it incredibly crispy and delicious.
Now I’d love to hear from you in the comments!
Have you tried this? Did you enjoy it?
What other recipes would you like to see?
And if you enjoyed this recipe, please consider rating, sharing, or leaving a comment – your feedback truly helps my blog grow!
Other recipes you might enjoy

If you are a fan of croissant sourdough, here is another recipe to make with this: A super indulgent Pistachio Croissant Cinnamon Roll.

A slightly more involved but oh-so-worthwhile Sourdough Brioche Feuilltee might tempt you too. The Thangzhong method keeps this one super soft.

Or try your hand on a classic German bake going Sourdough Protein: The Marzipan Wreath aka “Kaffeekranz”.

Easy Protein-Boosted Sourdough Croissant Bread
- Total Time: 3 days
- Yield: 12 slices 1x
Description
If you love the shatteringly crisp crust and rich, buttery crumb of a fresh croissant but shudder at the thought of spending hours laminating layers of dough, this recipe is for you. I’m combining the effortless “grated butter” method popularized by Amy Bakes Bread with my high-protein sourdough master dough. The result is an incredibly indulgent, flaky sourdough croissant loaf that packs double the protein of a standard slice, giving you the ultimate upgrade to your morning toast or weekend brunch.
Instructions
- Since this Protein Boosted Sourdough Croissant Bread is made from the Easy High Protein Sourdough and we simply add the butter, we are starting right after the bulk fermentation phase.
- So you’ll need to start by feeding your starter 3 days before you want to bake bread and mix the dough on day 2, to have it ready for baking on day 3.
- You can do the cold fermentation either before or after shaping, depending on your schedule and needs.
- I usually do my cold fermentation after shaping and take the loaf out of the fridge for the last rise if still needed.
Adding The Butter Into Your Sourdough Bread
While Amy adds her butter during the stretch and fold in the original recipe, I found my butter clumps together too much for my liking when I do that, so I prefer to add it right after the stretch and folds, in a sort of pre-shaping before the bulk fermentation, where I have a bit more control over the distribution by using a lamination method.
Grate The Butter
- When your dough is ready to be shaped, coarsely grate your very cold butter into a cool bowl.
- If your kitchen is very warm you may want to use a fridge cold bowl and frozen butter.
- Dipping the stick into a little bit of flour can make grating much easier and prevents a bit of the clumping.
Add The Butter While Pre-Shaping Your Croissant Loaf
- Lightly oil a bowl to make turning your dough out later easier.
- Turn your stretched and folded dough onto a lightly floured work surface.
- Use your hands to gently pull it out into a square about 11 in/ 30cm on both sides. This doesn’t have to be exact. We just want plenty of surface area to scatter the butter over without ripping the dough or deflating the trapped air. So no rolling pin needed.
- Scatter half of your butter over the dough.
- Fold the top third of the dough toward the center, then the bottom third up.
- Scatter half of the remaining butter over the folded dough.
- Fold the dough in half, so you have a square shape.
- Grab the opposing corners of the dough piece and pull them over the middle. Do the same with the remaining corners and pinch to close.
- If any butter bits fall out during this process, just push it back into the dough as best as you can, ideally while rolling up, so you don’t break the top afterwards.
- Flip the dough over, so the seam points down and gently shape into a round or oval by pushing it under itself with the sides of your palms while rotating it against the worktop. Be relatively gentle.
- Transfer your loaf top side down into a lightly oiled bowl.
Bulk Fermentation
- I like to put the bowl with the shaped loaf into a slightly inflated, clean plastic bag that I clip close, to keep it moist during the bulk fermentation . Plastic wrap will also work for the most part but often leaves gaps and with that dry bits on the dough.
- Make sure to check the temperature. If the butter gets too soft because your kitchen is warm, pop it into the fridge to cool down a bit.
- Here is your next bit of flexibility: You can either go straight to letting your dough rise for about 3 hours or until nice and puffy and jiggly and then bake it right away.
- Or you can cold ferment at this point (if it wasn’t already in the fridge for 3 days) and leave the rise for the next day. Be aware though that the rise, coming out of the fridge, will take a little longer as the dough needs to come back to room temperature for the bacteria to get back to peak activity.
- I often put my shaped loaf into the fridge and take it out about 5 hours before I want to bake, anywhere up to 3 days after shaping. The longer you leave it to ferment, the stronger the sourdough flavor and the easier it is to digest.
Cold Ferment and Re-shape
- Prepare a banneton basket by misting it with a bit of water and dusting with rice flour. Rice flour, as opposed to wheat flour doesn’t get absorbed by the dough, so it works much better as an effective non-stick layer.
- This Croissant Bread in particular does need to be cooled before the final shaping, so the butter starts out cold in the loaf. So I went with the cold fermentation after the bulk fermentation, to re-shape and have the final rise the next morning.
- During the cold ferment the dough relaxes a bit, so I decided to do a bit of a re-shape in the morning.
- I punched the nicely risen dough back, folded it into thirds again, the, repeated the rolling process until I had a lovely loaf with lots of tension.
- The upside of the re-shaping here was that the butter was also even better distributed throughout the dough.
Last Rise
- Add your banneton back into the plastic bag for the last rise, so it doesn’t dry out.
- Allow to rise for 3-6 hours in a relatively cool room.
- For this super buttery bread, you don’t want to speed it up by leaving it in a warm spot, as the butter would just melt into the dough.
- When the dough has visibly risen (not entirely doubled probably, but close), looks puffy and jiggly, it’s ready to bake.
Score Your Loaf and Pre-heat The Oven
- With your Dutch Oven inside, pre-heat your oven to 475°F/245°C for 30 minutes to 1 hour.
- It may show pre-heated before, but the Dutch oven won’t be and the heat evens out after about 30 minutes. The high temperature at the start gives you the best oven spring.
- Right after switching on the oven, put your banneton into the freezer for about 30 minutes for a cleaner score. I honestly often forget this or simply don’t have room in my freezer, so my scores aren’t always those picture-perfect Instagram patterns.
- I mainly see them as functional, to enable the bread to expand and spring up nicely.
- When ready to bake, flip your loaf onto a piece of baking parchment and score it with a sharp knife or lame. You can use any pattern you like, just make sure you score deep enough. About ½ inch/ 12mm deep at a 45 degree angle with one long confident slice gives you the best results.
- If you are not keen on that “ear” you could do a cross and then cut your loaf in quarters along those lines later for easy slicing, which is what I’m doing for this loaf.
Bake Your High-Protein Sourdough Croissant Loaf
- Use your parchment to transfer your bread into the hot Dutch oven, put the lid on and bake at 475°F/245°C for 30 minutes.
- Lower the temperature to 440°F/225°C, take the lid off, let the excess heat vent for a few seconds (temperature down before opening the door, so some heat can escape) and bake for another 15-20 minutes or until deep golden brown with the scored and risen bits a bit darker or until baked through.
- I rarely check the internal temperature of this loaf, as it comes out so consistently well baked, but if you’d like to be sure you can either tap the bottom, which should sound hollow when baked through or use an instant read thermometer to check the temperature at the center. It should be around 208°F/98°C for the crumb to be fully set and excess moisture having evaporated.
- Since this has fairly high moisture due to the inclusions, you’ll want to err on the side of baking a little longer rather than shorter to give it a chance to set perfectly.
- Take out of the oven and transfer to a cooling rack. Allow to cool at least a few hours, as you otherwise, you risk letting too much steam (aka moisture) escape too early, resulting in a gummy or doughy texture.
Notes
Top Tips For Success
- Grate your butter coarsely – and keep it in the fridge until you use it, so it’s cool and doesn’t melt back into a lump. I tend to grate mine fresh from the fridge (or even the freezer) right before I use it, so the pieces have as much separation as possible.
- Keep your dough cool – For the perfect texture the butter needs to stay solid. So no quick proofing in a slightly warm oven for this one. You want it to stay around 70°F/21°C, so the butter doesn’t melt into the dough. I admit that’s not ideal for summer, so if you have to pop it into the fridge in between, go right ahead.
- Butter will seep out during baking – This is normal and working as intended. Use baking parchment in your Dutch oven to make cleaning easier.
How To Serve
- I love this bread just as it is with a cup of hot coffee. But of course it’s even better with some creamy brie, tangy goats cheese or jam.
- Or you could go fully indulgent and slather it with Nutella.
How To Store
- Homemade sourdough bread is incredibly meal prep friendly:
- You can prepare it the day before and just push it into the oven in the morning or 3 hours before you’d like to eat it. Or prepare the dough up to 6 days in advance and leave it in the fridge for long cold fermentation for up to 3 days. The sourdough flavor will get more pronounced the longer it ferments.
- This Bread keeps well in a bread box for about 3 days or up to 5 in the fridge.
- It freezes perfectly for up to 6 months and is absolutely incredible toasted.
- Prep Time: 30 minutes
- Fermentation/Rise: 24 hours
- Cook Time: 1 hour
- Category: Bread, Bread & Sourdough, Breakfast, Dinner
- Method: Baking
- Cuisine: American