Buttery Flaky Protein Sourdough Cheese Biscuits
If you’ve been looking for a way to hit your protein goals without eating another dry chicken breast or a chalky protein bar, these biscuits are for you. We’re taking everything you love about a classic, flaky sourdough biscuit—the tang, the buttery layers, and the cheesy goodness—and giving it a major nutritional upgrade. By swapping buttermilk for cottage cheese and adding a boost of whey, I’ve created a savory, garlicky biscuit that feels like a total indulgence but packs a serious protein punch.

This post may contain referral links for products I love.
For The Pleasure Of Eating earns a small commission on these links at no cost to you.
- Why You’ll Love This
- The Ingredients
- Substitutions
- Equipment Used
- How to Make this
- How To Store
- FAQ
- Other Recipes You Might Enjoy
Why You’ll Love This
TL;DR
- Serious Protein – 11g of protein per biscuit thanks to a cottage cheese and whey swap.
- Actually Flaky – An easy lamination technique creates those lacy, buttery layers we all live for.
- Sourdough Tang – Uses your starter (active or discard) for a deeper flavor and easier digestion.
- No “Protein Dryness”- The combination of sourdough and real Irish butter keeps these incredibly tender and moist.
- Garlic-Cheese Heaven – Packed with melted cheese and filled with a savory herb-garlic butter.
Buttery Flaky Layers
The first thing you’ll notice about these biscuits is (and should be) how incredibly cheesy, buttery and flaky they are. Baked golden brown, risen to perfection and with a lovely garlicky cheesy taste, they are exactly what you want from biscuits. Super tender Layers, separated by the flavored butter, in an easy lamination step that uses soft instead of cold butter, making the dough a joy to work with.
Made with Sourdough
You might have guessed it if you are a regular reader: These cheesy biscuits are made with sourdough, adding that lovely tang, which goes incredibly well with the buttery cheese flavor. Yet it does much more. It helps of course with the rise, entirely without yeast. It also makes not just the flour, but the added protein and minerals easier to digest and leads to a very gut friendly bread.
11g Protein per Soft Biscuit
Now I just mentioned the sourdough makes the protein easier to digest, so you probably wonder how we get it into these biscuits. The original recipe from Claire Saffitz https://www.youtube.com/watch?v=6taJ4OWP-ZE (which is in credible I should add!) was made with buttermilk. Which tastes fabulously tangy but has very little protein. By swapping in cottage cheese as liquid, as it has a similar amount of tang to the buttermilk and adding some unflavored whey protein powder, I doubled the content to the above mentioned 11g. Not bad for a super tasty biscuit, is it?
And what’s best? It has none of the dryness you would usually associate with protein baked goods, as the sourdough and butter balance it amazingly.

Laminate you say? That’s got to be difficult to make?
While this recipe has a few steps, most of the time to make it is resting time. The laminating is really easy, as we just spread some garlic-herb flavored, soft compound butter on the dough, fold it and roll it out about 3 times. The dough is super soft and non-sticky, so working it is rather satisfying. It needs less work than, say my Sourdough Brioche Feuilletee, but feels really special when you pull the layers apart after baking.
Absolutely worthy of a nice Sunday dinner!
Ingredient Notes

Wet Dough Ingredients
- Butter – Ideally fridge cold. The flavor of butter really shines through in these fluffy and rich biscuits. So use the best you can afford. I’m living in Ireland, so of course I’m using Irish butter, which has the highest fat content among all types of butter, making it incredible for baking.
- Cottage Cheese – Mine is a really creamy looking one, which still has only 4% fat. I found there are big differences in texture, even with the same amount of fat, but since it gets blended and used as liquid essentially, it matters less than you’d think. I would not use 0% fat cottage cheese in this recipe (though you probably could) as the tiny bit of added fat content and milk protein makes a difference in the final tender texture.
- Sourdough Starter – You can use either active starter or a few days old discard for this recipe. I tried both version and it works just fine. The bread flour acts as food for the starter, and it’ll only need a bit more time to rise. So essentially decide if you want to spend the time before mixing the dough by feeding the starter or after, by waiting for the rise.
- If you don’t have a sourdough starter yet, this recipe works for both rye and white flour.
Dry Dough Ingredients
- Whey Protein – Mine is the unflavored version of the whey concentrate from MyProtein.
- This is neither affiliated nor sponsored. Just the powder I found to taste best after trying a fair few. If you never found one you actually enjoy, give this one a try.
- Flour – All-purpose is what you want for tender biscuits, as it has less gluten than, say, bread flour.
- Cheese – Any aged cheese will work. The original recipe from Claire Saffitz used aged cheddar, which has a fair bit of acidity. But since my recipe has sourdough and cottage cheese, which already add more acidity, I preferred a nutty-sweet Comté. Get a block of whatever cheese you enjoy!
- I would not use pre-grated cheese, as it tends to be coated with cornstarch, to keep it separated in the bag, which is working against it melting into the dough.
- Kosher Salt – I use Diamond Crystal in all my cooking and baking. It has a very fine structure, so it has less saltiness in volume than, say sea salt (but the same by weight). If you use sea salt, use half the amount in volume than given in the recipe.
Compound Butter For Laminating

- Butter – More of the above good Irish butter, to get that amazing flavor
- Garlic – As in any good compound butter, I’m adding a bit of fresh garlic here (you could absolutely use my Black Garlic Lemon Butter for this recipe! https://forthepleasureofeating.com/black-garlic-butter-with-lemon/)
- Herbs – While I added fresh rosemary in my biscuits, you can use whatever herb you enjoy. Dill would be particularly great if you chose aged cheddar as your cheese, giving the biscuits a sort of ranch flavor. Thyme works too, so does parsley or some chives. If you want to use dried herbs, stay with the soft ones like dill and parsley, as dried thyme and rosemary are best when added to some liquid, so they can soften and release their full flavor.
- Seasonings – Salt is of course part of the butter mix, but apart from that you can get wildly creative. I like some onion and garlic powder, keeping it simple. Check the variations below, to get some other ideas.
substitutions
If you are celiac, please ensure you use a certified gluten-free flour blend for all flour components, including the sourdough discard replacement, if needed.
Wet Ingredients
- Cottage Cheese – You can replace it with 4% fat Greek yogurt or the vegan version of it. Though for the vegan ones, be mindful of the ingredients. I found some have a lot of sugar in them, which really changes the flavor. Your protein content will be a little lower if using Greek yoghurt or any kind.
- Butter – Vegan butter will work great here. Use one you enjoy eating, as the flavor shines through.
- Sourdough Starter/Discard – If you don’t have sourdough, you can still make these rolls with a little modification. Add ¼ cup flour and ¼ cup water plus about 2 tsp active dry yeast. The flavor will be different, but still delicious.
Dry Ingredients
- Flour – For the celiacs among you, I heard the King Arthur brand of GF flour works pretty much 1:1 for AP flour. But I can’t get it here to try that out. So if you do, I’d love to hear from you in the comments!
- Protein Powder – Casein powder works well, but needs about 1-2 tbsp added water. So does upcycled (unflavored) Barley protein, which needs 1-2 tbsp less water, so reduce the cottage cheese.
- I have not tried to bake with any pea based vegan protein powders, as I deeply dislike the flavor and texture of them to begin with, so I’d rather not have them in my baked goods. If you give it a try, please tell me what you think!
- Cheese – A hard vegan cheese will work fine in this recipe. Just get a block that you can grate yourself.
Variations
- You can absolutely make these without cheese if you prefer and with unflavored butter, to get a plain biscuit to mop up whatever sauce you are making for dinner.
- Get creative with the compound butter. Chopped, sundried tomatoes and basil would be a lovely combo for summer. Use a firm mozzarella to grate into the dough.
- Add a tablespoon of pesto to the butter instead of the seasoning, to make a super easy Italian flavored biscuit.
- Fold some fried bacon bits into the butter mix, to get cheesy-bacon biscuits
- Or go the sweet route, leaving out the cheese, adding 2-3 tbsp cinnamon sugar to the butter, to make a cinnamon roll inspired biscuits. Sprinkle with more cinnamon sugar after brushing with butter before baking, to get a sparkly, crunchy top.
Equipment Used
- Food Processor – While you can absolutely go the old fashioned route of rubbing the butter into the flour by hand, I find my hands are always too warm and my joints hurt after 2 minutes. So I use my food processor to get the job done in seconds. It does double duty mixing the compound butter too.
- Blender – While I use my Nutribullet to get the cottage cheese really smooth, you could certainly use the food processor (the small bowl in that case) for this step. I find mine a bit too large though, leaving too many curds intact for my liking.
- Large bowl – For the remaining dough mixing steps
- Box grater – To grate the cheese
- Rolling Pin – For the laminating step.
- Sheet Pan – To bake your buttery cheese biscuits
 Buy Now →
  Buy Now →
 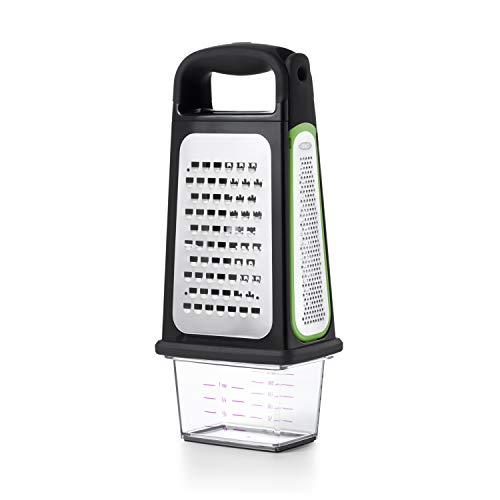 Buy Now →
  Buy Now →
 How to Make this
Gather your ingredients and equipment.
Blend The Cottage Cheese And Mix With Sourdough Starter
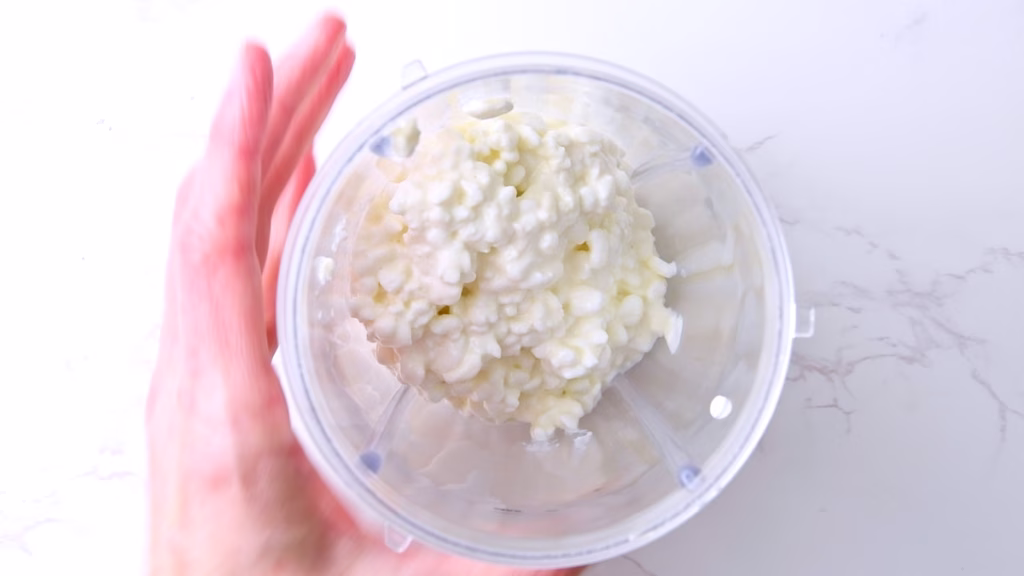
- The main step that gives you smooth looking biscuits is to get your cottage cheese blended really smooth, so you don’t have blobs of curd. It acts as liquid for the dough, which works best if it’s creamy.
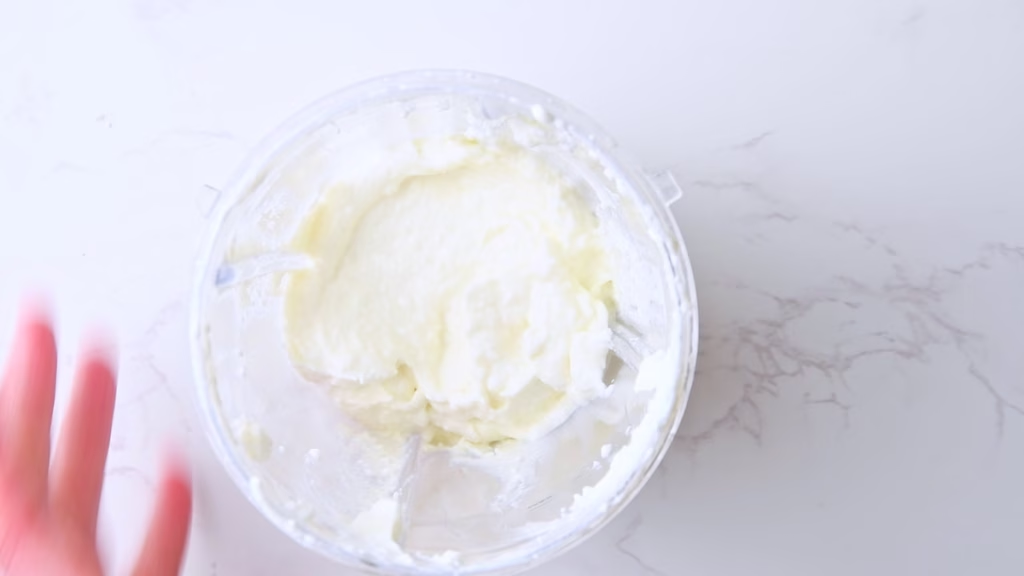
- Using a Nutribullet, you might have to scrape down the sides a few times and bang the cup on the counter, to get the cottage cheese into the blades.
- Once you have a smooth mass, stir in your sourdough starter, just using a spoon or spatula. You don’t want to blend it to not break the delicate gluten structure.
Process the Flour and Butter
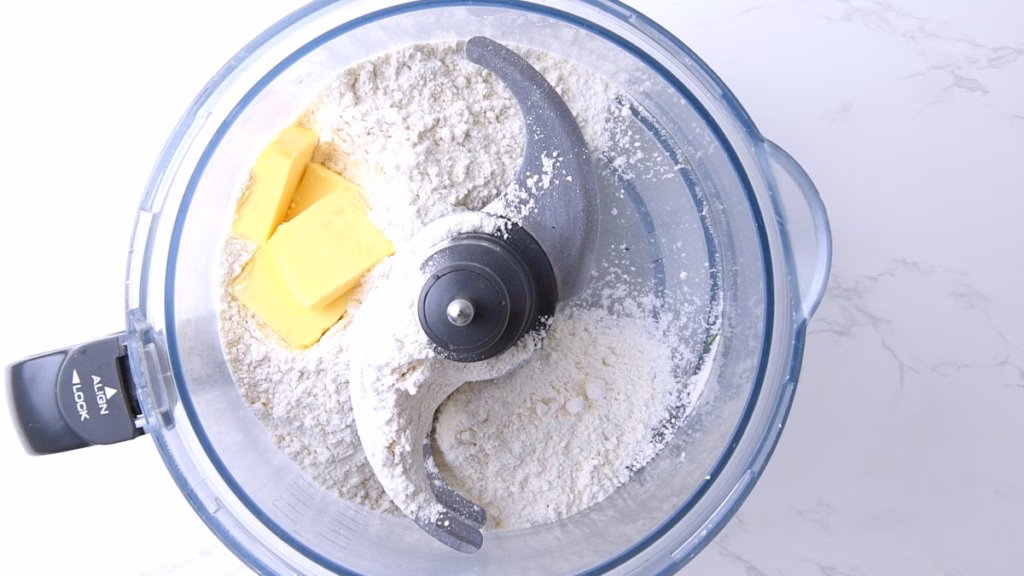

- Add the flour and cold butter for the dough to your food processor and just pulse a few times until you have about lentil sized bits of butter in the flour.
- Alternatively rub the flour into your butter by hand, aiming for the same result.
Grate The Cheese Into the Flour Mix
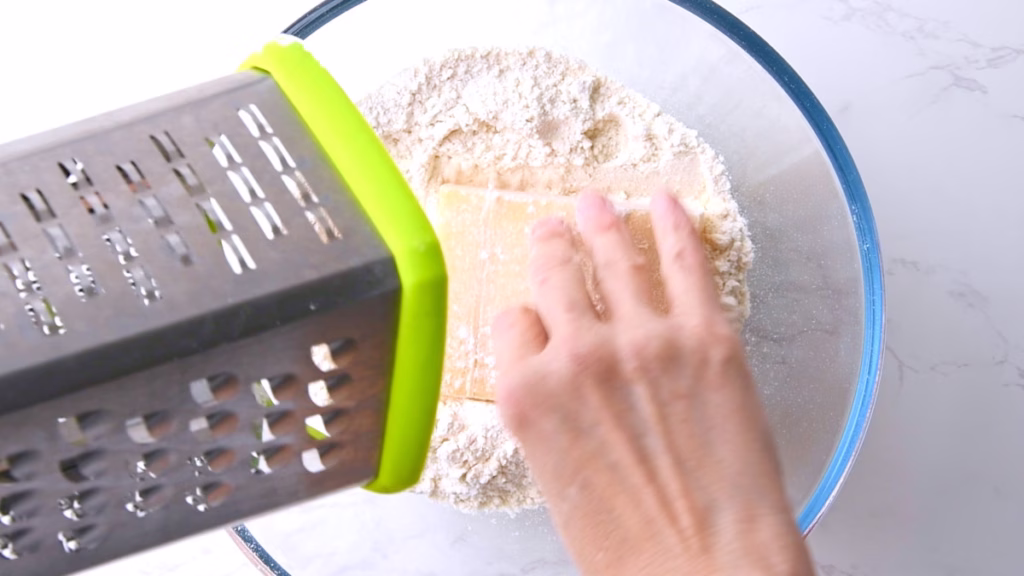
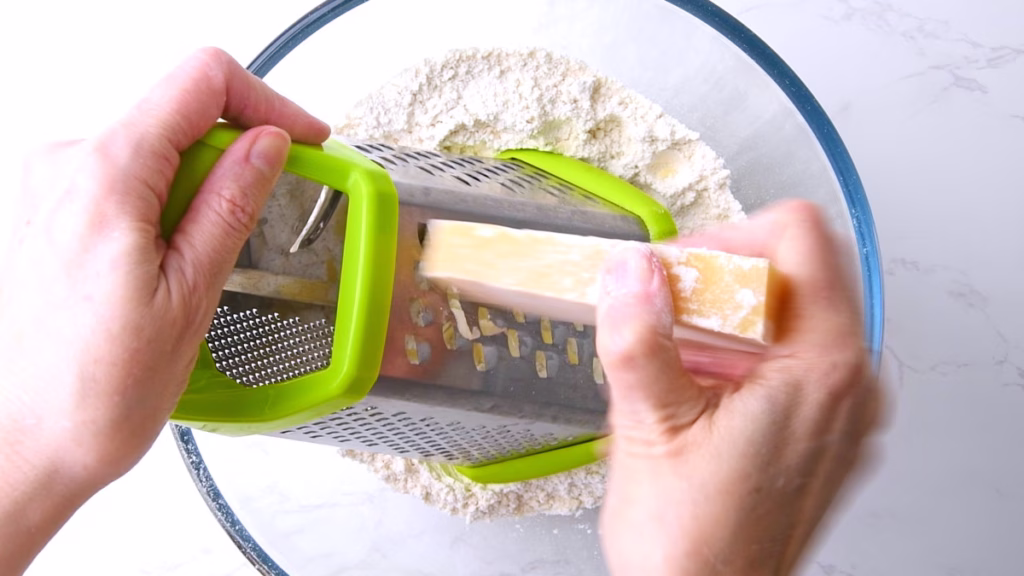
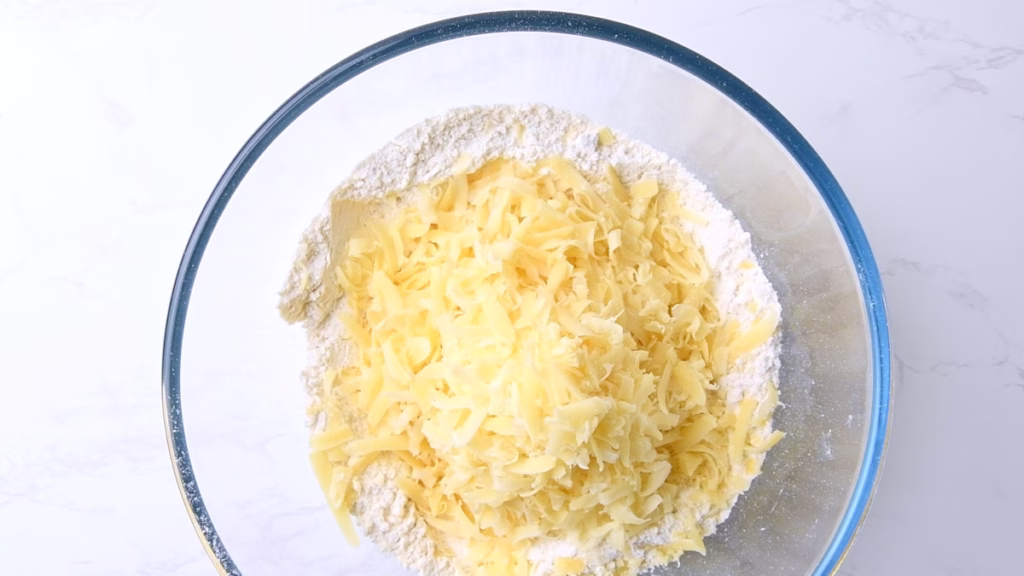
- Using the coarse side of your box grater, grate your chosen cheese into your flour. I saw Claire dipping her chunk of cheese into the flour, which is usually done by pastry chefs to keep grated butter bits separated, but I found it super helpful for getting a better grip on the block!
- Briefly mix the grated cheese into the flour, so it’s all coated. This prevents big chunks from forming and gives you an even distribution of cheesy flavor.
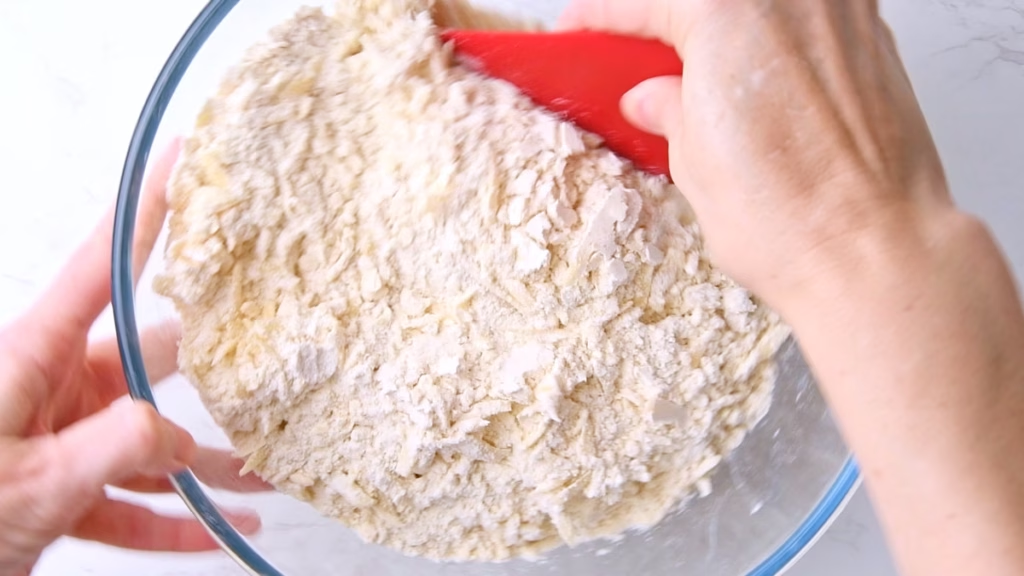
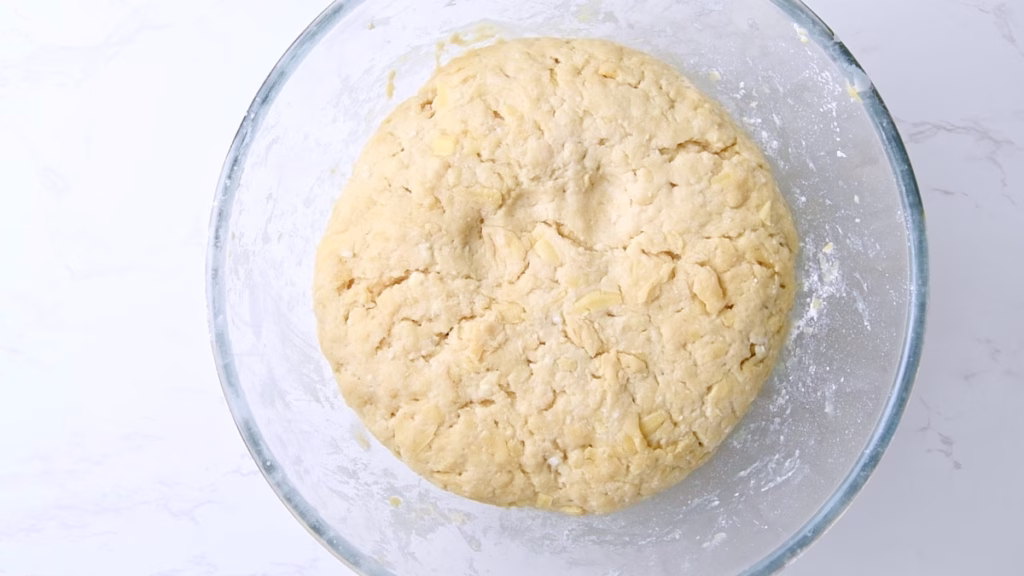
Add Your Wet Mixture To The Dry Ingredients
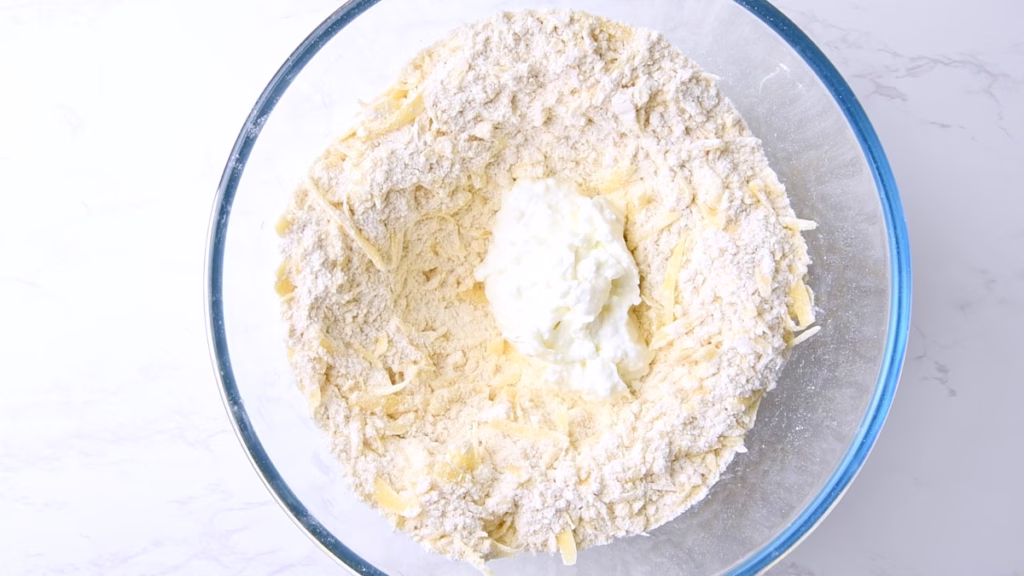
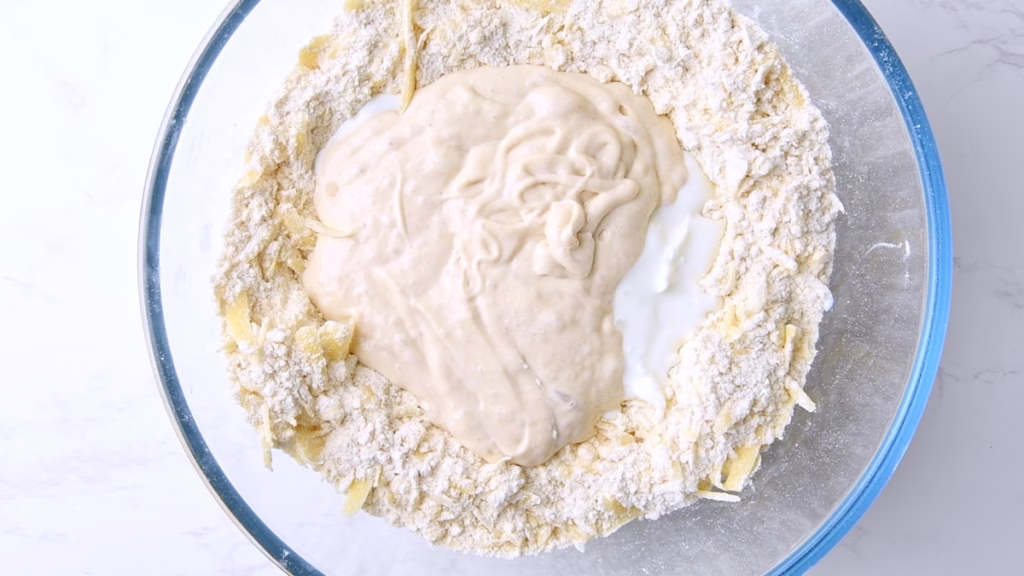
- Now add the cottage cheese with sourdough, protein powder, salt and sugar (these biscuits aren’t sweet, but it balances the flavor) to your flour-cheese mix and just stir until you have a shaggy dough. Don’t overwork this. You just want it to come together.
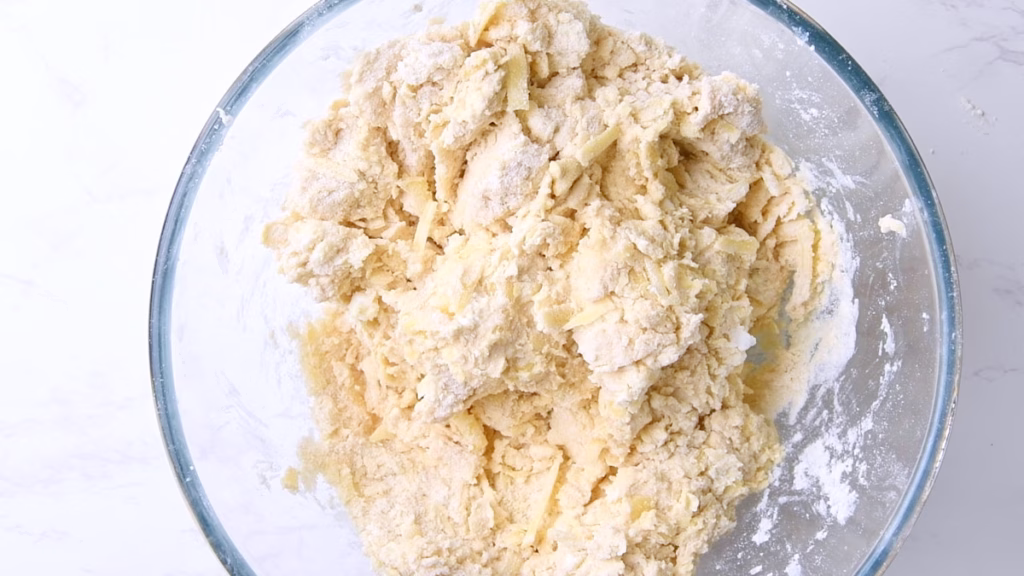
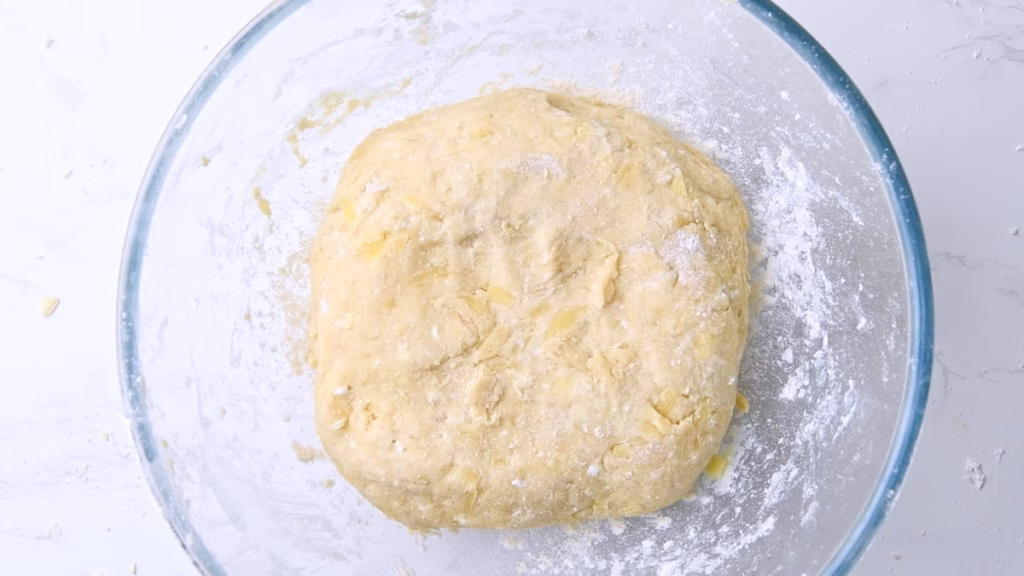
- Cover the bowl and allow to bulk ferment at cool room temperature for 4-6 hours or until risen by about 50 -100%. When it’s ready, it should spring back slowly when you poke it with your finger.
Mix The Flavored Butter
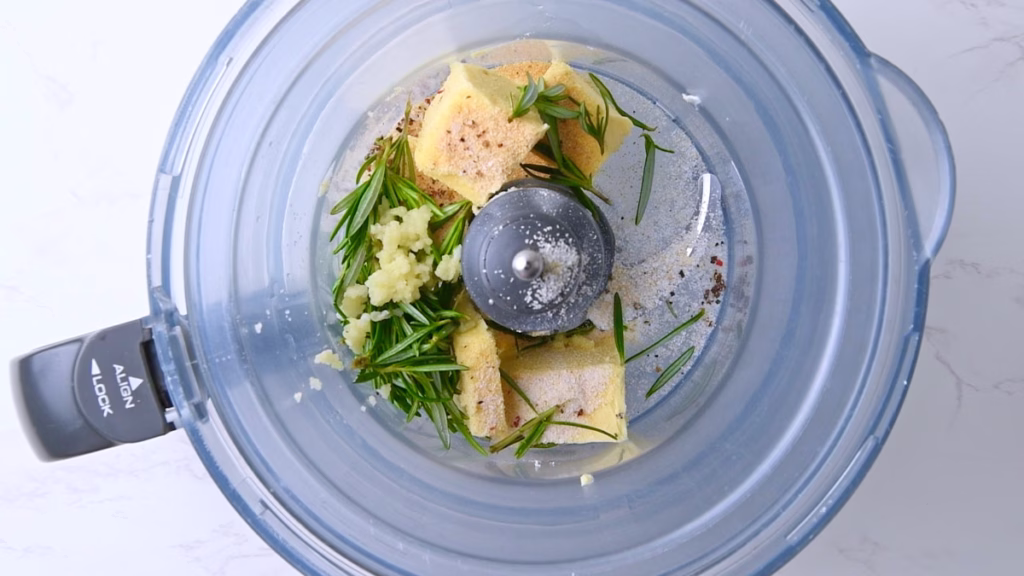

- If you decided you want to brush the tops of your biscuits with garlic butter after baking, add 2 tbsp butter to the basic amount.
- If you are using a food processor, simply add all the laminating butter ingredients (roughly chopped garlic and rosemary needles removed from the stems) to it and pulse until you have a uniformly mixed butter.
- If mixing by hand, finely chop the fresh rosemary. Grate or press your garlic clove into the butter for laminating. Add chopped rosemary and seasonings and mash with a fork until combined and soft.
- You’ll want this spreadable and at room temperature, but not half melting.
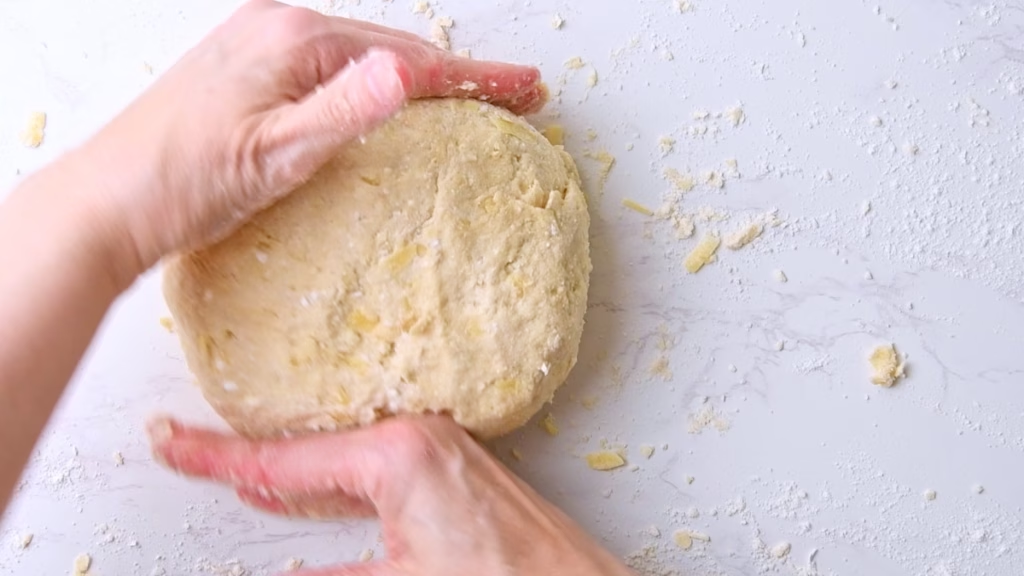
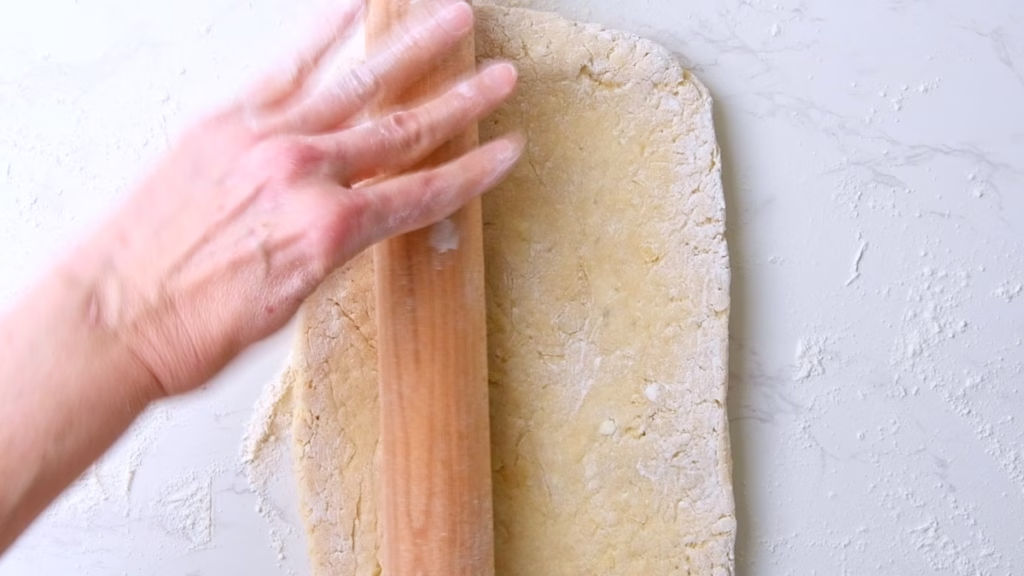
Roll Out The Dough
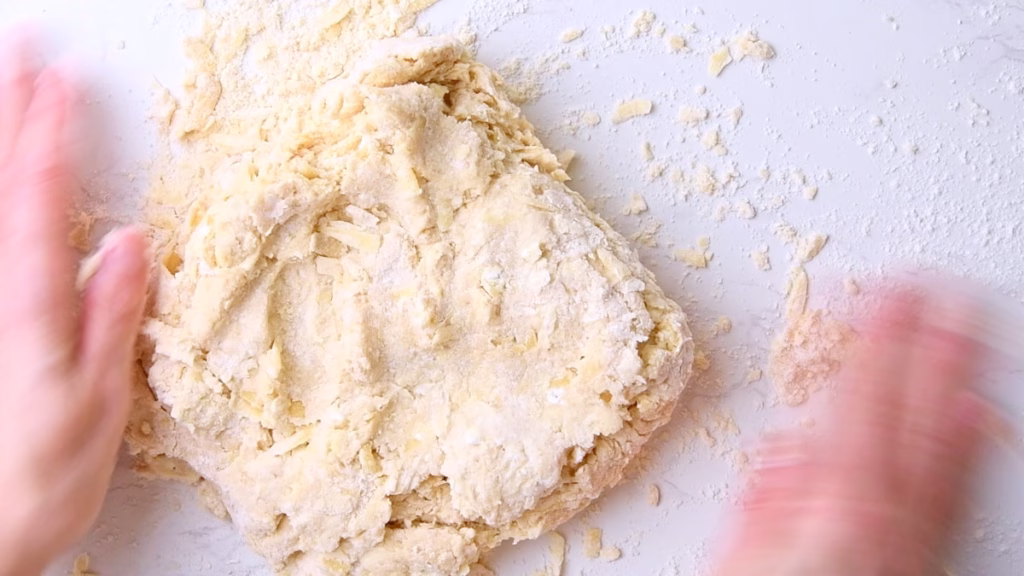
- Flour your work surface and rolling pin.
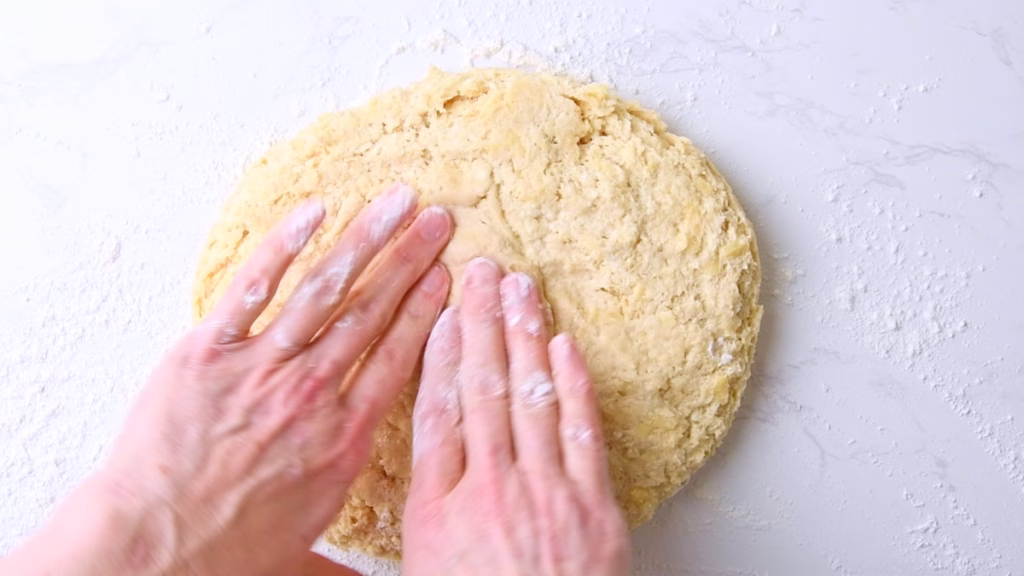
- Turn the dough out onto the floured surface and dust with a little more flour. It shouldn’t be very sticky at this point and fairly soft.
- Use your floured hands to pat it out into a rectangular shape, tugging on the corners gently. Flip it over, using a little more flour underneath, to stop it from sticking to the worktop.
- Now start gently rolling it out into said roughly rectangular shape until it’s about 3/8 inch (1cm) thick.
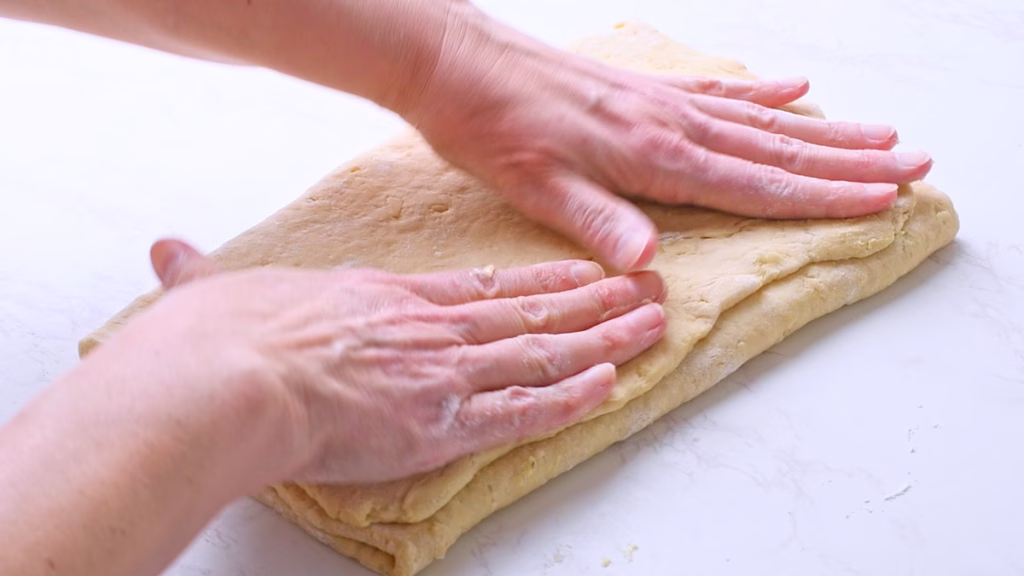
Laminating The Biscuit Dough
- If you want to brush the tops of the biscuits with garlic butter later, keep 2 tbsp of it in a small bowl.
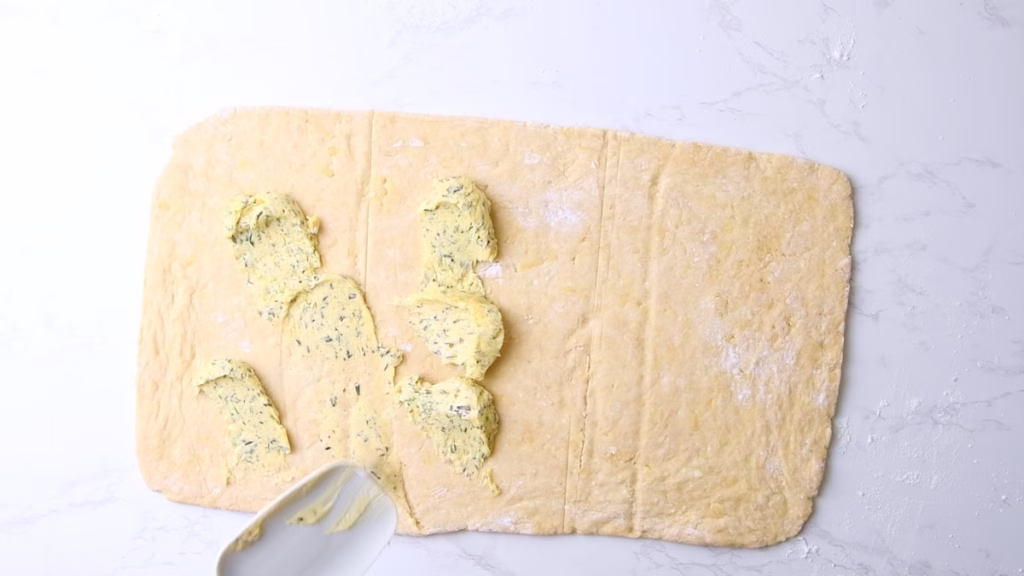
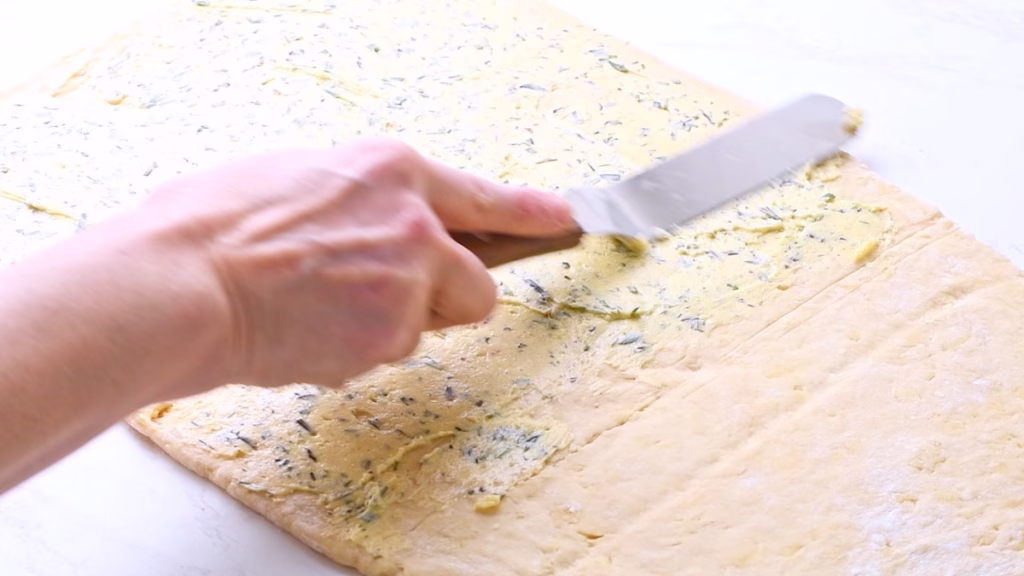
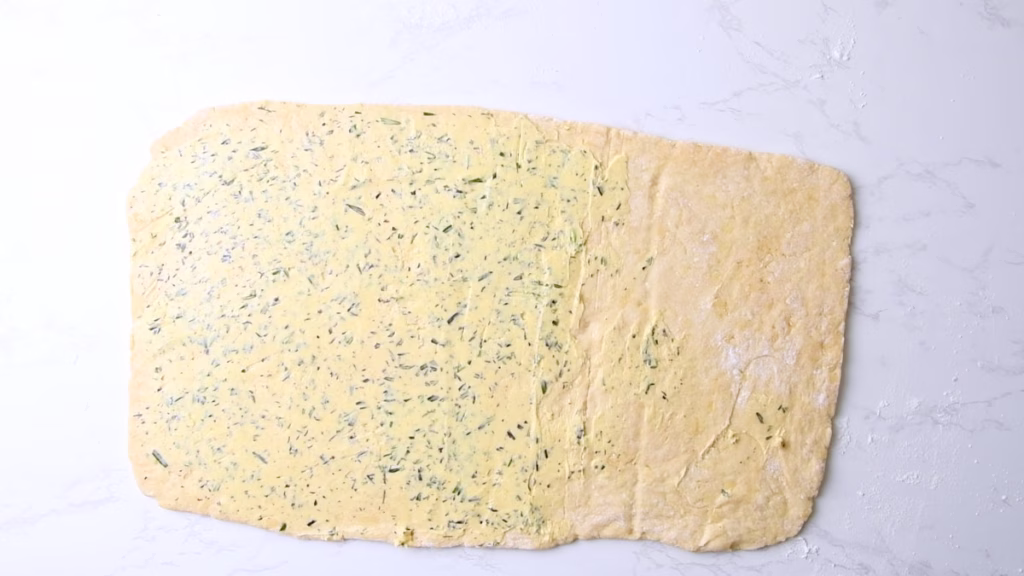
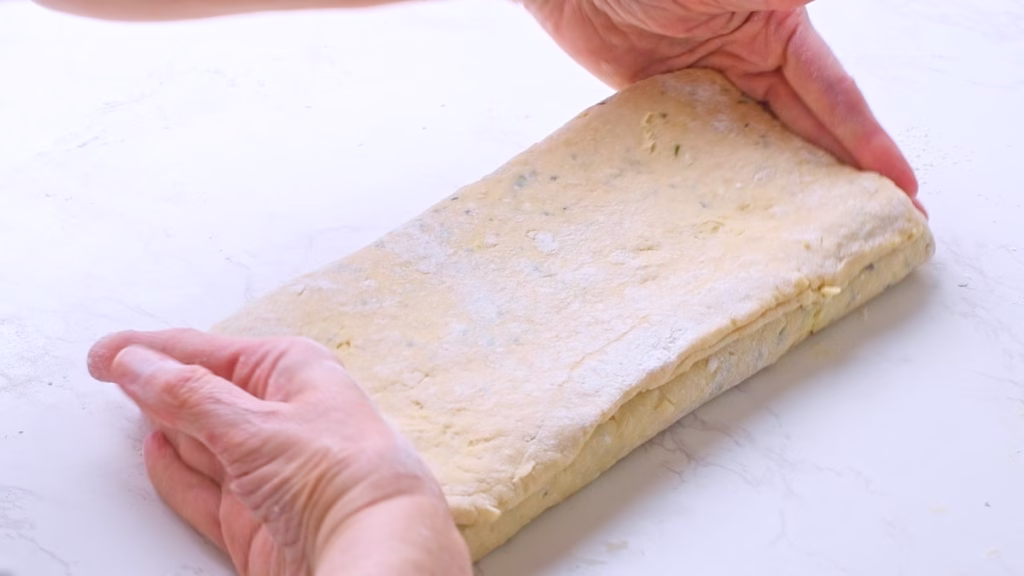
- Get an offset spatula ideally or a silicone spatula and spread the butter over the lower 2/3 of your dough rectangle. Keep the top 1/3 uncovered. Use the offset spatula to get it as even as you can, spreading it all the way into the corners.
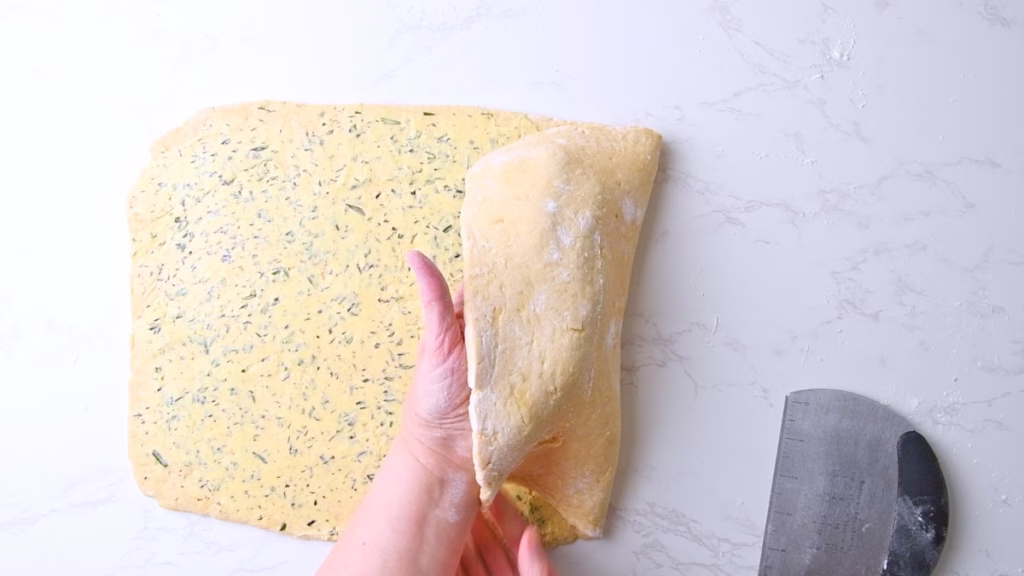

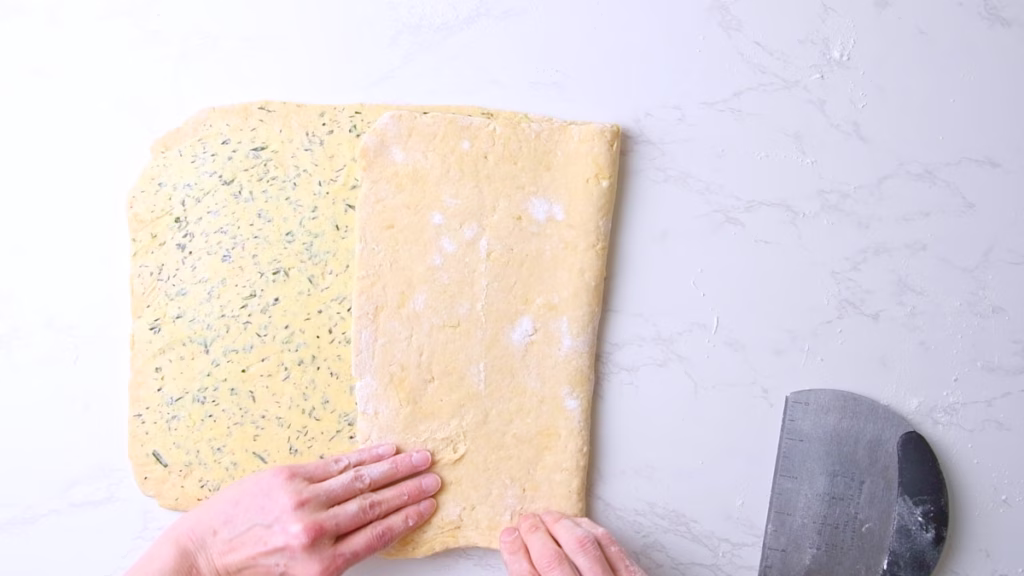
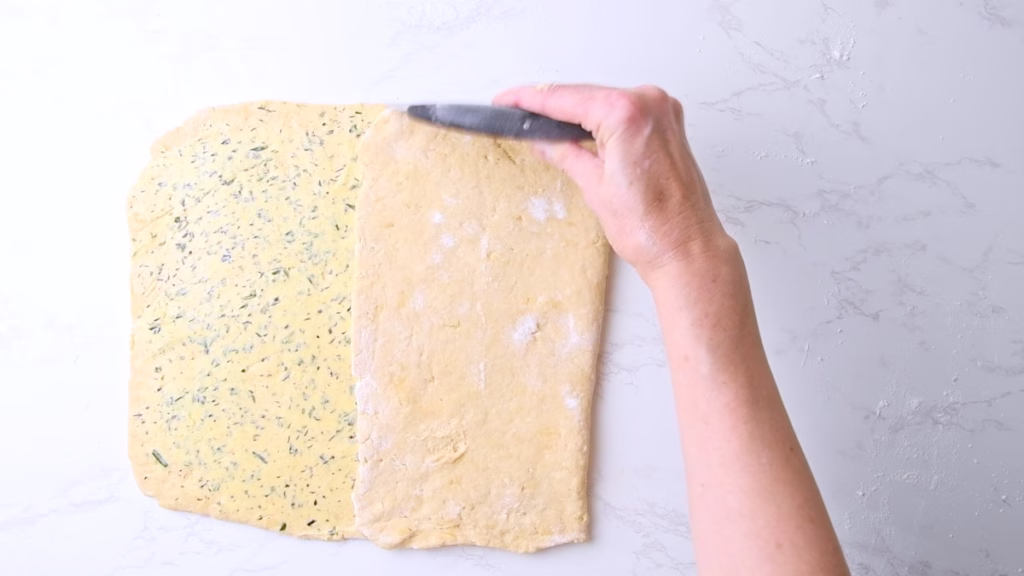
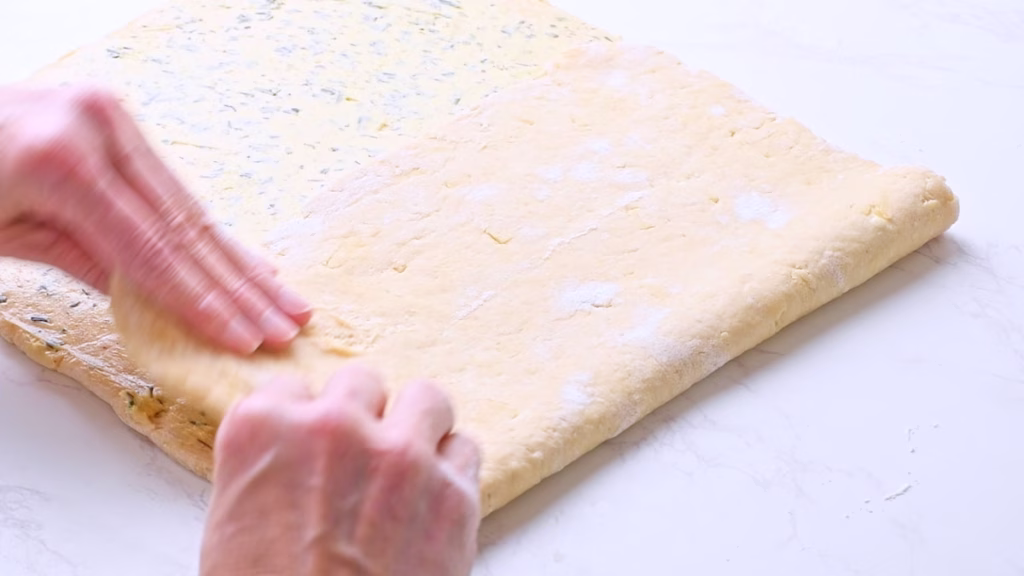
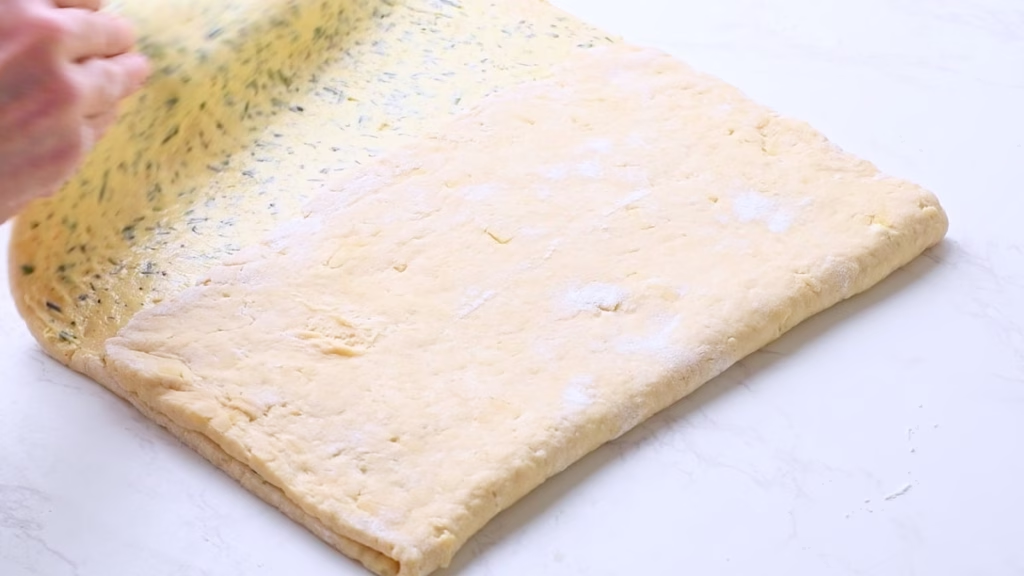
- Now fold the top third over the middle third, covering the butter, then the bottom third over the folded part, creating a sort of envelope shape with butter between each layer. Try to gently tug the corners, so they fit neatly on top of each other. It doesn’t have to be perfect. This will create the buttery flavored layers in the biscuits.
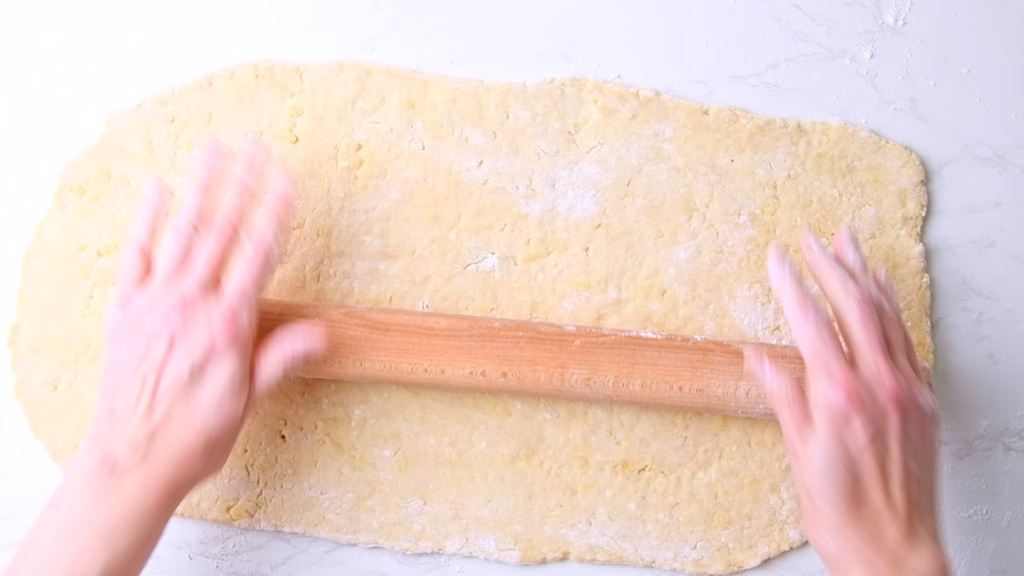
- Rotate your dough envelope by 90 degrees, using more flour as needed to prevent sticking and roll it out again, to about the same size as before and fold it in the same way once more.
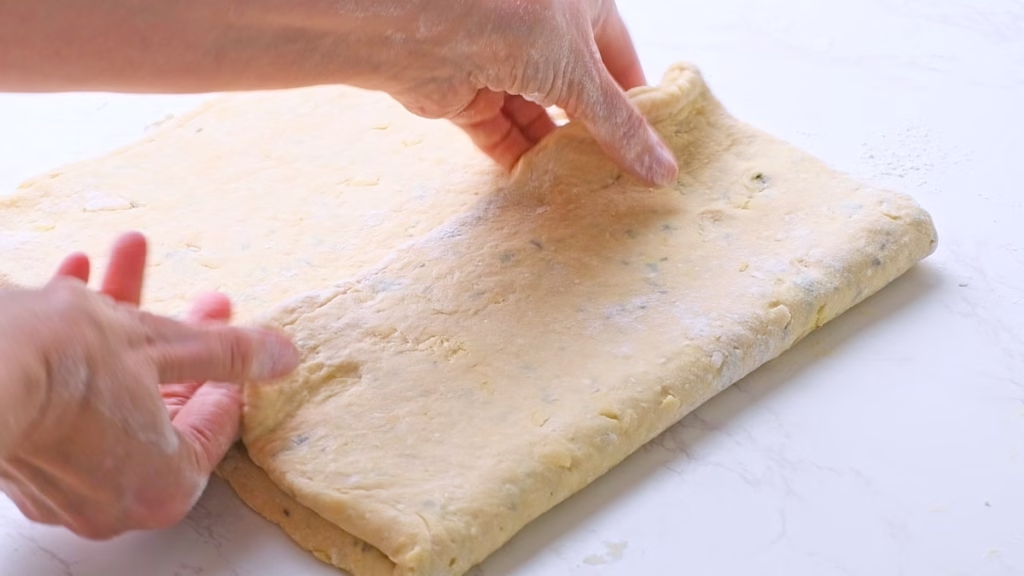
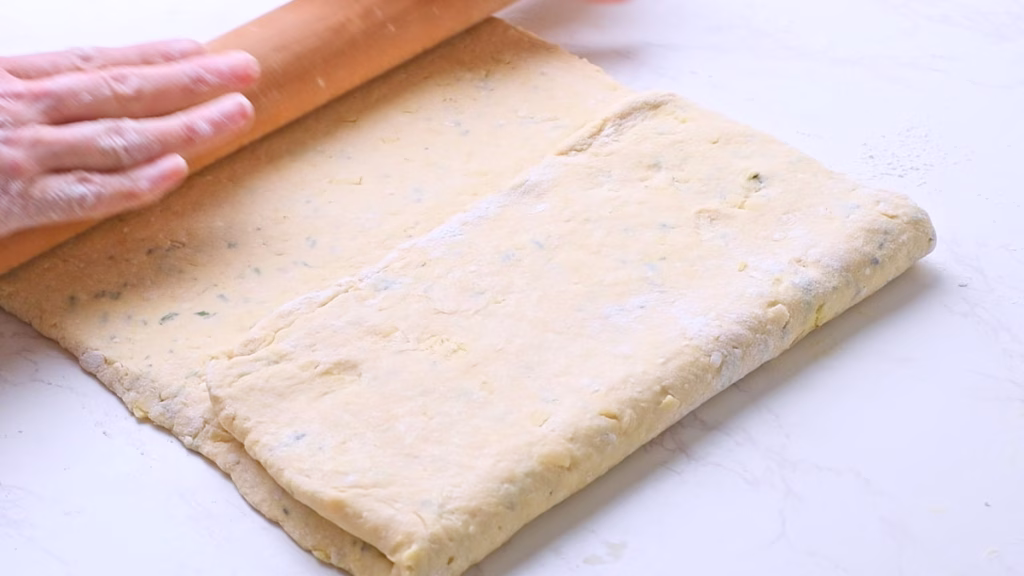
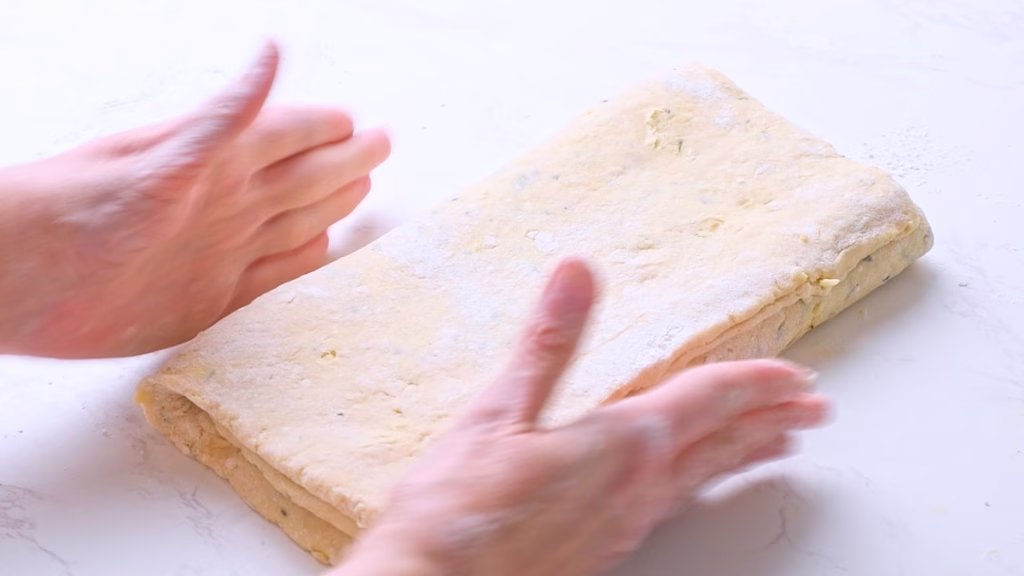
- Try to keep the rectangular shape as much as possible. I often push the sides with the rolling pin a bit, to straighten them.
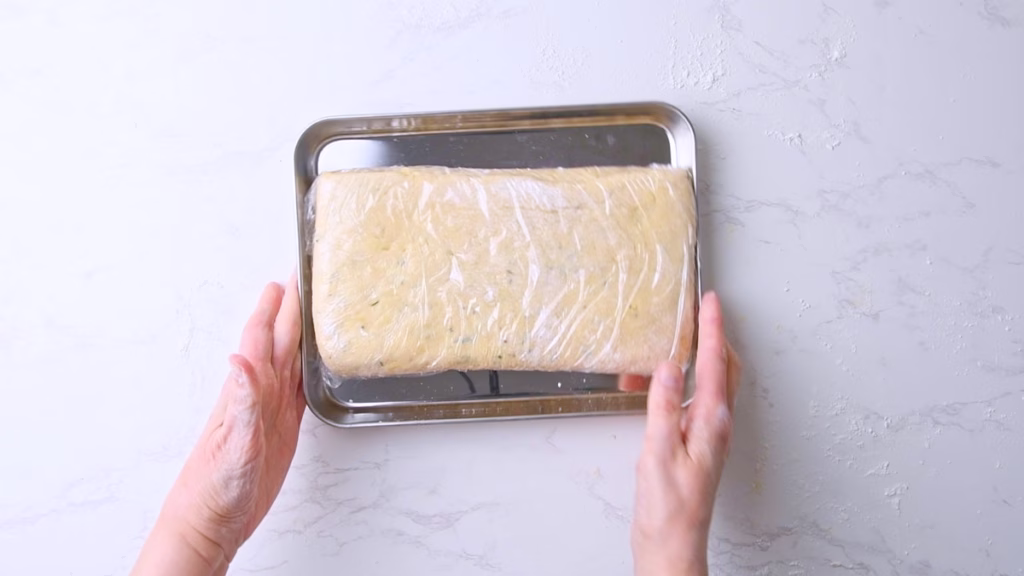
- Wrap in clingfilm or a large freezer bag and put into the fridge for about 30 minutes.
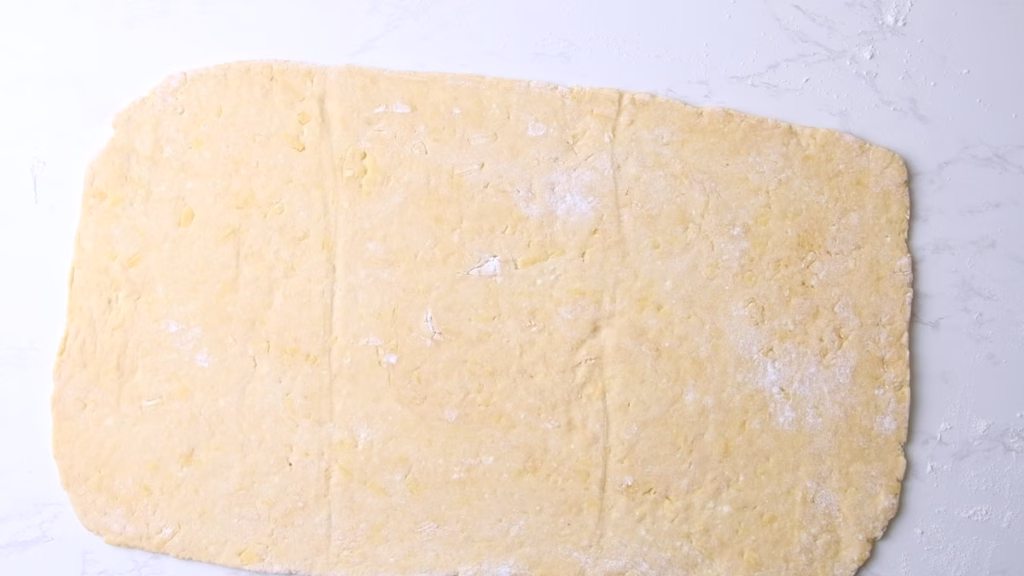
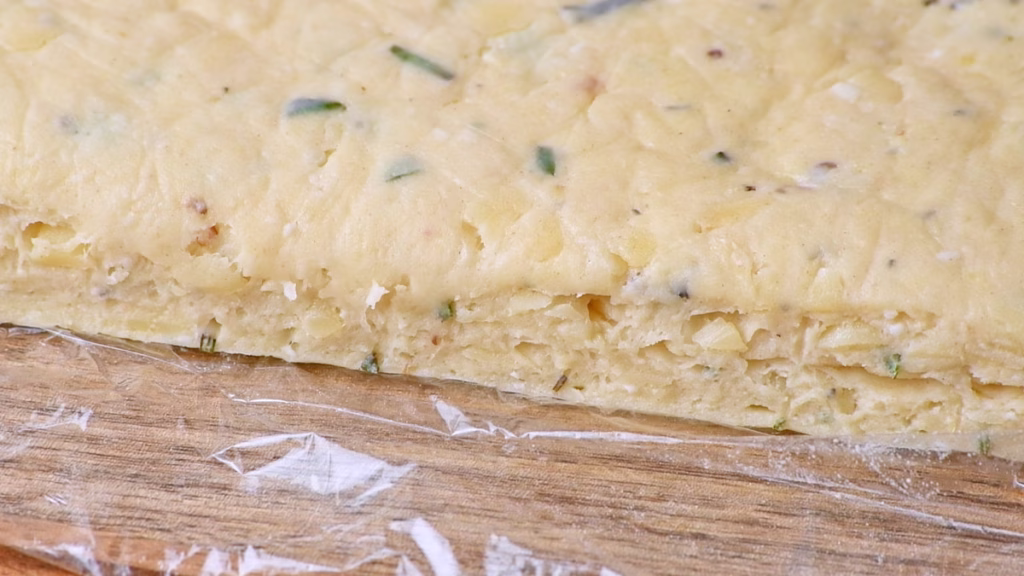
- Repeat the rolling process as above, paying attention to the shape in the last step in particular, as this will be your last rollout, getting the dough to the size you want to make 12 biscuits each about 2 inches square or slightly rectangular.

- The final measurement of your dough rectangle should be around 8×6 inch.
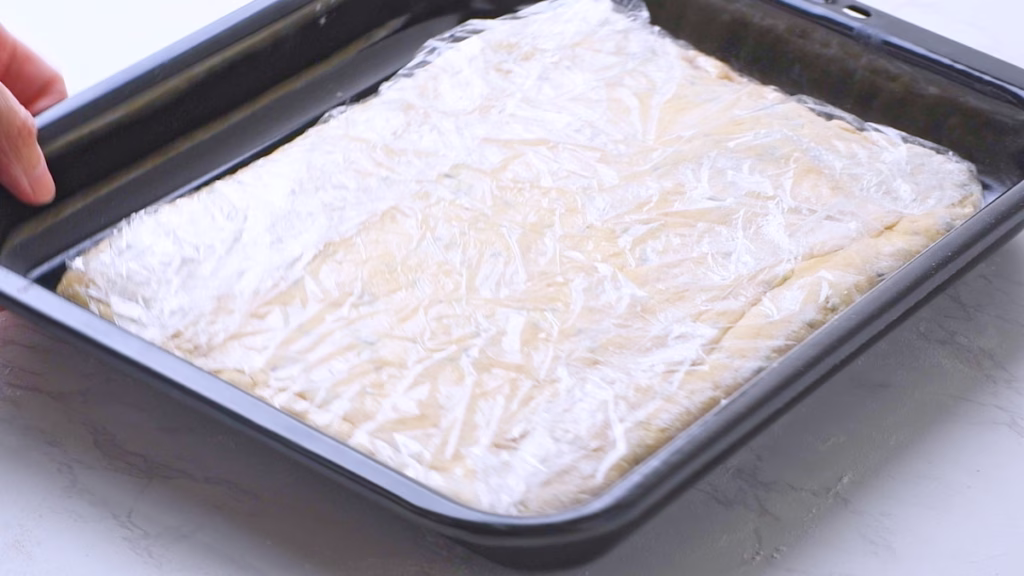
Cold Fermentation
- Wrap your dough loosely, so it can expand and slide it onto a sheet pan or large flat board that fits into your fridge, so the dough keeps it’s shape. Allow to cold ferment about 8h or overnight.
- At this point you could leave them in the fridge for up to 3 days and they will only deepen in flavor and get more delicious.
Cut Your Flaky Protein Sourdough Biscuits
- Line a sheet pan with baking parchment. For this recipe, as it’s very buttery, parchment works best as it absorbs any leaking butter, stopping the bottoms from being greasy.
- Once the dough had it’s fridge time, you can cut your biscuits. While you can of course cut round ones if you like, I feel rectangles lead to better results, as you don’t have to re-roll scraps of dough and get the optimal flakiness in every single piece.
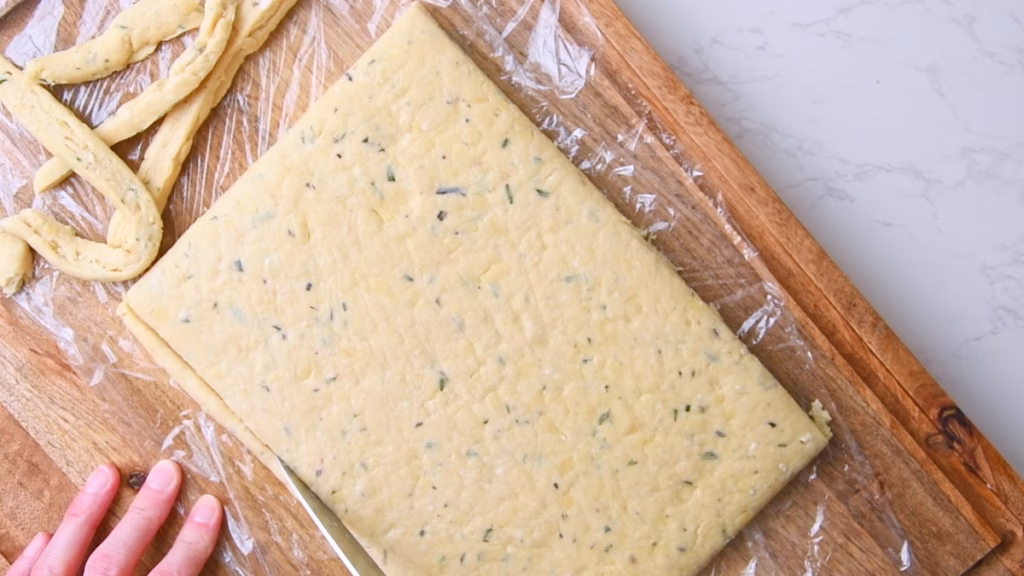
- Get a large sharp knife and cut a small slice off each side, to get the perfect flaky layers exposed. This is optional but gives you the best defined look and allows the biscuits to rise fullly, by removing the “seal”. You can bake the leftovers with the biscuits as bakers snack or even push them together as a sort of scraggly 13th bonus biscuit.

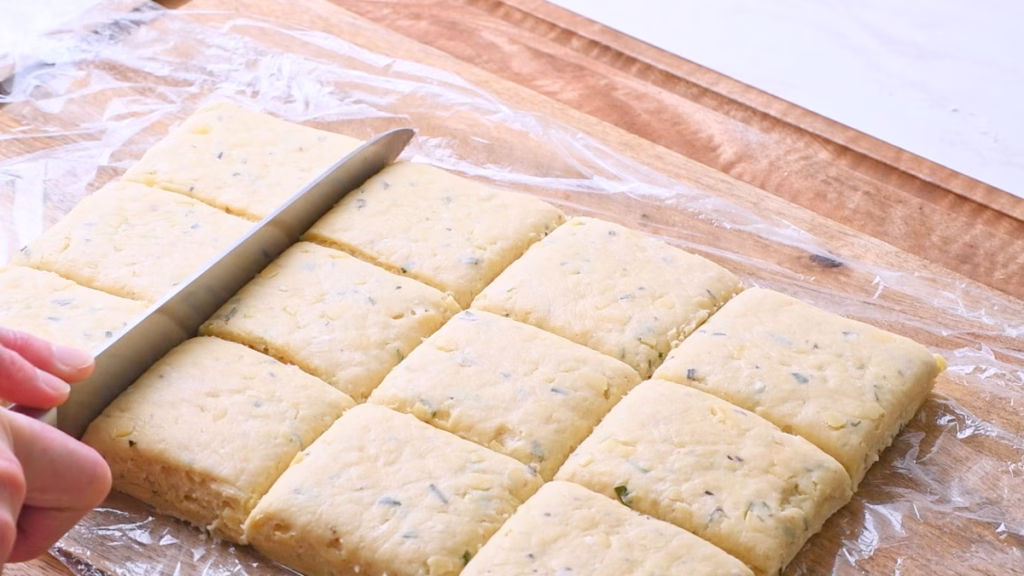
- I’m not very good at estimating, so I either use a ruler or just live with uneven sized biscuits, depending on mood and energy. Mark the dough so you get 3×4 biscuits out of it and cut them, placing them a bit apart on your sheet pan. They will expand, but more up than out.
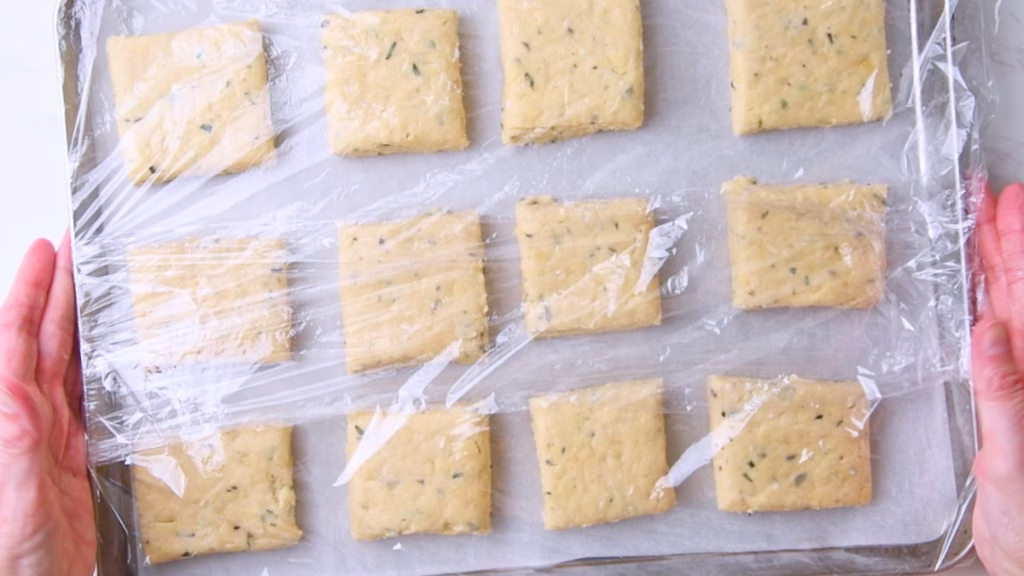
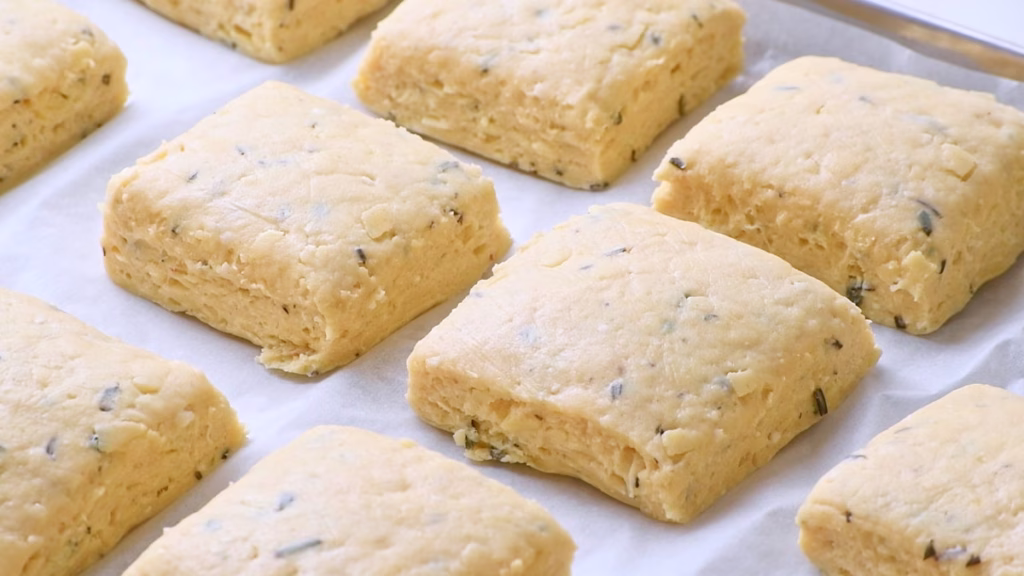
- Cover with clingfilm, giving them a bit of room to expand upwards and allow to rest for 2-3 hours at cool room temperature (you don’t want the butter to melt! So if your kitchen is very warm, find a cooler spot) until they have risen and are slightly domed on top.
Bake The Cheesy Garlic Biscuits
- Melt the butter for brushing the tops and brush each biscuit. This will give you an incredibly flaky, crisp top.
- Bake on the center rack for 15-20 minutes, or until they are golden brown, puffy, and show distinct layers.

Optional Garlic Butter Brushing
- Soften the remaining garlic butter slightly in the microwave, then brush it over the top of your freshly baked flaky biscuits.
- Allow them to cool just a bit. They are absolutely fabulous while still warm. Pull one apart, admiring those perfect lacy layers you created. Enjoy with dinner or just as a snack with a nice glass of wine.

How To Store
These buttery flaky protein biscuits can be prepared ahead of time and stored at different stages:
- The dough can be kept for up to 3 days in the fridge. The ready cut biscuits for up to 2 days (as they already had a full day of proofing).
- You can freeze the cut biscuits raw for up to 3 months and just bake them when you need them from frozen, for about 1-2 minutes longer.
- After baking they keep in an airtight container on the counter for about 3 days, up to 5 in the fridge.
- You can freeze them for up to 3 months in a freezer proof container or freezer bags.
- Personally I love them even more when re-heated, especially after brushing with the garlic butter, as the tops get even flakier with little blisters. The air fryer or oven work well for this at 350°F/175°C for 5 minutes in the air fryer, a bit longer in the oven.
Now I’d love to hear from you in the comments!
Have you tried this? Did you enjoy it?
What other recipes would you like to see?
And if you enjoyed this recipe, please consider rating, sharing, or leaving a comment – your feedback truly helps my blog grow!
Usually, this comes down to two things: the starter or the temperature. If your sourdough starter was a bit sluggish, the rise will be smaller. Also, if the butter got too warm during the lamination process, it melts into the dough instead of creating steam vents to lift those layers. Make sure that dough stays chilly!
I wouldn’t recommend it for this one. Whey protein acts a bit like flour and helps provide structure. Collagen tends to dissolve and can make the dough quite sticky and gummy, which is the enemy of a flaky, laminated biscuit. Stick with whey concentrate for the best texture.
Absolutely. You’ll just be doing a bit more manual labor. Use a pastry cutter or two forks to “cut” the butter into the flour until you see those lentil-sized pieces. Or rub the flour into it with your hands.
Just try to work quickly so the heat from your hands doesn’t melt the butter.
It feels like a waste, but it’s the secret to the “pop.” When you roll and fold dough, the edges get compressed and “sealed.” By slicing off a tiny bit from each side, you expose the raw layers, allowing them to expand freely upward in the oven. (And definitely bake those scraps as a “chef’s snack”!)
For sure! Just keep in mind that a very soft cheese (like fresh mozzarella) has more moisture and might make the dough a bit wetter. Harder, aged cheeses (like the Comté I used or a sharp Cheddar) work best because they have a lower moisture content and a bigger flavor punch.
It doesn’t have to be, but Irish butter (like Kerrygold) has a higher fat content and less water than standard US supermarket butter. Less water means more flavor and a more tender crumb. If you use standard US butter, your biscuits will still be good, but they might not be quite as rich.
Flavor-wise, yes! They have that amazing garlic-herb-cheese hit. Texture-wise, they are even better. While the restaurant ones are “drop biscuits” (more like a savory muffin), these are laminated, so you get those gorgeous, pull-apart layers.
Other recipes you might enjoy

These biscuits would go incredibly well with this Massaman Lamb Curry, instead of Naan.

Drag the garlicky, flaky biscuits through the whipped tofu in this healthy dish, and you are in heaven!

If you liked those fluffy biscuits, I bet you’ll love this Sourdough baguette with 27g protein too!

If you liked the flaky softness of these biscuits, you’ll love these soft Challah Breadsticks with crunchy topping!

Buttery Flaky Protein Sourdough Cheese Biscuits
- Total Time: 17 hours 10 minutes
- Yield: 12 biscuits 1x
Description
If you’ve been looking for a way to hit your protein goals without eating another dry chicken breast or a chalky protein bar, these biscuits are for you. We’re taking everything you love about a classic, flaky sourdough biscuit—the tang, the buttery layers, and the cheesy goodness—and giving it a major nutritional upgrade. By swapping buttermilk for cottage cheese and adding a boost of whey, I’ve created a savory, garlicky biscuit that feels like a total indulgence but packs a serious protein punch.
Ingredients
Biscuit Dough
- 1 cup (225g) cottage cheese, at room temperature, blended smooth
- 1 cup (225g) sourdough starter, active
- 2 tablespoons (25g) sugar
- 1/2 cup (60g) whey protein, unflavored
- 2 cups (240g) all-purpose flour, plus more for kneading and rolling
- 1/4 cup (60g) unsalted butter, cut into pieces, chilled
- 7 oz (200g) grated firm cheese, I used Comté
- 1 teaspoons (3g) kosher salt
Compound Butter For Laminating
(Make 2 tablespoons more of this garlic butter for brushing the tops after baking if you like)
- 1 stick butter at cool room temperature
- 1 clove fresh garlic
- 1 teaspoon Garlic powder
- 2 Tablespoons Fresh rosemary
- 1 Teaspoon onion powder
- 1 teaspoon salt or more to taste
- 1/2 teaspoon ground pepper or more to taste
Topping Before Baking
- 2 tablespoons (30g) melted butter, for brushing the tops before baking
Instructions
Gather your ingredients and equipment.
Blend The Cottage Cheese And Mix With Sourdough Starter
- The main step that gives you smooth looking biscuits is to get your cottage cheese blended really smooth, so you don’t have blobs of curd. It acts as liquid for the dough, which works best if it’s creamy.
- Using a Nutribullet, you might have to scrape down the sides a few times and bang the cup on the counter, to get the cottage cheese into the blades.
- Once you have a smooth mass, stir in your sourdough starter, just using a spoon or spatula. You don’t want to blend it to not break the delicate gluten structure.
Process the Flour and Butter
- Add the flour and cold butter for the dough to your food processor and just pulse a few times until you have about lentil sized bits of butter in the flour.
- Alternatively rub the flour into your butter by hand, aiming for the same result.
Grate The Cheese Into the Flour Mix
- Using the coarse side of your box grater, grate your chosen cheese into your flour. I saw Claire dipping her chunk of cheese into the flour, which is usually done by pastry chefs to keep grated butter bits separated, but I found it super helpful for getting a better grip on the block!
- Briefly mix the grated cheese into the flour, so it’s all coated. This prevents big chunks from forming and gives you an even distribution of cheesy flavor.
Add Your Wet Mixture To The Dry Ingredients
- Now add the cottage cheese with sourdough, protein powder, salt and sugar (these biscuits aren’t sweet, but it balances the flavor) to your flour-cheese mix and just stir until you have a shaggy dough. Don’t overwork this. You just want it to come together.
- Cover the bowl and allow to bulk ferment at cool room temperature for 4-6 hours or until risen by about 50 -100%. When it’s ready, it should spring back slowly when you poke it with your finger.
Mix The Flavored Butter
- If you decided you want to brush the tops of your biscuits with garlic butter after baking, add 2 tbsp butter to the basic amount.
- If you are using a food processor, simply add all the laminating butter ingredients (roughly chopped garlic and rosemary needles removed from the stems) to it and pulse until you have a uniformly mixed butter.
- If mixing by hand, finely chop the fresh rosemary. Grate or press your garlic clove into the butter for laminating. Add chopped rosemary and seasonings and mash with a fork until combined and soft.
- You’ll want this spreadable and at room temperature, but not half melting.
Roll Out The Dough
- Flour your work surface and rolling pin.
- Turn the dough out onto the floured surface and dust with a little more flour. It shouldn’t be very sticky at this point and fairly soft.
- Use your floured hands to pat it out into a rectangular shape, tugging on the corners gently. Flip it over, using a little more flour underneath, to stop it from sticking to the worktop.
- Now start gently rolling it out into said roughly rectangular shape until it’s about 3/8 inch (1cm) thick.
Laminating The Biscuit Dough
- If you want to brush the tops of the biscuits with garlic butter later, keep 2 tbsp of it in a small bowl.
- Get an offset spatula ideally or a silicone spatula and spread the butter over the lower 2/3 of your dough rectangle. Keep the top 1/3 uncovered. Use the offset spatula to get it as even as you can, spreading it all the way into the corners.
- Now fold the top third over the middle third, covering the butter, then the bottom third over the folded part, creating a sort of envelope shape with butter between each layer. Try to gently tug the corners, so they fit neatly on top of each other. It doesn’t have to be perfect. This will create the buttery flavored layers in the biscuits.
- Rotate your dough envelope by 90 degrees, using more flour as needed to prevent sticking and roll it out again, to about the same size as before and fold it in the same way once more.
- Try to keep the rectangular shape as much as possible. I often push the sides with the rolling pin a bit, to straighten them.
- Wrap in clingfilm or a large freezer bag and put into the fridge for about 30 minutes.
- Repeat the rolling process as above, paying attention to the shape in the last step in particular, as this will be your last rollout, getting the dough to the size you want to make 12 biscuits each about 2 inches square or slightly rectangular.
- The final measurement of your dough rectangle should be around 8×6 inch.
Cold Fermentation
- Wrap your dough loosely, so it can expand and slide it onto a sheet pan or large flat board that fits into your fridge, so the dough keeps it’s shape. Allow to cold ferment about 8h or overnight.
- At this point you could leave them in the fridge for up to 3 days and they will only deepen in flavor and get more delicious.
Cut Your Flaky Protein Sourdough Biscuits
- Line a sheet pan with baking parchment. For this recipe, as it’s very buttery, parchment works best as it absorbs any leaking butter, stopping the bottoms from being greasy.
- Once the dough had it’s fridge time, you can cut your biscuits. While you can of course cut round ones if you like, I feel rectangles lead to better results, as you don’t have to re-roll scraps of dough and get the optimal flakiness in every single piece.
- Get a large sharp knife and cut a small slice off each side, to get the perfect flaky layers exposed. This is optional but gives you the best defined look. You can bake the leftovers with the biscuits as bakers snack or even push them together as a sort of scraggly 13th bonus biscuit.
- I’m not very good at estimating, so I either use a ruler or just live with uneven sized biscuits, depending on mood and energy. Mark the dough so you get 3×4 biscuits out of it and cut them, placing them a bit apart on your sheet pan.
- Cover with clingfilm, giving them a bit of room to expand upwards and allow to rest for 2-3 hours at cool room temperature (you don’t want the butter to melt! So if your kitchen is very warm, find a cooler spot) until they have risen and are slightly domed on top.
Bake The Cheesy Garlic Biscuits
- Preheat your oven to 400°F/200°C.
- Melt the butter for brushing the tops and brush each biscuit. This will give you an incredibly flaky, crisp top.
- Bake on the center rack for 15-20 minutes, or until they are golden brown, puffy, and show distinct layers.
Optional Garlic Butter Brushing
- Soften the remaining garlic butter slightly in the microwave, then brush it over the top of your freshly baked flaky biscuits.
- Allow them to cool just a bit. They are absolutely fabulous while still warm. Pull one apart, admiring those perfect lacy layers you created. Enjoy with dinner or just as a snack with a nice glass of wine.
Notes
How To Store
- These Buttery flaky biscuits can be prepared ahead of time and stored at different stages:
- The dough can be kept for up to 3 days in the fridge. The ready cut biscuits for up to 2 days (as they already had a full day of proofing).
- You can freeze the cut biscuits raw for up to 3 months and just bake them when you need them from frozen, for about 1-2 minutes longer.
- After baking they keep in an airtight container on the counter for about 3 days, up to 5 in the fridge.
- You can freeze them for up to 3 months in a freezer proof container or freezer bags.
- Personally I love them even more when re-heated, especially after brushing with the garlic butter, as the tops get even flakier with little blisters. The air fryer or oven work well for this at 350°F/175°C for 5 minutes in the air fryer, a bit longer in the oven.
- Prep Time: 50 minutes
- Fermentation/Rise: 16 Hours
- Cook Time: 20 minutes
- Category: Sourdough Bread
- Method: Bake
- Cuisine: American


Yummmm!! I think the cottage cheese really sets these apart from another biscuit I’ve tried, so good!
It does, doesn’t it? I feel it emphasizes the general cheesiness even more.
So glad you like them!
It is so rare to find a protein-packed biscuit that actually maintains those beautiful, buttery layers! These look incredibly flaky and tender. What a brilliant way to make a breakfast staple a bit more nourishing without sacrificing that classic comfort.
Thank you, I’m so glad you say that! It’s exactly what I’m aiming for with my recipes: Keep all the classic goodness, but add a bit of nutrition. 🙂
I added some pesto sauce as you suggest and the biscuits turned out super delicious. Thanks for the recipe, my family loved it!
Oh good, so happy that worked out for you. Thanks so much for letting me know. 🙂
These were so good. Swapping buttermilk for cottage cheese really works. They turned out buttery and flaky, with great flavor.
Yay, so happy you liked them!
Surprised me too when I started doing it. 🙂
These take a bit of time and technique but it’s well worth the effort! They come out so fluffy and delicious. Love the herbed butter for the laminating
Thanks so much, so glad you think they are worth the effort. 🙂