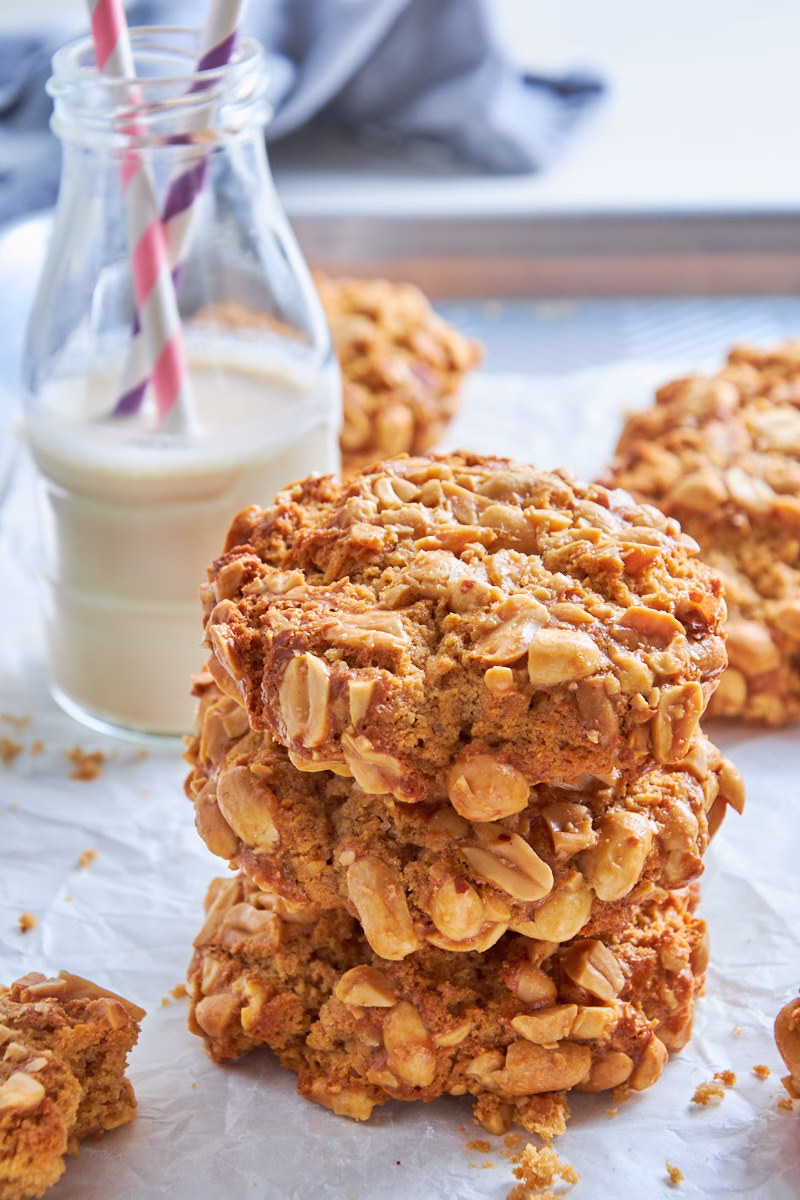
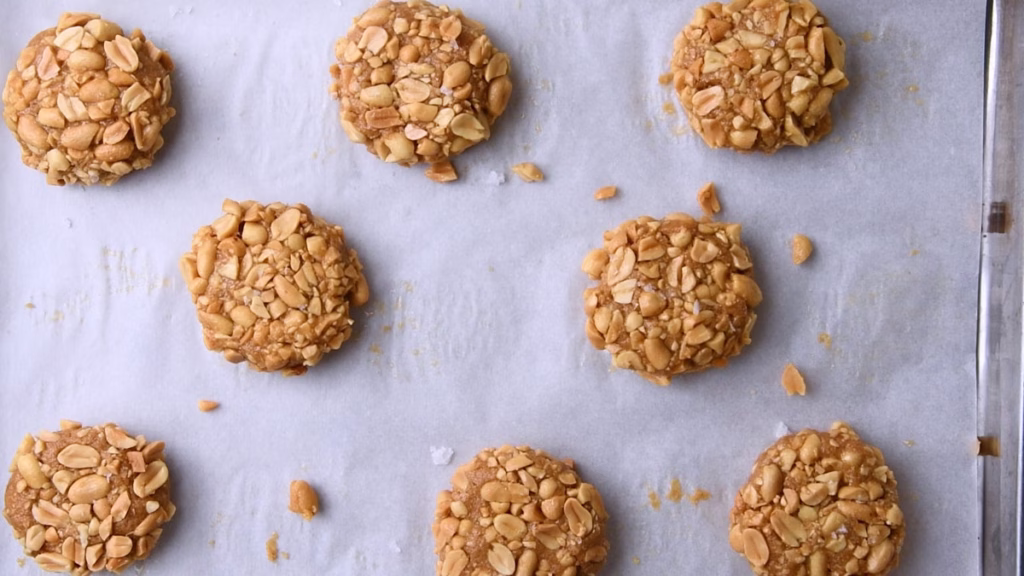
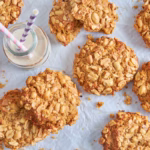
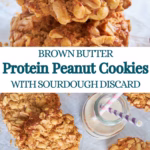
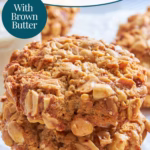
Peanut Brown Butter Protein Sourdough Cookies
I took a popular Peanut Brown Butter Cookie recipe and adapted it for my sourdough protein kitchen. This version features rich brown butter, the gentle flavor from sourdough discard, and a boost of protein powder to create a cookie that hits all the right notes: it’s chewy, satisfyingly salty-sweet, and crunchy with peanuts. With 11 grams of protein per cookie, this recipe gives you a super satisfying snack that doesn’t sacrifice great flavor.
This post may contain referral links for products I love.
For The Pleasure Of Eating earns a small commission on these links at no cost to you.
- Why You’ll Love This
- The Ingredients
- Substitutions
- Equipment Used
- How to Make this
- How To Store
- FAQ
- Other Recipes You Might Enjoy
Why You’ll Love This
TL;DR
- Salty-Sweet Crunch – Delivers an addictive flavor reminiscent of a Payday candy bar, thanks to the whole, salted peanut coating.
- Protein Power – Nearly doubles the protein content to almost 11g per cookie, turning a decadent treat into a satisfying, functional snack.
- Deep Flavor – Uses the complex, nutty richness of brown butter for a deep, craveable flavor profile.
- Sourdough Synergy – Sourdough discard adds a gentle tanginess and improves the digestibility (bioavailability) of the added protein powder.
- Perfect Texture – Achieves a soft, chewy center with crisp edges, fighting the typical dryness that can result from adding protein powder.
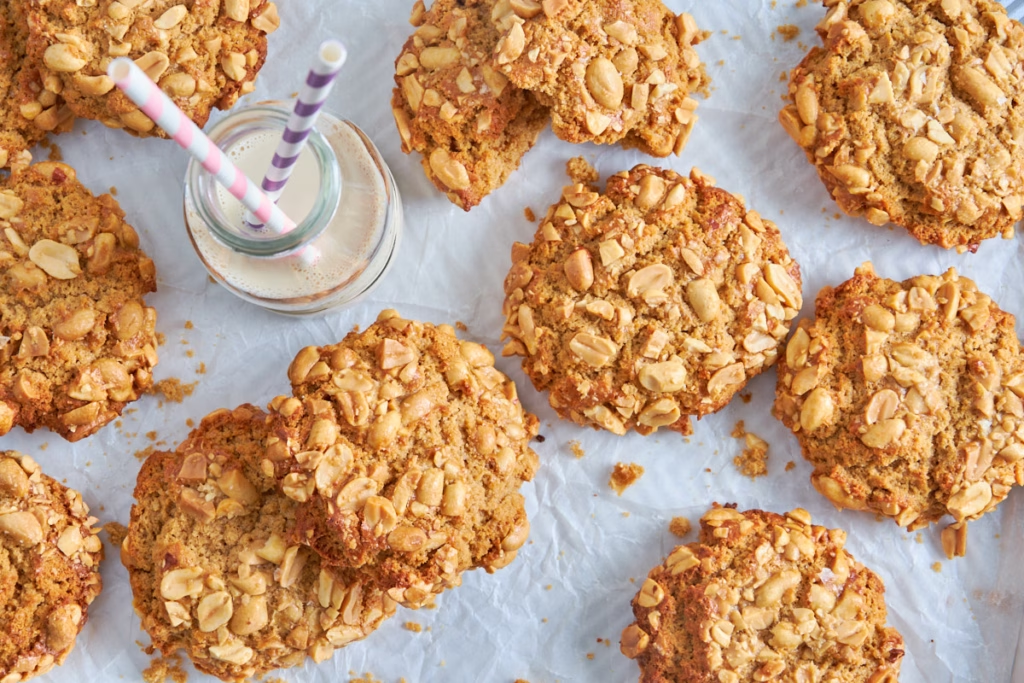
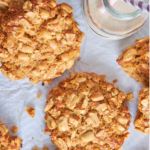
Salty & Sweet With Nutty Crunch & Soft Center
These cookies have all the textures and flavors you could possibly want in a snack, thanks to the soft peanut-brown butter based dough with a gentle hint of sourdough tang from using discard, giving them even more depth than the original.
The whole, roughly chopped peanuts covering them make them taste very similar to Payday bars including a soft, brown butter infused center tasting intensely salty-sweet, with just the right softness you want from a slightly fluffy cookie.
Improved With Additional Protein
While the original cookie from Sue Li in this year’s edition of the NYT cookie box is already absolutely incredible, I felt I could improve them even further by adding a little more protein to their already decent content, thanks to peanut butter and whole, salted peanuts.
A little whey protein does the trick, doubling the protein content, getting it to an impressive 11g per cookie, and making them from pure treat into a high protein cookie for the whole year, which also feels very satisfying due to the protein content and getting all the flavors and textures we crave in each bite. That being said, this is not a low carb or Keto recipe, nor is it one that pushes for super high protein by adding expensive ingredients (apart from the protein powder, which I feel most people have at home at this point). It is however a really good peanut butter cookie with benefits, that tastes as addictive as it looks, while being just that little bit better for you.
Use Up Your Sourdough Discard, Improving Digestibility
I say it nearly in every post and I will keep repeating it, as I feel it’s not talked about enough (yet?):
Sourdough and protein are a match made in heaven! I love using sourdough discard in recipes like this
I love using sourdough discard in recipes like this because it balances the dryness that adding protein powder to baked goods can result in. It also makes any protein in the dough, including the whey we add here, easier to digest, improving its bioavailability.
I wrote about the science behind it in my post on why I’m baking with sourdough and protein, if you are interested in a bit of a deep dive.
But in short: Sourdough contains enzymes called proteases, which break down protein into smaller molecules that our body can absorb easier.
This happens during the slow fermentation process, so it tends to be a good idea to prepare the dough a day ahead of baking, to get the full benefits. Not that you have to by any means. You can simply enjoy them on the same day if you like.
Ingredient Notes
Sourdough Protein Cookie Dough
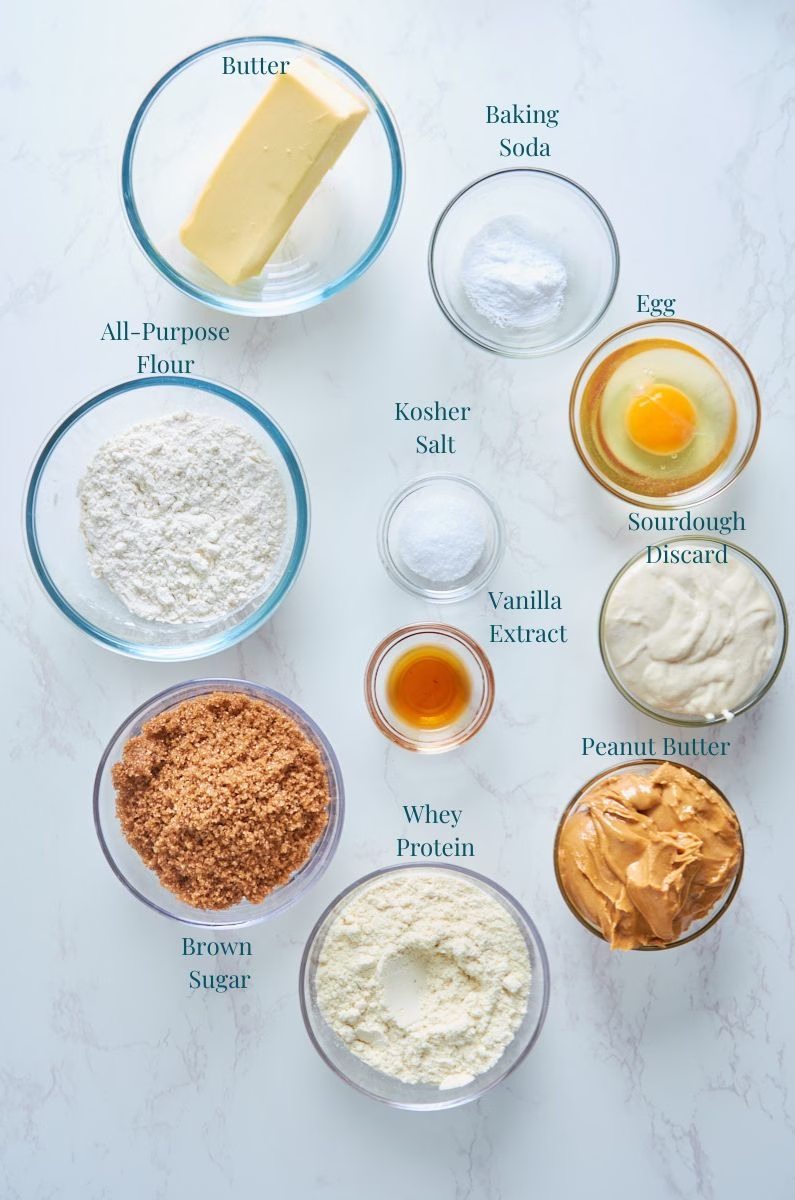
Wet Ingredients
- Butter – Mine is always Irish butter, unsalted. Kerrygold is of course fabulous. But any good quality high fat butter will do. Get the best you can afford, as the flavor comes through nicely.
- Peanut Butter – While you might be tempted to use the “Natural and Organic” type, in baking the very standard creamy peanut butter that you get in every supermarket works best. Though if you want even more bite, you certainly could use the crunchy one.
- Sourdough Discard – You can use anything from active starter to about 4 days old discard. After that, you might want to add a tablespoon more sugar, to balance the acidity. Mine is at about a 1:1 ratio with water. Sometimes a little less water, to get a slightly stiffer starter. But I found it makes barely any difference in the resulting discard. If it moves slowly out of the jar like thick pancake batter when you tip it, it’s perfect. If it’s stiffer, add a tablespoon of water to the dough. If it’s runnier, add a tablespoon of flour.
- For sourdough: Please weigh it, as the volume can wildly differentiate depending on age and activity.
Dry Ingredients
- Sugar – For these peanut butter cookies I’m using brown sugar, which adds caramel notes and chewiness, imitating the payday bars flavor and texture profile.
- Protein Powder – I mostly bake with whey concentrate. In sweet treat like this one usually vanilla flavor from “MyProtein”. Whey concentrate is one of the powders most people who do use any form of protein probably have at home, as it makes for lovely creamy shakes. For other options check the “Substitutions” section below.
- Flour – All-purpose is what you want for tender cookies, as it has less gluten than, say, bread flour.
- Baking Soda – You might think with sourdough you wouldn’t need any other leavener, and sure, you could leave it out if you really wanted to. But the soda balances the acidity from the sourdough and gives a very even rise. You’ll notice the difference if you leave them in the fridge overnight to allow them to ferment. If you added the soda before, it’ll lose its effectiveness and you get a slightly thinner cookie and more rise in the center.
- Salt – As always I use kosher salt, which has lower weight by volume than other types. So if you are using sea or table salt, use half a teaspoon instead.
Crunchy Peanut Coating
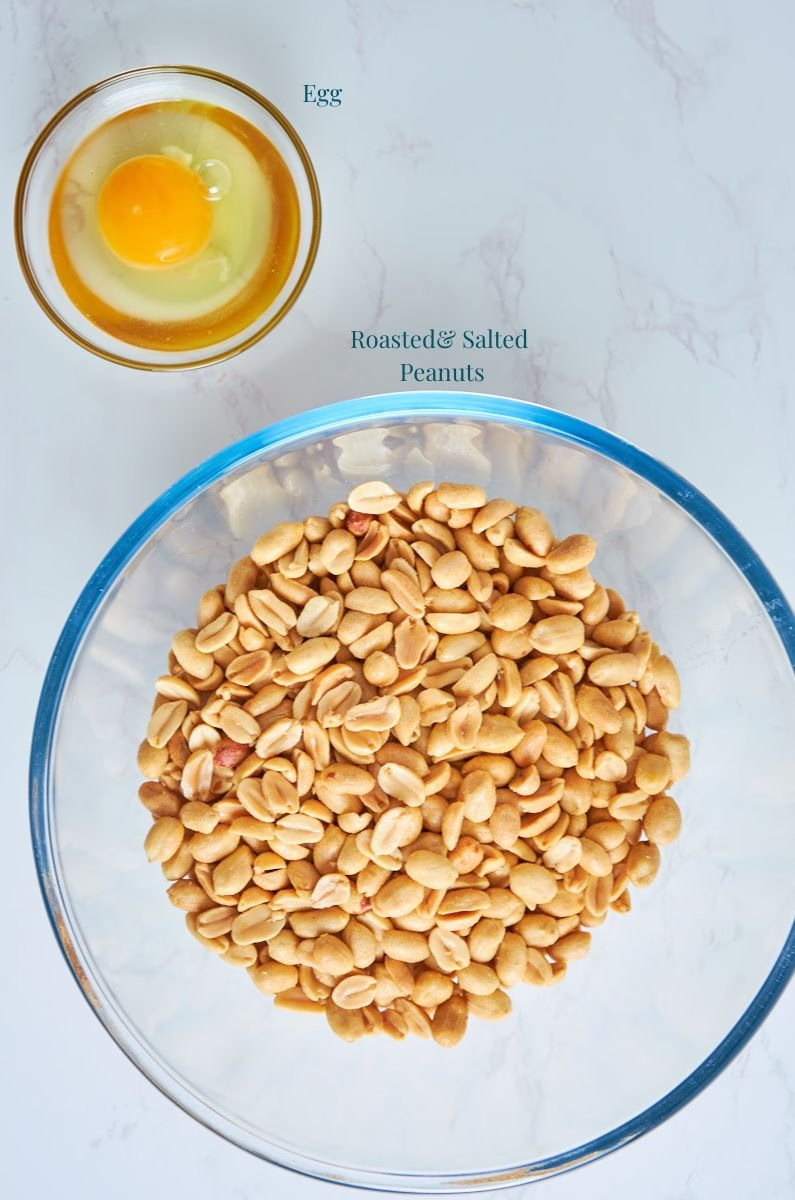
- Egg – Without the egg the peanuts won’t stick to the cookie dough.
- Peanuts – The roasted and salted snack variety is what you want, for that supper addictive sweet-salty combo that makes these cookies so incredible.
- Flaky Sea Salt – Mine is Maldon salt, which I love for both its texture and flavor. This is entirely optional to use but try it and you’ll thank me later.
substitutions
A little disclaimer for substitutions:
While I give a whole list here to replace one or the other ingredient and the options for, say the vegan version or the gluten free version will work together, replacing multiple ingredients at once in combinations I might not have foreseen can lead to surprising and possibly unintended results. So while I absolutely support playing around with food and recipes, please do so mindfully and at your own risk.
Oh and…I’d love to hear your stories when you do in the comments. 😊
Sourdough Protein Cookie Dough
If you are celiac, please ensure you use a certified gluten-free flour blend for all flour components, including the sourdough discard replacement, if needed.
Wet Ingredients
- Butter – Vegan butter would work too here. Try to get one with a high fat content, as the browning will otherwise evaporate too much of it, leading to dryer than intended cookies.
- Sourdough Discard – If you don’t have sourdough or prefer not to use it, replace it with ¼ cup flour and ¼ cup milk or plant milk. Full fat ideally, to imitate the tenderizing effects of sourdough.
- Eggs – To replace the egg, add 2 tbsp (40ml) plant milk with high fat content at the liquid ingredient step, and add 2 tbsp (15g) all-purpose flour with the rest of the dry ingredients. Your result might be ever so slightly dryer, but still really good.
- Peanut Butter – If you are allergic to nuts you could still make these cookies with either pumpkin or sun butter and respectively the matching seeds. I bet the bright green of pumpkin would be stunning.
Which Protein Powders can I use instead of Whey?
- I haven’t tried many vegan protein powders, but Nora from “Nora Cooks” swears by Orgain. So that might be worth a try.
- Casein will work too (ideally vanilla flavored), but you might need to add a tablespoon of milk to make up for its higher moisture absorption.
- I would not advise to use whey isolate, as it has a much stronger drying effect.
- If you do try any other types, I’d love to read about your experience in the comments below!
- Without Protein – If you’d prefer to make these cookies without protein powder, simply replace it 1:1 with flour.
- Flour – For the celiacs among you, I heard the King Arthur brand of GF flour works pretty much 1:1 for AP flour. But I can’t get it here to try that out. So if you do, I’d love to hear from you in the comments!
- Brown Sugar – If you are diabetic you can try any of the brown sugar substitutes out there, if the package says they are intended for baking. But since they are all different, please do follow the manufacturers instructions.
Crunchy Peanut Coating
- Egg – While egg has a lovely shine and great sticking capabilities, you can get similar results by using 2 tbsp plant milk and 1 tbsp maple syrup. It’ll even add a lovely caramelized flavor. This will result in a tiny bit less protein though.
- Peanuts – Replace them with any type of nuts or seeds you enjoy.
For those of you with a nut allergy: Pumpkin or sunflower seeds would be lovely! Or maybe even Tahini and sesame seeds?
Equipment Used
- Saucepan – For browning the butter
- Heatproof bowl – For the hot butter, to stop it from burning at just the right browning point. I used my KitchenAid Glass bowl, which I also use to mix the dough in. The original is heat proof, which is marvellous.
- Spatula – To stir the butter and transfer all the wet ingredients into the dough. Plus one last stir at the end, making sure everything is incorporated.
- Whisk – For whisking the butter and then the flour with the dry ingredients.
- Knife and Chopping Board – To very roughly chop the peanuts.
- Cookie Scoop – Super practical for getting (fairly) even portions from your dough. Mine for this recipe is the medium size of my set (18oz/35ml)
Frankly, I still manage to get different sizes, but then…I’m not handling it particularly accurate. It’s just cookies! - Stand Mixer – Entirely optional. You can absolutely make this with just a whisk, spatula and mixing bowl. I’m using my KitchenAid however, because I have arthritis and am, frankly, lazy. Sheet pan – Ideally 2, so you can bake in batches.
 Buy Now →
  Buy Now →
  Buy Now →
  Buy Now →
  Buy Now →
 How to Make this
Preparations
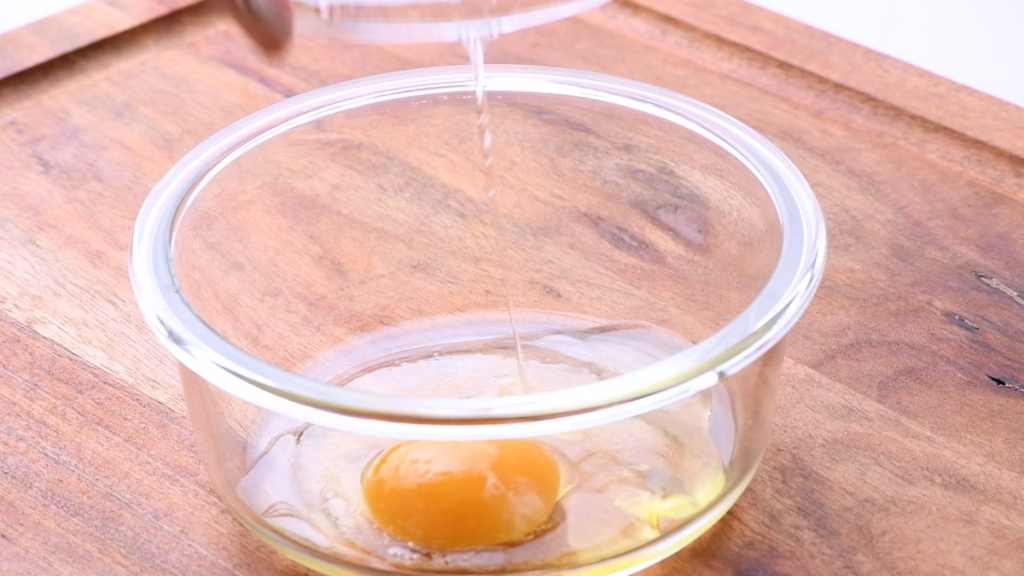
- Take your eggs out of the fridge, so they can come to room temperature. Though, if you forget (as I often do) simply add it to the still slightly warm butter, to help you cool it down.
- Get all your ingredients ready. I love measuring them out in advance, so I can just throw them together, looking all organised when making the cookies. Plus I’m very prone to forgetting something. So having it all lined up helps me make sure I got it all.
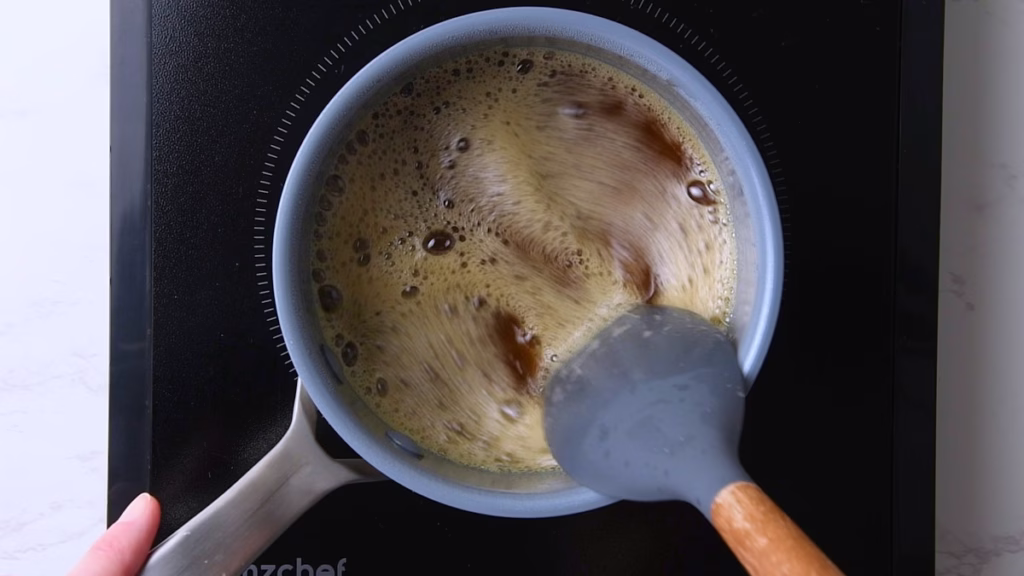
Brown Your Butter
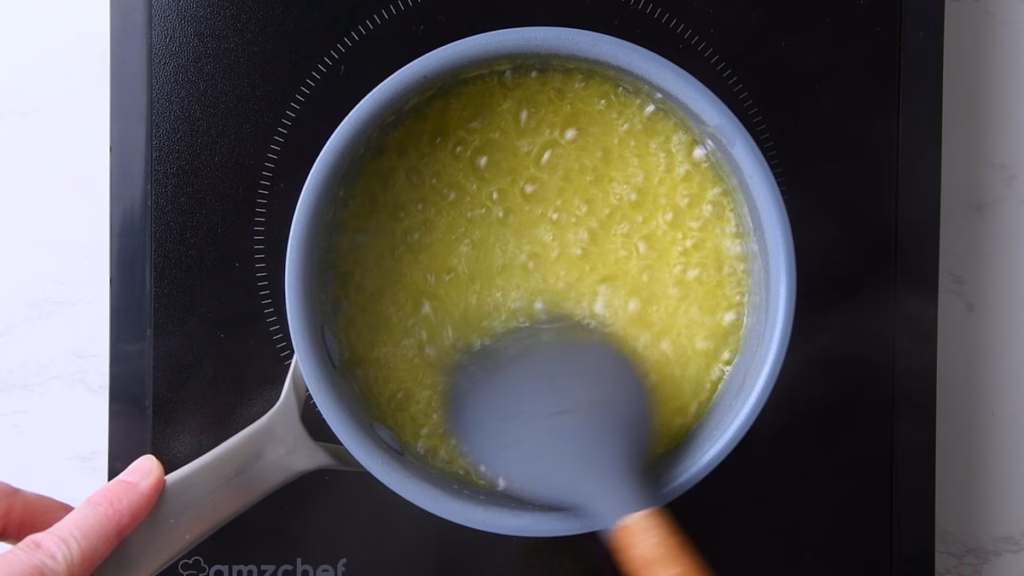
- In a saucepan, melt your butter over medium high heat. It will splatter and bubble wildly.
- The moment you hear the sound changing and the bubbles look smaller, turn down the heat to medium low and start stirring with your spatula, scraping any brown bits off the bottom of the pan. This is the good stuff, you don’t want it to burn!
- Let it brown for just a minute or so, until it smells lovely nutty and has a deep amber color. Depending on your hob this can be very quickly! In doubt stop earlier rather than burning it.
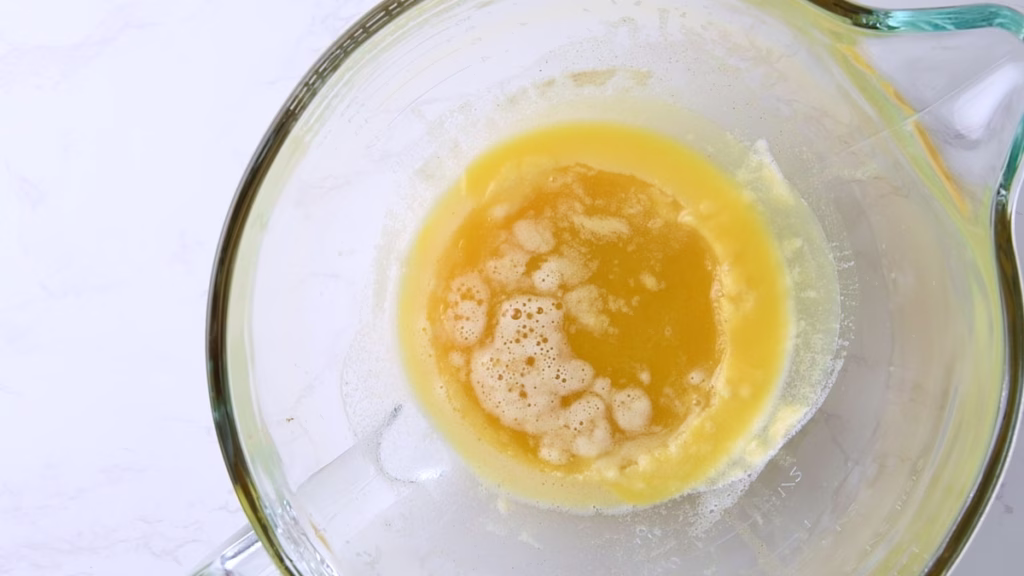
- Transfer to your heat proof bowl. Allow to cool in the fridge for about 30 minutes or until the sides are starting to solidify, but the center is still liquid.
- At this point whisk and integrate all the lovely brown bits from the bottom back in, until you have a creamy mass. You want the consistency to be scoopable and thick, like softened peanut butter.
- Don’t be tempted to use the butter in liquid form. It won’t get fluffy when mixing with the sugar and your cookies might come out flat and greasy instead of puffy and chewy.
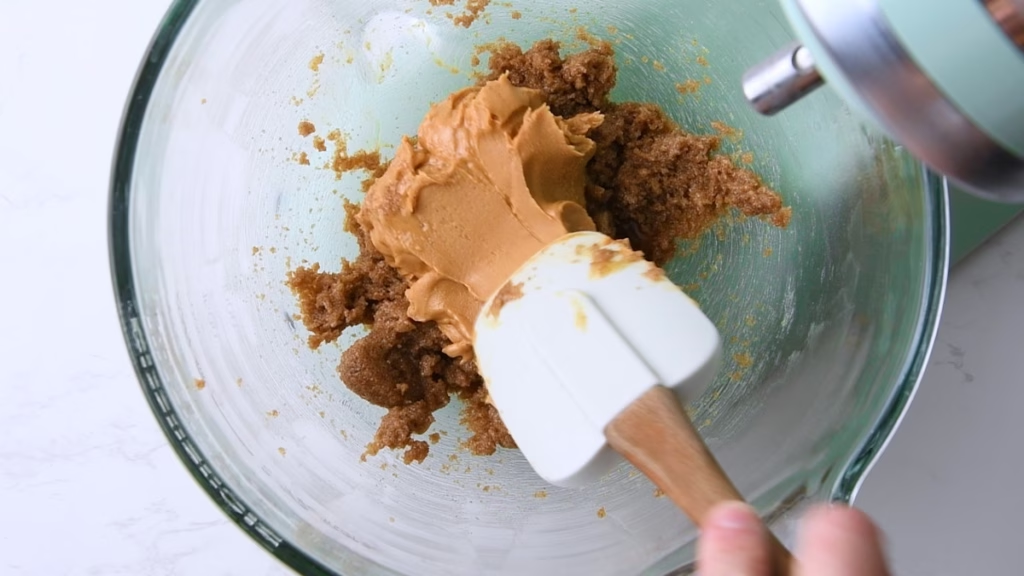
Whisk Butter and Sugar
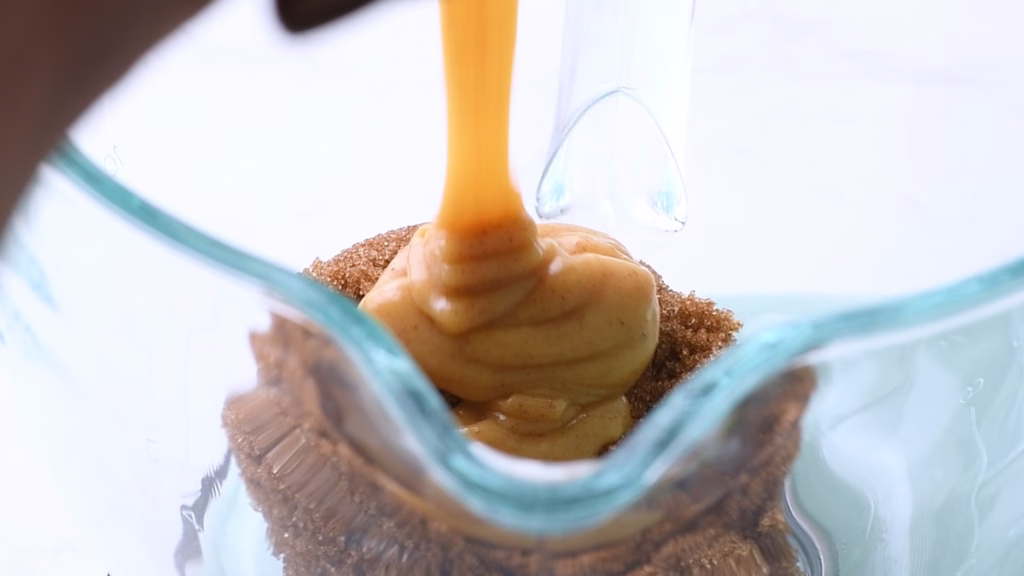
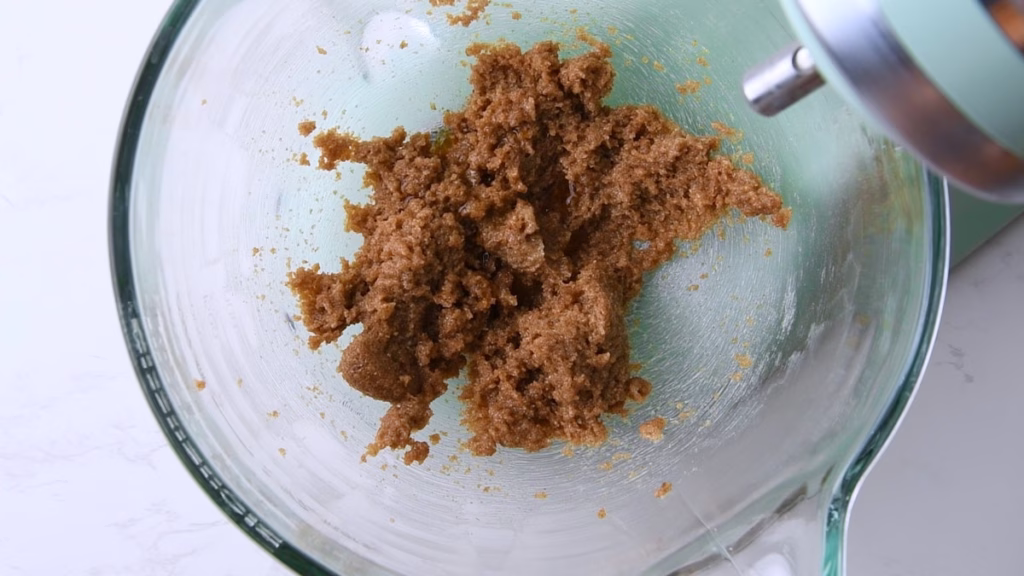
- Using either your whisk or the paddle attachment of your stand mixer, start whisking butter and sugar until slightly lighter in colour. It won’t get as fluffy as a white sugar mix, as the brown sugar is a bit denser due to the high molasses content.
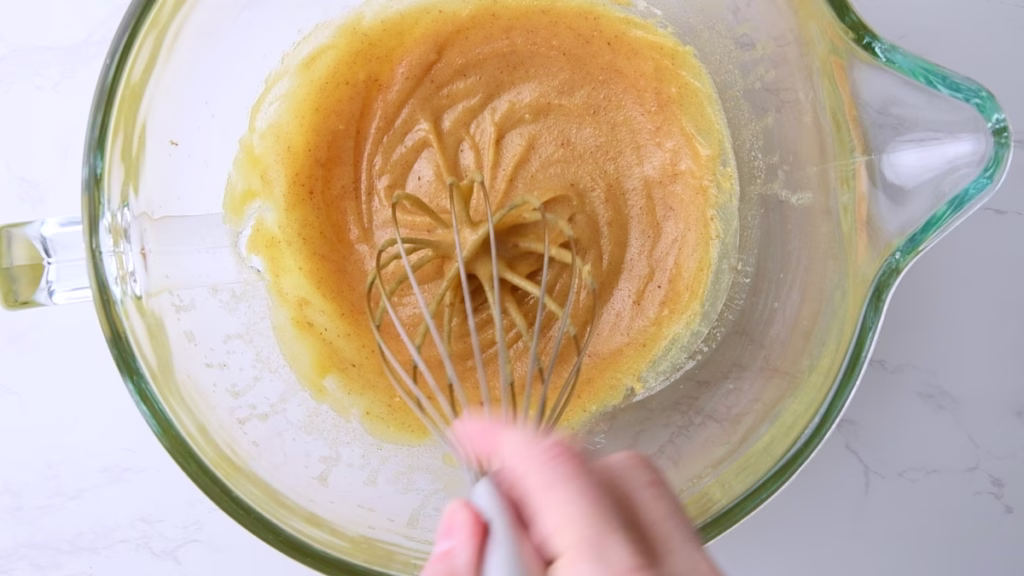
Add Wet Ingredients and Protein Powder
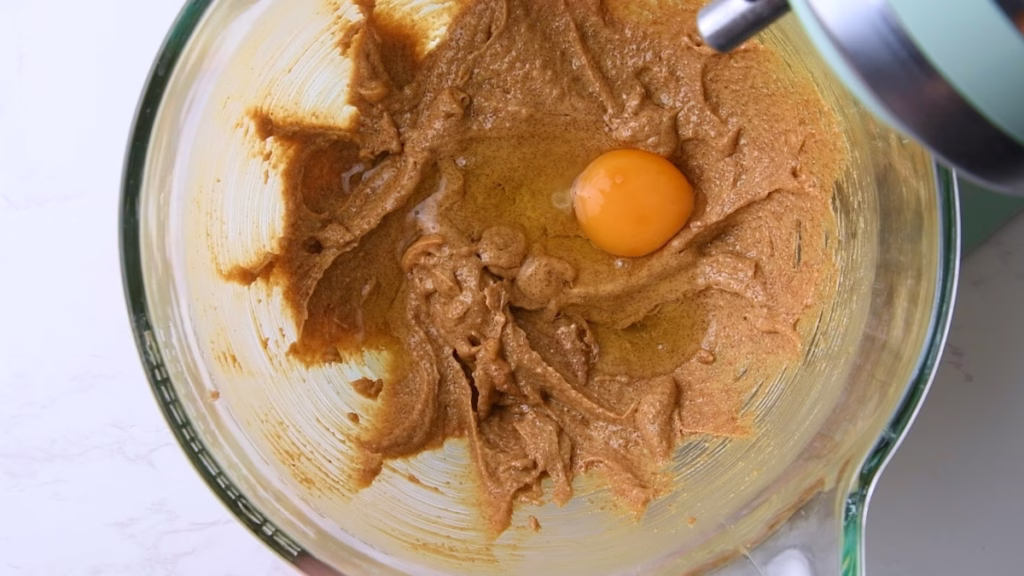
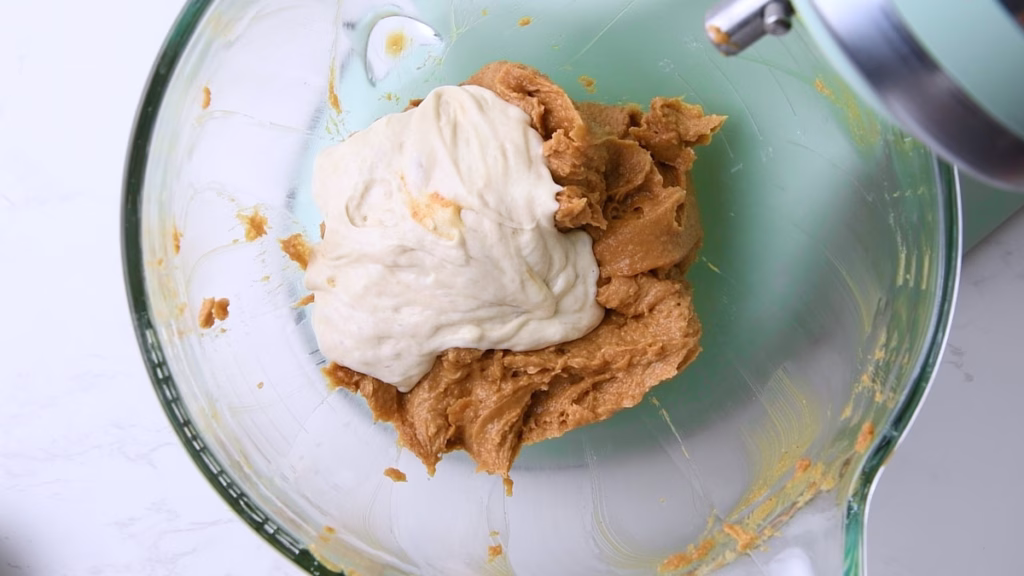
- Mix in the egg, peanut butter, and vanilla, until fully incorporated and creamy.
- Add the protein powder and sourdough discard and mix again until smooth. While you could add the protein powder to the flour, I always feel it dissolves better when added with the wet ingredients.
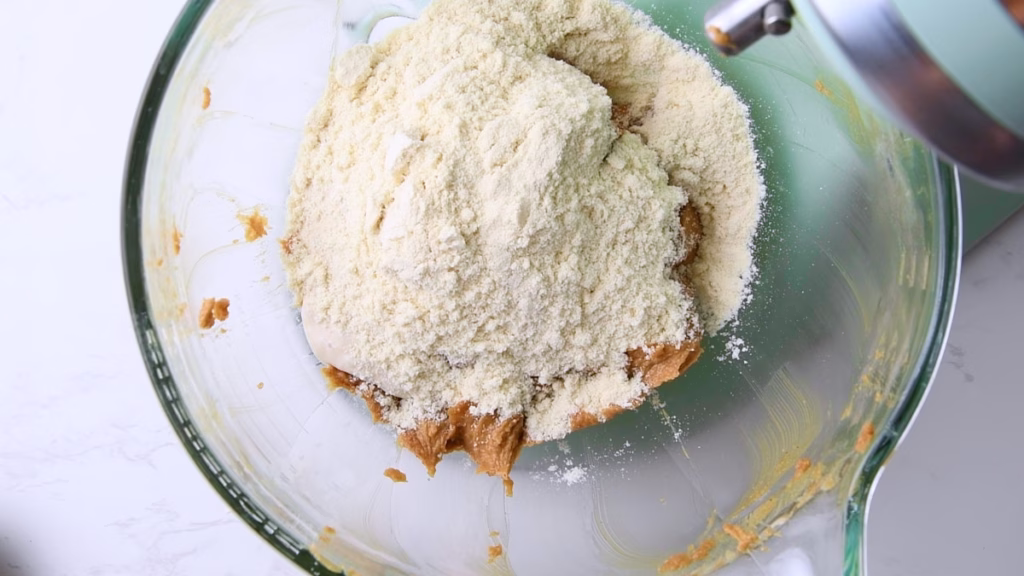
Mix in The Dry Ingredients
Note:
If you want to overnight ferment the dough, I recommend leaving out the baking soda for now and then mixing it in quickly the next day. Otherwise it’ll lose some of its rising power and you get denser, less evenly risen cookies.
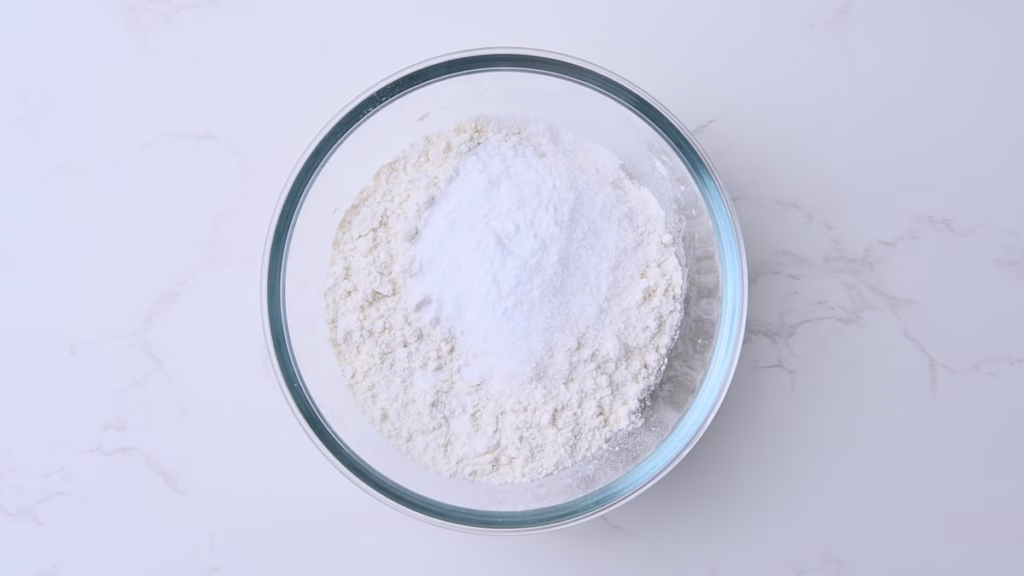
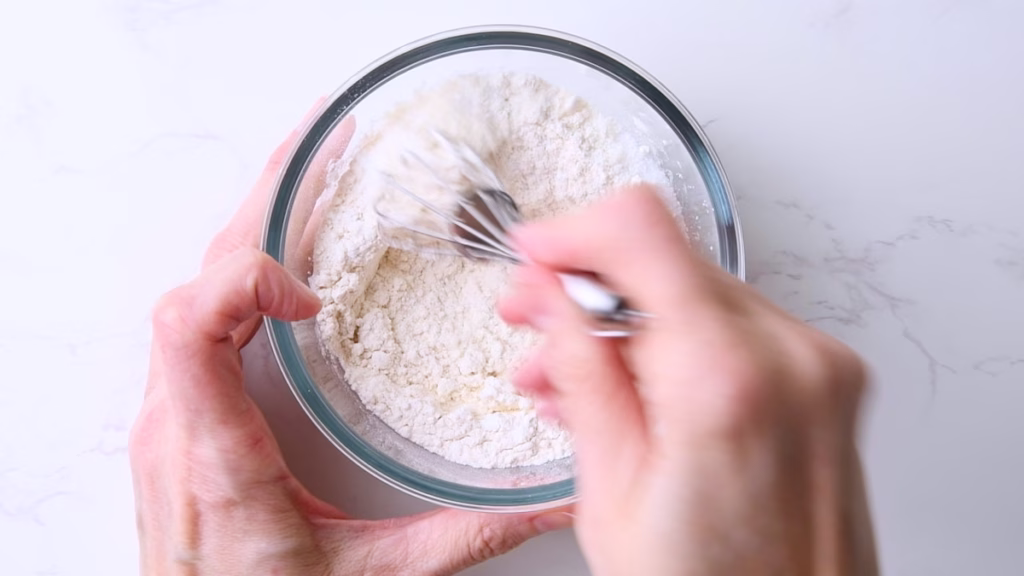
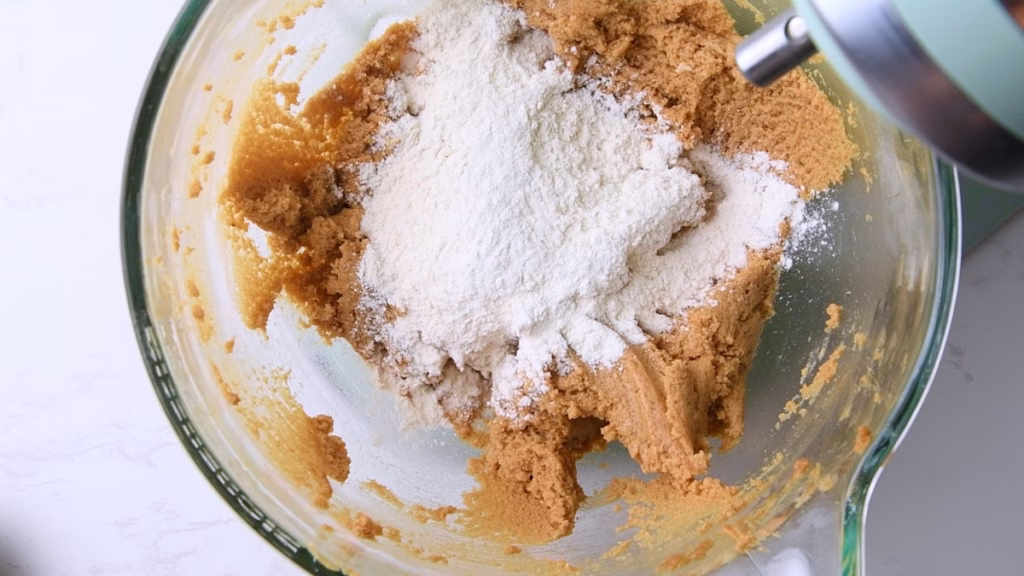
- Now come the flour, baking soda and salt. Give them a brief mix while on top of the batter (or in a smaller bowl), so all is evenly distributed throughout the dough.
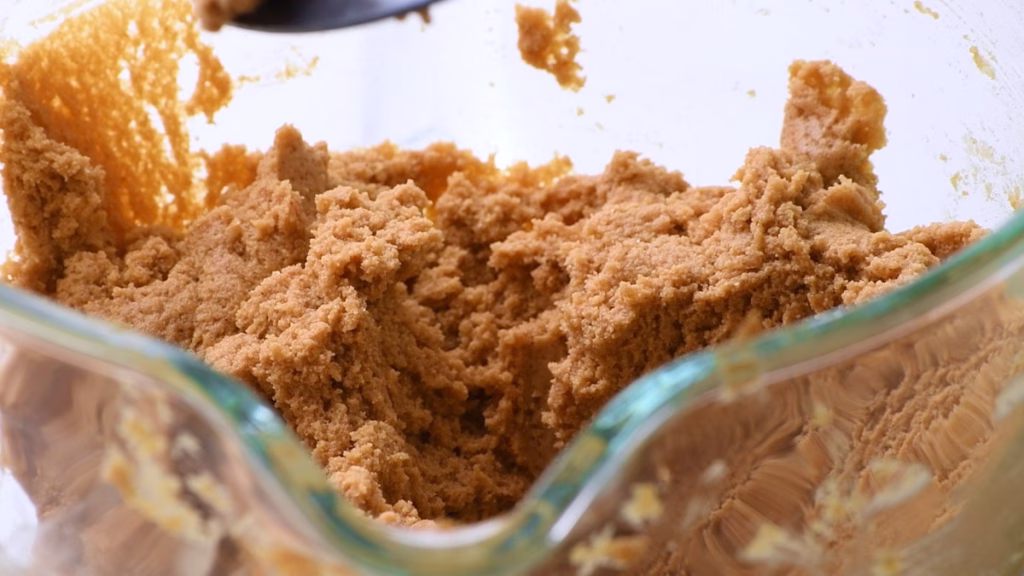
- Gently stir it in until just combined. Only until no dry streaks are left. Don’t overmix.
Shape And Coat Your Peanut Brown Butter Cookie Dough


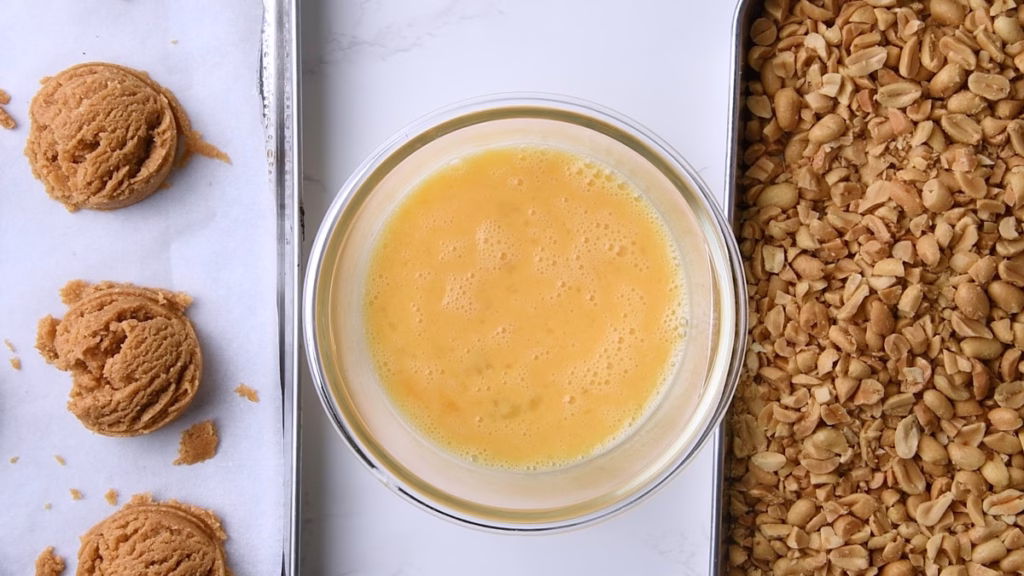
- Line your sheet pans with baking parchment. I usually portion all the cookie dough onto one of them, so I can set up and easy “coating station” with sheet pans on both sides of the peanut/egg containers.
- Very roughly chop your peanuts. It’s totally fine if you have some halves in the mix.
- Transfer into a flat container or deep plate.
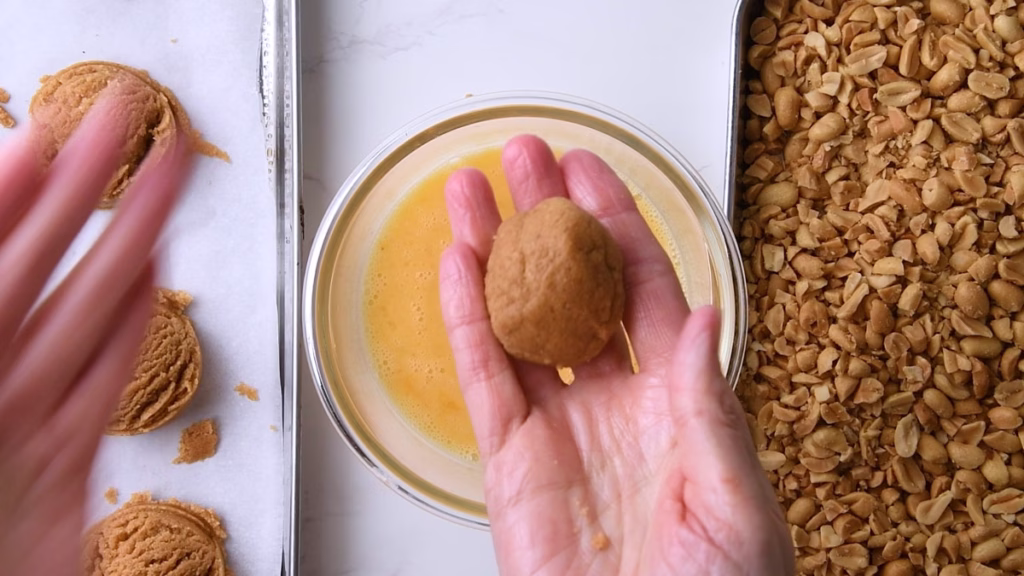
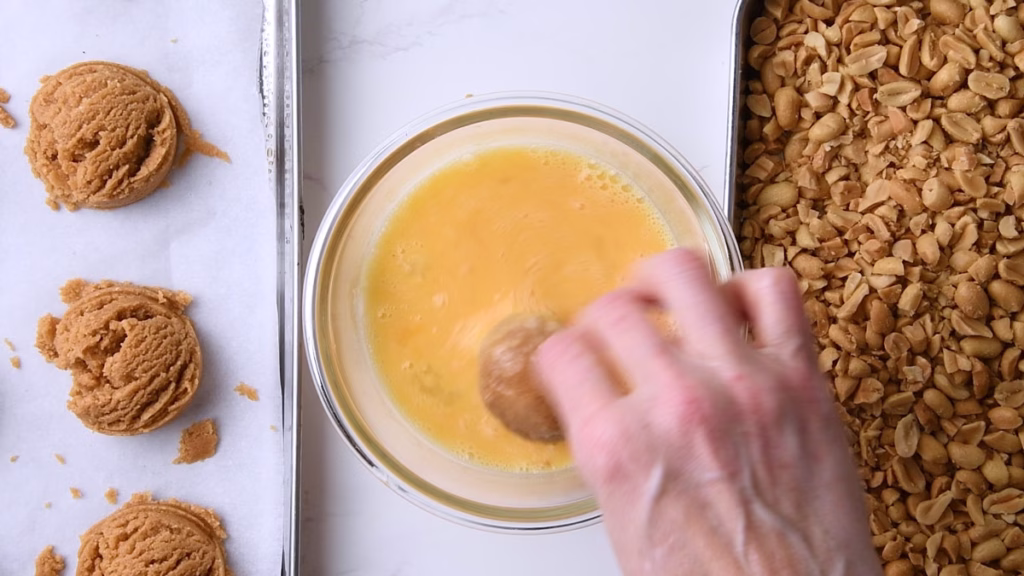
- Find a small bowl that fits a cookie ball being rolled in it, but not much more. Your egg for the coating goes into that and gets slightly whisked with a fork.
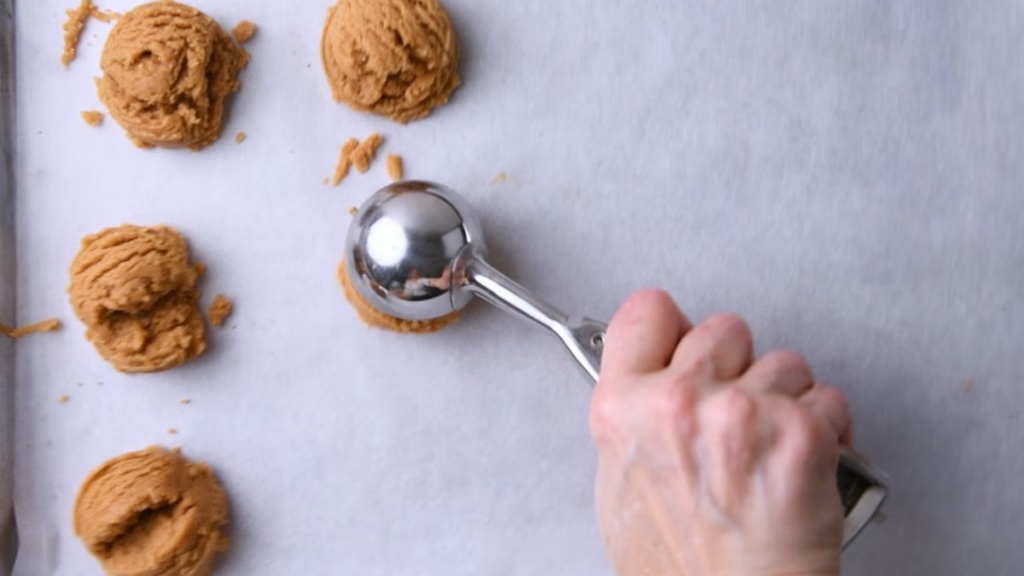
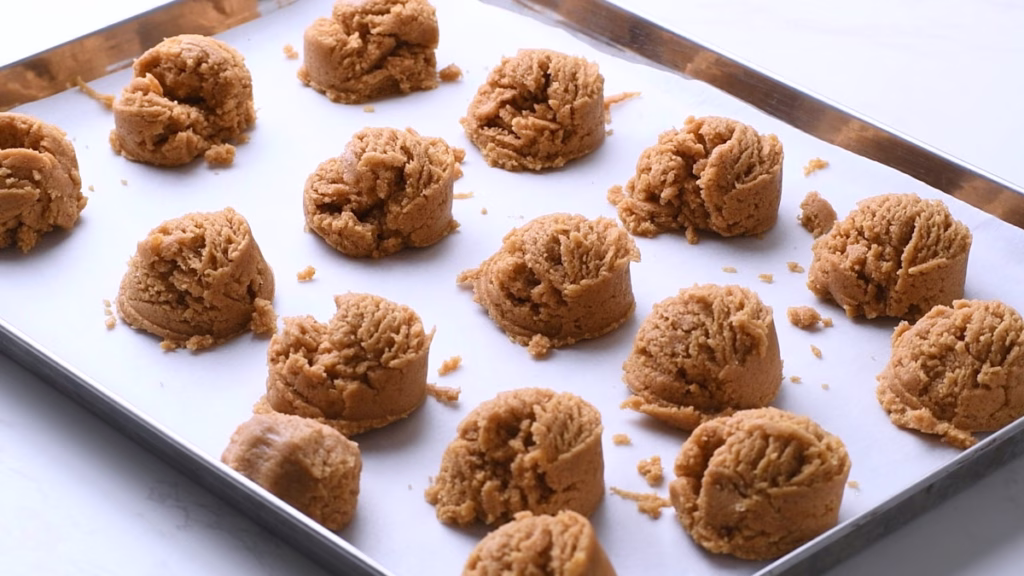
- Portion out all of your brown butter cookie dough, ideally with a cookie scoop. Mine was medium sized 35ml/1.18oz.
- Your cookie dough will be smooth, slightly crumbly and soft. It should hold together when gently squished in your hand, but crumble apart when more pressure is applied.
- Grab each portion of the dough and roll it into a smooth ball, finding exactly that “hold together but not crumble” pressure point. The first cookie might take a moment to figure out, but easy enough.
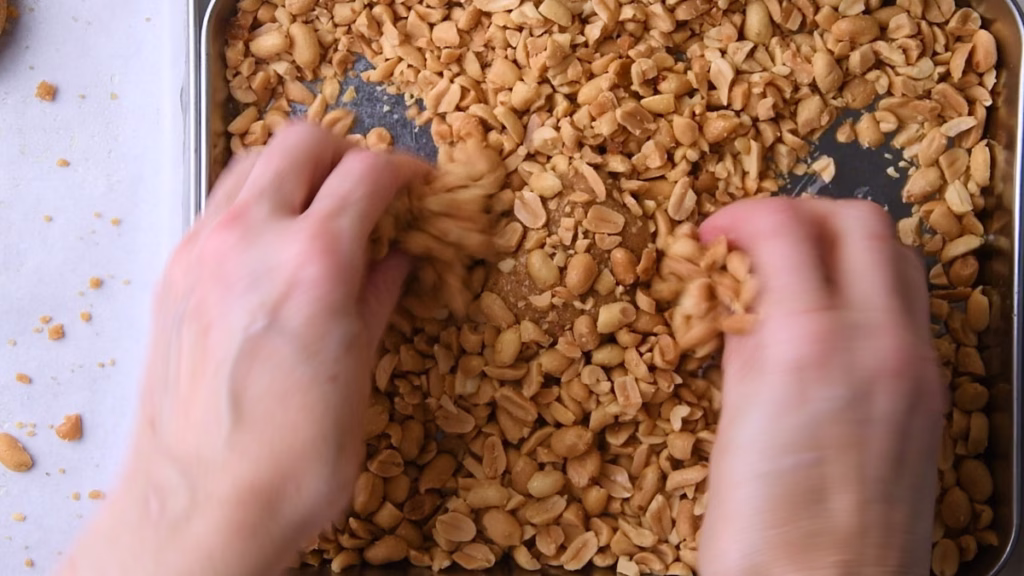
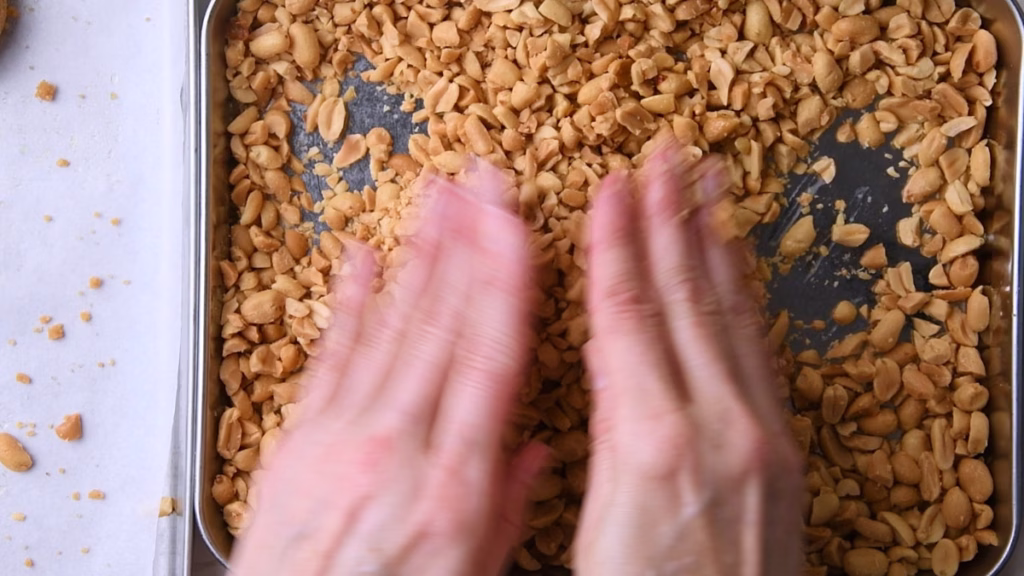
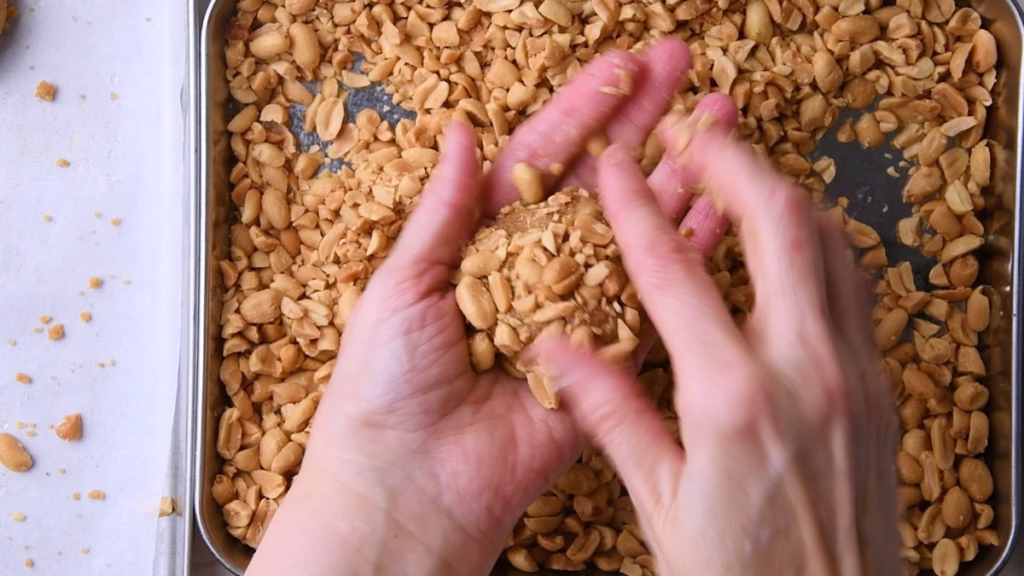
- Toss each of the dough balls in the egg wash, then right into the peanuts, pressing them onto the dough firmly. Again, play with the pressure point here. My first cookie crumbled a bit when pushing too firmly but easily came back together.
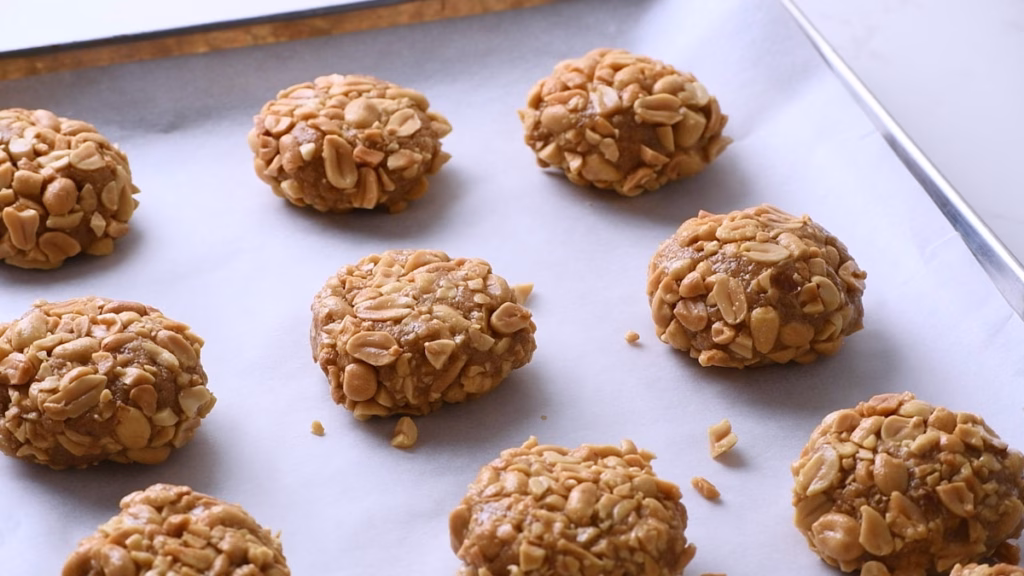
- Place them on the second sheet pan.
Bake Your Cookies
- Preheat your oven to 350°F/175°C.
- Arrange your cookies a few inches apart, flattening them a little, so you have about 8 evenly spaced ones on each sheet pan. They don’t spread very much.
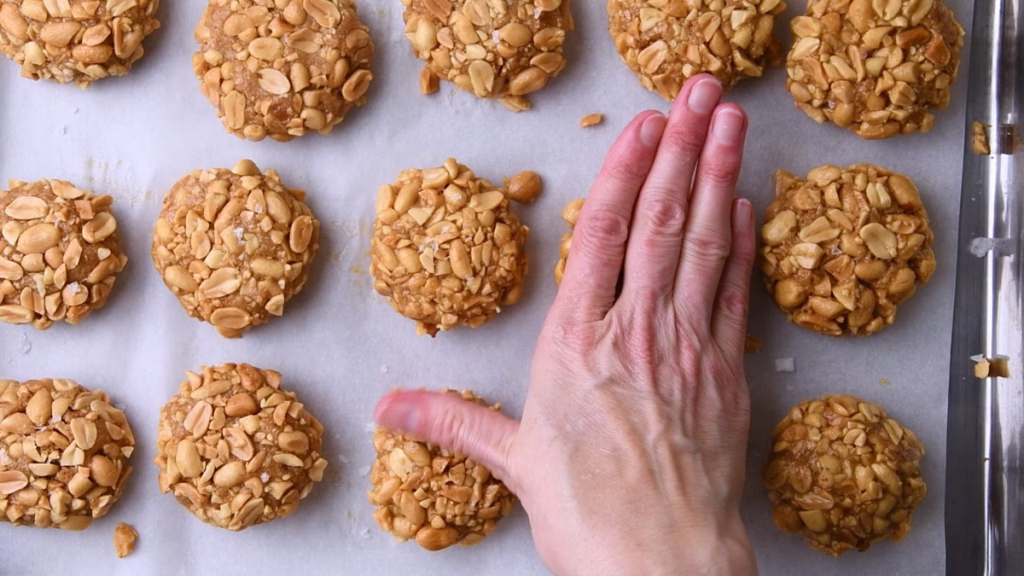
- Bake for 10-14 minutes, rotating the tray once at around 6 minutes, as most ovens bake unevenly.
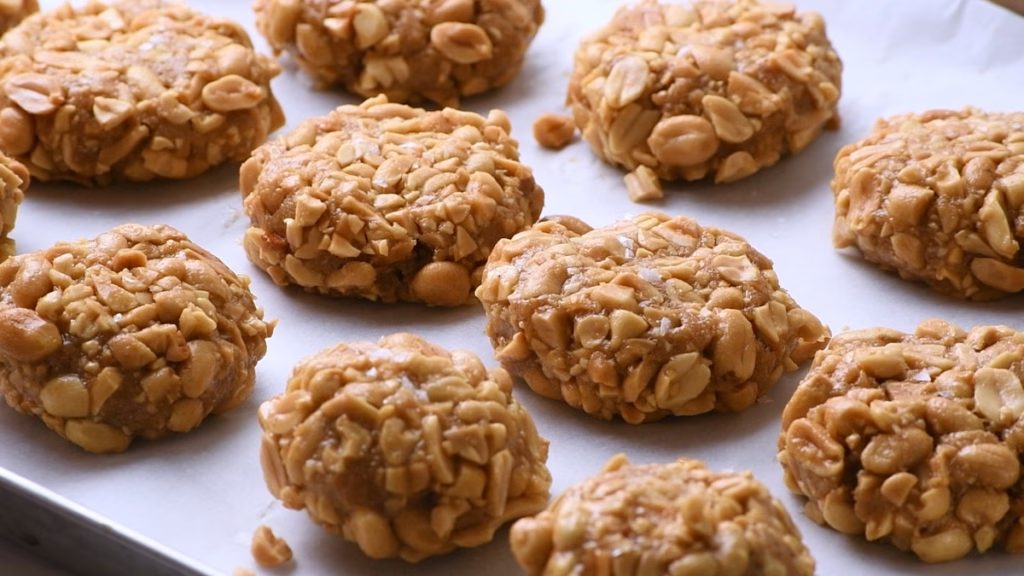
- If the tops are a bit cracked, but the dough underneath looks matte (slightly dry, not shiny and wet) and the edges are starting to brown, take them out.
- The trick here is, to have them still slightly underbaked in the center, as they will keep baking after removing from the oven.
- Allow them to cool on the sheet pan while you bake the next portion. Transfer to a cooling rack after about 5-10 minutes, using a spatula.
- These Peanut Brown Butter Protein Sourdough Cookies do need to cool completely before they are at their best, as peanuts are slightly soft when warm. So to get the full crunch factor, enjoy them cold. If you like with some milk or a nice cuppa.

Watch The Video
How To Store
- You can keep the unshaped cookie dough in the fridge for up to 3 days or freeze the shaped and peanut rolled, slightly flattened dough for up to 3 months in a freezer bag or freezer proof container.
- Bake right from frozen when a snack craving hits. They just need 1-2 minutes more in the oven then the fresh version.
- Baked sourdough discard peanut cookies store very well for about 7 days in an airtight container on the counter or up to 3 months in the freezer.
- If you reheat them, let them cool before enjoying, to help the peanuts crisp up again.
Now I’d love to hear from you in the comments!
Have you tried this? Did you enjoy it?
What other recipes would you like to see?
And if you enjoyed this recipe, please consider rating, sharing, or leaving a comment – your feedback truly helps my blog grow!
FAQ
Brown butter adds a deep, toasted, nutty flavor that is much richer than regular melted butter. It’s key to achieving that complex depth that makes the cookies taste so much like a Payday bar. The browning process also slightly changes the cookie’s texture by removing water, leading to a slightly chewy center.
No, sour. You’ll get a very subtle, pleasant tanginess, especially if you use older discard. Its main job in this recipe is to hold moisture, improve the texture, and make the protein easier to digest. It complements the sweetness without making the cookies taste like sourdough bread.
It’s generally not advised. Natural peanut butter, which separates into oil and solids, is much drier and less consistent than standard emulsified creamy peanut butter. Using it can lead to a drier, more crumbly dough and affect the cookie’s final texture.
This is usually due to the butter being too warm or too liquid when you mix it with the sugar. When you cream the cooled brown butter, it should be the consistency of soft peanut butter. If you use it while it’s still fully liquid, the dough won’t trap enough air, leading to excessive spreading.
You can bake them right away! The dough holds its shape well after the initial coating process. However, chilling the dough (even for 30 minutes) can slightly deepen the flavor and lead to a marginally thicker cookie, but it’s not strictly necessary for this recipe’s success.
Yes, but be mindful of moisture. Casein is often fine, but you might need to add a splash of milk or plant milk as it absorbs more moisture than whey concentrate. If using a plant-based powder (like pea or soy), you may need to add a little extra liquid, as those can also be very absorbent and dry out the dough.
Absolutely. A simple mix of plant milk (high-fat oat or soy) and a touch of maple syrup works excellently as a vegan binder to help the peanuts stick.
Other recipes you might enjoy
From this years cookie collection:
Soft & Chewy Protein Snickerdoodles with Sourdough Discard
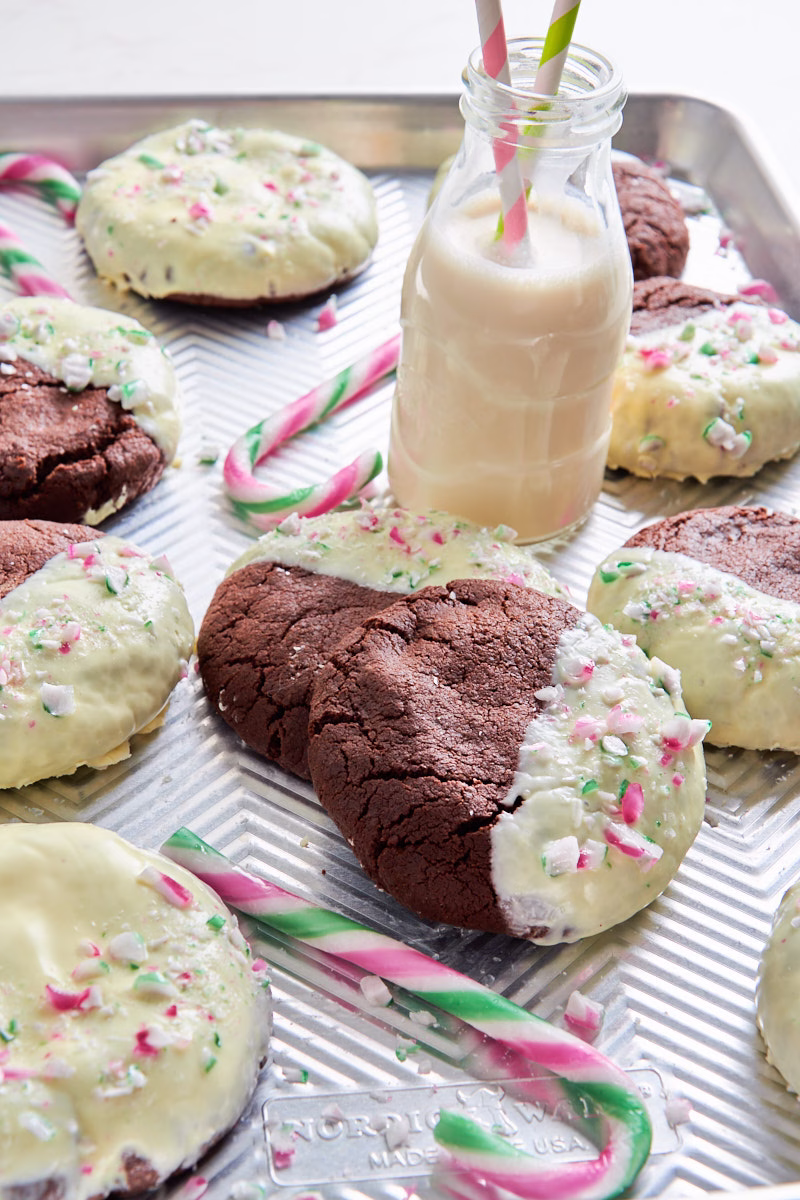
A christmas classic improved: Triple Mint Chocolate Sourdough Protein Cookies
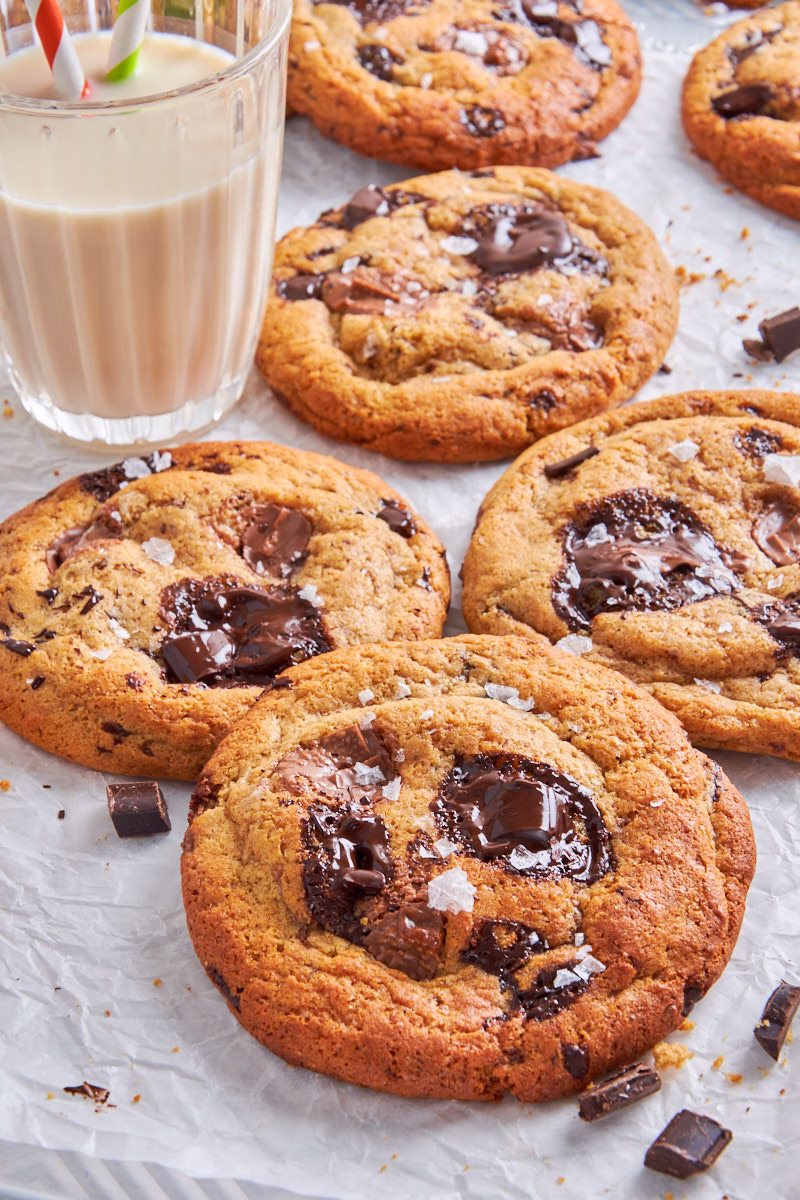
Everyone’s favorite cookie, but with sourdough and protein: Rippled Sourdough Protein Chocolate Chip Cookies
Peanut Brown Butter Protein Sourdough Cookies
- Total Time: 34 minutes
- Yield: 16 cookies 1x
Description
I took a popular Peanut Brown Butter Cookie recipe and adapted it for my sourdough protein kitchen. This version features rich brown butter, the gentle flavor from sourdough discard, and a boost of protein powder to create a cookie that hits all the right notes: it’s chewy, satisfyingly salty-sweet, and crunchy with peanuts. With 11 grams of protein per cookie, this recipe gives you a super satisfying snack that doesn’t sacrifice great flavor.
Ingredients
Sourdough Protein Cookie Dough
- 1/2 cup (113g) unsalted butter
- 3/4 cup (150g) dark brown sugar, packed
- 1/2 cup + 3 tbsp (200g) creamy peanut butter
- 1 large egg
- 1/2 cup protein powder
- 2 tsp vanilla extract
- 1/2 cup sourdough discard
- 3/4 cups (90g) all-purpose flour
- 1 1/2 tsp kosher salt
- 1 tsp baking soda
Crunchy Peanut Coating
- 1 large egg
- 2 1/2 cups (350g) salted roasted peanuts
- Flaky sea salt
Instructions
Preparations
- Take your eggs out of the fridge, so they can come to room temperature. Though, if you forget (as I often do) simply add it to the still slightly warm butter, to help you cool it down.
- Get all your ingredients ready. I love measuring them out in advance, so I can just throw them together, looking all organised when making the cookies. Plus I’m very prone to forgetting something. So having it all lined up helps me make sure I got it all.
Brown Your Butter
- In a saucepan, melt your butter over medium high heat. It will splatter and bubble wildly.
- The moment you hear the sound changing and the bubbles look smaller, turn down the heat to medium low and start stirring with your spatula, scraping any brown bits off the bottom of the pan. This is the good stuff, you don’t want it to burn!
- Let it brown for just a minute or so, until it smells lovely nutty and has a deep amber color. Depending on your hob this can be very quickly! In doubt stop earlier rather than burning it.
- Transfer to your heat proof bowl. Allow to cool in the fridge for about 30 minutes or until the sides are starting to solidify, but the center is still liquid.
- At this point whisk and integrate all the lovely brown bits from the bottom back in, until you have a creamy mass. You want the consistency to be scoopable and thick, like softened peanut butter.
- Don’t be tempted to use the butter in liquid form. It won’t get fluffy when mixing with the sugar and your cookies might come out flat and greasy instead of puffy and chewy.
Whisk Butter and Sugar
- Using either your whisk or the paddle attachment of your stand mixer, start whisking butter and sugar until slightly lighter in colour. It won’t get as fluffy as a white sugar mix, as the brown sugar is a bit denser due to the high molasses content.
Add Wet Ingredients and Protein Powder
- Mix in the egg, peanut butter, and vanilla, until fully incorporated and creamy.
- Add the protein powder and sourdough discard and mix again until smooth. While you could add the protein powder to the flour, I always feel it dissolves better when added with the wet ingredients.
Mix in The Dry Ingredients
- Now come the flour, baking soda and salt. Give them a brief mix while on top of the batter (or in a smaller bowl), so all is evenly distributed throughout the dough.
- Gently stir it in until just combined. Only until no dry streaks are left. Don’t overmix.
Shape And Coat Your Peanut Brown Butter Cookie Dough
- Line your sheet pans with baking parchment. I usually portion all the cookie dough onto one of them, so I can set up and easy “coating station” with sheet pans on both sides of the peanut/egg containers.
- Very roughly chop your peanuts. It’s totally fine if you have some halves in the mix.
- Transfer into a flat container or deep plate.
- Find a small bowl that fits a cookie ball being rolled in it, but not much more. Your egg for the coating goes into that and gets slightly whisked with a fork.
- Portion out all of your brown butter cookie dough, ideally with a cookie scoop. Mine was medium sized 35ml/1.18oz.
- Your cookie dough will be smooth, slightly crumbly and soft. It should hold together when gently squished in your hand, but crumble apart when more pressure is applied.
- Grab each portion of the dough and roll it into a smooth ball, finding exactly that “hold together but not crumble” pressure point. The first cookie might take a moment to figure out, but easy enough.
- Toss each of the dough balls in the egg wash, then right into the peanuts, pressing them onto the dough firmly. Again, play with the pressure point here. My first cookie crumbled a bit when pushing too firmly but easily came back together.
- Place them on the second sheet pan.
Bake Your Peanut Crunch Cookies
- Preheat your oven to 350°F/175°C.
- Arrange your cookies a few inches apart, flattening them a little, so you have about 8 evenly spaced ones on each sheet pan. They don’t spread very much.
- Bake for 10-14 minutes, rotating the tray once at around 6 minutes, as most ovens bake unevenly.
- If the tops are a bit cracked, but the dough underneath looks matte (slightly dry, not shiny and wet) and the edges are starting to brown, take them out.
- The trick here is, to have them still slightly underbaked in the center, as they will keep baking after removing from the oven.
- Allow them to cool on the sheet pan while you bake the next portion. Transfer to a cooling rack after about 5-10 minutes, using a spatula.
- These Peanut Brown Butter Protein Sourdough Cookies do need to cool completely before they are at their best, as peanuts are slightly soft when warm. So to get the full crunch factor, enjoy them cold. If you like with some milk or a nice cuppa.
Notes
Note:
If you want to overnight ferment the dough, I recommend leaving out the baking soda for now and then mixing it in quickly the next day. Otherwise it’ll lose some of its rising power and you get denser, less evenly risen cookies.
How To Store
- You can keep the unshaped cookie dough in the fridge for up to 3 days or freeze the shaped and peanut rolled, slightly flattened dough for up to 3 months in a freezer bag or freezer proof container.
- Bake right from frozen when a snack craving hits. They just need 1-2 minutes more in the oven then the fresh version.
- Baked sourdough discard peanut cookies store very well for about 7 days in an airtight container on the counter or up to 3 months in the freezer.
- If you reheat them, let them cool before enjoying, to help the peanuts crisp up again.
- Prep Time: 30 Minutes
- Cook Time: 14 minutes
- Category: Protein Recipes
- Method: Bake
- Cuisine: American


These peanut brown butter protein sourdough cookies came out soft with a slightly nutty taste and were really easy to make—such a nice bake to have on hand.
Oh good, so glad they worked for you. Thanks for letting me know. 🙂
These cookies pack all the salty sweet crunch you want with a rich brown butter base. The added protein makes them a satisfying treat without losing any flavor.
I couldn’t have described it better myself!
So happy you like them. 🙂
These cookies are so wonderful. I love the flavor and the extra protein in them. They were so easy to make, too.
I’m so glad to hear that! Thanks a lot for letting me know. 🙂
Brown butter makes everything better but adding it to a peanut-based cookie is pure genius! That nutty, toasted aroma is incredible!
Thank you, so happy you like them. 🙂
Excellent cookies. I love the brown butter flavor, and the added protein makes them a tasty post-workout snack.
Thanks a lot, so happy to hear that. 🙂