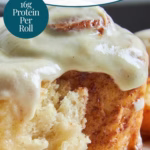
Soft Sourdough Protein Cinnamon Rolls (with Greek Yogurt)
If you’ve been looking for a cinnamon roll that actually keeps you full without feeling like you’re eating a dry protein bar, this is it. These Sourdough Protein Cinnamon Rolls combine the tang of a slow-fermented starter with Greek yogurt and whey protein. They are remarkably soft, fluffy, and have those gooey, caramelized bottoms we all crave, but with over 16g of protein to power your morning.
This post may contain referral links for products I love.
For The Pleasure Of Eating earns a small commission on these links at no cost to you.
- Why You’ll Love This
- The Ingredients
- Substitutions
- Equipment Used
- How to Make this
- How To Store
- FAQ
- Other Recipes You Might Enjoy
Why You’ll Love This
TL;DR
- High Protein, Zero Dryness: 16g of protein per roll thanks to a Greek yogurt and whey blend that keeps them incredibly soft.
- Gut-Friendly Sourdough: No commercial yeast here—just slow-fermented flavor that’s easier on the digestion.
- Flexible Schedule: Designed for busy lives; mix it tonight, bake it tomorrow (or the day after).
- Perfect Texture: Features that classic caramelized “cinnamon pool” at the bottom with a protein-boosted cream cheese frosting.
Soft And Fluffy Cinnamon Rolls
I recently noticed that I had already 2 kinds of cinnamon roll recipes on my blog (Sourdough Croissant Cinnamon Rolls with Pistachio Cream and the rather festive Sourdough Brioche Feuilltee), but none of them was a classic soft version. Obviously that urgently needed to be rectified, considering that I’m eternally addicted to them!
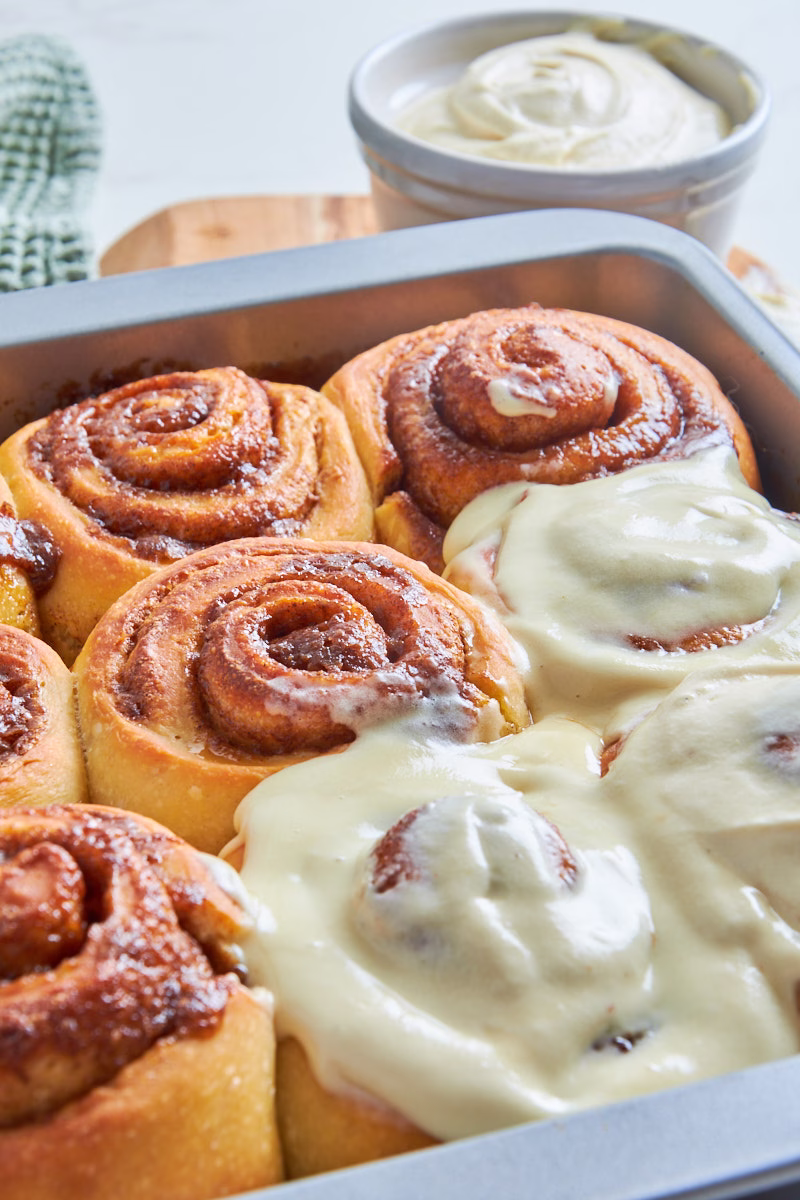
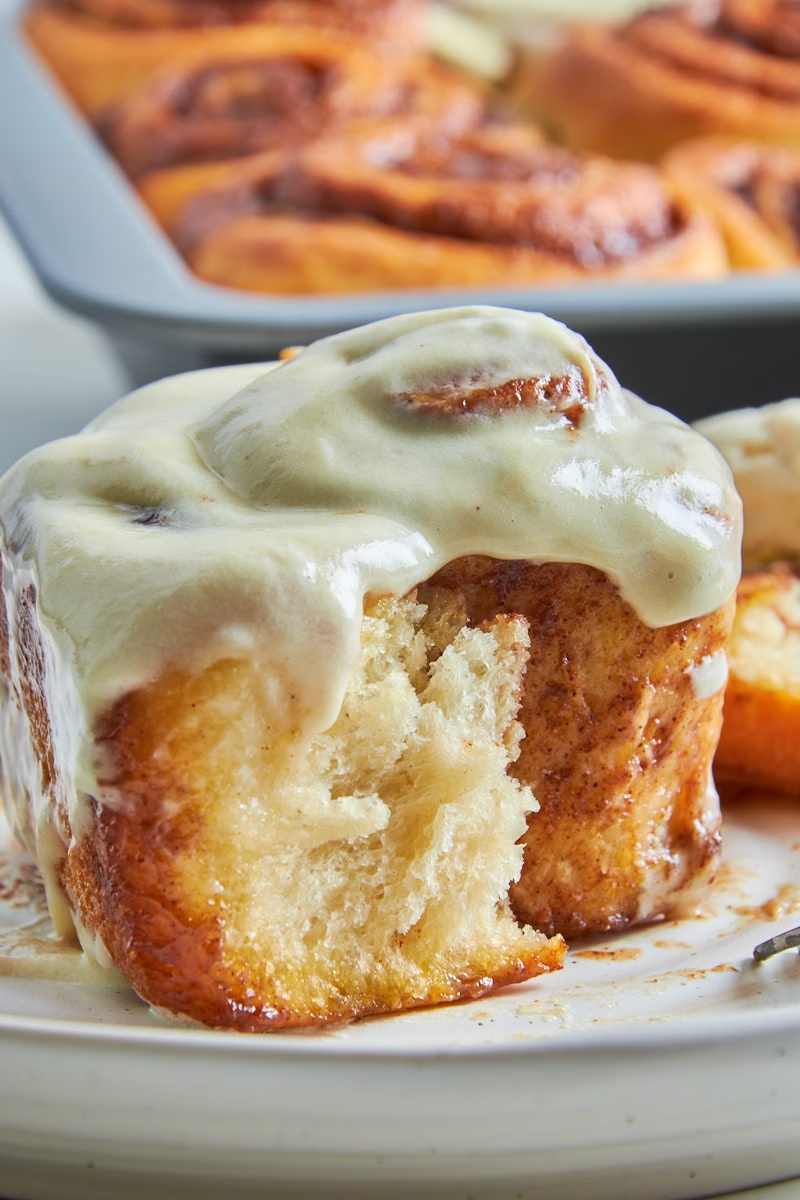
These lovelies have everything you want from your favorite breakfast: They are seriously soft and fluffy, have an intensely cinnamon filling, with far less butter than you’d imagine, yet they form these beautifully caramelized pools of deliciousness underneath themselves while baking, which makes the bottom of the rolls clearly the best bit. Well…unless you are a frosting person, in which case you can top them with a protein enriched frosting too!
But Make Them High Protein
With over 16g protein per piece (Including the frosting. Over 13g without it) my High Protein Cinnamon Rolls aren’t just delicious but also satisfying as breakfast, snack or dessert.
But why don’t I add more protein? I know there are recipes that add more protein powder to get up to 20g of protein. But I found in my tests that this leads to the classic dreaded protein dryness. The combo of ½ cup whey protein plus Greek yoghurt together with the sourdough counters exactly that issue, leaving you with the texture you love and the nutrition your body needs.
Sourdough Instead Of Yeast
I always found yeasted cinnamon rolls a little flat and disappointing in flavor. Using sourdough instead of yeast changed that instantly. You get a depth, gentle tang and maltiness that is simply not achievable with commercial yeast.
The slow fermentation makes these sweet rolls also gut friendly and, what’s best, breaks down protein into easier bioavailable molecules thanks to sourdough enzymes called proteases that not just work on the protein from flour but also on any whey protein powder and the Greek yoghurt I’m adding here, making the use of sourdough even more compelling.
You can read more about this in my post on why I’m baking with sourdough and protein.
Flexible and Meal Prep Friendly
Personally I love sourdough because it’s so incredibly flexible.
“Wait! Aren’t we supposed to follow those super complicated bakers schedules?” I hear you exclaim. Well…yes…and no.
Here is the thing about those schedules: They are just examples on how to get your dough from mixed to baked in the most efficient way. And for that they are certainly valid.
But here is the good news: Sourdough gives you much more time to work it into your own schedule if you take your time.
Let me give you an example of how my days usually look:
In the mornings I go to my horse for an hour or two, then work until afternoon. Suddenly it occurs to me that I have no bake planned for the week. But I only have an hour or two before bed, so the whole bulk ferment and whatnot wouldn’t really fit into the schedule anymore.
No problem at all. I just mix the dough within 10 minutes or so (I usually have sourdough starter in my fridge that I feed every 3 days or so, with a high flour to water ratio, meaning it is still active enough to mix a dough after 3 days). Then I do 1-3 sets of stretch and fold before going to bed and just pop the dough into the fridge after.
This means it gets the cold fermentation done and is now ready to shape the next morning or, if I’m busy, for up to 2 days after.
The next day or the one after I take it out in the morning and often shape it right away while still cool, as sourdough is often easier to handle when cold, especially the enriched versions like this cinnamon roll dough.
Once it’s shaped and in the baking pan, I place it in a large plastic bag that I inflate slightly, so it doesn’t stick to the dough, but keeps it perfectly protected and moist for days.
And here is the next flexible part: You can leave it on your counter for three to six hours to rise and bake it on the same day, or you can pop it back into the fridge and bake them at any point from the next day on, as even in the fridge they will keep rising slowly, making them great for meal prep. Or do a combination of both where you either let it rise a bit before or after the fridge time.
This is what I mean by flexibility: The slowness of sourdough works in your favor and you can slow it down or speed it up (by leaving it in a warmer place) to suit your pace. The only thing it’s not very good at is speed. Though, if you add baking powder or soda to it, that also works, if without most of the sourdough’s benefits.
Ingredient Notes
As usual, just the most relevant ones that I feel need notes. The full list including amounts is in the recipe card.
Cinnamon Roll Dough Ingredients
- Fat Free Greek Yoghurt – Why am I choosing fat free? Because it is there to replace most of the milk as liquid. You get lower calories and higher protein with this swap.
- Sour Cream – While you could just add more Greek yogurt here, the sour cream has a higher fat content, leading to softer rolls.
- Whey Protein Powder – Whey concentrate to be exact, as it still has a bit of fat and lactose (minimal) helping with the softness and moisture of the rolls. Ideally vanilla or cinnamon flavored. Mine is from MyProtein.
- This is neither affiliated nor sponsored. Just the powder I found to taste best after trying a fair few. If you never found one you actually enjoy, give this one a try. I feel it leaves none of the typical protein aftertaste in my baked recipes, which is a huge bonus!
- And, if you use a flavored version, it’ll be sweet and you can skip the added sugar that is usually in the dough of sweet rolls.
- Butter – Any butter will do, though I prefer the Irish butter due to it’s high fat content and amazing flavor. In this recipe it’s mainly for tenderizing the rolls by coating the flour right from the start a little bit.
- Sourdough Starter – If you have no starter yet, follow my recipe to make your own.
- You want it to be active and bubbly for the protein cinnamon rolls. I’m using a slightly different feeding ratio of 1:7:6 these days, which keeps my sourdough active for longer, giving me more flexibility in my baking schedule and leading to a very strong starter. This ratio also leads to a less acidic outcome, which, in Cinnamon Rolls is lovely, as you want them a bit sweeter tasting than, say, rye bread.
- Strong White Flour – I use strong white flour (called bread flour in many countries) here for the classic texture and flavor. It also has slightly more protein than all-purpose flour, which is always good in my book.
The Cinnamon Sugar Filling
- Dark Brown Sugar – This gives the extra caramel flavored layer you want in the perfect cinnamon roll.
- Cinnamon – Ideally relatively fresh, so it still has all the amazing layered aroma of the spice.
- Butter – Less than you think. Just to moisten the sugar and help with caramelising
- Flour – This might seem ad odd addition to the filling, but it helps keep the butter inside of the roll instead of pooling at the bottom during the rising time. Any flour will work.
Cream Cheese Protein Frosting
- Light Cream Cheese – While you can use full fat, I found that when I add protein powder, it gets enough added creaminess that the light version works better (and with less calories).
- Whey Protein Concentrate – Ideally vanilla flavored. Again I’m using MyProtein to avoid any weird aftertaste. Use whichever powder you really enjoy as shake. Gold Standard whey has a similar nice flavor.
- Icing Sugar – Because the protein powder is already sweet I reduced the icing sugar by half. But you do need a bit for that perfect frosting texture. Leave it out at your own peril.
- Butter – I found this is relatively optional for my taste anyway. I left it in for the classic frosting texture, but have, on other occasions just as happily made the glaze without butter.
substitutions
Cinnamon Roll Dough Ingredients
- Fat Free Greek Yogurt – The vegan version works fine here. If you are vegan, you can also replace the 2 tablespoons of sour cream with the vegan Greek style yogurt.
- Whey Protein Concentrate – Casein powder works well, but needs about 1-2 tbsp added water. So does upcycled (unflavored) Barley protein, which needs 1-2 tbsp less water. Add 2 tsp vanilla extract if you are using unflavored powder.
- I have not tried to bake with any pea based vegan protein powders, as I deeply dislike the flavor and texture of them to begin with, so I’d rather not have them in my baked goods. Though I’ve heard Orgain Vanilla flavor works pretty well.
- If you give it a try, please tell me what you think! You’ll likely need to add 1-2 tbsp water, as they do soak up more than whey concentrate.
- I would not recommend using whey isolate, as it has a much stronger drying effect. It lacks the fats found in concentrate, which leads to a much thirstier, tougher dough.
- If you’d like to make this recipe without protein powder, simply replace 1:1 with more flour. Start with about 2-3 tbsp less water, as protein powder absorbs more than flour.
- Butter – Vegan butter will work nicely.
- Egg – If you’d like to replace the egg, add 30ml/2 tbsp plant milk and 20g flour to get very similar results in texture.
- Sourdough Starter – You can make these rolls with discard that is up to 3 days old. Just give them a little longer to rise.
- If you’d like to make this recipe without sourdough add ¼ cup/30g more flour, ¼ cup/60ml more milk/plant milk and 2 ¼ teaspoons instant dry yeast. This will roughly halve the rising/fermentation time.
- Strong White Flour – You can absolutely use all-purpose flour here. It absorbs a little less liquid than strong bread flour, so you might want to add a tablespoon or two more flour or a little less milk.
The Cinnamon Sugar Filling
- Brown Sugar – You could use sweeteners that are designed to function like brown sugar. But they won’t caramelize. So your results will be slightly different.
- Cinnamon – If you dislike cinnamon, do it like the Swedes and use copious amounts of ground cardamom to get a result similar to the classic Swedish Kardemummabullar.
Cream Cheese Protein Frosting
- Cream Cheese – Vegan cream cheese works here. You could also use just cream and thicken it with protein powder and icing sugar. You’ll just need a few tablespoons.
- Whey Protein Concentrate – Any vanilla flavored and delicious tasting protein powder will work. Just make sure it doesn’t have a weird aftertaste, as you will most certainly notice that even more in a frosting. Alternatively just replace 1:1 with more icing sugar.
- Or simply top them with my 5 minute Pistachio cream. I promise you won’t look back!
Variations
You can fill these rolls with anything your heart desires from dark chocolate over apple butter all the way to Pistachio cream. Whatever you use, they will be delicious!
Top Tips For Success
- Sourdough Starter – While I would opt for an active starter in this recipe, as it’s an enriched dough and with that a little heavier, you can use discard too. It just needs more time in the bulk ferment and rise.
- Think of it like this: You always feed the little sourdough bacteria, be it in the starter or the dough. But to get them back to happy, bubbly, and active takes time. Give it to them ahead of mixing the dough or after. Your results may vary a little, but much less than you think.
- Roll your dough very tightly after applying the filling. It will always end up much looser than you think anyway.
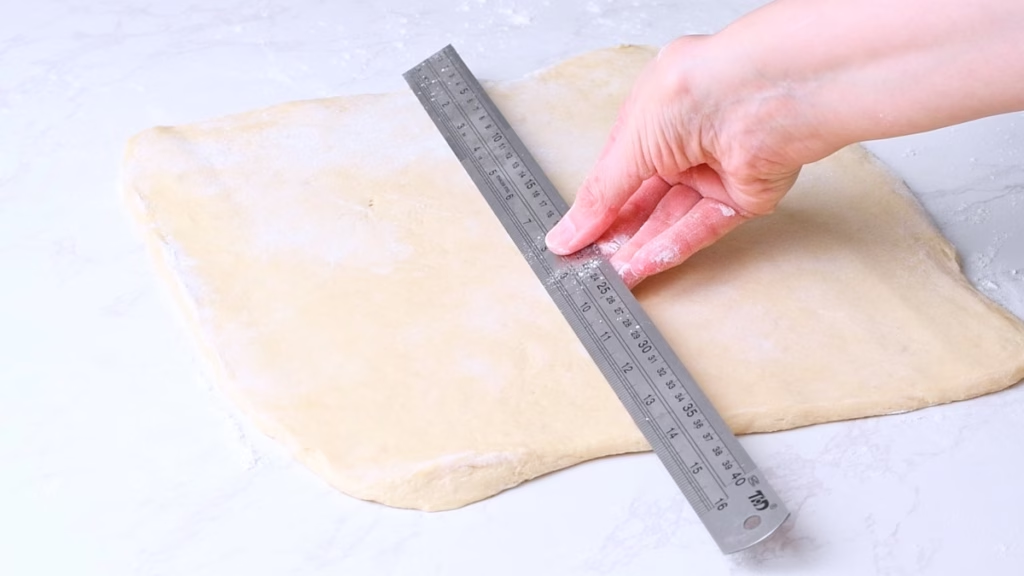
- Having the rolls at the same size isn’t just for cosmetic reasons. Different sizes have different baking times. Which is why I used a ruler in this recipe, to get as close to even sized ones as possible.
- However, we are working with soft dough and perfection (unless you are a professional baker) is hard to come by. So in order to even out the differences put the largest rolls into the corners of your baking pan, where they get the most heat exposure and the smallest in the center, where the heat takes the longest to reach.
- Using kitchen or sewing twine to portion – I found this to be the easiest method by far, leading also to the best looking results. A knife, even a very sharp one, will always squish the rolls a bit, while cutting and then rolling them one by one looks incredible in videos, but I found it messy at best and rather labor intensive.
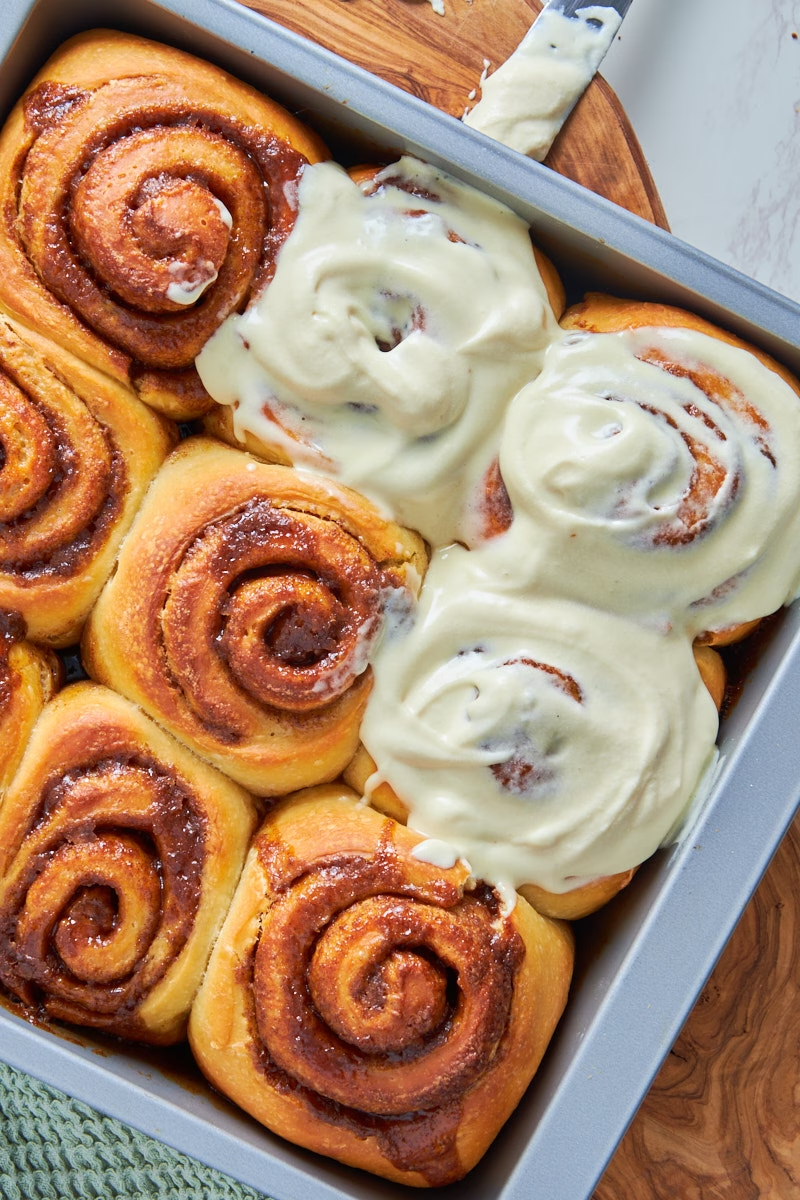
- The timing of applying the frosting matters – If you apply your frosting on the rolls right out of the oven, it will just completely melt and run off. If you apply it when they are cold, it won’t melt at all and just sit on top.
- You want the happy middle here: Warm rolls, where it can melt into them a little bit, but not run off. After about 10-15 minutes out of the oven seems to be the sweet spot.
Equipment Used
- Bowl– I adore both of my KitchenAid bowls that, weirdly enough, get more use than the stand mixer itself these days. I found that most sourdough recipes don’t need a lot of kneading, but rather a few gentle stretch and folds and time to develop the perfect fluffy structure we love. I got fitting lids for both of my bowls, meaning I don’t have to resort to cling film most of the time. Though for visibility in videos I still sometimes do. Any large bowl will do here.
- Blender – This is optional, but I love using my Nutribullet for blending the protein powder with the liquid ingredients, making sure it gets super smooth. If you don’t have a blender a few minutes of vigorous whisking will do.
- Danish Dough Whisk – This might be my favorite new(ish) tool since I got it last year. The long handle makes this whisk excellent to use in large bowls, and the style of this whisk makes mixing your sourdough a breeze, integrating all the wet ingredients and still sturdy enough when the dough starts getting firmer.
- Rolling Pin – I like a straight and simple wooden one best. While I used one with handles for a long time, the straight one gives me a better feel for the dough when rolling it out. It provides more direct feedback to my hands. I tried a marble one for all of…uhm…1 day, at the end of which it rolled off my counter and shattered. Plus it was super heavy. Not great for arthritis!
- Ruler – To get evenly sized cinnamon rolls for the best results.
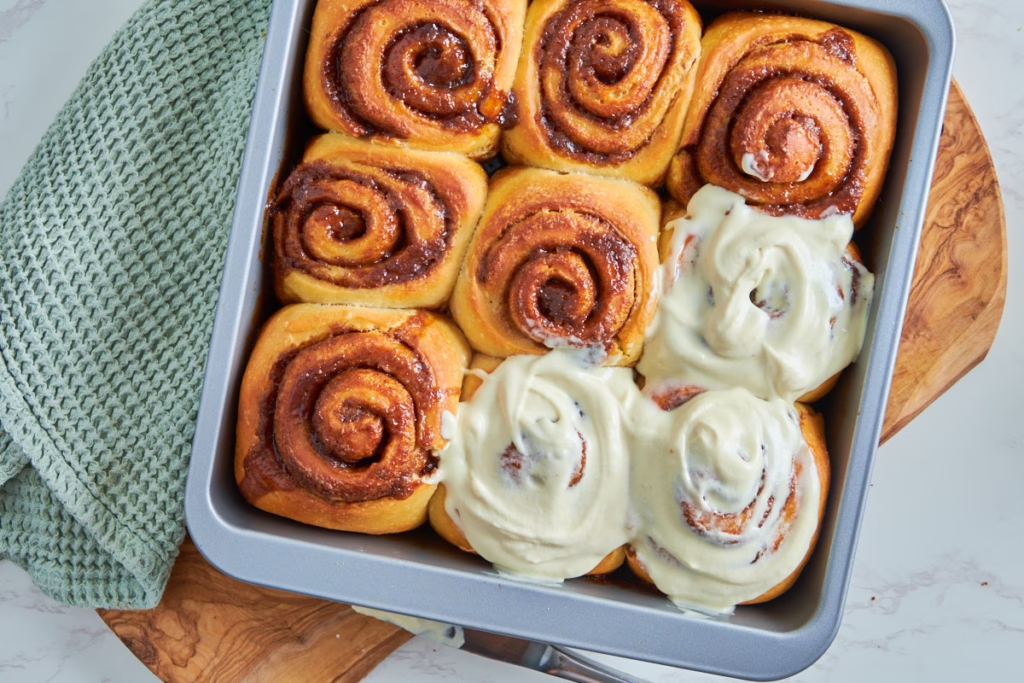
- Baking Pan – Ideally a 9 x 9 inch / 23 x 23 cm square, which fits the 9 rolls perfectly, giving them enough room to expand, but not so much that there would be gaps in between then, which means they will stay soft and fluffy instead of crisping up.
- A cast iron pan will work too.
- Instant read thermometer – Optional but helpful, as with cinnamon rolls you want to stay in the very light golden range, to keep them soft but still baked all the way through. A thermometer takes out the guesswork here.
 Buy Now →
  Buy Now →
  Buy Now →
 How to Make this
Example Bakers Schedule
| Time | Action | Note |
| Day 1: 9:00 PM | Feed Levain | Mix your 1:7:6 starter. Let it sit at room temp overnight. |
| Day 2: 9:00 AM | Mix Dough | Blend Wet Ingredients. Mix with flour, salt, and starter. |
| 10:00 AM | Stretch & Folds | Perform 3–4 sets of folds every 30 minutes. |
| 12:00 PM | Bulk Ferment | Let the dough sit undisturbed (Counter or move to Fridge for up to 3 days.) |
| 6:00 PM | Shape | Shape and place in baking pan |
| 6:30 PM | Cold Proof | Put the Cinnamon Rolls in the “plastic bag tent” and into the fridge (for up to 3 days). Or proof on counter until puffed up. |
| Day 3: 8:00 AM | Bake | Pre-heat the oven and bake. |
Mixing The Protein Cinnamon Roll Dough
Blend Liquids and Protein
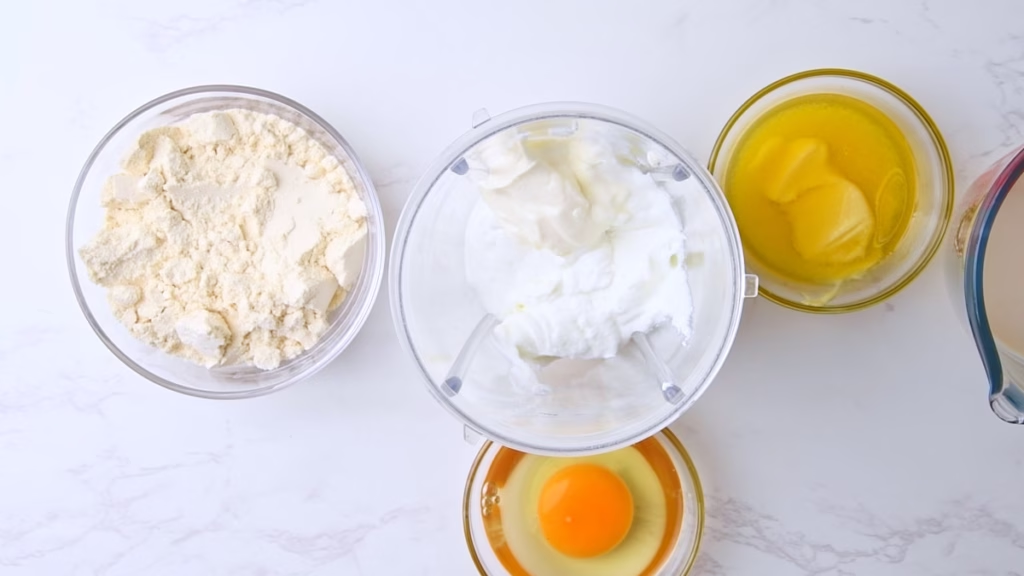
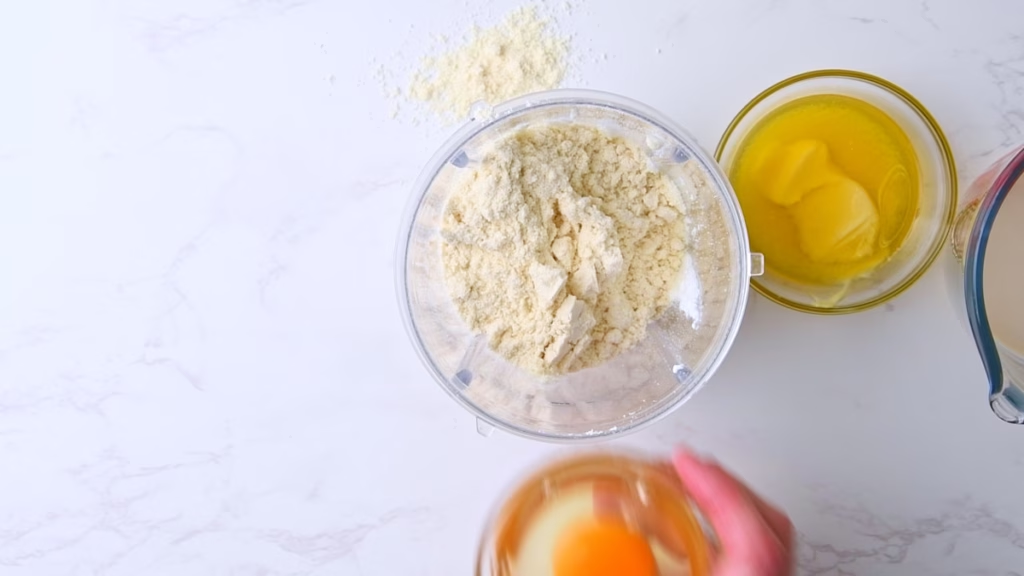
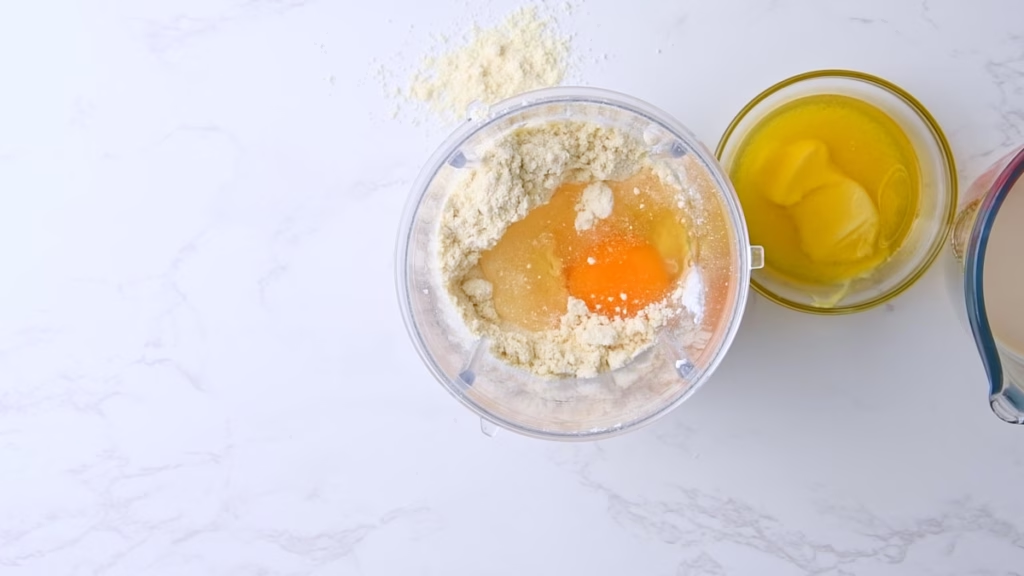
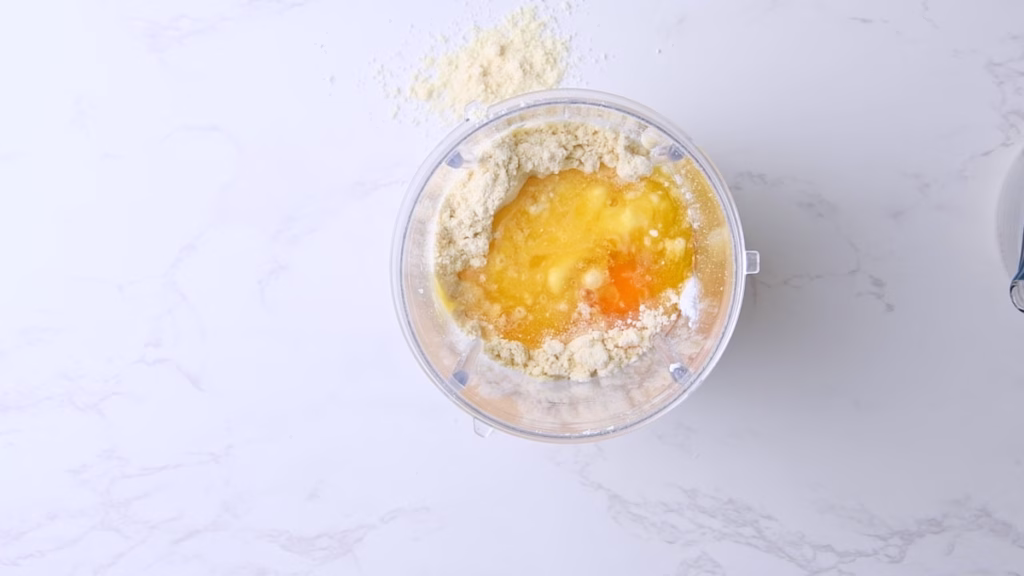
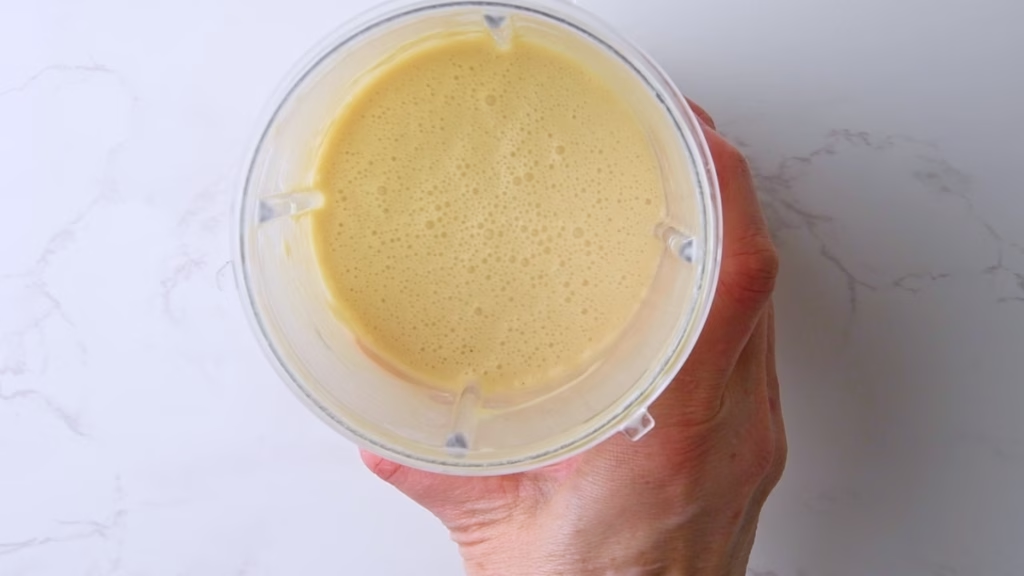
- For the smoothest result and easiest mixing add Greek yogurt, sour cream, whey protein, milk, egg and butter to a blender. Blend until smooth.
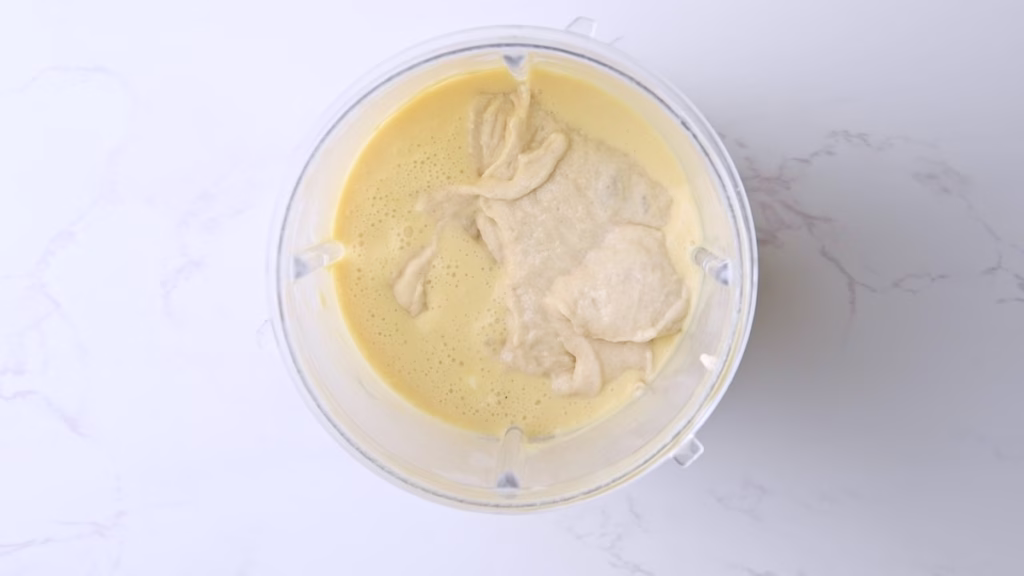
- Stir in the sourdough starter gently.
Mix The Dry Ingredients
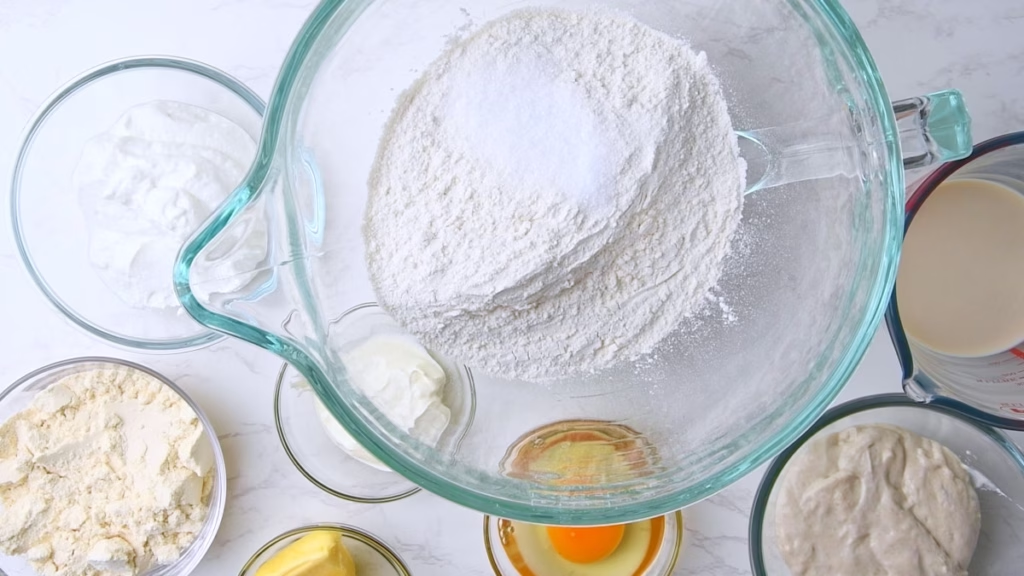
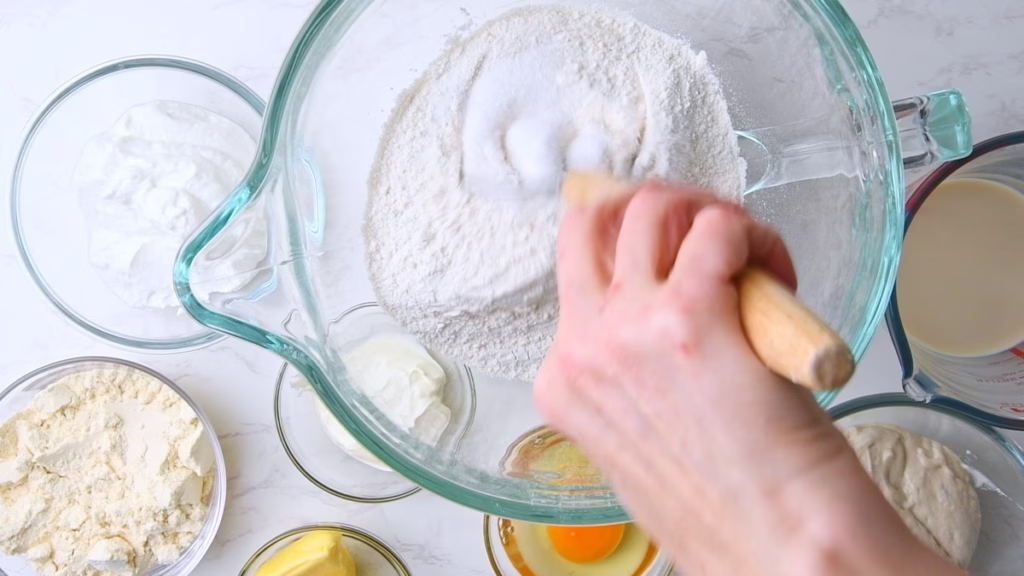
- Add the salt to your flour and stir briefly.
Add The Wet Mix To The Dry Ingredients
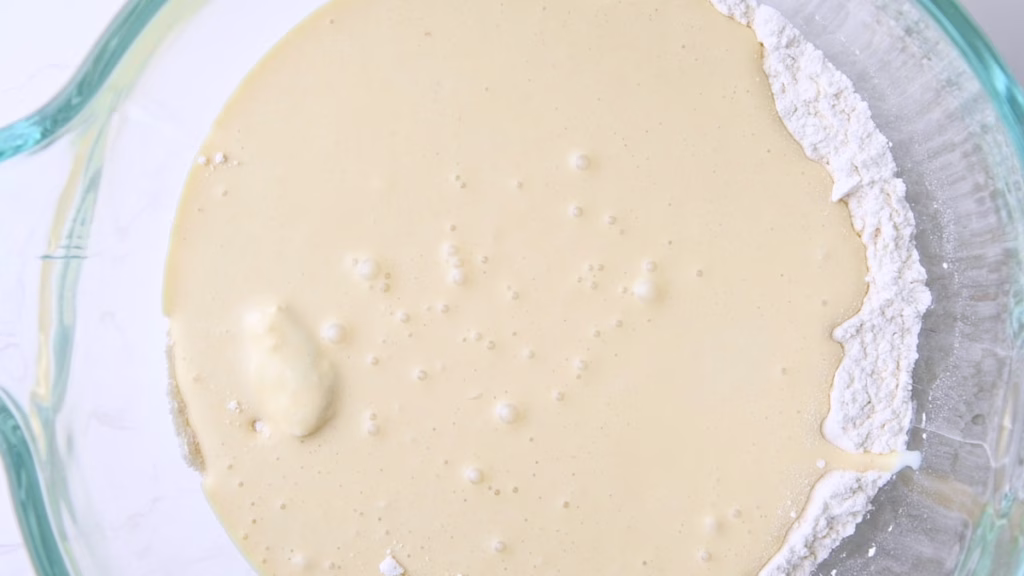
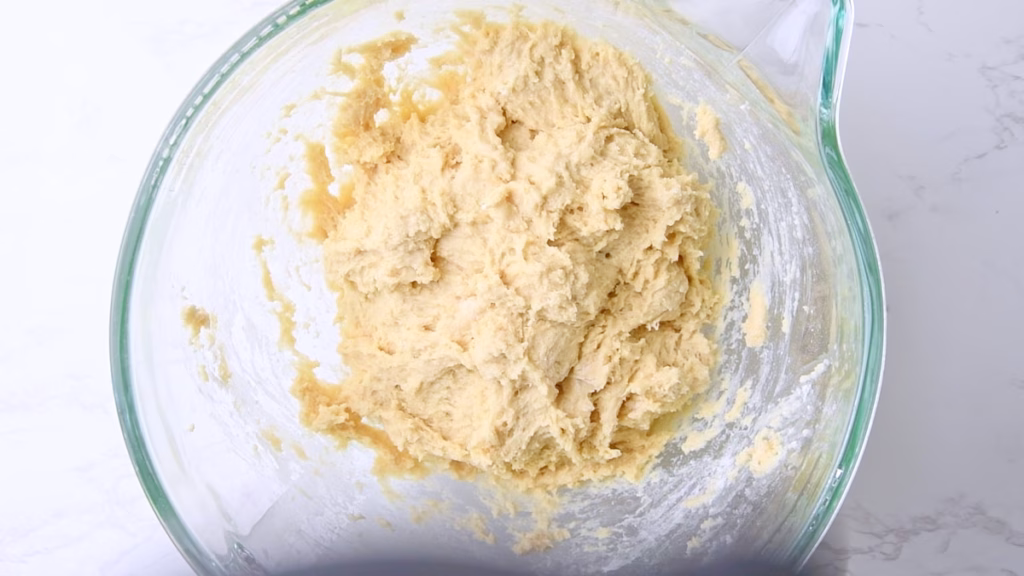
- Pour your protein blend into the flour and, ideally using a dough whisk, stir until you have a shaggy dough.
- Cover your bowl for about 30 minutes, allowing the flour absorbing the liquid.
Bulk Proof and Stretch and Folds
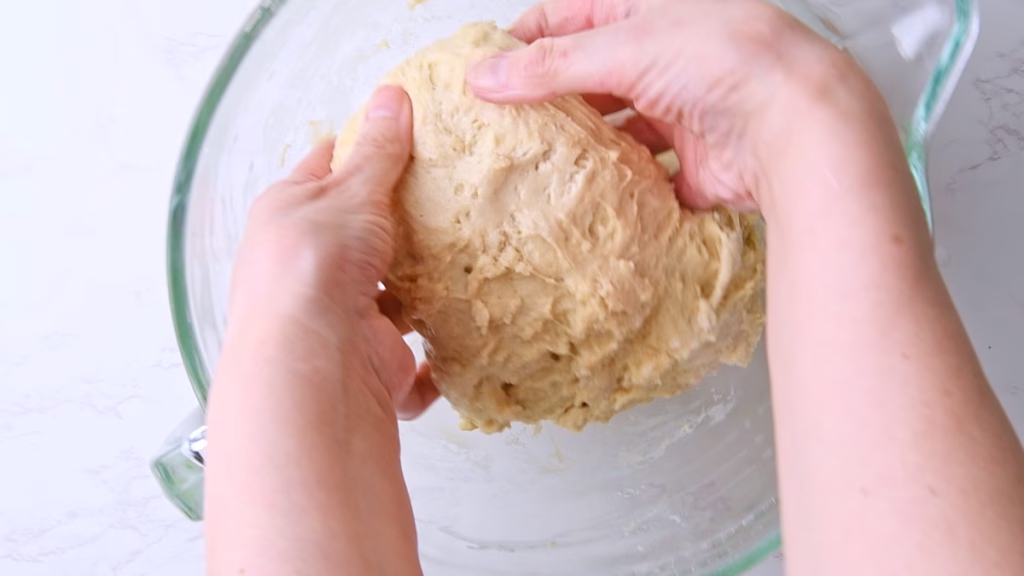
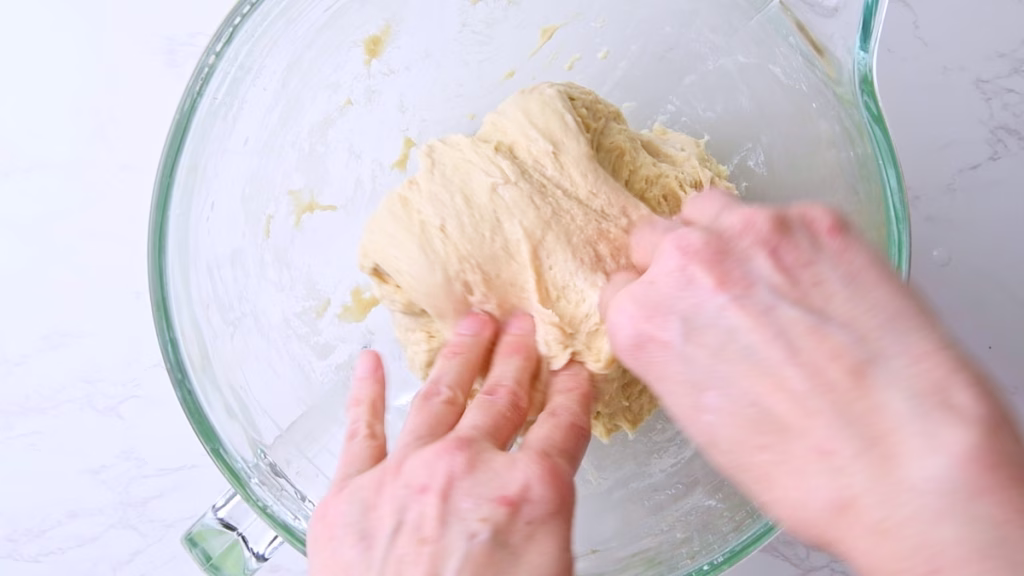
- Starting after about 30 minutes to one hour (this is very flexible) do 3 sets of stretch and folds by using wet hands to push under the dough, pulling one side up and folding it over the rest.
- Turn the bowl by 90 degrees and repeat. Do this 3-4 times or until the dough looks visibly smoother.
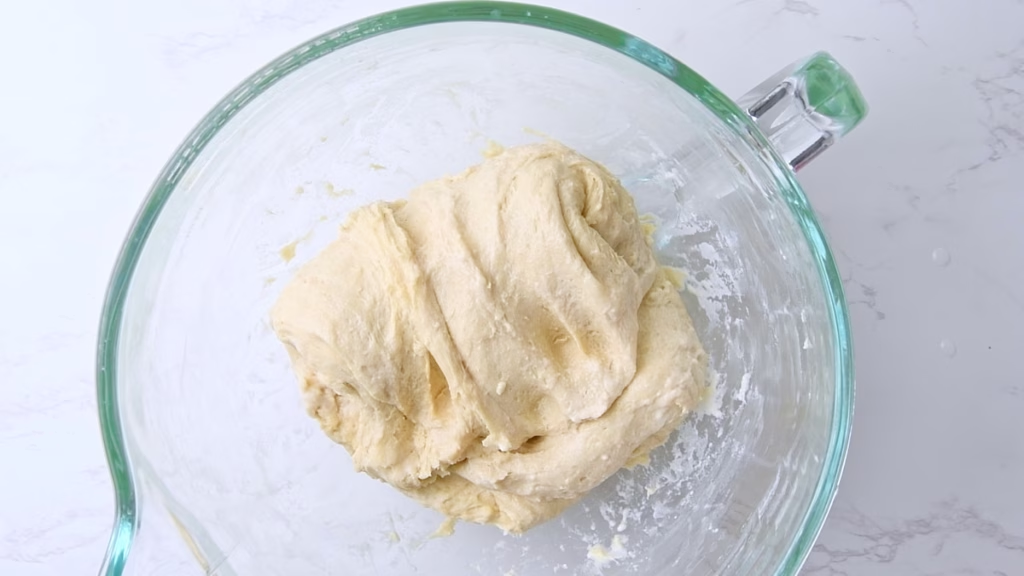
- Cover again and repeat after about 30 minutes. Repeat 2 more times.
- Your dough should now look very smooth and be less sticky. If not, repeat the above once more.
Put into rectangular or square container (optional)
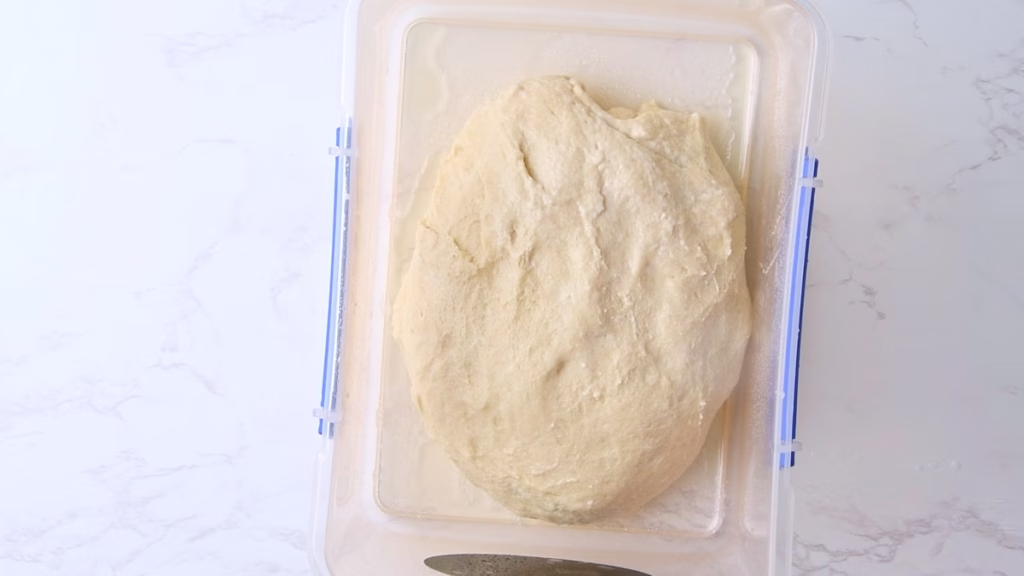
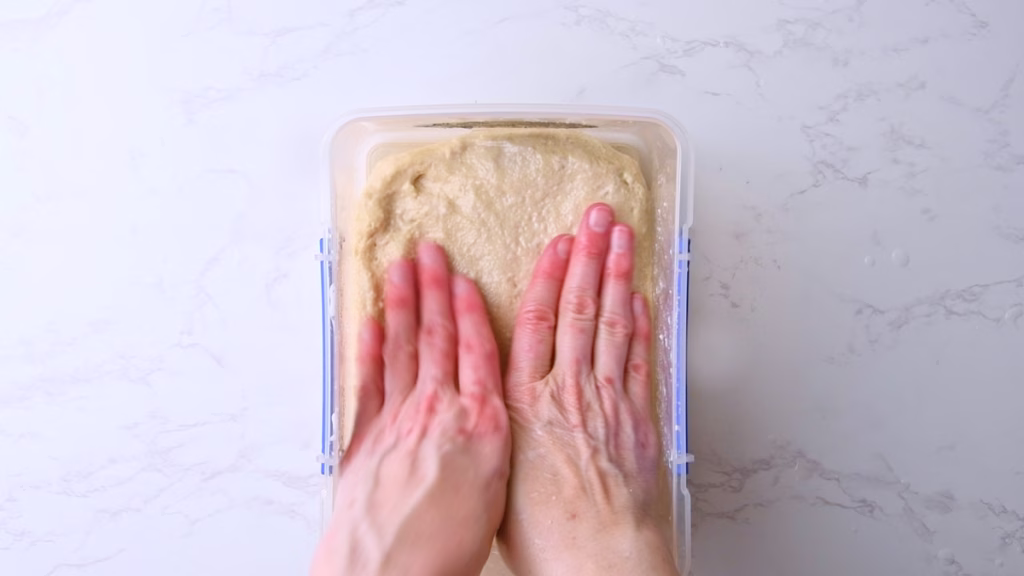
- I put my dough into an oiled rectangular box that has a lid, as dough “remembers” the shape it was in last, so you’ll have an easier time convincing it to roll into a square shape later.
- Pat it out with your hands a bit, pushing it into the corners.
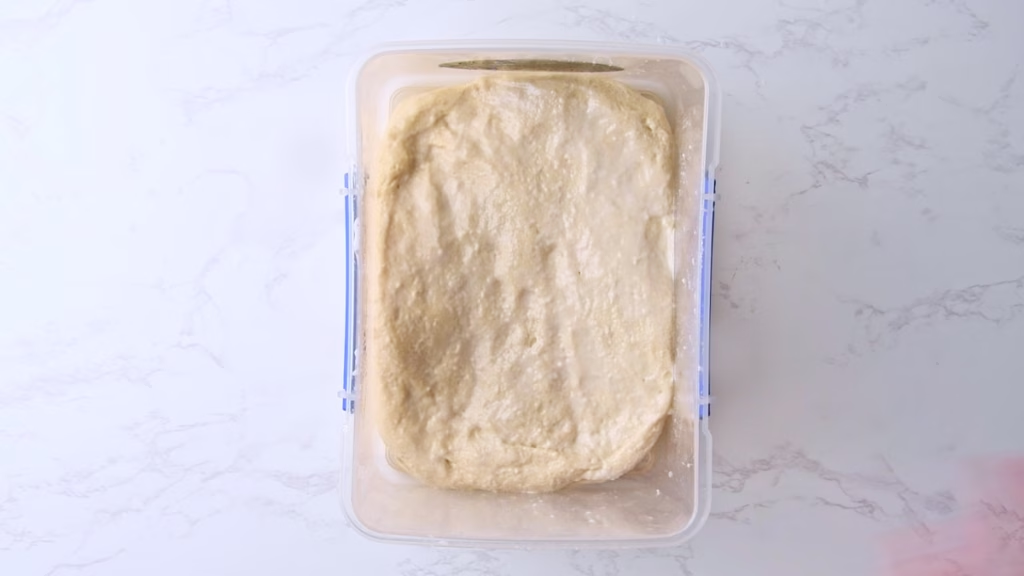
- Cover and allow to bulk ferment.
- I usually let it sit on my counter for a few hours (up to 6 max.) until visibly risen and start shaping it at that point.
- But depending on your schedule you could also put it into the fridge to cold ferment for up to 3 days of fridge time total. Shape and finish the rise when you have a few hours until baking.
Tips for Busy Schedules
- Personally I wildly switch up the time of bulk fermentation, cold ferment and rise after shaping. The important part is that your dough gets time to rise once before shaping, so it’s already light and fluffy when you start and then again until visibly risen and puffy after shaping. It doesn’t matter if that happens in the fridge or on your counter and the time needed will vary depending on the temperature it sits at.
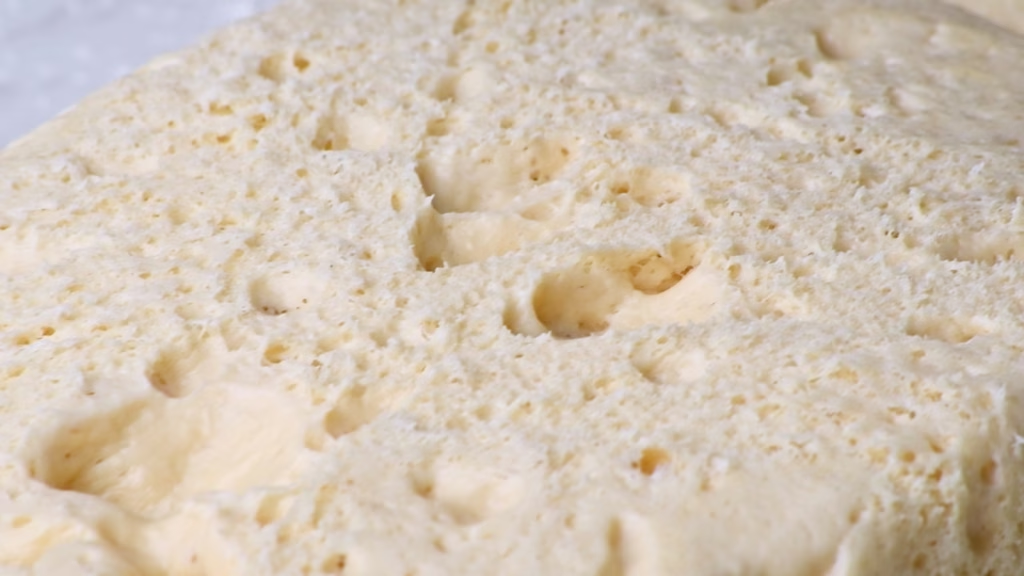
- To check if your dough is ready gently poke it with your finger. It should leave a dent, feeling noticeably airy, that springs back slowly.
- If you have a hard time denting it at all, it needs more time.
- If the dent stays and doesn’t bounce back slowly, it might have gone a little too long (though you can still bake it).
- It’s much harder to overproof sourdough than to underproof it.
- Patience and cold fermentation always pay out in flavor and gut friendliness.
Filling And Shaping
Prepare The Cinnamon Sugar Filling
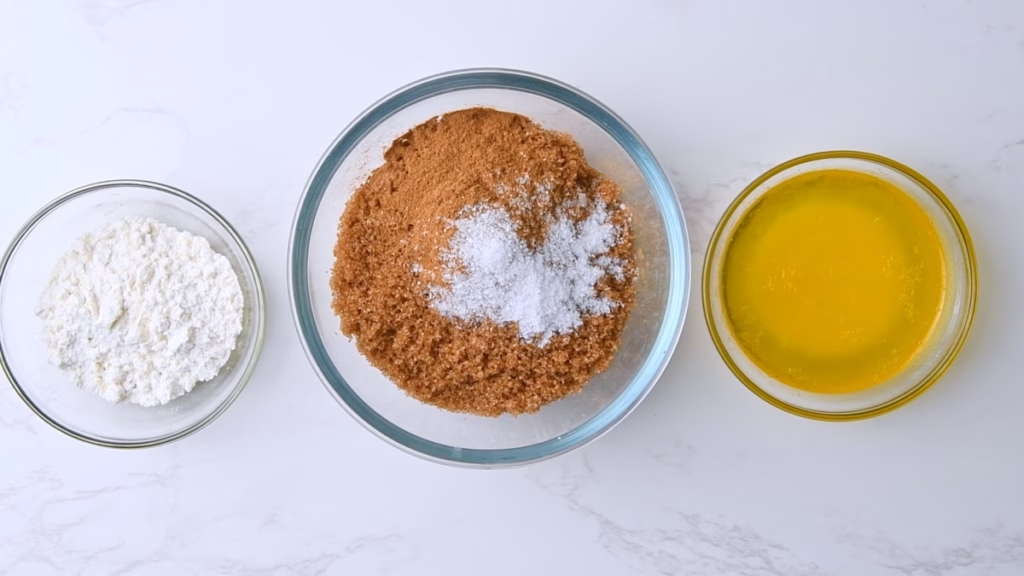
- When your dough looks ready to roll, start mixing your filling.
- Melt the butter. A minute max. in the microwave will be enough. You just want it liquid, not super-hot, as you’ll crumble it later with your fingers.
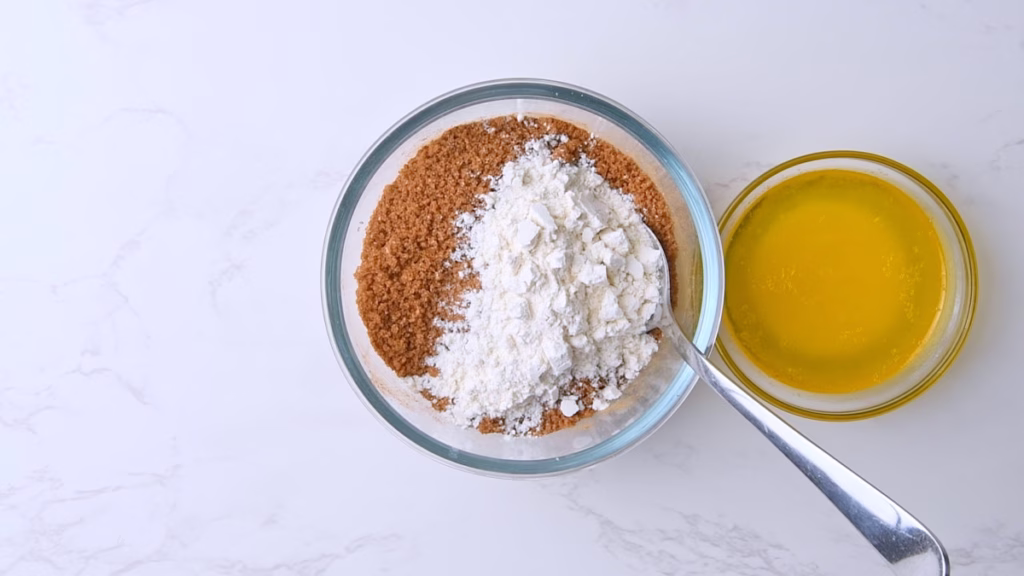
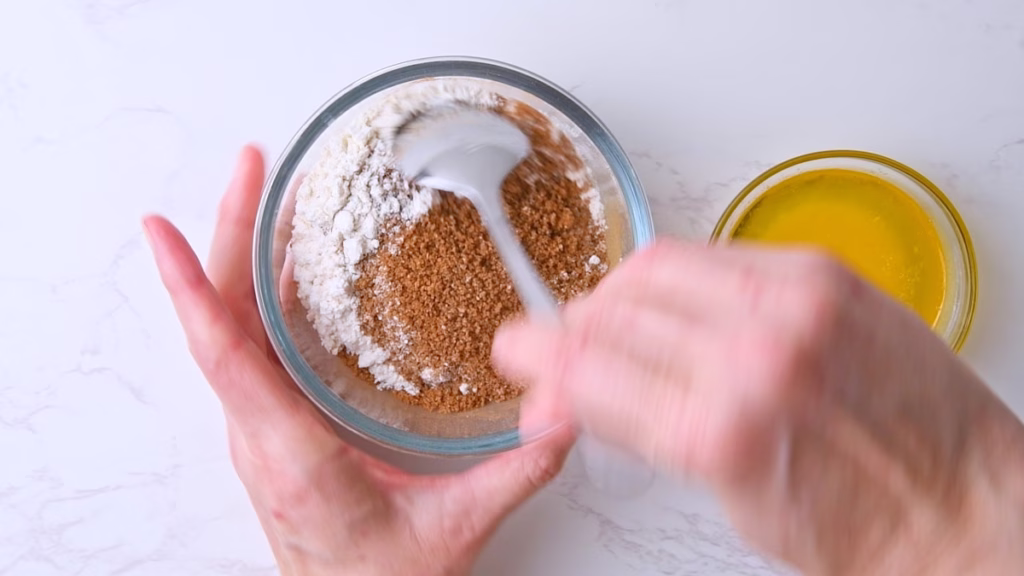
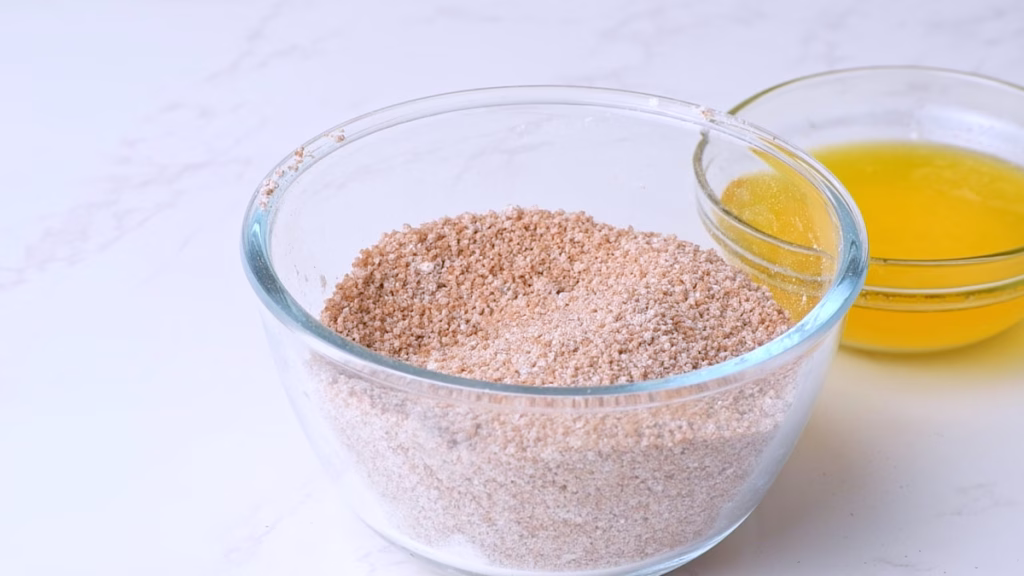
- Add cinnamon, salt and flour to the brown sugar and give it a good stir until the sugar is coated with the flour and cinnamon.
- The salt balances the sweetness and emphasizes the flavor. The flour will bind with the butter and keep it from seeping out during the rise.
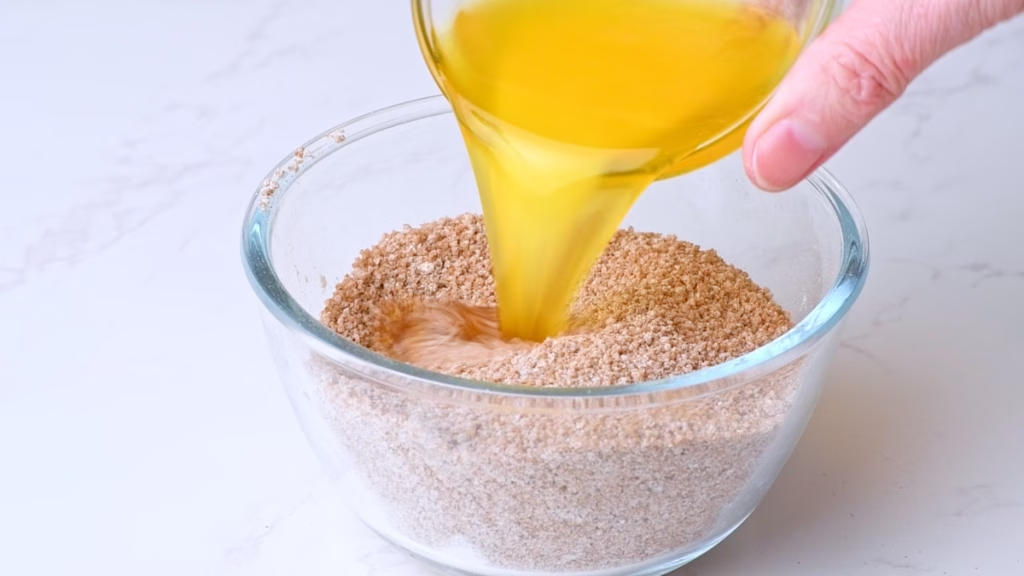
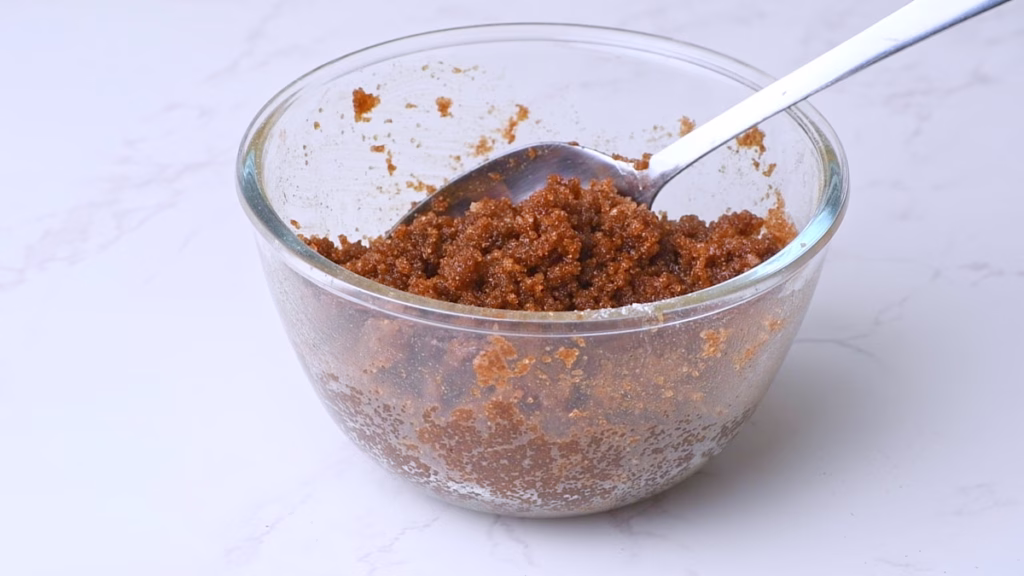
- Pour in the butter and give it a good mix until well incorporated.
Rolling Out the Dough
- Grease a 9 x 9 inch / 23 x 23 cm baking pan. I like using and empty butter wrapper for this (if I have one handy) to minimise waste.
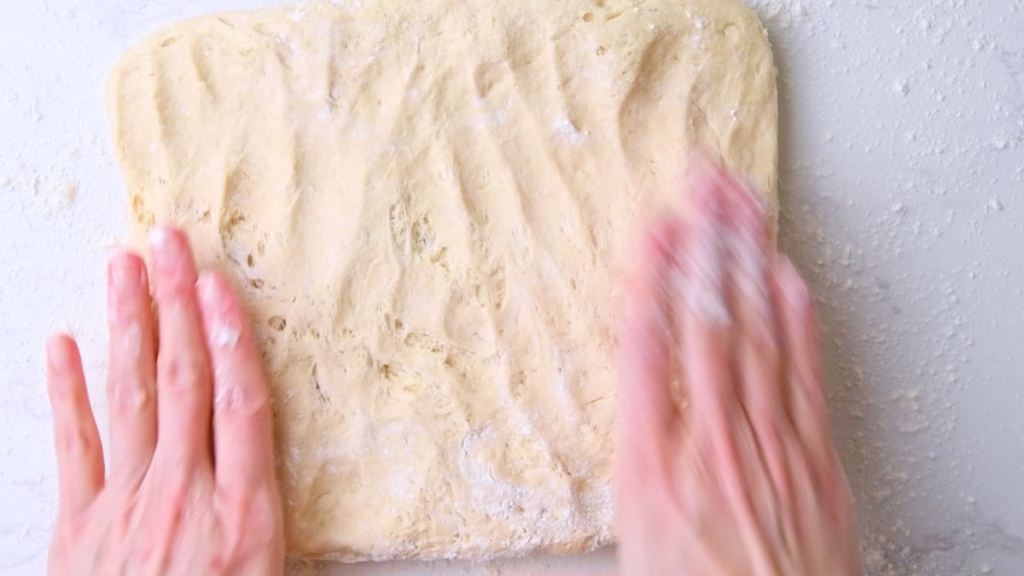
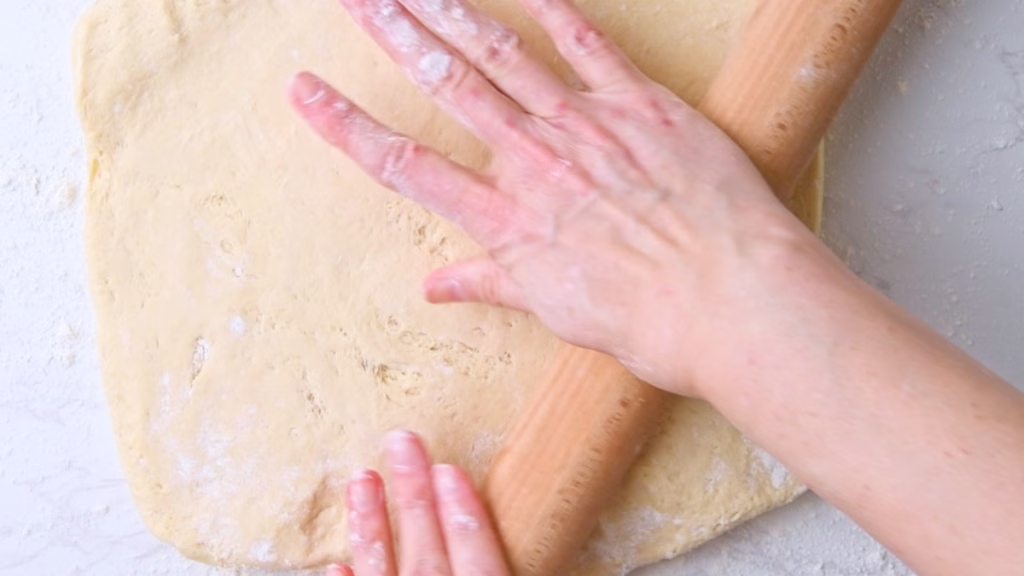
- Turn your now fluffy and bubbly dough out onto a lightly floured work surface.
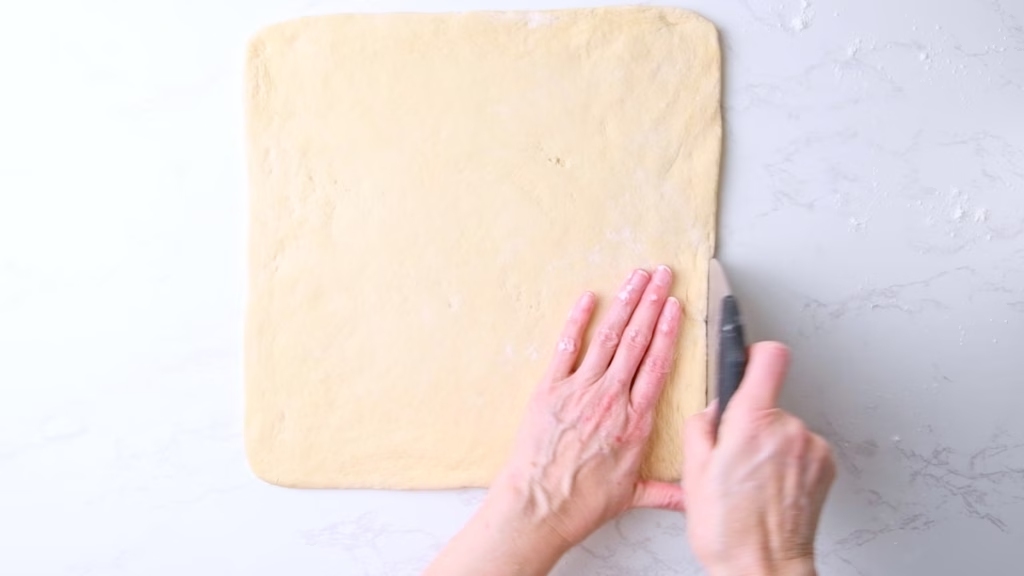
- Use your hands to pat it out into a square, then use a rolling pin to roll it out to about 12 x 12 inch / 30 x 30 cm.
- To get nice straight corners, I like using a dough scraper or the rolling pin to straighten them.
Filling Your Sourdough Cinnamon Rolls
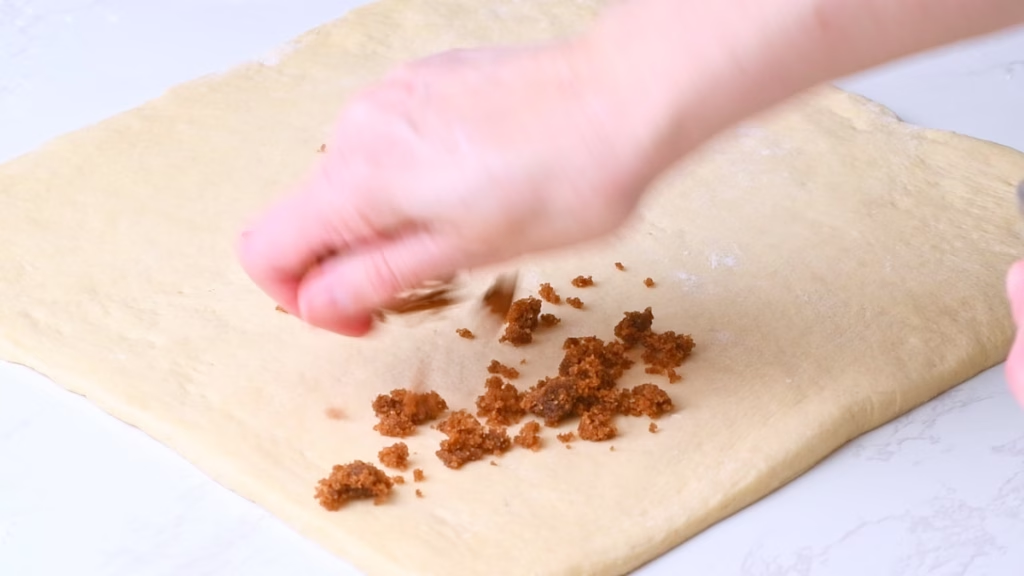
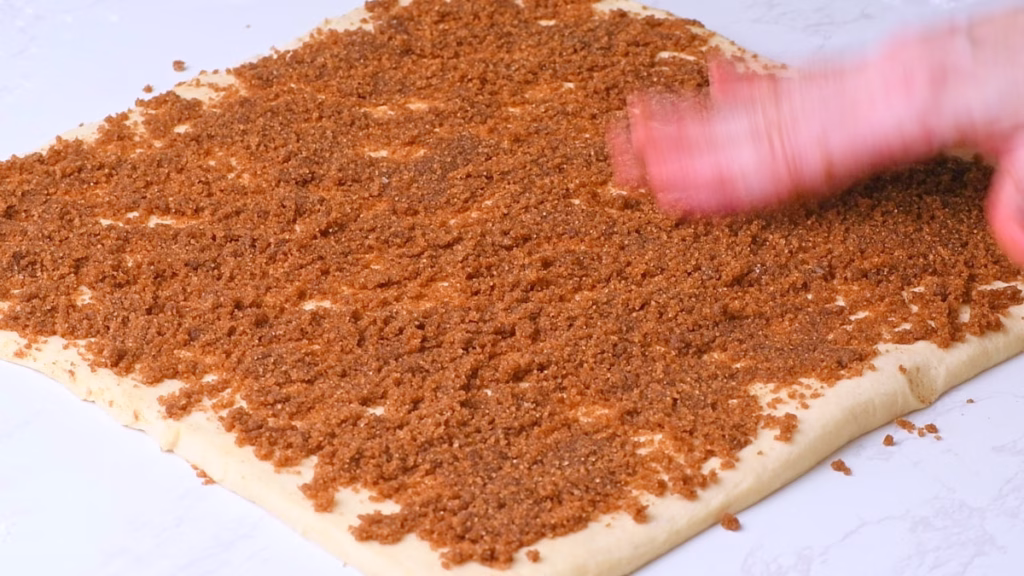
- Sprinkle all of your brown sugar-cinnamon-butter mix over the dough. Use your hands spreading it around. Make sure to cover it all the way to the sides. This will give you the caramelized cinnamon all the way through without any odd “just dough” ends.
Shaping The Dough Log
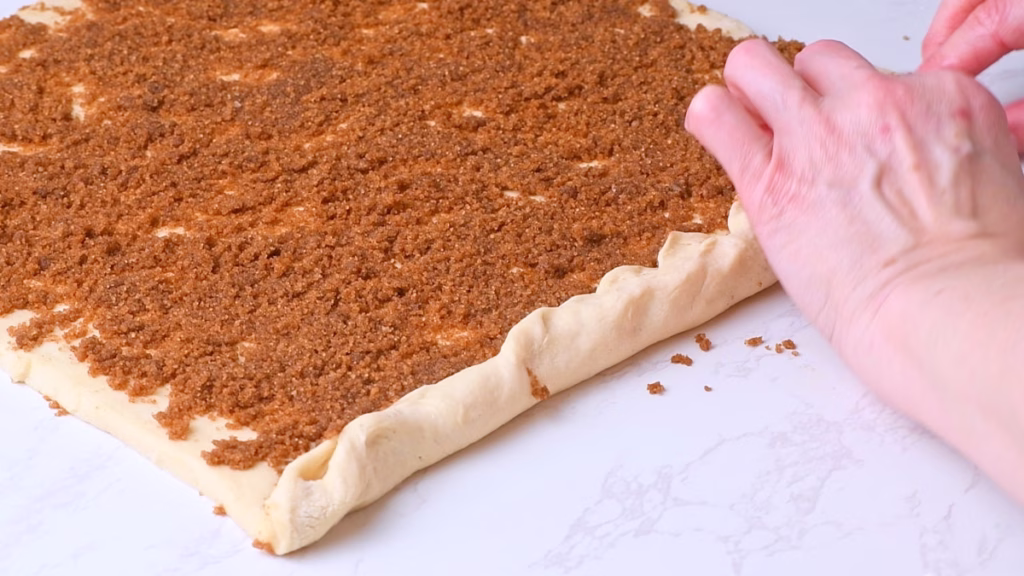
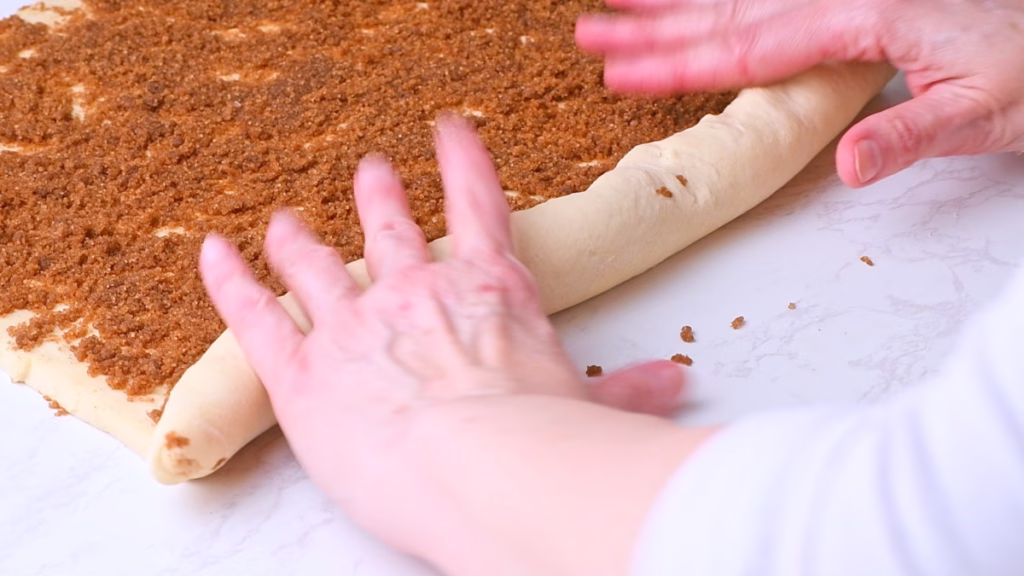
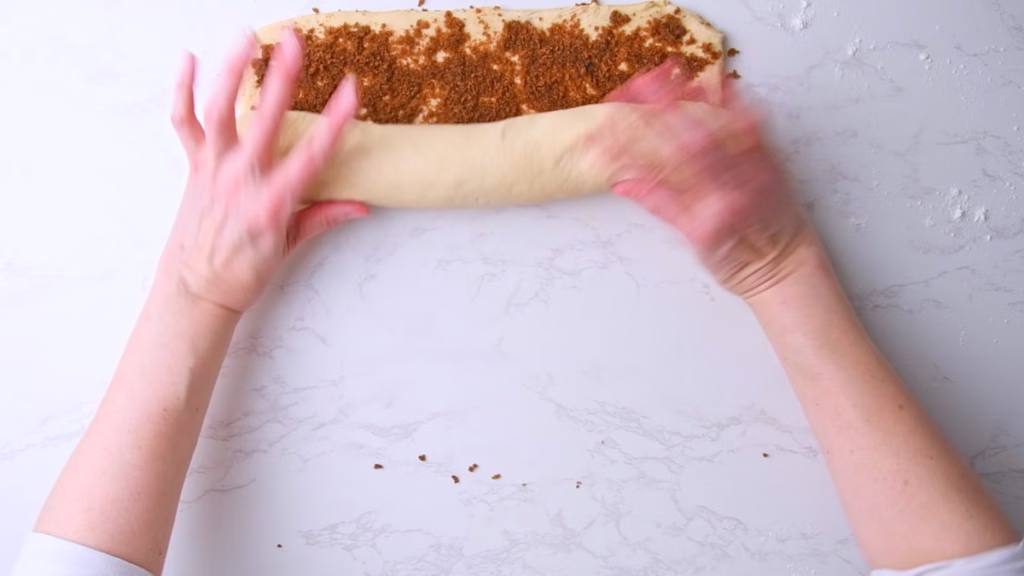
- Now start rolling them up. I usually start with the side closest to me. Take your time making sure especially the start is really tightly rolled, then continue pushing up with your thumbs, gently pulling with your fingertips, to get a firm roll.
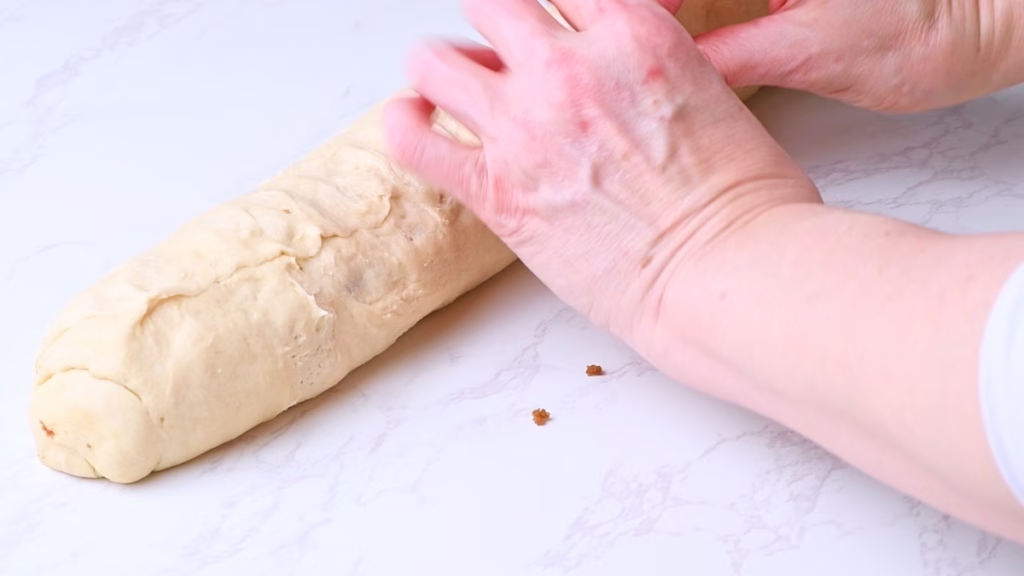
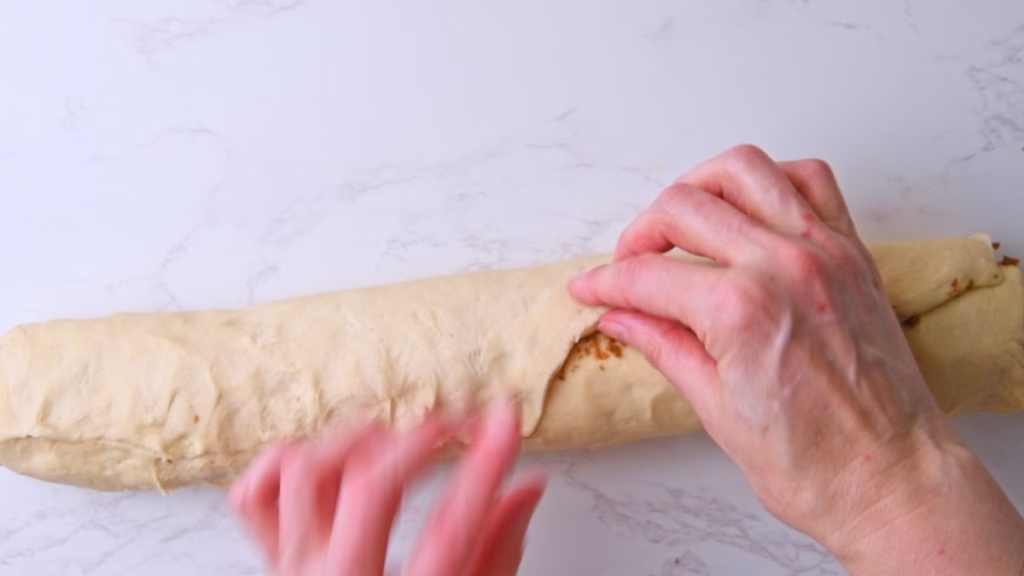
- To seal the seam pull the dough from the end up a little and pinch it close.
- Turn the roll onto the seam side and very gently pull/roll it out just a little further until it reaches roughly 14 inch / 36 cm.
Cutting Evenly Sized Spirals
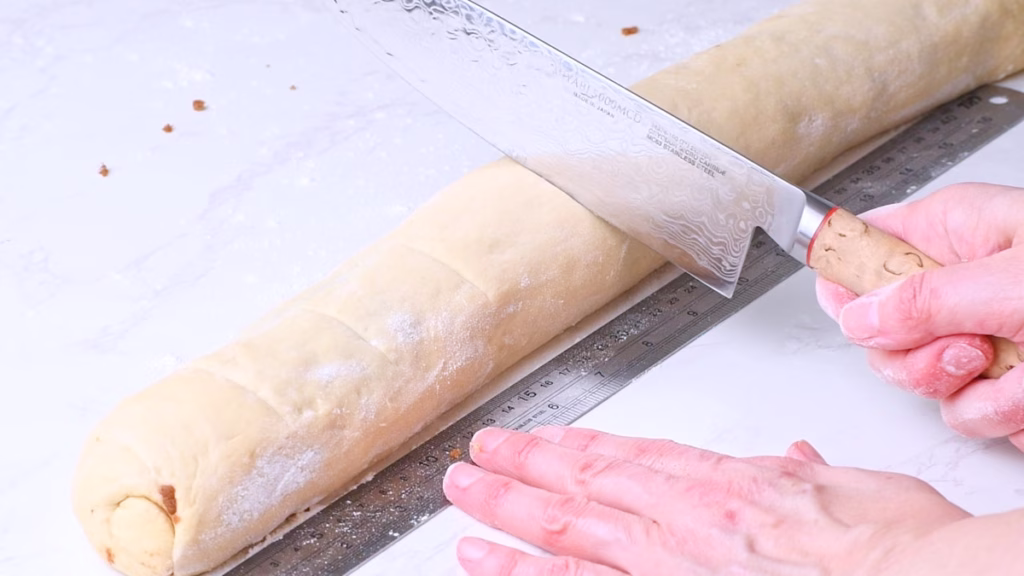
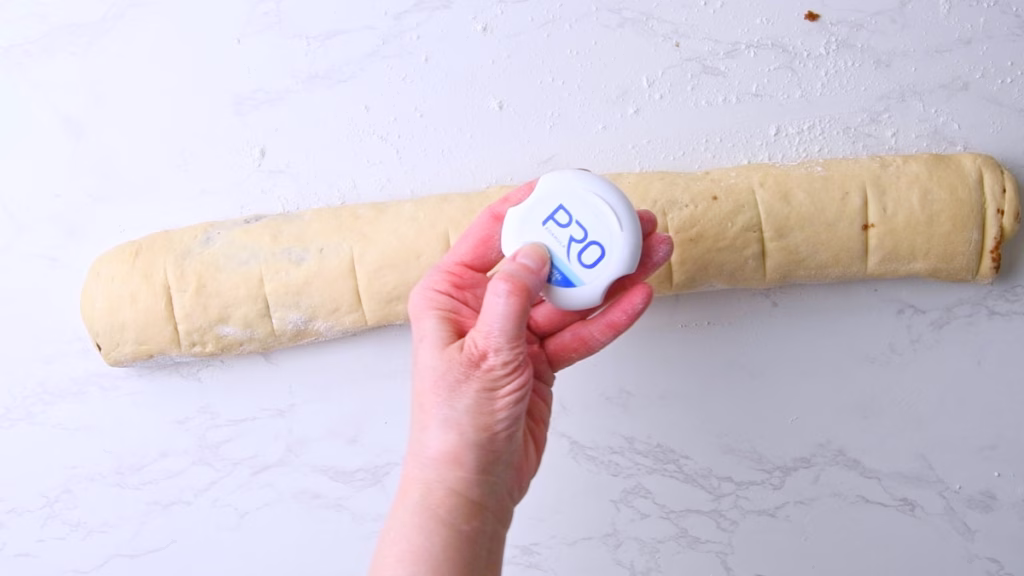
- To get really evenly baked cinnamon rolls, you want to make sure they are as close to being the same size as possible. I use a ruler and a sharp knife, marking the top of the log for 1 ½ inch / 4 cm wide pieces.
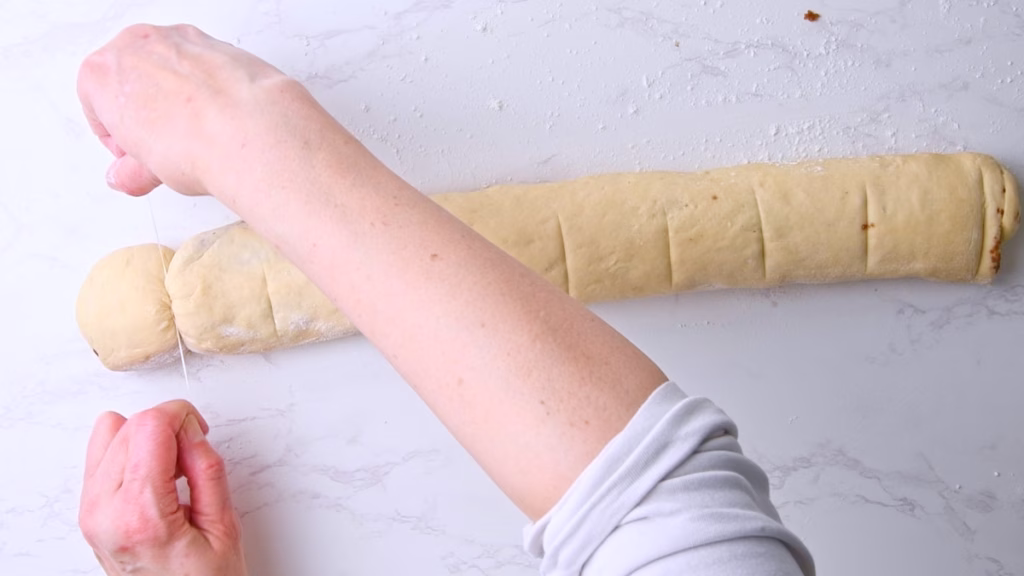
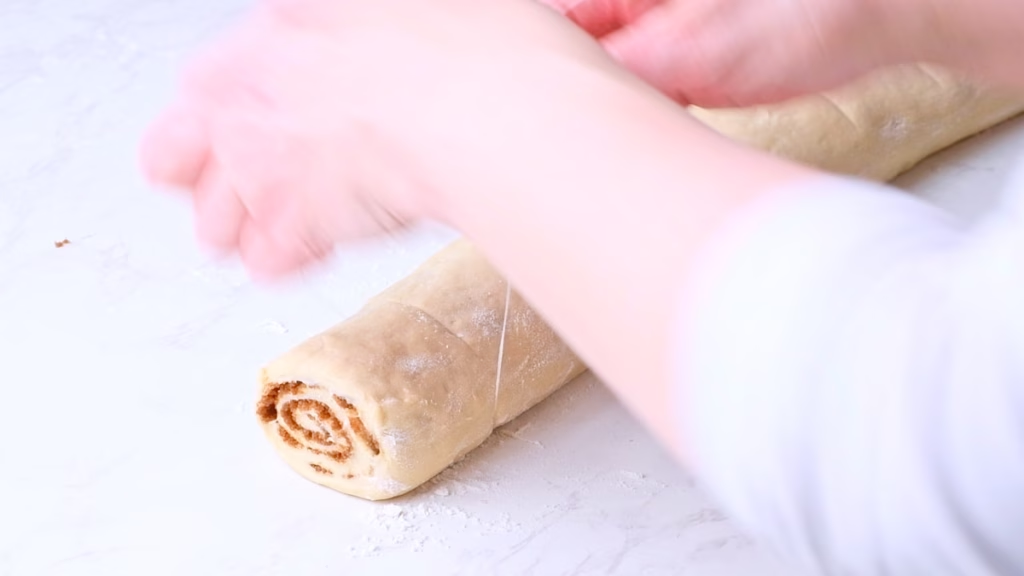
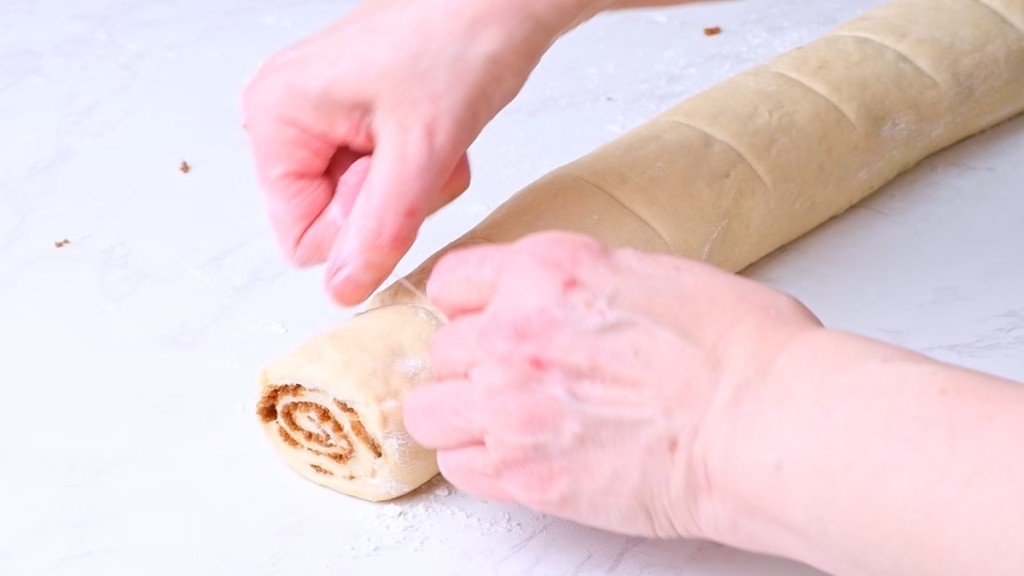
- For perfectly round shaped rolls, use kitchen twine or, as I did here, unflavored dental floss. (I admit mine was actually mint flavored. But I didn’t notice any of that in the baked rolls later.)
- Cut off a piece of string, slide it under the log matching the markings, cross it over itself and pull until cut through the dough, leaving you with a perfect spiral.
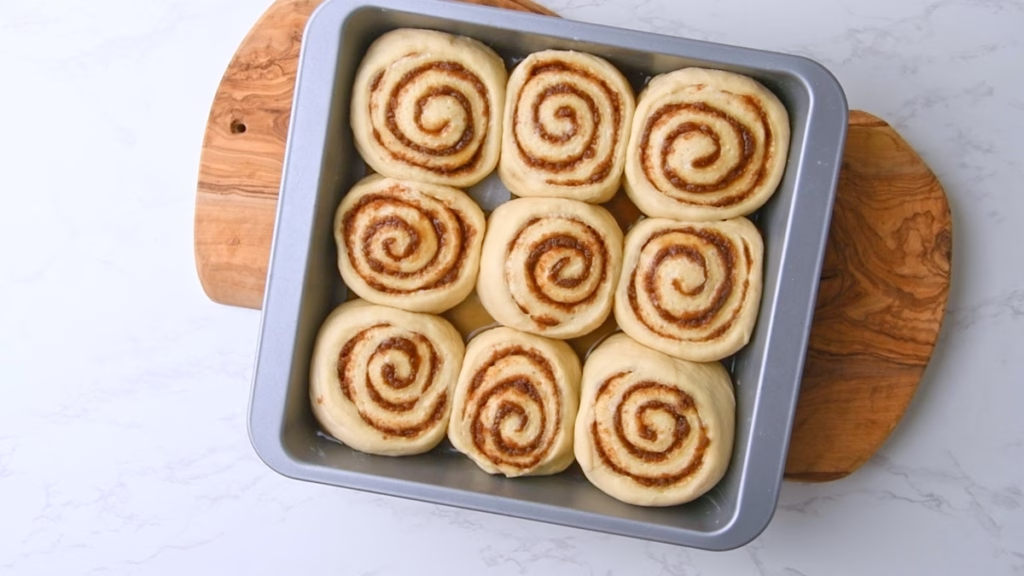
Place Into Baking Pan
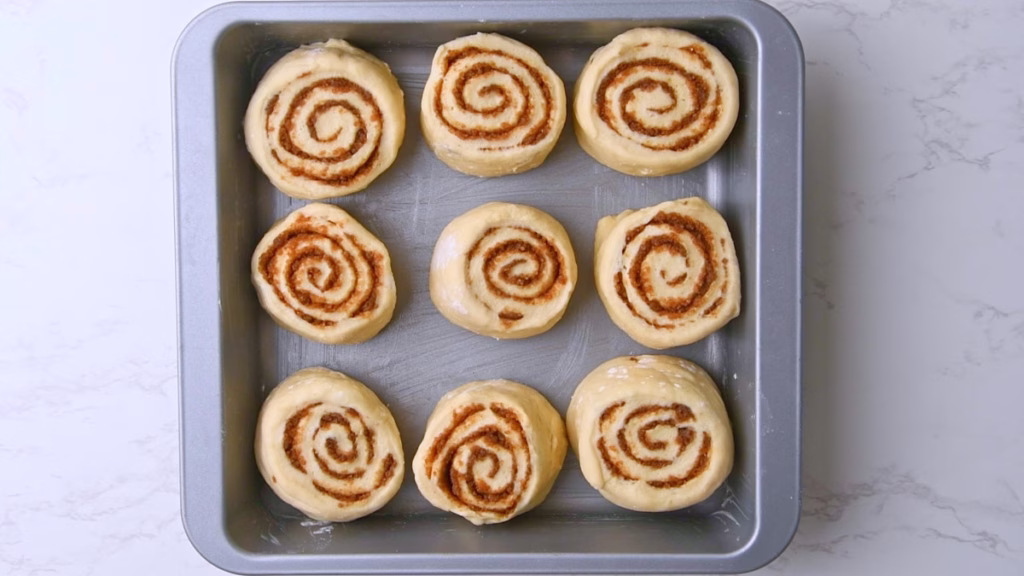
- If, despite your efforts, your rolls are still ever so slightly unevenly sized, first of all: Don’t worry. Mine are too.
- To still get them all baked evenly, simply place the largest ones in the 4 corners and the smallest one in the center of the baking pan, so the bigger ones get heat from two sides, and the center one gets baked last later.
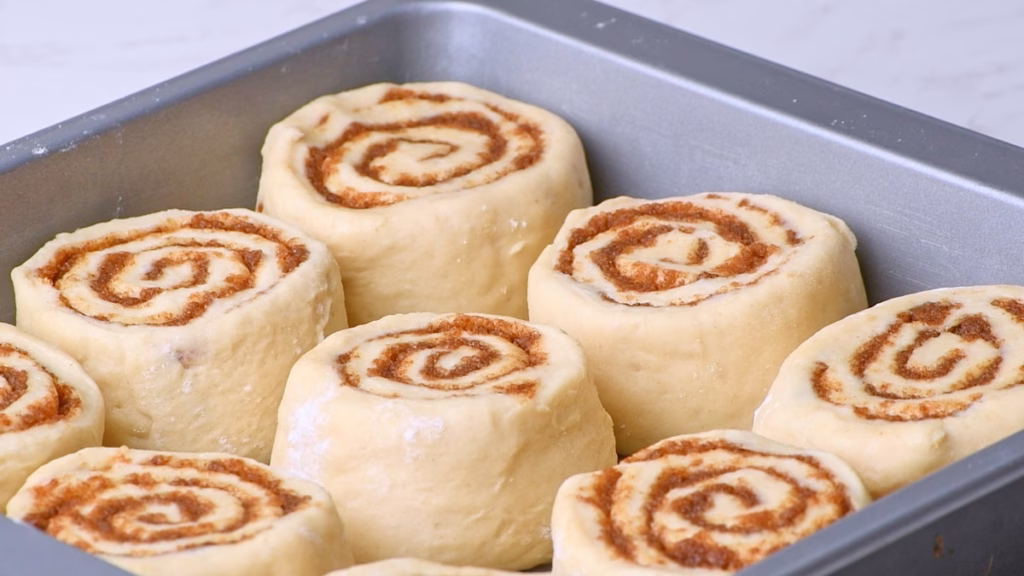
- They should be relatively evenly spaced out with a bit of room between them, which they will fill while rising, leading to soft sides as they’ll be touching.
- If you don’t have the right sized baking pan, a cast iron skillet will work too. Just make sure it’s not too large, as that will give you crispy sides on all rolls.
Allow To Rise
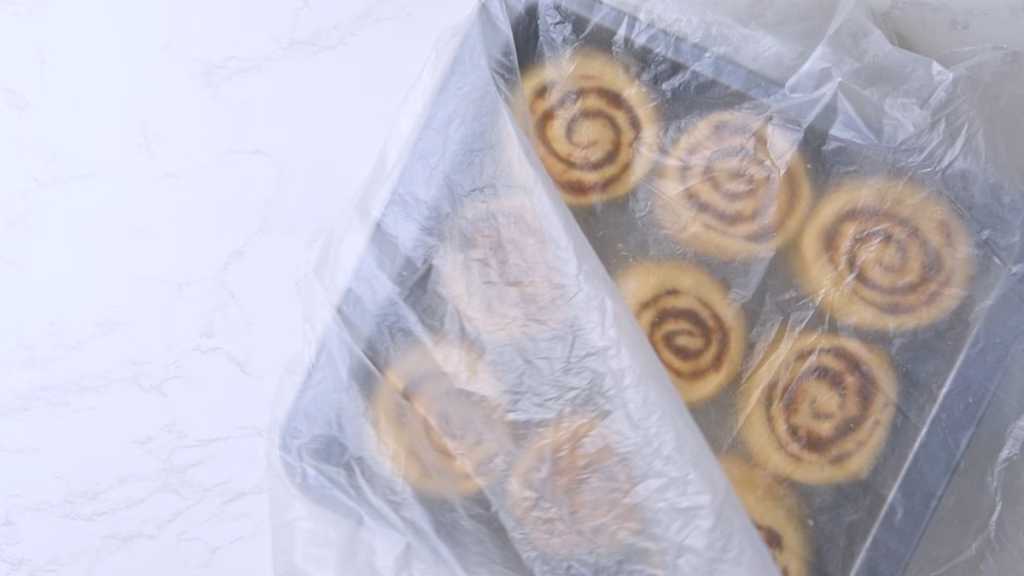

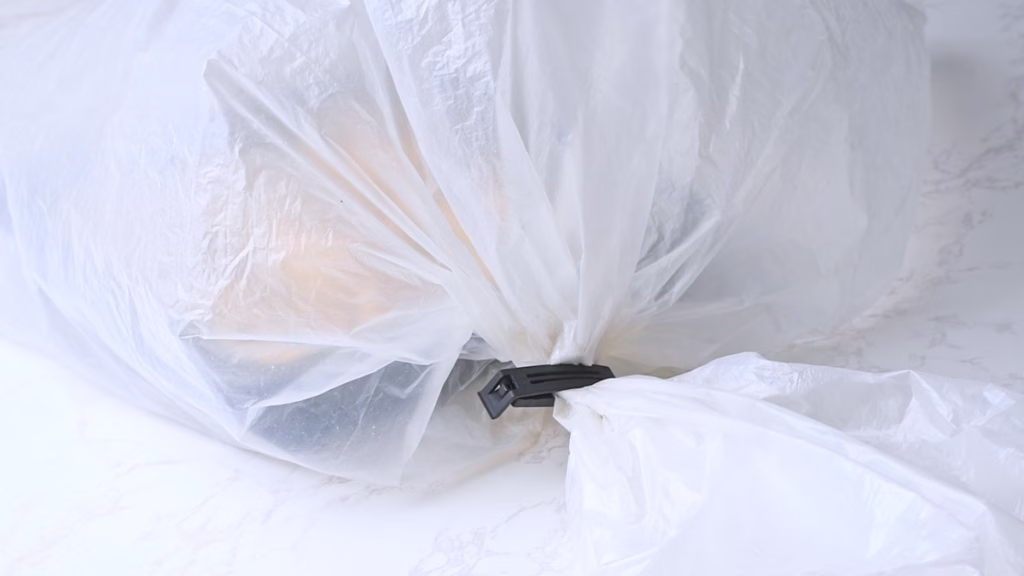
- At this point I like to put the whole filled baking pan into a “tent” made out of a large plastic bag that I inflated lightly by blowing into it, then sealed with a clip or a knot.
- This keeps the rolls perfectly moist without any dried out corners and created a bit of a micro-climate for them to rise in.
- You can now either leave them on the counter until they have filled out the form and are visibly puffed up (about 4h at 70°F/21°C). Or put them in the fridge overnight to bake in the morning, ready for breakfast for the perfect overnight sourdough cinnamon rolls.
- Alternatively leave them in the fridge for up to 3 days (total time for the dough in the fridge) and bake whenever it suits you.
Baking And Frosting
Bake Your Soft Sourdough Protein Cinnamon Rolls
- Preheat your oven to 350°F / 175°C with an oven rack in the center.
- Take the baking pan out of the bag and bake for 20-30 minutes until very lightly golden on top.
- Since we want the cinnamon rolls to be soft (though I like slightly crisp tops for mine) an instant read thermometer is really worth using here. Aim for 190°F/88°C at the center, so you know they are baked through.
- Allow them to cool while you make the frosting. This will give the caramelized bottoms time to set just so, for the perfect rolls.
Protein Cream Cheese Frosting
- While I’m perfectly happy to munch the rolls just as they are, with their amazingly caramelized bottoms and shiny, bubble cinnamon sugar showing in the spiralled tops, a frosting does makes them even more irresistible.
- And of course you can use your favorite frosting, but mine comes with an extra protein boost. So give it a try!
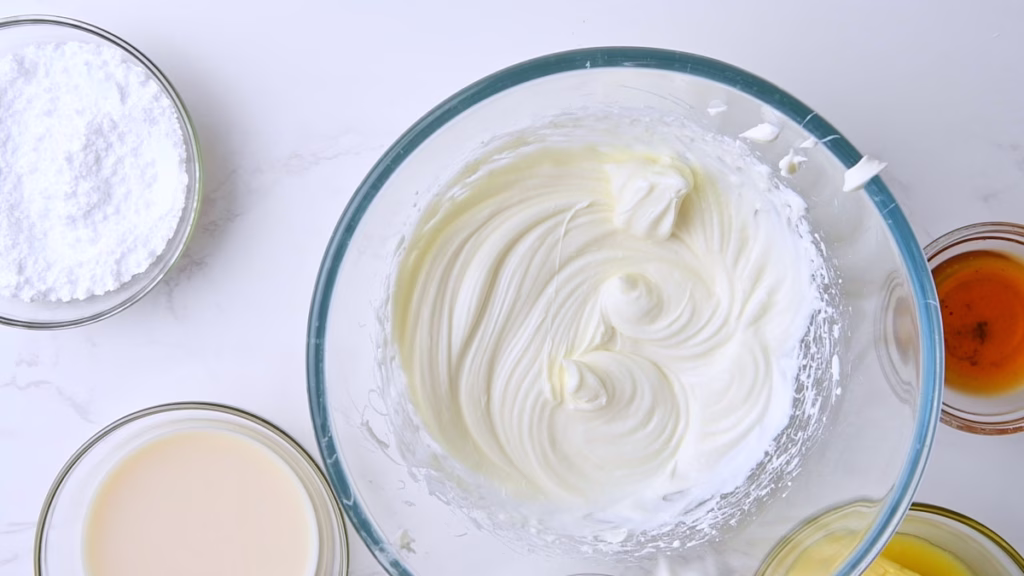
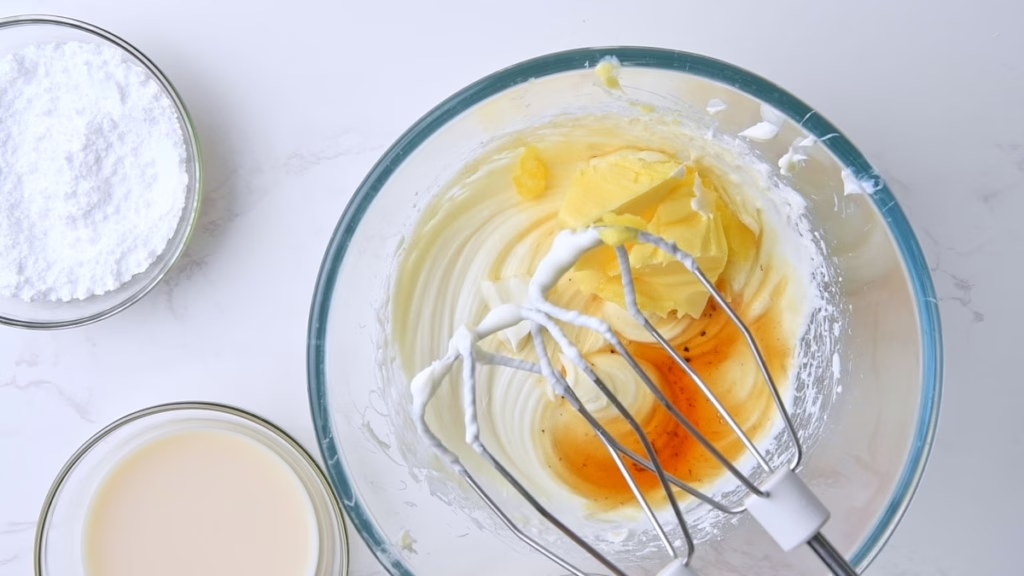
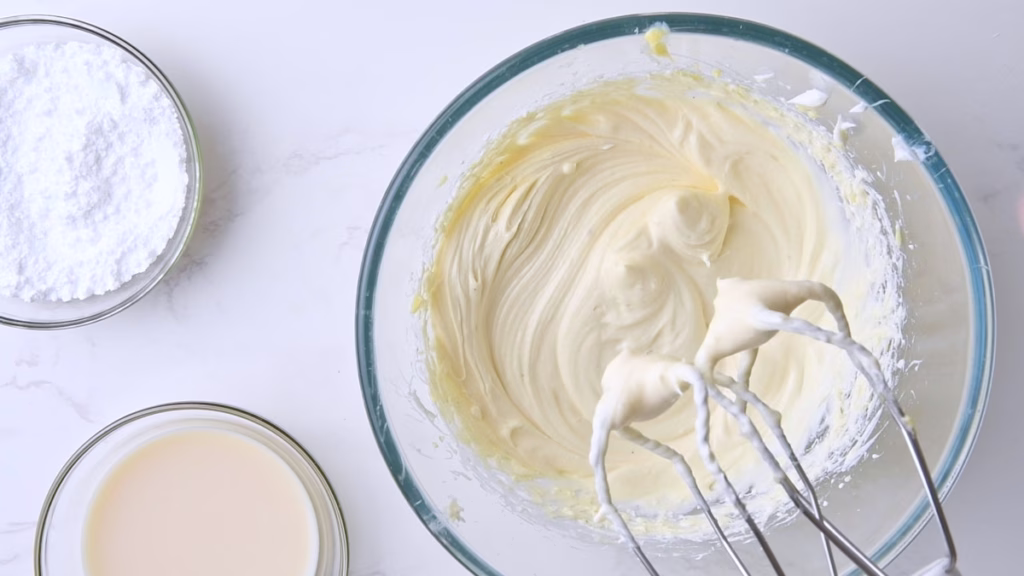
- Start by whisking your room temperature light cream cheese.
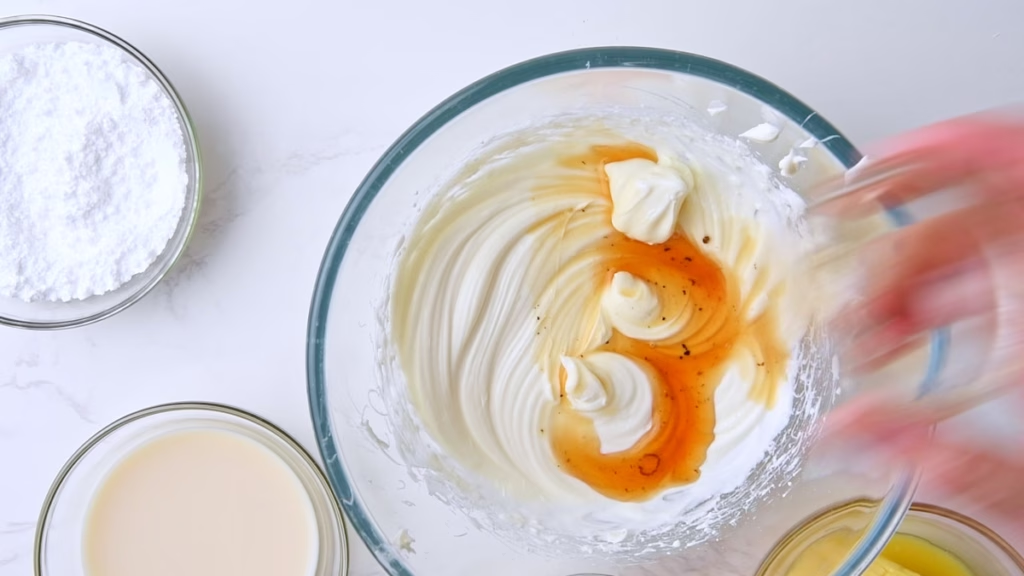
- Add the vanilla extract (I make mine myself, so you can see the bits of real vanilla in it) and butter and whisk until creamy.

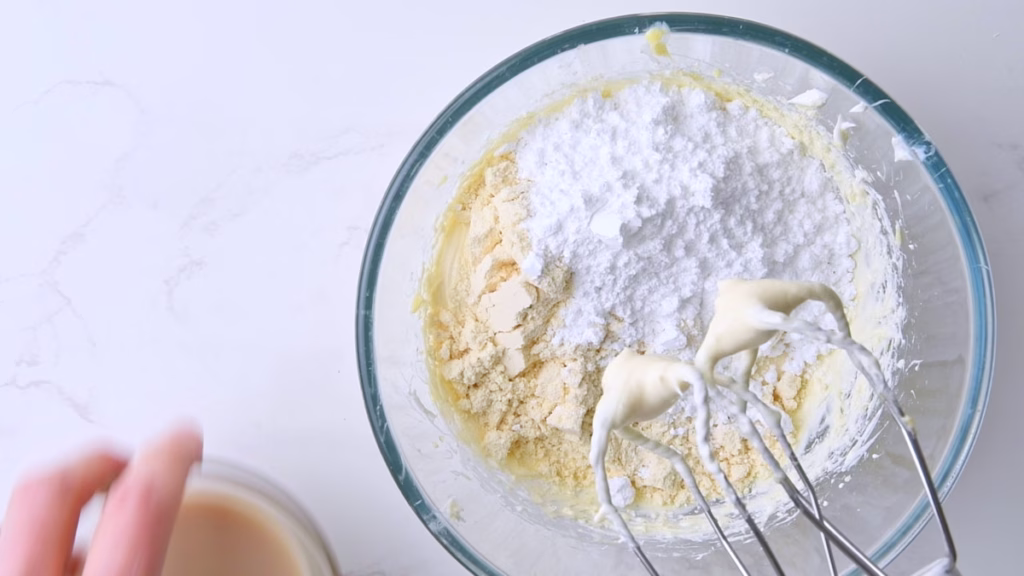
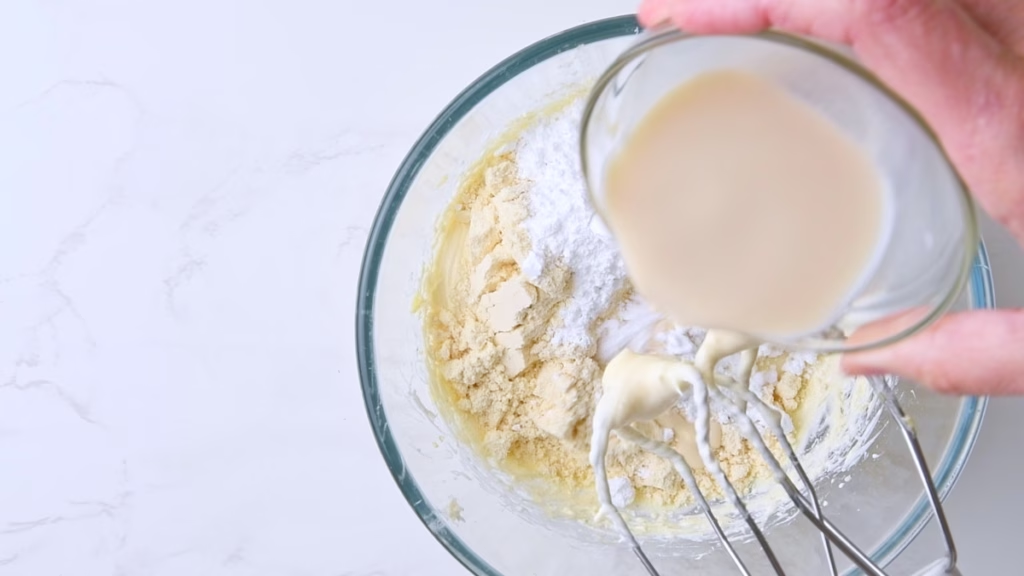
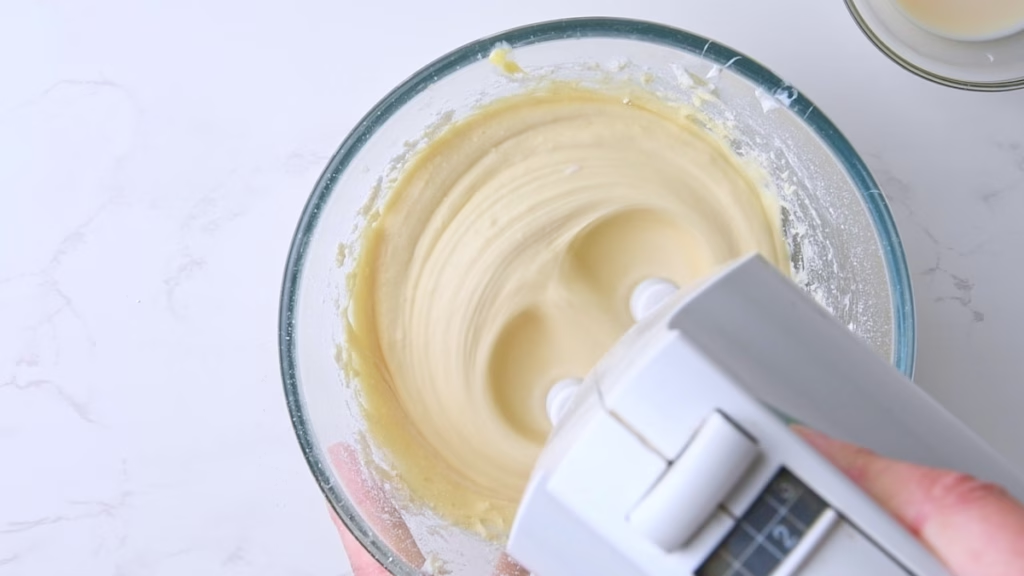
- Now dump in the protein powder and icing sugar and, ideally using a hand mixer for perfectly creamy results, mix until smooth and delicious.
- Spread onto your still warm, but not hot cinnamon rolls, so it can melt just a little, but not run off entirely. The icing sugar and butter will set more while cooling, giving you that amazing glazed look and taste.
- Enjoy with a nice cuppa or hot coffee for breakfast or dessert. Or for dinner, if you ask me.
How To Store
- These Cinnamon Rolls store well in a lidded container in the fridge for up to 3 days with the frosting.
- If you’d like to freeze them, don’t frost them yet, as that will cause a bit of a mess and don’t look very pretty after defrosting.
- I love to reheat them in my air fryer once defrosted for an hour or two, as I adore the crispy tops and freshly heated caramel at the bottom. If you want to keep them soft, you could also put them into the microwave for a minute.
FAQ
Absolutely. I actually prefer making these by hand using the stretch and fold method. Because we aren’t looking for a super-developed “bread” crumb, a few sets of folds and a long fermentation time do all the hard work for you. It’s much more therapeutic, anyway!
Sourdough enriched with protein and yogurt is naturally stickier than standard bread dough. If you’re struggling, try using wet hands for your folds rather than flouring them. Also, don’t skip the fridge time! Cold dough is much easier to handle and won’t stick to your rolling pin.
I’ve had the best results with Whey Concentrate or a Whey/Casein blend. If you use a vegan protein (like pea or soy), you’ll likely need to add an extra splash of milk as they are much more absorbent. Stay away from Whey Isolate if you can—it tends to make the rolls a bit tough and dry.
You don’t have to, but I highly recommend it. Unlike a damp tea towel, the inflated bag ensures nothing touches the tops of your rolls and keeps the moisture 100% locked in. It’s the best way to prevent that “leathery” skin from forming on the dough while it proofs.
If your starter is looking a bit sluggish, give it an extra feed before mixing the dough, or simply allow for a longer bulk ferment on the counter. Sourdough is patient! You can also use discard, but just know the rise will take significantly longer.
It’s my favorite little baker’s secret. The flour acts as a binder; when the butter melts in the oven, the flour helps it cling to the sugar and the dough rather than just running out and pooling at the bottom of the pan.
You will still get plenty of caramel at the bottom, but this step makes sure enough of it stays in the rolls too.
Yes! That’s the beauty of sourdough. You can keep the shaped rolls in the fridge for up to 3 days before baking. It’s the ultimate meal prep for a weekend brunch.
Now I’d love to hear from you in the comments!
Have you tried this? Did you enjoy it?
What other recipes would you like to see?
And if you enjoyed this recipe, please consider rating, sharing, or leaving a comment – your feedback truly helps my blog grow!
Other recipes you might enjoy
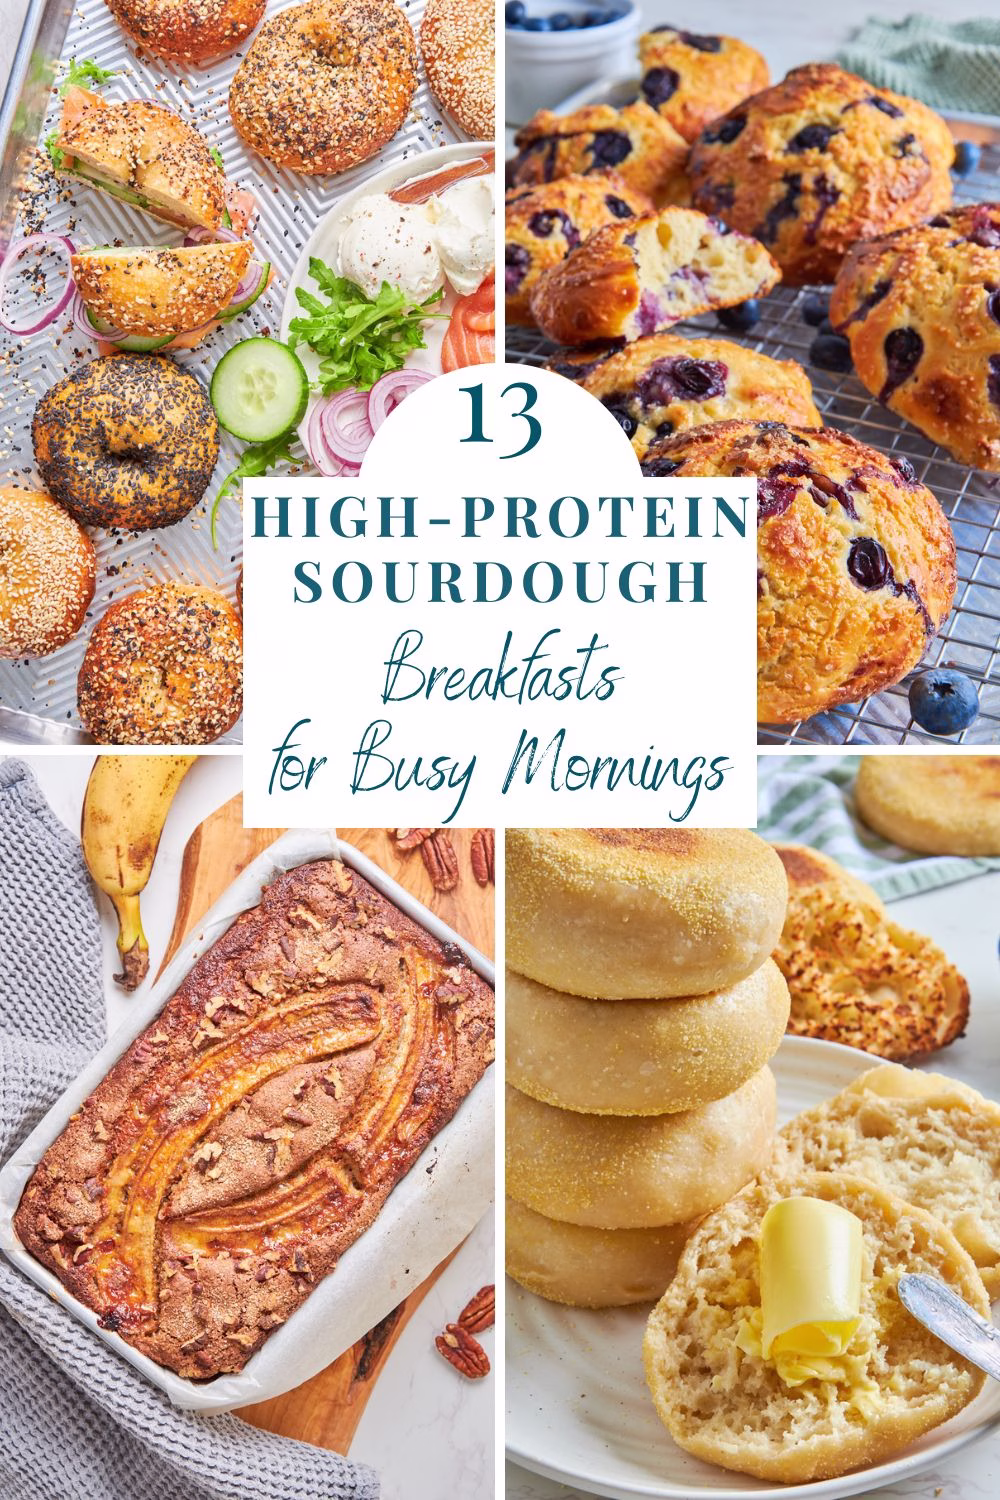
Need more sourdough protein breakfasts to make ahead?
Here are 13 reader favorites!

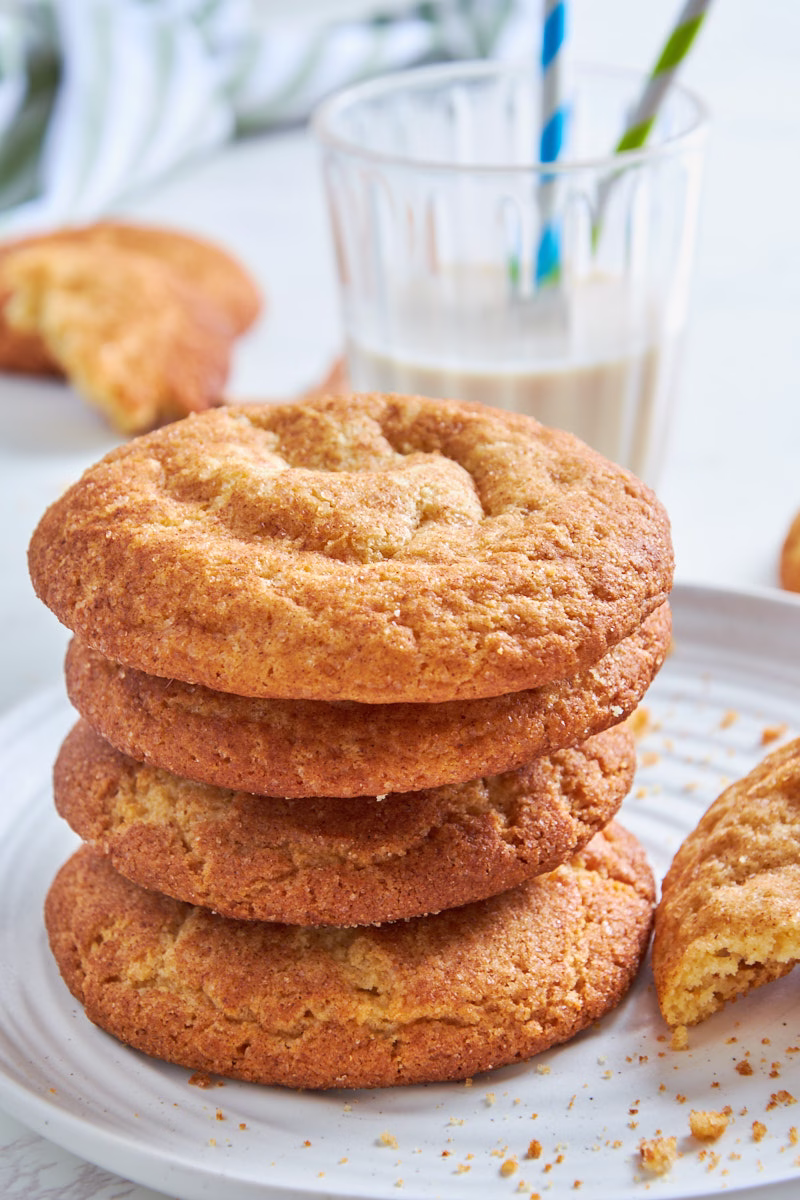
Love cinnamon and cookies?
These Sourdough Protein Snickerdoodles are for you!

Soft Sourdough Protein Cinnamon Rolls (with Greek Yogurt)
- Total Time: 25 hours 30 minutes
- Yield: 9 Rolls 1x
Description
If you’ve been looking for a cinnamon roll that actually keeps you full without feeling like you’re eating a dry protein bar, this is it. These Sourdough Protein Cinnamon Rolls combine the tang of a slow-fermented starter with the power of Greek yogurt and whey protein. They are remarkably soft, fluffy, and have those gooey, caramelized bottoms we all crave, but with over 16g of protein to power your morning.
Ingredients
Sourdough Starter (Levain)
- 1 tbsp (15 g) sourdough starter
- 60 g all-purpose flour
- 3 1/2 tbsp (50ml) water
Sourdough Protein Dough
- 170g / 3/4 cup fat free Greek yogurt
- 30g / 2 tablespoons sour cream
- 60g / 1/4 cup water
- 60g / 2 scoops whey concentrate, ideally vanilla
- 28g / 2 tablespoons unsalted butter, melted
- 56g / 1 large egg
- 100g/1/2 cup sourdough starter, active
- 450g / 3 1/4 cups strong white flour (Bread Flour)
- 6g / 1 1/2 teaspoons fine sea salt
Cinnamon Sugar Filling
- 160g / 3/4 packed cup light or dark brown sugar
- 9g / 1 tablespoon ground cinnamon
- 2g / 1/2 teaspoon kosher salt
- 15g / 2 tablespoons all-purpose flour
- 42g / 3 tablespoons unsalted butter, melted
Cream Cheese Protein Frosting
- 30g/2 tablespoons unsalted butter, softened
- 125g/1/2 cup light cream cheese, room temperature
- 30g /1 scoop vanilla whey protein powder
- 30g /1/4 cup icing sugar
- 15–30ml/1-2 tbsp milk
Instructions
Mixing The Protein Cinnamon Roll Dough
Blend Liquids and Protein
- For the smoothest result and easiest mixing add Greek yogurt, sour cream, whey protein, milk, egg and butter to a blender. Blend until smooth.
- Stir in the sourdough starter gently.
Mix The Dry Ingredients
- Add the salt to your flour and stir briefly.
Add The Wet Mix To The Dry Ingredients
- Pour your protein blend into the flour and, ideally using a dough whisk, stir until you have a shaggy dough.
- Cover your bowl for about 30 minutes, allowing the flour absorbing the liquid.
Bulk Proof and Stretch and Folds
- Starting after about 30 minutes to one hour (this is very flexible) do 3 sets of stretch and folds by using wet hands to push under the dough, pulling one side up and folding it over the rest.
- Turn the bowl by 90 degrees and repeat. Do this 3-4 times or until the dough looks visibly smoother.
- Cover again and repeat after about 30 minutes. Repeat 2 more times.
- Your dough should now look very smooth and be less sticky. If not, repeat the above once more.
Put into rectangular or square container (optional)
- I put my dough into an oiled rectangular box that has a lid, as dough “remembers” the shape it was in last, so you’ll have an easier time convincing it to roll into a square shape later.
- Pat it out with your hands a bit, pushing it into the corners.
Cover and allow to bulk ferment.
- I usually let it sit on my counter for a few hours (up to 6 max.) until visibly risen and start shaping it at that point.
- But depending on your schedule you could also put it into the fridge to cold ferment for up to 3 days of fridge time total. Shape and finish the rise when you have a few hours until baking.
Prepare The Cinnamon Sugar Filling
- When your dough looks ready to roll, start mixing your filling.
- Melt the butter. A minute max. in the microwave will be enough. You just want it liquid, not super-hot, as you’ll crumble it later with your fingers.
- Add cinnamon, salt and flour to the brown sugar and give it a good stir until the sugar is coated with the flour and cinnamon.
- The salt balances the sweetness and emphasizes the flavor. The flour will bind with the butter and keep it from seeping out during the rise.
- Pour in the butter and give it a good mix until well incorporated.
Rolling Out the Dough
- Grease a 9 x 9 inch / 23 x 23 cm baking pan. I like using and empty butter wrapper for this (if I have one handy) to minimise waste.
- Turn your now fluffy and bubbly dough out onto a lightly floured work surface.
- Use your hands to pat it out into a square, then use a rolling pin to roll it out to about 12 x 12 inch / 30 x 30 cm.
- To get nice straight corners, I like using a dough scraper or the rolling pin to straighten them.
Filling Your Sourdough Cinnamon Rolls
- Sprinkle all of your brown sugar-cinnamon-butter mix over the dough. Use your hands spreading it around. Make sure to cover it all the way to the sides. This will give you the caramelized cinnamon all the way through without any odd “just dough” ends.
Shaping The Dough Log
- Now start rolling them up. I usually start with the side closest to me. Take your time making sure especially the start is really tightly rolled, then continue pushing up with your thumbs, gently pulling with your fingertips, to get a firm roll.
- To seal the seam pull the dough from the end up a little and pinch it close.
- Turn the roll onto the seam side and very gently pull/roll it out just a little further until it reaches roughly 14 inch / 36 cm.
Cutting Evenly Sized Spirals
- To get really evenly baked cinnamon rolls, you want to make sure they are as close to being the same size as possible. I use a ruler and a sharp knife, marking the top of the log for 1 ½ inch / 4 cm wide pieces.
- For perfectly round shaped rolls, use kitchen twine or, as I did here, unflavored dental floss. (I admit mine was actually mint flavored. But I didn’t notice any of that in the baked rolls later.)
- Cut off a piece of string, slide it under the log matching the markings, cross it over itself and pull until cut through the dough, leaving you with a perfect spiral.
Place Into Baking Pan
- If, despite your efforts your rolls are still ever so slightly unevenly sized, first of all: Don’t worry. Mine are too.
- To still get them all baked evenly, simply place the largest ones in the 4 corners and the smallest one in the center of the baking pan, so the bigger ones get heat from two sides, and the center one gets baked last later.
- They should be relatively evenly spaced out with a bit of room between them, which they will fill while rising, leading to soft sides as they’ll be touching.
- If you don’t have the right sized baking pan, a cast iron skillet will work too. Just make sure it’s not too large, as that will give you crispy sides on all rolls.
Allow To Rise
- At this point I like to put the whole filled baking pan into a “tent” made out of a large plastic bag that I inflated lightly by blowing into it, then sealed with a clip or a knot.
- This keeps the rolls perfectly moist without any dried out corners and created a bit of a micro-climate for them to rise in.
- You can now either leave them on the counter until they have filled out the form and are visibly puffed up (about 4h at 70°F/21°C). Or put them in the fridge overnight to bake in the morning, ready for breakfast for the perfect overnight sourdough cinnamon rolls.
- Alternatively leave them in the fridge for up to 3 days (total time for the dough in the fridge) and bake whenever it suits you.
Bake Your Soft Sourdough Protein Cinnamon Rolls
- Preheat your oven to 350°F / 175°C with an oven rack in the center.
- Take the baking pan out of the bag and bake for 20-30 minutes until very lightly golden on top.
- Since we want the cinnamon rolls to be soft (though I like slightly crisp tops for mine) an instant read thermometer is really worth using here. Aim for 190°F/88°C at the center, so you know they are baked through.
- Allow them to cool while you make the frosting. This will give the caramelized bottoms time to set just so, for the perfect rolls.
Add Protein Cream Cheese Frosting
- While I’m perfectly happy to munch the rolls just as they are, with their amazingly caramelized bottoms and shiny, bubble cinnamon sugar showing in the spiralled tops, a frosting does makes them even more irresistible.
- And of course you can use your favorite frosting, but mine comes with an extra protein boost. So give it a try!
- Start by whisking your room temperature light cream cheese.
- Add the vanilla extract (I make mine myself, so you can see the bits of real vanilla in it) and butter and whisk until creamy.
- Now dump in the protein powder and icing sugar and, ideally using a hand mixer for perfectly creamy results, mix until smooth and delicious.
- Spread onto your still warm, but not hot cinnamon rolls, so it can melt just a little, but not run off entirely. The icing sugar and butter will set more while cooling, giving you that amazing glazed look and taste.
- Enjoy with a nice cuppa or hot coffee for breakfast or dessert. Or for dinner, if someone asks me.

Notes
Tips for Busy Schedules
- Personally I wildly switch up the time of bulk fermentation, cold ferment and rise after shaping. The important part is that your dough gets time to rise once before shaping, so it’s already light and fluffy when you start and then again until visibly risen and puffy after shaping. It doesn’t matter if that happens in the fridge or on your counter and the time needed will vary depending on the temperature it sits at.
- To check if your dough is ready gently poke it with your finger. It should leave a dent, feeling noticeably airy, that springs back slowly.
- If you have a hard time denting it at all, it needs more time.
- If the dent stays and doesn’t bounce back slowly, it might have gone a little too long (though you can still bake it).
- It’s much harder to overproof sourdough than to underproof it.
- Patience and cold fermentation always pay out in flavor and gut friendliness.
How To Store
- These Cinnamon Rolls store well in a lidded container in the fridge for up to 3 days with the frosting.
- If you’d like to freeze them, don’t frost them yet, as that will cause a bit of a mess and don’t look very pretty after defrosting.
- I love to reheat them in my air fryer once defrosted for an hour or two, as I adore the crispy tops and freshly heated caramel at the bottom. If you want to keep them soft, you could also put them into the microwave for a minute.
- Prep Time: 1 hour
- Fermentation/Rise: 24 hours
- Cook Time: 30 minutes
- Category: Breakfast, Dessert, Protein Breakfast, Protein Dessert, Protein Sourdough
- Method: Baking
- Cuisine: American


These cinnamon rolls are incredible! My family loved them so much that they asked for more the next day. Saving this recipe to my favorites folder.
That makes me really happy to hear!
Thanks so much for taking the time to let me know. 🙂
Holy moly, these were so delicious! Loved the added flavor from the sourdough.
Haha, so happy to hear that!
Thanks a lot for taking the time to comment. 🙂
I tried these and was honestly impressed by how soft and fluffy they turned out. The tang from the sourdough paired with those gooey caramelized bottoms makes them feel truly special.
That is so lovely to hear!
Thanks a lot for letting me know!
This soft sourdough protein cinnamon rolls is really delicious love the addtion of tangy greek yogurt, thanks for sharing with me.
So happy to hear that! Thanks a lot for taking the time to comment. 🙂
This recipe is a great find. I love that it has significant protein in it. It made a delicious breakfast, soft, fluffy, with caramelized bottoms, and everyone at home loved it.
Of course they loved it. How can they not with cinnamon rolls? 😀
Kidding. So happy to hear you liked them!