Whole Orange & Chocolate Sourdough Protein Cake (Jaffa-Inspired)
If you’ve ever sat down with a sleeve of Jaffa Cakes only to find the wrapper mysteriously empty ten minutes later, this recipe is for you. I’ve taken that nostalgic chocolate-orange combination and leveled it up using the famous “whole-orange” method, tangy sourdough discard, and a boost of protein. It’s a moist, zesty snack cake that satisfies the craving for real citrus and a dark chocolate snap, without the processed-food “inhaling” effect.

This post may contain referral links for products I love.
For The Pleasure Of Eating earns a small commission on these links at no cost to you.
- Why You’ll Love This
- The Ingredients
- Substitutions
- Equipment Used
- How to Make this
- How To Store
- FAQ
- Other Recipes You Might Enjoy
Why You’ll Love This
TL;DR
- The Ultimate Jaffa Fix: Captures that iconic sponge-jelly-chocolate trio but with deeper, more intense flavors using natural ingredients.
- Gut-Friendly & High Protein: Uses sourdough discard for tang and 7g of protein per slice to keep you satisfied.
- The “Whole Orange” Magic: Avoiding food waste while maximising flavor, we blend the entire fruit (skin and all) for a moist, zesty crumb.
- Better-Than-Store-Bought: Real dark chocolate and fresh orange jelly replace processed alternatives for a feel-good indulgence.
- Surprisingly Simple: Blending and a same-pan jelly method make this much easier than it looks.
Like A Jaffa Cake, But More So
Ok look, I admit it: If I eat one Jaffa cake I’ll eat the whole sleeve in one go. There. I said it.
It’s just something about first biting into the super soft sponge, then your teeth satisfyingly break through the crackling, yet oddly tender chocolate into the fruity orange jelly, contrasting the soft sponge sweetness with some acidity and a hint of bitterness. After the first bite the chewing has it all melt together into some orangey chocolatey goodness. So of course you have to repeat it, to experience the sensations again. And again, because, well…it just went by so fast, how were you supposed to fully appreciate it?
Ten minutes later you stare sheepishly at the empty plastic wrapper, wondering who on earth ate all those Jaffas (while clearly no one else is around). Why is that thing empty? I just had three!
Or is that just me? Please tell me I’m not alone with this!
So one day I thought about the reason for this mystery, and it occurred to me that I was just chasing the flavor and hence needed more of it in every bite to satisfy the craving for it. Which was when the famous Whole-Orange Snack Cake from the NYT popped into my mind.
What if this satisfyingly moist, intensely orangey sponge is the solution to my mini cake inhaling?
To work I went, making the sponge, topping it with a jelly made from real oranges, meaning this cake uses three of them, which isn’t a bad fruit content for a snack cake and then smothering it with real dark chocolate. Needless to say, it was a hit. Not just for my craving, but friends and visitors absolutely loved it. And so will you!
Less Work Than You Think
Talking about work: This Jaffa-like snack cake comes together much faster than you think.
The sponge is whisked up in minutes and while it bakes you can throw together the orange jelly. Once the cake is out of the tin, the jelly goes into it to set for half an hour in the fridge while the fluffy and intensely orange scented cake is cooling down.
Once it’s set you just flip it onto the cake, freeze everything for just 20 minutes, to get a cold surface for your chocolate shell and then pour the melted dark chocolate right over it. A few strokes with a knife or offset spatula and your cake is ready to be devoured.
Not complicated by any means. Don’t let the mention of jelly from scratch scare you away. I promise it’s simple.
Of Course With Protein And Sourdough Discard
Now, if you know me or just had a quick look at my site, you probably noticed that many of my recipes come with both sourdough and protein. For slow fermented recipes like my Easy High Protein Sourdough Bread, it’s about both flavor and functionality as sourdough breaks down proteins into more bio-available molecules (as I explain in my post on why I’m baking with sourdough and protein) if you give it time.
For quick sourdough discard bakes like this sponge the enzymes (proteases) don’t have enough time to do their job. So why would I still use both?
First and foremost: Flavor. The sourdough discard adds tang, which goes fabulous with the orange, and depth to the batter. A sort of malty hint, softening the acidity while supporting it at the same time. It just makes everything it touches taste like more itself, if that makes any sense. Give it a try and you’ll know what I mean.
The acidity of the sourdough discard reacts with the baking soda to create an immediate lift, which is vital for carrying the weight of the whole-orange pulp and dense protein powder.
Plus of course using up our precious discard is always a bonus.
And the Protein? The 7g per slice of cake, thanks to Greek yogurt and whey protein, will leave you more satisfied after eating one piece, so you don’t feel like you have to inhale the whole thing to get what you need. Which is an unfortunate (though very much intended) side effect of processed foods that you cleverly side pass by re-creating the flavor combos you crave with better ingredients.
Let’s Talk About The Elephant…I mean Whole Orange In The Room
You might think adding a whole (And I really mean whole. Skin and all.) orange into a batter is slightly odd. But it works incredibly well in this cake! You get all the fiber, sure. But frankly that’s just a pleasant side effect. More importantly you get all the intense orange flavor with hints of bitterness, countering the sweet jelly and chocolate into one balanced experience.
Not only is throwing in the whole thing less work, the natural oils in the orange peel and the moisture from the Greek yogurt create a biological barrier against the typical dry texture of whey protein. It keeps the cake delicious and juicy for days after baking, meaning it’s perfect as snack cake, slicing off a piece here and there, munching it to reward yourself for all the things you got done today while feeling all virtuous, because you are also giving your body the nutrition it needs mixed with some gut friendly sourdough.

Two Options For Your Chocolate Topping
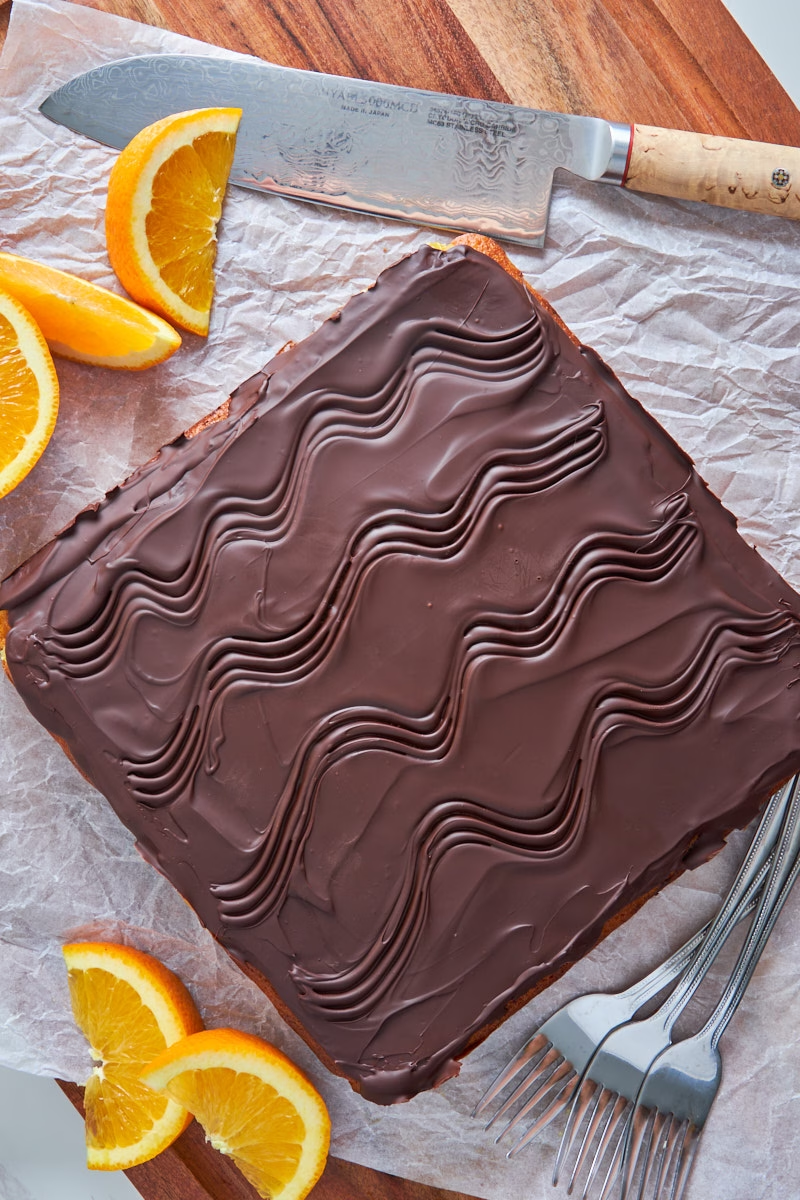
I’ve made this cake a fair few times while testing, mainly playing with two different versions of the chocolate topping. For the version in the photos I went with a slightly thicker coverage, for which I mixed the dark chocolate with just a teaspoon of coconut oil, so you are able to break it with a fork or knife without it shattering into pieces. This sacrificed a small bit of the “snap” yet still felt crackling enough while eating it to give you the satisfaction of the Jaffa experience.
If you prefer more snap and don’t mind the shattering chocolate, you could use around 30-50g less chocolate, leave out the coconut oil and get a thinner but harder shell, closer to the original.
Ingredient Notes
As usual I’m only adding notes for ingredients that need it. The whole ingredient list is in the recipe card.
Whole-Orange Batter
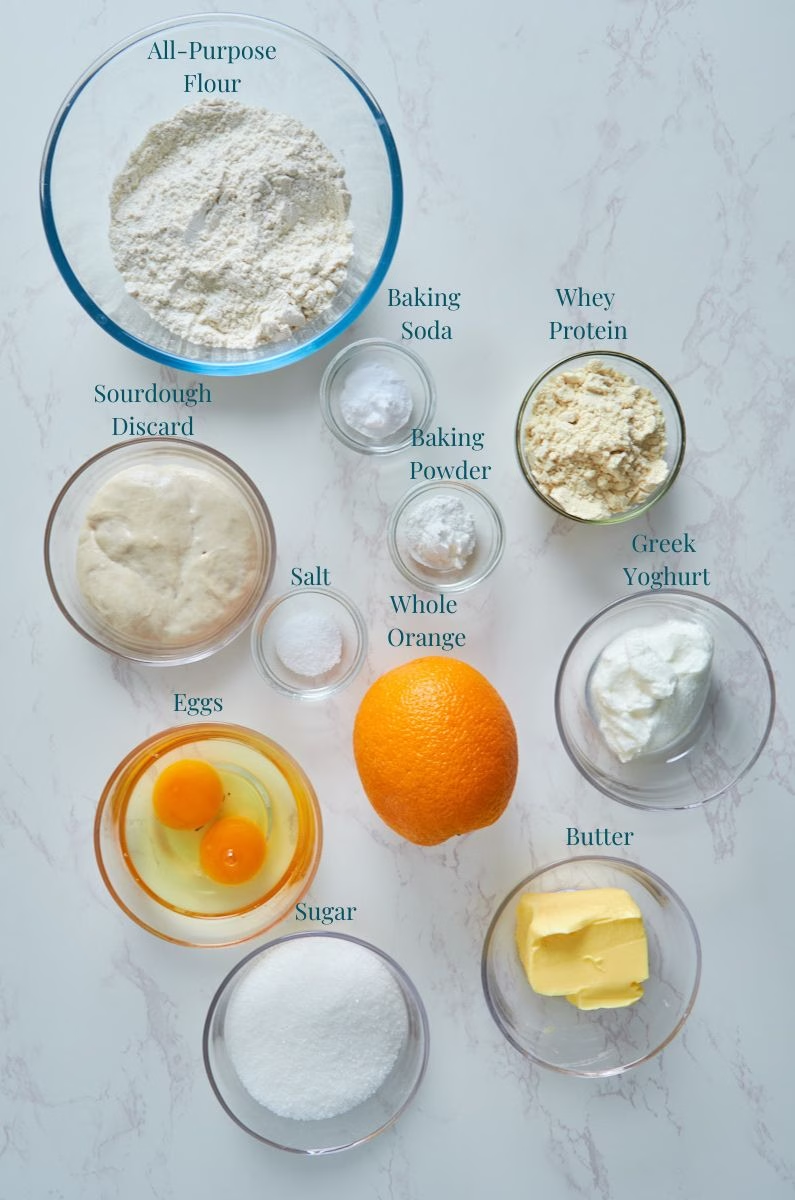
Make sure all ingredients are at room temperature for this cake. I found not doing that has a much bigger effect on this cake than other sponges. A fact that I blame on the split-inducing acidity of the orange. The correct temperature though will counter this as soon as you add the flour.
- Orange – As the name says, we are using a whole orange, flesh, zest and even the white pith and blend it. Navel oranges work best due to their balanced, sweet flavor. But generally any untreated (or well washed) relatively sweet variety without too many seeds ideally, as they are the only thing you should remove before blending, will work nicely. This will give the cake a nice flavor similar to marmalade.
- Greek Yogurt – I’m using yogurt instead of the milk from the original recipe here to increase the protein content. It also makes the cake incredibly tender. Any fat content will do. I’ve tested it a few times with whatever I had in my fridge at any given point, and it always came out lovely. With that being said: The most tender result comes from full fat.
- Whey Protein Concentrate – I’m using MyProtein Whey Concentrate in vanilla, which has a really pleasant taste and no weird after taste.
- This is neither affiliated nor sponsored. Just the powder I found to taste best after trying a fair few. If you never found one you actually enjoy, give this one a try.
- Alternatively I have baked with Gold Standard Whey Concentrate (also vanilla) and found it lovely too.
- Sourdough Discard – I usually store mine in the fridge after using it for anything that needed active starter. So be sure to take it out early enough too. Anything up to 5 days old works great. Anything older I would probably refresh with a feeding or add a tablespoon more sugar to counter the acidity.
- Sugar – While the protein powder does have sweetener, the sugar here serves the purpose to add volume and lift to the sponge, so don’t leave it out or you might end up with a very dense cake.
- Butter – Serves the same purpose as sugar mainly, trapping air while beating both together until light and fluffy.
- Flour – For cake all-purpose is best due to its lower gluten content, keeping the sponge lovely and tender.
Orange Jelly
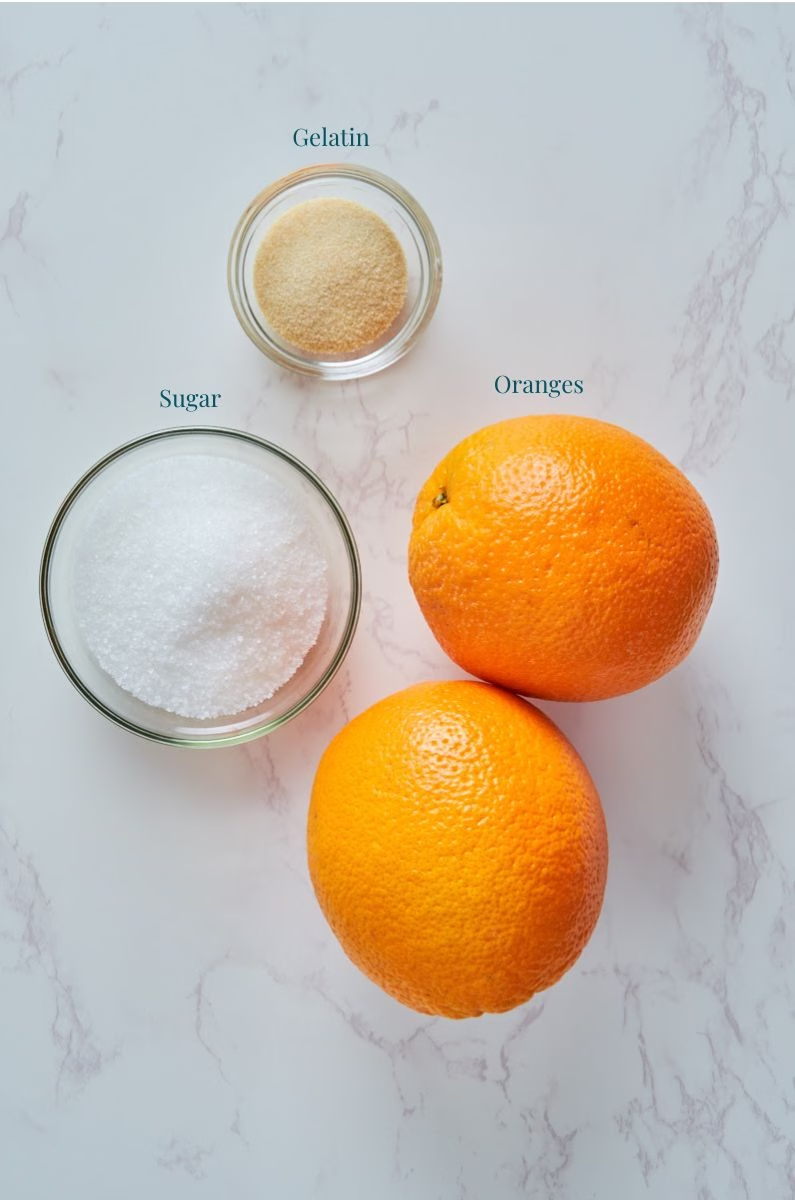
- Oranges – Two to be exact. Though if the jelly is your favorite part, feel free to add one more and raise sugar and gelatine content accordingly. Your cake, your rules. We are using both the zest and the flesh here. So the jelly is indeed reasonably healthy.
- Sugar – Not much. Just enough to sweeten it a little. I halved it compared to the recipe I found online. Feel free to adapt to your liking. The whole job of the sugar here is to add sweetness.
- Gelatine – I’m using powdered gelatine here for ease of use. 10 seconds in the microwave with a bit of water is all it needs to be ready for use.
Chocolate Topping
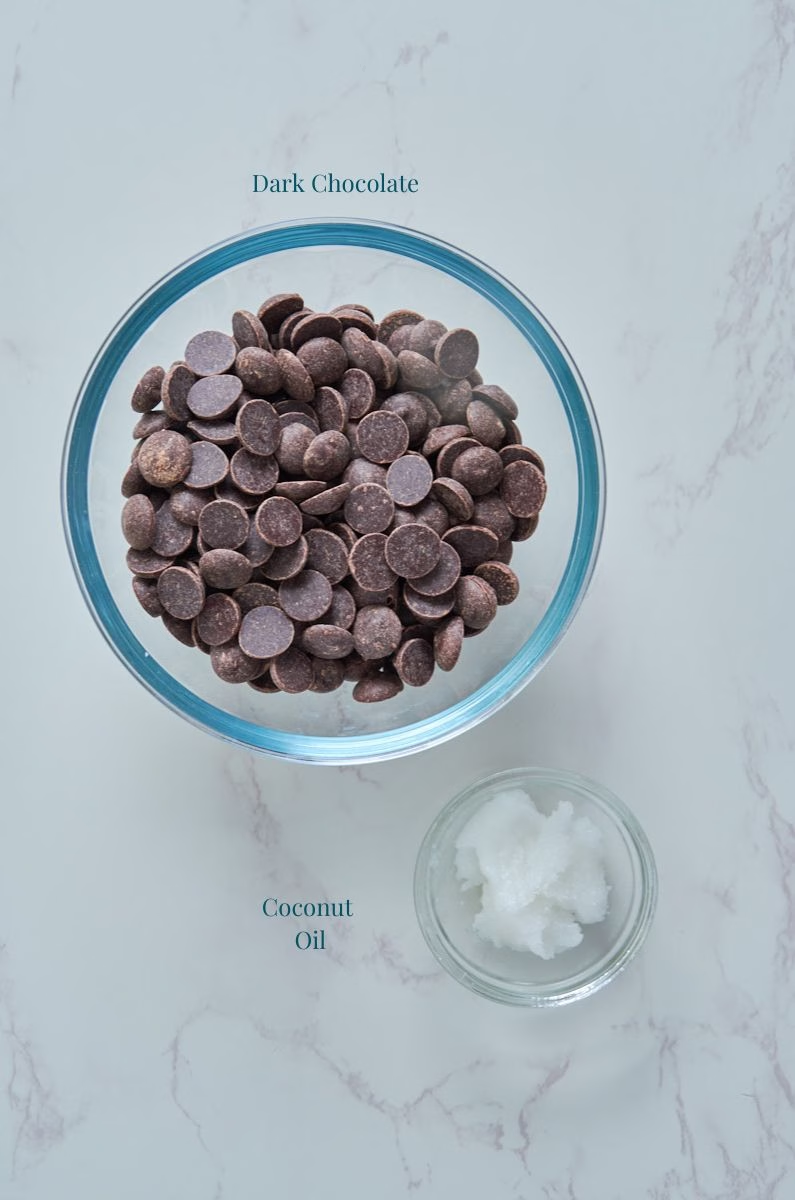
- Dark Chocolate – I used 70% chocolate chips from Callebaut, which I adore for ease of melting and flavor. Any good eating chocolate with relatively high cocoa content will do though. Lindt is particularly lovely but got rather prohibitively expensive over the last few years. So just use the best you can afford.
- Coconut oil – This is entirely optional as described above in the two versions of chocolate topping. It softens the chocolate ever so slightly and makes melting it even easier. But if you prefer a distinct snap in your chocolate, feel free to leave it out. When it comes to personal preference without any thought about look and how easy it is to eat with a fork, I would not add the oil.
- But beware: Your topping will shatter all over the place.
substitutions
Whole-Orange Batter
- Oranges – Feel free to replace them with mandarins/clementines. Just make sure to remove any seeds, as they often have more of them or your cake texture won’t be very pleasant. Blood oranges would be great too and transform the cake into a Valentine’s day reddish colour. You are looking to get about 1 cup/250g of pureed fruit.
- Greek Yogurt – Vegan Greek yogurt will work too. If you only have normal yogurt, strain it by using the method described in my Labneh recipe for an hour or two, to get the consistency/water content of Greek yogurt.
- Whey Protein Concentrate – While this recipe is optimized for the moisture absorption of whey concentrate, casein will work too. Just add a tablespoon more yogurt.
- For vegan options the vanilla flavored vegan protein from Orgain seems to work well for many people.
- I have not yet tested it myself as it’s tricky to get here, so I’d love to hear from you if you try.
- To make this recipe without protein powder, simply replace it with the same amount of flour and use one tablespoon less yogurt to make up for the lower liquid absorption.
- Sourdough Discard – You can of course use active starter. If you have no sourdough, no problem either. Simply replace with 60g flour and 40ml (approx. 3 tablespoons) milk or plant milk or water.
- Butter – Vegan Butter will work here. I haven’t tried it with oil as this cake relies on beating butter and sugar until fluffy for much of its lift.
- Eggs – If you’d like to replace the two eggs, add 60ml/1/4 cup plant milk and 40g flour to get very similar results in texture.
- Flour – While I haven’t tried this myself, as we don’t get it here, I read that King Arthur Gluten free flour is a great substitute for all purpose. But with the sourdough discard adding some gluten, I would still only advise this swap if you were gluten sensitive, not celiac.
- You could however replace about 1/3 of the AP flour with fine whole wheat flour. Your cake may not be as soft but will gain a lovely nutty flavor.
- Sugar – If you’d like to make a sugar free cake, Xylitol will work well as replacement.
Orange Jelly
- Oranges – Same as for the cake batter you can use clementines or blood oranges without issues. You are aiming for around 300g/ 1 ¼ cup of fruit flesh.
- Sugar – Xylitol or any sweetener you enjoy will work. Or, if you want a more acidic result/your oranges are very sweet, you could try to leave it out entirely.
- Gelatin – Vege-Gel or Agar Agar will work. Use according to package instructions. You are aiming for a relatively firm set jelly, as you need to be able to flip it over to transfer onto the cake.
Chocolate Topping
- Dark Chocolate – If you are vegan make sure to check the ingredients. Most dark chocolates are naturally vegan though.
- If you are not a fan of dark chocolate feel free to use any chocolate you enjoy.
- Coconut Oil – A teaspoon of butter will have a very similar effect. Or just leave it out for a cracklier topping.
Top Tips For Success
- Have your ingredients at room temperature. This is particularly important for this cake, as the whole blended orange has a fair bit of acidity, which, in itself will have the batter split slightly right before adding the flour, which brings it all back together. The room temperature butter, eggs and yogurt will make sure this split is minimal and give you the perfect fluffy sponge every time.
- Cooling your jelly on baking parchment in the same pan that you used for baking the sponge ensures it has the exact same size and shape as your base, making it super easy to just flip onto it, then peel off the parchment.
- A 20 minute burst of cold in the freezer for sponge and jelly cools down the jelly just enough so it won’t melt when you pour on the slightly warm chocolate, giving you a smooth topping.
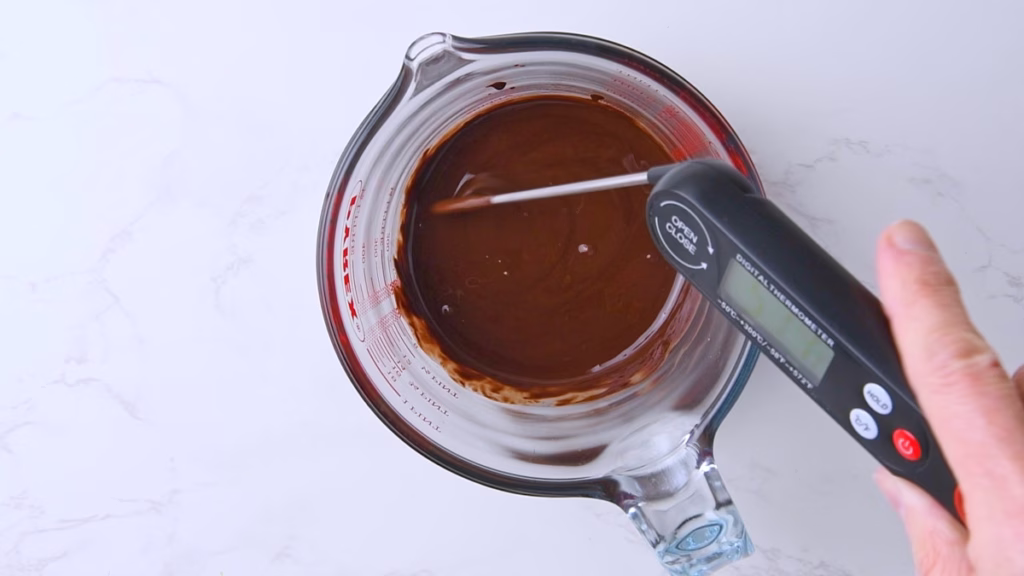
- Tempering the chocolate. I know, I know, it sounds scary. But it really isn’t! The trick is to heat 2/3 of the chocolate chips or chopped chocolate first, melting it and bringing it to around 120°F/50°C (Melted and nicely warm), then adding the remaining third, a bit at a time, allowing it to melt in the heat, stirring to “teach” the chocolate crystals how to behave correctly, so they get the satisfying snap until the mix is around 85°F/30°C, which won’t melt the jelly too fast.
- If you decide to skip the tempering, simply melt the chocolate gently in the microwave and allow it to cool for a while. Your jelly will likely melt a bit as the chocolate needs to be warmer to be spreadable, but it’ll still taste lovely.
Equipment Used
- Blender – As so often I’m using my Nutribullet. This might actually be the most used tool in my kitchen, apart from my air fryer. I love it for it’s size in particular, making it easier to blend smaller portions like one orange or just a bit of cottage cheese, but holding enough volume that I can add all the liquids for a cake if needed. Though we are not doing that here.
- Any blender that can smash a whole (roughly chopped) orange into a smoothie-like slush will work here.
- Hand Mixer – While you can use a stand mixer to fluff butter and sugar I feel the amount of ingredients has them stick to the walls of the bowl rather than get properly light and airy. Hence for this I used a hand blender, giving me a bit more control and higher speeds, which worked better for getting a relatively smooth mix when you add the blended orange. It’ll still look a little split, but less so than with the stand mixer when I tried it.
- 8-inch Square Baking Pan – The perfect size for a snack cake, giving you the ideal jelly-to-sponge ratio.
- Offset Spatula – This makes it easy to spread the melted chocolate quickly over the very cold cake before it sets. Because we work with tempered chocolate here, to not melt the jelly, being only a little over room temperature, it will set very fast. So you want a tool that is as efficient as possible. A silicone spatula will sort of work but give you a less clean finish. Not that mine was super clean as you can see, but reasonable for a snack cake I suppose. No perfection needed.
 Buy Now →
  Buy Now →
 How to Make this
The Whole-Orange Sponge with Protein and Sourdough Discard
- Make sure Your ingredients are all at room temperature.
- If your oranges aren’t untreated, make sure to scrub them really well, to get rid of any unwanted chemicals on the skin.
- Pre-heat your oven to 350°F/175°C.
Prepare Your Cake Pan
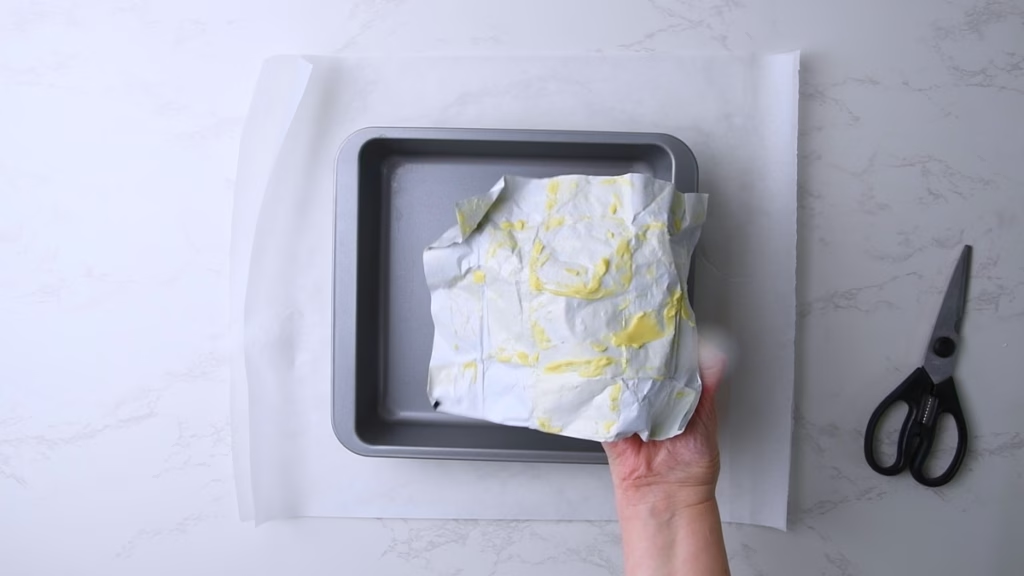
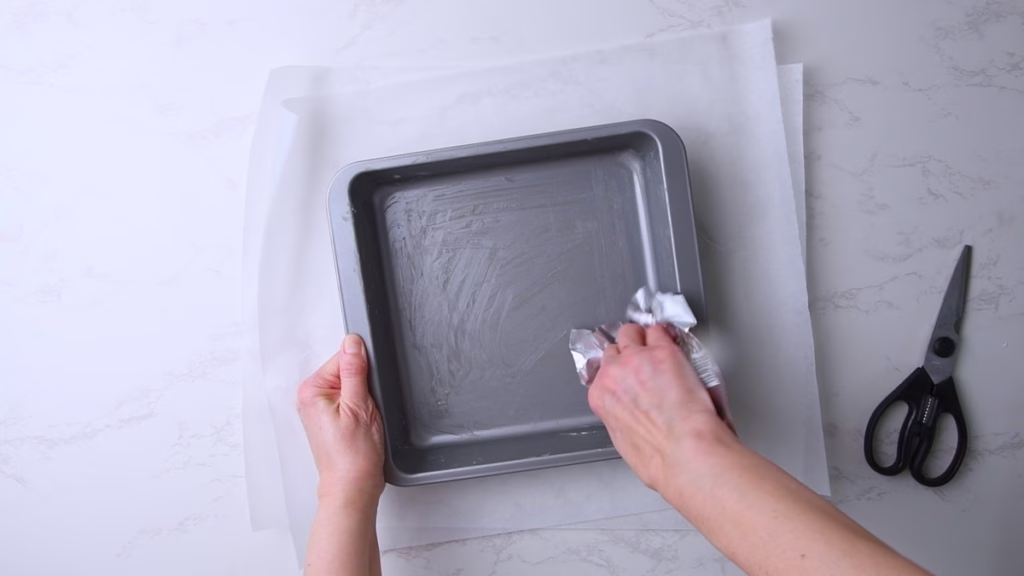
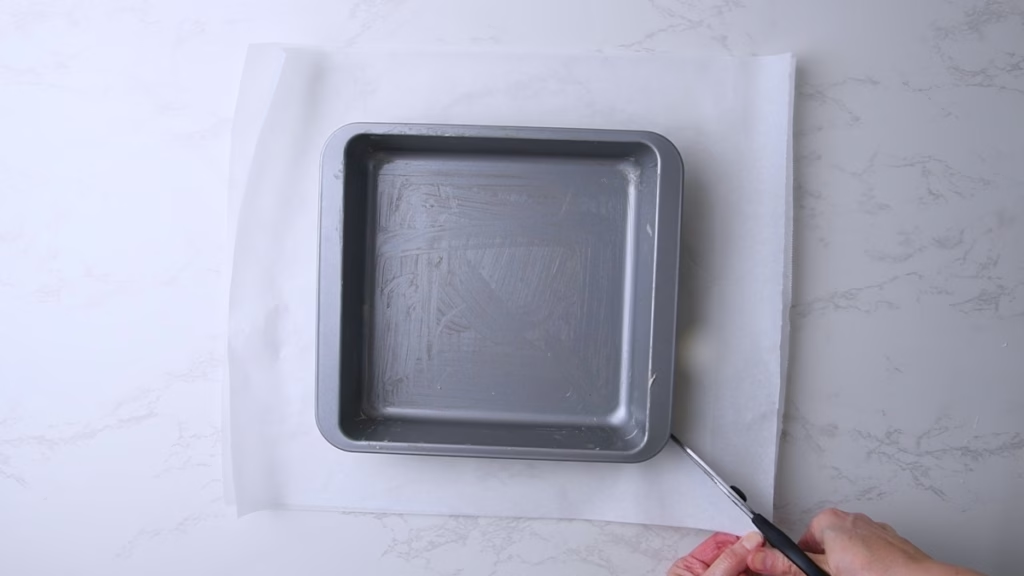
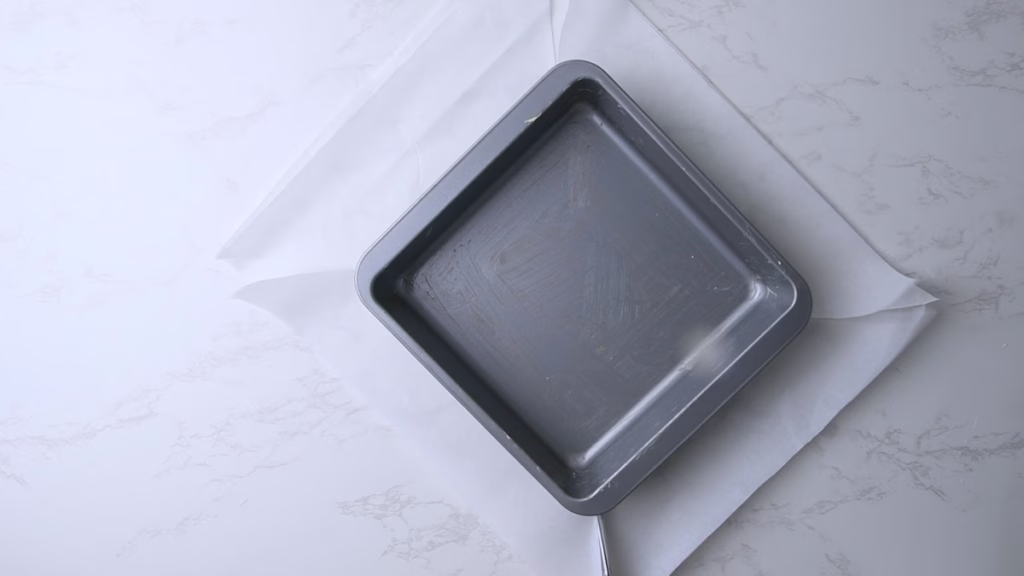

- Butter an 8-inch square baking pan and line it with baking parchment.
- While you can theoretically just push it in there if you don’t mind messy corners, here is a way to line it a little more neatly:
- Measure 2 pieces of baking parchment (one for the sponge, one for the jelly later) so you have about 1-2 inch/2-4 cm overhang on both sides.
- Place the pan in the center of it and, using scissors, starting at the corners, cut the parchment in all 4 corners diagonally towards each pan corner.
- Now you can very easily arrange the parchment neatly in the pan without scrunched bits by allowing the cut pieces to fold in naturally where they want to go, then pushing the remaining paper over the edges to hold it in place.
Blending The Orange And Protein
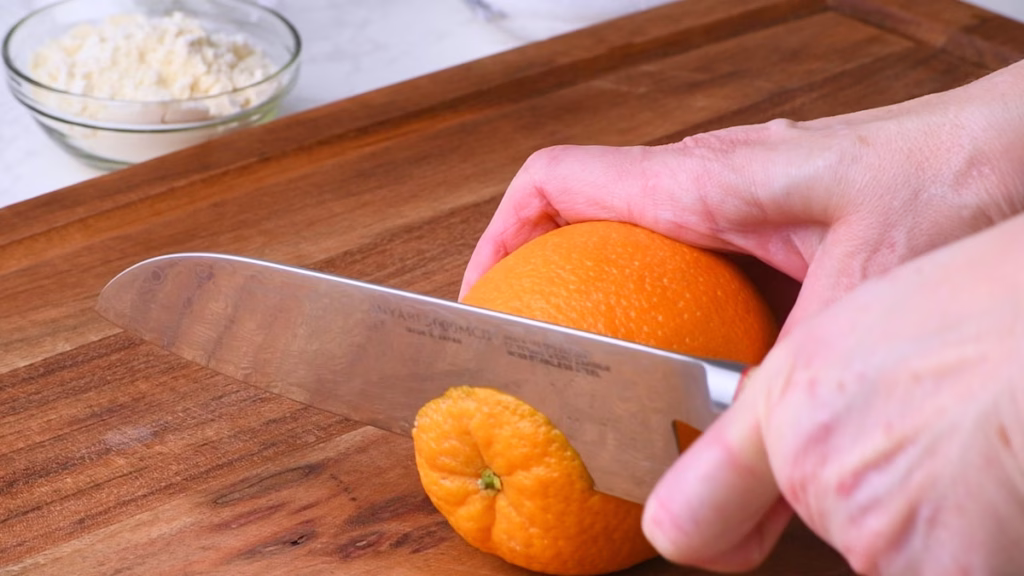
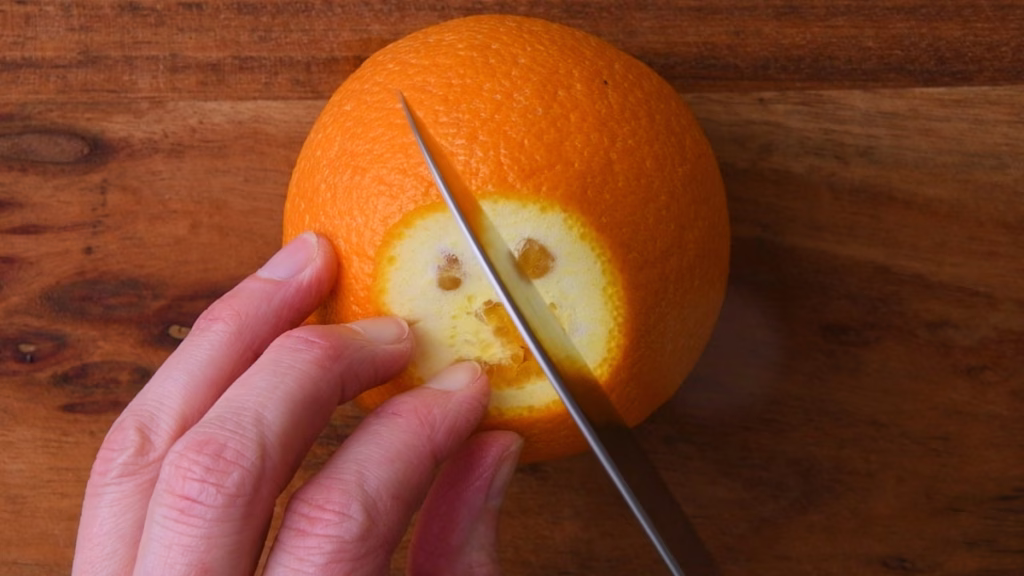


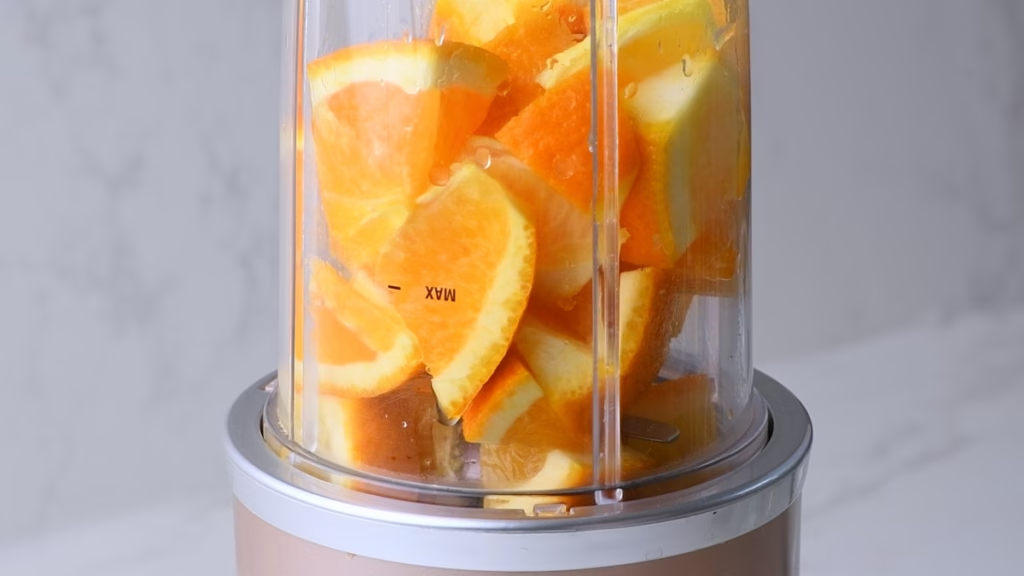
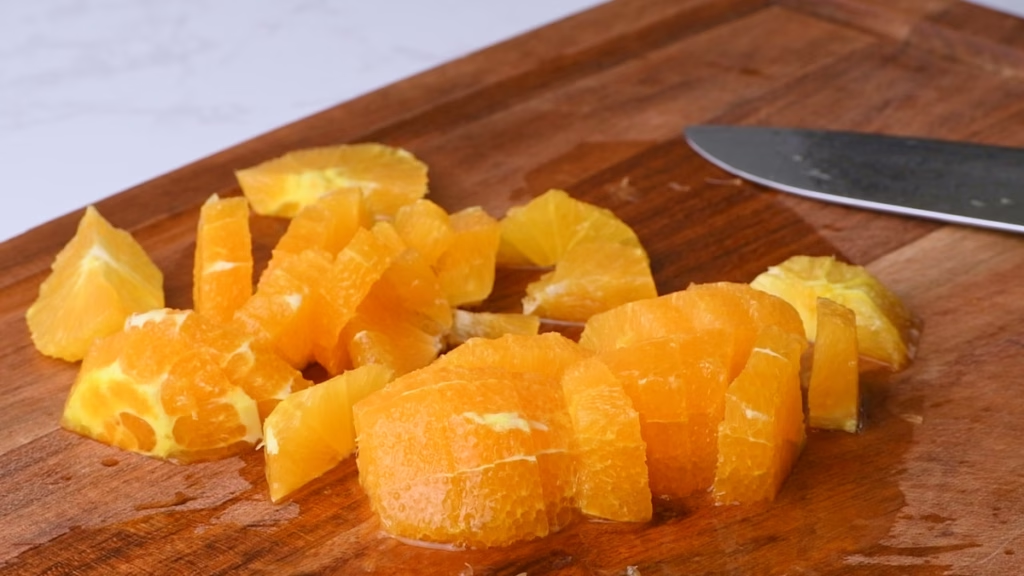
- Slice off the top and bottom bit of the orange, just to get off any woody parts. Roughly chop it into chunks, peel and all, removing any seeds you might find.
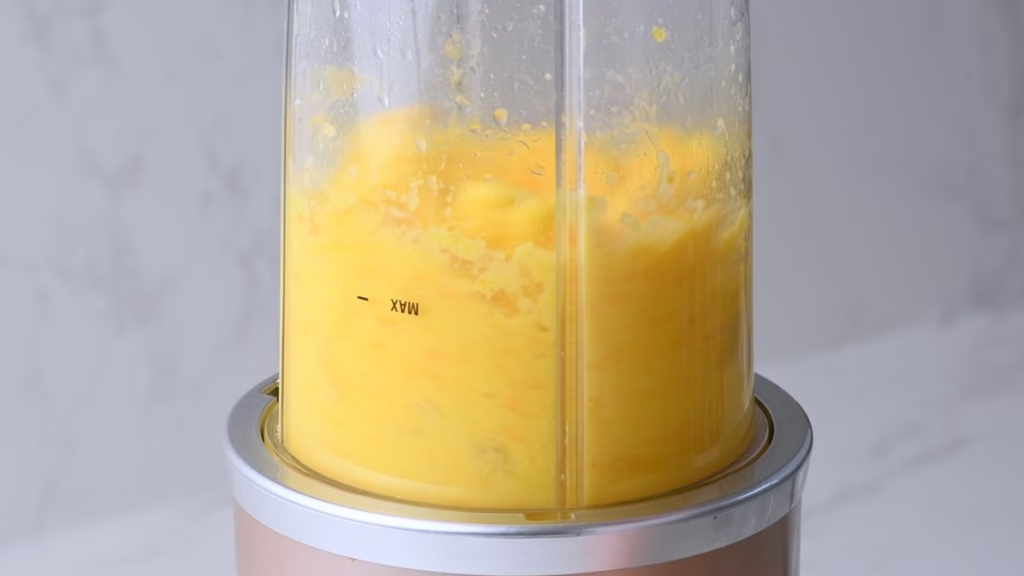
- Blend until it is the consistency of smooth apple sauce. You should have roughly 1 cup/250ml.
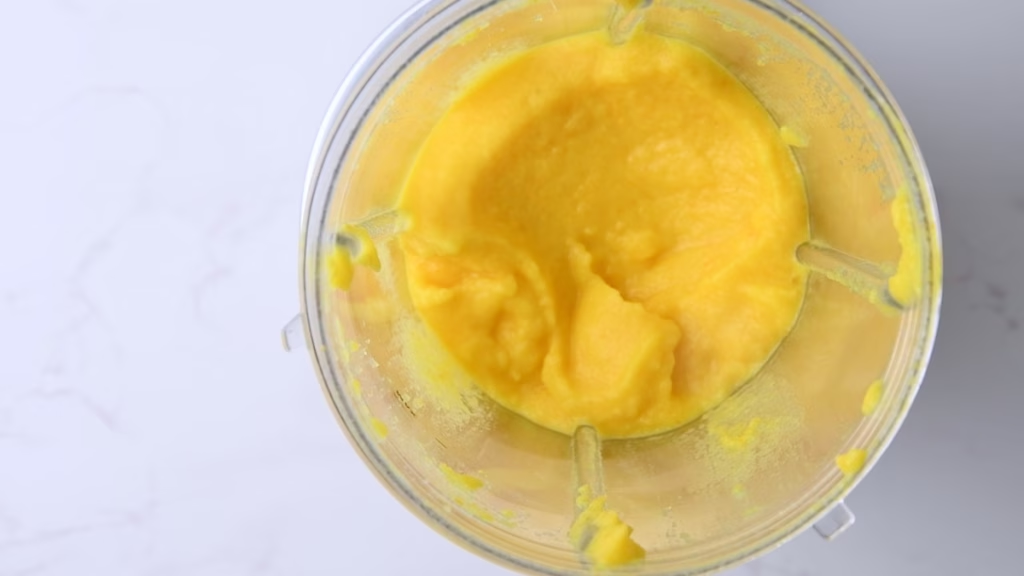

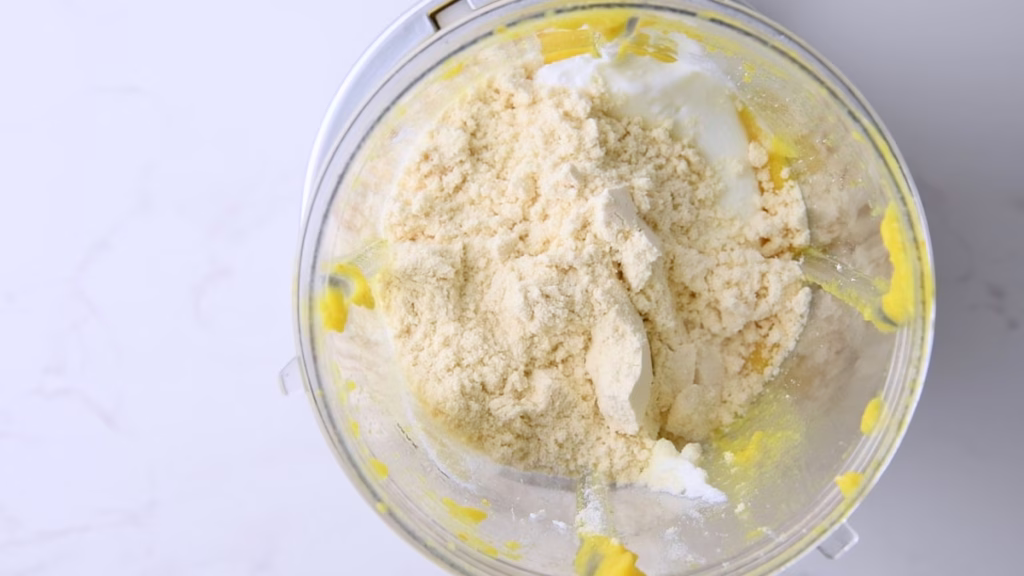
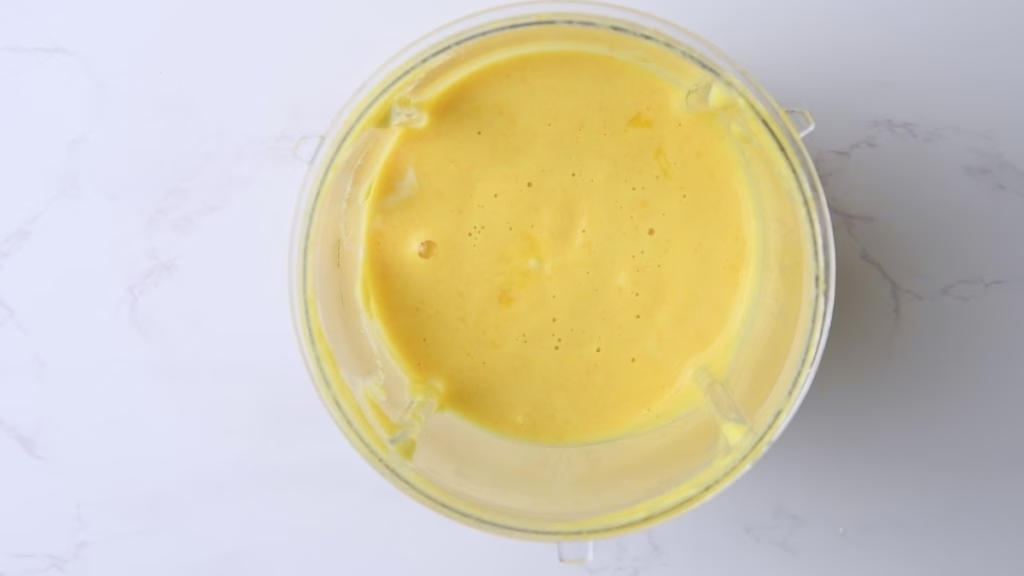
- Now add the Greek yogurt and protein powder and blend again until smooth. This ensures you have no clumps of protein in your cake.
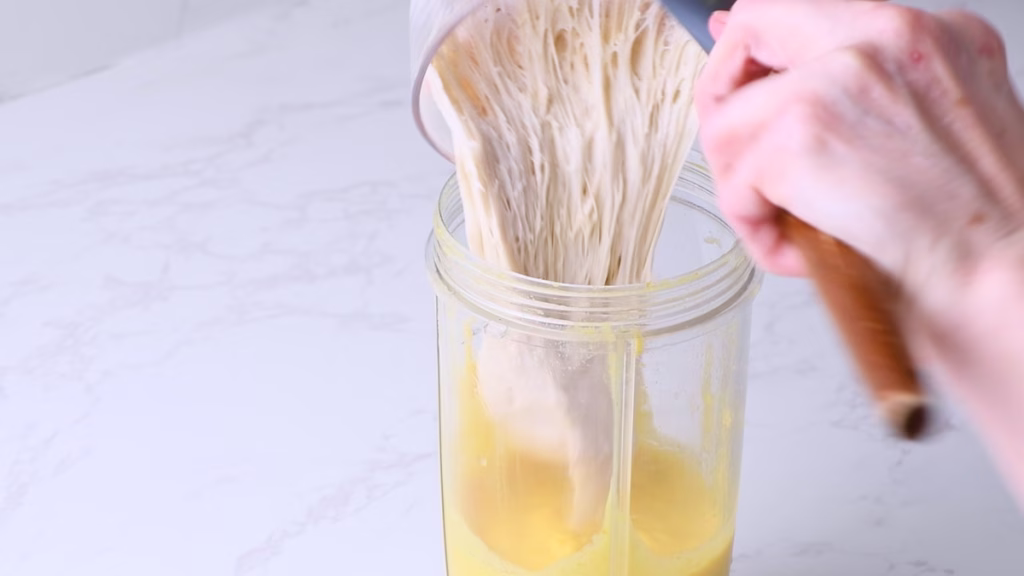
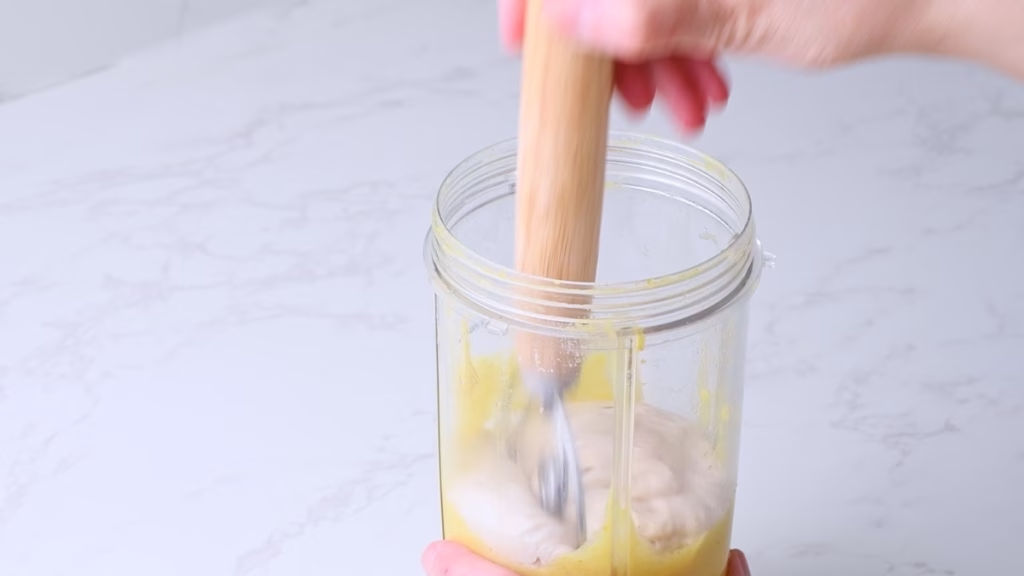
- Drop the sourdough discard into your orange mix and stir or gently whisk it in by hand. The remaining formed gluten strands in it will help your cake rise, so ideally don’t blend it in.
Creaming Butter and Sugar
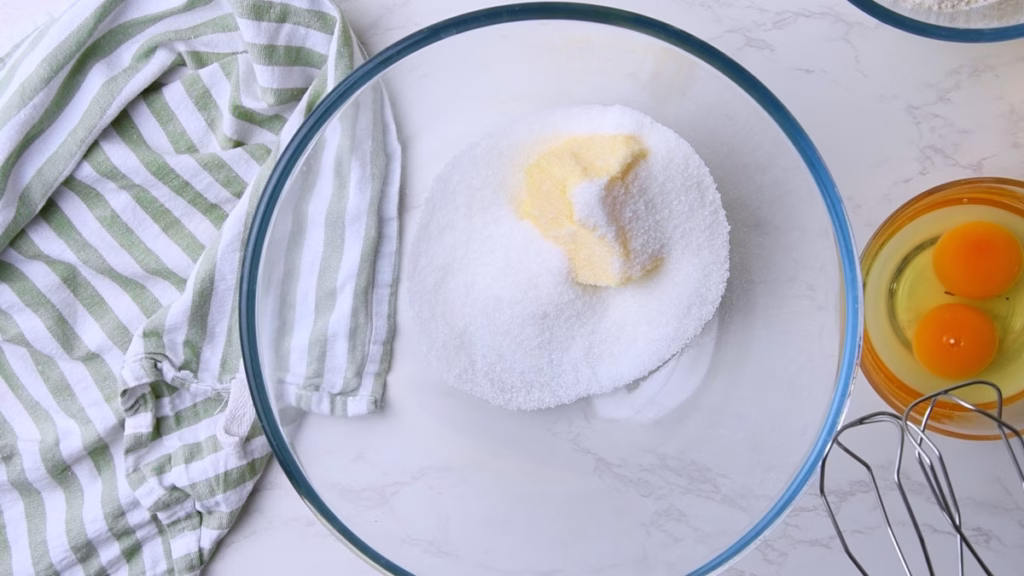
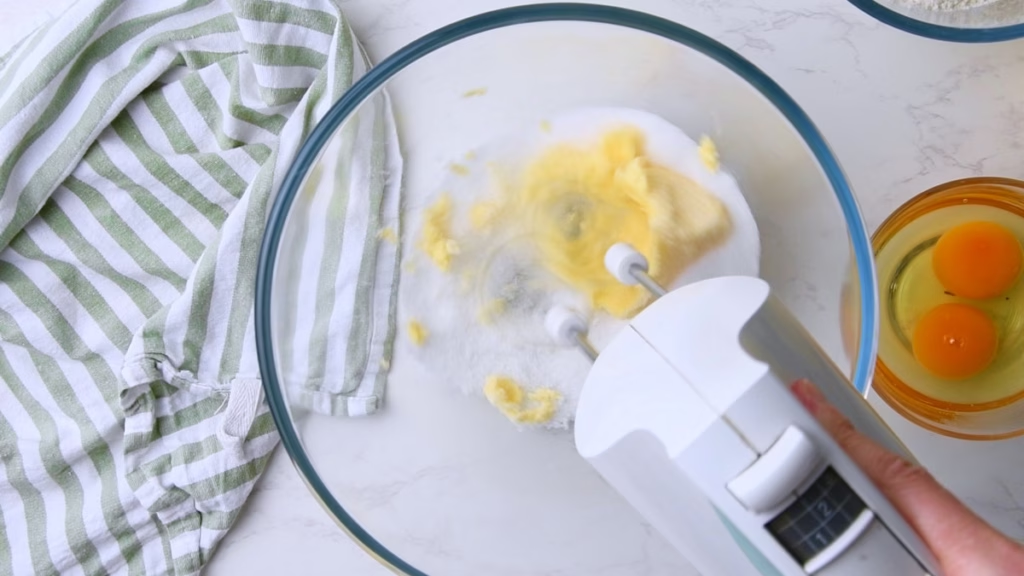
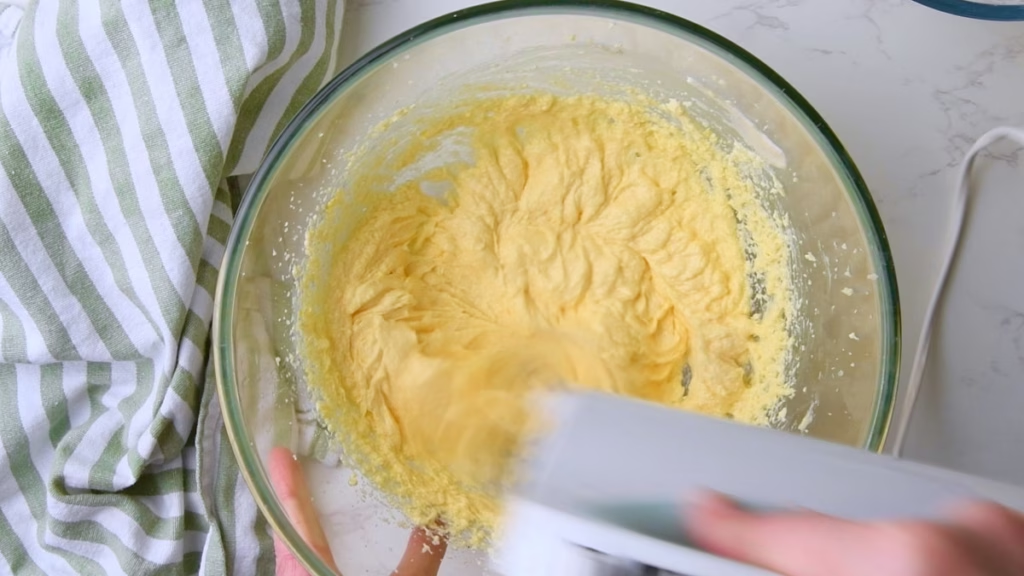
- In a large bowl, using a hand mixer (electric mixer), cream the room temperature butter with the sugar until light and fluffy. This is where your orange sponge gets its volume and fluffy texture.
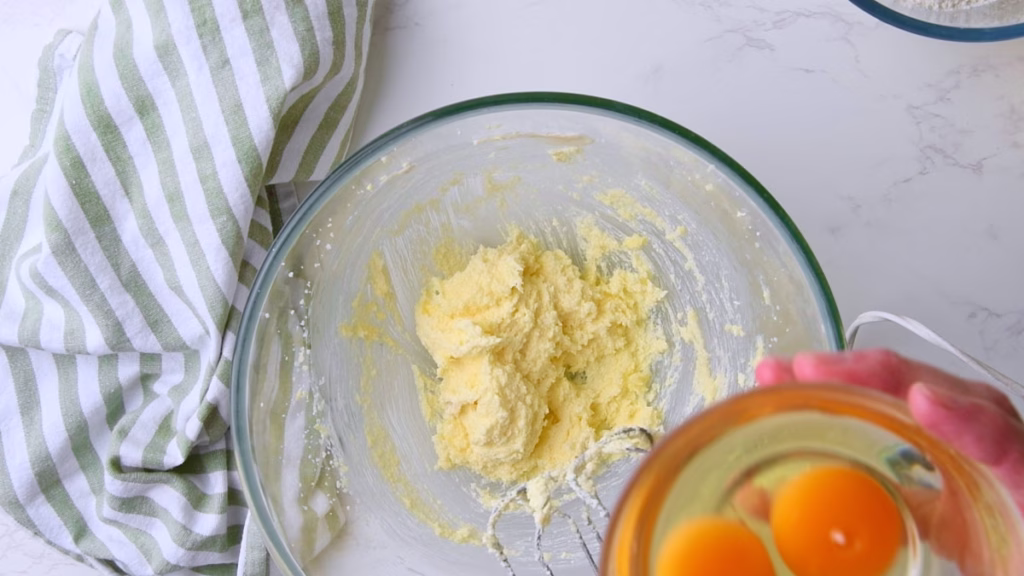
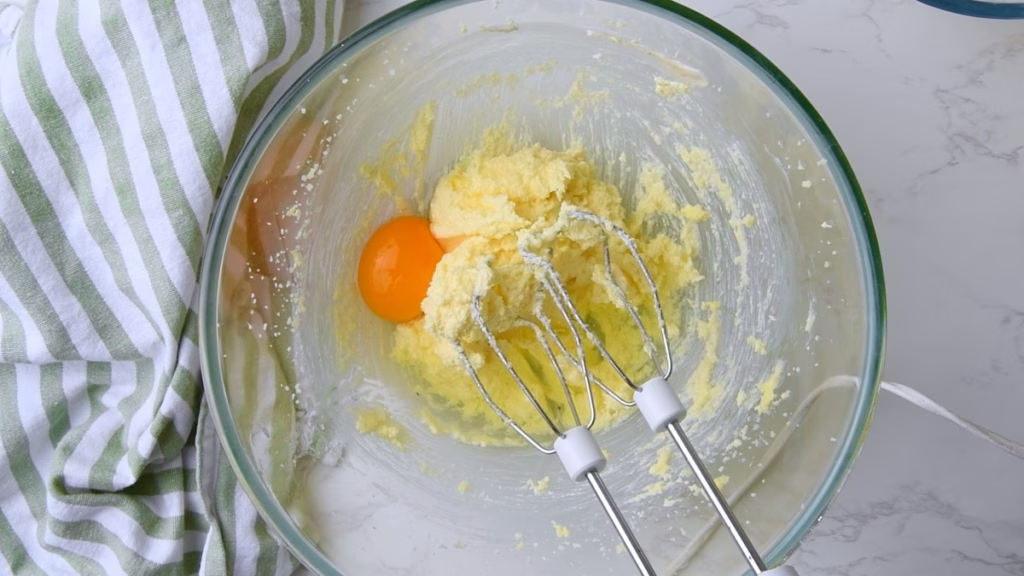
- Add one egg at a time and whisk until incorporated and smooth.
Add the Orange-Protein Mix

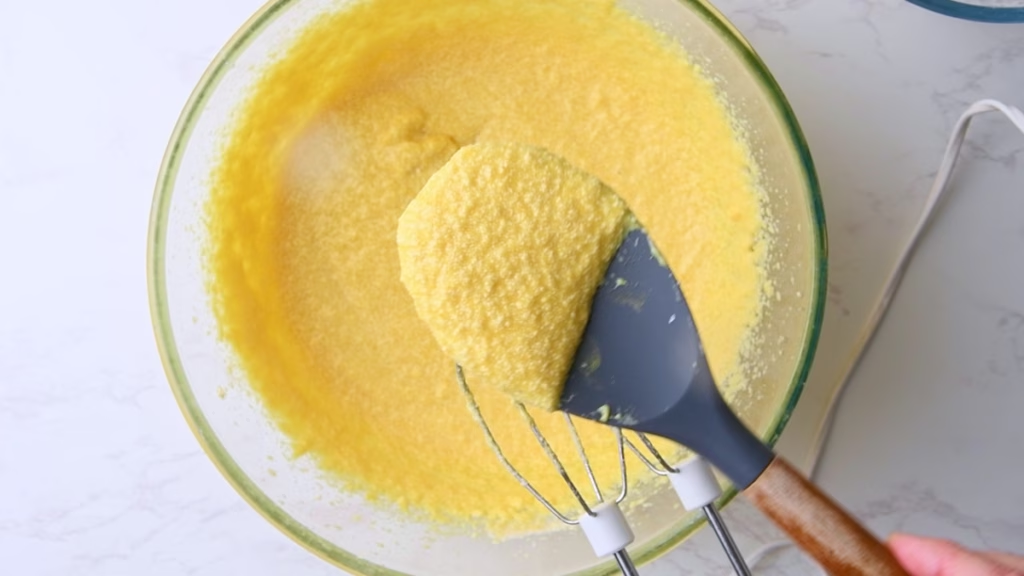
- Now pour in that orange mix, which at this point looks and smells like a delicious orange cream popsicle. Don’t be tempted to try it though. It’s (at this point) tricking you. Have a wild guess how I know…
- Use your hand mixer to beat it all together, taking a few minutes to get it really well whisked together.
- At this stage your batter will look like it’s splitting a bit. Don’t panic, we’ll solve that in the next step. If your ingredients were at room temperature, you’ll be fine. (If not your cake will be a little denser, but still delicious.)
Stir the Flour and Raising Agents
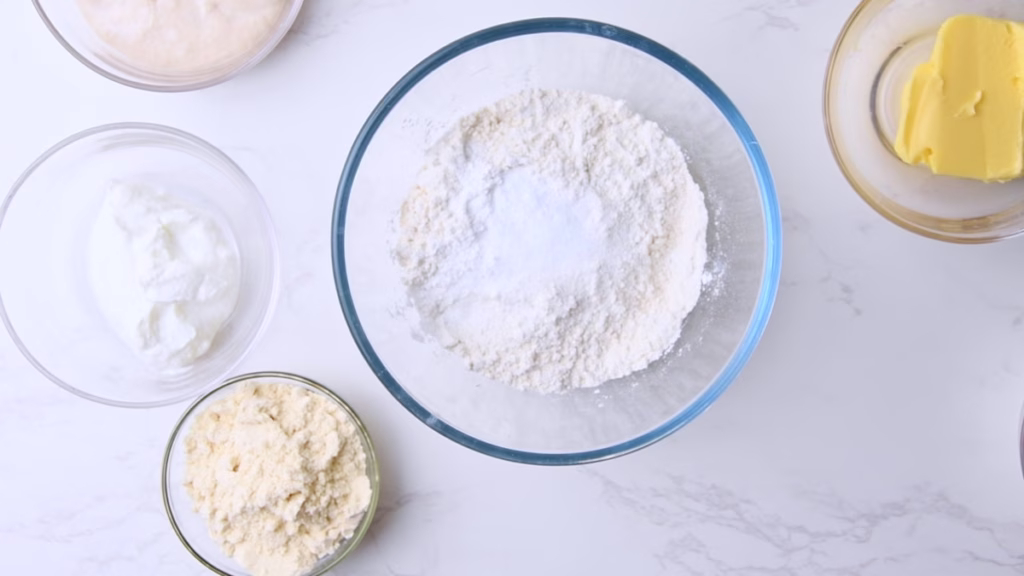
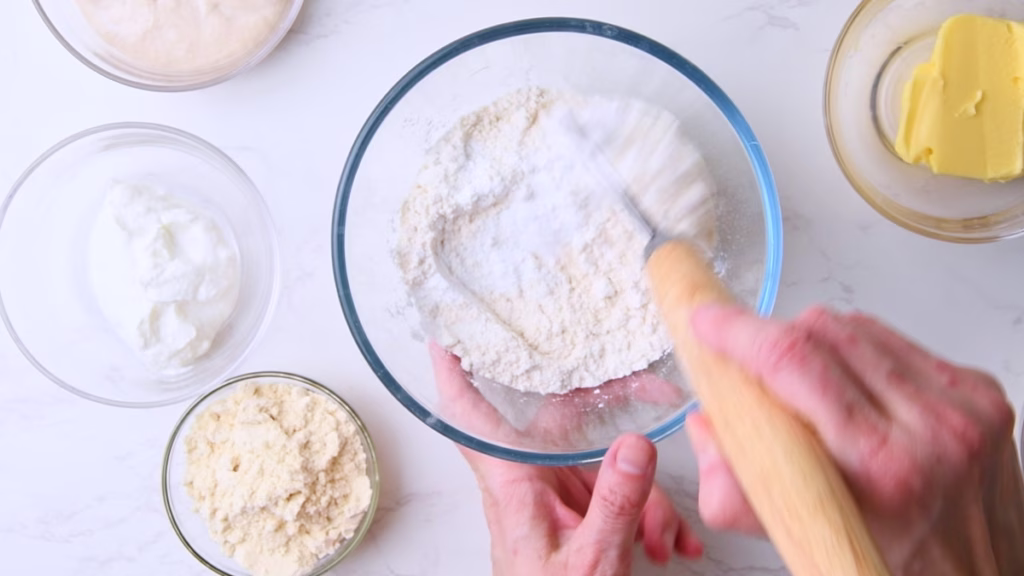
- Add baking soda, baking powder and salt to your flour in a medium bowl and give it a quick stir. The one teaspoon of each may sound like a lot, and is certainly more than the original used, but I found the protein powder orange mix needs a bit of help to rise to perfection.
Mix the Dry into the Wet
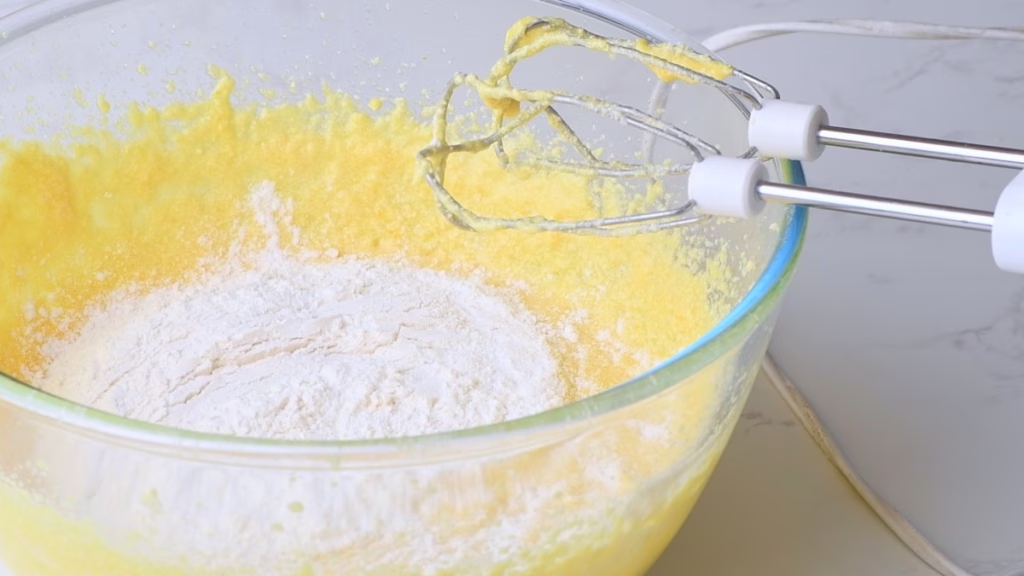
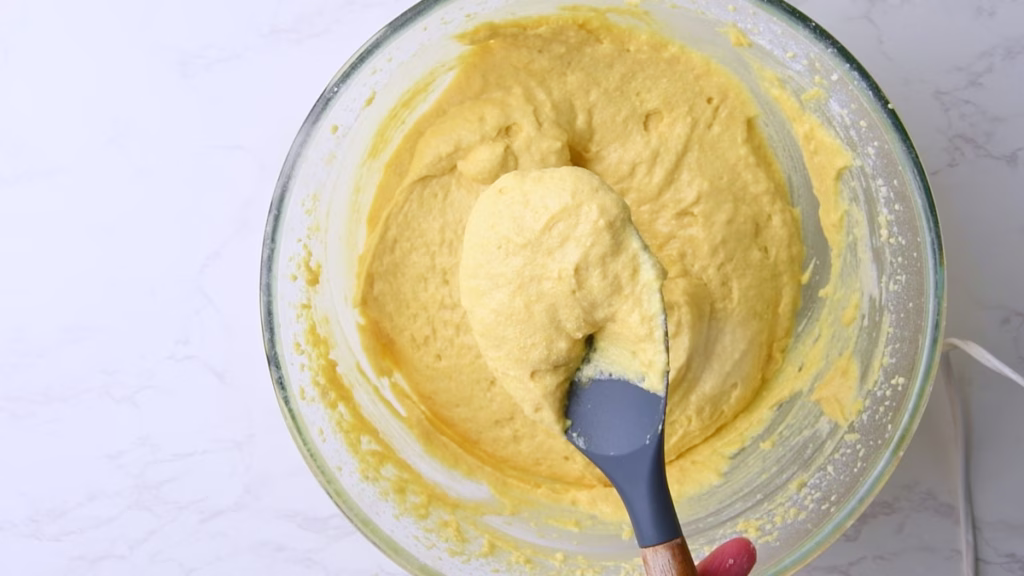
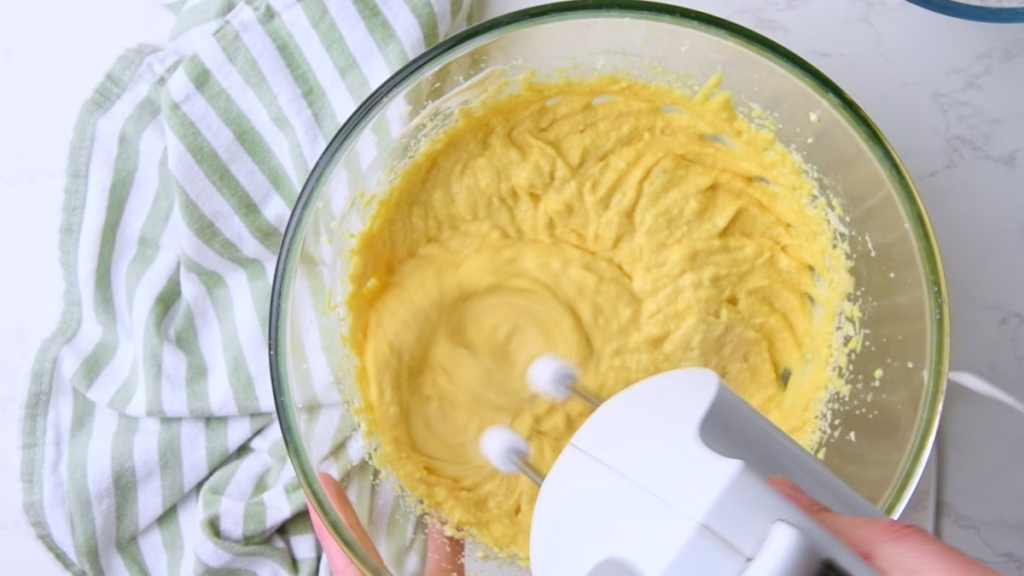
- Drop the flour into the wet ingredients and briefly whisk with your hand mixer until you have a creamy, homogenous batter. Most of the signs of splitting should be gone now and it’ll look like a typical, very marmalade-y scented sponge batter.
- Don’t overmix to avoid developing the gluten too much. This ensures a tender and fluffy cake.
Bake The Sourdough Discard Snack Cake
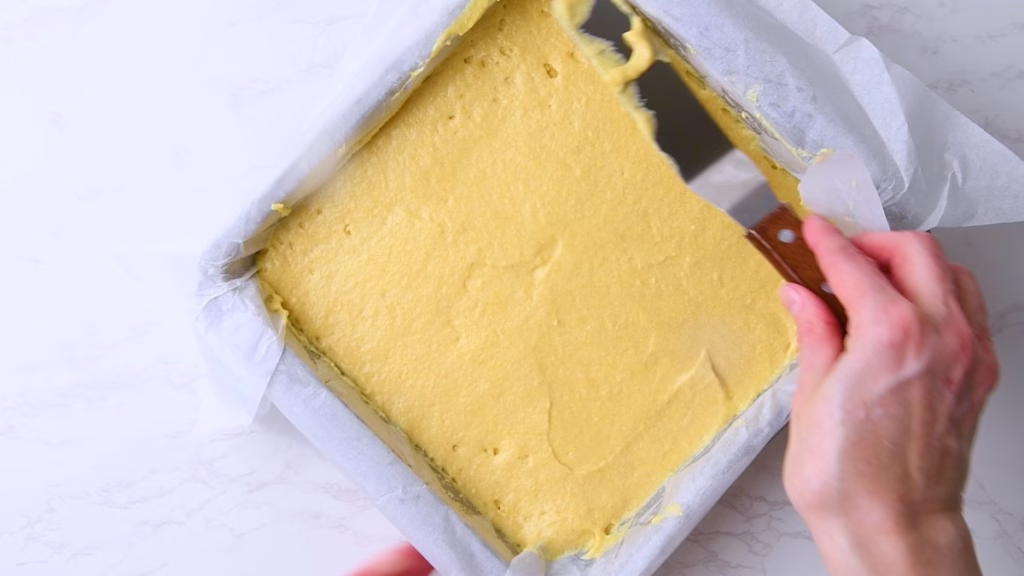
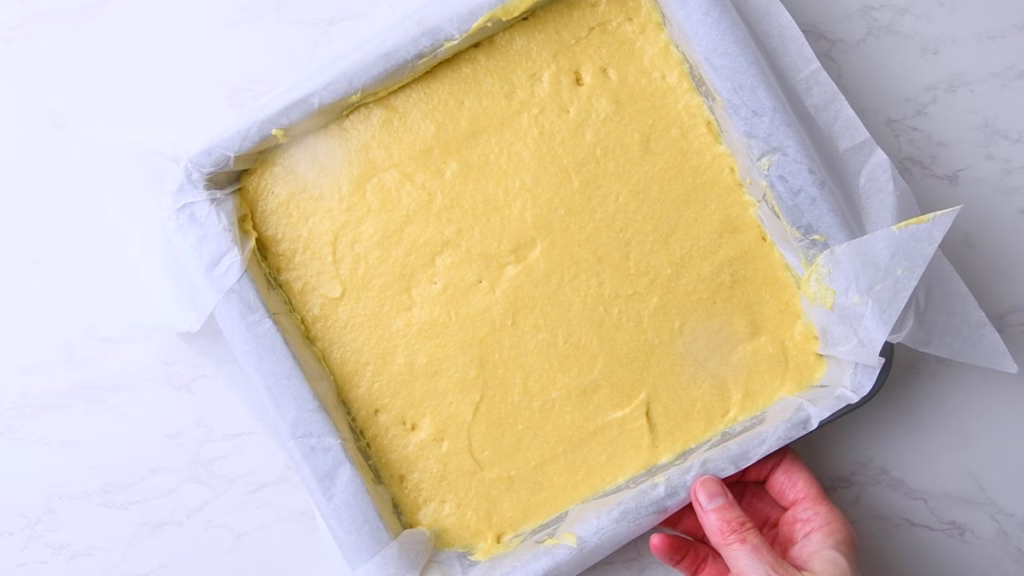
- Pour your batter into the lined cake pan and smooth the top a little. Bang the pan on the counter a few times to have any big bubbles rising to the top and pop.
- Other than most sponges, this one will not “melt” into having a super smooth top while baking. So any smoothing you want to happen should be done before baking.
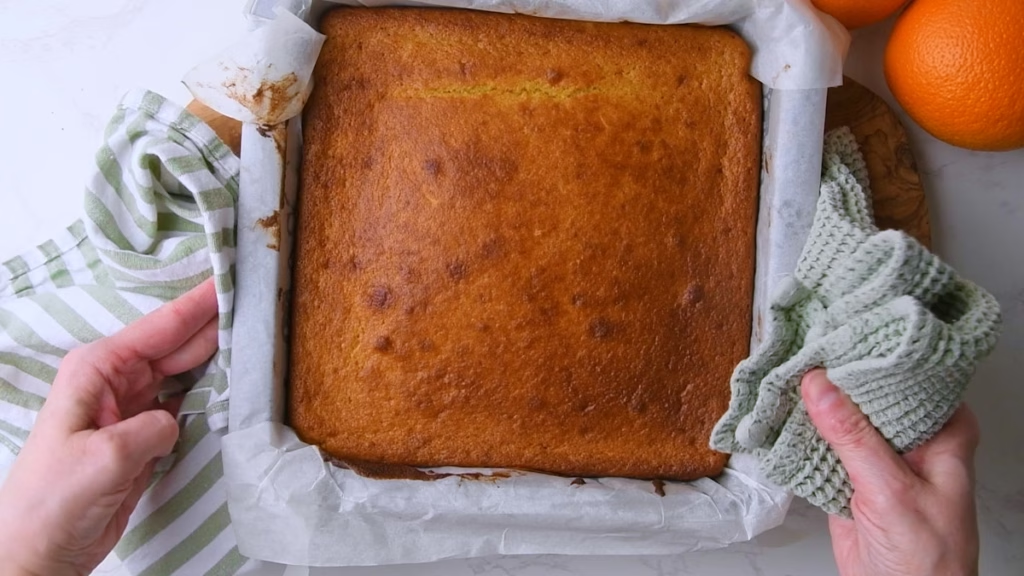
- Bake for 30-40 minutes or until your kitchen smells delicious, is golden and an inserted toothpick comes out clean or with a few moist crumbs attached.
- I tend to rotate any baked goods in my oven by 180 degrees after the first half of baking time, as my oven (like most) bakes unevenly.
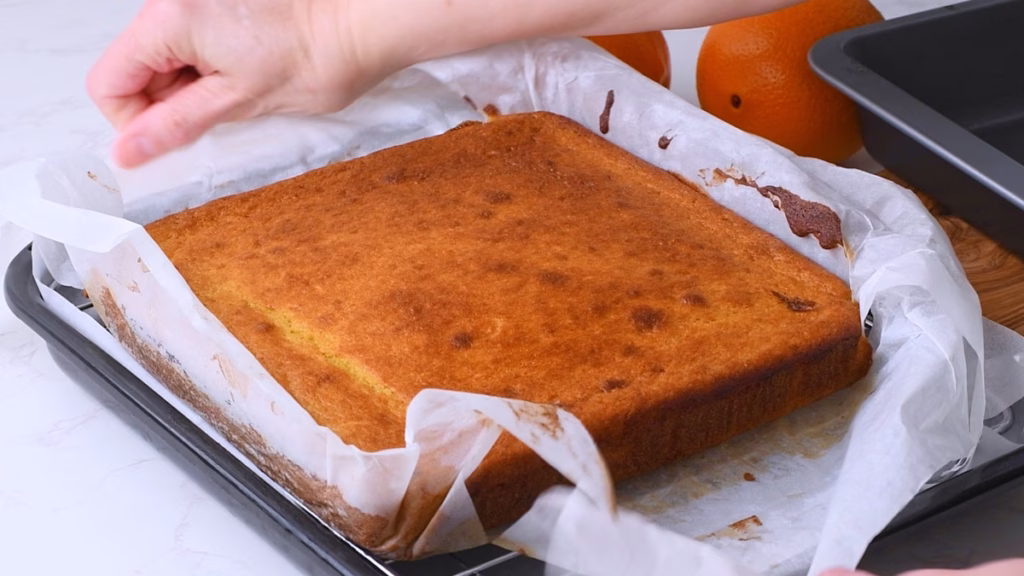
- Allow to cool for 5-10 minutes in the pan, then grab the corners of the parchment and lift it onto a cooling rack to cool completely without condensation at the bottom.
- Whatever you do, don’t peel off the parchment yet. We still need it on the cake!
Now you could, if you wanted, absolutely just snack on this as is or with a simple orange juice and icing sugar glaze on top. And you will feel tempted, that’s for sure. Because it smells intoxicating.
But we can do better, so bear with me here. Just 2 easy bits and you are in Chocolate-Orange Heaven.
The Orange Jelly
While your sponge is cooling, make your real orange jelly.
Line your still slightly greasy baking pan with the second piece of baking parchment.
Zest The Oranges and Chop the Flesh
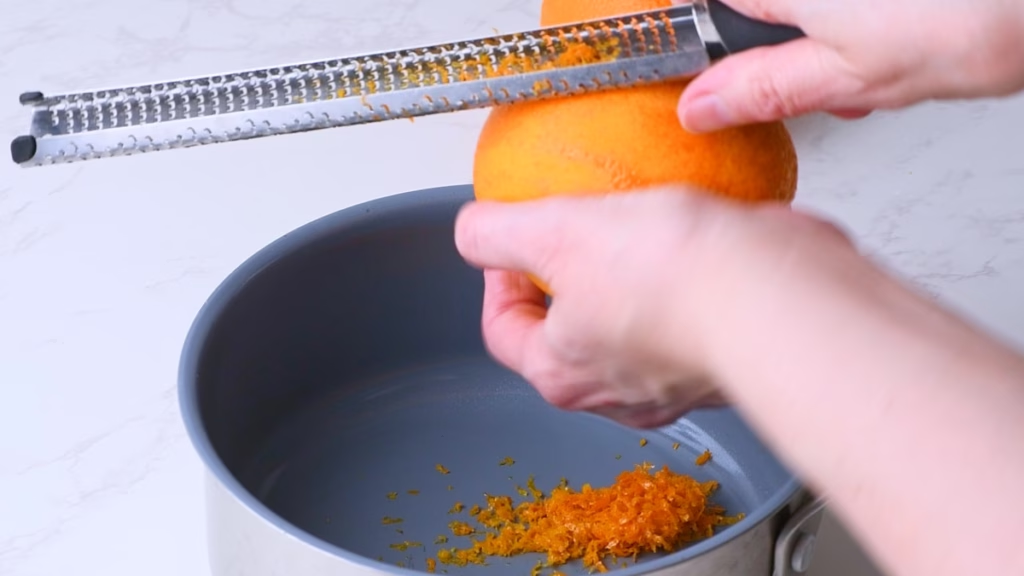

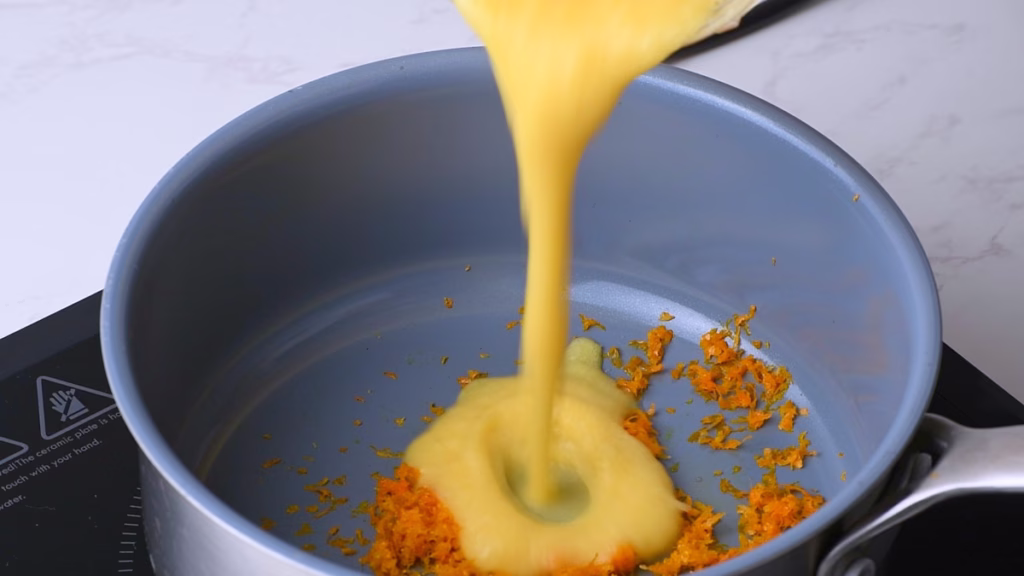
- For maximum flavor in the jelly zest both oranges into a small saucepan.
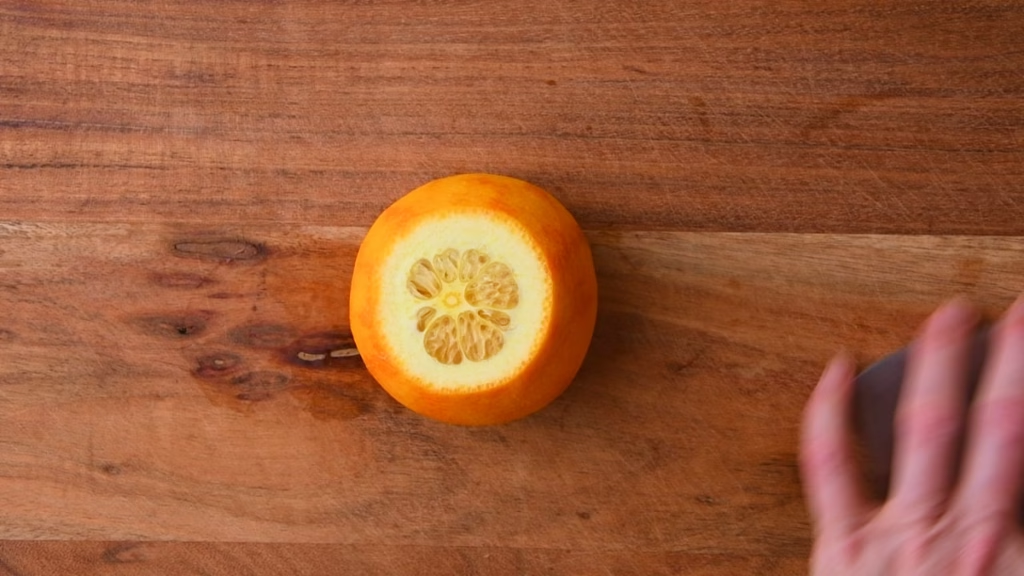
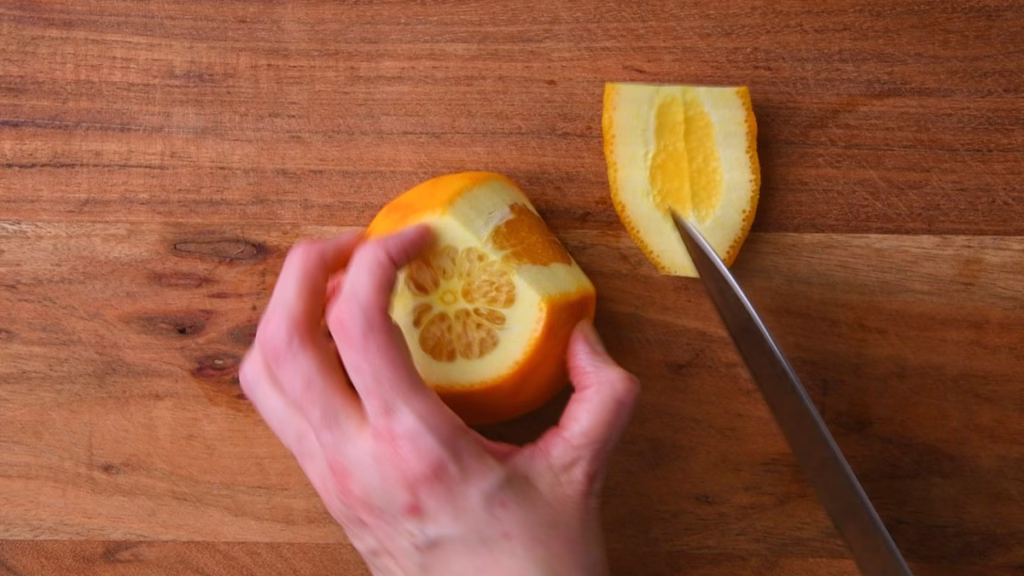
- Using a sharp knife, cut off top and bottom from your oranges.
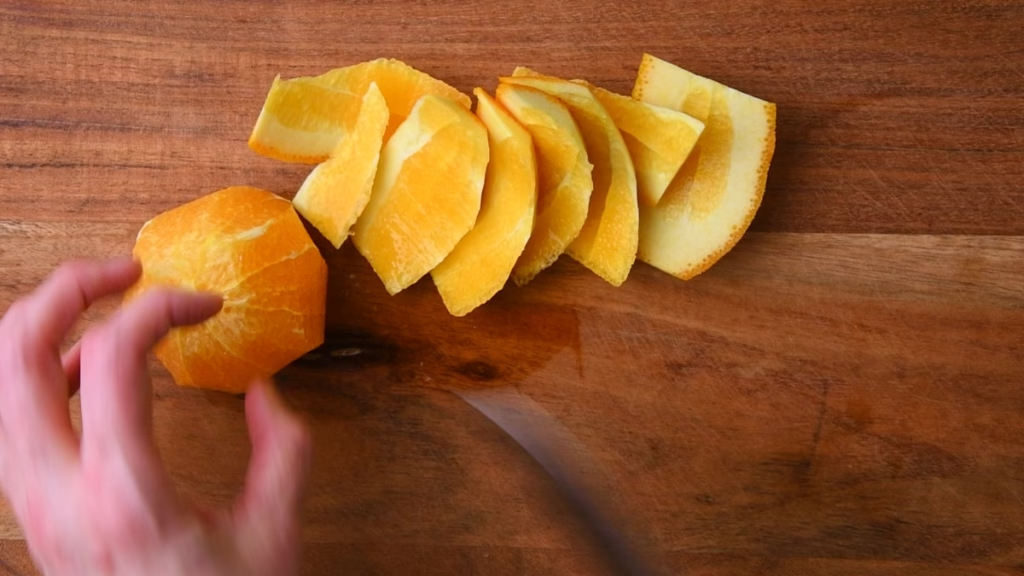
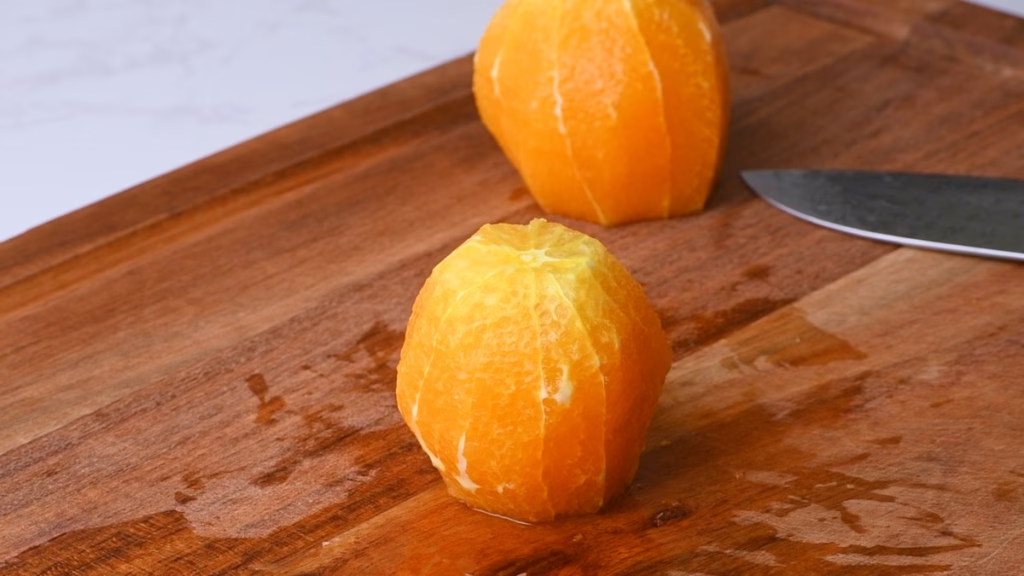
- Resting them on one of the freshly created flat pieces, slice off the skin, following the curve of the orange, including white pith, leaving you with just the flesh and a few membranes.
- Roughly chop, removing any stray seeds.
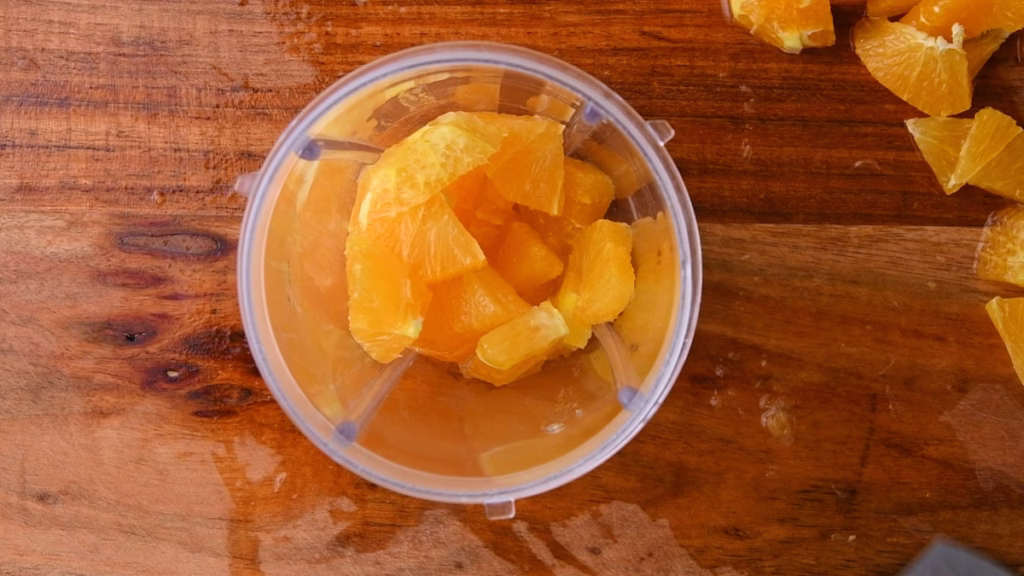
- Use your Nutribullet again to blend them until they are the consistency of smooth apple sauce (just without the skin this time) and transfer to your saucepan.
Cook the Jelly
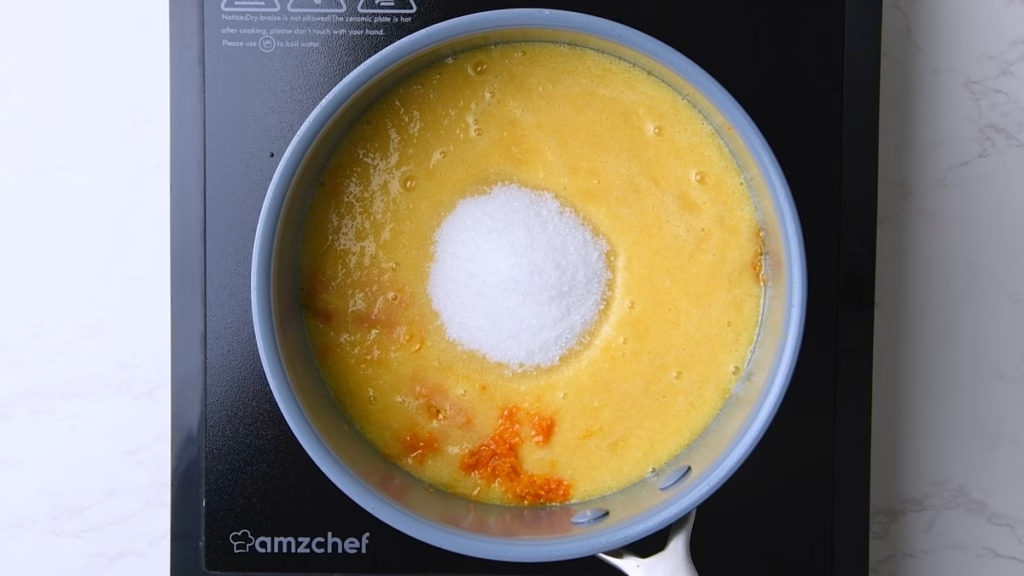

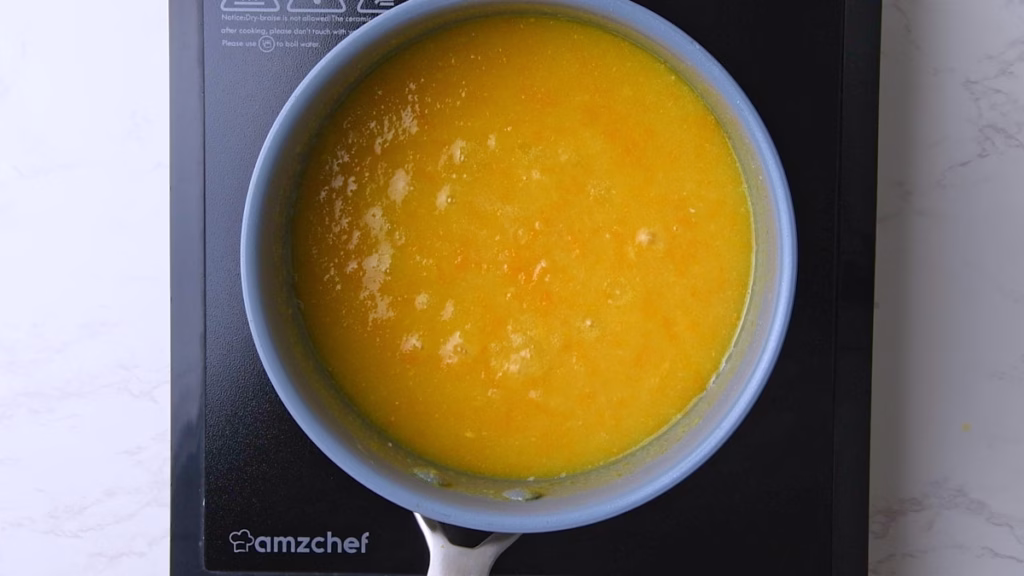
- Add the sugar and, stirring, let it come to a very brief boil until the sugar is dissolved. Take off the heat.
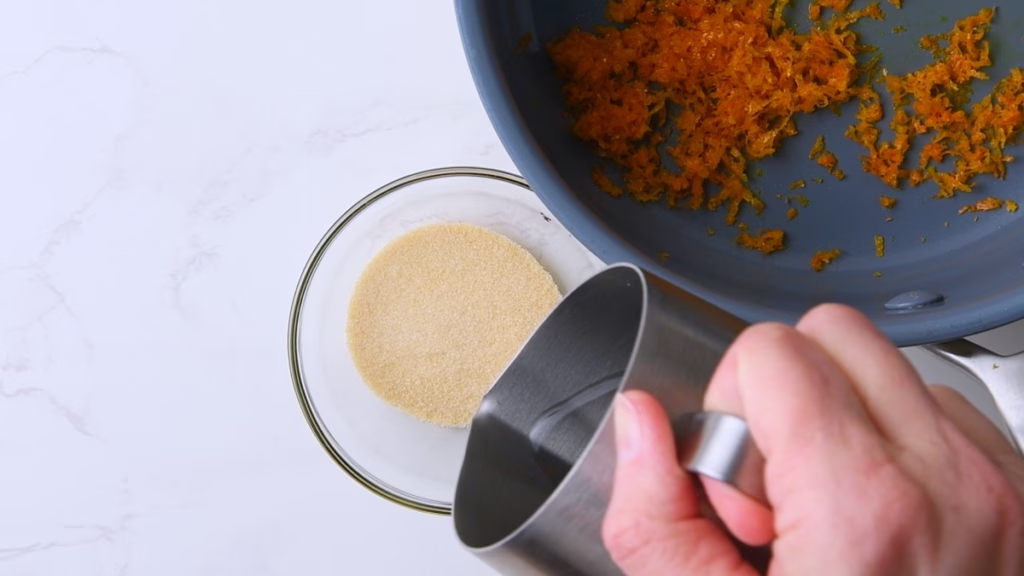
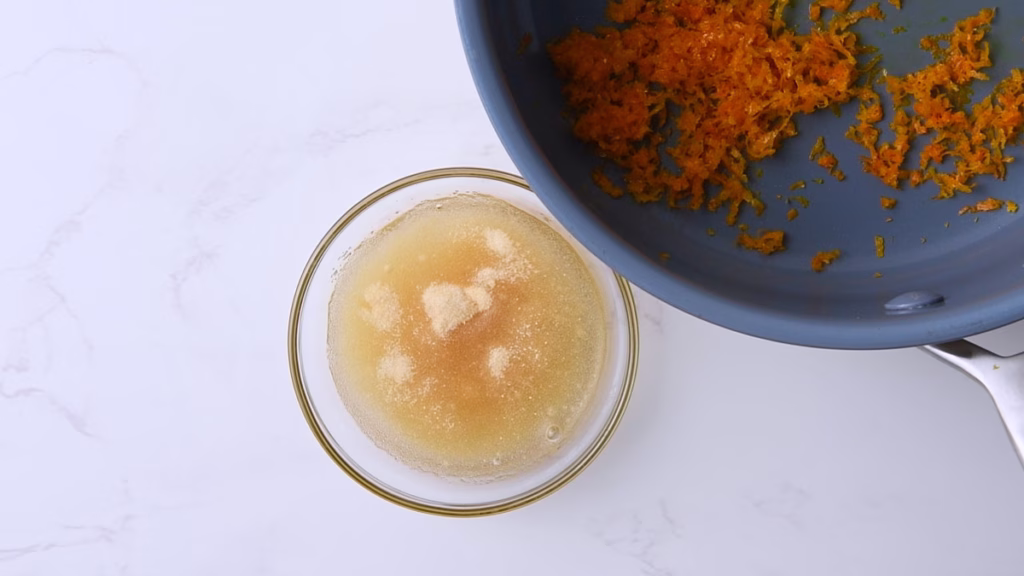
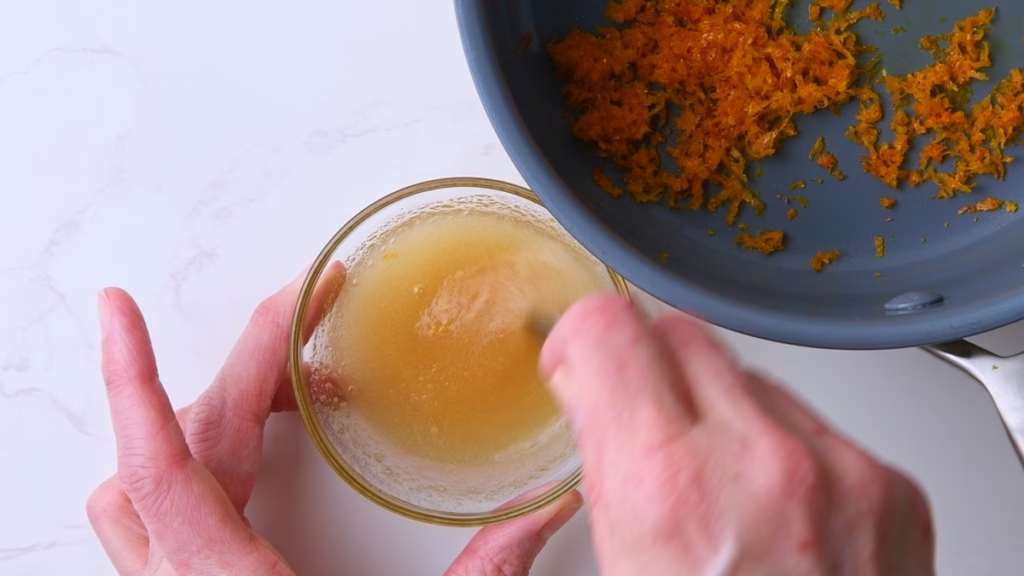
- In a small heat proof bowl mix your 2-3 teaspoons of gelatin with 2-3 tablespoons of water.
- Microwave for about 10 seconds (no more!) until just liquid.
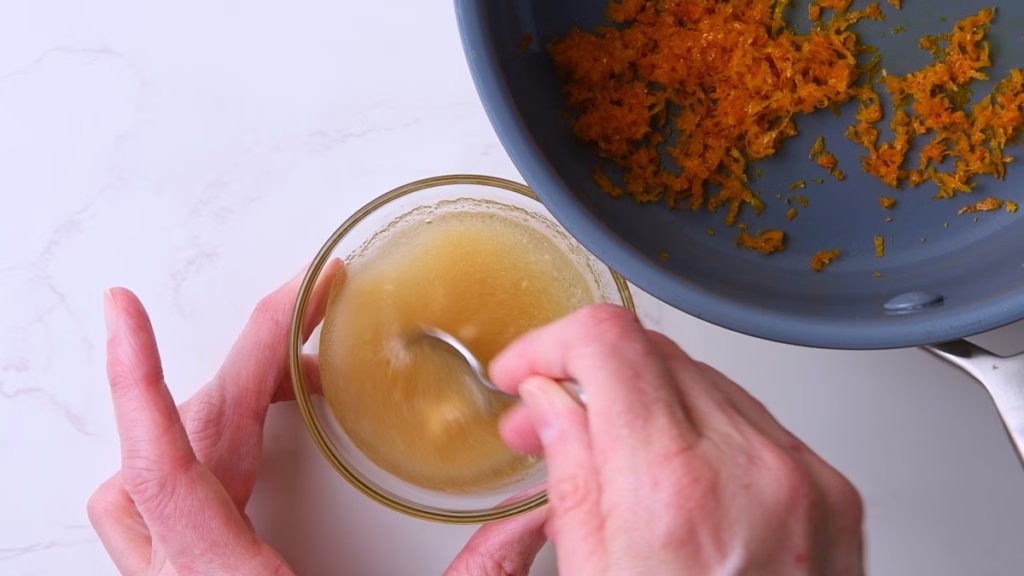
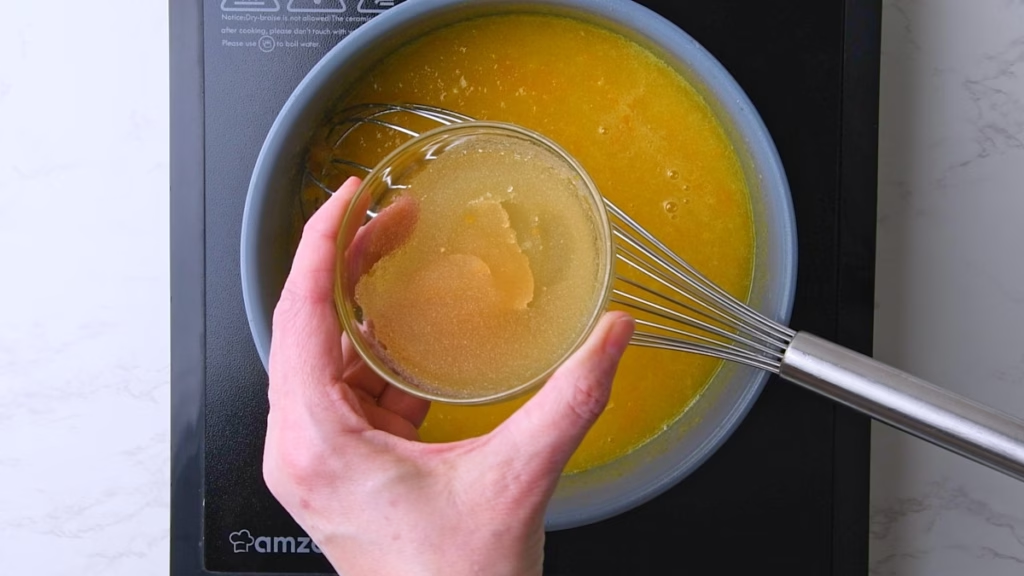
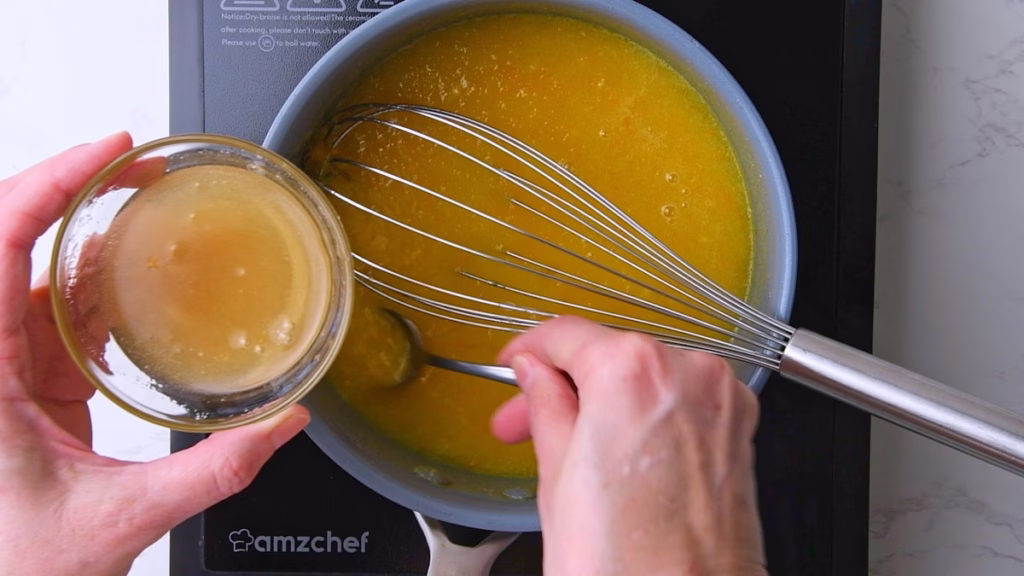
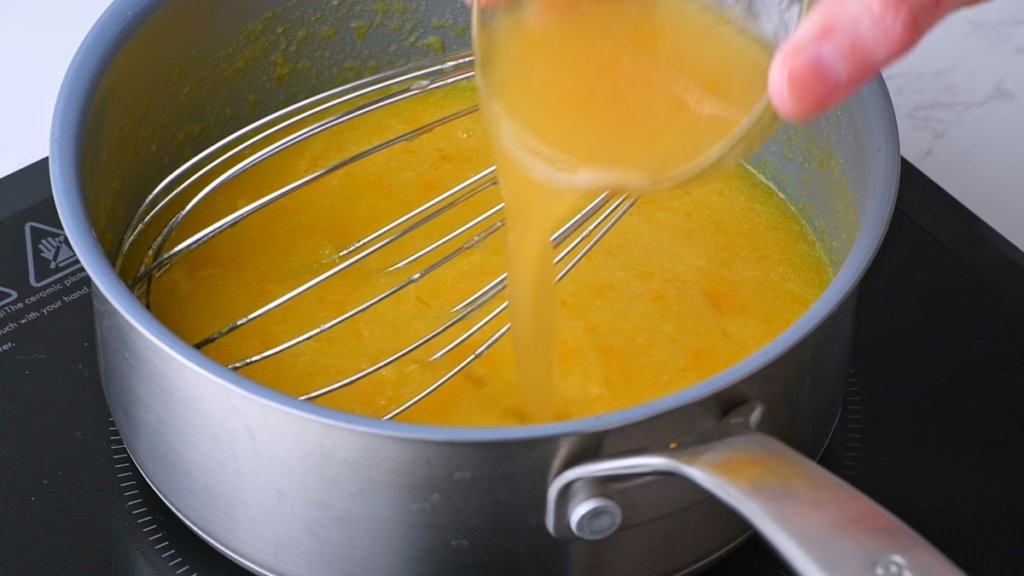
- Add 1-2 tablespoons of your orange mix to the gelatin, stir and then pour the whole thing into your zesty orange juice while mixing.
- Whisk a little longer until everything is well combined.
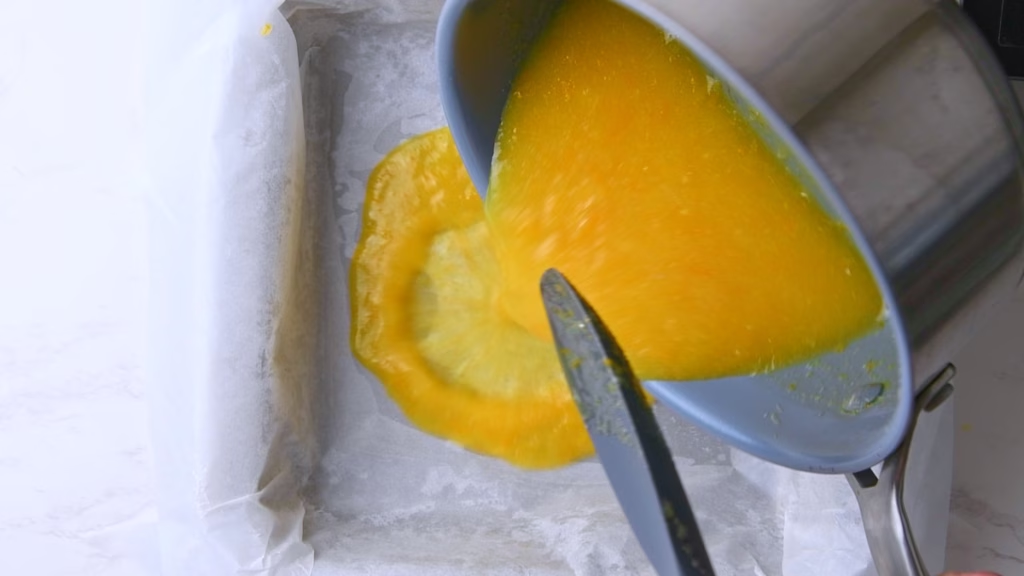
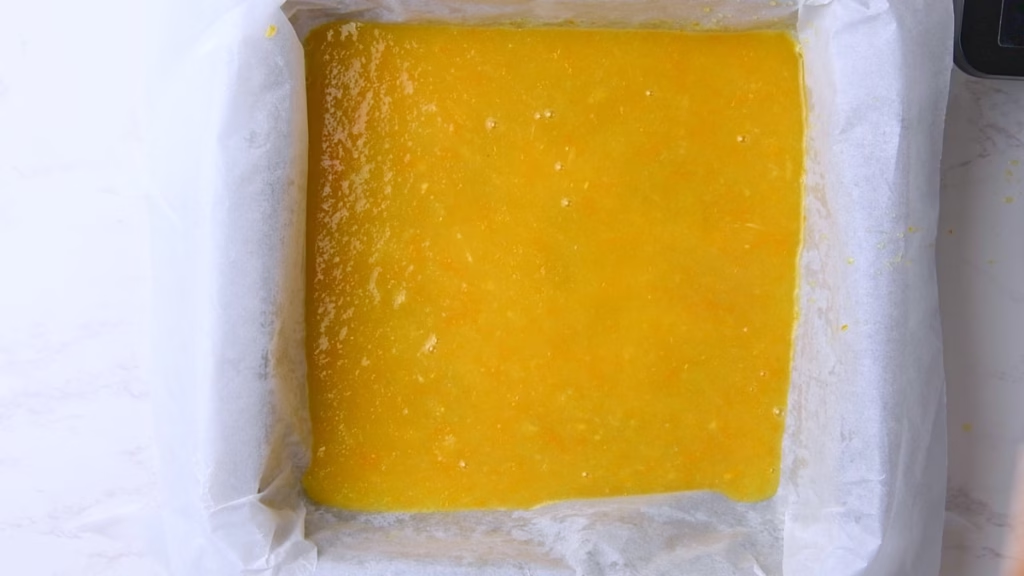
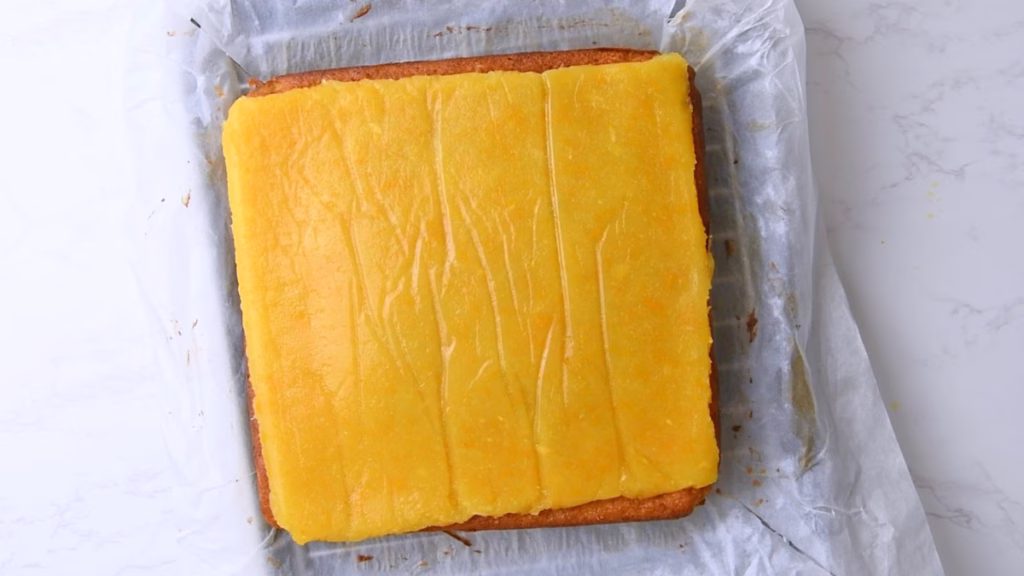
- Pour the orange jelly mix into the parchment lined baking pan and transfer to the fridge for about 20-30 minutes until the cake is cooled and the jelly is set.
Assemble Your Healthy Jaffa Style Cake
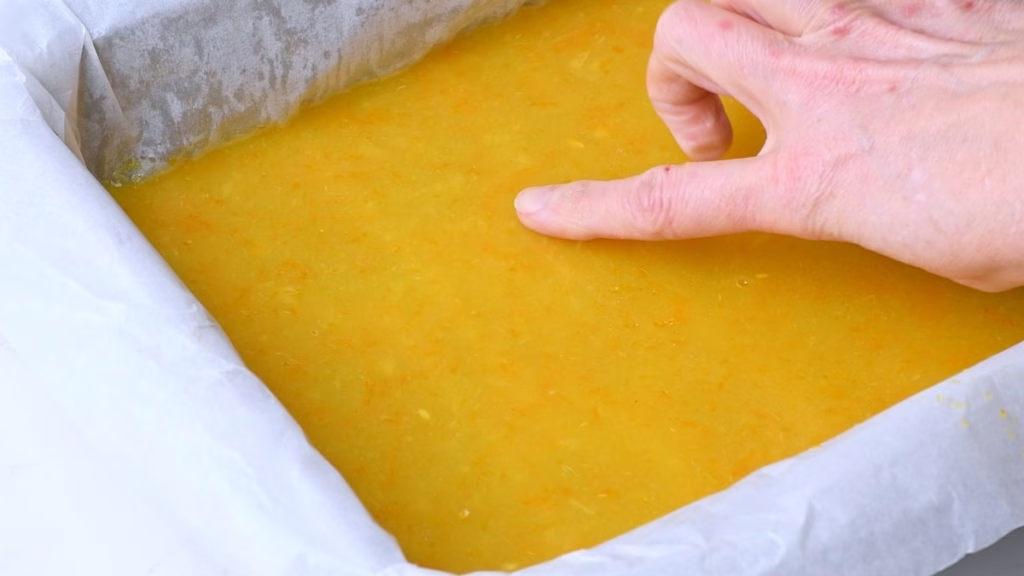
- Once the jelly is firm enough (Tap gently with a finger. If nothing sticks and it feels firm to the touch it’s ready) take it out of the baking pan using the parchment corners to lift it out.
- Now comes the only (slightly) tricky part:
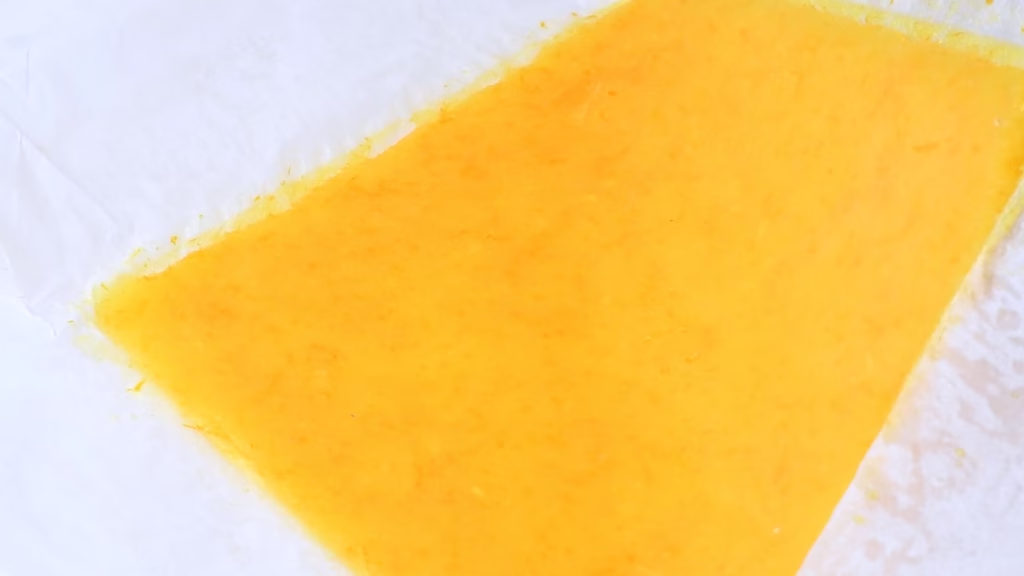
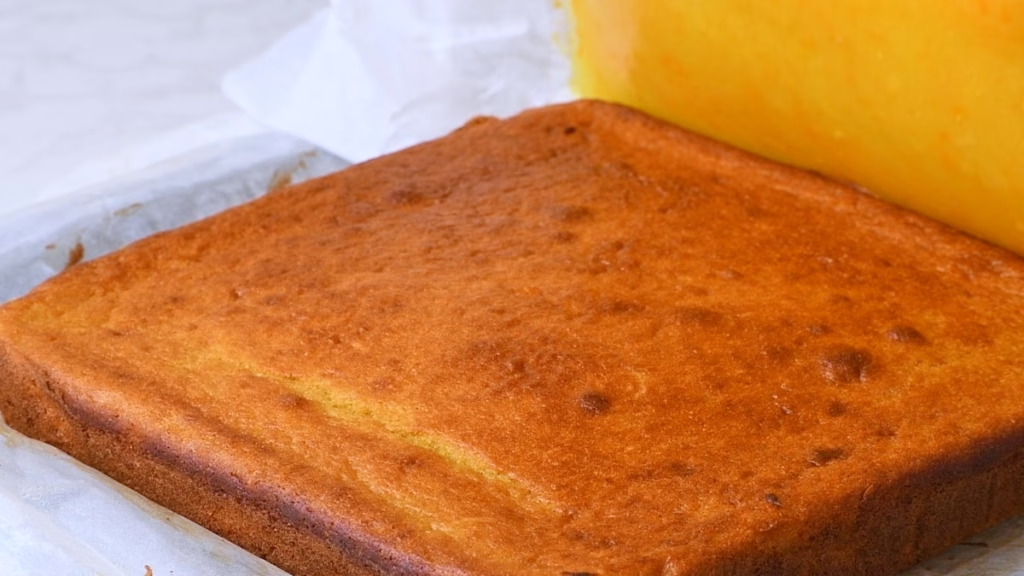
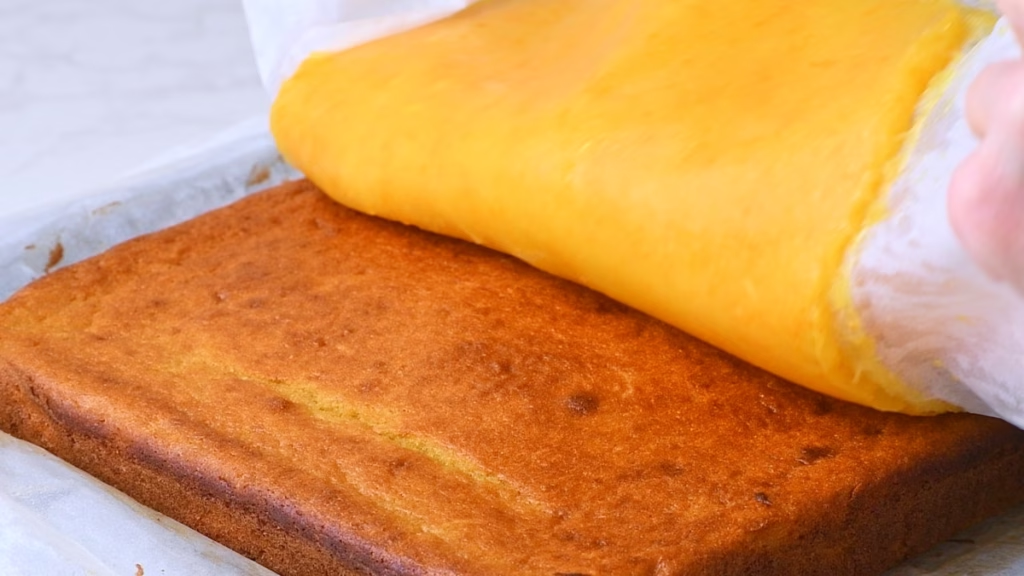
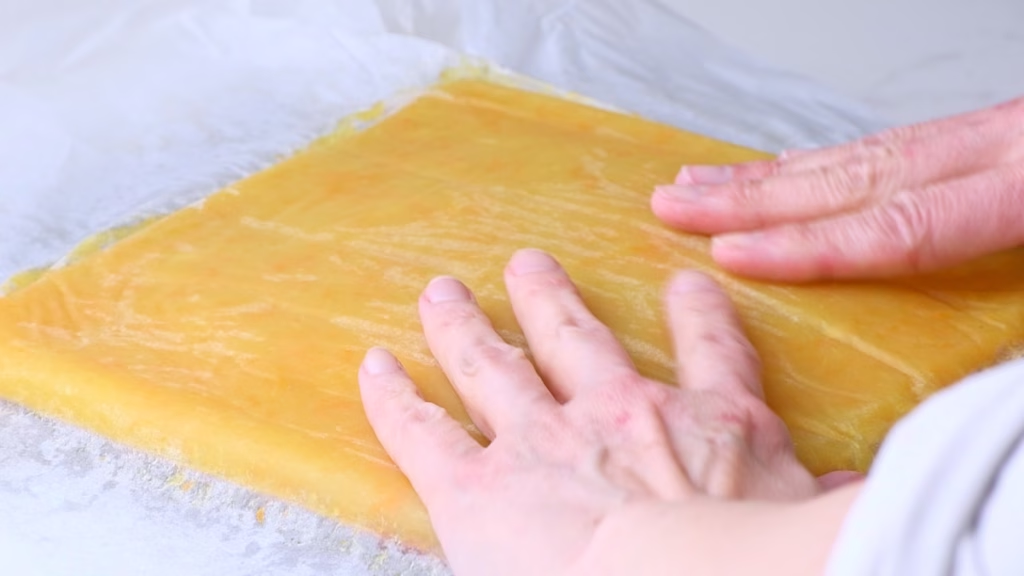
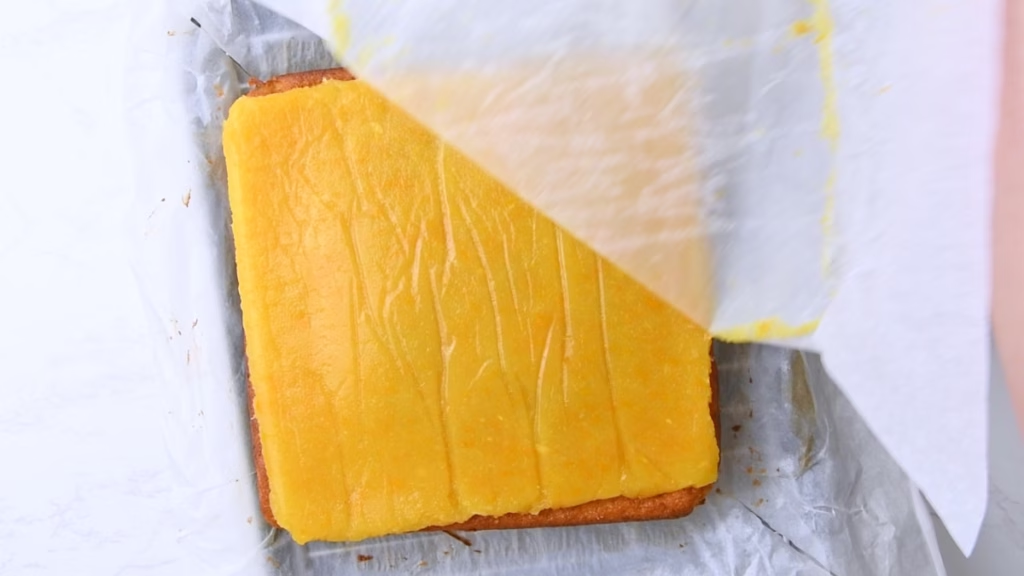
- Lining it up on one side, flip the whole thing over onto your orange sponge. It should fit pretty well as it was made in the same pan.
- Peel off the parchment and admire your work. Neat, eh?
- Grab the corners of the parchment and put the whole thing back into the baking pan then put it into the freezer for about 10-20 minutes. While I’m a fan of eating cakes warm, this isn’t one of them.
- Just one more step and it’s a quick one.
Temper Your Chocolate
Why go through the hassle of tempering the chocolate?
In my early attempts I noticed that the jelly started to melt before I could properly distribute the chocolate across it. But of course waiting until the chocolate is cooled has it too firm to spread.
Tempering solves that conundrum by keep the chocolate still liquid at only 85°F/30°C, which, if you briefly freeze it first, will not melt the jelly.
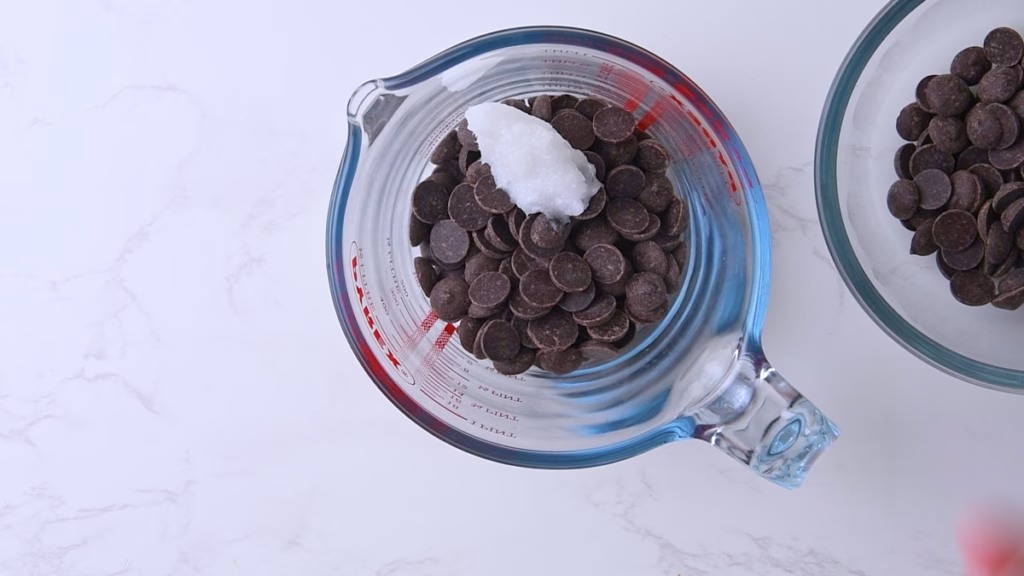
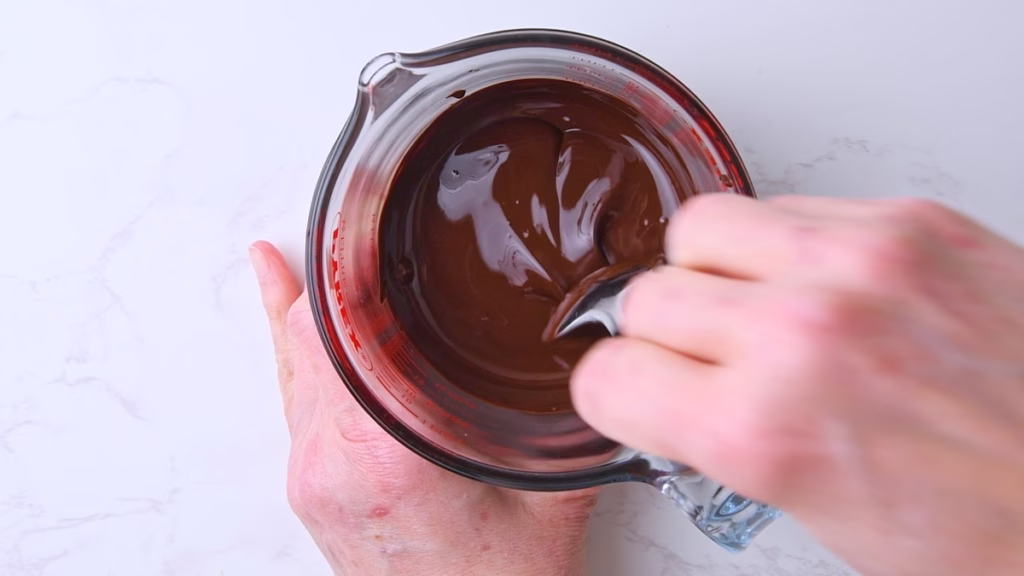
- In a microwave safe bowl add 2/3 of your chocolate (chips or chopped) together with the coconut oil if using and melt it in the microwave (or in a bowl over a water bath, not touching the water) until melted.
- I usually use a 1 minute burst, wait a few seconds, stir, then do another minute or two, let it sit for a minute then stir again until it’s melted. The waiting time allows the center of the chocolate pieces to melt without causing the already warm parts to burn.
- Ideally you want it to be at roughly 120°F/50°C at this point. Or….very warm to the touch. It should be hot enough to melt the remaining third of the chocolate without the need to heat it again.
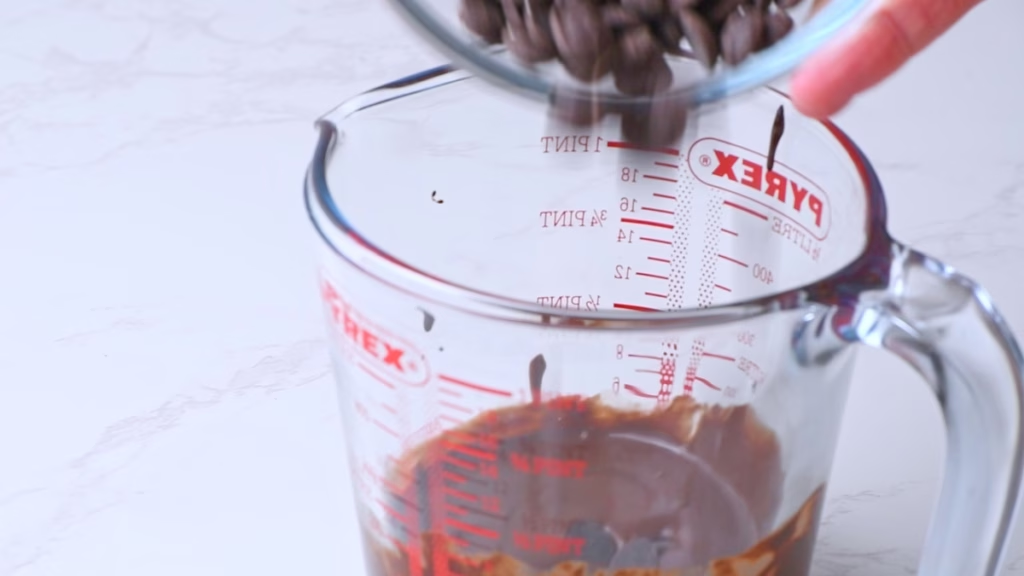
- Drop in the last third of the chocolate, let it stand for another minute and stir again. Your chocolate should look very shiny and smooth now.
- Allow to cool a few minutes or until it reaches about 85°F/30°C (feeling just a little warm now.)
Top Your Orange Cake With Chocolate
- Grab your now fairly cool cake from the freezer.
- Get your offset spatula ready. You want to be quick as soon as the chocolate hits the cake as the cold jelly will have it set fast.
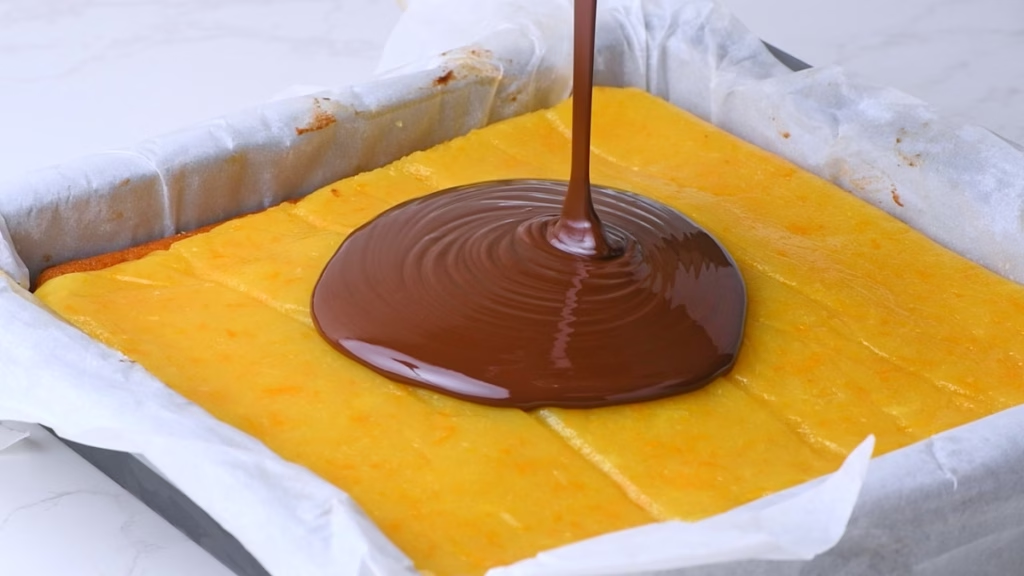
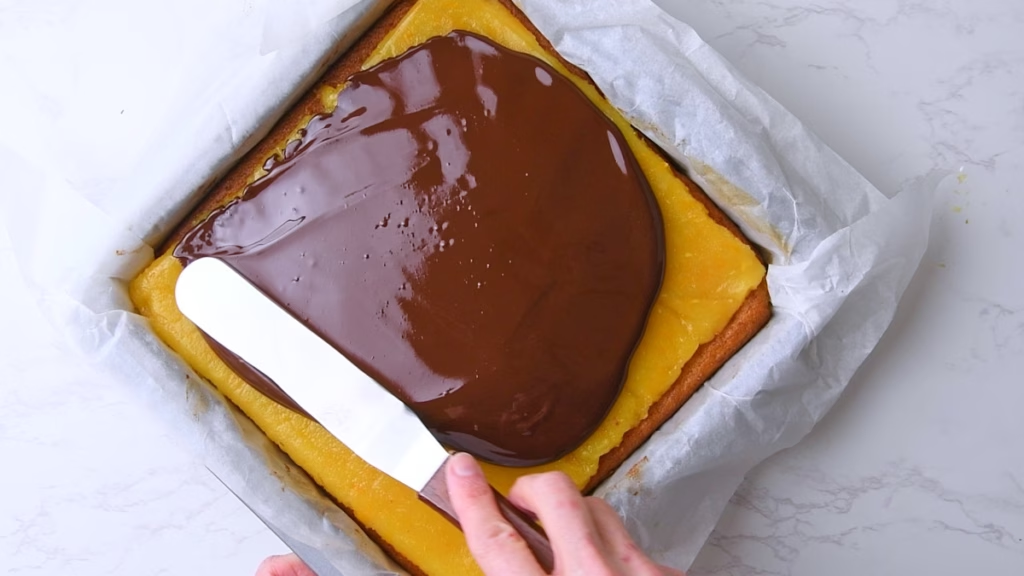
- Pour most of the still liquid chocolate over the top and immediately start spreading it towards the sides and corners. You only have seconds until it sets, so the cake pan helps to keep it from drizzling off the sides, meaning you don’t have to be as precise with your moves.
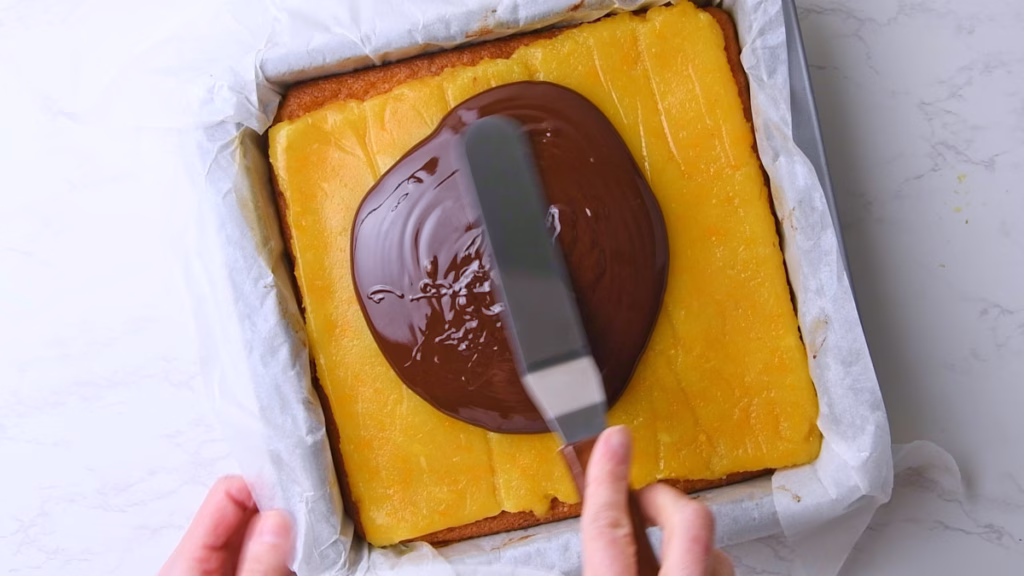
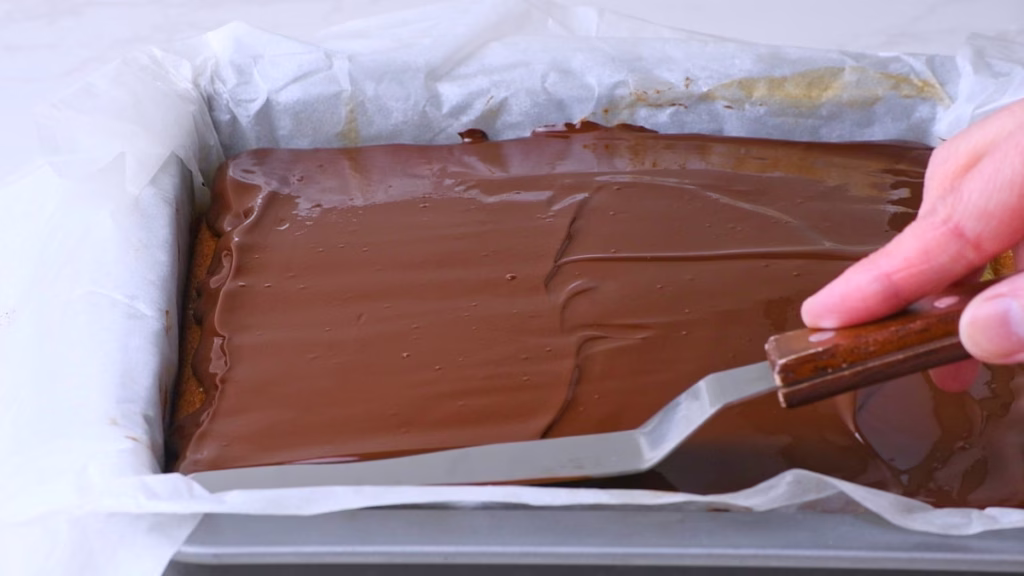
- Once most of the top is covered, you can use a silicone spatula to drizzle the last bit of the melted chocolate over any uncovered corners.
- Smooth a little, taking care not to touch any bits that are already firming, as that will cause messy bit (though frankly, a bit messy it good).
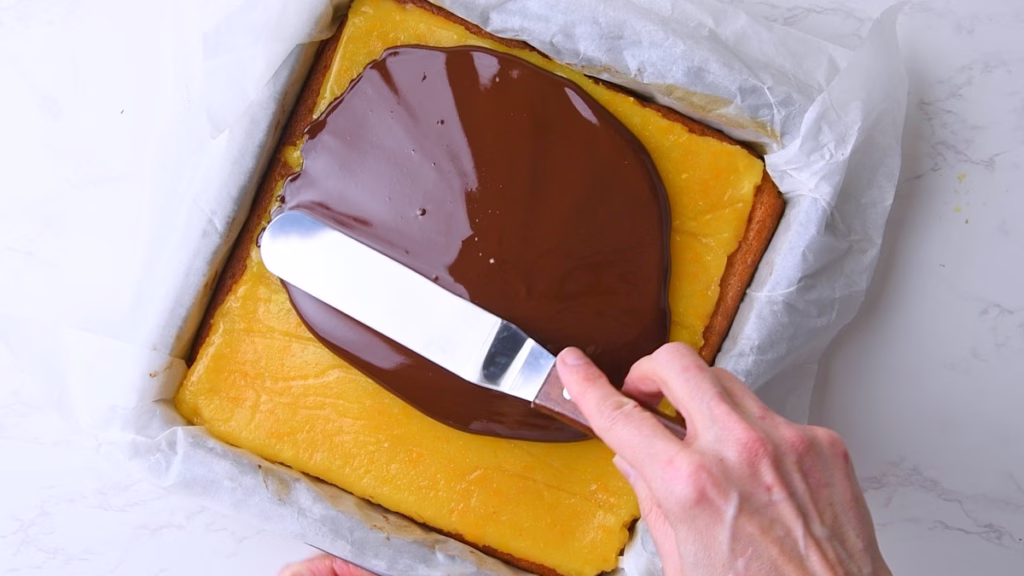
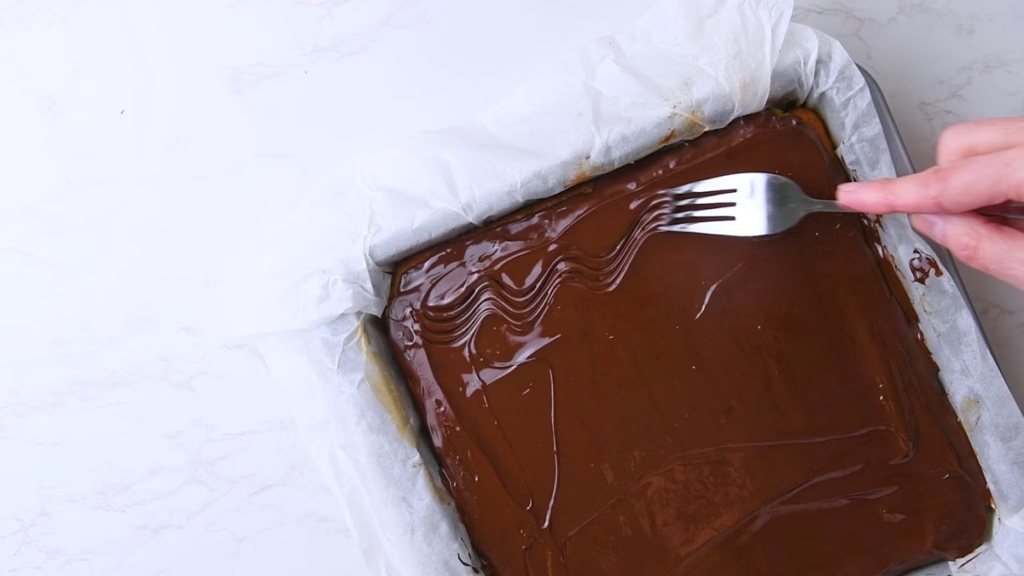
- If you like, drag a fork gently through the still slightly soft chocolate to create a wave pattern.
- Then allow it to set for a few minutes. No fridge time needed. The cold jelly will do the job beautifully.
Serve Your Jaffa-Style Snack Cake with Protein
- To get neat slices, use a sharp knife that you dipped into hot water and whipped dry.
- Or embrace the shattering chocolate! Enjoy your cake, feeling all virtuous because you snuck in 3 whole oranges, 7g protein and sourdough! And still get a super satisfying Jaffa-like experience.

How To Store
Because it is so moist and orange-y, this snack cake keeps best in the fridge in a sealed container for up to 4 days. Not that I believe it will last that long.
It also freezes really well. Ideally slice it first and freeze the pieces, letting them come to room temperature for about 30 minutes before eating.
FAQ
Absolutely! If you aren’t in your “sourdough era,” you can still enjoy this cake. Simply replace the 100g of sourdough discard with 60g of all-purpose flour and 40ml of milk (dairy or plant-based). You’ll lose that signature tang, but the whole-orange flavor will still shine through.
Not at all. While the raw pith is bitter, the combination of the sugar, vanilla whey, and the baking process transforms the whole orange into a flavor that tastes like a high-end marmalade. Just make sure to use a Navel orange or another sweet variety, as thinner-skinned oranges have less pith.
You can, but keep an eye on the texture. Plant proteins (like pea or soy) tend to be much more “thirsty” than whey concentrate. If your batter looks more like dough than pourable lava, add an extra tablespoon or two of yogurt or milk to loosen it up.
This is totally normal for this recipe! When you mix the acidic orange and yogurt with the butter and eggs, the fats want to separate. Don’t panic—as soon as you stir in the dry ingredients, the flour will emulsify everything back into a smooth, creamy batter.
The “Hot Knife” trick is your best friend here. Dip a sharp chef’s knife into a tall glass of boiling water, wipe it dry, and let the heat of the blade melt through the chocolate layer as you slice. Clean the blade between every single cut for those perfect, Instagram-ready squares.
Yes! This cake freezes remarkably well. I recommend slicing it first and freezing the pieces individually. Just let a slice thaw on the counter for about 20 minutes before eating so the jelly regains its wobble and the sponge softens back up.
Now I’d love to hear from you in the comments!
Have you tried this? Did you enjoy it?
What other recipes would you like to see?
And if you enjoyed this recipe, please consider rating, sharing, or leaving a comment – your feedback truly helps my blog grow!
Other recipes you might enjoy
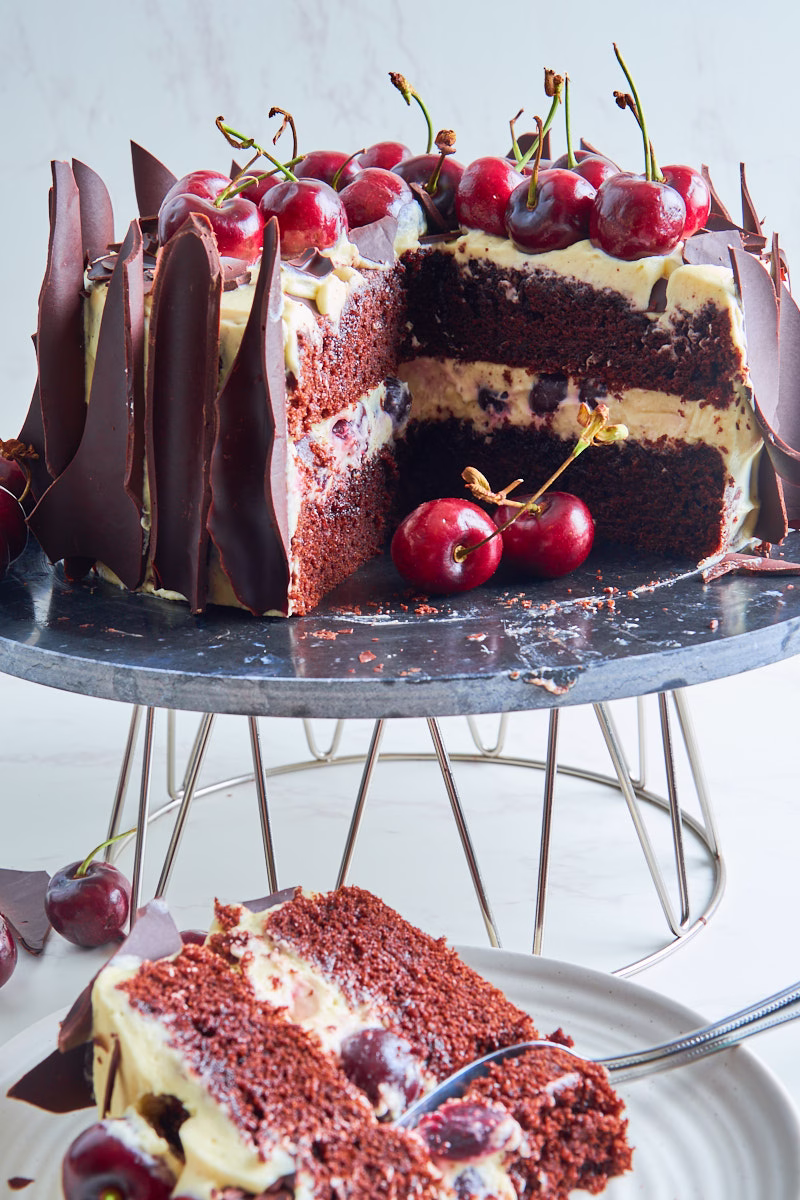
Another example of a layered cake, if very different, that was improved by adding protein and sourdough: My German Approved Black Forest cake.

Want sourdough, protein and fruit, but a much simpler recipe?
These Blueberry Drop Scones got you.

Also made with sourdough, protein and Greek yogurt, this time with plums. A super juicy yet simple Plum Cake.

Whole Orange & Chocolate Sourdough Protein Cake (Jaffa-Inspired)
- Total Time: 2 hours 35 minutes
- Yield: 9 slices 1x
Description
If you’ve ever sat down with a sleeve of Jaffa Cakes only to find the wrapper mysteriously empty ten minutes later, this recipe is for you. I’ve taken that nostalgic chocolate-orange combination and leveled it up using the famous whole-orange method, tangy sourdough discard, and a boost of protein. It’s a moist, zesty snack cake that satisfies the craving for real citrus and a dark chocolate snap, without the processed-food “inhaling” effect.
Ingredients
The Orange Protein Sponge
- 1 small navel orange (about 250 grams)
- 1/4 cup/60 ml Greek yogurt
- 1 scoop/30g whey concentrate, ideally vanilla flavor
- 1/2 cup /100g sourdough discard
- 6 tablespoons/85 grams unsalted butter, at room temperature, plus more for greasing the pan
- 1/2 cup/100 grams granulated sugar
- 2 large eggs, at room temperature
- 1 cup/120g all-purpose flour
- 1 teaspoon baking powder
- 1 teaspoon baking soda
- 1/2 teaspoon kosher salt
Orange Jelly
- 2 oranges
- 4 tbsp/45g sugar
- 2–3 tsp gelatin
Chocolate Topping
- 150g dark chocolate
- 1.5 tsp coconut oil
Instructions
The Whole-Orange Cake with Protein and Sourdough
- Make sure Your ingredients are all at room temperature.
- If your oranges aren’t untreated, make sure to scrub them really well, to get rid of any unwanted chemicals on the skin.
- Pre-heat your oven to 350°F/175°C.
Prepare Your Cake Pan
- Butter an 8-inch square baking pan and line it with baking parchment.
- While you can theoretically just push it in there if you don’t mind messy corners, here is a way to line it a little more neatly:
- Measure 2 pieces of baking parchment (one for the sponge, one for the jelly later) so you have about 1-2 inch/2-4 cm overhang on both sides.
- Place the pan in the center of it and, using scissors, starting at the corners, cut the parchment in all 4 corners diagonally towards each pan corner.
- Now you can very easily arrange the parchment neatly in the pan without scrunched bits by allowing the cut pieces to fold in naturally where they want to go, then pushing the remaining paper over the edges to hold it in place.
Blending The Orange And Protein
- Slice off the top and bottom bit of the orange, just to get off any woody parts. Roughly chop it into chunks, peel and all, removing any seeds you might find.
- Blend until it is the consistency of smooth apple sauce. You should have roughly 1 cup/250ml.
- Now add the Greek yogurt and protein powder and blend again until smooth. This ensures you have no clumps of protein in your cake.
Gently Stir in your Sourdough Discard
- Drop the sourdough discard into your orange mix and stir or gently whisk it in by hand. The remaining formed gluten strands in it will help your cake rise, so ideally don’t blend it in.
Creaming Butter and Sugar
- In a large bowl, using a hand mixer (electric mixer), cream the room temperature butter with the sugar until light and fluffy. This is where your orange sponge gets its volume and fluffy texture.
- Add one egg at a time and whisk until incorporated and smooth.
Add the Orange-Protein Mix
- Now pour in that orange mix, which at this point looks and smells like a delicious orange cream popsicle. Don’t be tempted to try it though. It’s (at this point) tricking you. Have a wild guess how I know…
- Use your hand mixer to beat it all together, taking a few minutes to get it really well whisked together.
- At this stage your batter will look like it’s splitting a bit. Don’t panic, we’ll solve that in the next step. If your ingredients were at room temperature, you’ll be fine. (If not your cake will be a little denser, but still delicious.)
Stir the Flour and Raising Agents
- Add baking soda, baking powder and salt to your flour in a medium bowl and give it a quick stir. The one teaspoon of each may sound like a lot, and is certainly more than the original used, but I found the protein powder orange mix needs a bit of help to rise to perfection.
Mix the Dry into the Wet
- Drop the flour into the wet ingredients and briefly whisk with your hand mixer until you have a creamy, homogenous batter. Most of the signs of splitting should be gone now and it’ll look like a typical, very marmalade-y scented sponge batter.
- Don’t overmix to avoid developing the gluten too much. This ensures a tender and fluffy cake.
Bake The Whole-Orange Protein Cake
- Pour your batter into the lined cake pan and smooth the top a little. Bang the pan on the counter a few times to have any big bubbles rising to the top and pop.
- Other than most sponges, this one will not “melt” into having a super smooth top while baking. So any smoothing you want to happen should be done before baking.
- Bake for 30-40 minutes or until your kitchen smells delicious, is golden and an inserted toothpick comes out clean or with a few moist crumbs attached.
- I tend to rotate any baked goods in my oven by 180 degrees after the first half of baking time, as my oven (like most) bakes unevenly.
- Allow to cool for 5-10 minutes in the pan, then grab the corners of the parchment and lift it onto a cooling rack to cool completely without condensation at the bottom.
- Whatever you do, don’t peel off the parchment yet. We still need it on the cake!
- Now you could, if you wanted, absolutely just snack on this as is or with a simple orange juice and icing sugar glaze on top. And you will feel tempted, that’s for sure. Because it smells intoxicating.
- But we can do better, so bear with me here. Just 2 easy bits and you are in Chocolate-Orange Heaven.
The Orange Jelly
- While your sponge is baking, make your real orange jelly.
- Line your still slightly greasy baking pan with the second piece of baking parchment.
Zest The Oranges and Chop the Flesh
- For maximum flavor in the jelly zest both oranges into a small saucepan.
- Using a sharp knife, cut off top and bottom from your oranges.
- Resting them on one of the freshly created flat pieces, slice off the skin, following the curve of the orange, including white pith, leaving you with just the flesh and a few membraned.
- Roughly chop, removing any stray seeds.
- Use your Nutribullet again to blend them until they are the consistency of smooth apple sauce (just without the skin this time) and transfer to your saucepan.
Cook the Jelly
- Add the sugar and, stirring, let it come to a very brief boil until the sugar is dissolved. Take off the heat.
- In a small heat proof bowl mix your 2-3 teaspoons of gelatin with 2-3 tablespoons of water.
- Microwave for about 10 seconds (no more!) until just liquid.
- Add 1-2 tablespoons of your orange mix to the gelatin, stir and then pour the whole thing into your zesty orange juice while mixing.
- Whisk a little longer until everything is well combined.
- Pour the orange jelly mix into the parchment lined baking pan and transfer to the fridge for about 20-30 minutes until the cake is cooled and the jelly is set.
Assemble Your Jaffa Style Orange Cake
- Once the jelly is firm enough (Tap gently with a finger. If nothing sticks and it feels firm to the touch it’s ready) take it out of the baking pan using the parchment corners to lift it out.
- Now comes the only (slightly) tricky part:
- Lining it up on one side, flip the whole thing over onto your orange sponge. It should fit pretty well as it was made in the same pan.
- Peel off the parchment and admire your work. Neat, eh?
- Grab the corners of the parchment and put the whole thing back into the baking pan then put it into the freezer for about 10-20 minutes. While I’m a fan of eating cakes warm, this isn’t one of them.
- Just one more step and it’s a quick one.
Temper Your Chocolate
- In a microwave safe bowl add 2/3 of your chocolate (chips or chopped) together with the coconut oil if using and melt it in the microwave (or in a bowl over a water bath, not touching the water) until melted.
- I usually use a 1 minute burst, wait a few seconds, stir, then do another minute or two, let it sit for a minute then stir again until it’s melted. The waiting time allows the center of the chocolate pieces to melt without causing the already warm parts to burn.
- Ideally you want it to be at roughly 120°F/50°C at this point. Or….very warm to the touch. It should be hot enough to melt the remaining third of the chocolate without the need to heat it again.
- Drop in the last third of the chocolate, let it stand for another minute and stir again. Your chocolate should look very shiny and smooth now.
- Allow to cool a few minutes or until it reaches about 85°F/30°C (feeling just a little warm now.)
Top Your Orange Cake With Chocolate
- Grab your now fairly cool cake from the freezer.
- Get your offset spatula ready. You want to be quick as soon as the chocolate hits the cake as the cold jelly will have it set fast.
- Pour most of the still liquid chocolate over the top and immediately start spreading it towards the sides and corners. You only have seconds until it sets, so the cake pan helps to keep it from drizzling off the sides, meaning you don’t have to be as precise with your moves.
- Once most of the top is covered, you can use a silicone spatula to drizzle the last bit of the melted chocolate over any uncovered corners.
- Smooth a little, taking care not to touch any bits that are already firming, as that will cause messy bit (though frankly, a bit messy it good).
- If you like, drag a fork gently through the still slightly soft chocolate to create a wave pattern.
- Then allow it to set for a few minutes. No fridge time needed. The cold jelly will do the job beautifully.
Serve Your Jaffa-Style Snack Cake with Protein
- To get neat slices, use a sharp knife that you dipped into hot water and whipped dry.
- Or embrace the shattering chocolate!
- Enjoy your cake, feeling all virtuous because you snuck in 3 whole oranges, 7g protein and sourdough! And still get a super satisfying Jaffa-like experience.
Notes
How To Store
- Because it is so moist and orange-y, this snack cake keeps best in the fridge in a sealed container for up to 4 days. Not that I believe it will last that long.
- The cake also freezes really well. Ideally slice it first and freeze the pieces, letting them come to room temperature for about 30 minutes before eating.
Why go through the hassle of tempering the chocolate?
- In my early attempts I noticed that the jelly started to melt before I could properly distribute the chocolate across it. But of course waiting until the chocolate is cooled has it too firm to spread.
- Tempering solves that conundrum by keep the chocolate still liquid at only 85°F/30°C, which, if you briefly freeze it first, will not melt the jelly.
- Prep Time: 1 hour
- Cooling Time: 1 hour
- Cook Time: 35 minutes
- Category: Dessert
- Method: Baking
- Cuisine: American


I’m so glad I tried this cake. I have to admit, I was skeptical about the peel being in this recipe, but it came out amazing! Total winner.
I know, right? The peel threw me too, but it just tastes like marmalade!
So happy you like it!
This cake sounds like a delicious twist on the classic chocolate orange flavor everyone remembers. The whole orange and sourdough discard make it feel extra moist and full of real citrus flavor.
Thank you, it really is. So happy you like it. 🙂
I cooked this sourdough protein cake following the recipe and pictures to the T and it turned out amazing! it’s delicious!
That’s lovely to hear! Thanks for letting me know. 🙂
I loved the protein boost form this cake, it was very good!
Happy to hear you liked it. 🙂
The flavors of orange and dark chocolate make such a lovely combination! The cake was so moist and flavorful, I love that it has a boost of protein in it. The baking process was fun, the steps are well-explained and easy to follow.
Aww, thanks! So glad you found it easy to follow.
Thanks so much for taking the time to let me know. 🙂