Dill Pickle and Cheddar Sourdough (Protein-Boosted)
If you want to master adding mix-ins to your bread without ruining the dough structure, this post serves as both a practical guide to sourdough inclusions and a recipe for a savory dill pickle and cheddar loaf. Built on the back of my Easy Protein Sourdough, this recipe shows you how to safely add wet and dry ingredients using a simple lamination technique. It delivers the comforting flavors of a classic German Abendbrot with an extra hit of 10g protein, requiring only about 30 minutes of hands-on work.
This post may contain referral links for products I love.
For The Pleasure Of Eating earns a small commission on these links at no cost to you.
- Why You’ll Love This
- The Ingredients
- Substitutions
- Equipment Used
- How to Make this
- How To Store
- FAQ
- Other Recipes You Might Enjoy
Why You’ll Love This
TL;DR
- Built on a Reader Favorite: Uses the exact same foolproof, high-protein master dough you already know and love.
- How to Add Inclusions – Learn my favorite method to add inclusions to your protein bread
- The Ultimate Flavor Combo: Sharp cheddar pockets, tangy dill pickles, and a fresh herb aroma that makes the bread taste buttery without any actual butter.
- Low Effort, High Reward: Only 30 minutes of active hands-on time; the sourdough bacteria and your fridge do all the heavy lifting.
- Sneaky Nutrition: 10g protein per slice from the cottage cheese, added cheddar and whey, plus beautiful crust browning from the natural milk sugars.
- Total Flexibility: Easily adaptable to whatever cheeses, herbs, or mix-ins you have hanging around your kitchen.
Dill Pickle and Cheese Bread
This is the obvious part of course. I mean pickles have gone viral for good reason, though for me they were always part of how I eat. There is always at least one jar of pickles in my fridge. Most of the time dill pickles. Ideally with a hint of honey and mustard seeds.
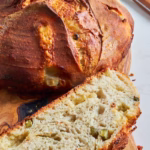
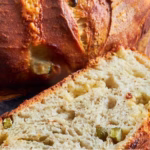
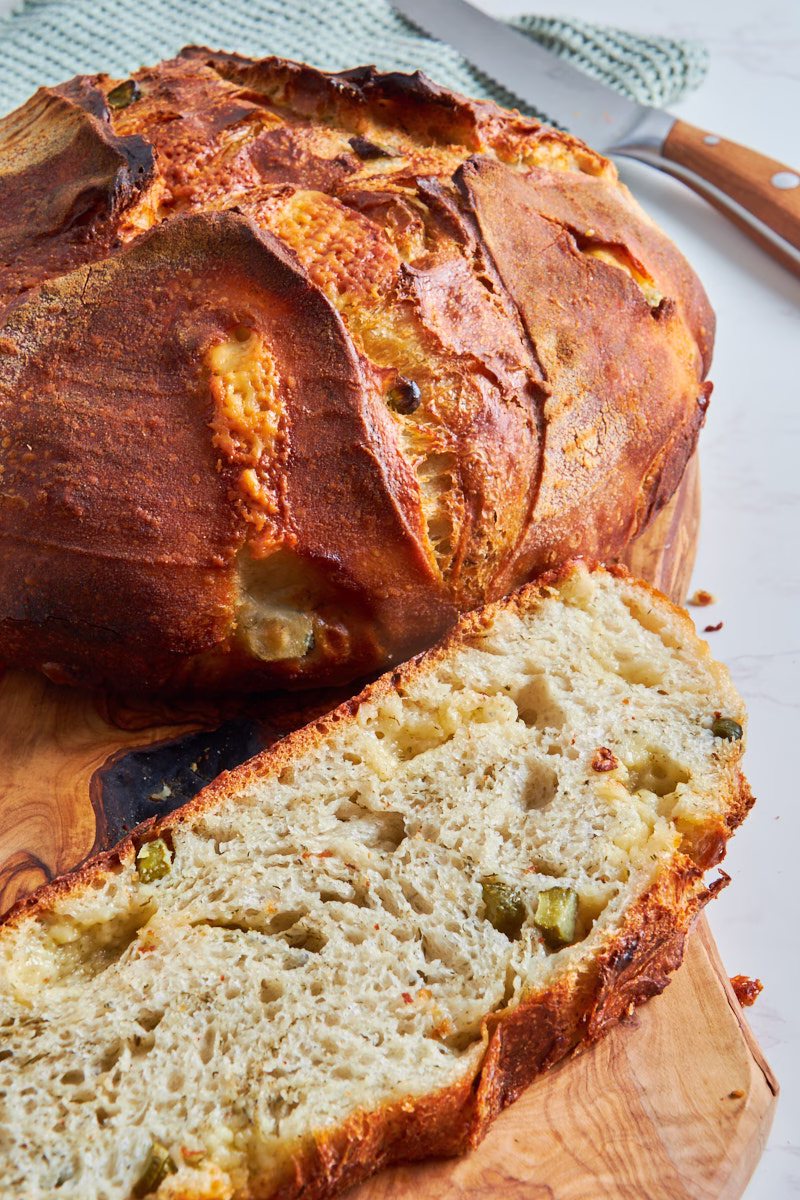
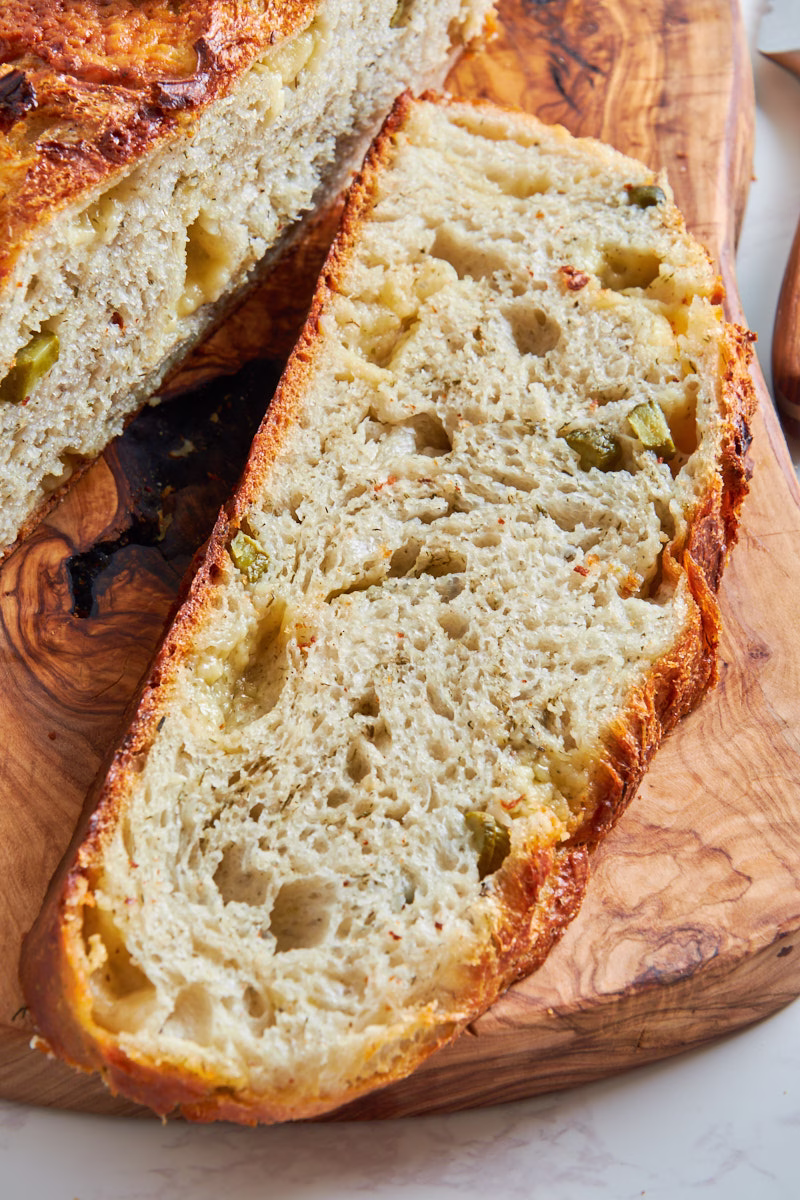
In Germany we often have these with dinner, some bread and cheese usually, maybe some typical German types of sausage, which we call “Abendbrot” (Evening Bread quite literally). So what could possibly make more sense as first inclusion recipe in my Easy Protein sourdough series, than simply adding said pickles and cheese right into my bread, together with copious amounts of dill. While pickles provide crunch, the dill spreads its gentle and fresh aroma that always reminds me of spring all through the bread, making it taste buttery entirely without added butter. The cheese melts into deliciously sharp and salty little pockets, so you could just snack on this bread as it is.
Sourdough Bread With Inclusions
This recipe also serves as basic guide to inclusions in sourdough bread. The amount used for inclusions is always pretty similar. Around 1.5 cups of them typically. If using “wet” ones like pickles or, say berries, limit those to about half a cup, to avoid adding too much water into your dough.
Adding them can be done in different ways and at different times in the process, depending on your goal. Sprinkle them over during the stretch and folds, knead them in using your stand mixer or, as I do here use a sort of lamination technique (don’t worry, it’s not complicated) at the end of the stretch and fold period to get them very evenly distributed and the flavor to spread all throughout the dough during the following fermentation period.
One Protein Boosted Sourdough, Many Uses
Since my Easy High Protein Sourdough Bread has become a reader favorite over the past 10 months, I decided to show you some other ways to use the exact same dough. I mean, I’m not sure about you, but while I love simply good bread, I also get very easily bored by eating the same thing over and over. Hence constantly trying new recipes.
And while that is great, at times like these, with the world seemingly burning around us, everything feeling like too much plus, for me personally the added mental flowchart of moving to Spain within the next month or two, I like recipes that I can make half on autopilot. This dough is one of them.
No matter how tired I am, I can manage to throw some cottage cheese, water and protein powder into a blender, add some sourdough starter and stir the whole thing into bread flour. A few stretch and folds, then I forget about it for a few hours. Later it gets either quickly shaped or right into the fridge until I have 5 minutes for shaping and a few hours later (or up to 3 days if I’m busy) it’s ready to be baked. For this particular loaf I just add the inclusions during the shaping process, which means all “work” that is added takes me about another 5 minutes of chopping pickles and cheese and crumbling them over the dough. All in all the active work here is about 30 minutes. The rest is going about your day and letting the sourdough bacteria go about theirs.
Oh and you can feel very virtuous for having added more protein to your diet. Together with some fabulous browning from the milk sugars in whey and cottage cheese. Win/win.
Ingredient Notes
You’ll find the Ingredients for the basic dough in the master recipe for the Easy Sourdough Protein Bread. So we only cover the dill pickle and cheddar inclusions here.
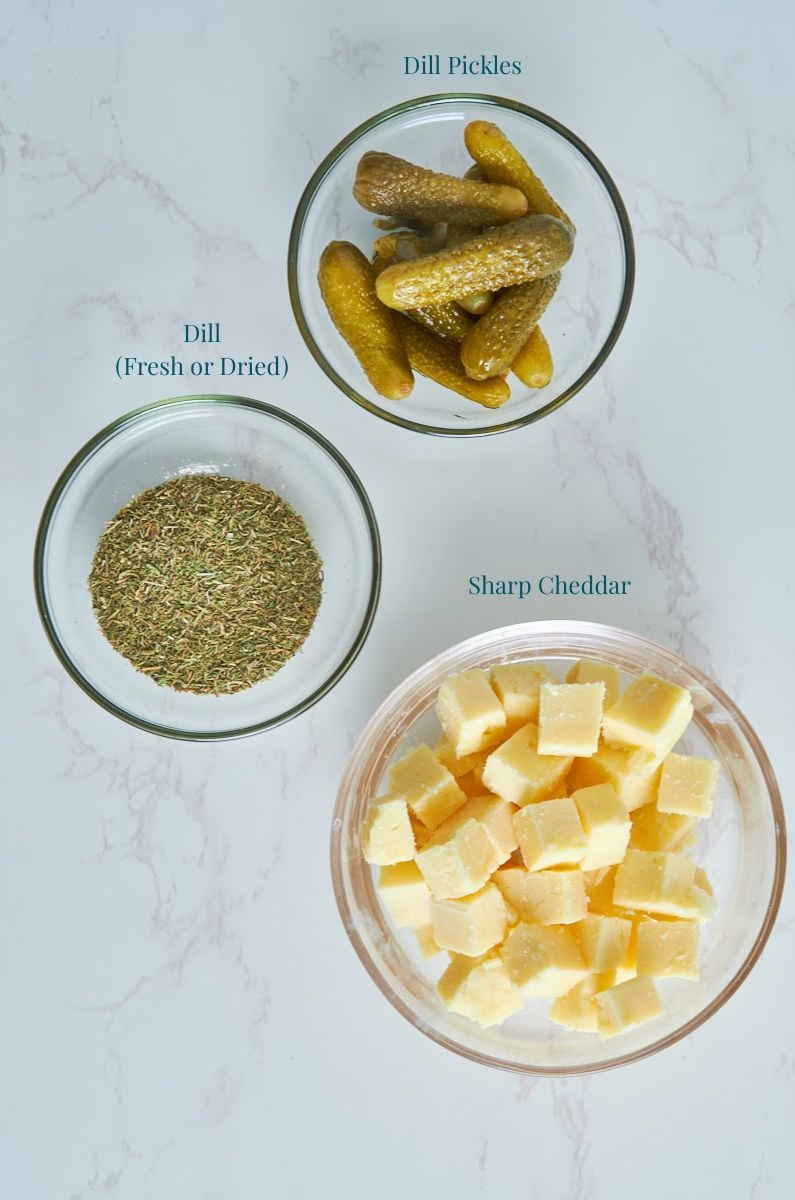
- Dill – You can use fresh or dried here. Since fresh is really tricky to find in Ireland, I used dried. The amount is, frankly a matter of preference. The “official” recommended amount of dried herbs as inclusion in sourdough bread is about 1 teaspoon. But dill addicted as I am, I used it as I use my vanilla extract: with wild abandon. I think I threw about a tablespoon, if not more at mine and absolutely loved it!
- Dill Pickles – Use any type of them that you love. Mine are the tiny honey-mustard pickled gherkins I get at Lidl. I munch them by the jar like sweets.
- Cheese – Being in Ireland, a hunk of nice, sharp cheddar was the logical choice for me. Though frankly a good fruity and nutty Swiss cheese would have been lovely too.
substitutions
- Dill – Use any herb you enjoy. Rosemary or thyme are incredible in bread, but Tarragon would work lovely in place of the dill too. Just use a little less, as it’s quite pungent. In a pinch simple dried parsley will do just fine.
- Pickles – No one says pickles have to be gherkins, right? Use Jalapenos to recreate the current viral trend of Jalapeno- Cheese sourdough. Or maybe you swap pickles for sundried tomatoes? In which case, may I suggest swapping the herb to basil and the cheese to feta?
- Cheese – Anything goes here. From mild, buttery Havarti (the one with Dill would be incredible here if you can find it!) over nutty Maasdamer all the way to the intense umami punch of Parmigiano Reggiano, all cheese is welcome.
Variations
This is where you can go absolutely wild!
Just as a general rule for inclusions: For about 500g flour you’ll want a maximum of 1.5 cups inclusions.
One of the cups should be more on the dry side (Think cheese or chocolate or dried fruit), the half cup can be slightly wetter (Think pickles, blueberries or similar), to keep the dough balanced.
This bread works equally well for savory and sweet inclusions, as the cottage cheese is fairly neutral with a tiny hint of “cheesecake” flavor, without the sweetness. Though of course you can very easily add sweetness by using flavored protein powder.
The dough is very easy going thankfully, so try out your favorite combos and let me know how they came out. 😊
Top Tips For Success
- Pat dry any wet ingredients – Any inclusion like pickles or berries that is, by nature rather wet, is best added after patting dry a little with paper towels. Adding too much moisture can lead to a flat loaf.
- Your Bread won’t rise as much as without inclusions – This is working as intended and to be expected, as the dough has to “lift” additional weight. It will still be beautiful and utterly delicious in its own right.
- Try to keep inclusions inside of the dough – This is why I sprinkle mine over the stretched out dough in a way of lamination. Anything on top of your bread is more likely to burn. A bit of cheese on top will be delicious, as it has enough fat to simply crisp up and brown, but a tiny half burned pickle might not be great. So if they fall out, tuck them back into the dough.
Equipment Used
I’m using the same equipment for this bread as for my basic Easy Sourdough Protein Bread.
The only additional tools you need are a knife and chopping board.
 Buy Now →
  Buy Now →
 How to Make this
Since this Dill Pickle and Cheddar Sourdough recipe is made from the Easy High Protein Sourdough and we simply add the inclusions, we are starting after the bulk fermentation.
So you’ll need to start by feeding your starter 3 days before you want to bake bread and mix the dough on day 2, to have it ready for baking on day 3.
You can do the cold fermentation either before or after shaping, depending on your schedule and needs.
I usually do my cold fermentation after shaping and take the loaf out of the fridge for the last rise if still needed.
Bakers Schedule
| Time | Action | Note |
| Day 1: 9:00 PM | Feed Levain | Mix your starter. Let it sit at room temp overnight. |
| Day 2: 9:00 AM | Mix Dough | Blend cheese/whey. Mix with flour, salt, and starter. |
| 10:00 AM | Stretch & Folds | Perform 3–4 sets of folds every 30 minutes. |
| 12:00 PM | Bulk Ferment | Let the dough sit undisturbed (Counter). |
| 6:00 PM | Shape& Add Inclusions | Shape& Add Inclusions and place in banneton |
| 6:30 PM | Cold Proof | Put the banneton in the “plastic bag tent” and into the fridge. |
| Day 3: 8:00 AM | Final Rise | Check on your bread. If the dough hasn’t risen considerably and is nice and jiggly, allow it to rise at room temperature for a few hours. |
| Freezer Chill | Move the banneton to the freezer for 30 mins to firm up for scoring while your oven pre-heats. | |
| 08:30:00 or 2:00pm, depending on your last rise timing | Score & Bake | Pre-heat the oven including your dutch oven, score deep, and bake. |
Adding Inclusions Into Sourdough Bread
There are two main methods to add inclusions:
During Stretch and Fold
You can either add them during the stretch and folds, which is particularly good if you want the flavor to deeply penetrate the dough or get mixed in really evenly. Seeds are fantastic for this, as are herbs.
Simple sprinkle over half just before the second set of stretch and folds, then the other half right before the third set.
Downside to this method: Bigger inclusions, like say dill pickle or cheddar pieces may fall out of the dough in the next round of stretch and fold.
During Shaping
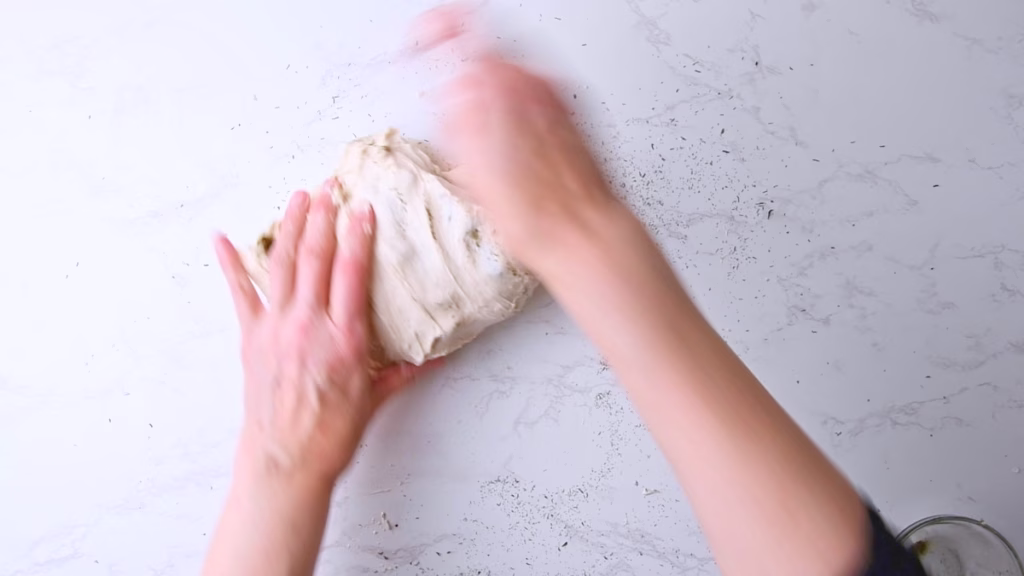
In this case you use a sort of simplified lamination technique (don’t let the term scare you. We are getting nowhere near croissant level laminating). This is the method I’m using here, as it gives me more control over where my inclusions land and then stay. So let me show you how I do this.
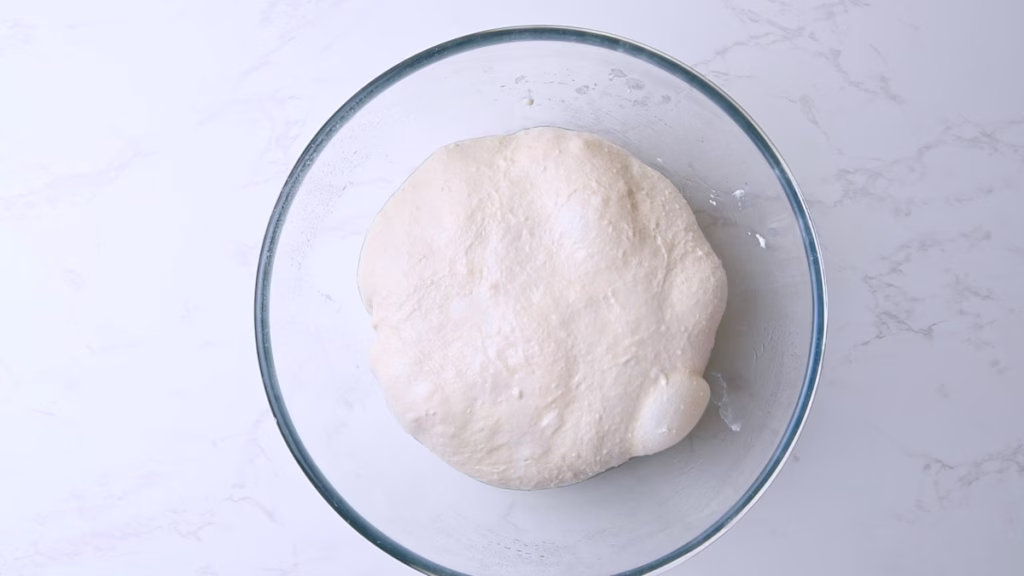
Start with the dough after the bulk fermentation. After the cold ferment works too. A cooler dough is generally easier to work with and less sticky.
Prepare Your Inclusions
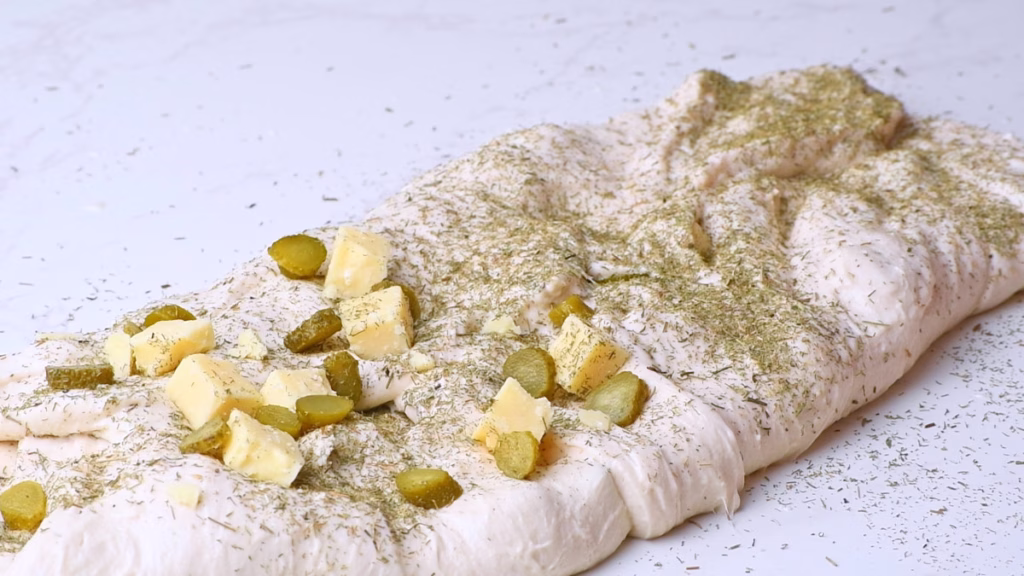
Chop your pickles into about ¼ in/ 7mm pieces. I used small gherkins, so mine where slices. If your pickles are bigger, you may want to halve or quarter them.
Cube your cheddar to around the same size or up to ½ in/ 1 cm, if you’d like slightly bigger melted cheese bits or grate it coarsely, if you want an even dispersion throughout your dough.
For the dill: Season with your heart. I noted 1 teaspoon dried in the recipe, as that is the measurement most commonly used for dried herbs and apparently sensible. But frankly I added a heaped tablespoon to my dough as I just adore its fresh herbaceous flavor. I feel it nearly tastes buttery in this bread, without adding any butter. Maybe that’s from my compound butter taste memory, which in Germany often has lots of dill.
Add your Dill, Pickles and Cheddar and Shape
Prepare a banneton by misting it with a bit of water and dusting with rice flour. Rice flour, as opposed to wheat flour doesn’t get absorbed by the dough, so it works much better as effective non-stick layer.
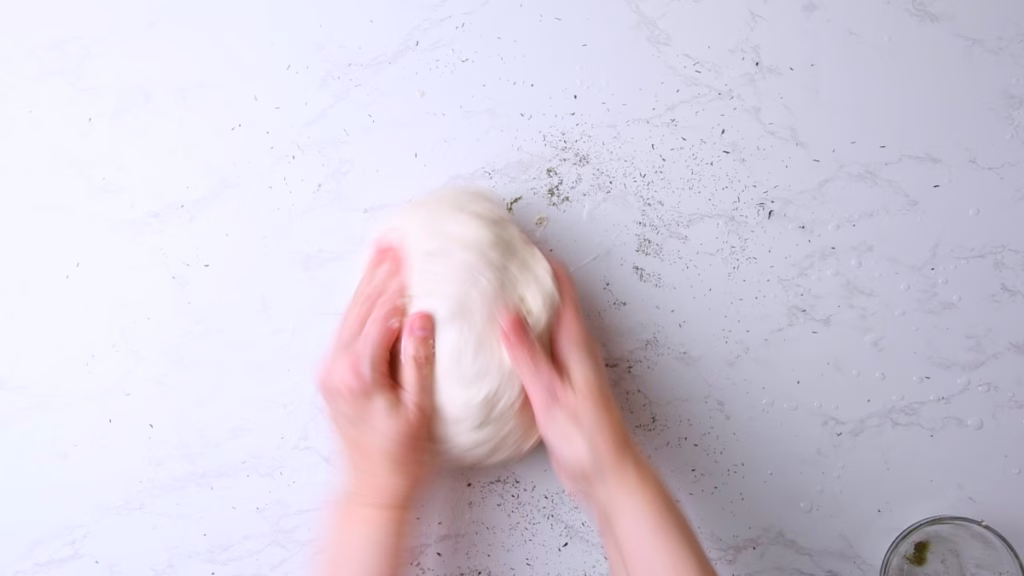
Turn your proofed dough onto a lightly floured work surface.
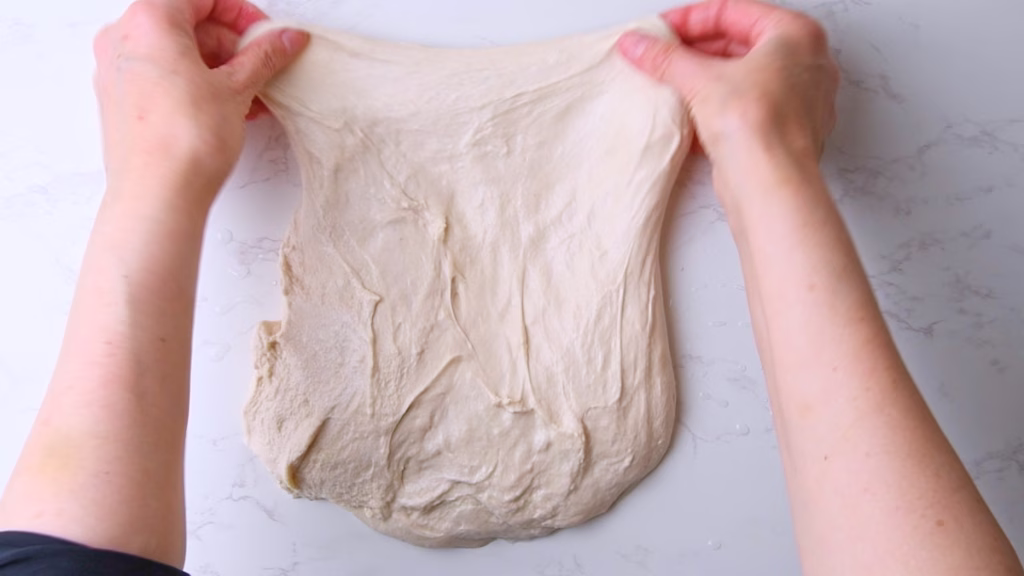
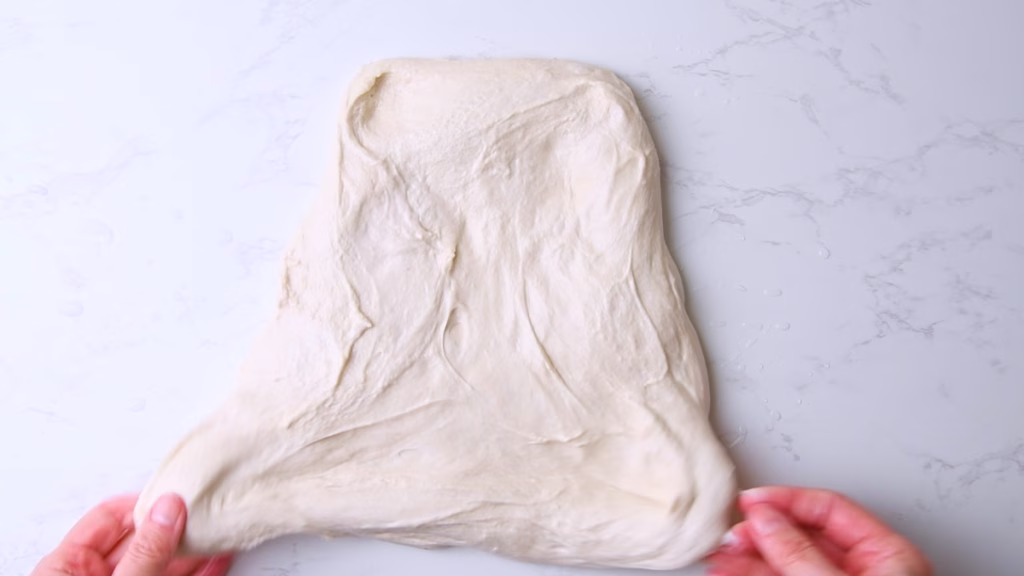
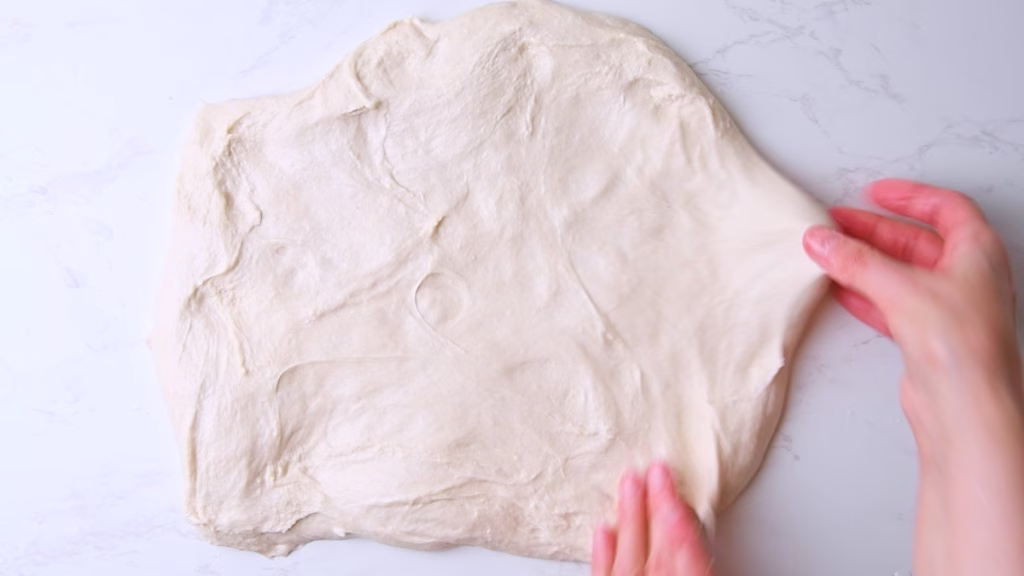
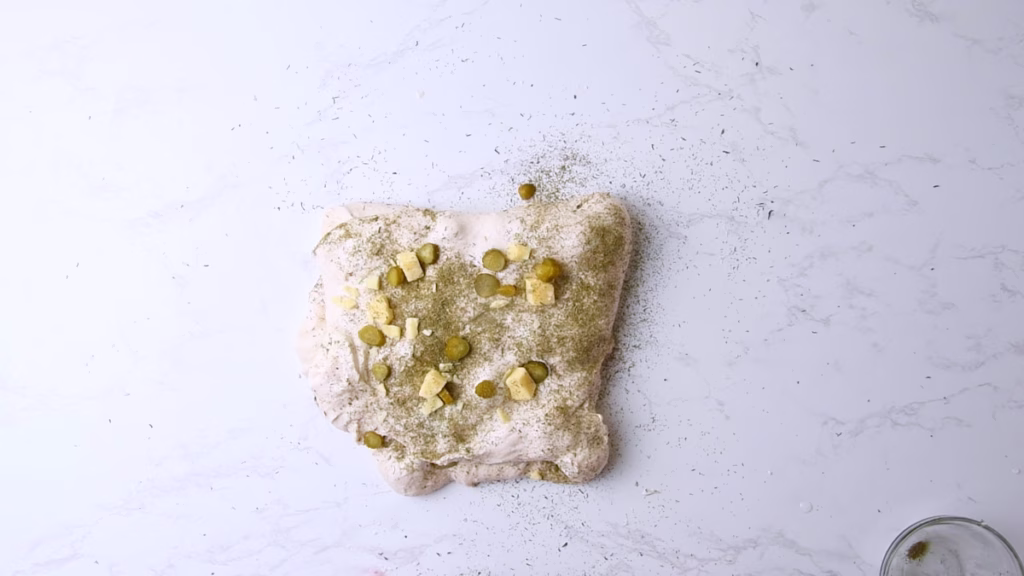
Use your hands to gently pull it out into a square about 11 in/ 30cm on both sides. This doesn’t have to be exact. We just want as much surface area as we can get to scatter the inclusions over without ripping the dough and pushing too much of the trapped air out. So no rolling pin needed.
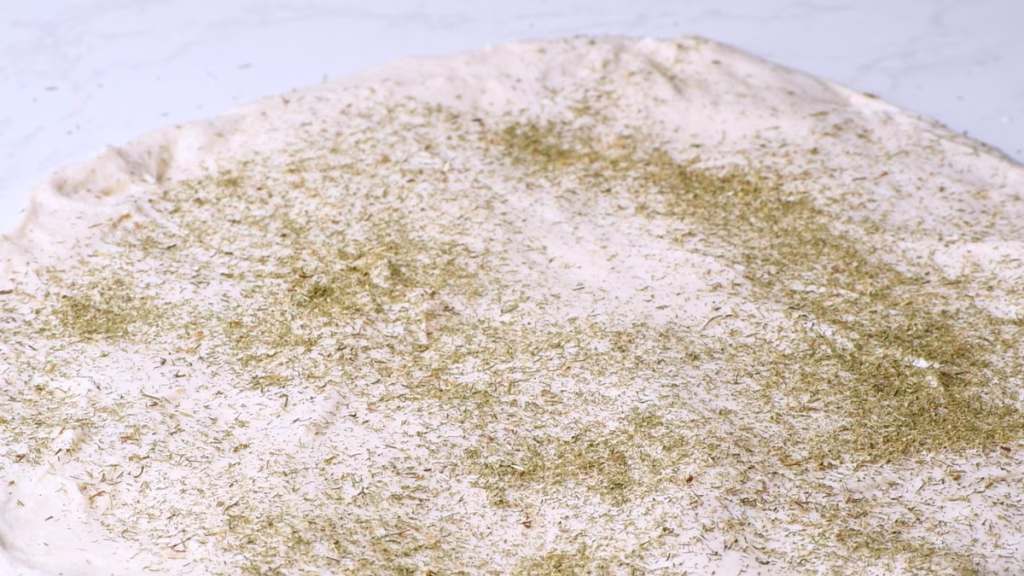
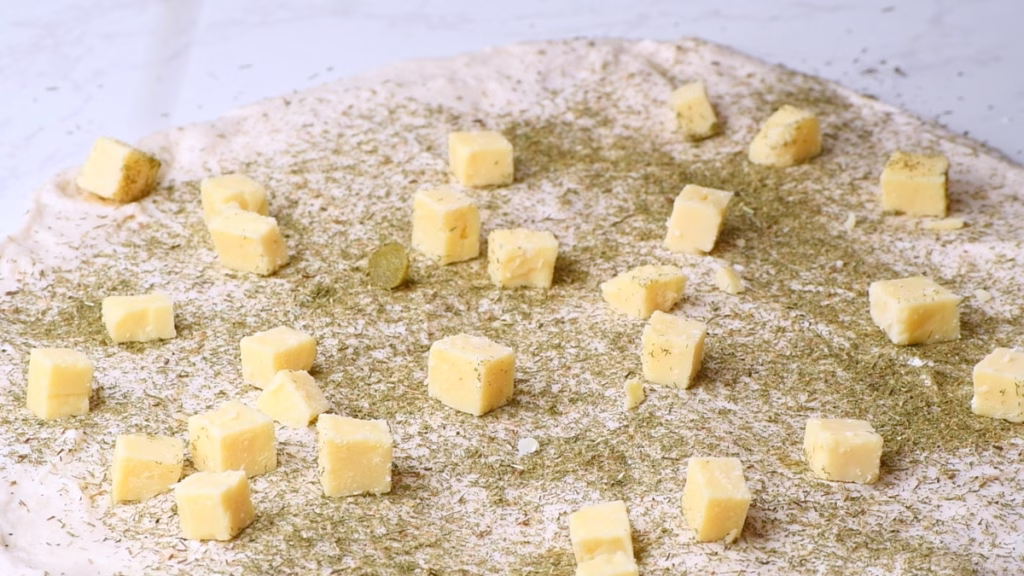
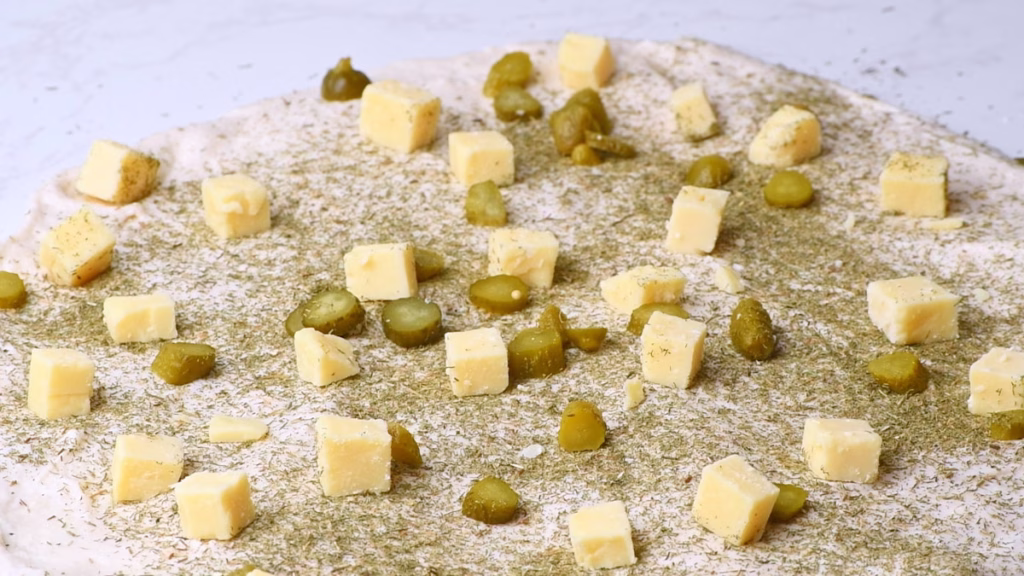
- Scatter half of your pickles, cheese and dill over the dough.

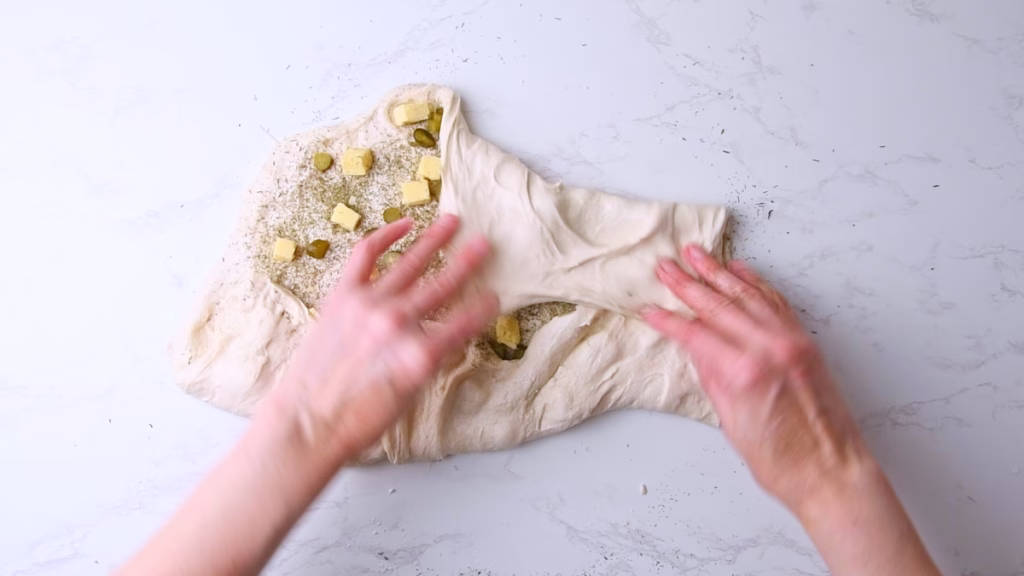
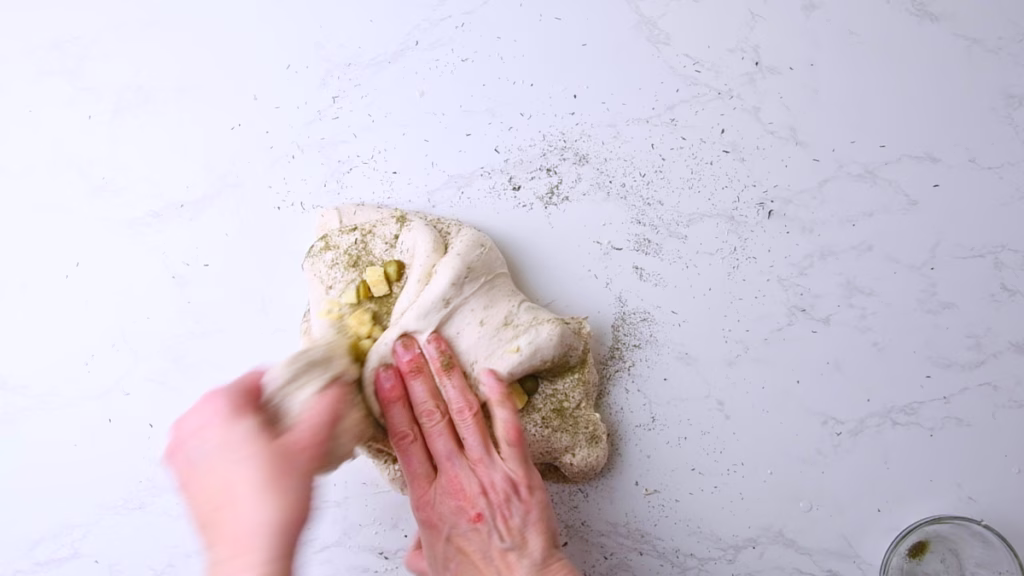
- Fold the top part of the dough toward the center, then the bottom part.
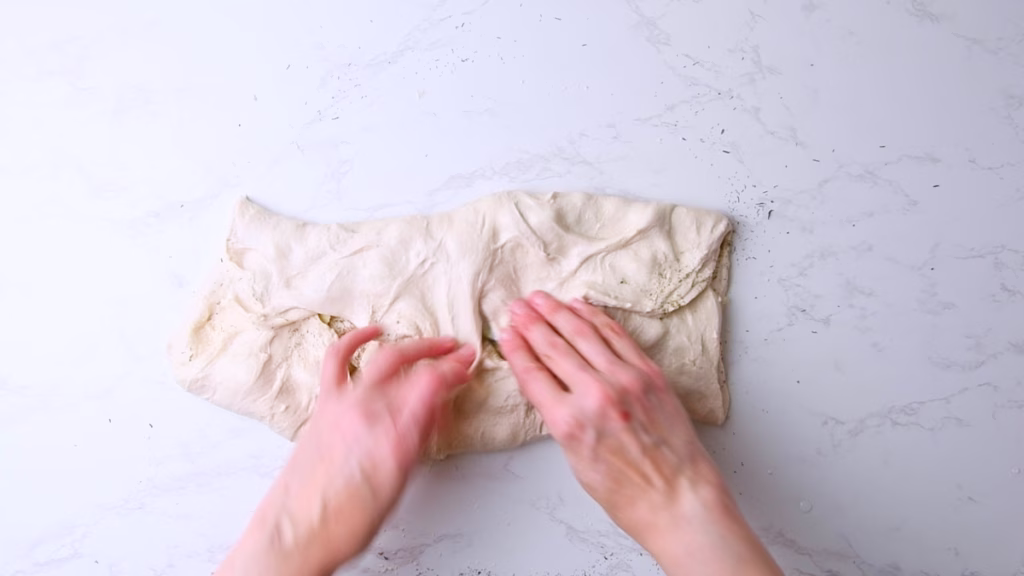
- Scatter half of the remaining fillings over the folded dough.
- Fold the dough in half, so you have a square shape.
- Grab the opposing corners of the dough piece and pull them over the middle. Do the same with the remaining corners and pinch close.
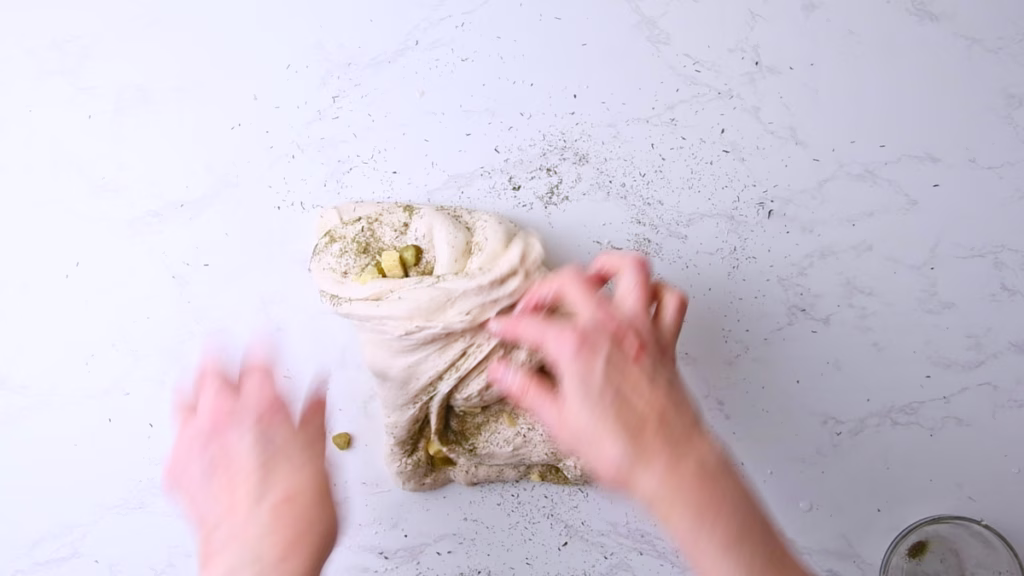
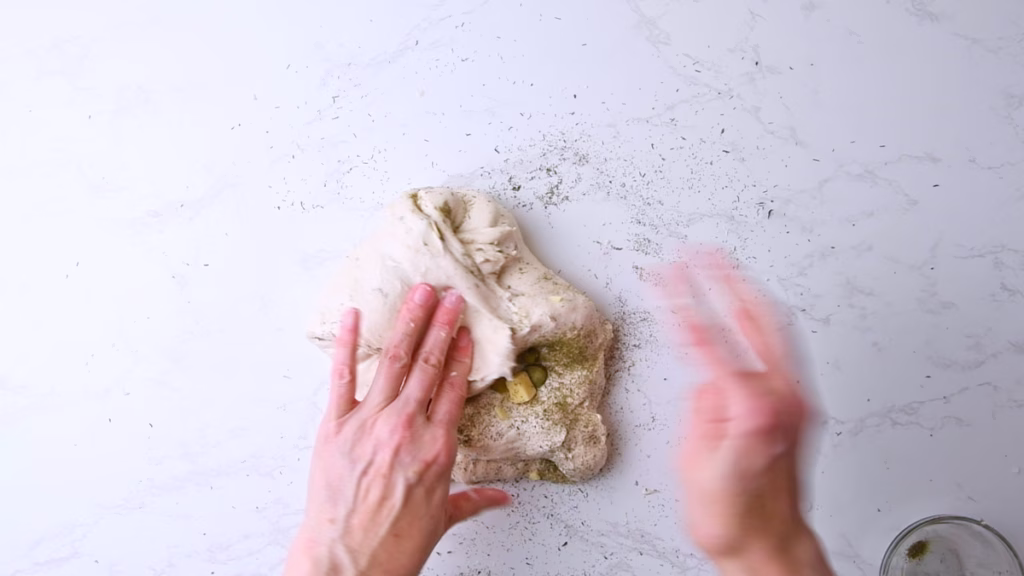
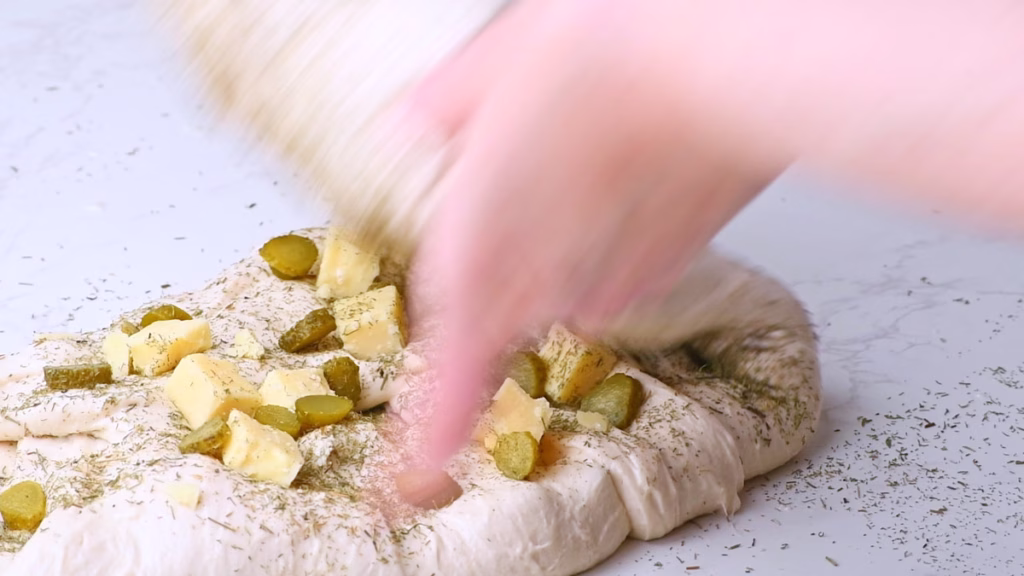
- If any bits fall out during this process, just push them back into the dough, ideally while rolling up, so you don’t break the top afterwards.
- Flip the dough over, so the seam points down and gently shape into a round or oval by pushing it under itself with the sides of your palms while rotating it against the worktop. Be very gentle.
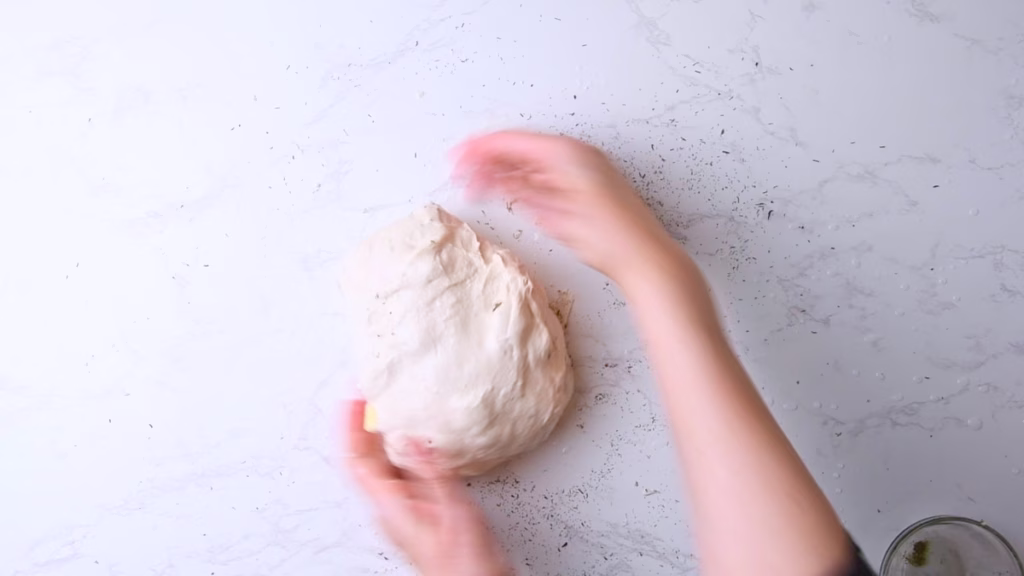
- Because the cheese and pickles have edges, you’ll need to be a little more careful than with your standard loaf, so the top doesn’t rip too much from poking bits. A few small holes are expected though and will give you lovely browned and crispy cheese pockets.
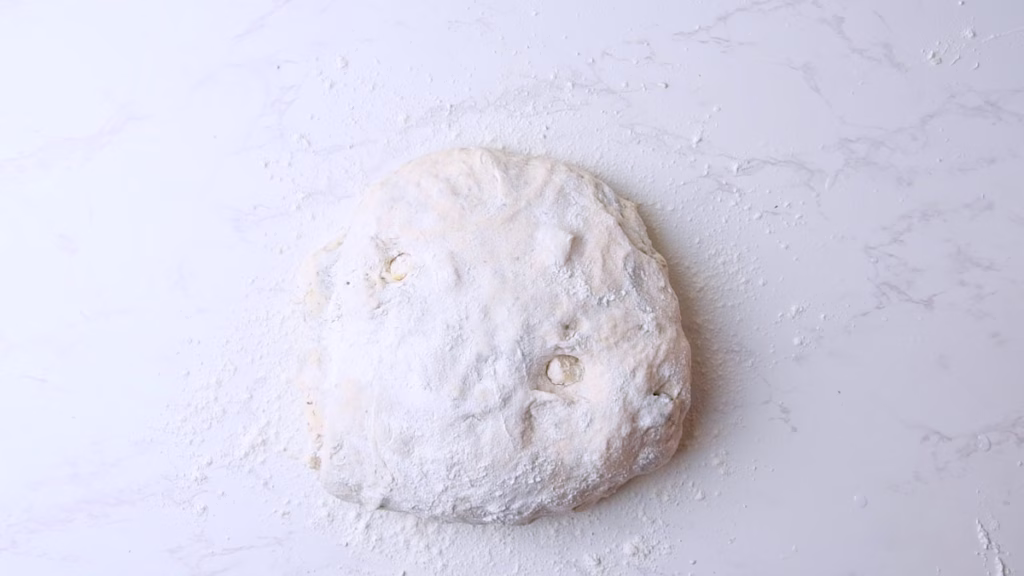
- Transfer your loaf top side down into your prepared banneton.
Last Rise
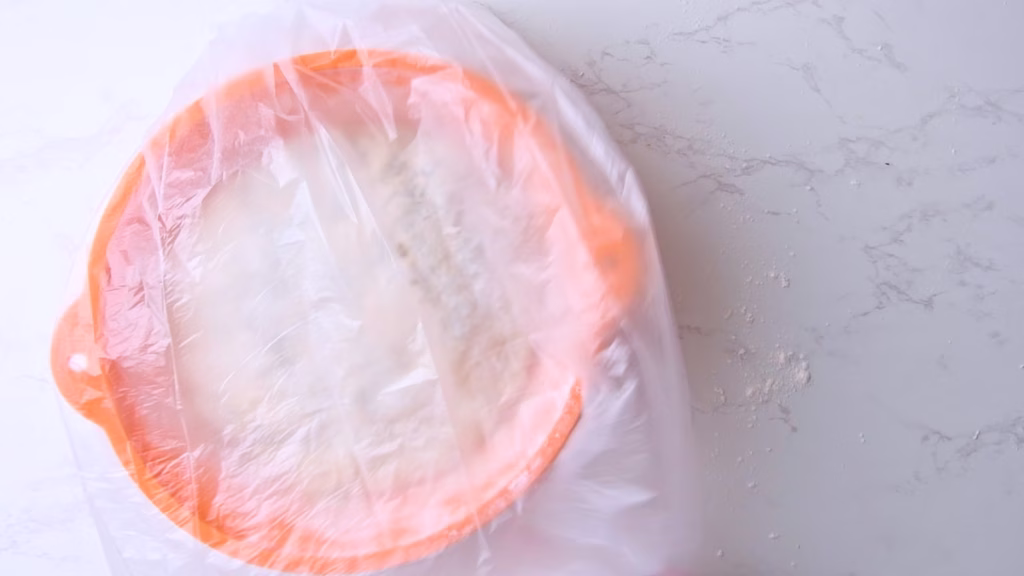
I like to put the banneton with the shaped loaf into a slightly inflated, clean plastic bag that I clip close, to keep it warm and moist during the rise. Clingfilm will also work for the most part but often leaves gaps and with that dry bits on the dough.
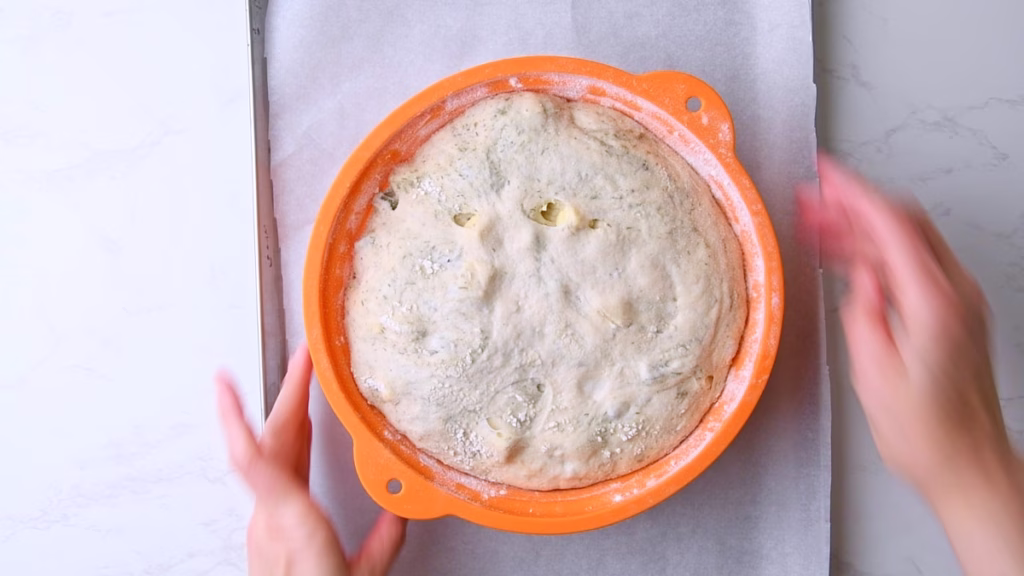
Here is your next bit of flexibility: You can either go straight to letting your dough rise for about 3 hours or until nice and puffy and jiggly and then bake it right away.
Or you can cold ferment at this point (if it wasn’t already in the fridge for 3 days) and leave the rise for the next day. Be aware though that the rise, coming out of the fridge, will take a little longer as the dough needs to come back to room temperature for the bacteria to get back to peak activity.
I often put my shaped loaf into the fridge and take it out about 5 hours before I want to bake, anywhere up to 3 days after shaping. The longer you leave it to ferment, the stronger the sourdough flavor and the easier it is to digest.
Score Your Loaf and Pre-heat The Oven
With your Dutch Oven inside, pre-heat your oven to 475°F/245°C for 30 minutes to 1 hour.
It may show pre-heated before, but the Dutch oven won’t be and the heat evens out after about 30 minutes. The high temperature at the start gives you the best oven spring.
Right after switching on the oven put your banneton into the freezer for about 30 minutes for a cleaner score. I honestly often forget this or simply don’t have room in my freezer, so my scores are not those beautiful IG patterns.
I mainly see them as functional, to enable the bread to expand and spring up nicely.
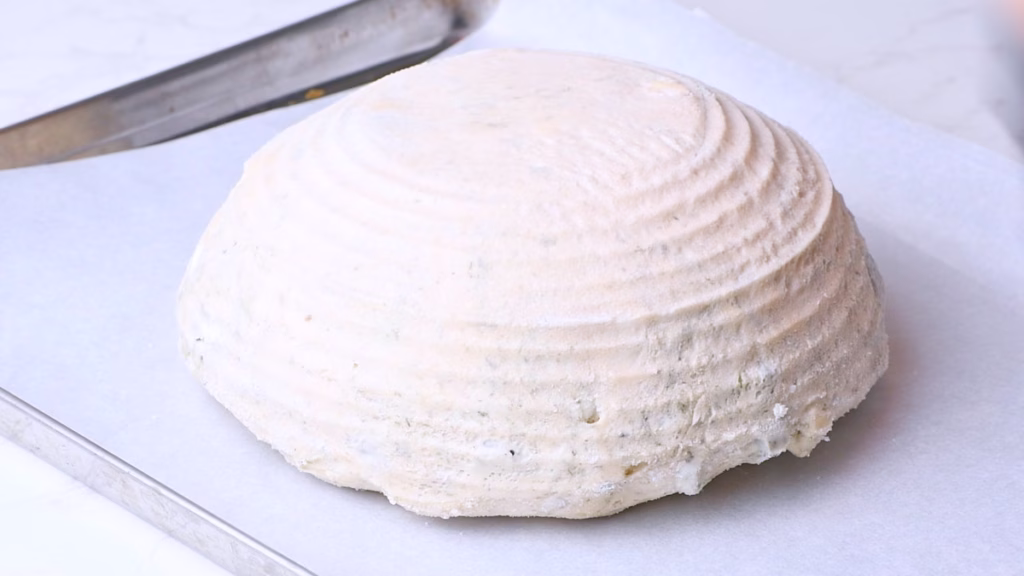
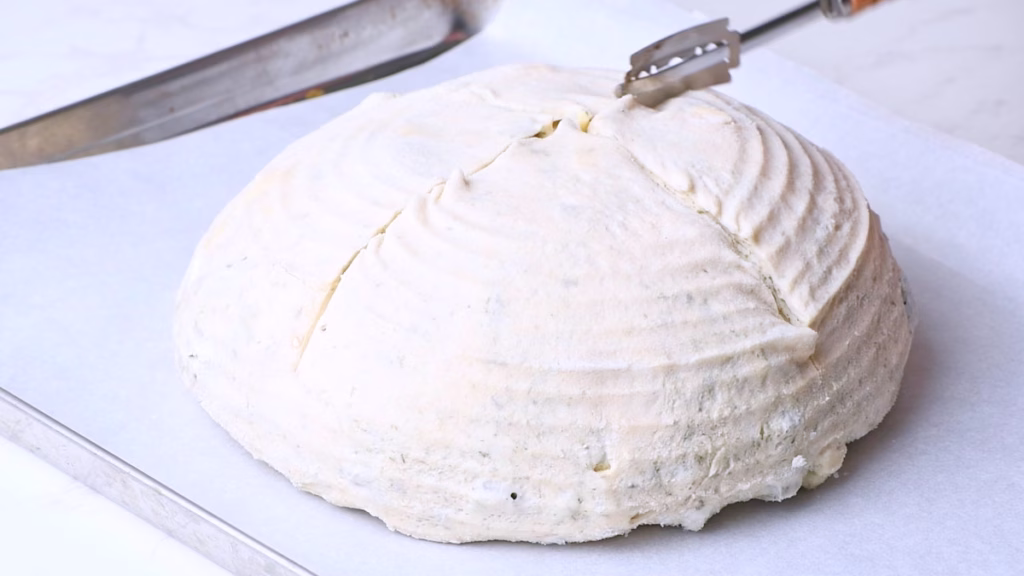
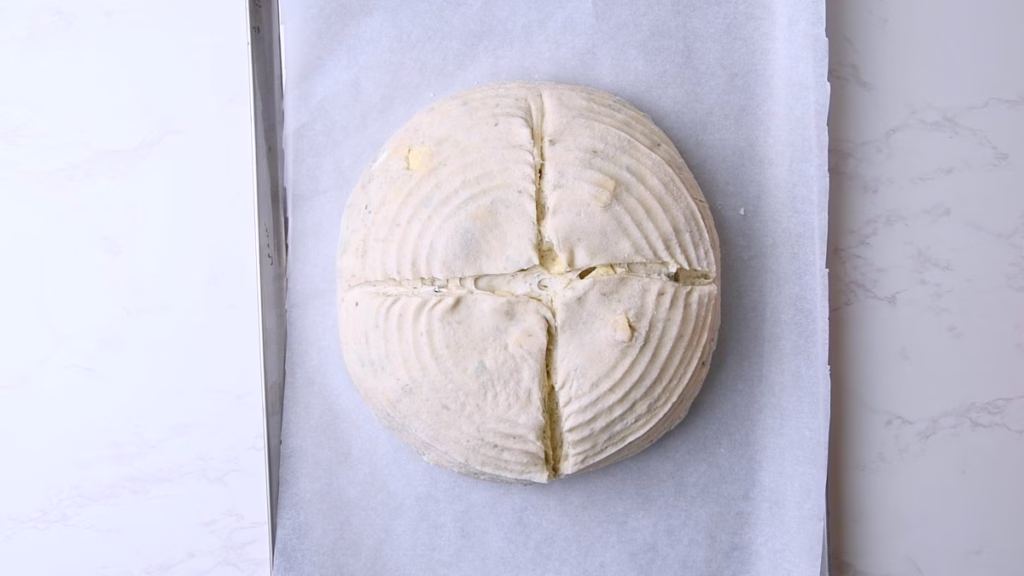
When ready to bake, flip your loaf onto a piece of baking parchment and score it with a sharp knife or lame. You can use any pattern you like, just make sure you score deep enough. About ½ inch/ 12mm deep at a 45 degree angle with one long confident slice gives you the best results.
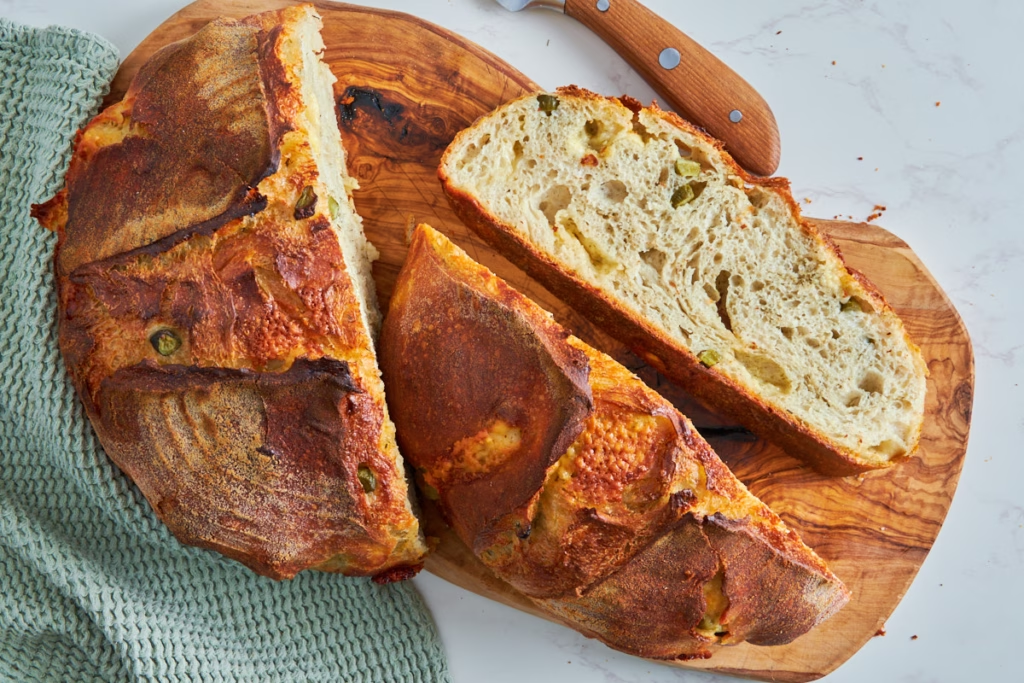
If you are not keen on that “ear” you could do a cross and then cut your loaf in quarters along those lines later for easy slicing, which is what I’m doing for this loaf.
Bake your Dill Pickle Cheddar Protein Sourdough Bread
Use your parchment to transfer your bread into the hot Dutch oven, put the lid on and bake at 475°F/245°C for 30 minutes.
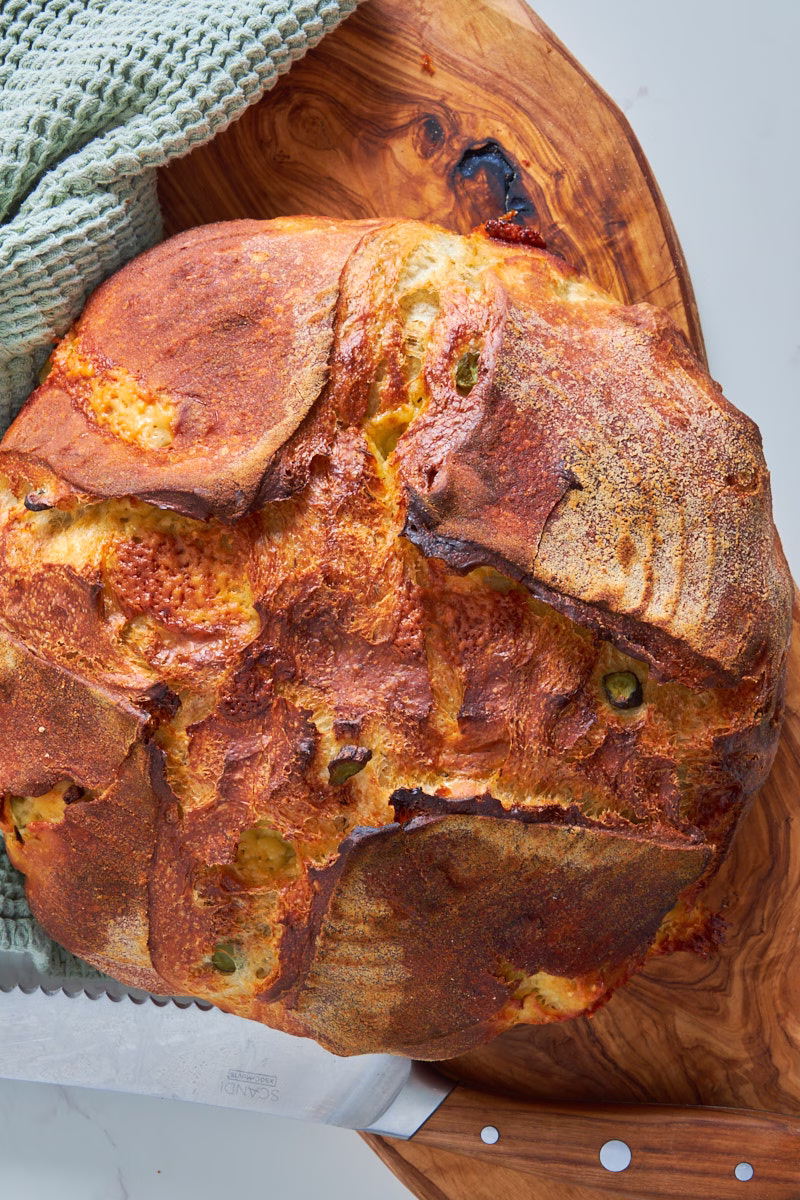
Lower the temperature to 440°F/225°C, take the lid off (temperature down before opening the door, so some heat can escape) and bake for another 15-20 minutes or until deep golden brown with the scored and risen bits a bit darker or until baked through.
I rarely check the internal temperature of this loaf, as it comes out so consistently well baked, but if you’d like to be sure you can either tap the bottom, which should sound hollow when baked through or use an instant read thermometer to check the temperature at the center. It should be around 208°F/98°C for the crumb to be fully set and excess moisture having evaporated.
Since this has fairly high moisture due to the inclusions, you’ll want to err on the side of baking a little longer rather than shorter to give it a chance to set perfectly.
Take out of the oven and transfer to a cooling rack. Allow to cool at least a few hours, as you otherwise risk too much steam (aka moisture) to escape too early and with that a gummy, sticky or doughy texture.
How To Serve This Sourdough Loaf
While this bread is absolutely incredible on its own due to the cheesy pickle flavors (just a dab of fresh cold butter is heaven!), it’s even more delicious as a sandwich or used to mop up dressing or sauce. Think the cashew pickle ranch dressing from my Spring Salad or drag it through some creamy cottage cheese pickle dip, adding proper oomph to the flavor combo.
How To Store
Homemade sourdough bread is incredibly meal prep friendly:
You can prepare it the day before and just push it into the oven in the morning or 3 hours before you’d like to eat it. Or prepare the dough up to 3 days in advance and leave it in the fridge. The sourdough flavor will get more pronounced the longer it ferments.
All of these breads keep well in a bread tin for about 3 days or up to 5 in the fridge.
They freeze perfectly for up to 6 months and are excellent toasted.
FAQ
You can use coarsely grated cheese if you want it completely melted throughout the entire crumb, but avoid store-bought pre-shredded cheese in bags. Those are coated in anti-caking agents (like cellulose) that absorb moisture and prevent the cheese from melting into those beautiful, gooey pockets. Buying a block and cubing or grating it yourself takes two minutes and yields a much better texture.
They won’t ruin it if you follow the golden rule: pat them dry thoroughly with paper towels after chopping. If you skip this, the residual brine will bleed into the dough during lamination, creating localized wet spots that destroy the gluten structure and leave you with a gummy, flat loaf.
Absolutely. The basic cottage cheese and whey dough is neutral, so you can easily swap the savory mix-ins for things like chocolate chips or dried fruit. Just remember the ratio rule: for a standard loaf using 500g of flour, keep your total inclusions to a maximum of 1.5 cups, keeping any wet ingredients (like fresh berries) to half a cup or less.
A note on raspberries: While they work they will turn very mushy and reduce the rise rather drastically. Bake longer to get a properly baked crumb.
As the cheese melts during baking, it releases steam and fat, creating a pocket. When the bread cools, the cheese solidifies against the dough walls, sometimes leaving a small hollow space above it. This is completely normal for any cheese-inclusion sourdough and is actually where the best crispy, caramelized bits live.
Now I’d love to hear from you in the comments!
Have you tried this? Did you enjoy it?
What other recipes would you like to see?
And if you enjoyed this recipe, please consider rating, sharing, or leaving a comment – your feedback truly helps my blog grow!
Other recipes you might enjoy


If you liked this Dill-Pickle Cheddar loaf you’ll love these buttery and flaky cheese biscuits.
Of course also with yourdough and protein.
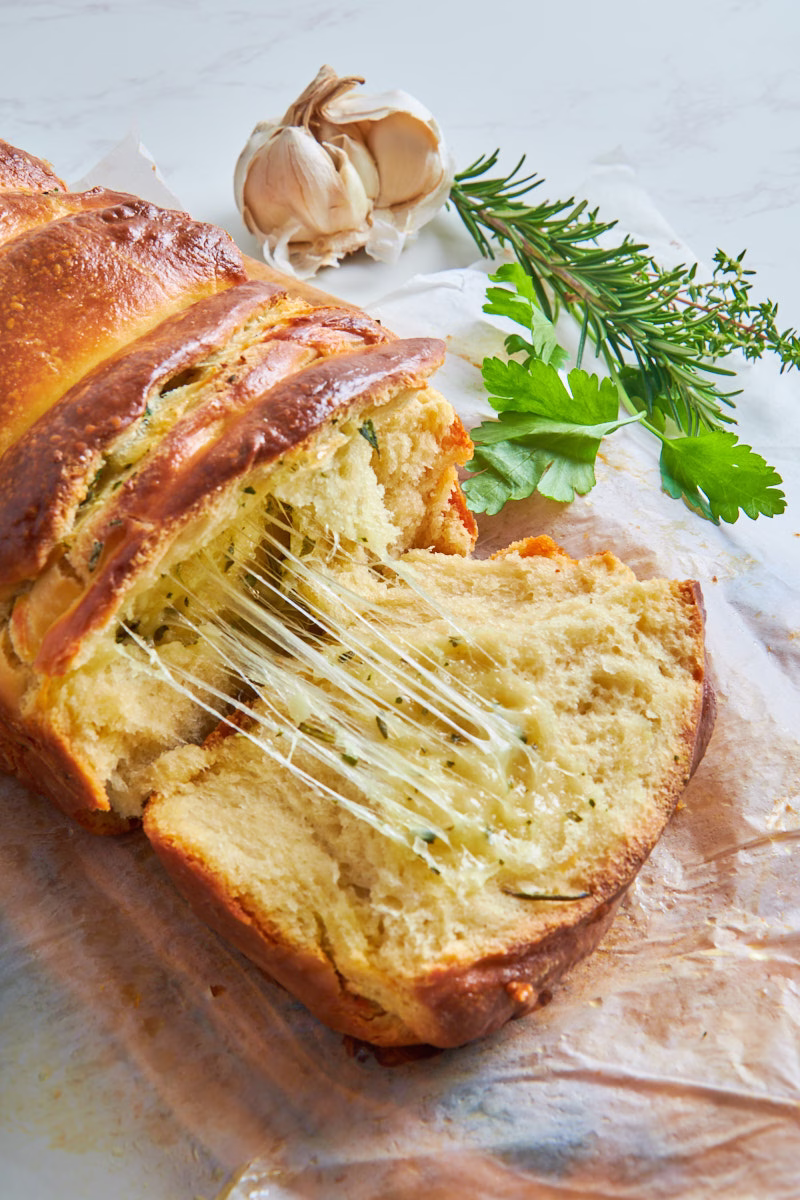
And yet another cheesy-herby bread. This time with a brioche dough, classic pull apart style!
Dill Pickle and Cheddar Sourdough (Protein-Boosted)
- Total Time: 13 hours 30 minutes
- Yield: 12 slices 1x
Description
If you want to master adding mix-ins to your bread without ruining the dough structure, this post serves as both a practical guide to sourdough inclusions and a recipe for a savory dill pickle and cheddar loaf. Built on the back of my Easy Protein Sourdough, this recipe shows you how to safely add wet and dry ingredients using a simple lamination technique. It delivers the comforting flavors of a classic German Abendbrot with an extra hit of protein, requiring only about 30 minutes of hands-on work.
Ingredients
- 1 Portion Easy High-Protein Sourdough – Right after the bulk ferment
- 1 teaspoon dried dill or 1 tablespoon fresh dill
- 1/2 cup (70 grams) dill pickles
- 1 cup (115g) sharp cheddar
Instructions
How to Make This
- Since this Dill Pickle and Cheddar Sourdough recipe is made from the Easy High Protein Sourdough and we simply add the inclusions, we are starting after the bulk fermentation.
- So you’ll need to start by feeding your starter 3 days before you want to bake bread and mix the dough on day 2, to have it ready for baking on day 3.
- You can do the cold fermentation either before or after shaping, depending on your schedule and needs.
- I usually do my cold fermentation after shaping and take the loaf out of the fridge for the last rise if still needed.
Prepare Your Inclusions
- Chop your pickles into about ¼ in/ 7mm pieces. I used small gherkins, so mine where slices. If your pickles are bigger, you may want to halve or quarter them.
- Cube your cheddar to around the same size or up to ½ in/ 1 cm, if you’d like slightly bigger melted cheese bits or grate it coarsely, if you want an even dispersion throughout your dough.
- For the dill: Season with your heart. I noted 1 teaspoon dried in the recipe, as that is the measurement most commonly used for dried herbs and apparently sensible. But frankly I added a heaped tablespoon to my dough as I just adore its fresh herbaceous flavor. I feel it nearly tastes buttery in this bread, without adding any butter. Maybe that’s from my compound butter taste memory, which in Germany often has lots of dill.
Add your Dill, Pickles and Cheddar and Shape
- Prepare a banneton by misting it with a bit of water and dusting with rice flour. Rice flour, as opposed to wheat flour doesn’t get absorbed by the dough, so it works much better as effective non-stick layer.
- Turn your proofed dough onto a lightly floured work surface.
- Use your hands to gently pull it out into a square about 11 in/ 30cm on both sides. This doesn’t have to be exact. We just want as much surface area as we can get to scatter the inclusions over without ripping the dough and pushing too much of the trapped air out. So no rolling pin needed.
- Scatter half of your pickles, cheese and dill over the dough.
- Fold the top part of the dough toward the center, then the bottom part.
- Scatter half of the remaining inclusions over the folded dough.
- Fold the dough in half, so you have a square shape.
- Scatter over the rest of the dill, cheese and pickles.
- Grab the opposing corners of the dough piece and pull them over the middle. Do the same with the remaining corners and pinch close.
- If any bits fall out during this process, just push them back into the dough, ideally while rolling up, so you don’t break the top afterwards.
- Flip the dough over, so the seam points down and gently shape into a round or oval by pushing it under itself with the sides of your palms while rotating it against the worktop. Be very gentle.
- Because the cheese and pickles have edges, you’ll need to be a little more careful than with your standard loaf, so the top doesn’t rip too much from poking bits. A few small holes are expected though and will give you lovely browned and crispy cheese pockets.
- Transfer your loaf top side down into your prepared banneton.
Last Rise
- I like to put the banneton with the shaped loaf into a slightly inflated, clean plastic bag that I clip close, to keep it warm and moist during the rise. Clingfilm will also work for the most part but often leaves gaps and with that dry bits on the dough.
- Here is your next bit of flexibility: You can either go straight to letting your dough rise for about 3 hours or until nice and puffy and jiggly and then bake it right away.
- Or you can cold ferment at this point (if it wasn’t already in the fridge for 3 days) and leave the rise for the next day. Be aware though that the rise, coming out of the fridge, will take a little longer as the dough needs to come back to room temperature for the bacteria to get back to peak activity.
- I often put my shaped loaf into the fridge and take it out about 5 hours before I want to bake, anywhere up to 3 days after shaping. The longer you leave it to ferment, the stronger the sourdough flavor and the easier it is to digest.
Score Your Loaf and Pre-heat The Oven
- With your Dutch Oven inside, pre-heat your oven to 475°F/245°C for 30 minutes to 1 hour.
- It may show pre-heated before, but the Dutch oven won’t be and the heat evens out after about 30 minutes. The high temperature at the start gives you the best oven spring.
- Right after switching on the oven put your banneton into the freezer for about 30 minutes for a cleaner score. I honestly often forget this or simply don’t have room in my freezer, so my scores are not those beautiful IG patterns.
- I mainly see them as functional, to enable the bread to expand and spring up nicely.
- When ready to bake, flip your loaf onto a piece of baking parchment and score it with a sharp knife or lame. You can use any pattern you like, just make sure you score deep enough. About ½ inch/ 12mm deep at a 45 degree angle with one long confident slice gives you the best results.
- If you are not keen on that “ear” you could do a cross and then cut your loaf in quarters along those lines later for easy slicing, which is what I’m doing for this loaf.
Bake your Dill Pickle Cheddar Protein Sourdough Bread
- Use your parchment to transfer your bread into the hot Dutch oven, put the lid on and bake at 475°F/245°C for 30 minutes.
- Lower the temperature to 440°F/225°C, take the lid off (temperature down before opening the door, so some heat can escape) and bake for another 15-20 minutes or until deep golden brown with the scored and risen bits a bit darker or until baked through.
- I rarely check the internal temperature of this loaf, as it comes out so consistently well baked, but if you’d like to be sure you can either tap the bottom, which should sound hollow when baked through or use an instant read thermometer to check the temperature at the center. It should be around 208°F/98°C for the crumb to be fully set and excess moisture having evaporated.
- Since this has fairly high moisture due to the inclusions, you’ll want to err on the side of baking a little longer rather than shorter to give it a chance to set perfectly.
- Take out of the oven and transfer to a cooling rack. Allow to cool at least a few hours, as you otherwise risk too much steam (aka moisture) to escape too early and with that a gummy, sticky or doughy texture.


Notes
Top Tips For Success
- Pat dry wet ingredients – Any inclusion like pickles or berries that is, by nature rather wet, is best added after patting dry a little with paper towels. Adding too much moisture can lead to a flat loaf.
- Your Bread won’t rise as much as without inclusions – This is working as intended and to be expected, as the dough has to “lift” additional weight. It will still be beautiful and utterly delicious in its own right.
- Try to keep inclusions inside of the dough – This is why I sprinkle mine over the stretched out dough in a way of lamination. Anything on top of your bread is more likely to burn. A bit of cheese on top will be delicious, as it has enough fat to simply crisp up and brown, but a tiny half burned pickle might not be great. So if they fall out, tuck them back into the dough.
How To Serve This Sourdough Loaf
While this bread is absolutely incredible on its own due to the cheesy pickle flavors (just a dab of fresh cold butter is heaven!), it’s even more delicious as a sandwich or used to mop up dressing or sauce. Think the cashew pickle ranch dressing from my Spring Salad with Pickles and Pretzels or drag it through some Creamy Cottage Cheese Pickle Dip, adding proper oomph to the flavor combo.
How To Store
- Homemade sourdough bread is incredibly meal prep friendly:
- You can prepare it the day before and just push it into the oven in the morning or 3 hours before you’d like to eat it. Or prepare the dough up to 3 days in advance and leave it in the fridge. The sourdough flavor will get more pronounced the longer it ferments.
- All of these breads keep well in a bread tin for about 3 days or up to 5 in the fridge.
- They freeze perfectly for up to 6 months and are excellent toasted.
- Prep Time: 30 minutes
- Rise/Overnight Ferment: 12 hours
- Cook Time: 1 hour
- Category: Bread, Bread & Sourdough, Breakfast, Dinner, Lunch, Protein Sourdough, Protein Sourdough Recipes
- Method: Baking
- Cuisine: American