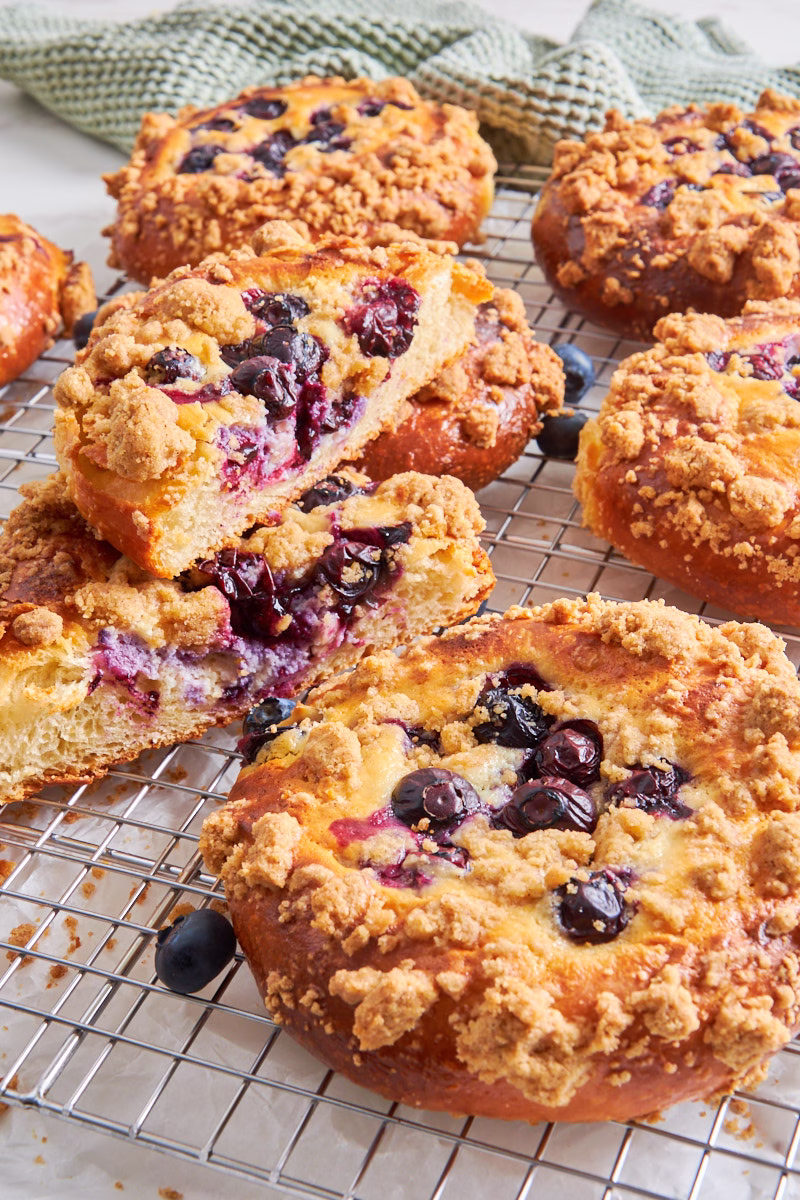
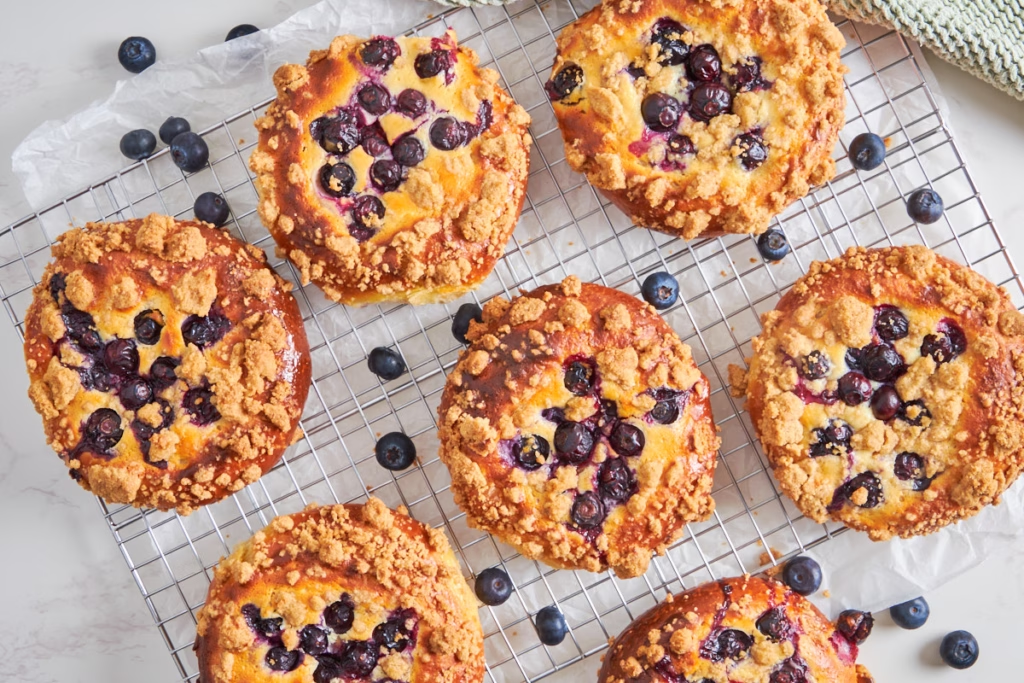
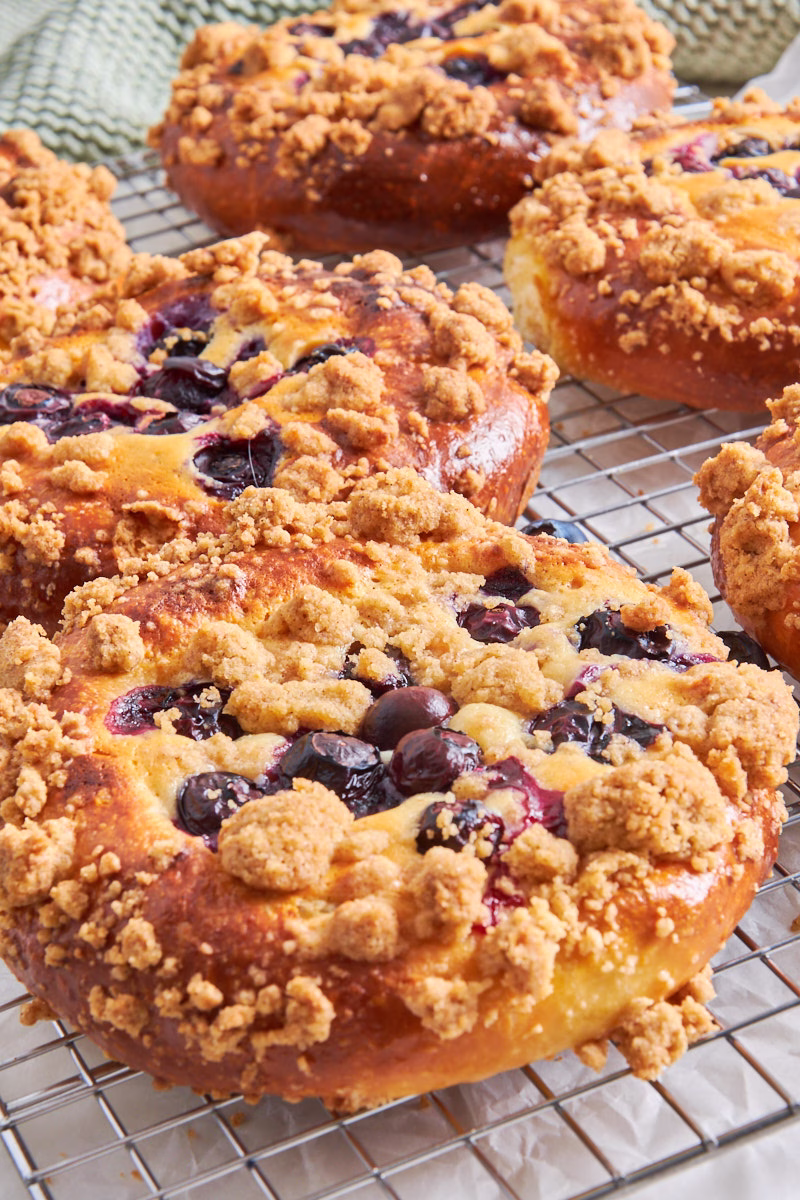
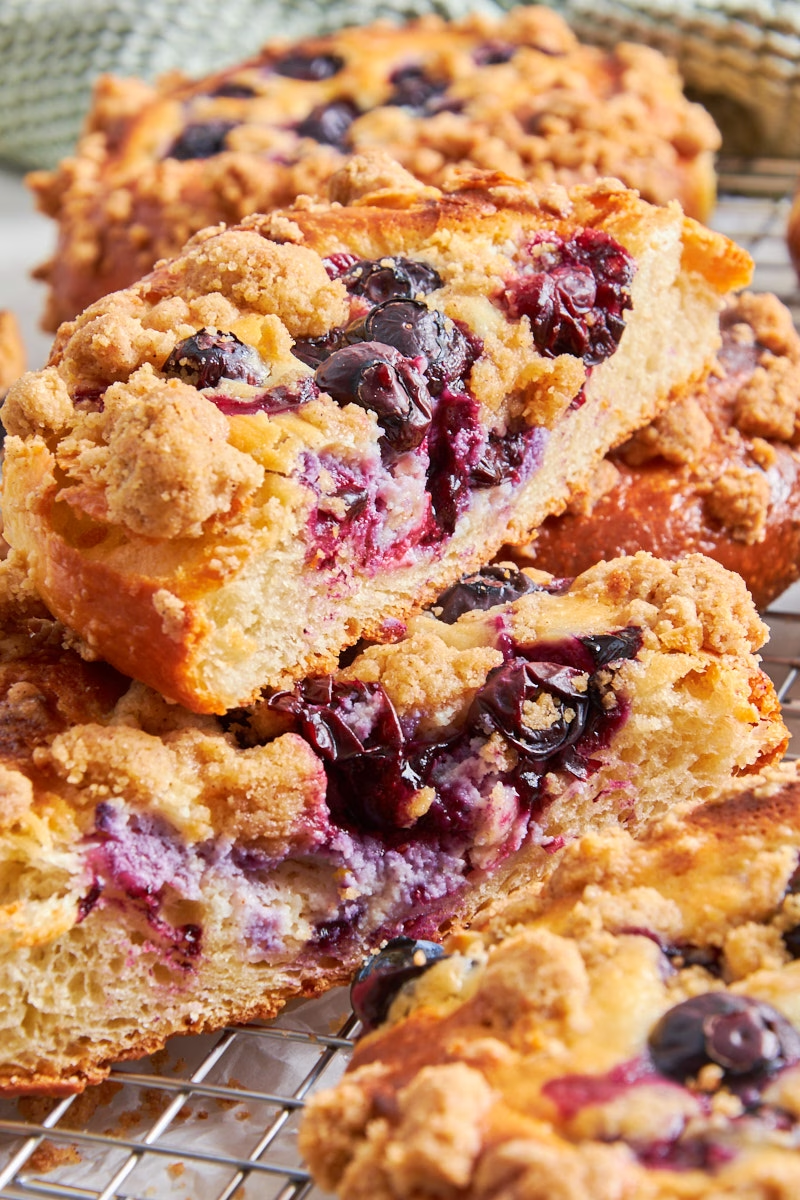
Sourdough Blueberry Cheesecake Danishes with Protein
If you’ve been looking for a way to have your cheesecake and eat it too—for breakfast—this is it. These Sourdough Blueberry Cheesecake Danishes combine the pillowy softness of a Japanese milk bread with the rich, buttery crumb of a classic Brioche. By using a protein-enriched sourdough base and a creamy cheesecake filling, I’ve created a treat that packs 18g of protein without sacrificing that melt-in-your-mouth texture. Finished with a crunchy brown sugar crumble, these are miles ahead of anything you’ll find at a standard bakery.
This post may contain referral links for products I love.
For The Pleasure Of Eating earns a small commission on these links at no cost to you.
- Why You’ll Love This
- The Ingredients
- Substitutions
- Equipment Used
- How to Make this
- How To Store
- FAQ
- Other Recipes You Might Enjoy
Why You’ll Love This
TL;DR
- Protein-Packed: With 18g of protein per Danish, they actually keep you full rather than giving you a sugar crash.
- Cloud-Like Texture: The combination of Tangzhong and sourdough creates a brioche-style dough that stays soft for days.
- Customizable: Use the base recipe for blueberries, or swap in whatever seasonal fruit you have on hand.
- Gut-Friendly: Long fermentation makes the grains easier to digest and the protein more bioavailable.
- Make-Ahead Friendly: The dough is happy in the fridge for up to 3 days, fitting perfectly into a busy week.
Fruity & Creamy Breakfast Danish
If you are looking for an amazing breakfast high protein breakfast Danish that has a super creamy blueberry cheesecake filling, is topped with irresistible crunchy crumble and has the softest melt-in-your-mouth dough you can imagine, this is it! It also has about 18g protein per Danish. Which means you feel full for longer and gives you the nutrition you need. Pretty good for a sweet treat, isn’t it?
You can make between 8 and 12 Danishes from half of the base enriched dough. I made 8 rather generous ones, which is what I used for the nutrition per piece calculation in the recipe card.
Made with The Softest Enriched Protein Sourdough
This recipe is yet another use for my Enriched “Everything” Protein Sourdough, giving you a Brioche dough with added protein that you can use to make all kinds of recipes like Burger Buns, German Marzipan Wreath, Garlic Cheese Pull Apart Bread and now these Danishes.
Of course you could also use it to bake your favorite cinnamon rolls, pretty Easter Braids and a million other recipes. Anything that uses enriched dough.
It’s super soft thanks to Tangzhong, the method used to give Japanese Milk bread its incredible softness and keep it moist for days, buttery-rich like the best Brioche and with the flavor complexity and gut friendliness from sourdough, which also helps break down the added protein into more easily digestible molecules.
Super Customizable
Of course you don’t have to use blueberries. I just adore them (as you might have noticed by now after the Blueberry Muffins and Drop Scones), but cherries, strawberries, raspberries, mangoes, apricots and peaches would be equally amazing here.
Nice and ripe fruits are just really hard to find in good quality in Ireland, which is why I’m moving to Spain in a few months! There, I said it! Woohoo!
Easy To Fit Into Your Schedule
Since sourdough is so flexible and can stay in the fridge happily for up to 3 days once prepared, this dough works no matter how busy your schedule is. While it needs time to proof and ferment, that time is all hands off and the active time to make these Danishes is roughly 1 hour altogether, stretched over 3 days.
You can pre-shape the Danishes on day 2 of making the dough, prepare the cheesecake filling and crumble topping, which just take about 10 minutes to throw together and then leave them in a bag in the fridge until you are ready to bake.
While the oven heats up you top them and about 30 minutes later you have lovely golden brown, warm blueberry packed cheesecake treats.
A Note On The Dough Amount

This recipe, to make 8-10 large Blueberry Cheesecake Danishes, needs only  half a portion of the “Everything Sourdough Protein Dough”.

You could of course halve the recipe for the dough, but with it having 5 eggs for the exactly right hydration (I tried other amounts and it failed miserably) this gets a little tricky. Now, if you really want to halve it, weigh one egg in a bowl, whisk it vigorously and add exactly half of that to your wet ingredients. Use the other half for scrambled eggs.

But here is a better idea: With this dough being so versatile, make the full amount and bake one half as brioche or burger buns, Garlic Cheese Pull Apart Bread or a German Marzipan Wreath and shape the other into these Danishes. I promise you’ll be happy you made it all!

Obviously you could also use the full portion of dough to make 16 Danishes (double the filling ingredients) and freeze part of them. They keep up to 3 months in the freezer.
Ingredient Notes
Just for the filling and topping of these Danishes, as I went over the dough ingredients in the master recipe post.
Blueberry Cheesecake Filling
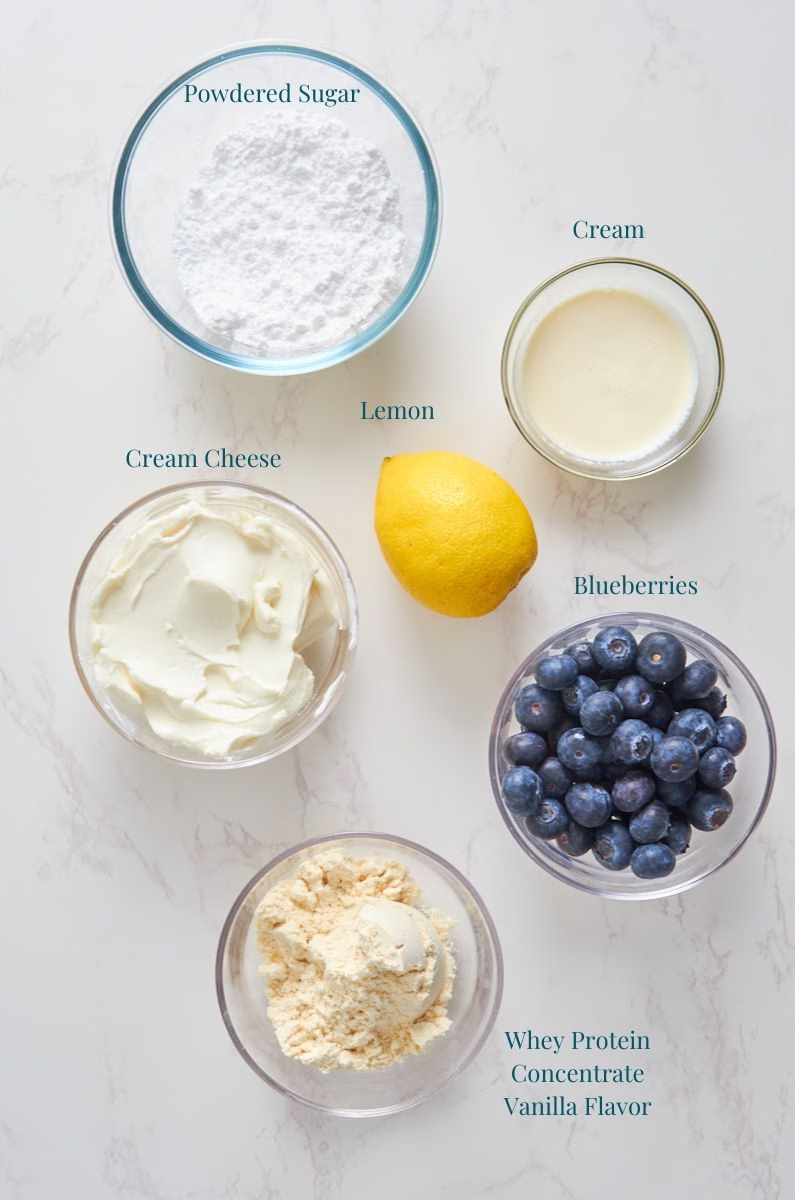
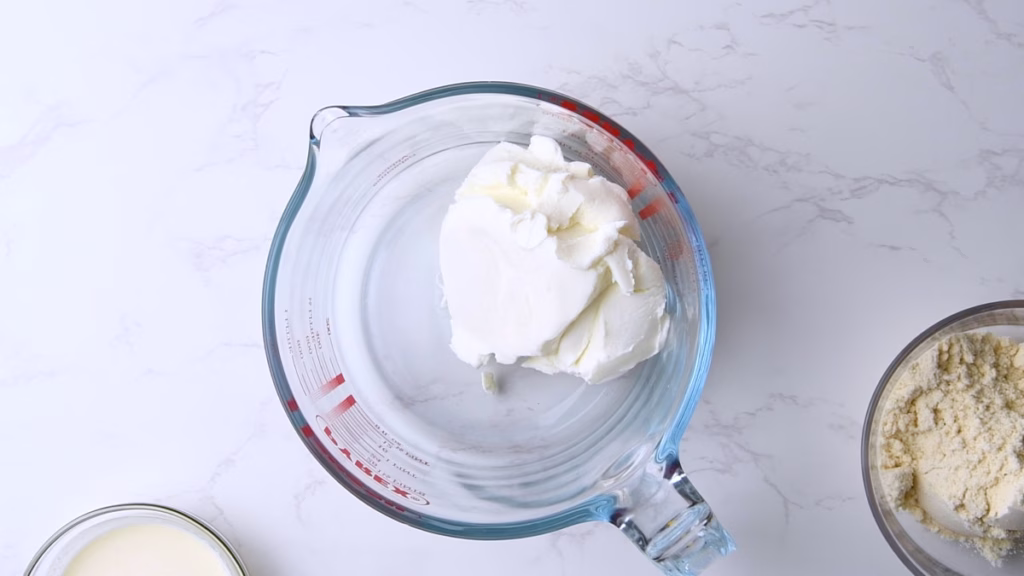
- Cream Cheese – I used light cream cheese for this recipe, as the bit of cream to get the right texture adds enough fat to have this taste super creamy.
- Whey Protein Concentrate – I used vanilla flavor here, as it replaces part of the icing sugar from the original Cheesecake filling recipe I used as my base. However it boosts the protein content a little and makes the filling even creamier.
Do use a protein powder you really enjoy drinking, ideally without strange after taste.
My personal favorite that I use for all my baking is MyProtein Whey Concentrate.
This is neither affiliated nor sponsored. Just the powder I found to taste best after trying a fair few. If you never found one you actually enjoy, give this one a try. - Note: If your cheesecake filling feels too thick or chalky depending on your brand of protein, add a teaspoon of milk or cream until it reaches a spreadable consistency.
- Powdered Sugar – Adds sweetness, texture and structure to the filling.
- Lemon Zest and Juice – I just adore the lemony flavor they add to the blueberry filling. If you don’t have a lemon, just leave it out.
- Blueberries – Both fresh and frozen work well. If using frozen, don’t thaw them before using, to keep them nice and juicy.
Crumble Topping
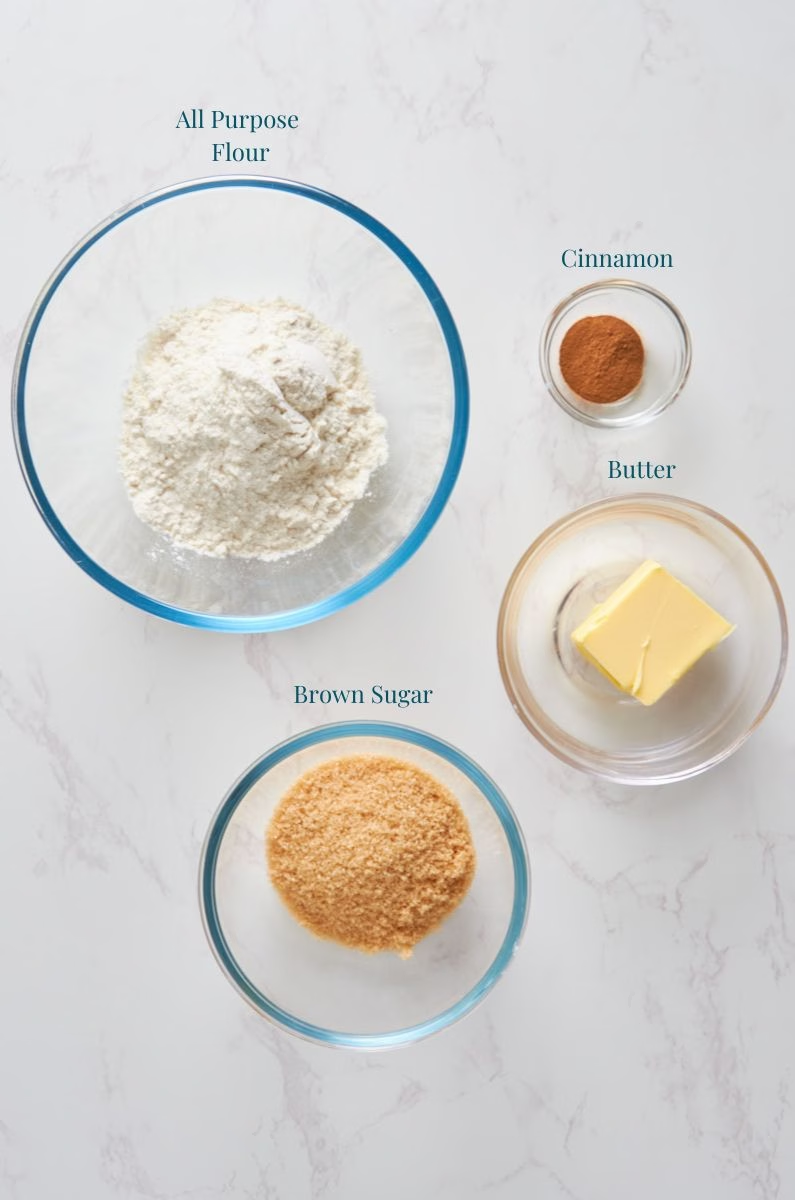
- Butter – The flavor of the butter really comes through, as in any good crumble topping. Use the best you can get your hands on. I adore Irish butter of course. But then, I currently live in Ireland, so it’s everywhere.
- Brown Sugar – This adds a lovely caramel note to the crumble, due to the molasses content, that you wouldn’t get with white granulated sugar.
- Flour – All-purpose works best, but frankly, use whatever you have. Even whole wheat will work nicely and add a nice nutty flavor. You might need a little more butter though, as it’s quite thirsty.
- Cinnamon – Entirely optional. Personally I throw copious amounts of cinnamon at pretty much everything, but you do you!
substitutions
Blueberry Cheesecake Filling
- Cream Cheese – If you are lactose intolerant, a vegan version will work here.
- Cream – You can use plant based full fat milk, but it won’t be as creamy or of course any vegan cream alternative.
- Whey Protein Concentrate – Any delicious tasting protein powder will work nicely here. Contrary to the dough, which is a bit more finicky when it comes to the type of protein used, the filling is flexible as long as it’s sweetened and you enjoy the flavor.
- Powdered Sugar – If you don’t have it, granulated sugar and about ½ teaspoon of cornstarch will work too. Powdered sugar contains a small amount of corn starch to keep it from clumping, which does double duty as thickener in cheesecake fillings. Similar to the often added pudding mix.
- Blueberries – Use your favorite fruit. Raspberries, apricots, peach, mango are all fabulous options!
- The only ones I would advise against are Kiwi and Pineapple (unless canned), as they contain enzymes that react with the milk protein and can turn bitter.
Crumble Topping
- Butter – Vegan butter will work fine for those of you that are lactose intolerant. (Making the whole recipe vegan is decidedly trickier due to the 5 eggs it contains.)
- Brown Sugar – Any sugar will work. Sweeteners able to replace brown sugar 1:1 are ok too, though they won’t caramelize as beautifully.
- Flour – Any flour will work. Even gluten free. Though the brioche dough will not work as GF version without major changes that I haven’t tested. So the swap for just the crumble might be a little pointless.
- Cinnamon – If you hate cinnamon, try ground cardamom. It has a slightly lemony flavor that will go fabulous with the fruits.
Variations
Essentially anything you can imagine in a cheesecake will work here.
Nearly all types of fruit (see Substitutions) are delicious on these Danishes.
Want to add crumbled Oreos? Go ahead! Chocolate? You bet!
Salted caramel? Now there is a thought!
You get the idea. The Enriched dough base and the cream cheese filling are both endlessly versatile.
I’d love to hear about your creations in the comments below.
Top Tips For Success
- Keep it cool. This is the key secret for working with this rather buttery dough. It should be cooled thoroughly (4h min.) before shaping, to avoid sticky hands.
- Give it time. I know we all want our sweets right now (me too), but a good sourdough takes time. Be sure to let it proof until really fluffy, then shape and rest again until risen noticeably. This will give you the dreamy-soft result like from an artisan baker. Though it’ll probably taste even better.
- Be gentle. This is an enriched dough that balances right along the edge between “Incredibly soft” and sticky mess. Being gentle when shaping it, cooling it well, using a bit of flour and, if needed, a bench scraper, to lift it off the work surface, will pay off in having a workable dough that can handle a lot of filling for its weight.
- Don’t worry about perfect looks. The Danishes will rise and look gorgeously puffy, even if the shaping wasn’t perfect.
- Make the well for the filling deeper than you think it needs to be, as it will bounce back a bit.
Equipment Used
Just the equipment for the Danishes in particular is listed here, as I mention everything needed for the enriched protein dough in the base post.
- Sheet Pan – Two ideally, for baking your Danishes.
- Hand Mixer – Not entirely necessary, but useful for quickly mixing the filling. In a pinch a fork or spoon will do.
- Bowls – One for the cheesecake filling and one for the crumble mix.
- Cookie Scoop – I found this useful for both quickly and evenly pushing the little well in the center of the dough pieces and portioning the cheesecake mix. I used a large one for the well and a medium sized scoop for the portioning.
How to Make this
The Enriched All Purpose Sourdough
- Start the Everything Protein Sourdough three days before you plan to bake these Blueberry Protein Danishes.
- Use half of the recipe for this after the bulk fermentation and fridge time.

- Use the other half for another recipe (like the Brioche from the base recipe, Burger buns, Marzipan Wreath or Garlic Cheese Pull Apart Bread) or make two batches of Danishes (maybe using different fruits?). They freeze really well!
Preparations
- Line 2 sheet pans with baking parchment.
- Grab 2 large plastic bags that will fit your sheet pans and close comfortably while being inflated a bit.
- Lightly flour your work surface and get your tools ready.
Divide The Dough

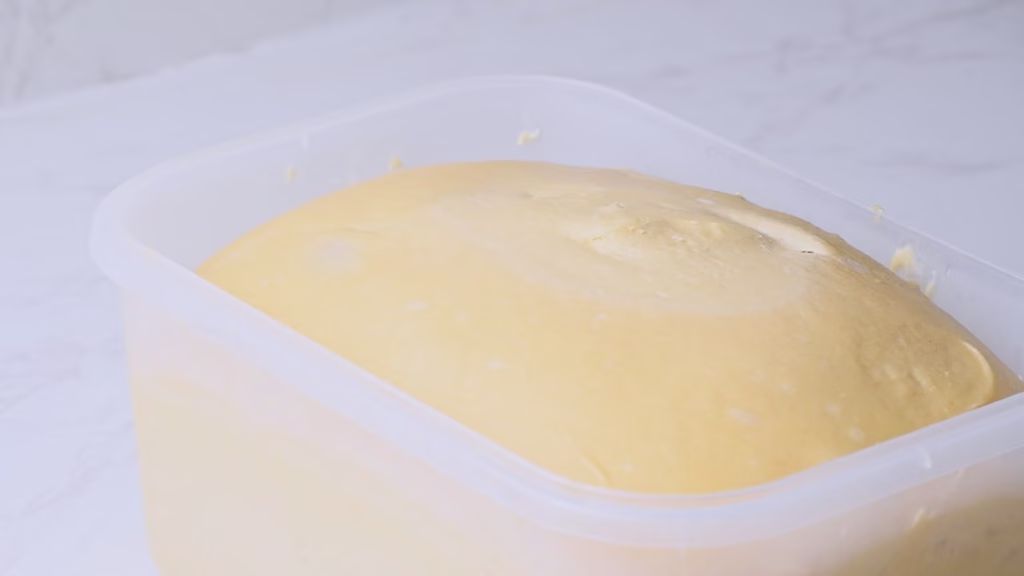
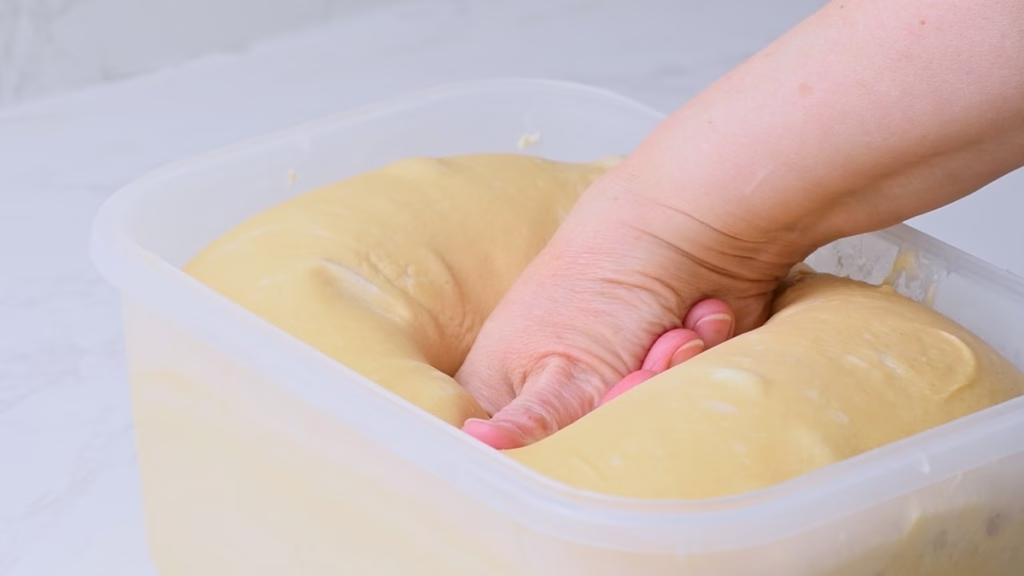
- Divide your base enriched dough into 2 pieces and store one half for another use. It will keep in the fridge for up to 3 days.
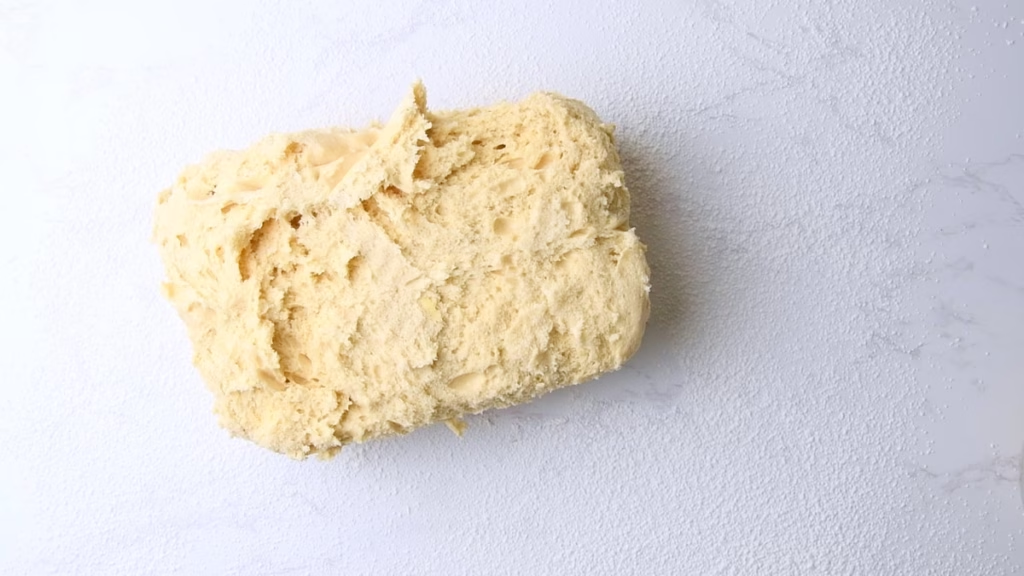
- Lightly flour your worktop and pat the half of the dough you are using out into a rough square or rectangle. You could also use a round shape, but I always feel dividing a rectangle into evenly sized pieces is so much easier!
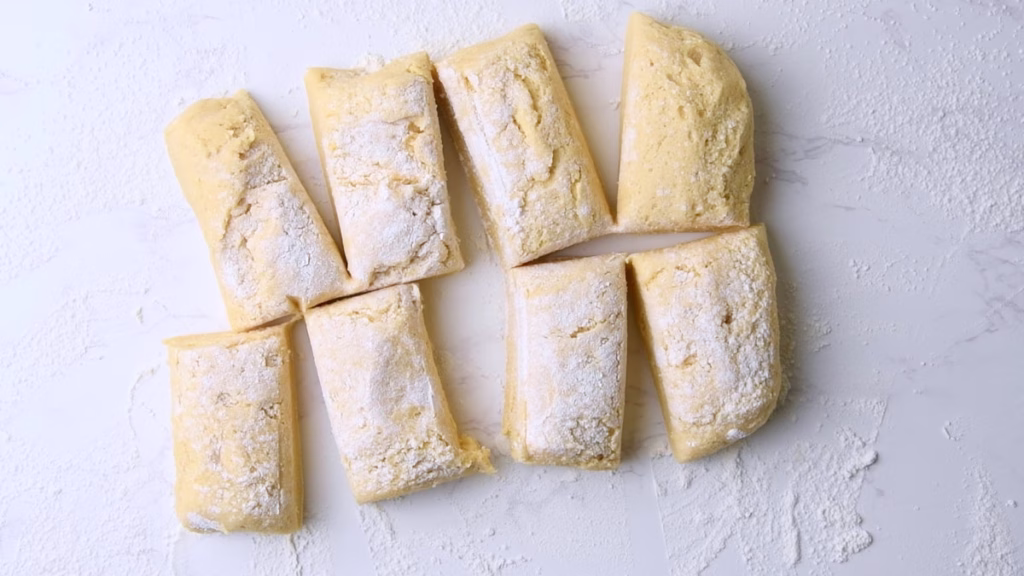
- Divide into 8 evenly sized pieces. I like using food scales for this, but you can just eyeball it. Just keep them roughly the same size, so they bake evenly.
Pre-Shaping Your Danishes

- Aim for about 4 Danishes per sheet pan, to keep enough space between them. You can fit 6 at a push, as I did in the video, but with 8 you may as well give yourself more room.
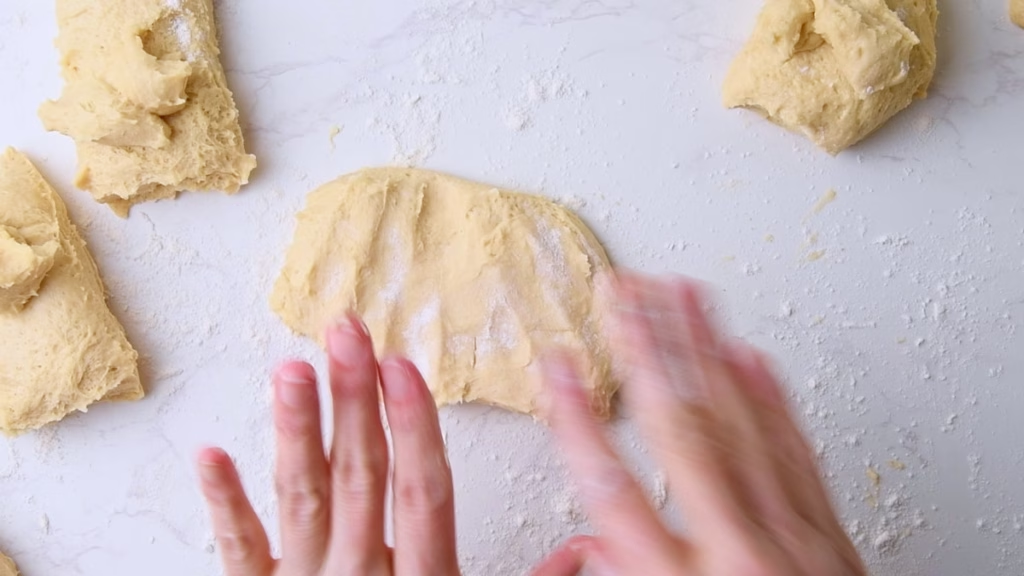
- To shape your Danishes, locate the smooth and less sticky side. It’s usually the side that was on top in your bowl.
- Put that side down in the palm of your hand, then pull up the four corners and push them together, to get a little parcel/garlic bulb shape.
- Flip it over with the “tip” down onto your work surface. Ideally in a spot without flour. It will stick a little bit, but that’s what we want to create tension here.
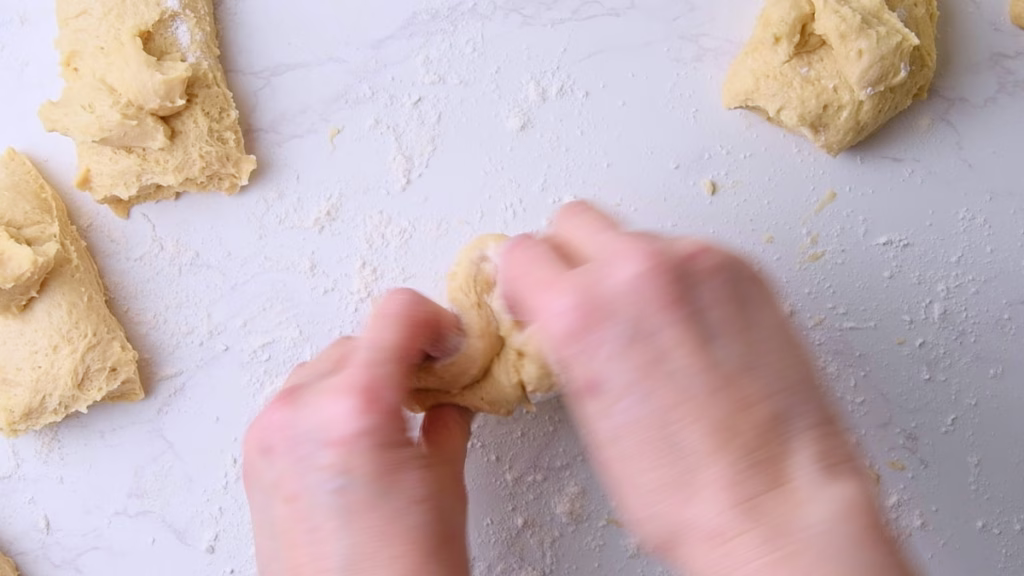
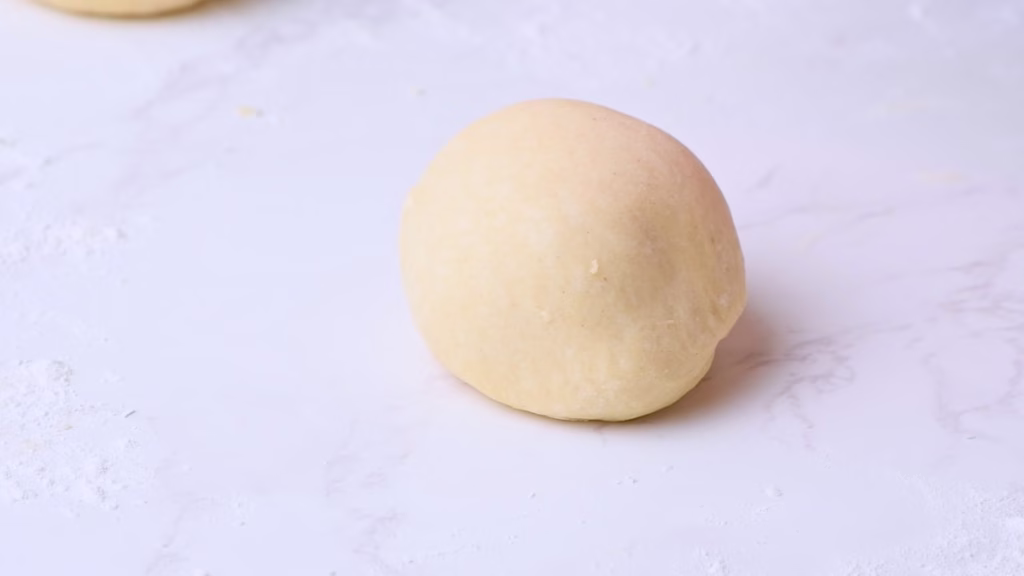
- Now cup your hand over the dough and start moving it in tiny rapid circles, barely touching the top of the dough until it “rises” up a bit and is shaped into one smooth ball with good surface tension.
- Now I like to dip the bottom of my dough ball into a little bit of flour from the worktop, so it doesn’t stick to the baking parchment, in case I need to re-arrange the pieces a bit when flattening.
- Transfer to the parchment lined baking sheet.
- Repeat with the remaining dough pieces.
- Flatten each piece slightly until it’s about ¾ in/1.5cm high.
Last Rise

- Transfer both sheet pans into the plastic bags, inflate slightly and close with a clip or a knot.
- This step will keep the dough from drying out while staying nice and warm.
- Allow your Danishes to rise for about 3-6 hours or until looking very large and puffy.
- In my kitchen, which is around 70°F/21°C this took 6 hours.
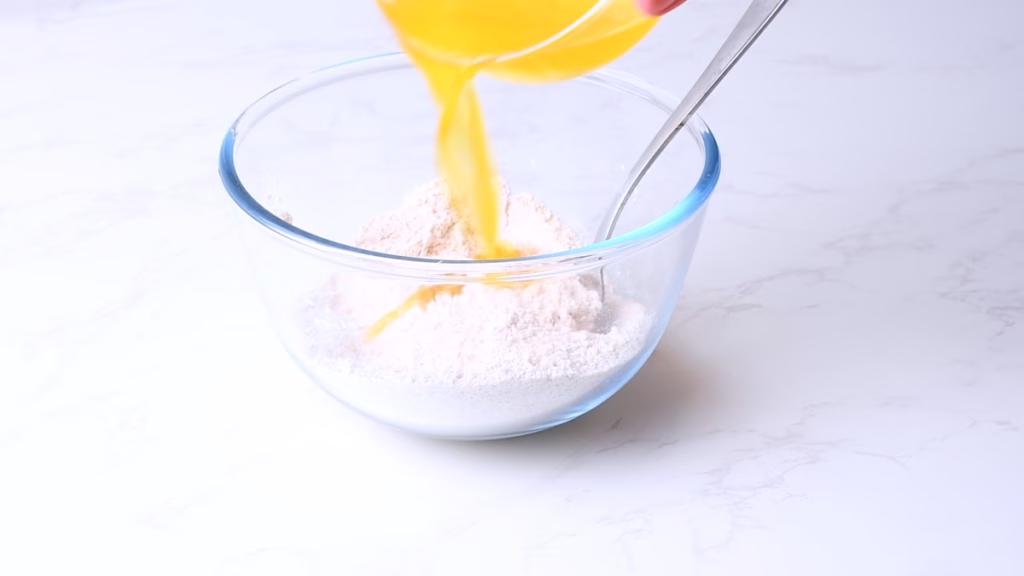
Make The Cheesecake Filling
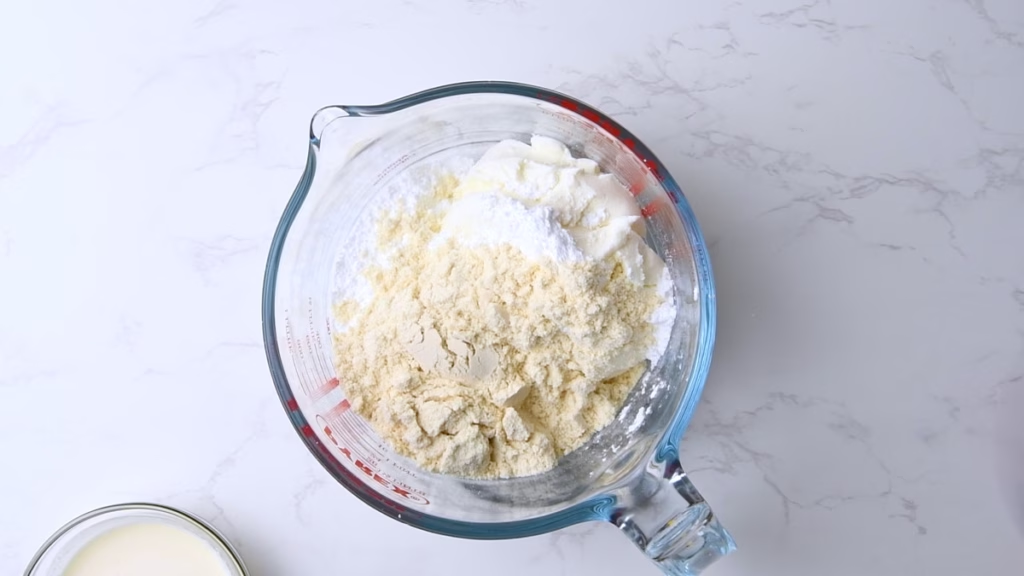

- While the dough is rising, mix all the ingredients for the filling, except the blueberries, in a medium bowl until creamy.
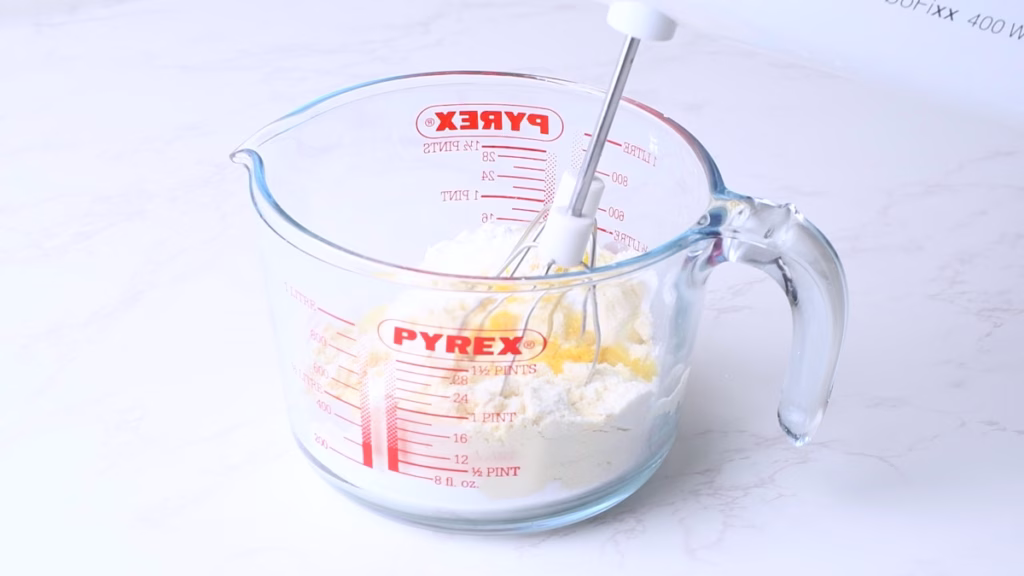
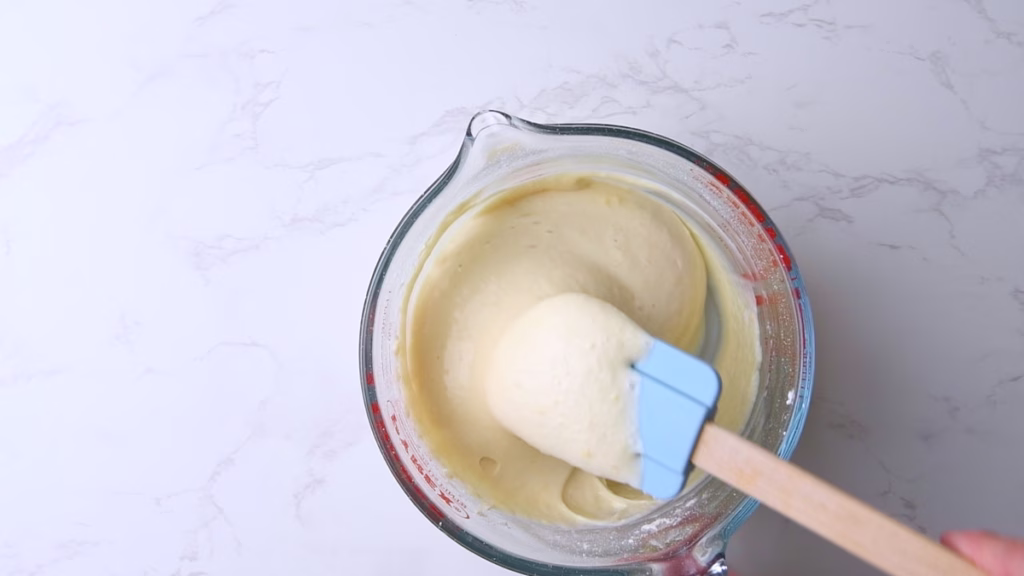
- Taste and see if you feel it needs more sugar or if you’d like to add a bit of vanilla extract. Mine was just right with the amounts given.
- Cover and store in the fridge until needed for up to 3 days.
Crumble Topping
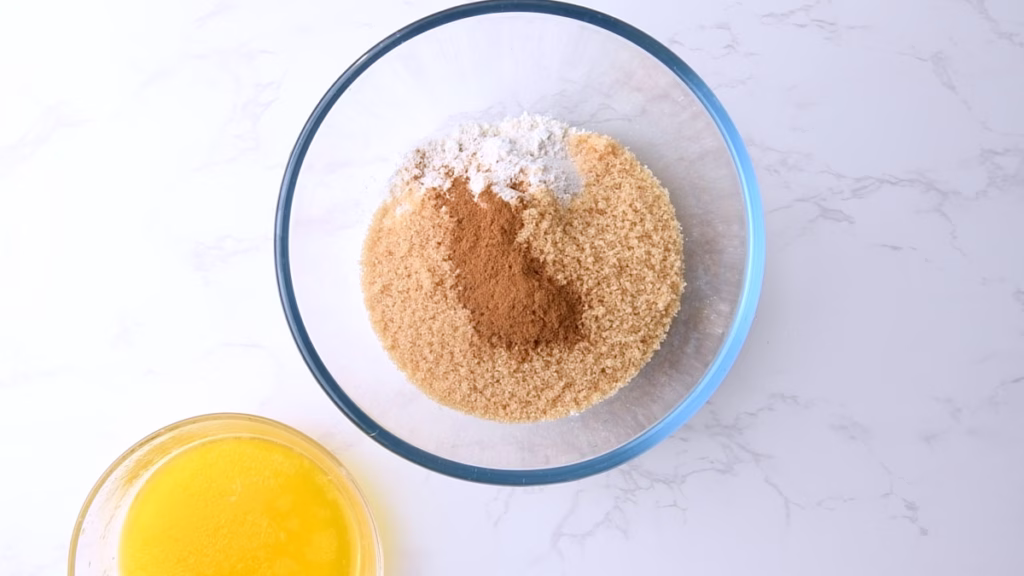
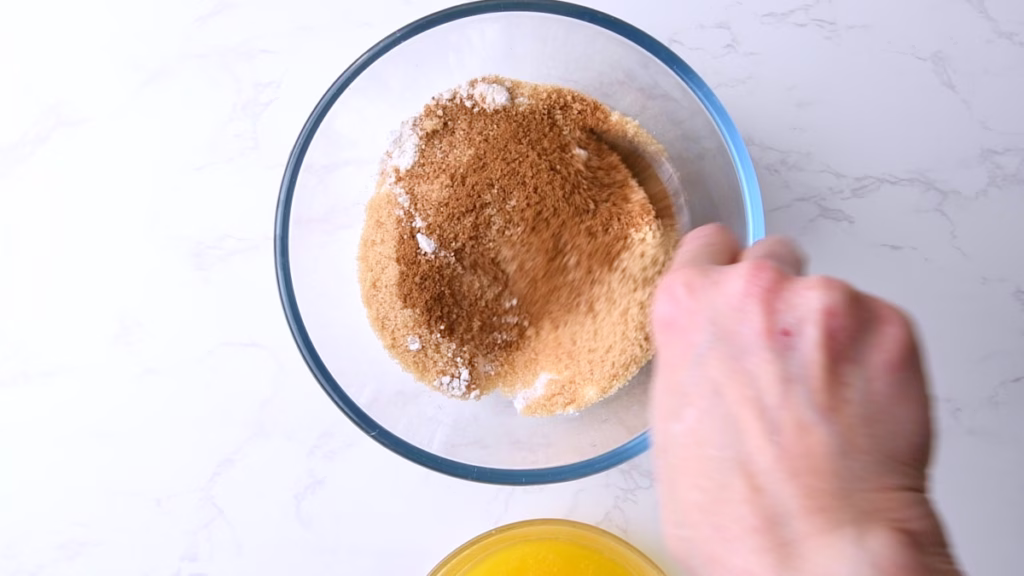
- Melt your butter.
- Using a fork or spoon, stir all the crumble ingredients together until well combined but crumbly.
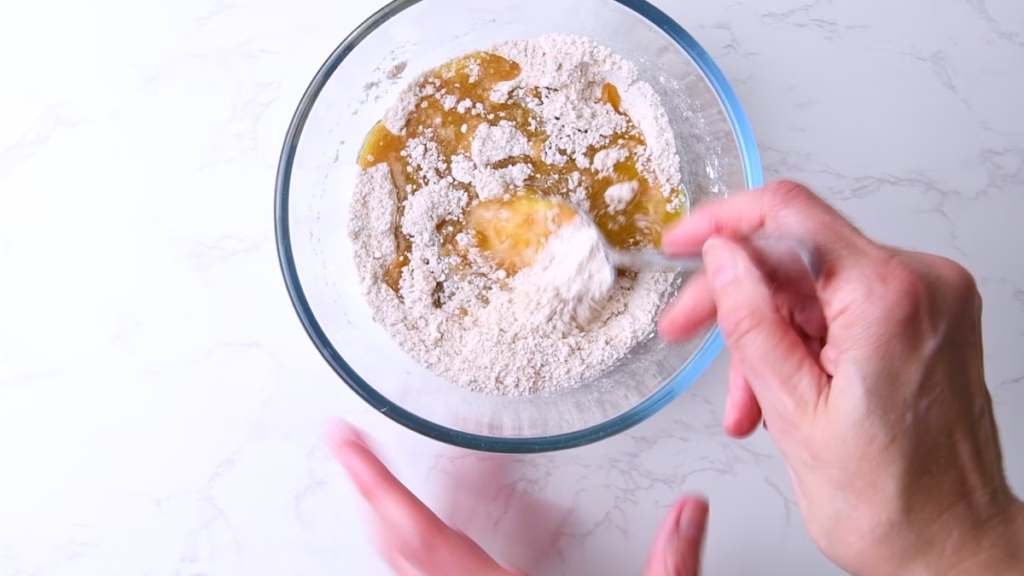
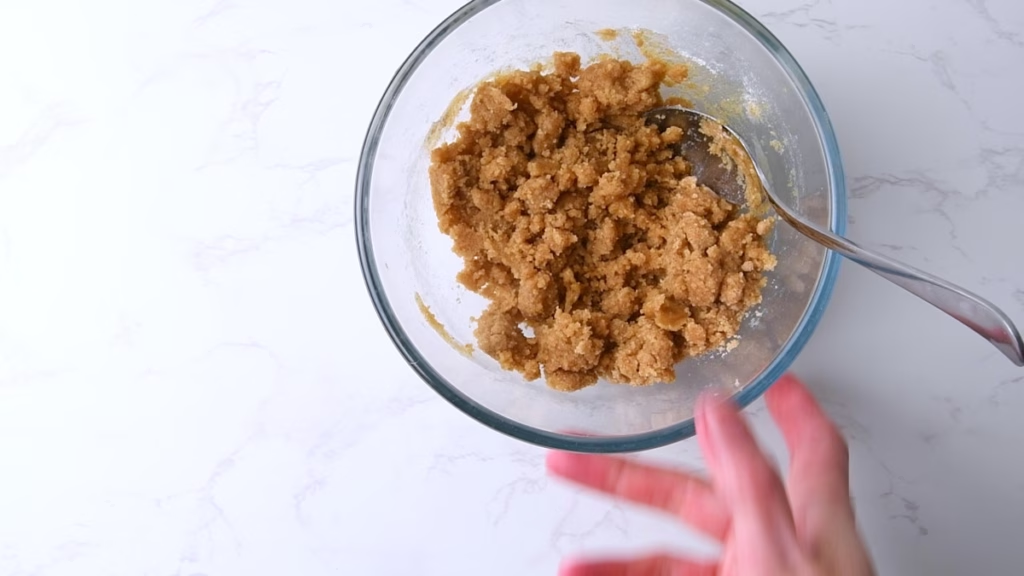
- You can determine the size of the crumbs later.
- Cover and set aside at room temperature.
- If you want to get ahead, you can make this up to 3 days in advance and store it in the fridge, but it’ll need 30 seconds in the microwave before using, so it’ll become soft enough to properly crumble.
Filling Your Blueberry Cheesecake Danishes
- When the dough pieces are nice and puffy, test one by poking it with an oiled finger. It should feel puffy and leave a dent that slowly springs back. If it feels still firm or bounces back immediately, leave it for longer.
- Get a little bowl with flour, to dip fingers or cookie scoop into for shaping.
- You can do this simply by making a well in the middle of each piece of dough with your fingers or, as I did, use the round side of a cookie scoop.
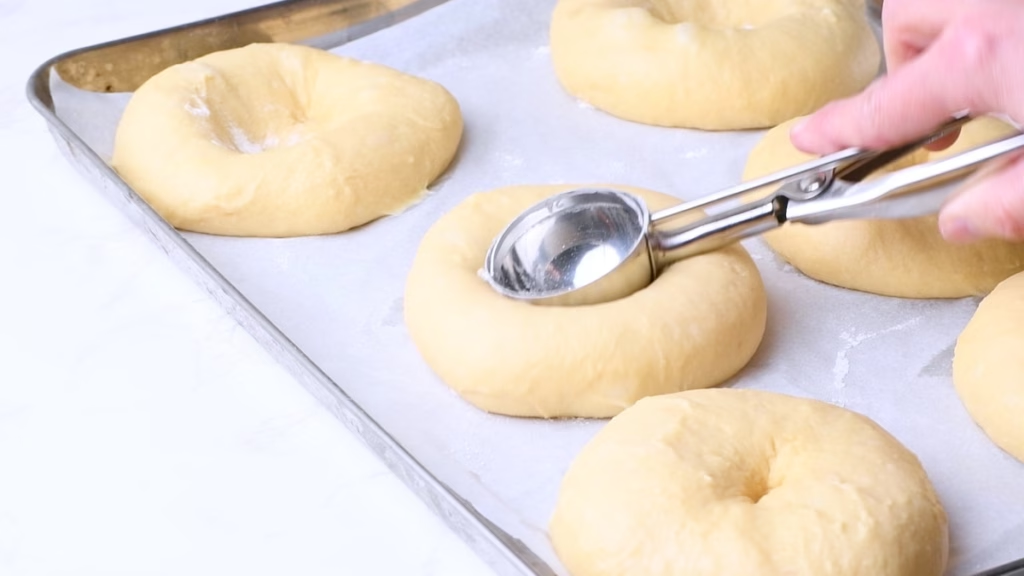
- I dipped the round bottom of the large scoop into flour between pieces, then pushed into the center of the dough until a nice deep well was formed, leaving a thin layer of dough intact to hold the filling.
- The rim will now look really lovely and puffy.
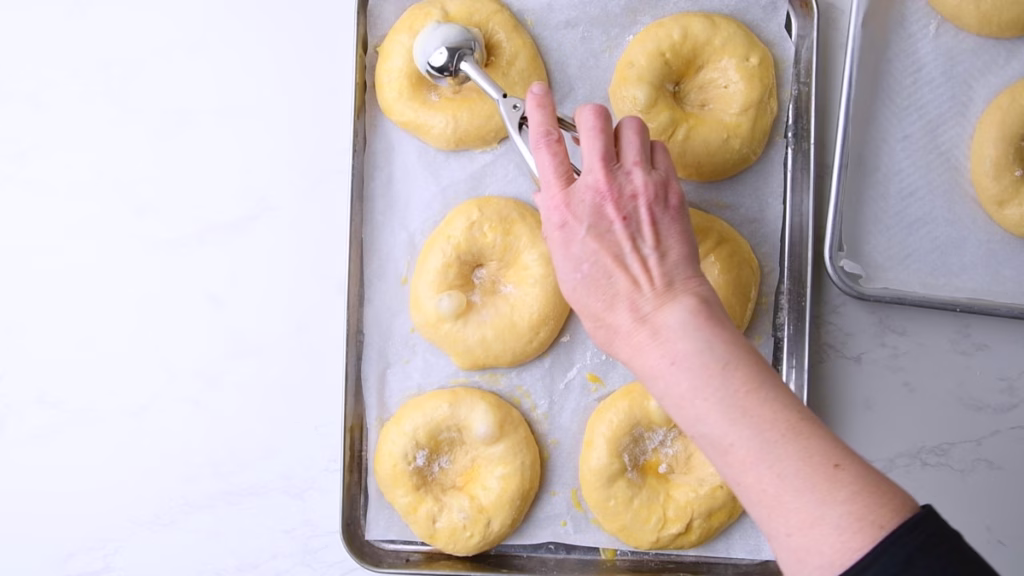
- Now whisk your egg and brush the rim with it to get that lovely dark golden, shiny exterior later and help the crumble stick.
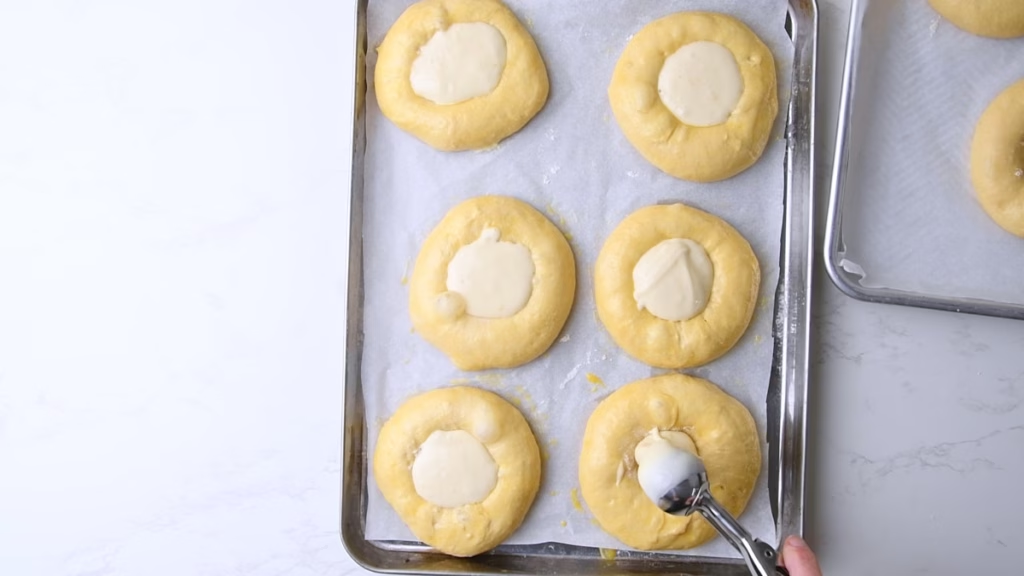
- Fill each Danish with about one medium cookie scoop/ two tablespoons of the creamy cheesecake protein filling.

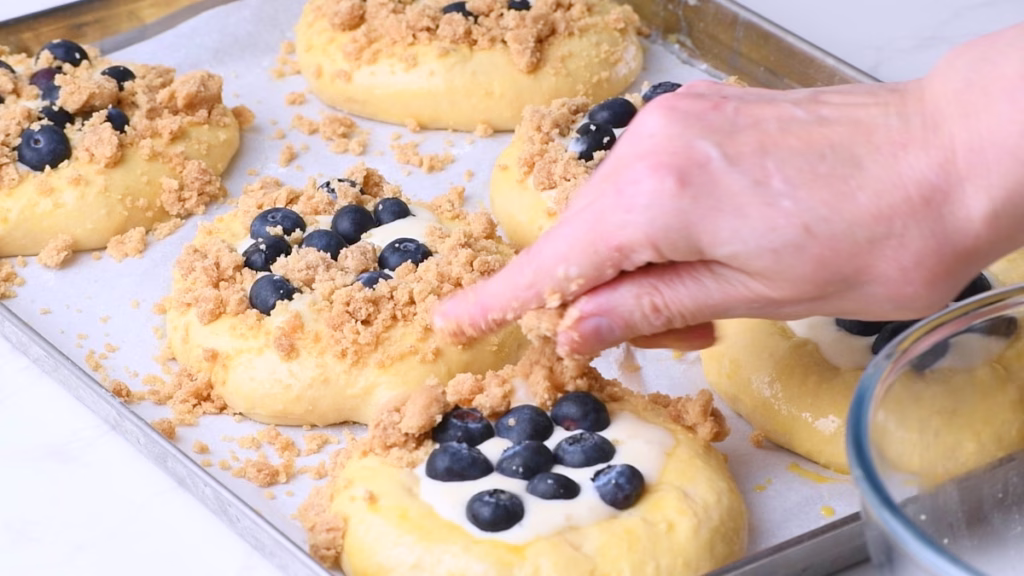
- Tumble a small handful of blueberries onto the filling.
- Then, using your hands to form crumbs of your favorite size (I like a mix best), scatter mostly over the rim of each Danish with the crumble topping.
Baking The Sourdough Danishes
- Pre-heat your oven to 350°F/175°C
- Bake the Danishes for 20-30 minutes or until deep golden brown and baked through.
- Rotate the sheet pan after 15 minutes by 180 degrees for even browning if your oven bakes unevenly as most do.
- If you want to make sure the dough is baked through, you can check with an instant read thermometer inside of the rim. It should read about 190°F/88°C when it is ready.
How To Serve
- Allow the Danishes to cool on the sheet pan for about 10-15 minutes.
- These creamy and incredibly fluffy sweet protein treats are amazing eaten warm with a cup of tea or coffee, but equally good when cooled, especially in summer, when the cheesecake blueberry filling will be really refreshing right from the fridge.
How To Store
They keep best in the fridge (because of the cheesecake filling) for about 3 days in an airtight container or frozen for up to 3 months.
I love to re-heat them before eating in the air fryer for about 7 minutes at 350°F/175°C.
Now I’d love to hear from you in the comments!
Have you tried this? Did you enjoy it?
What other recipes would you like to see?
And if you enjoyed this recipe, please consider rating, sharing, or leaving a comment – your feedback truly helps my blog grow!
FAQ
Since this is an enriched brioche-style dough that needs to lift heavy ingredients like eggs, butter, and protein powder, I recommend using an active, bubbly starter for the best rise. If your discard is very fresh (less than 24 hours old) and still showing some activity, it might work, but your proofing times will likely be much longer.
This dough is high in fat and protein, which makes it incredibly soft (and delicious!). When the butter in the dough is at room temperature, it can be quite sticky and difficult to handle. Chilling it for at least 4 hours—or ideally overnight—firms up the butter, making it easy to slice and shape without a “sticky mess” situation.
I used Whey Protein Concentrate because it blends smoothly into the cheesecake filling. If you use a Plant-Based protein, keep in mind it tends to be much more “thirsty” and might make the filling thicker or slightly grainier. If the filling seems too dry, just add a splash of milk or cream until it’s creamy again.
While I always recommend weighing ingredients for sourdough (especially with the 5-egg hydration balance), you can eyeball the division of the dough. However, for the dough itself, try to use a scale to ensure the protein-to-flour ratio is spot on so your Danishes don’t turn out too dense.
Enriched sourdough moves much slower than a standard loaf because the fats and sugar slow down the yeast. If your kitchen is cool, it might take the full 6 hours (or more) to look puffy. Make sure they are in a draft-free, warm spot. If they look significantly larger and feel like a soft marshmallow when poked, they are ready for the oven!
Absolutely. These stay remarkably soft for 2–3 days thanks to the Tangzhong method. I recommend storing them in the fridge because of the dairy in the cheesecake filling. For that “just-baked” experience, pop them in the air fryer or oven for a few minutes to crisp up the crumble and soften the dough before serving.
Other recipes you might enjoy

Looking for more sourdough protein breakfast ideas? Here are 13 of them!
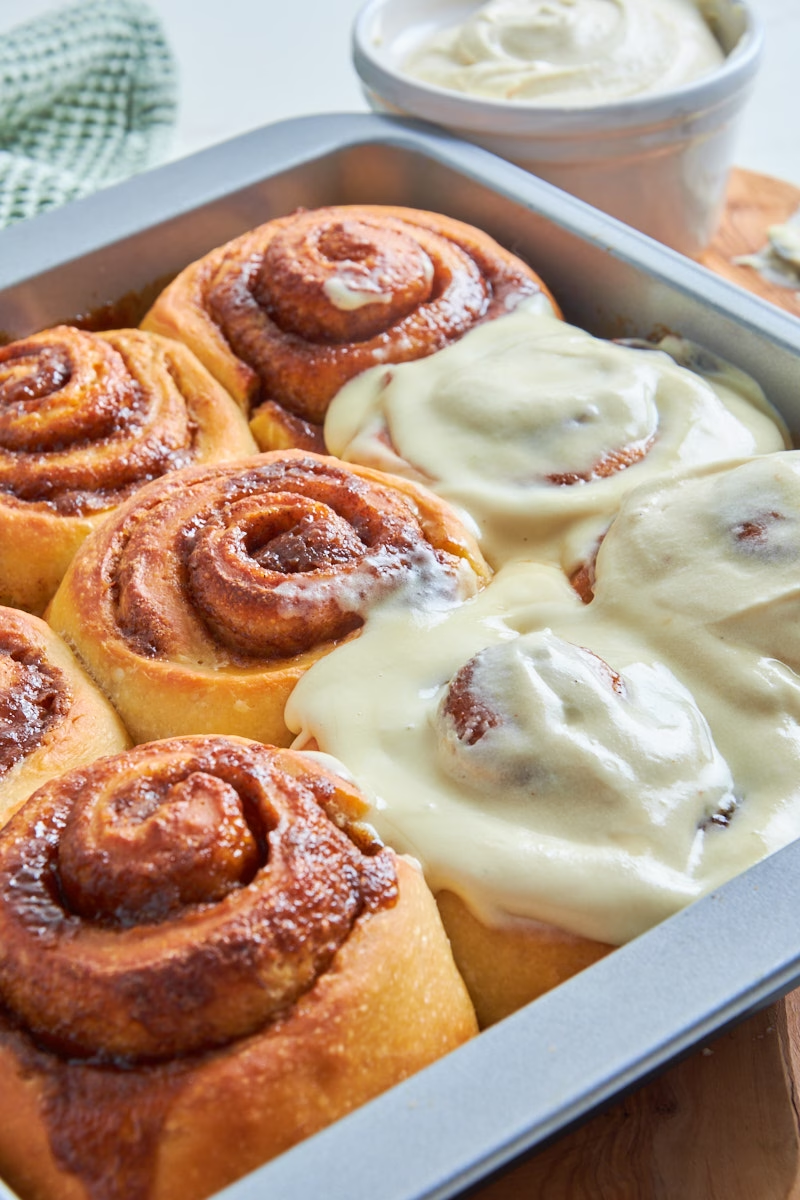
You could use the same dough to make these cinnamon rolls or go with the slightly lighter version I used.

If you are a Bluberry Fan like me, these Blueberry Muffins with Protein and Sourdough are next level!

Sourdough Blueberry Cheesecake Danishes with Protein
- Total Time: 3 days
- Yield: 8 Danishes 1x
Description
If you’ve been looking for a way to have your cheesecake and eat it too—for breakfast—this is it. These Sourdough Blueberry Cheesecake Danishes combine the pillowy softness of a Japanese milk bread with the rich, buttery crumb of a classic Brioche. By using a protein-enriched sourdough base and a creamy cheesecake filling, I’ve created a treat that packs 18g of protein without sacrificing that melt-in-your-mouth texture. Finished with a crunchy brown sugar crumble, these are miles ahead of anything you’ll find at a standard bakery.
Ingredients
Danish Base
- 1/2 portion Enriched Protein Sourdough
Blueberry Protein Cheese Filling
- 1/2 cup/113g cream cheese, softened
- 2 tablespoons/30ml cream
- 1/4 cup/60g powdered sugar
- 1 scoop/30g whey protein concentrate, vanilla ideally (or more powdered sugar)
- Zest from 1/2 lemon
- 1 tbsp lemon juice
- 1/2 cup blueberries (or more to taste)
Crumble Topping
- 1/4 cup/60g unsalted butter, melted
- 3/4 cup/90g all-purpose flour
- 1/4 cup/60g brown sugar
- 1/2 teaspoon ground cinnamon
- 1 egg for brushing
Instructions
The Enriched Sourdough
- Start the Everything Protein Sourdough three days before you plan to bake these Blueberry Protein Danishes.
- Use half of the recipe for this after the bulk fermentation and fridge time.
- Use the other half for another recipe (like the Brioche from the base recipe, Burger buns, Marzipan Wreath or Garlic Cheese Pull Apart Bread) or make two batches of Danishes (maybe using different fruits?). They freeze really well!
Preparations
- Line 2 sheet pans with baking parchment.
- Grab 2 large plastic bags that will fit your sheet pans and close comfortably while being inflated a bit.
- Flour your work surface lightly
- Get all your tools
Divide The Dough
- Divide your base enriched dough into 2 pieces and store one half for another use. It will keep in the fridge for up to 3 days.
- Lightly flour your worktop and pat the half of the dough you are using out into a rough square or rectangle. You could also use a round shape, but I always feel dividing a rectangle into evenly sized pieces is so much easier!
- Divide into 8 evenly sized pieces. I like using food scales for this, but you can just eyeball it. Just keep them roughly the same size, so they bake evenly.
Pre-Shaping Your Danishes
- Aim for about 4 Danishes per sheet pan, to keep enough space between them. You can fit 6 at a push, as I did in the video, but with 8 you may as well give yourself more room.
- To shape your Danishes, locate the smooth and less sticky side. It’s usually the side that was on top in your bowl.
- Put that side down in the palm of your hand, then pull up the four corners and push them together, to get a little parcel/garlic bulb shape.
- Flip it over with the “tip” down onto your work surface. Ideally in a spot without flour. It will stick a little bit, but that’s what we want to create tension here.
- Now cup your hand over the dough and start moving it in tiny rapid circles, barely touching the top of the dough until it “rises” up a bit and is shaped into one smooth ball with good surface tension.
- Now I like to dip the bottom of my dough ball into a little bit of flour from the worktop, so it doesn’t stick to the baking parchment, in case I need to re-arrange the pieces a bit when flattening.
- Transfer to the parchment lined baking sheet.
- Repeat with the remaining dough pieces.
- Flatten each piece slightly until it’s about ¾ in/1.5cm high.
Last Rise
- Transfer both sheet pans into the plastic bags, inflate slightly and close with a clip or a knot.
- This step will keep the dough from drying out while staying nice and warm.
- Allow your Danishes to rise for about 3-6 hours or until looking very large and puffy.
- In my kitchen, which is around 70°F/21°C this took 6 hours.
Make The Cheesecake Filling
- While the dough is rising, mix all the ingredients for the filling, except the blueberries, in a medium bowl until creamy.
- Taste and see if you feel it needs more sugar or if you’d like to add a bit of vanilla extract. Mine was just right with the amounts given.
- Cover and store in the fridge until needed for up to 3 days.
Crumble Topping
- Melt your butter.
- Using a fork or spoon, stir all the crumble ingredients together until well combined but crumbly.
- You can determine the size of the crumbs later.
- Cover and set aside at room temperature.
- If you want to get ahead, you can make this up to 3 days in advance and store it in the fridge, but it’ll need 30 seconds in the microwave before using, so it’ll become soft enough to properly crumble.
Filling Your Blueberry Cheesecake Danishes
- When the dough pieces are nice and puffy, test one by poking it with an oiled finger. It should feel puffy and leave a dent that slowly springs back. If it feels still firm or bounces back immediately, leave it for longer.
- Get a little bowl with flour, to dip fingers or cookie scoop into for shaping.
- You can do this simply by making a well in the middle of each piece of dough with your fingers or, as I did, use the round side of a cookie scoop.
- I dipped the round bottom of the large scoop into flour between pieces, then pushed into the center of the dough until a nice deep well was formed, leaving a thin layer of dough intact to hold the filling.
- The rim will now look really lovely and puffy.
- Now whisk your egg and brush the rim with it to get that lovely dark golden, shiny exterior later and help the crumble stick.
- Fill each Danish with about one medium cookie scoop/ two tablespoons of the creamy cheesecake protein filling.
- Tumble a small handful of blueberries onto the filling.
- Then, using your hands to form crumbs of your favorite size (I like a mix best), scatter mostly over the rim of each Danish with the crumble topping.
Baking The Sourdough Danishes
- Pre-heat your oven to 350°F/175°C
- Bake the Danishes for 20-30 minutes or until deep golden brown and baked through.
- Rotate the sheet pan after 15 minutes by 180 degrees for even browning if your oven bakes unevenly as most do.
- If you want to make sure the dough is baked through, you can check with an instant read thermometer inside of the rim. It should read about 190°F/88°C when it is ready.


Notes
How To Serve
- Allow the Danishes to cool on the sheet pan for about 10-15 minutes.
- These creamy and incredibly fluffy sweet protein treats are amazing eaten warm with a cup of tea or coffee, but equally good when cooled, especially in summer, when the cheesecake blueberry filling will be really refreshing right from the fridge.
How To Store
- They keep best in the fridge (because of the cheesecake filling) for about 3 days in an airtight container or frozen for up to 3 months.
- I love to re-heat them before eating in the air fryer for about 7 minutes at 350°F/175°C.
- Prep Time: 1 hour 30 minutes
- Fermentation/Rise: 24 hours
- Cook Time: 30 minutes
- Category: Bread & Sourdough, Breakfast, Dessert, Protein Breakfast, Protein Dessert, Protein Sourdough Recipes
- Method: Baking
- Cuisine: American


These were soft, rich, and so good with the blueberry cheesecake filling. The sourdough base, brown sugar crumble, and extra protein make them feel like a bakery treat with a fun breakfast twist.
Aww thank you, that’s so kind. 🙂
Used frozen blueberries straight from the freezer like you suggested and the filling stayed so creamy. That brown sugar crumble is everything!
Crumble makes everything better!
So happy to hear you liked them. 🙂
My family loved these! Delicious!
Thank you, happy to hear!
The filling and crumble are SO good. These don’t taste healthy at all!
Aren’t they just? Thanks so much for commenting. 🙂