High Protein Sourdough Sandwich Bread
This soft and moist High Protein Sourdough Sandwich Bread uses cottage cheese, seeds and protein powder to get up to about 9g of protein per slice or about 18%, making it a great choice for anyone aiming to increase their protein intake while enjoying an actually delicious slow fermented bread, that is just as healthy for your gut as it is for your muscles. Plus it really tastes like a sourdough sandwich bread should: Fluffy, sturdy enough for any toppings, lots of flavor. No compromise.

This post may contain referral links for products I love.
For The Pleasure Of Eating earns a small commission on these links at no cost to you.
- Why You’ll Love This
- The Ingredients
- Substitutions
- Equipment Used
- How to Make this
- How To Store
- FAQ
- Other Recipes You Might Enjoy
Why You’ll Love This
TL;DR
TL;DR: Love sourdough but want more protein? This bread is for you!
- High Protein Powerhouse: Get ~9g of protein per slice (18% of the bread’s weight!) thanks to cottage cheese, seeds, and protein powder.
- Seriously Delicious: Enjoy the classic soft, sturdy sourdough sandwich bread you crave, without compromise on flavor or texture.
- Gut-Healthy & Muscle-Friendly: Slow fermentation aids digestion, while the added protein fuels your muscles.
- Versatile & Easy: Perfect for any sandwich topping, and surprisingly simple to make, even with an unfed sourdough starter.
Inspired by the desire for really good bread
During my weight loss journey I discovered I need decidedly more protein than I was getting in my everyday diet. I didn’t want to increase my meat intake and am, unfortunately, not the biggest fan of legumes. So my options where limited.
Since I absolutely love sourdough bread, I wished I would find one that had a high protein content, supplementing my diet while letting me eat what I love most (well…beside desserts that is!), but wasn’t keen on the options I found. Sure, the recent hype around cottage cheese bread has a place. And it partially gave me the idea for a sourdough bread with cottage cheese and protein. But the texture and flavor of the viral version left a lot to be desired for me.
And maybe for you too, considering you found this post looking for a healthy, high protein sourdough bread recipe.
So I started experimenting, building upon my Whole Wheat Sourdough Sandwich Bread recipe.
I decided to make the first version a white loaf for versatility and to get an easy jumping off point for future recipes. It came out so fabulous, that I just have to share it with you!
Why do I use Sourdough?
I can’t count how many times I’ve said it, but I’ll say it again: Sourdough is really good for you!
Not does the slow fermentation make this an easier digestible protein bread, there are also studies showing that even people with celiac disease can tolerate it better than for example yeasted bread.
Plus sourdough bread, due to the fermentation, raises your bloog sugar slower, making it great at preventing hunger pangs shortly after eating. A fact I used to my advantage while losing 70lb in a year.
And it just has so much more flavor.
Incorporating Protein Powder
While there are a few recipes using cottage cheese in sourdough bread, I was aiming for a decidedly higher protein percentage. Egg whites came to mind, but frankly I’d rather use fewer eggs these days if I can with the prices, availability, and chicken welfare in mind.
Also separating several eggs to have egg yolks leftover every time I’m baking bread just didn’t appeal to me.
Deciding to opt for flavourless whey protein powder, which is a very practical and shelf stable option, especially if you are using it in recipes anyway, I ran into some issues: My bread kept turning out way too squidgy inside. It looked great outside, but not matter the baking time, seemed to hold on to way too much liquid.
“Strange!” I thought, considering I was already replacing ¼ of the flour in my sweet baked recipes without any issues!
The lightbulb moment came when I researched the properties of protein powder: It holds on to water like a sponge! And while this sounds counter-intuitive at first, it meant I had to reduce the water content in my bread. Plus of course the cottage cheese acted as a fluid. As soon as I made that change, my bread baked absolutely fabulous!
Why Do I Add Protein?
You mean apart from the well known physical benefits of protein for the body like helping you to build muscle, keeping your bones strong and increasing satiation, meaning you stay fuller for longer and with that can maintain your weight easier?
Lesser known is, that it also effects the brain by helping it to effectively transport information through neuropathways using the amino acods found in Protein.
This even has been shown to help protect from age related dementia.If you’d like to read more about how and why I use protein, I wrote a blog post about it.
And another one about my weight loss journey, shedding 70lb within 1 year. Protein played a big part in that too!
With all those benefits, it’s no surprise that the recipes containing both sourdough and protein were popular enough for me to shift my focus.
Cottage Cheese, but not too much
I’ve been starting to wildly experiment with cottage cheese in my recipes recently and found it to be incredibly versatile. My Cottage Cheese Fried Pickle dip was the first I published, but you can look forward to a lot more. Next will be Cottage Cheese Overnight Oats that taste like cheesecake!
Anyway, back to this bread:
Since the cottage cheese is blended you won’t taste any of it. Instead it acts as additional fluid, replacing part of the water and providing just a tiny bit of tang together with the sourdough. Because I’m using just ½ a cup for the whole dough, it doesn’t give the intense chewiness you find in the viral cottage cheese bread recipes, but the dough remains lovely and soft. Yet it adds to the overall protein increase.
High Protein Bread Flour
Using Bread flour adds even more protein, which is used to develop a stronger gluten structure, leading to the super high rise of this loaf and its ability to hold all your favourite toppings between two slices without falling apart. Just like a proper sandwich bread should.
Seeds to add even more protein and crunch
While seeds sound like a bit of an unusual addition to sandwich bread, they do add a good amount of protein plus lots and lots of deliciously nutty flavor with a bit of crunch. Not so much that it would disturb the soft sandwich experience though.
You can adapt them to your taste (nuts would be great too) and your store cupboard contents. The recipe is very flexible that way.
Oh and they make this loaf so pretty when you add them to the top!
So how much protein do we get?
This bread clocks in with about 18% protein or about 9g per slice. The latter depends of course on the size of your slices, hence the percentage given. I’ve assumed about 24 slices for the calculation, which is pretty standard for a loaf of sandwich bread.
This is quite the jump, compared to a “classic” sourdough loaf, containing about 7-10% protein.
The Sourdough, but simple
Now, we can’t forget the sourdough, which makes this high protein sandwich bread not just delicious, but also really good for your gut due to the slow fermentation process.
During my testing I made this with fed and unfed starter (because I sometimes forget to feed but really want to bake bread!) and found as long as you give it enough time, the results will be fabulous either way.
That being said, when I talk “unfed” it means my starter was probably fed about 3-4 days ago the last time. Any longer than that and I’d probably just wait a day until it’s happy and bubbly again. The final picture here is a bread I made with unfed starter (because I’m scatterbrained).
While this one is with active starter, though taken with my mobile, hence the lack of proper lighting and quality. But I figured I show you both, so you can decide for yourself.
For me, honestly, sometimes the ability to just throw a bread together when I have a few minutes trumps the desire for “perfect”. Seriously delicious bread is good enough for me.
We have plenty to stress about in our lives. Bread really does not have to be another one of them.
Oh btw, the most I feed my very reliable starter before baking is once. The evening before. I just roughly double it, eyeballing the amounts and texture and it works.
Benefits of sourdough for protein absorption
While there is a common misconception that sourdough adds protein, the reality is a little more complex: The protein in your typical sourdough bread loaf mainly comes from the flour you use and lies between 7-10%.
What the sourdough starter does during the fermentation time is, breaking down the protein in said flour into smaller and easier digestible molecules, enhancing its bioavailability to the body.
It also reduces anti-nutrient like phytic acid, which can bind to minerals and proteins, leading to better absorption of both. Using high protein bread flour enhances all of these effects.
But more importantly: The lactic acid bacteria in sourdough are just as happy to break down the protein in whey and cottage cheese, reducing the lactose as they go.
This means that your body can use even those added proteins better (not just the ones from the flour) and the lactose will affect you less, which is great news for those of us with an intolerance to it.
In short: If you add more protein to a loaf with sourdough, your body can use it better, making it a fabulous choice for anyone wanting to grow muscle or simply increase their protein intake.
I wrote a whole post on why I use sourdough with added protein and how it benefits you here.
Following this, here are 10 delicious Sourdough Protein Recipes.
Why I Often Make 2 At Once
I’m a big fan of meal prep and my freezer is usually well stacked with different breads and soups.
So usually when I make this bread I bake 2 and freeze them in halves to use one for sandwiches and one with my favorite Vegan Tom Kha Soup. It hold up so well when dipping it into the fragrant coconut broth!
If you are brand new to sourdough
If this is your first sourdough loaf and you’d like to create your own starter, I have a super simple recipe for rye starter that is transferable to white starter made with all purpose flour. Which is what I used for this loaf.
The recipe is as simple as using water and flour in a 1:1 weight ratio, doubling it every day.
I suggest you weigh the flour and water the first week or so, to get a good feel for the right consistency. And over time you’ll just be able to estimate it. Sourdough starter is incredibly forgiving!
I once left mine for about 3 months (That was during the start of my weight loss journey and trying Keto. Failing miserably.) and it was still alive after I fed it twice.
The only thing you might want to do when you forget it for so long, is to pour out the liquid and scrape off the top layer.
Unless you find mold (in which case you should discard it and start new), you can probably revive it.
Ingredient Notes

Note:
Cups, due to the possibility of compacting the flour while dragging the container through it, can give you wildly different results. Use a tablespoon to gently fill the cup with flour, then drag the back of a knife over it to level. This should give you the closest to the standard 120g per cup of flour.
Alternatively, if you have kitchen scales, assume 120g flour per cup and weigh it out.
In many of my recipes I will give gram measurements for this reason, but you can always switch to the american measurements in the recipe card.
- Bread Flour – Often called “Strong flour” for its high protein content and great gluten development. The structure of bread using this type of flour is often more stable, as the gluten strands are stronger, helping with oven spring due to trapping the air in the dough.
- Sourdough starter – This is what will ferment, produce the air bubbles and typical gentle tang, while making the bread easier to digest
- Honey or sugar – feeds the yeast bacteria, balances the sourdough flavor and helps with browning due to caramelising
- Salt – not only enhances flavor but also strengthens the gluten network by interacting with protein molecules, allowing for a stronger structure. It slows fermentation to prevent over-proofing, which helps develop the distinctive sourdough flavor. Additionally, salt aids in browning by preserving essential sugars for the Maillard reaction and improves shelf life by retaining moisture in the crumb, slowing staling
- Butter – Is a bond-breaking component in bread dough, inhibiting gluten development, leading to a soft and tender crumb with a fine structure. Unlike “typical” sourdough bread, this serves to hold all your butter and other toppings in place instead of them falling through big bubbles.
- Cottage cheese – Provides moisture and adds to the butters gluten inhibiting ability with its fat content, leading to a more even crumb. It boosts protein, plus provides calcium and other nutrients.
- Protein Powder – Absorbs water like a sponge. Boosts protein, but not the gluten kind. It essentially acts similar to the flour, but without the gluten structure, hence we can’t use too much without risking the structure of the bread.
The whey, due to the lactose in it, also helps with browning because of its sugar and amino acid content (even in unsweetened versions). Which leads to an absolutely beautiful crust in this loaf and a high rise as it helps feeding the sourdough bacteria. - Mixed seeds – I chose pumpkin, sunflower, sesame and hemp seeds for both their protein content and flavor. You can leave them out or swap for other seeds, but be mindful that this will influence both the protein content and may influence the structure. Chia and linseeds for example soak up a lot of water, so you might have to add a bit more.
Optional:
Egg – as egg wash, for extra beautiful shine and browning and to attach more (also optional) seeds to the top.
substitutions
- Flour – You can use all purpose flour, but it will have an impact on the protein content and structure of this bread. Whole wheat would also work, though you’ll probably need to add a bit more water. I’ll be posting a whole wheat version in the future, but figured I’d give you the white one first, considering most people seem to prefer it.
- GF flour is a lot trickier and would, again, influence the protein content. I’d advise to consult the book “The Elements of Baking” which gives calculations for replacing ingredients for Gluten free baking.
- Butter – Coconut oil will work in place of butter, though you’ll taste the coconut. If you enjoy that, go ahead.
- Cottage Cheese – Now that’s where it gets tricky if you want to keep the protein content. Low fat Greek yoghurt might be an option, though I haven’t tried it yet. Buttermilk would work, but again: Protein is lower. For vegan options I’m unfortunately not sure, as I haven’t seen any vegan cottage cheese or similar with high protein.
- Protein Powder – Both whey and casein will work. You may try pea protein in case of a vegan diet, but I haven’t tried it myself as I just cannot stand the taste of it. If you do, I’d love to hear about it!
- Honey – I love to use barley malt syrup instead of honey. The only reason I haven’t done so here is, that not everyone has it at home. It adds a lovely malt flavor to the loaf and helps with browning. Maple syrup or coconut sugar will also work.
- Seeds – Use any seeds you like and have at home. Poppy seeds make a lovely inclusion, so do Nigella seeds with their onion-y flavor. Or finely chopped nuts like walnuts, pecans, cashews or hazelnuts.
- Salt – Please don’t replace or leave out the salt. As explained above it’s quite essential.
- Optional egg wash – You could use some melted butter or plant milk instead, both will give shine and more browning. The butter will leave the crust softer.
Equipment Used
- Measuring cups – For most ingredients
- Kitchen scales – While I have given cups for the flour, it’s 900g in the recipe. If you choose to use cups, please check my note below on measuring flour, as it can be wildly off when using cups.
- Blender – I’m using a Nutribullet for this, but any blender will work to get the cottage cheese smooth and mixed with the protein powder
- Stand Mixer – A note on this for bread recipes: I recently got a brand new Kitchen Aid, thinking they last a lifetime and are made for kneading bread. Hmm yeah. About that. I had to learn the hard way that the artisan series can struggle with heavier bread dough.
So I would recommend, if you use it, to only switch it to the first gear and stand beside it the whole time of the kneading. If you feel it strains, switch it off and finish by hand. This dough is very non-sticky and easy to work with, so that should be fine.
Meanwhile, I’m using my over 15 years old Kenwood Major Chef, which has kneaded hundreds of bread doughs without complaints and am waiting for my Kitchen Aid to be back from its repair.
I still use the Kitchen Aid glass bowl I got for pictures though, as it’s much better for showing you the dough. - Loaf Pan – I’m using this Nordic Ware Loaf Pan and am very impressed with how high my bread rises and how even the browning comes out.
 Buy Now →
  Buy Now →
  Buy Now →
  Buy Now →
  Buy Now →
 How to Make this
2 days before baking
In an ideal world, you would feed your sourdough 2 days before planning to bake this bread. If you didn’t don’t despair. As long as you fed it within the last, say 4, you’ll be grand. There might be a tiny bit less rise, but the bread will still be perfectly delicious, as the sourdough catches up during the overnight fermentation.
With a very active and freshly fed starter, I managed to mix the bread dough early in the morning and bake in the evening. However it needs at least 2h to cool, so plan with that. I cut into my first one too early and it resulted in an underbaked center with a hole.
1 day before baking
I usually start my bread in the evening with enough time for a few optional stretch and folds during the bulk ferment. So about 2h before going to bed/settling in with some Netflix.
Either melt your butter and let it cool completely or let it soften outside the fridge. Just don’t use it either hot or fridge cold. Both versions won’t incorporate well and have different undesirable effects for this particular dough. Put it to the side until after the autolyse.
Blend cottage cheese and protein powder
Using about ½ cup of the water in the recipe, start by blending the cottage cheese. I usually do this in my Nutribullet, as the Vitamix is a bit too big for the task. But any blender will work. Or in doubt even a food processor. As long as it breaks up the curds into a smooth liquid.


Add the protein powder and honey. Briefly blend again until no lumps are left.
Now, you might be tempted to throw in the protein powder right with the cottage cheese, but from the experience of the clumped up mess I scraped out of my blender: I wouldn’t advise you to. It becomes perfectly smooth though as soon as the cottage cheese is liquified first.
Mix the wet
Stir the blended cottage cheese-protein into the remaining water and sourdough starter. I’m using a dough whisk, but a simple spoon, whisk or fork will do just fine.


Mix the Dry
I realise that many recipe fold in the seeds last. And sure, you can do that. Personally, I’m lazy and at least with seeds that are fairly small and don’t break apart much, I simply include them into the flour from the start. If you are using larger nuts that you’d like to keep the size they are, wait until you are shaping the loaf. Add the salt to the flour as well.
Mix the wet into the dry


I usually start the mixing with a wooden spoon or spatula. I would show you in a video, but my light broke after just 4 months of use. *sigh*. Another item waiting for a repair. You think I have bad karma around electrical devices?
Anyway, back to the dough: Once roughly mix, either knead the dough by hand for about 10 minutes or in your stand mixer with the dough hook on low for about 5 minutes.

Assess your dough: Is it too wet? Add a little flour at a time until it comes away from the sides of the bowl.
Is it too dry? Add a little water, a tablespoon at a time until it feels pliable but not mushy.
Autolyse
Let is stand for the autolyse for about 20 minutes. This allows the flour to absorb the water and the gluten to start developing, before the addition of butter coats some of the flour and slows it down.
Again, it is possible to skip this and add the butter from the start, but the rise and gluten development will be impacted.
Add butter
With a stand mixer this is really easy: Add the butter in 2 parts, allowing the mixer to incorporate it into the dough. At first it will look as if the dough is just sloshing around in the butter, but don’t worry, it’ll be worked in over time. Add the second half once the first is worked in nicely.
By hand, stretch out the dough a bit (I would firmly vote for just softened and not melted butter here), spread half on the butter over it, fold the dough over and knead it in. Then repeat with the second half until well incorporated.
Bulk Ferment
Now it’s time for the bulk ferment. Take your dough out of the bowl. It should be easy to work with already. Shape it into a neat ball. Spray your bowl with a bit of oil and place the dough inside. This makes it easier to take out later. Cover the bowl with cling film or a lid. The Kitchen Aid glass bowl has a loose sitting plastic lid that I find pretty ideal for this. With the Kenwood, I often just leave it to sit there in the machine with the splash protection cover attached, but the dough hook removed.

Stretch and fold (optional)
For the very best gluten development and oven spring, you can do a stretch and fold 3-4 times every 30 minutes now. To do that, wet your hands (it’s easier that way and less messy, in case your dough is still a bit sticky), lift and stretch one side of the dough, then fold it over. Rotate the bowl by 90 degrees, repeat. Do that 3-4 times. Stop when you feel your dough becoming very resistant. That’s a good sign of the gluten forming.
You can skip this step (I have done so many times) and still get a perfectly fine loaf of bread. It just gets some more rise and oven spring when you do it.
Overnight (or day) ferment
Now leave your dough in the covered bowl in the fridge overnight or at least 6-8h on the counter until it has doubled in volume.
Alternatively you could shape it as below the evening before, put it into the loaf tin and let it rise there.
This is how it looks when it’s done:

The day of Baking
Shape
Once your dough is visibly risen (this might be quicker in warmer conditions and take longer in winter) get a silicone baking mat or lightly flour your worktop. Some flour in an old saltshaker works marvellously for aiming. Especially, if you, like me, are very good at sprinkling your floor with flour while dusting the worktop.
Get your loaf pan and grease it lightly or line with baking parchment.


Push or roll your dough out about 8 inches long, and about as wide as the loaf pan. It doesn’t have to be perfect, don’t worry. Check for and big bubbles and pop them. As opposed to classic sourdough bread with its open crumb, we don’t want holes in sandwich bread!
If you haven’t included the seeds/nuts yet, sprinkle them over now, fold the dough and knead it briefly until evenly distributed. Then push it out again. You might have to let it relax for 15min after kneading.
If the seeds are already in, start by rolling up the dough tightly from the short side and pinch the seam to seal it.
Optional seed and egg wash topping
If using egg wash, crack the egg into a small bowl and whisk it briefly with a fork.
Add the mixed seeds to a large plate that will fit the loaf.
Brush the top of the loaf with egg wash, then roll in it the seeds, pushing gently, so they adhere.


Place the bread seam side down in your prepared loaf pan and cover loosely with cling film or a damp kitchen towel.
Final rise
Allow your sandwich loaf to rise for 1-3 h or overnight in the fridge until visibly puffed up over the top of the loaf tin.


Bake
Pre-heat your oven to 425°F/220°C, placing a baking rack in the middle and either a baking tray or a large baking dish at the bottom.
Slice your bread dough all the way through the middle with a sharp knife or lame about 1cm deep. This will allow it to rise more evenly and prevent uncontrolled cracking on the sides.

If you have 2 loaf pans of the same size you can skip the bottom baking dish and simply cover your bottom loaf pan with the empty one to create a steam trap.
Once your oven is nice and hot (I usually pre-heat for about 30min to get an even temperature throughout) add your bread and pour 1.5 cups of water into the bottom dish to create some steam.
This will create a great oven spring and that perfect crust.
Close the oven and immediately lower the temperature to 400°F/200°C.
Bake for 30 minutes, take out the bottom dish with any remaining water and turn your bread by 180 degrees if your oven browns unevenly.
Bake for another 30, checking for browning after 15. If you feel your bread has reached the browning you enjoy, cover it loosely with kitchen foil to prevent it from getting too dark.
This bread, opposed to many others I made, needs a little longer than the top browning would suggest, to get the middle baked perfectly.

Let it Cool
Take your stunning Soft High Protein Sourdough Sandwich Bread out of the oven. Let it cool in the tin for about 15 minutes, then carefully transfer it onto a cooling rack to prevent moisture from gathering in the tin while cooling. I’m absolutely serious about this one: Let your bread cool. At least 2h until completely cooled out.

I know it’s hard, because it smells and looks just SO good! But trust me you’d regret cutting into it too early. I sure did. At this point the middle is still finishing to bake and firm up. Cutting into it too early can lead to holes and underbaked centres.

Enjoy
Now that you have patiently waited for your homemade sourdough loaf to cool, slice into it. Admire how nice and evenly it slices. Enjoy with any of your favourite toppings.

I had mine with lettuce, crumbly Greek feta, fresh tomatoes, cucumbers and red onions rings sprinkled with some salt and pepper and it was glorious!
How to Serve
This bread works, as the name suggests, fantastically well as sandwich. It holds the ingredients in firmly, while being soft enough to give you an easy bite of even the highest filled sandwich. I’m very partial to the classic BLT, recently more often with rice paper bacon. (I’m working on a recipe for that one!).
And while it keeps well for 3-4 days, it’s particularly nice toasted with some honey or jam. Plus it makes an incredible PBJ sandwich!
Variations
Savory
- Onion bread – Very popular in Germany, onion bread is created by mixing about a cup of crispy fried onions (you can get them ready made for hot dogs and similar) into the dough. Usually instead of the seeds.
- Cheese – Same as above, instead of the seeds, mix in grated cheese.
- Cheese and bacon – Use half grated cheese, half crispy fried and crumbled bacon or serrano ham
Sweet
- You could even use flavored protein powder like vanilla or chocolate, to make a flavored and sweeter loaf. Just be mindful that they add sweetener too, so the flavor profile won’t be neutral anymore. I have used vanilla whey protein in many of my sourdough discard recipes like my Sourdough Apple Muffins and Lemon Drizzle Bread with Zucchini and sourdough.
- Instead or even additional to the seeds sprinkle over some cinnamon sugar before rolling the dough up for the loaf pan. If you want a cinnamon roll feel, you could even spread some cream cheese over before the cinnamon sugar sprinkle.
- Raisins or other dried fruits – Replace about half of the seeds with them. Cranberries work great, so do chopped, dried apricots or dates.
- Or chocolate chips if you like.
How To Store
This lovely soft sourdough loaf keeps really nice and moist due to the butter and protein powder, both helping with the softness. About 3-4 days in a bread tin is perfect. I would probably toast it on day 3 and 4.
It also freezes great for up to 6 months. I usually freeze half or it, as it makes a large loaf.
FAQ
Most of the time this happens due to the use of cups in measuring the flour. Scooping it out of a container will compact the flour and give you much more than the calculated 120g per cup. But not all hope is lost. Simply add some water until the dough feels like soft playdoh again.
Every flour is different, so you might run into one that doesn’t absorb water all that well. Wait about 20 minutes, stretch and fold and see if it improves. If not, add more flour 2 tbsp at a time until it feels like soft playdoh.
Usually you can. Sourdough responds to temperature, so especially in summer this can happen. Or if you left it for more than 48h in your fridge. (Or maybe you forgot the salt?)
I’ve occasionally left mine outside the fridge overnight, to see what happens and while the sourdough deflated a fair bit, it still baked ok. The sourdough flavor might be more pronounced though, so if you are not a fan, counteract that by kneading in a bit more honey.
Usually 36-48 hours will be fine. The rise might be impacted after that, and the flavor gets rather pronounced sour.
You absolutely can. I freeze doughballs for sourdough pizza all the time, to have some “emergency pizza” on hand.
Happens to the best of us. Don’t worry. While this loaf never got stuck for me, I had plenty of other test breads stick to the bottom of a pot or pan.
I found mostly a damp towel over the bottom of the loaf tin helps the issue. Alternatively leave it to cool a little while longer and the condensation inside the tin should help it slide right out.
Alternatively slide a thin, flexible spatula or knife around the sides to loosen it a bit, then shake it upside down.
Another option is to put it back into the oven upside down on a baking sheet and bake for a few minutes on lower temperature, then shake after taking it out, until it just falls out.
To prevent this, grease the loaf pan well and/or line it with baking parchment. A bit of coarse cornmeal or polenta sprinkled into it then shaken to have it stick to the grease is also a failsafe method.
Other recipes you might enjoy

Looking for more sourdough protein breakfast ideas?
Here are 13 of my most popular!

Have some sourdough discard left?
Don’t throw it out! Instead make these super delicious Sourdough Protein Pancakes. Literally the most popular recipe on my blog. For good reason.
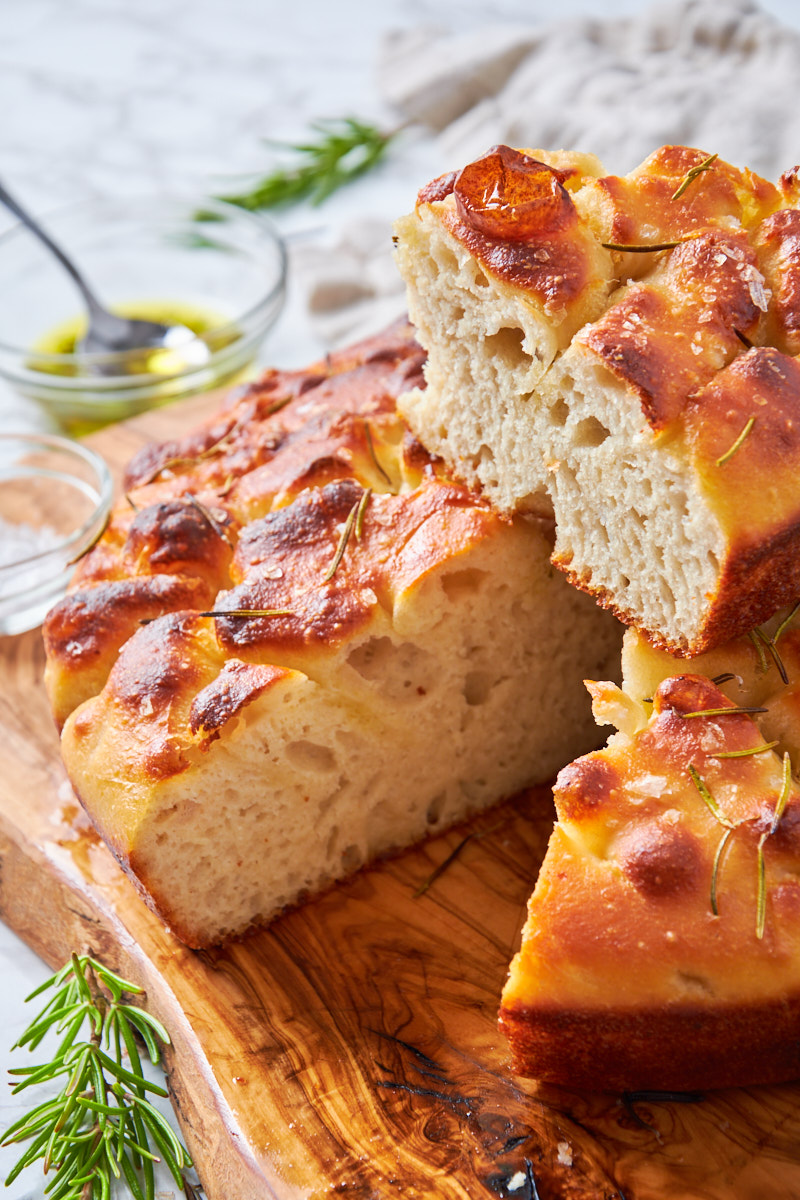
High Protein Sourdough Focaccia. Tastes like right from your Italian Restaurant, but has double the protein.

How about a dessert Focaccia that tasted like Apple Fritters?
Now I’d love to hear from you in the comments!
Have you tried this? Did you enjoy it?
What other recipes would you like to see?
And if you enjoyed this recipe, please consider rating, sharing, or leaving a comment – your feedback truly helps my blog grow!

High Protein Sourdough Sandwich Bread
- Total Time: 9 hours 20 minutes
- Yield: 24 slices 1x
- Diet: Vegetarian
Description
This soft High Protein Sourdough Sandwich Bread uses cottage cheese, seeds and protein powder to get up to about 9g of protein per slice or about 18% making it a great choice for anyone aiming to increase their protein intake while enjoying an actually delicious slow fermented bread that is just as healthy for your gut as it is for your muscles. Plus it really tastes like a sourdough sandwich bread should. Soft, sturdy enough for any toppings, lots of flavor. No compromise.
Ingredients
For the Dough:
- 1/2 cup/ 115g full-fat cottage cheese
- 1/2 cup/ 60g unflavored protein powder (Casein or Whey)
- 2 tablespoons/30g honey
- 1 cup /200g sourdough starter, active and bubbly
- 1 1/4 cups/310ml water
- 7 1/2 cups /900g bread flour
- 1 tablespoon/7g salt
- 1/2 cup/113g butter, softened
- 4 tablespoons hemp seeds
- 4 tablespoons pumpkin seeds
- 2 tablespoons sesame seeds
- 2 tablespoons sunflower seeds
For the Optional Topping:
- 1 egg (for egg wash)
- 1 tablespoon hemp seeds
- 1 tablespoon pumpkin seeds
- 1 tablespoon sesame seeds (black sesame works well)
- 1 tablespoon sunflower seeds
Instructions
Two Days Before Baking (Starter Prep)
- Feed your sourdough starter. Ideally, feed your active, bubbly starter two days before you plan to bake. Don’t worry if it’s been a few days since the last feed (up to 4 days is usually fine); the bread will still be delicious, and the sourdough will catch up during fermentation.
One Day Before Baking (Dough Prep – Evening Start Recommended)
- Soften Butter: Let your butter soften at room temperature until very soft but not melted. If melting, ensure it cools completely before use. Do not use hot or fridge-cold butter, as it won’t incorporate well. Set aside.
- Blend Cottage Cheese & Protein Powder: In your blender (a Nutribullet or similar is ideal), combine ½ cup of the water from the recipe with the cottage cheese. Blend until completely smooth with no curds.
- Add Protein & Honey: Add the protein powder and honey to the blended cottage cheese mixture. Blend again briefly until no lumps remain. Blending the cottage cheese first helps prevent the protein powder from clumping.
- Combine Wet Ingredients: In a large mixing bowl, combine the blended cottage cheese-protein mixture with the remaining water and the active sourdough starter. Stir well with a dough whisk, spoon, or fork until fully combined.
- Combine Dry Ingredients: In a separate bowl, or directly with the wet ingredients if you’re mixing in a stand mixer, combine the bread flour, salt, hemp seeds, pumpkin seeds, sesame seeds, and sunflower seeds. If using larger nuts you want to keep whole, you can hold them back and fold them in during shaping instead.
- Mix Wet into Dry: Add the wet ingredients to the dry ingredients. Mix with a wooden spoon or spatula until roughly combined.
- Knead: Transfer the dough to a clean surface and knead by hand for about 10 minutes, or use a stand mixer with a dough hook on low speed for about 5 minutes.
- Assess Dough Consistency: The dough should be pliable but not mushy. If too wet, add a little flour (1 tablespoon at a time) until it pulls away from the sides of the bowl. If too dry, add a little water (1 tablespoon at a time) until it feels pliable.
- Autolyse: Let the dough rest, covered, for about 20 minutes. This allows the flour to fully hydrate and gluten development to begin before the fat is added. While optional, it improves the final rise and gluten development.
- Incorporate Butter:
- Stand Mixer: With the mixer running on low, add the softened butter in two parts. Allow the first half to be fully incorporated into the dough before adding the second. The dough may look like just sloshing around in the bowl at first, but it will come together.
- By Hand: Stretch the dough out a bit. Spread half of the softened butter over it, fold the dough over, and knead it in until fully incorporated. Repeat with the second half of the butter. Continue kneading until the butter is fully worked into the dough.
- Bulk Ferment (First Rise): Shape the dough into a neat ball. Lightly spray a clean bowl with oil and place the dough inside. Cover the bowl with cling film or a lid.
- Optional Stretch and Folds: For best gluten development and oven spring, perform 3-4 sets of stretch and folds every 30 minutes during the first 1.5-2 hours of bulk fermentation.
- To do this, wet your hands. Gently lift and stretch one side of the dough up, then fold it over itself. Rotate the bowl 90 degrees and repeat 3-4 times. Stop if the dough becomes very resistant.
- Overnight Fermentation: Leave the covered dough in the fridge overnight (at least 6-8 hours) or until it has visibly doubled in volume. Alternatively, you can shape it in the evening and let it rise in the loaf tin overnight in the fridge.
Baking Day (Morning/Afternoon)
- Prepare Loaf Pan: Grease your loaf pan lightly or line it with baking parchment.
- Shape the Dough: Lightly flour your worktop (a saltshaker with flour works well for even dusting). Gently push or roll your risen dough into a rectangle about 8 inches long and as wide as your loaf pan. Pop any large bubbles in the dough; for sandwich bread, we want a tighter crumb with no large holes.
- If seeds were not added earlier: Sprinkle them evenly over the flattened dough now. Fold the dough over and knead briefly until the seeds are evenly distributed. Then flatten it out again. You may need to let it relax for 15 minutes after kneading before reshaping.
- If seeds were added earlier: Tightly roll up the dough from the short side, creating a cylinder. Pinch the seam firmly to seal it.
- Optional Seed & Egg Wash Topping:
- Whisk one egg in a small bowl for the egg wash.
- Spread your topping seeds (hemp, pumpkin, sesame, sunflower) onto a large plate that will fit your loaf.
- Brush the top of the shaped loaf generously with egg wash, then gently roll it in the seed mixture, pressing lightly to ensure adhesion.
- Final Rise (Proofing): Place the shaped loaf seam-side down in your prepared loaf pan. Cover loosely with cling film or a damp kitchen towel. Allow it to rise for 1-3 hours at room temperature, or overnight in the fridge, until it’s visibly puffed up and risen over the top of the loaf pan.
- Pre-heat Oven: About 30 minutes before baking, pre-heat your oven to 425°F (220°C). Place a baking rack in the middle and either a baking tray or a large baking dish on the bottom rack for steam. If you have two loaf pans of the same size, you can use one as a lid for the other to create a steam trap instead of the bottom dish.
- Score the Loaf: Just before placing the bread in the oven, use a sharp knife or lame to make a shallow cut (about 1cm deep) all the way through the middle of the dough along the top. This allows for even rising and prevents uncontrolled cracking.
- Bake with Steam:
- Carefully place your loaf pan in the preheated oven.
- If using a bottom dish, pour 1.5 cups of hot water into it to create steam. If using the second loaf pan as a lid, place it over your loaf pan.
- Immediately close the oven door and lower the temperature to 400°F (200°C).
- First Bake Phase: Bake for 30 minutes with the steam method (lid on second pan, or water in bottom dish).
- Second Bake Phase: After 30 minutes, remove the bottom baking dish with any remaining water (or remove the top loaf pan lid). If your oven browns unevenly, turn your bread 180 degrees.
- Finish Baking: Continue baking for another 30 minutes. Check for browning after 15 minutes. If your crust has reached your desired color, loosely cover the loaf with aluminum foil to prevent it from getting too dark. This bread often needs a little longer to bake through the center than the top browning suggests.
- Cooling: Take your stunning bread out of the oven. Let it cool in the loaf pan for about 15 minutes, then carefully transfer it onto a wire cooling rack.
- The Crucial Cool Down: This step is vital! Let your bread cool for at least 2 hours, or until completely cooled through. It’s hard to resist cutting into it early because it smells so good, but the middle is still finishing cooking and firming up during this time. Cutting it too early can lead to a gummy, underbaked center or large holes. Trust the process!
Notes
- Flexibility: This is a guideline. Sourdough is forgiving. Adjust times based on your starter’s activity and your kitchen’s temperature. And your own schedule. Really, don’t live for your sourdough. 😉
- “Visibly Risen”: This is your best guide for fermentation steps. Dough will be bubbly, airy, and increase significantly in volume.
- Cooling Time: Seriously, don’t rush the cooling! It’s worth the wait.
- Prep Time: 20 minutes
- Fermentation/Proofing time: 8 hours
- Cook Time: 1 hour
- Category: Bread
- Method: Bake
- Cuisine: American, German


Hi, this recipe sounds extremely tempting and I was going to print it.
However I struggle with the conversion to the metric version.
Have you ever used it?
I think I will have to convert it myself with the help of the internet and try the recipe at a later time.
Thanks for creating the recipe though – I truly appreciate people who develop such interesting recipes.
Thumbs up!!!
Hey Andrea,
Thanks so much for your comment and pointing this out!
I had indeed not used it and tried it now. I can see the issues with it clearly!
So I’ve updated this recipe by adding all the conversion (except for the seeds, which don’t need to be 100% accurate) behind a / in the card directly.
I’ve been doing the same thing for many of my newest recipes already, but I guess I need to update all of them when I find a day or two.
I’d love to hear how the bread comes out for you. 🙂
I would like to try this tecipe, but when I saw it takes 7 1/2 cups of flour I need to ask how many loaves does this recipe make? Usually 3 cups is all I use per loaf in other recipes. Thank you.
This makes one very large loaf. Think the ones you get in the fairly big packages in the shop.
If you halve it, it’ll probably more like the ones you made before size wise.
I like to make the large loafes, as I always freeze half for later. 🙂
I have never cooked with protein powder before. Will either isolate or concentrate work, and which one is better? Does anything need to change in the recipe depending on which one is used? Thanks!
Hey Ashley,
Thanks for your question! That’s an important one indeed.
I mostly use concentrate in my baking, as it has small amounts of fat and lactose.
It maintains a softer and more moist consistency in baked goods, helps with browning due to the lactose (even though it’s a very small amount that our bodies mostly don’t react to) and keeps things fluffy.
Whey isolate however has almost no fat or lactose and contains 90% protein (as opposed to concentrates 80%), leading to a much drier and more compact result.
So in short: If your decision is between concentrate and isolate, choose concentrate for baking.
I did test two other types of protein powder in my easy sourdough protein bread here: https://forthepleasureofeating.com/easy-high-protein-sourdough-bread/
And explained the subtle differences, in case that interests you.
I’d love to hear how your bread turns out and which protein you’ll use in it. 🙂
This sourdough bread made the perfect sandwiches for my family!! Bonus points for being packed with protein.
Thanks so much for letting me know. It’s great when the whole family likes a recipe. 🙂
Really nice bread recipe to use with my sourdough starter!! High protein makes this even another reason to make it again!
Thank you, so glad you like it. 🙂
This looks like the ultimate high-protein bread—love that it combines gut-friendly sourdough fermentation with such a solid protein boost! Cottage cheese and seeds are such clever additions, and I’m impressed it still turns out fluffy and flavorful. Definitely adding this to my weekend baking list!
I was surprised too. Didn’t expect it to work this well. Glad you like it. 🙂
Love the idea of a high protein bread! this is such a great solution for my kiddo who enjoys eating sandwiches but doesn’t like most sources of protein. thanks for this!
Excellent, your kid feels like me! Just whom I made it for. 🙂
I love, love this sandwich bread! I needed to up my protein intake and I will be making this recipe again and again!
So happy you like it and it helps! 🙂