Sourdough Protein Pizza Crust
Forget the myth that a high-protein pizza crust must be bland, dry, or dense. This sourdough protein pizza crust recipe is here to prove that you can have it all: the incredible tangy flavor and airy chew of the best artisan sourdough, plus a nice nutritional boost. By replacing part of the water with creamy cottage cheese and a portion of the flour with unflavored whey protein, we achieve over 20g of protein per crust without sacrificing an ounce of classic pizza perfection. Get ready for your new favorite “Emergency Pizza” dough!

This post may contain referral links for products I love.
For The Pleasure Of Eating earns a small commission on these links at no cost to you.
- Why You’ll Love This
- The Ingredients
- Substitutions
- Equipment Used
- How to Make this
- How To Store
- FAQ
- Other Recipes You Might Enjoy
Why You’ll Love This
TL;DR
- Protein-Packed: Over 20g of protein per crust (without toppings) for a nutritious meal.
- Authentic Flavor: Incredible, tangy sourdough taste—no “flat” or “dry” protein aftertaste.
- Easy Meal Prep: Dough can be made ahead and kept in the fridge for up to 5 days, getting better with age.
- Freezer Friendly: Follow the “Emergency Pizza” concept and always have a homemade dough ball ready.
- Versatile: Perfect for classic pizza, flatbread, focaccia, or even air fryer rolls.
Sourdough and Protein For Perfect Balance of Flavor and Nutrition
Have you ever felt that sourdough pizza tastes amazing, yet is lacking the much needed protein?
And high protein pizza just doesn’t taste as good? Exactly!
That is where this recipe comes into play (or many of my recipes to be exact. Be sure to check my high protein sourdough Focaccia for another Italian favorite). It gives you all the flavor you get from the best sourdough crust, but also has over 20g of protein per crust, without any of the “side effects” you usually get when raising the protein in a recipe, like dryness, too much chew, flat taste, to name just a few.
Why This Pizza Crust Recipe Works
While classic protein recipes often go the simple recipe route, aiming for either very few ingredients or add things like almond flour or similar to go in the Keto direction, this one uses mostly classic sourdough ingredients and only replaces part of the water with cottage cheese and part of the flour with protein powder.
The sourdough with its tenderizing properties then balances the potential dryness from the protein powder and lends its incredible flavor to the crust, countering the “flat” taste you get from many easy recipes.
Similar with cottage cheese: Used in the right amount and not as sole source of liquid, its acidity tenderizes.
In short: Its proper healthy pizza crust with benefits that tastes like right from your Italian restaurant.
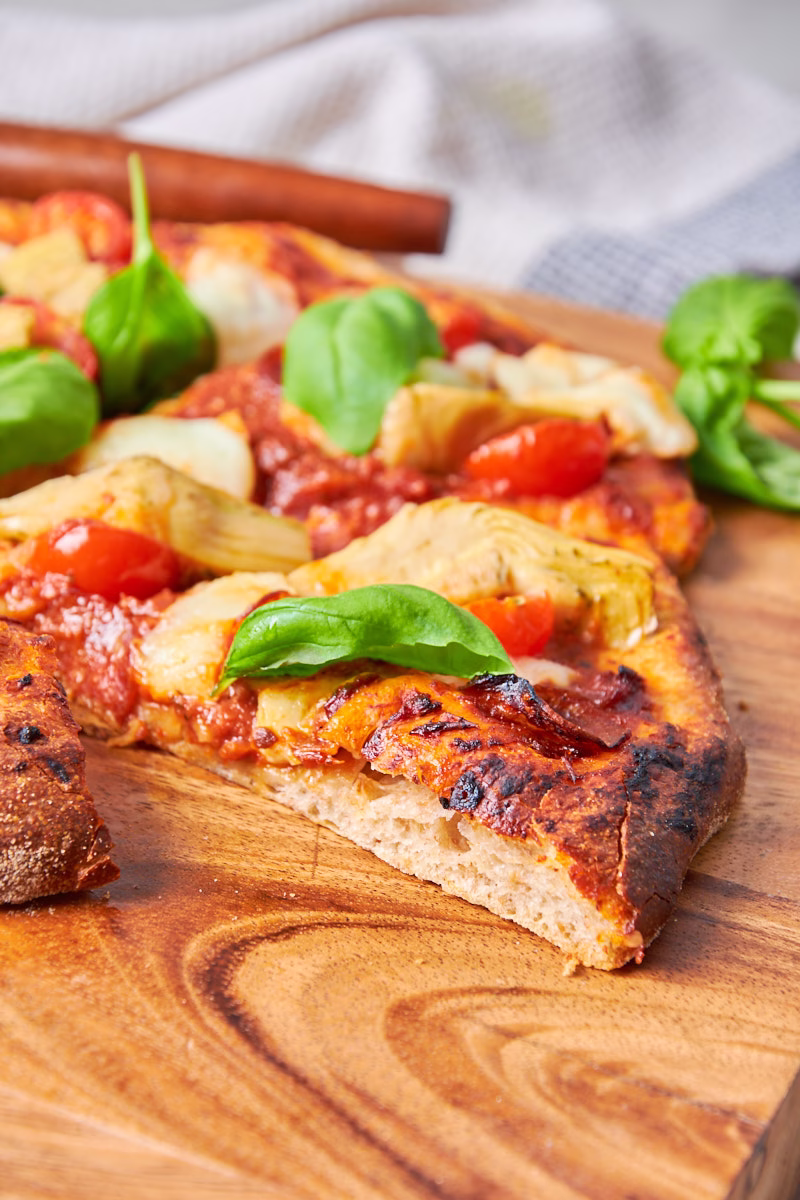
The Result: A Perfect Crust Texture
It took me years to create the pizza crust I wanted: Crispy crusts with bubbles, but not so many that it feels hollow, inviting you to dip them into a ranch dressing if you so choose. A chewy center that bakes through under my toppings, supporting them well when I pick it up.
Lots of flavor! This is the most important one for me!
I often made yeasted crusts in the past, wondering what on earth was missing that I got from the restaurant pizza. Now I know: It was the sourdough!
The Surprising Benefits Of Adding Protein To Sourdough
And here is another really good reason to make this: When you slow ferment sourdough, its enzymes called proteases break down protein from any source, not just flour, into smaller more easily bioavailable molecules, meaning you get more benefits from the protein you are adding. I went into more detail on this in my post on why I’m adding protein to most of my sourdough baking these days. And it’s why I have a whole category of recipes on the topic.
The addition of cottage cheese and protein powder in this recipe results in a significant protein boost to over 10% of the total weight, making it a great and viable option for anyone aiming to add more protein to their diet without compromising on flavor and texture.
Sourdough Pizza Crust Is Practical
I have a bit of a concept for myself that I call “Emergency Pizza”. It means I always have at least one of dough ball for pizza crust in my freezer, that can be thawed within just a few hours, ready to bake when I have a short notice pizza craving or just didn’t find time to cook something.
This saves me from ordering expensive and often unhealthy takeout, plus it allows me to customize my pizza just as I like it. Which, frankly, is really necessary here in Ireland, as no takeout anywhere near me offers pizza with artichoke hearts, which is my all-time favorite.
If you have the dough ready, making your very own pizza takes about the time your oven needs to pre-heat, making it even faster than takeout.
Tastes Even Better Days Later
What many people don’t realise is, how flexible and forgiving sourdough is. Yes, you can bake it right away once it has risen by about 50%, but you can also leave it in your fridge for up to 5 days and it will get better and better.
Sourdough develops flavor over time and the bubblier it gets, the better your crust will rise. This makes it an incredible option for meal prep, since you make it on your preparation day and then it’s ready for all kinds of lovely toppings in the next few days.
Many Uses
While you can of course just use this protein dough for pizza crust, I often make flatbread from it by pressing a smaller ball of it in my tortilla press, then giving it a quick fry in my cast iron pan.
Fill them or use them to mop up your favorite sauce, brush with garlic butter for a Naan-like feel, spread some Za’atar mixed into olive oil over them to give you a stunningly aromatic Middle Eastern take on flatbread.
I’ve also made small rolls from it in my air fryer, baking them for about 12-15 minutes at 400°F/200°C.
I’d love to hear what uses you can come up with!
Ingredient Notes
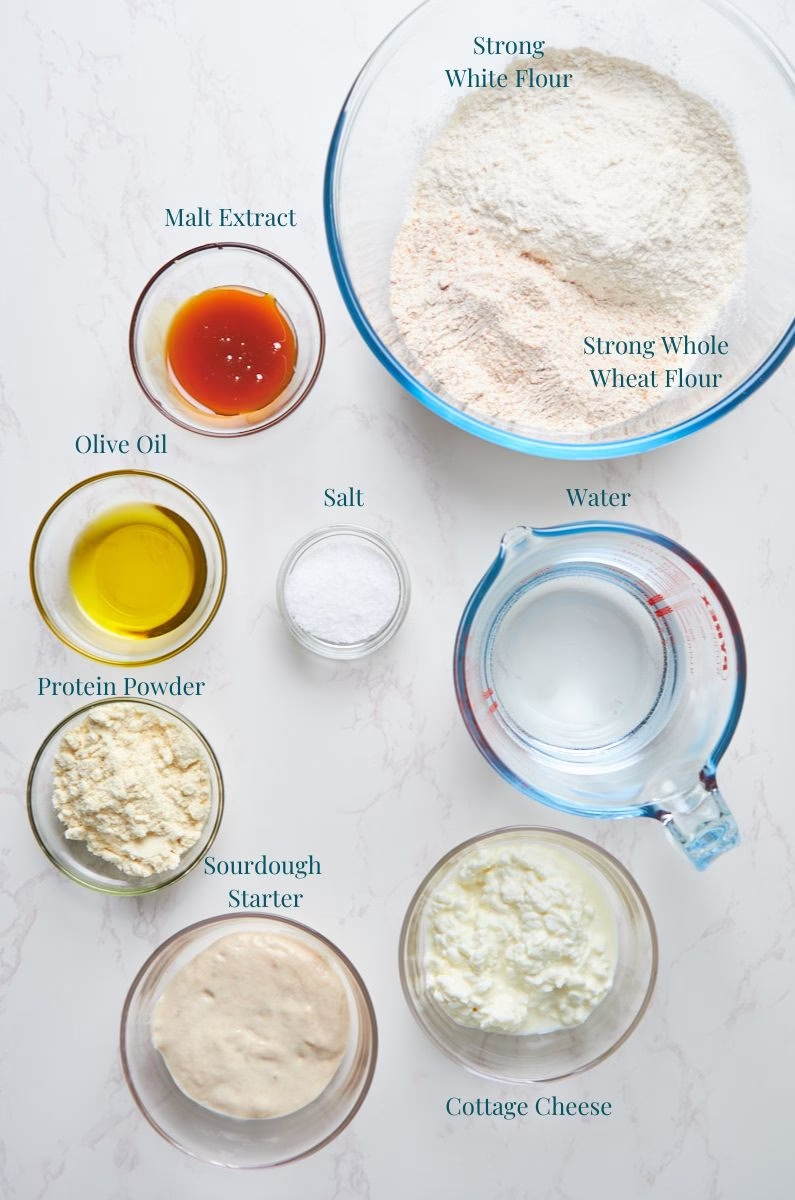
A few notes on the most important ones. The full list with amounts is in the recipe card.
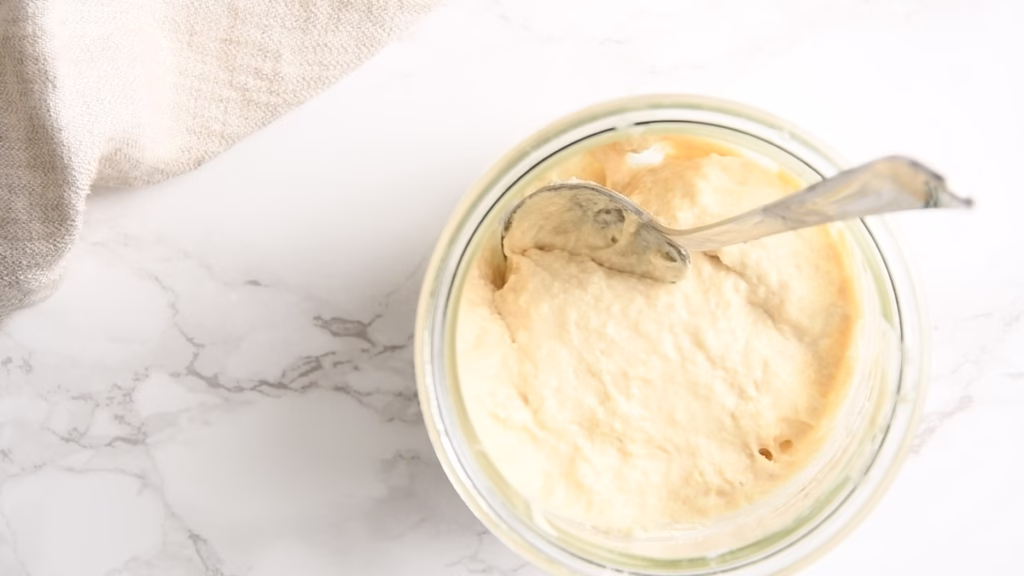
- Sourdough Starter – I’m using an active starter here that I fed the day before.
- Flour – While 00 flour would be the most typical Italian option, I find it really hard to get here, hence using bread flour. I added some whole wheat flour for better nutrition.
- Cottage Cheese – This is the main contributor for protein here, by replacing part of the water with blended cottage cheese. It also adds a tiny bit of tangy flavor, which goes fabulously with the sourdough.
- For those of you with picky eaters to cook for – If you don’t tell them this has cottage cheese, they’ll never notice!
- Unflavored Whey Protein – This is the ingredient I use in most of my non-sweet protein baking. Once you’ve tried it you’ll want to make lots of recipes with it.
- Mine is from MyProtein. This is neither affiliated nor sponsored. Just the powder I found to taste best after trying a fair few. If you never found one you actually enjoy, give this one a try.
- Malt Extract – I love adding this to my baked goods since it gives everything just a touch of maltiness. Think of classic New York Style Bagels, which btw I also sourdough-proteinified (Apparently that’s not a word yet, but it should be!). They get their distinct taste from malt extract (and the specific mineral content of NY water, but we can’t really replicate that).
- Salt – I always use Diamond Crystal Kosher salt. If you are using sea salt and have switched to the US measurements going by volume, half the amount. In gram it will be the same.
substitutions
- Sourdough Starter – You can use discard instead but double the amount if you do. The slow fermentation will give it plenty of time and food to get happy and bubbly.
- If you have no sourdough starter yet, follow my easy recipe to make your own. It works with both rye and white flour and you can use either in this recipe.
- Flour – You can absolutely use just bread flour or even all-purpose. You might have to reduce the water by 1-2 tablespoons if you do so, as whole wheat flour absorbs more water.
- Cottage Cheese – If cottage cheese sold out, as so often here recently, you can use 0%-4% Greek yogurt instead. Same if you don’t have a blender to get it smooth. Your dough will have slightly less protein and taste a tiny bit different, but still delicious.
- Olive Oil – This gives the base that classic Italian feel. But you can use any other neutral oil like avocado or rapeseed if you have no olive oil around.
- Malt extract – You can use honey or sugar instead or just leave it out entirely. It gives the pizza crust a lovely balanced flavor and helps with browning, but you’ll still have good crust without it.
- Whey Protein – This recipe was developed with whey protein. Other types of protein powder have different rates of water absorption. I’ve tried casein and spent barley powders in bread before and found that the former needs a bit more water (+1-2 tablespoons) while the latter needs a bit less (- 1-2 tablespoons).
- I have not tried other vegan powders in my baking, as I have never found one I enjoyed aside from the stunningly malty and smooth barley mix.
The most important point is, as in any non-sweet baking, that it’s unflavored. Unless you’d like to make, say, banana-chocolate pizza. In which case: do you share?
If you try another one, I’d love to hear about your results.
Equipment Used
- Blender – To get the cottage cheese lovely and creamy.
- Bowl – For mixing the dough. Of course you could use a stand mixer, but it’s by no means necessary, as there isn’t any long kneading involved.
- Dough Whisk – Or just a spoon for mixing the dough
- Pizza stone – Or sheet pan to pre-heat for the perfectly baked sourdough pizza crust.
 Buy Now →
  Buy Now →
  Buy Now →
  Buy Now →
 How to Make this
Bakers Schedule
- Day 1 – Feed your starter the day before you plan to mix the dough (Or use discard. See Substitutions)
- Day 2 – Mix your dough and allow it to slow ferment overnight. It will need about 6-8 hours and can go into the fridge afterwards, to be ready at any time you want to bake, up to 5 days later.
- Day 3 – Bake your pizza whenever you are hungry. It just takes about 30 minutes from start to finish.
Day 1
Feeding your Starter
- Mix flour and water with a spoon, then add your existing starter to it and stir until incorporated.
- I have started to deviate ever so slightly from the classic 100% hydration (1:1 flour to water ratio) since I found a lower hydration gives me a more active and longer lasting Levain.
- I mostly go by feel when stirring it. It should be relatively stiff and getting harder to stir when all the water is in. This can vary depending on the flour you use and the season/humidity. You’ll get to know your own starter over time. Don’t worry too much about it though, sourdough is incredibly forgiving and will give you great results even with less than optimal starter.
- I have added pictures of mine here, to give you an idea. Watch the video to see a bit more.
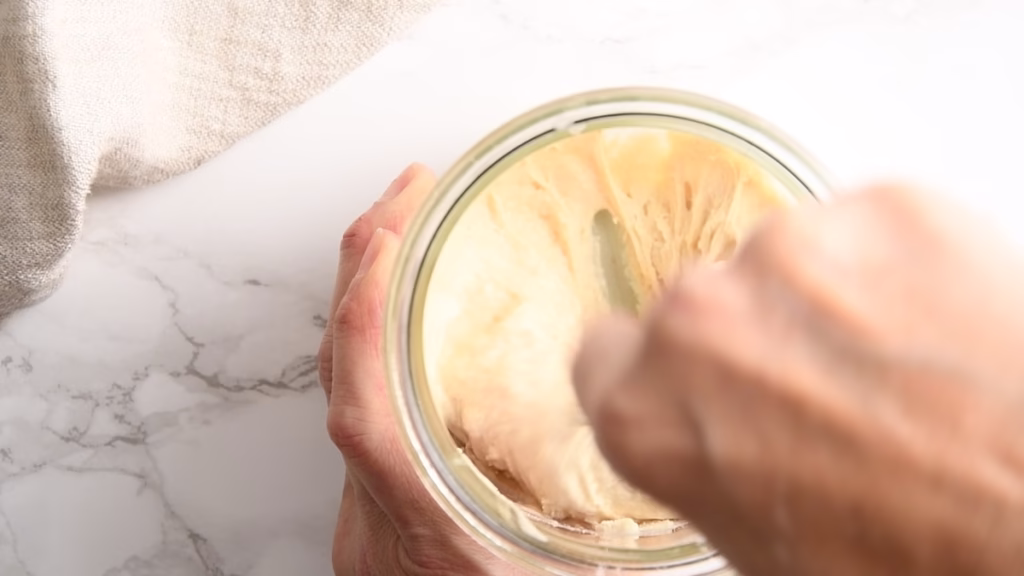
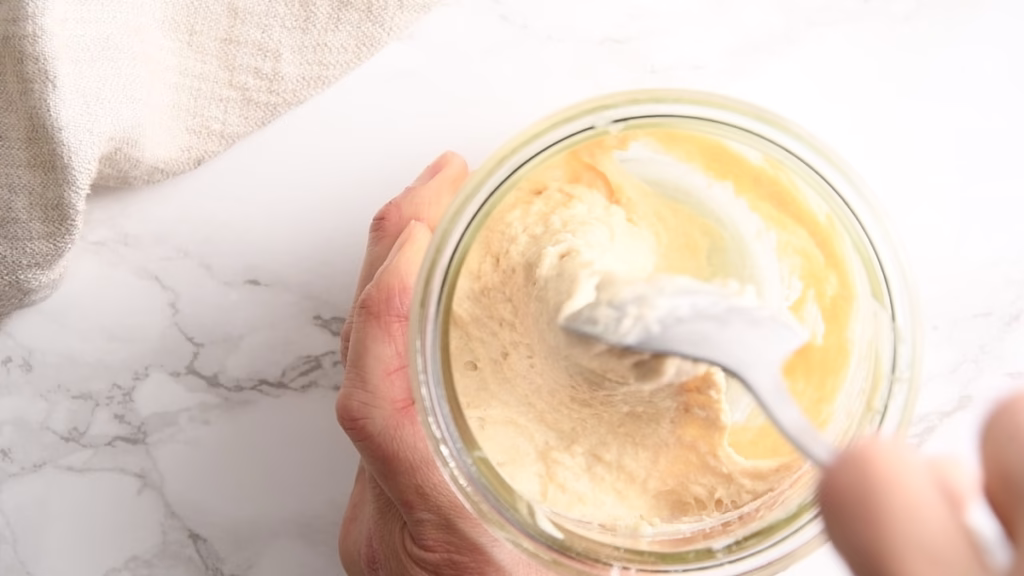
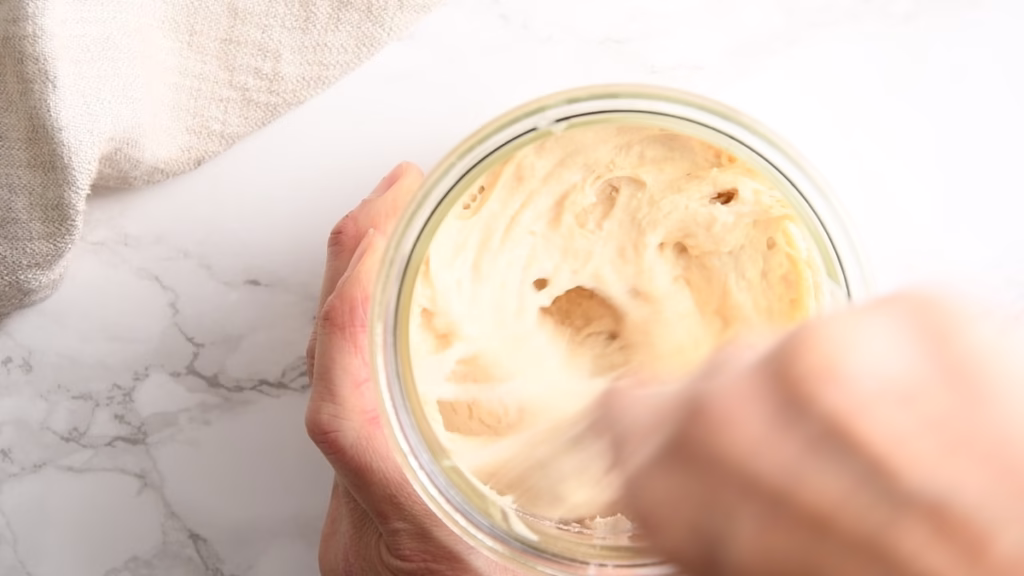
- Leave it to activate and double in volume on your counter overnight.
- The time it takes will vary depending on the temperature of your kitchen. Mine is about 71°F/22°C. In summer, when my kitchen is warmer my starter often doubles in half the time.
Day 2
Blend The Cottage Cheese and Protein Powder
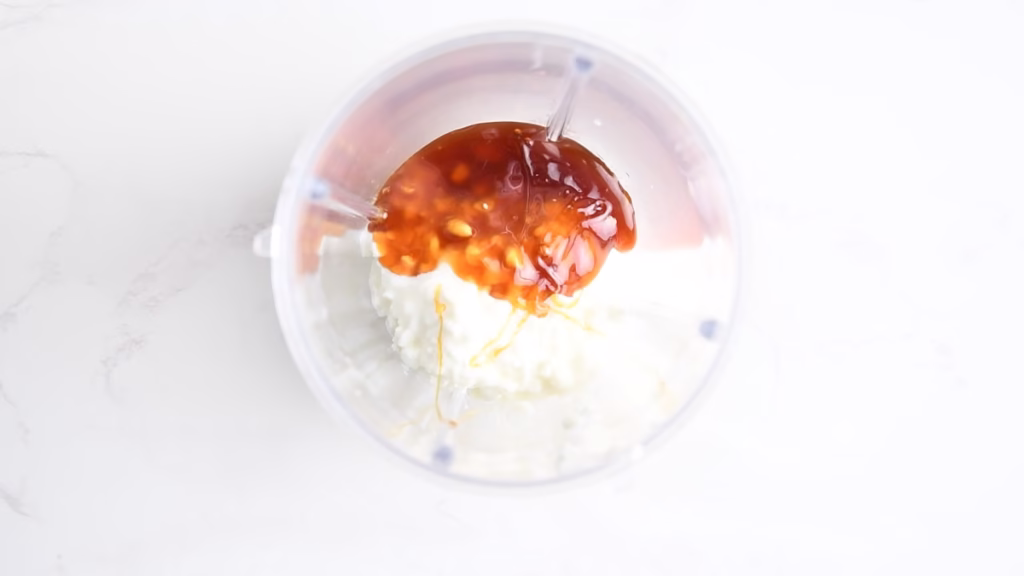
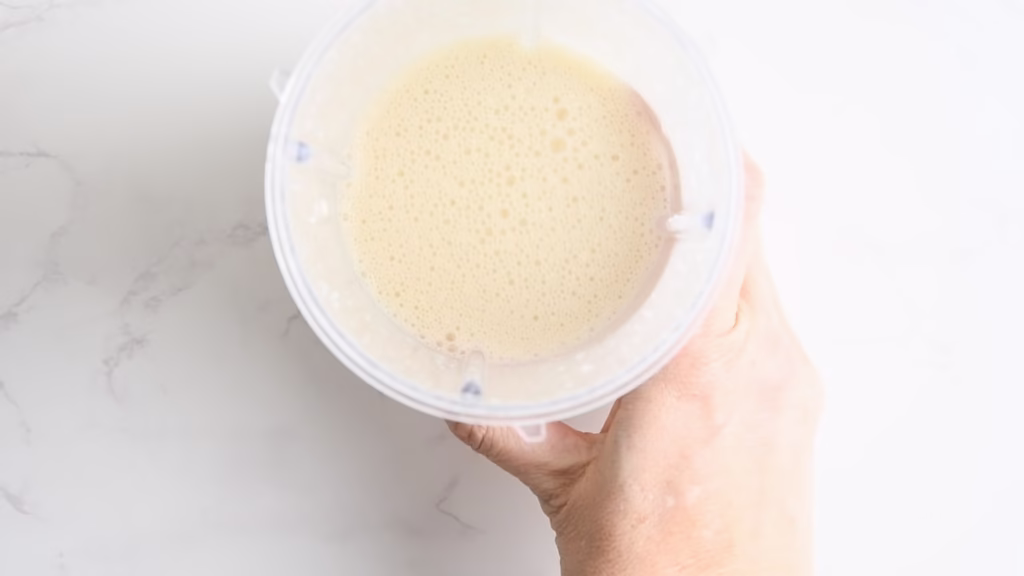
- In your blender add half of the water, cottage cheese, malt extract, olive oil and protein powder. Blend until smooth.
- While I often advise to blend the cottage cheese first, with the high water content in this recipe blending it all together works well.
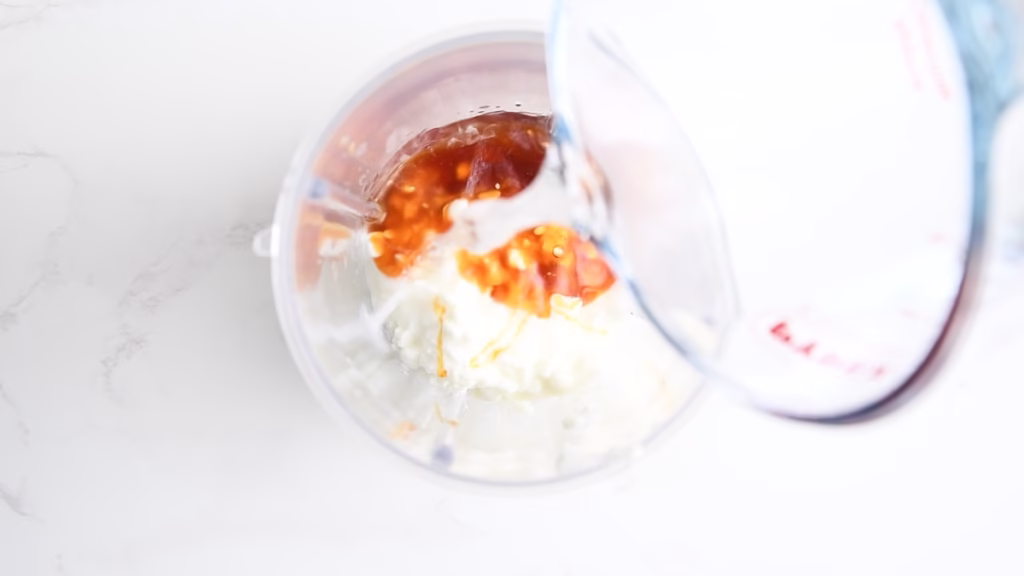
Mix In Your Starter
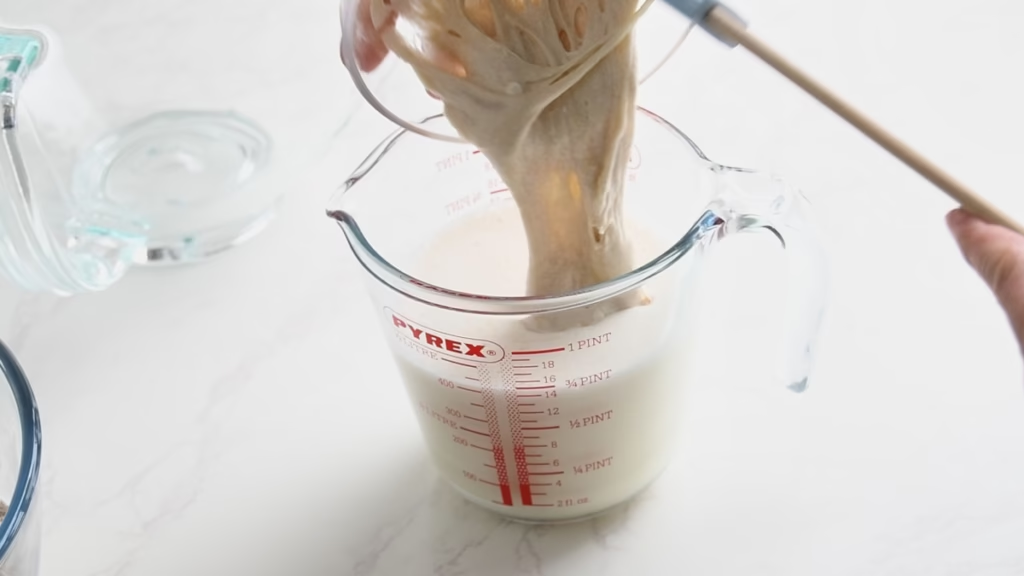
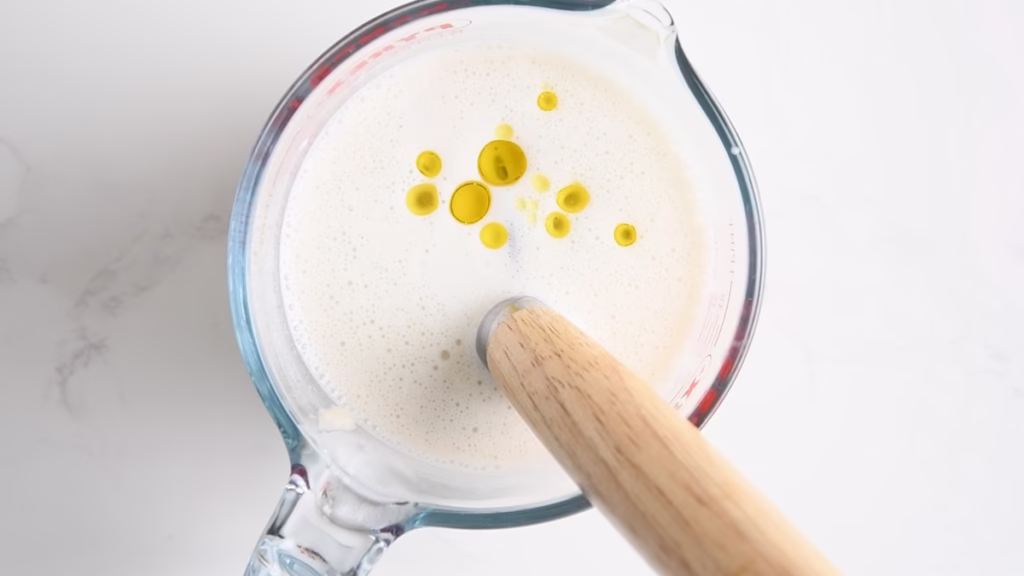
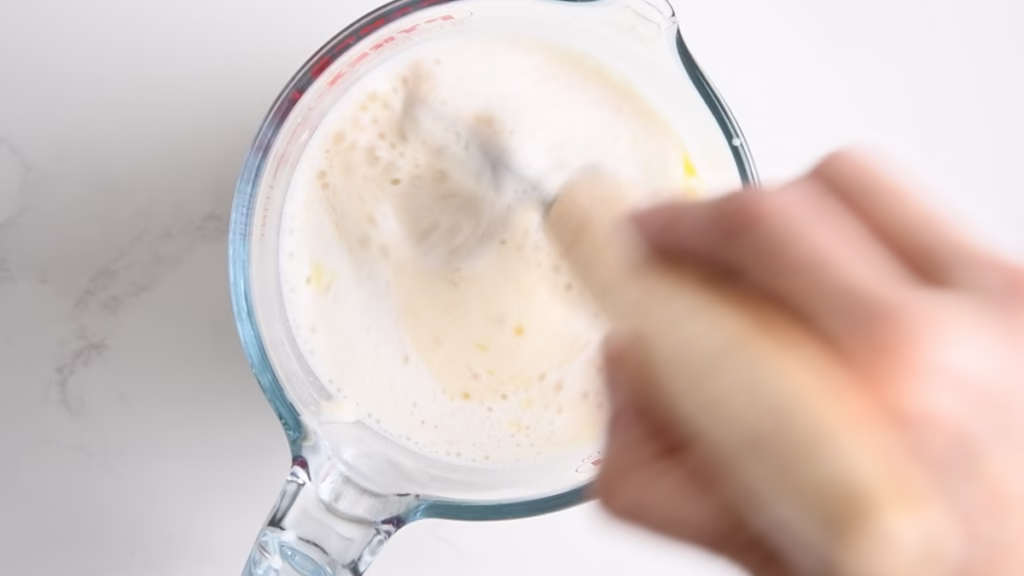
- In a jug (or your blender cup, but without blending again) add your active starter, the blended cottage cheese-protein mix and remaining water. Stir with a dough whisk or spoon until everything is well mixed and no sourdough starter “blobs” are left.
- In theory you could probably blend it, but I feel sourdough deserves a gentler treatment and blending risks damaging the delicate gluten structure.
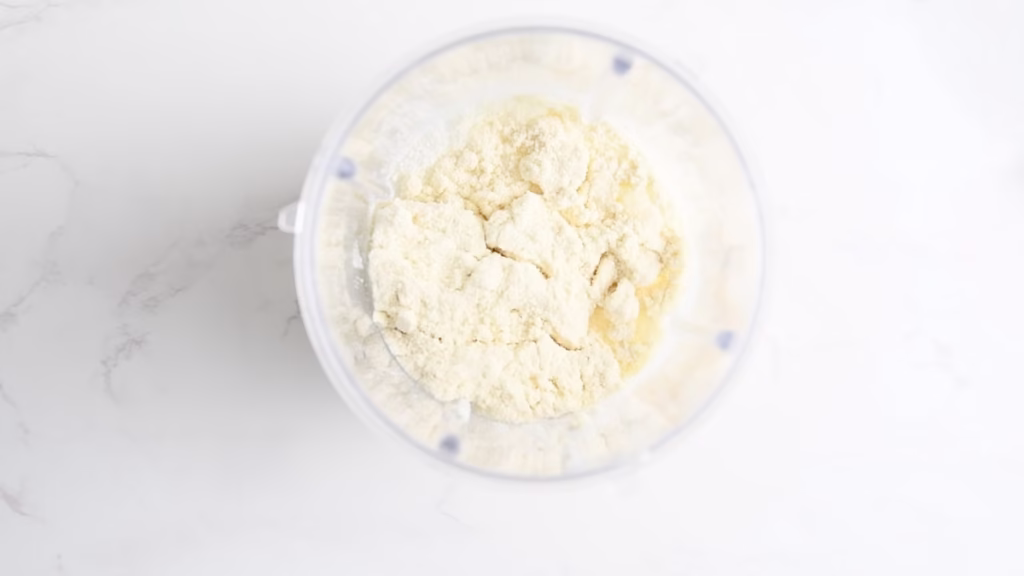
Whisk Flour And Salt
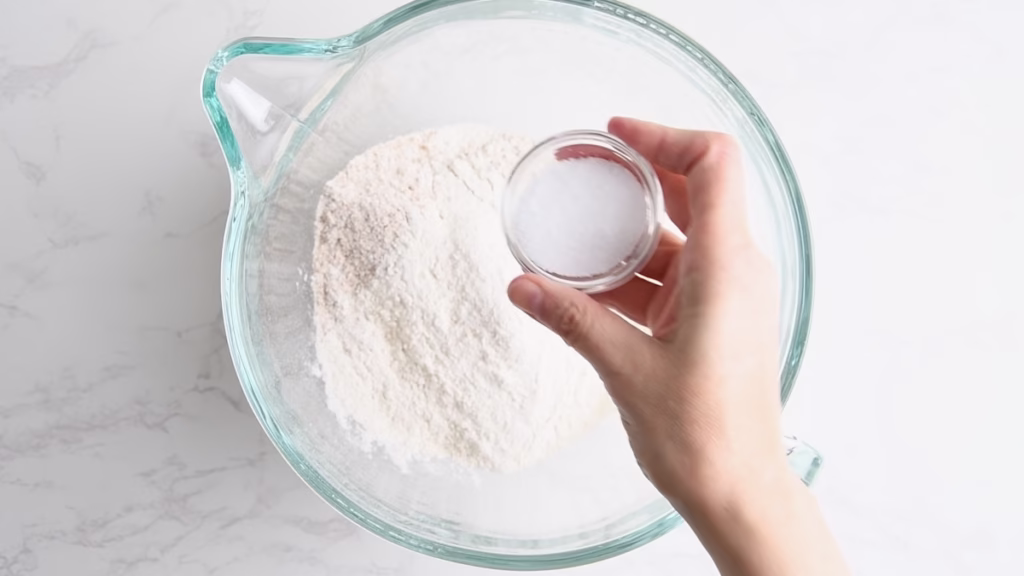
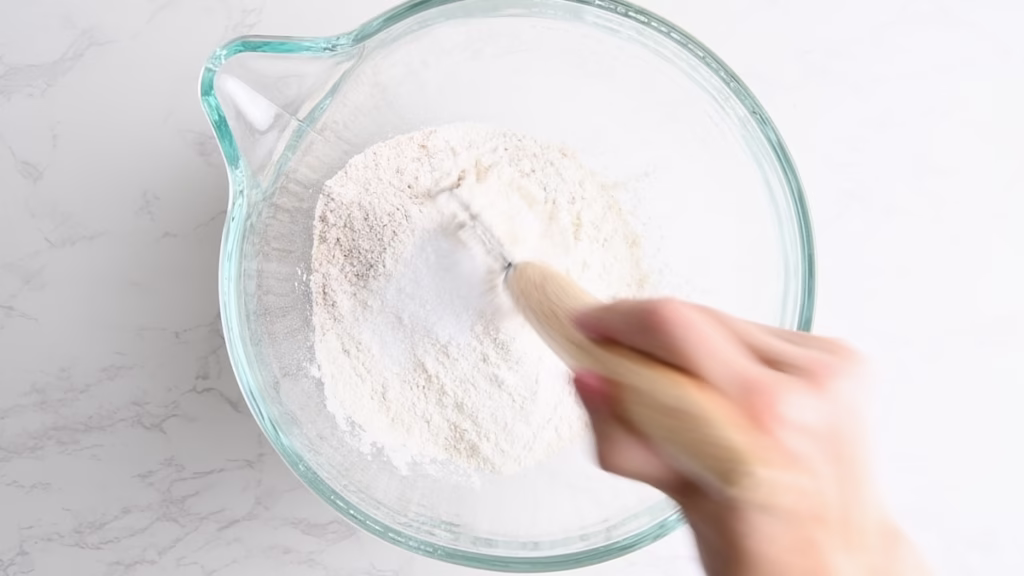
- Using your dough whisk or spoon, briefly stir the salt into the flour, giving it all a good mix.
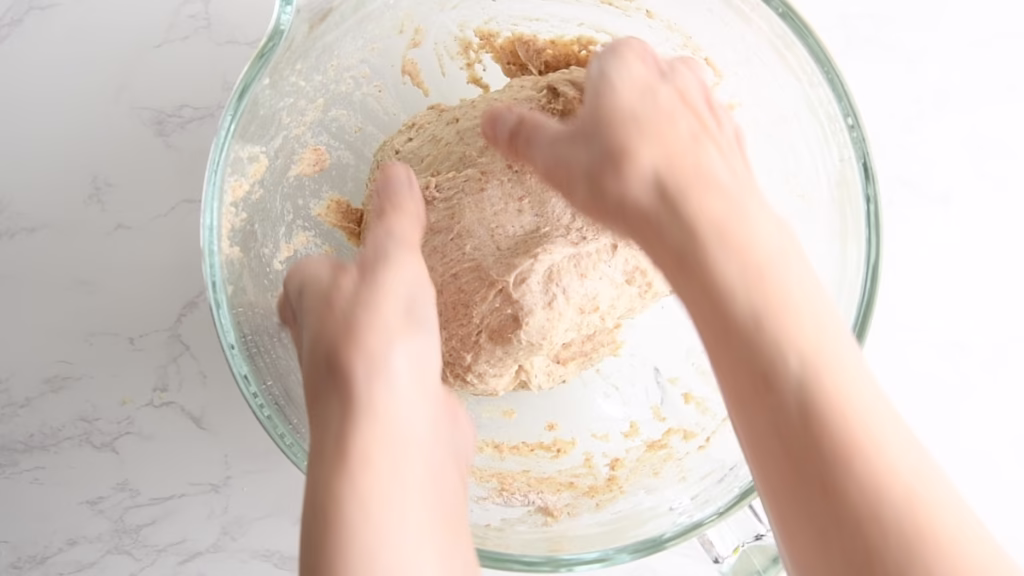
Stir The Dough Together
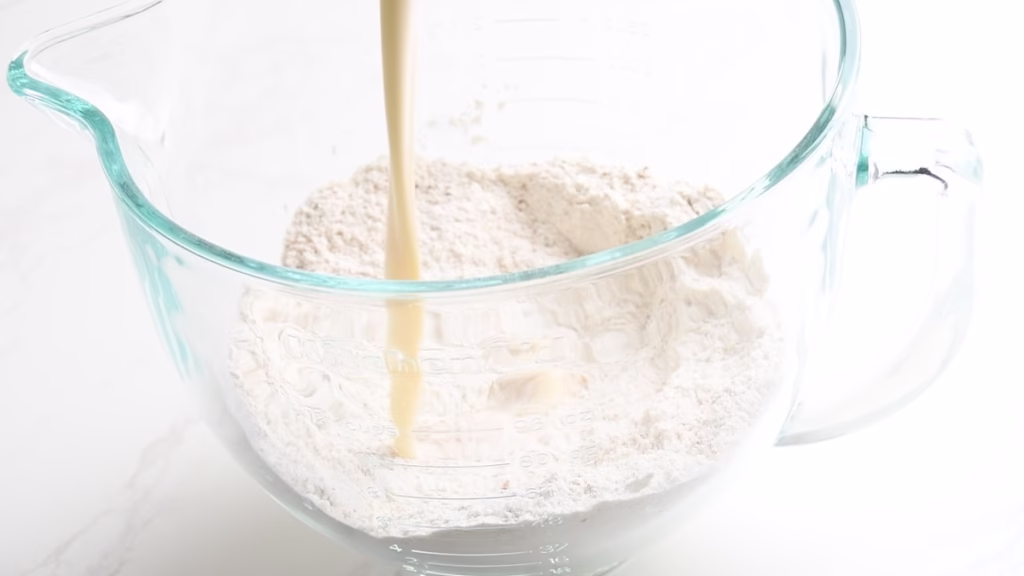
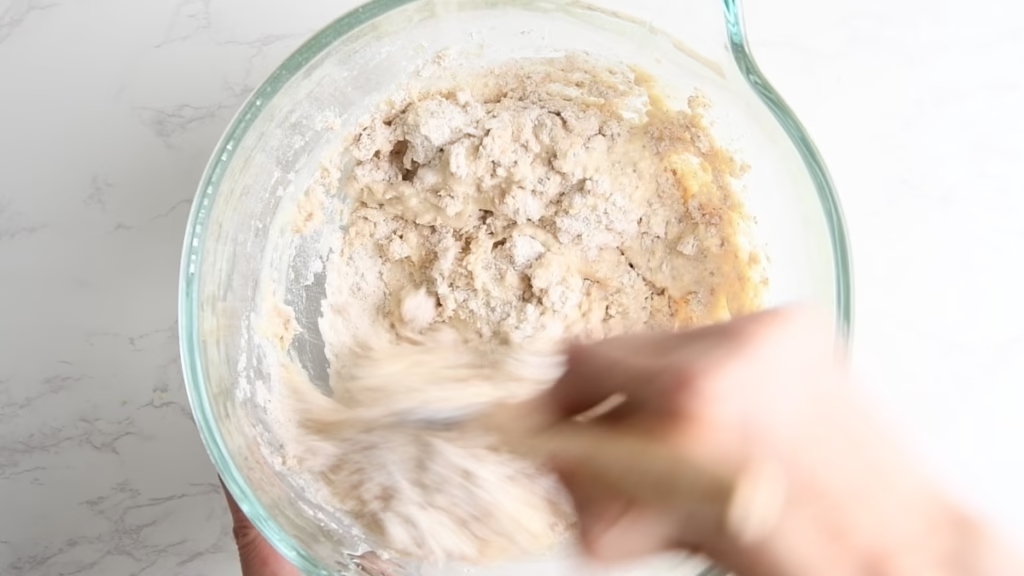
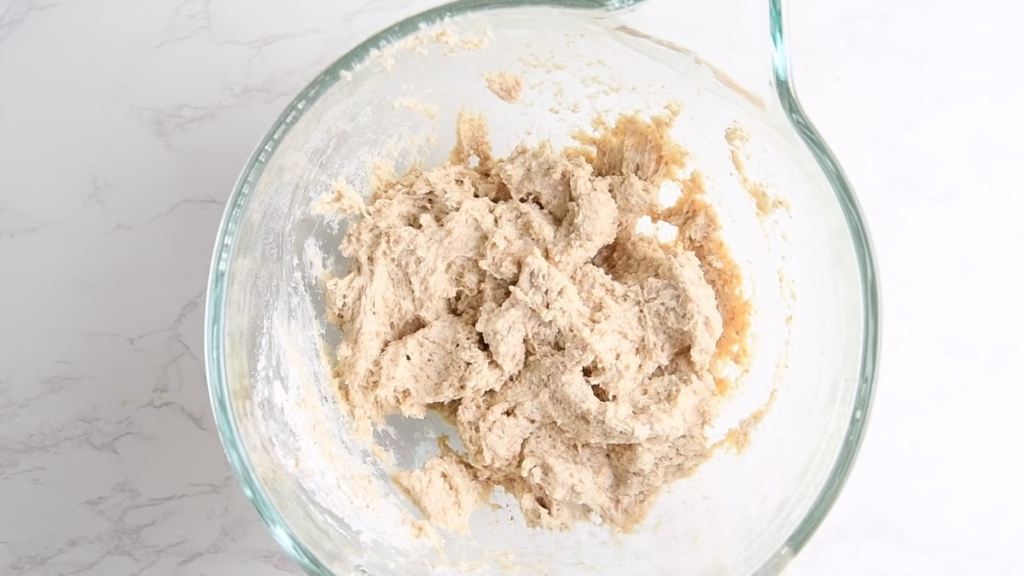
- In a large bowl pour the wet ingredients into the flour and salt mixture.
- Using a dough whisk, spoon or stand mixer (take care to only combine the dough until shaggy in the stand mixer, don’t knead it longer, or it might end up being tough and chewy), stir everything together until you have a shaggy dough.
- Assess if it feels right. It should be very sticky at this point but not batter like. If you can’t get all flour incorporated, add a little more water, a tablespoon at a time.
- Cover with a clean kitchen towel or cling film and allow to rest for 30 minutes.
Stretch and Folds
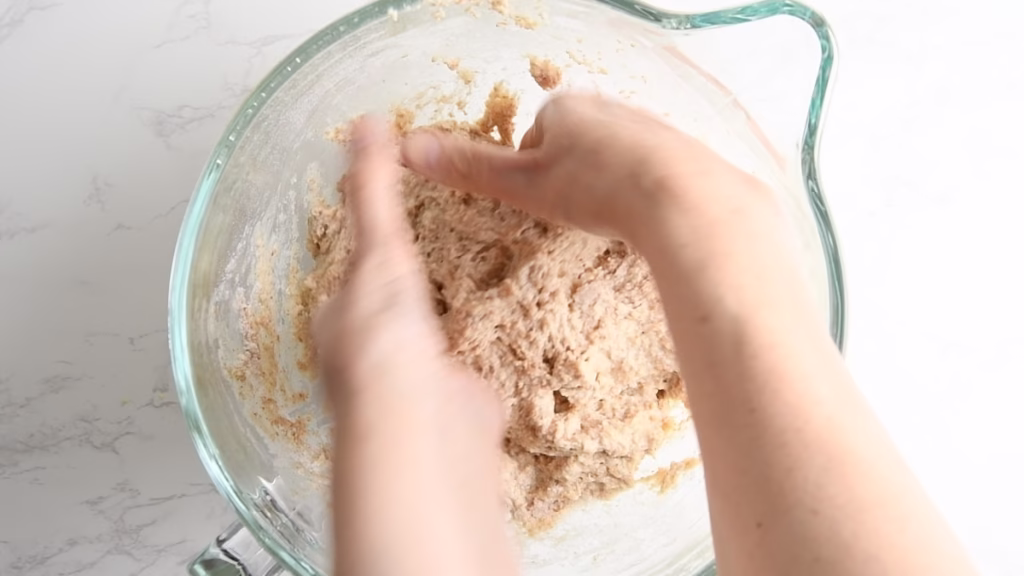
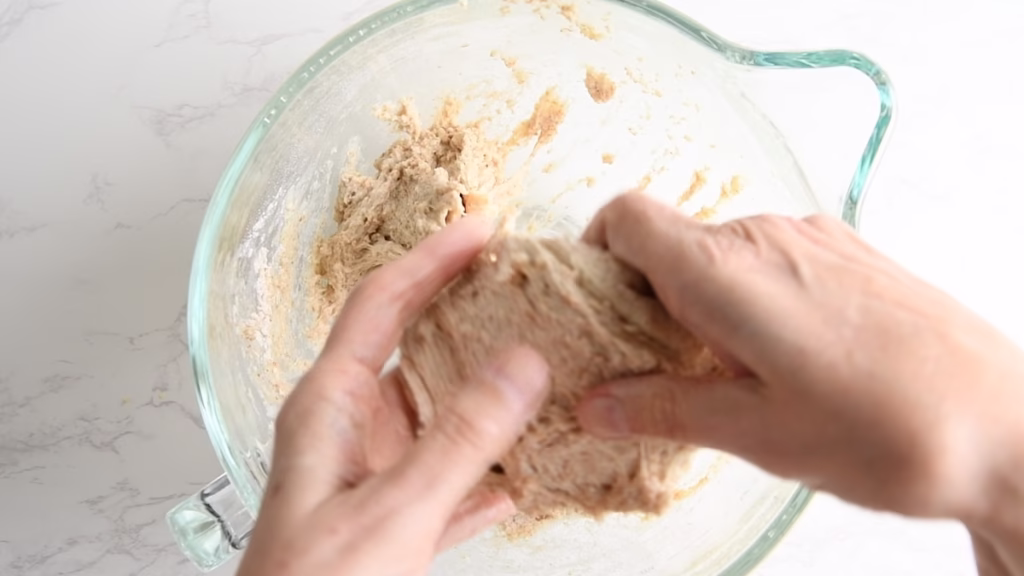
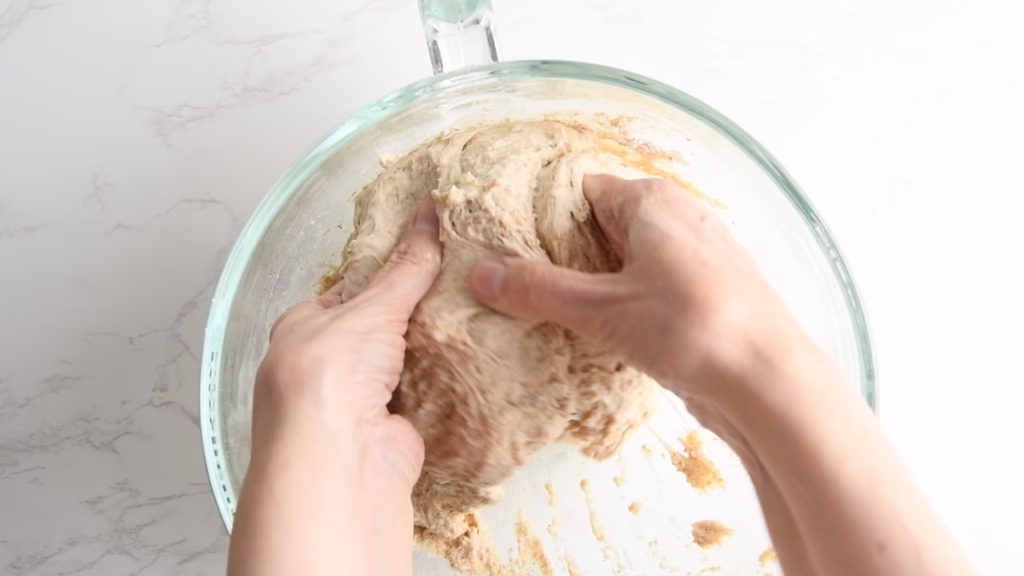
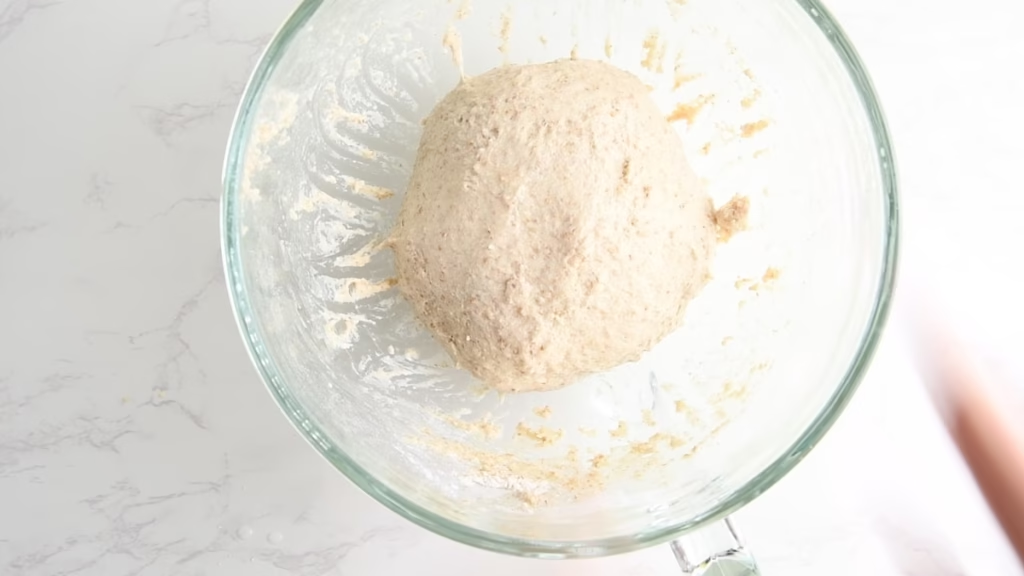
- Within the next 90 minutes, do 3 sets of stretch and folds. This will develop the gluten, incorporate some air and transform your shaggy mass into a smooth and easy to handle dough.
- Using wet hands, as flour would only stick more, push both hands under your dough on one side, pull it up all the way, then fold it over itself. Turn the bowl by 90 degrees, repeat two or three times.
- You will feel an immediate change in your dough. It’ll get smoother and develop resistance to the stretching. If you feel it getting very resistant, even if that is after the second stretch, stop.
- If it’s very sloppy still after the third, perform one set more.
- Leave it covered for another 30 minutes and repeat. Do the same again after the last 30 minutes.
- The times are rough guidelines. Don’t worry if it’s a while longer or shorter. I’ve had times where I only did one set, because I got super busy or had longer breaks between them and it was all good.
- I dare say it will even be ok without, but not as bubbly, springy and easy to work.
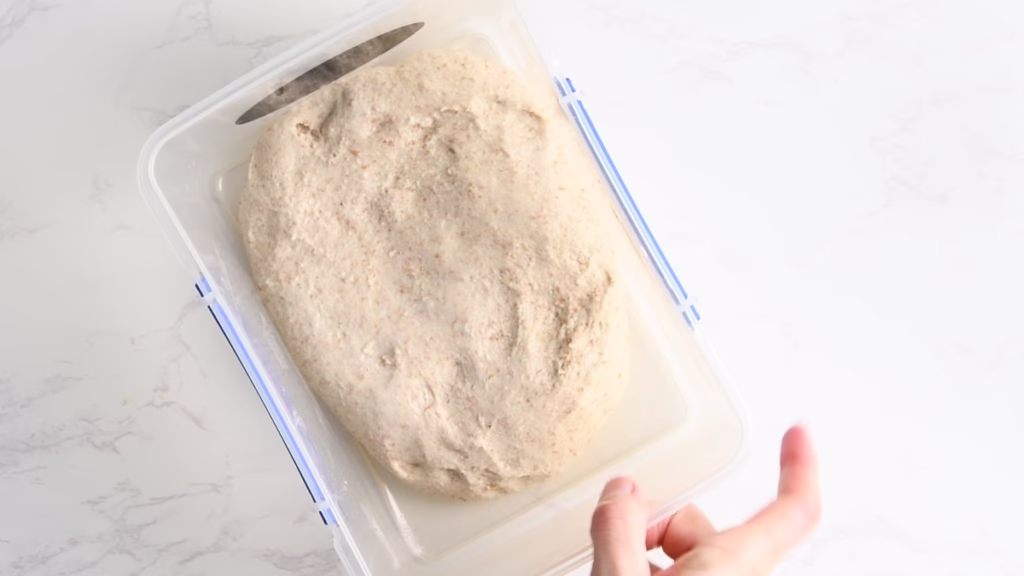
Slow Fermentation
- After the last set of stretch and folds you can transfer your dough into a bowl rubbed with a little olive oil, to make taking it out later easier.
- Cover and allow to slow ferment on your counter for 6-8 hours or overnight. By then it should have at least grown about 50% in volume. In summer mine often doubles, in winter it stays a little flatter. Both will be fine.
Day 3
Divide Into Dough Balls
- On a lightly floured surface to prevent sticking, turn out your now very bubbly dough. Using a dough scraper or knife, divide into 2-8 balls. 2 will make fairly large and a bit thicker bases (mine in the picture was made like this), 4 makes the classic Italian thin pizzas of medium size. 8 will make small individual pizzas.
- Carefully, to not push out all the lovely air, shape your dough into smooth balls by folding them into themselves, pulling the edges toward the center, then pinching them close. This will trap a lot of air and make your pizza crust bubble up nicely.
- I often divide my dough right after the fermentation, then freeze some of the balls for later, using one to make my Sourdough Protein Pizza right away.
Shape Your Sourdough Protein Pizza Crust
- Pre-heat your oven with a pizza stone or sheet pan in it to 425°F/220°C.
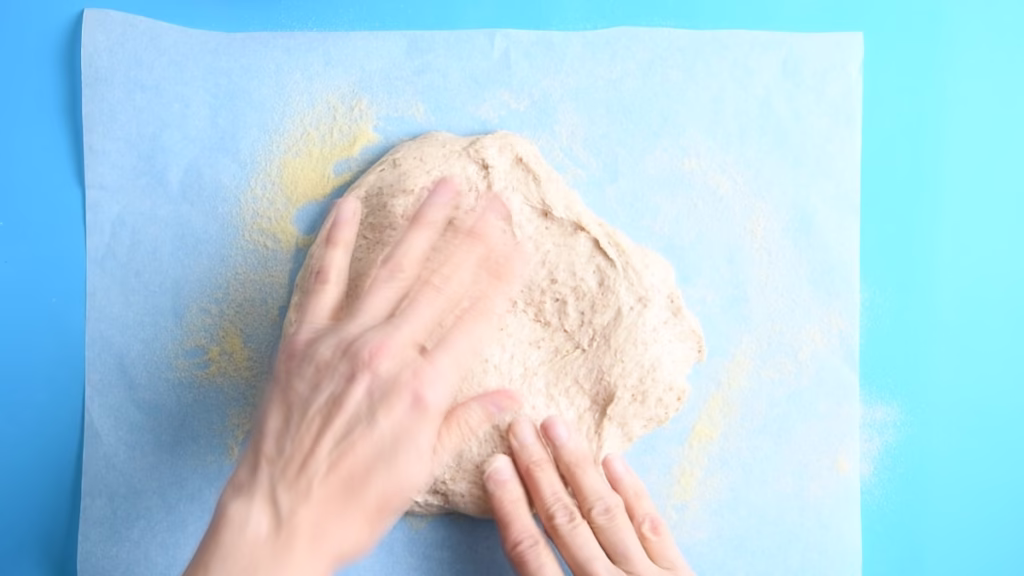
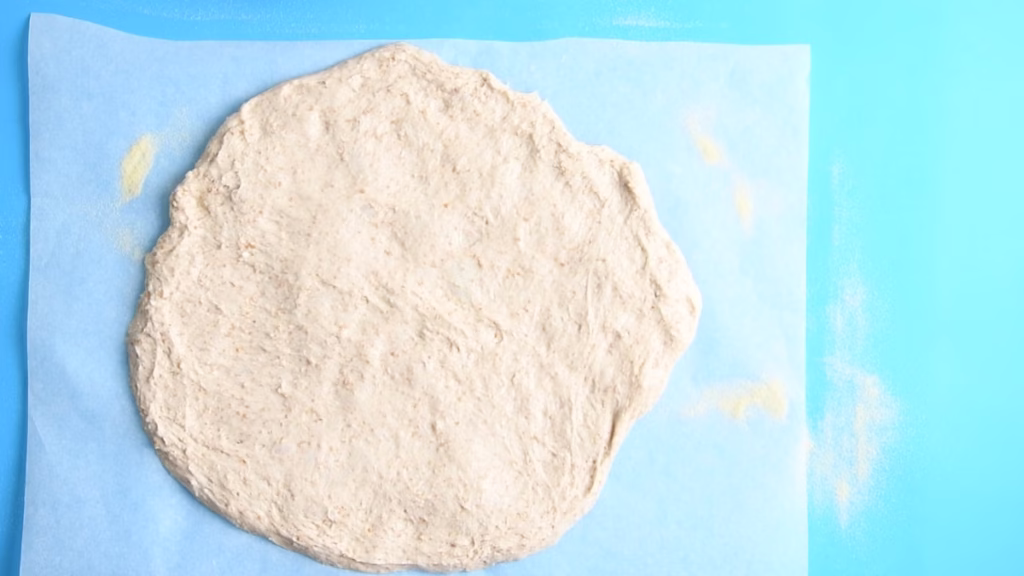
- Since I have no pizza peel (cupboard space is getting pretty tight here!) I shape my pizza on baking parchment for easy transfer.
- Dust your shaping surface with a bit of semolina fine cornmeal. This will give your sourdough crust that typical Italian crunch factor you know from your favorite restaurant and make shaping very easy.
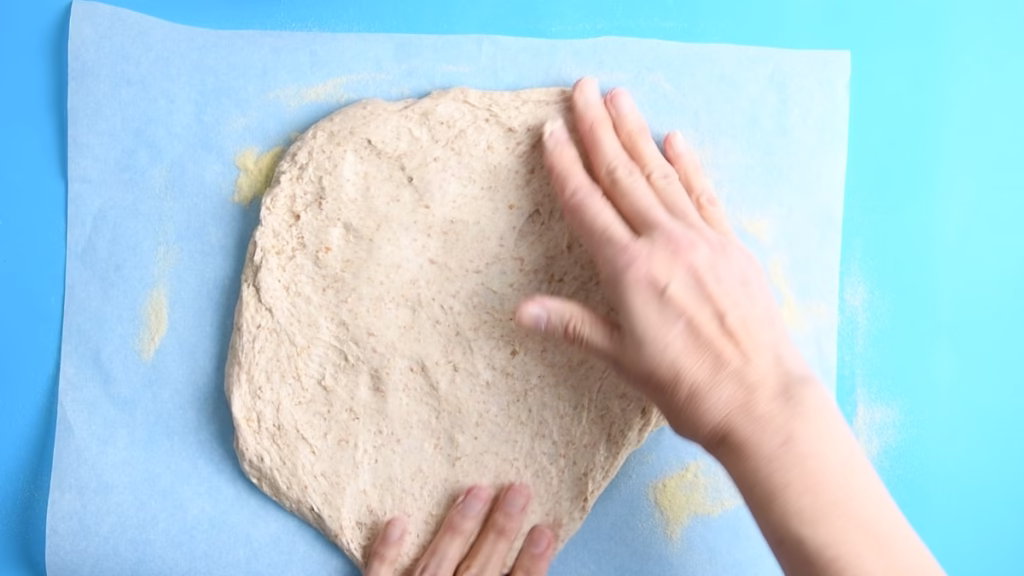
- Using your hands, start flattening the dough, pushing from the center towards the edges, creating a slightly raised rim and getting all those lovely air bubbles into it. This way the middle will be a little thinner, so it can bake quicker beneath the toppings.
- Judge by your own preferences. This is the point where you can decide if you want a thinner, larger pizza or fluffier and smaller. I like mine balanced. Baked through, but not paper thin, so it gets too crispy. I want to taste it under my toppings.
Top With All your Favorites
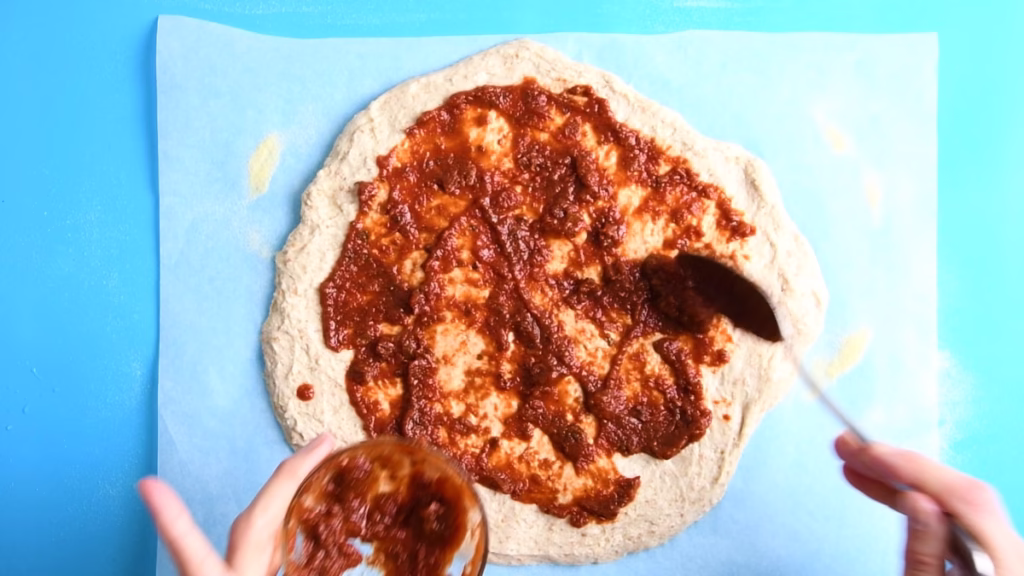
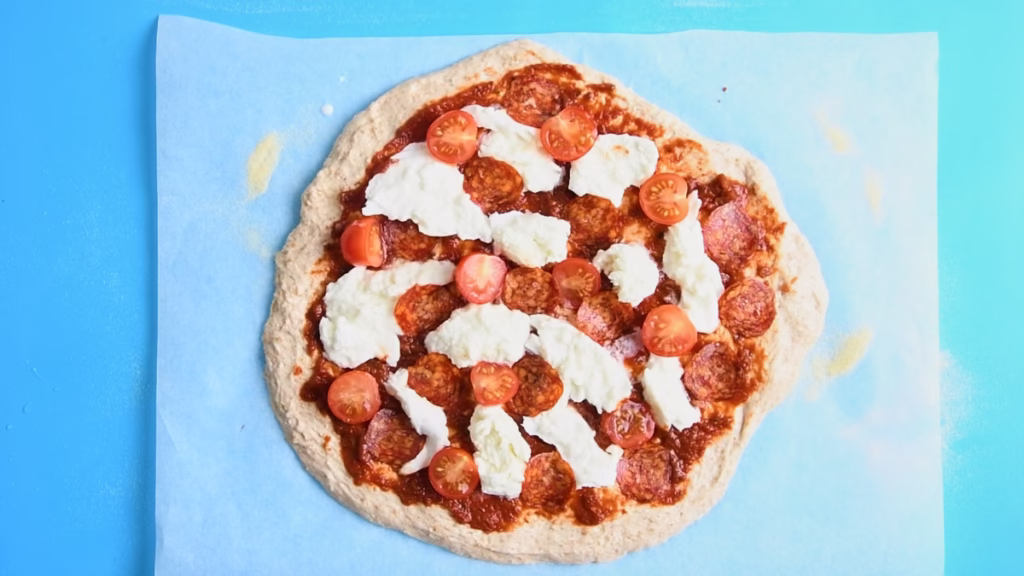
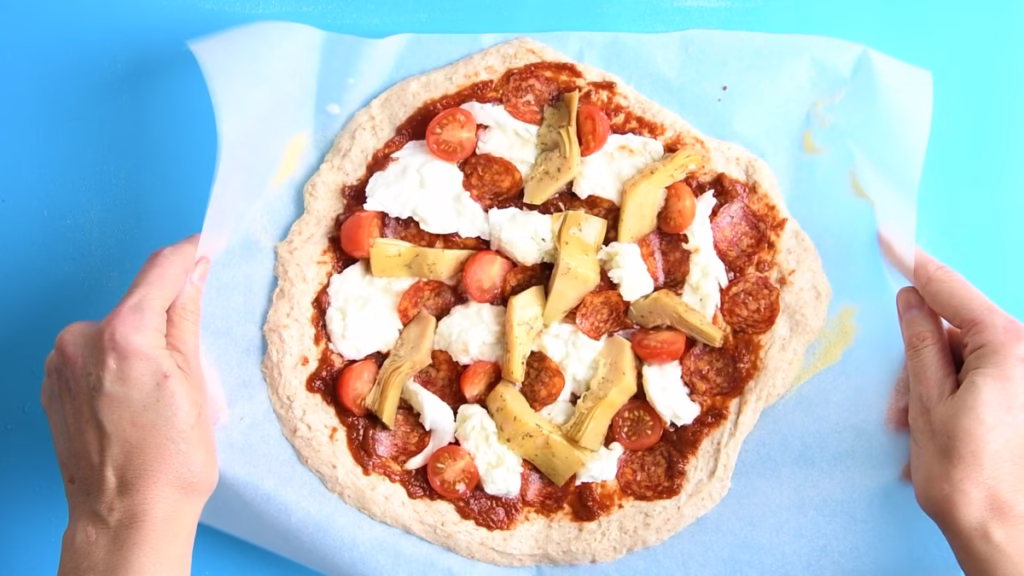
- The toppings are a bit of a balancing act: You want enough to get the flavor, but not so many your crust can’t bake through.
- Start by spreading a few tablespoons of marinara or pizza sauce. I used a ready made one from the jar here, as they are perfect for having a super quick dinner on the table in no time.
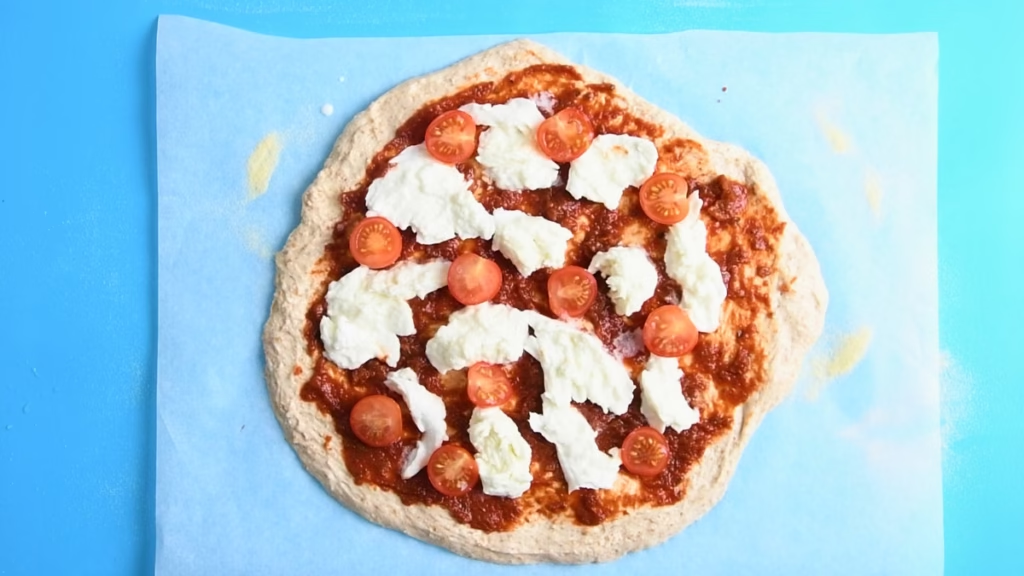
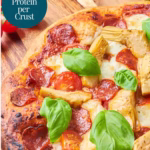
- Then add anything you want to stay soft (in my case the artichoke hearts), then a layer of grated mozzarella cheese or a ball of torn mozzarella, which is what I used here. Or both, if you want.
- On top goes anything you want to crisp up. For example pepperoni or prosciutto.
Bake Your Protein Sourdough Pizza
- Use either a pizza peel or the baking parchment, transfer your pizza quickly onto the stone or sheet pan. Doing this in one smooth motion will keep everything in place.
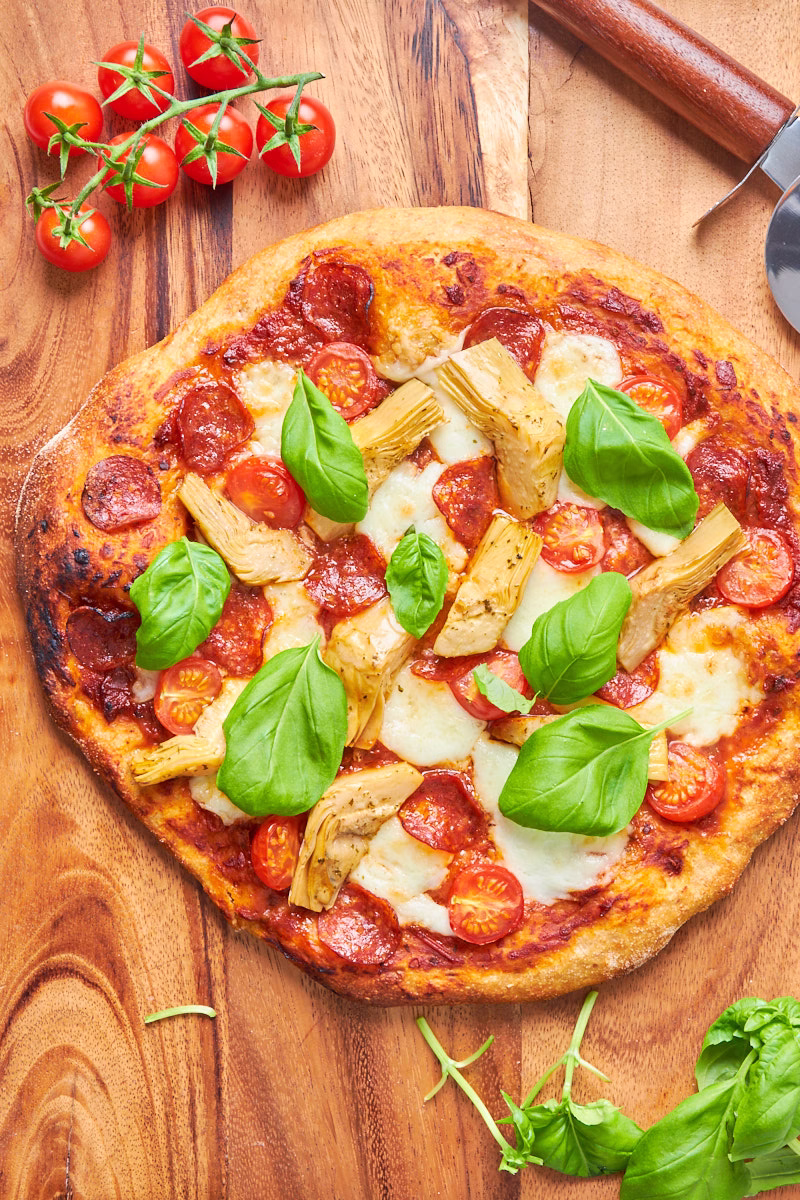
- Bake for 15-20 minutes or until the crust is baked through and golden around the edges and the cheese is melted and bubbly.
- Enjoy with a lovely glass of red wine and feel like you travelled straight to Italy!
Watch The Video
How To Store
The unbaked dough keeps in the fridge for about 5 days and only gets more flavorful and bubblier over time.
To freeze the dough ball, rub a little olive oil over some cling film, wrap the balls into it and keep in freezer bags for about 3 months.
Take them out of the freezer about 3-5 hours before you want to bake (or the day before) and let them thaw completely before shaping.
Alternatively you could pre-bake the crust for about 5 minutes and freeze it shaped, to then take it out frozen, top and bake straight from the freezer for about 15-20 minutes.
Now I’d love to hear from you in the comments!
Have you tried this? Did you enjoy it?
What other recipes would you like to see?
And if you enjoyed this recipe, please consider rating, sharing, or leaving a comment – your feedback truly helps my blog grow!
FAQ
This can happen if the dough has too much flour, is kneaded too much (often with a stand mixer) or over-proofed.
To prevent this make sure to just mix into a shaggy dough first and check if it’s sticky and moist. If it feels dry, add water.
Be careful not to add extra flour unless your dough is a runny mess (unlikely with this recipe). Sourdough will always be wetter than yeasted dough. So if you never baked with it before, trust the process and don’t add flour, even if it feels weird at first.
Then do a few stretch and folds later as explained above instead of kneading, as you would with yeasted dough.
For the same reason we are not rolling out the dough. This can result in a tougher dough, compressing it and pushing out all the lovely air the sourdough worked so hard to produce.
Once your dough has risen by 50% or latest when doubled in volume, transfer to the fridge to slow down the fermentation. It needs time to rise, but if you leave it out, say a full day, it might be too much of a good thing for it to work properly.
Another possibility is the use of very high protein flour or a protein powder with much higher content than the one I used here. There are a million different types of powder out there. I use a whey concentrate with a fairly average protein content of 21g per scoop.
Overbaking is another reason this can happen. To make sure your pizza bakes well, the stone pre-heating is important. It gives the crust underneath the ingredients a good heat burst at the start, baking it through at the same time the sides take to rise and brown.
Other recipes you might enjoy

Looking for more Sourdough Recipes that are made with Cottage Cheese? Here are 15 of them!

Have more discard and need recipes to use it?
This sourdough discard Naan is as easy as it is delicious.

And for dessert? More sourdough and protein of course. Hidden in a super moist yogurt plum cake!

Sourdough Protein Pizza Crust
- Total Time: 12 hours 50 minutes
- Yield: 4 Pizza Crusts 1x
Description
Forget the myth that a high-protein pizza crust must be bland, dry, or dense. This sourdough protein pizza crust recipe is here to prove that you can have it all: the incredible tangy flavor and airy chew of the best artisan sourdough, plus a nice nutritional boost. By replacing part of the water with creamy cottage cheese and a portion of the flour with unflavored whey protein, we achieve over 20g of protein per crust without sacrificing an ounce of classic pizza perfection. Get ready for your new favorite “Emergency Pizza” dough!
Ingredients
Sourdough Starter (Levain)
- 25g starter
- 50g flour
- 45ml water
- (This makes a little more than you need for the dough, so you can keep the leftover as base for your next bake.)
Dough
- 60 g sourdough starter (fed)
- 230 g warm water
- 15 g olive oil (1 tbsp)
- 21 g malt extract or honey (1 tbsp)
- 90 g full-fat cottage cheese
- 25 g unflavored whey protein powder
- 250 g white bread flour
- 120 g whole wheat bread flour
- 10 g kosher salt (2 tsp)
Instructions
Bakers Schedule
- Day 1 – Feed your starter the day before you plan to mix the dough (Or use discard. See Substitutions)
- Day 2 – Mix your dough and allow it to slow ferment overnight. It will need about 6-8 hours and can go into the fridge afterwards, to be ready at any time you want to bake, up to 5 days later.
- Day 3 – Bake your pizza whenever you are hungry. It just takes about 30 minutes from start to finish.
Day 1
Feeding your Starter
- Mix flour and water with a spoon, then add your existing starter to it and stir until incorporated.
- I have started to deviate ever so slightly from the classic 100% hydration (1:1 flour to water ratio) since I found a lower hydration gives me a more active and longer lasting Levain.
- I mostly go by feel when stirring it. It should be relatively stiff and getting harder to stir when all the water is in. This can vary depending on the flour you use and the season/humidity. You’ll get to know your own starter over time. Don’t worry too much about it though, sourdough is incredibly forgiving and will give you great results even with less than optimal starter.
- I have added pictures of mine here, to give you an idea.
- Leave it to activate and double in volume on your counter overnight.
- The time it takes will vary depending on the temperature of your kitchen. Mine is about 71°F/22°C. In summer, when my kitchen is warmer my starter often doubles in half the time.
Day 2
Blend The Cottage Cheese and Protein Powder
- In your blender add half of the water, cottage cheese, malt extract, olive oil and protein powder. Blend until smooth.
- While I often advise to blend the cottage cheese first, with the high water content in this recipe blending it all together works well.
Mix In Your Starter
- In a jug (or your blender cup, but without blending again) add your active starter, the blended cottage cheese-protein mix and remaining water. Stir with a dough whisk or spoon until everything is well mixed and no sourdough starter “blobs” are left.
- In theory you could probably blend it, but I feel sourdough deserves a gentler treatment and blending risks damaging the delicate gluten structure.
Whisk Flour And Salt
- Using your dough whisk or spoon, briefly stir the salt into the flour, giving it all a good mix.
Stir The Dough Together
- In a large bowl pour the wet ingredients into the flour and salt mixture.
- Using a dough whisk, spoon or stand mixer (take care to only combine the dough until shaggy in the stand mixer, don’t knead it longer, or it might end up being tough and chewy), stir everything together until you have a shaggy dough.
- Assess if it feels right. It should be very sticky at this point but not batter like. If you can’t get all flour incorporated, add a little more water, a tablespoon at a time.
- Cover with a clean kitchen towel or cling film and allow to rest for 30 minutes.
Stretch and Folds
- Within the next 90 minutes, do 3 sets of stretch and folds. This will develop the gluten, incorporate some air and transform your shaggy mass into a smooth and easy to handle dough.
- Using wet hands, as flour would only stick more, push both hands under your dough on one side, pull it up all the way, then fold it over itself. Turn the bowl by 90 degrees, repeat two or three times.
- You will feel an immediate change in your dough. It’ll get smoother and develop resistance to the stretching. If you feel it getting very resistant, even if that is after the second stretch, stop.
- If it’s very sloppy still after the third, perform one set more.
- Leave it covered for another 30 minutes and repeat. Do the same again after the last 30 minutes.
- The times are rough guidelines. Don’t worry if it’s a while longer or shorter. I’ve had times where I only did one set, because I got super busy or had longer breaks between them and it was all good.
- I dare say it will even be ok without, but not as bubbly, springy and easy to work.
Slow Fermentation
- After the last set of stretch and folds you can transfer your dough into a bowl rubbed with a little olive oil, to make taking it out later easier.
- Cover and allow to slow ferment on your counter for 6-8 hours or overnight. By then it should have at least grown about 50% in volume. In summer mine often doubles, in winter it stays a little flatter. Both will be fine.
Divide Into Dough Balls
- On a lightly floured surface to prevent sticking, turn out your now very bubbly dough. Using a dough scraper or knife, divide into 2-8 balls. 2 will make fairly large and a bit thicker bases (mine in the picture was made like this), 4 makes the classic Italian thin pizzas of medium size. 8 will make small individual pizzas.
- Carefully, to not push out all the lovely air, shape your dough into smooth balls by folding them into themselves, pulling the edges toward the center, then pinching them close. This will trap a lot of air and make your pizza crust bubble up nicely.
- I often divide my dough right after the fermentation, then freeze some of the balls for later, using one to make my Sourdough Protein Pizza right away.
Shape Your Sourdough Protein Pizza Crust
- Pre-heat your oven with a pizza stone or sheet pan in it to 425°F/220°C.
- Since I have no pizza peel (cupboard space is getting pretty tight here!) I shape my pizza on baking parchment for easy transfer.
- Dust your shaping surface with a bit of semolina fine cornmeal. This will give your sourdough crust that typical Italian crunch factor you know from your favorite restaurant and make shaping very easy.
- Using your hands, start flattening the dough, pushing from the center towards the edges, creating a slightly raised rim and getting all those lovely air bubbles into it. This way the middle will be a little thinner, so it can bake quicker beneath the toppings.
- Judge by your own preferences. This is the point where you can decide if you want a thinner, larger pizza or fluffier and smaller. I like mine balanced. Baked through, but not paper thin, so it gets too crispy. I want to taste it under my toppings.
Top With All your Favorites
- The toppings are a bit of a balancing act: You want enough to get the flavor, but not so many your crust can’t bake through.
- Start by spreading a few tablespoons of marinara or pizza sauce. I used a ready made one from the jar here, as they are perfect for having a super quick dinner on the table in no time.
- Then add anything you want to stay soft (in my case the artichoke hearts), then a layer of grated mozzarella cheese or a ball of torn mozzarella. Or both, if you want.
- On top goes anything you want to crisp up. For example pepperoni or prosciutto.
Bake Your Protein Sourdough Pizza
- Use either a pizza peel or the baking parchment, transfer your pizza quickly onto the stone or sheet pan. Doing this in one smooth motion will keep everything in place.
- Bake for 15-20 minutes or until the crust is baked through and golden around the edges and the cheese is melted and bubbly.
- Enjoy with a lovely glass of red wine and feel like you travelled straight to Italy!
Notes
How To Store
- The unbaked dough keeps in the fridge for about 5 days and only gets more flavorful and bubblier over time.
- To freeze the dough ball, rub a little olive oil over some cling film, wrap the balls into it and keep in freezer bags for about 3 months.
- Take them out of the freezer about 3-5 hours before you want to bake (or the day before) and let them thaw completely before shaping.
- Alternatively you could pre-bake the crust for about 5 minutes and freeze it shaped, to then take it out frozen, top and bake straight from the freezer for about 15-20 minutes.
FAQ
Why is my pizza crust tough and chewy?
- This can happen if the dough has too much flour, is kneaded too much (often with a stand mixer) or over-proofed.
- To prevent this make sure to just mix into a shaggy dough first and check if it’s sticky and moist. If it feels dry, add water.
- Be careful not to add extra flour unless your dough is a runny mess (unlikely with this recipe). Sourdough will always be wetter than yeasted dough. So if you never baked with it before, trust the process and don’t add flour, even if it feels weird at first.
- Then do a few stretch and folds later as explained above instead of kneading, as you would with yeasted dough.
- For the same reason we are not rolling out the dough. This can result in a tougher dough, compressing it and pushing out all the lovely air the sourdough worked so hard to produce.
- Once your dough has risen by 50% or latest when doubled in volume, transfer to the fridge to slow down the fermentation. It needs time to rise, but if you leave it out, say a full day, it might be too much of a good thing for it to work properly.
- Another possibility is the use of very high protein flour or a protein powder with much higher content than the one I used here. There are a million different types of powder out there. I use a whey concentrate with a fairly average protein content of 21g per scoop.
- Overbaking is another reason this can happen. To make sure your pizza bakes well, the stone pre-heating is important. It gives the crust underneath the ingredients a good heat burst at the start, baking it through at the same time the sides take to rise and brown.
- Prep Time: 30 minutes
- Cook Time: 20 minutes
- Category: Sourdough Protein Recipes
- Method: Bake
- Cuisine: Italian


This is a great recipe, thanks for sharing the protein-rich version of pizza crust, my family enjoyed it.
That’s great to hear. Thanks a lot for letting me know!
Love this high-protein sourdough crust — healthy, flavorful, and perfectly chewy!
Thank you, so happy you love it!
Fantastic flavour in this protein pizza. Loved the pizzeria worthy crust!
Thank you, so happy you liked it!
This came out so well! And it makes pizza feel a little more nutritious!
Thank you! Just the excuse we need for eating pizza, isn’t it? 🙂
This is genius! I never thought protein-packed pizza could taste this good. The sourdough tang and chewy crust totally won me over.
Aww, thank you so much! So happy you enjoyed it. 🙂