Cinnamon Raisin Sourdough Protein Bread
Get ready to bake a bread that combines the comfort of German-style raisin bread with the gut-friendly benefits of sourdough. This soft, enriched loaf, packed with a warm cinnamon swirl, fills your home with an irresistible aroma. What makes it truly special is the boost of protein from simple additions like cottage cheese and protein powder, turning a classic treat into a satisfying, everyday staple that’s perfect for toast, sandwiches, and more.

This post may contain referral links for products I love.
For The Pleasure Of Eating earns a small commission on these links at no cost to you.
- Why You’ll Love This
- The Ingredients
- Substitutions
- Equipment Used
- How to Make this
- How To Store
- FAQ
- Other Recipes You Might Enjoy
Why You’ll Love This
TL;DR
- Soft & Flavorful: A fluffy, enriched bread with a cozy cinnamon swirl and juicy raisins.
- Protein-Packed: Over 9g of protein per slice, thanks to walnuts, cottage cheese, eggs, and protein powder.
- Easy to Digest: The sourdough’s long fermentation makes this bread easier on the stomach.
- Versatile: Perfect for sandwiches, toast, French toast, or even bread pudding!
- Simple Process: A relaxed, no-stress recipe that works with your schedule.
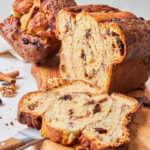
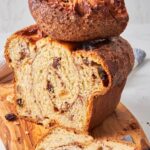
Soft Cinnamon Raisin Sourdough Bread
When I think of raisin bread, German bakeries with their soft brioche-like loaves come to mind. While available all year round these days, they are traditionally eaten around lent, some braided, some baked in loaf pans like this one.
Their egg and butter enriched dough envelops the raisins perfectly and basically begs to be rolled into a cinnamon swirl version, as I did here, flooding your house with the most delicious cosy scent. No scented candles needed. Though of course lighting some makes everything more special, doesn’t it?
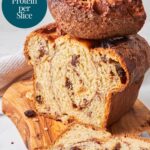
Enriched With Protein
While your classic sourdough loaf with raisins would have about 4-5g protein per slice, this one comes with over 9g, thanks to the eggs, cottage cheese, protein powder and walnuts. All of these ingredients roughly double the protein content, especially when you compare it to a classic loaf on a percentage basis. This one has 19% protein, which is a lovely benefit.
And thanks to the ability of the enzymes in sourdough and the long, slow fermentation, the protein is broken down intro smaller molecules, so your body can digest them easier, as I explained in my post on why I’m adding protein to my sourdough bread.
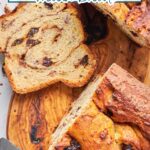
Perfect For Toast And Sandwich
Because the cinnamon filling contains no extra butter, which would separate the layers due to the non-stick capabilities of butter, this sweet sourdough bread is perfectly suited for sandwiches (PBJ would be amazing!) and French toast. It’s sturdy enough to hold together, yet soft and fluffy, so it gives easily when biting into it. Personally I adore a crispy crust in my bread, which is why I emphasised this one by sprinkling cinnamon sugar over it. But if you love yours soft, simply brush it with butter while still warm.
You could even make it taste similar to a British tea cake by drizzling it with some simply syrup after baking.
And you know what it would also be fabulous for? Bread pudding!
Sourdough For Easy Digestibility and Flavor
While I sometimes find yeasted sweet breads a bit heavy and too sweet, the tang from the sourdough in this raisin cinnamon bread balances the sweetness perfectly.
The long fermentation breaks down both the lactose from cottage cheese, protein powder and butter and even makes the gluten from the flour easier digestible for those with mild gluten intolerance.
Ingredient Notes
As always I’m giving you some information on the noteworthy ingredients. You can find the full list and amounts in the recipe card below.
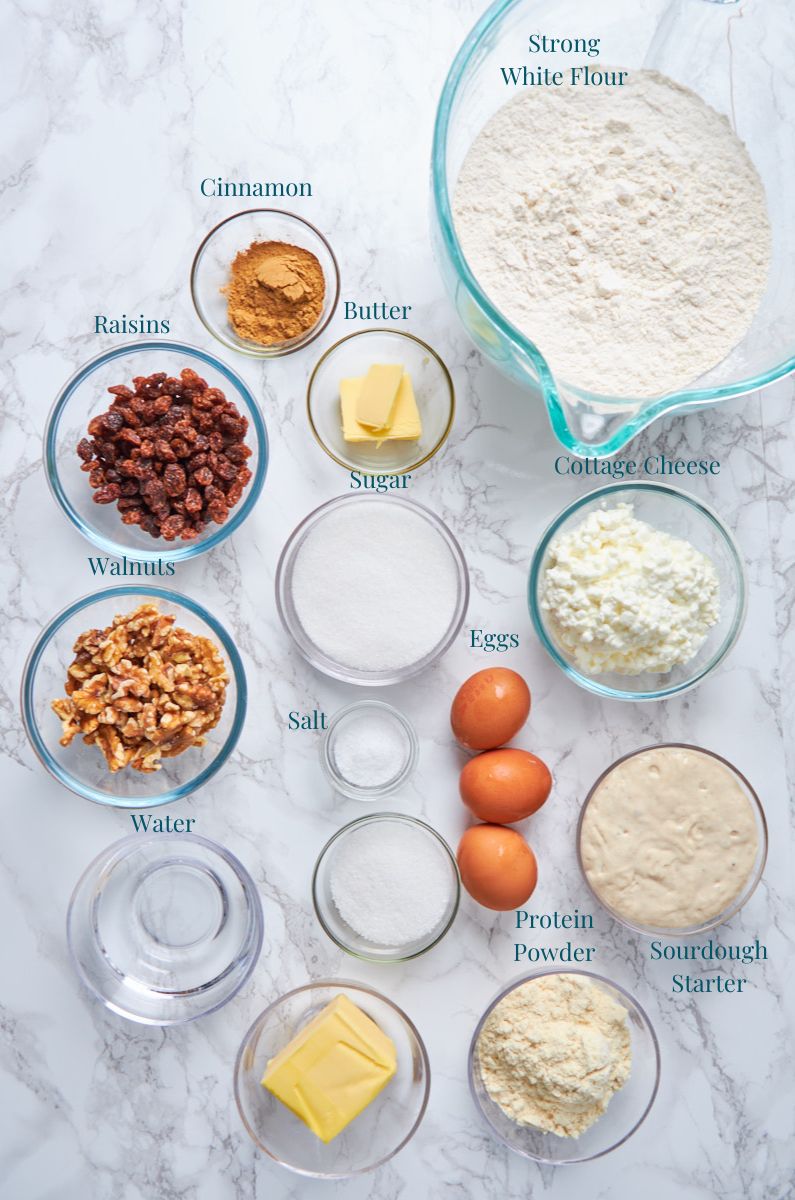
- Cottage Cheese – You can use any cottage cheese here. The fat content is fairly small in even the full fat versions, so it won’t make much of an impact in the dough.
- Protein Powder – I used MyProtein whey concentrate in vanilla flavor for this bread, as the hint of extra sweetness and vanilla work lovely for a sweet loaf.
(This is neither affiliated nor sponsored. Just the powder I found to taste best after trying a fair few. If you never found one you actually enjoy, give this one a try.) - Strong White Flour – I prefer using this type of flour (also called bread flour) in most of my loaves, as it contains more protein and forms stronger gluten strands than AP flour.
- Sourdough Starter – I found that if I don’t go with the classic 100% hydration (same amount of water to flour) but rather use a little more flour than water, my sourdough starters peak activity lasts longer and it’s much stronger. This gives you more flexibility on when to use it, which is always a good thing.
A Note On Sourdough Starter
While a starter at peak activity is fantastic (especially for a relatively heavy brioche-like dough), I know that life gets in the way, and we can’t always plan around our sourdough’s peak activity. I sure can’t!
So just do what you can by feeding your starter the day before and make the dough somewhere in the first half of the next day. If you give it enough time to ferment/rise it’ll be fine, I promise.
I can’t count the times I baked with less than perfect starter and frankly rarely worried about it. Could some bread have had a more perfect rise if I timed it better? Sure. Did they look and taste amazing anyway? You bet!
I feel we need to obsess less about perfection and enjoy the simplicity that sourdough gives us in bread making. After all it’s been around for thousands of years, and you bet not everyone baking with it sat there and waited until perfect peak activity.
We have enough stressors in our life. Let’s not add another one in form of sourdough to them!
substitutions
Dough
- Cottage Cheese – Low fat Greek yoghurt works well as substitution. It has a little less protein, but on the other hand needs no blending. I have yet to try a vegan version but would imagine it could work to use vegan low fat Greek yoghurt too. If you try it, I’d love to hear from you!
- Protein Powder – I tried out 3 different types of protein powder in my Easy High Protein Sourdough bread and am happy to report that both spent Barley Protein as vegan version and Casein Protein work well in baking. When using barley protein, you may need to reduce the water by 1-2 tablespoons. For casein, add an extra 1-2 tablespoons of water.
I have not tried any other vegan powders in my baking, as any I had in form of shakes just didn’t taste good enough to want them in my bread. - Strong White Flour – All purpose flour would work here instead but might need a little less water. You could also replace about 1/3 of the flour with whole wheat bread flour and use a little more water.
- Sugar – Brown sugar will work fine, so will cane sugar or coconut sugar. For the dough you could also use honey, but reduce the water by 1-2 tbsp to make up for the higher moisture in honey.
- Butter – Olive oil will work too, so would coconut oil (and give a lovely flavor addition too!).
Add Ins
You can get wildly creative with the add ins, as long as you keep it to roughly 2 cups of them.
- Raisins – Use dried cranberries, cherries or blueberries instead. Or make a fall version with dried apples, similar to my Apple Fritter Sourdough Focaccia. Or just leave them out and make a cinnamon swirl sourdough bread.
- Walnuts – They do add a good amount of protein in this bread. Pecans would be lovely instead if you are not a fan of walnuts. Or add chocolate chunks (can I suggest together with the cherries?) and completely ignore the protein from the nuts.
- Cinnamon Swirl – If you are not a fan of cinnamon (how did you stumble over this recipe?) you can simply make raisin bread and leave the swirl out entirely. Or use some ground cardamom, taking it into the direction of Swedish kardemummabröd.
- Grated orange zest would also make a really lovely cinnamon replacement or addition.
Topping
I used the remains of cinnamon sugar, but a brush with egg wash, milk or butter would be lovely too.
Equipment Used
- Blender – As in most of my recent Sourdough Protein recipes I use a blender to get the cottage cheese really smooth and creamy. A Nutribullet works really well, since it’s small enough.
- Stand Mixer – Because I’m decidedly too lazy to knead the butter into this rather sticky and heavy dough I used a stand mixer for this one, just briefly, to achieve a smooth consistency.
- Or Bowl and Spoon – If you don’t have a stand mixer, don’t worry. You can absolutely knead the dough by hand.
- Loaf Pan – My loaf pan holds 1.5lb and is from Nordic Ware Naturals. I love how evenly it bakes and how easy I can get my bread out without baking parchment. Any loaf pan that holds around this weight will work though. And if yours is too small? Either bake 2 loaves or put into your pan as much as it holds and bake the rest of the dough on the side as treat.
A larger pan won’t be much of an issue, as this bread rises incredibly high in a 1.5lb pan. So it should easily fill a slightly larger pan and simply not rise as high. Alternatively use the function in the recipe card to double the recipe, if you pan is double the size.
 Buy Now →
  Buy Now →
  Buy Now →
 How to Make this
Day 1
2 days before baking
Make your Sourdough Starter (Levain)


- In an ideal world, you would feed your sourdough 2 days before planning to bake this bread in the evening.
- If you didn’t, don’t despair. You can feed it early in the morning, leave it in a warm place for about 4-8 hours, depending on room temperature, and it should be fine. If yours seems to be taking longer, boil some water, pour it into a cup and place it in your oven with just the light switched on. Place your starter jar beside it and you’ll have the perfect temperature for it to thrive.
- The same goes for the dough later, if your house is fairly cold.
- With a very active and freshly fed starter, I managed to mix the bread dough early in the morning and bake in the evening. However it needs at least 2h to cool, so plan with that.
Day 2
1 day before baking
Preparations
I usually start my bread in the evening with enough time for a few optional stretch and folds during the bulk ferment. So about 2h before going to bed/settling in with some Netflix.
Either melt your butter and let it cool completely or let it soften outside the fridge. Just don’t use it either hot or fridge cold. Both versions won’t incorporate well and have different undesirable effects for this particular dough. Put it to the side until you need it.
Blend cottage cheese and protein powder
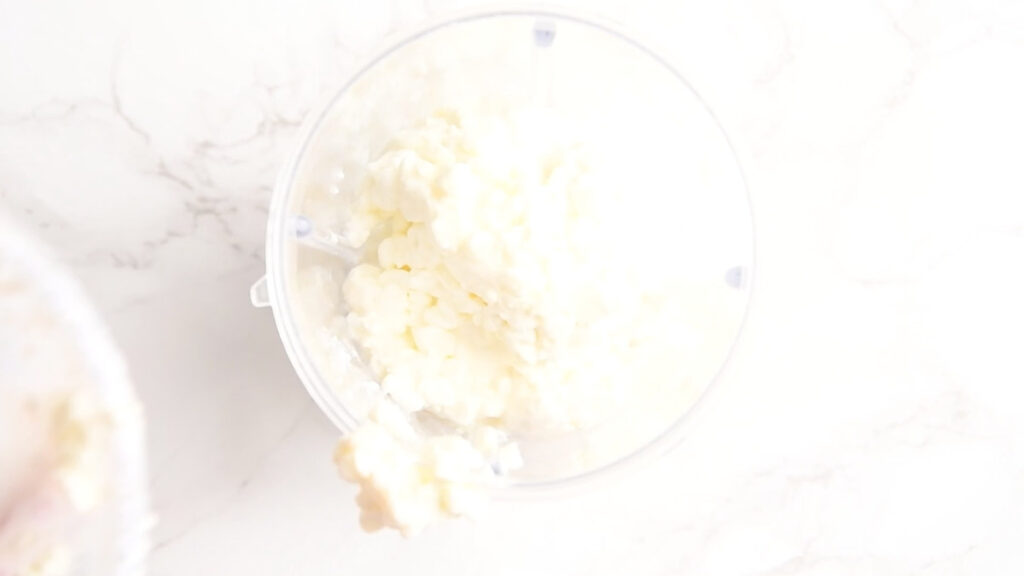
- Using about ½ cup of the water in the recipe, start by blending the cottage cheese. I usually do this in my Nutribullet, as the Vitamix* is a bit too big for the task. But any blender will work. Or in doubt even a food processor*. As long as it breaks up the curds into a smooth liquid.
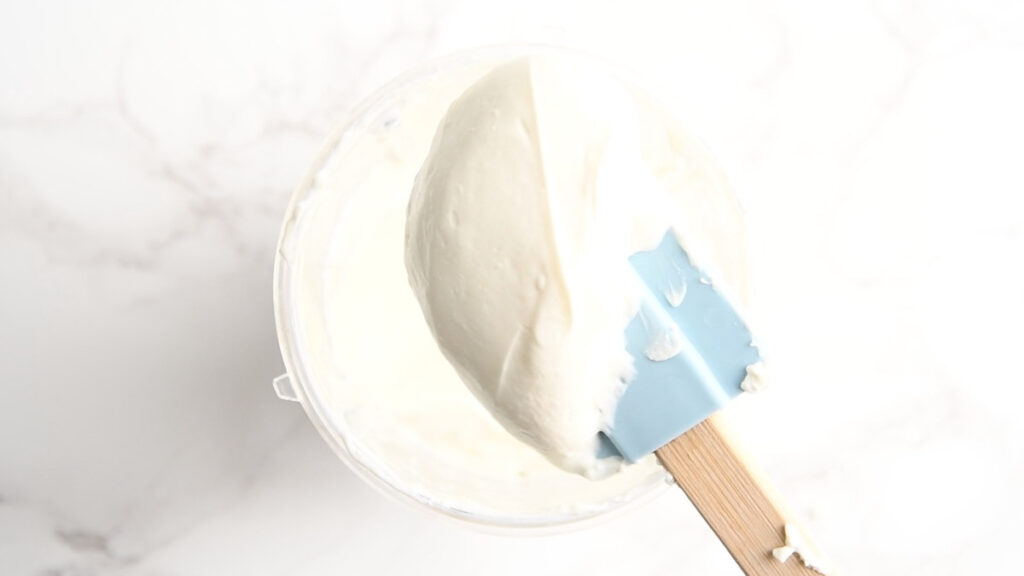
- Add the protein powder and sugar for the dough. Briefly blend again until no lumps are left.
- Now, you might be tempted to throw in the protein powder right with the cottage cheese, but from the experience of the clumped up mess I scraped out of my blender: I wouldn’t advise you to. It becomes perfectly smooth though as soon as the cottage cheese is liquified first.
Whisk The Wet
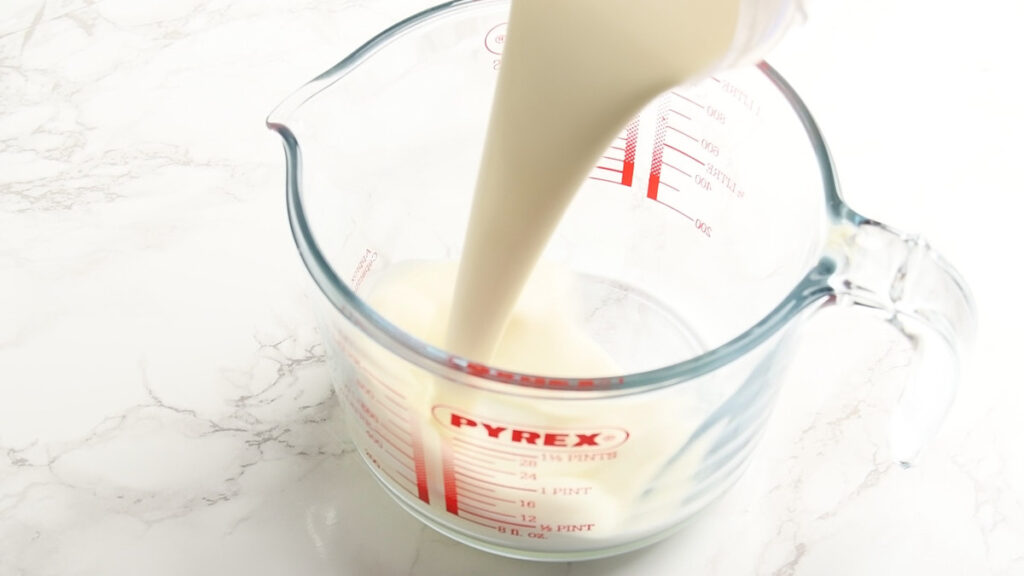


- Stir the blended cottage cheese-protein mix into the remaining water and sourdough starter. I’m using a dough whisk*, but a simple spoon, whisk* or fork will do just fine.
- Add your eggs and whisk in as well.
Mix the Dry
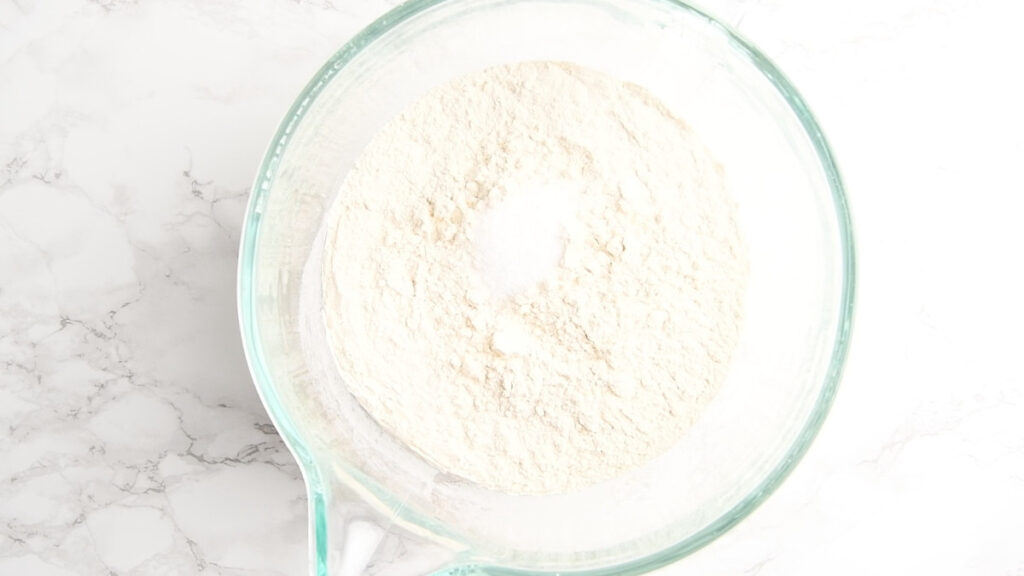
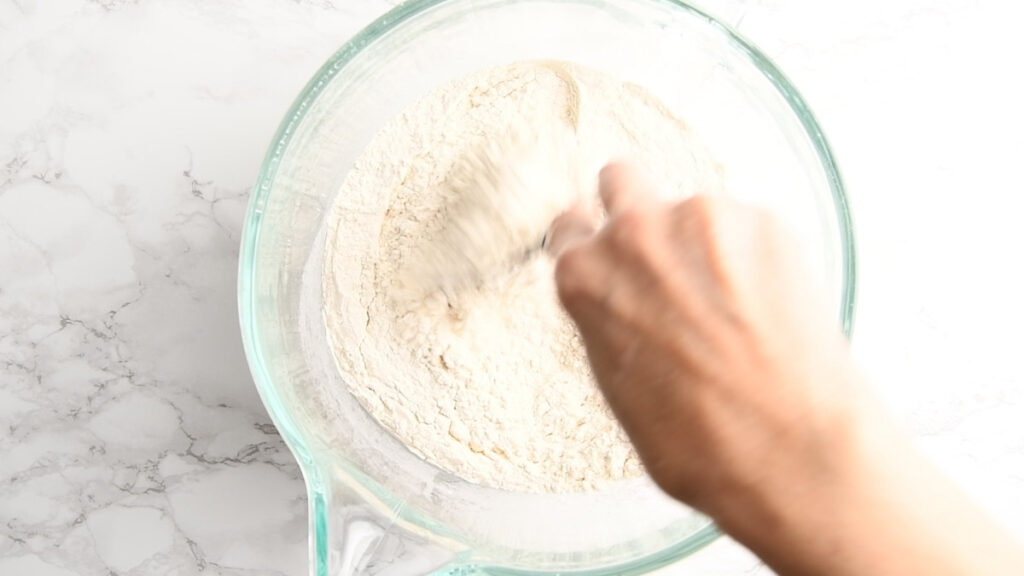
- Add the salt to your flour and mix it in well, so it doesn’t come into direct contact with the sourdough starter.
- Many sourdough bakers work it into the dough after the autolyse as it can slightly inhibit gluten formation, just as butter (which coats the flour with fat), but personally I tried both methods and didn’t see much of a difference in the resulting bread, yet a fair amount more work. So I add it from the start.
Stir the wet into the dry

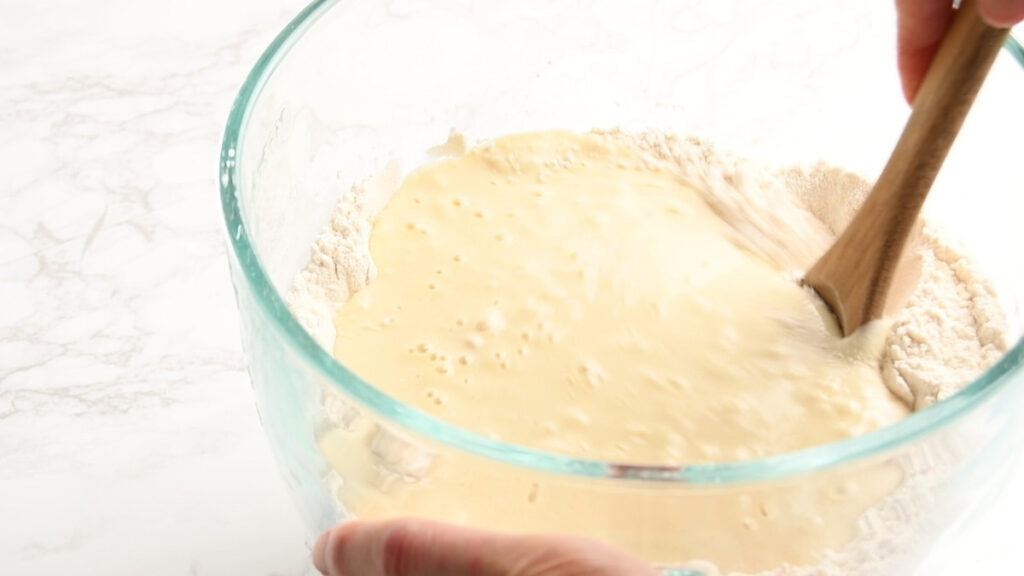
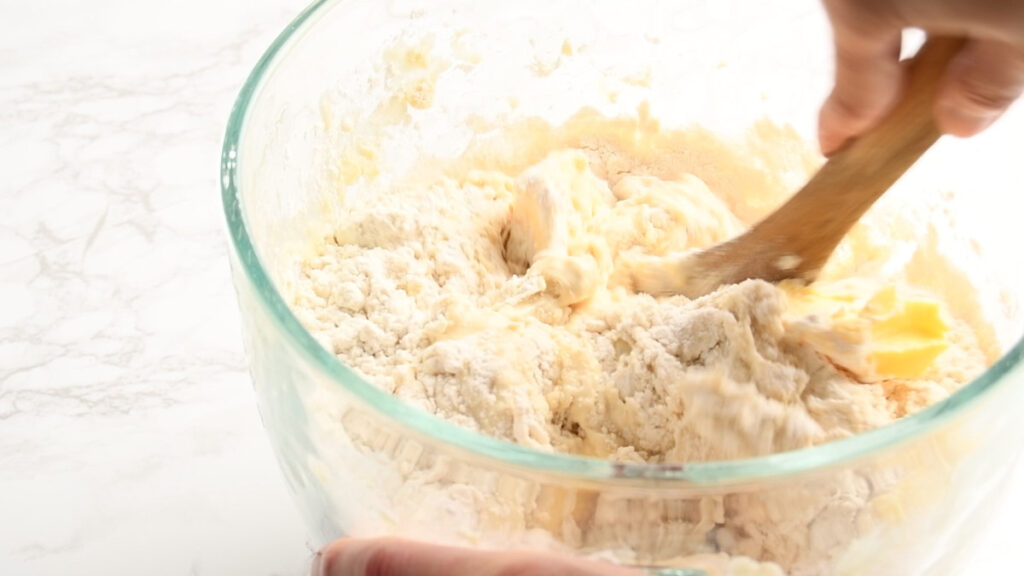
- Pour your creamy protein mix into the flour.
- Either use your stand mixer or start stirring with a dough whisk or wooden spoon. Or just use your hands, whatever floats your boat. Mix until you have a shaggy dough.
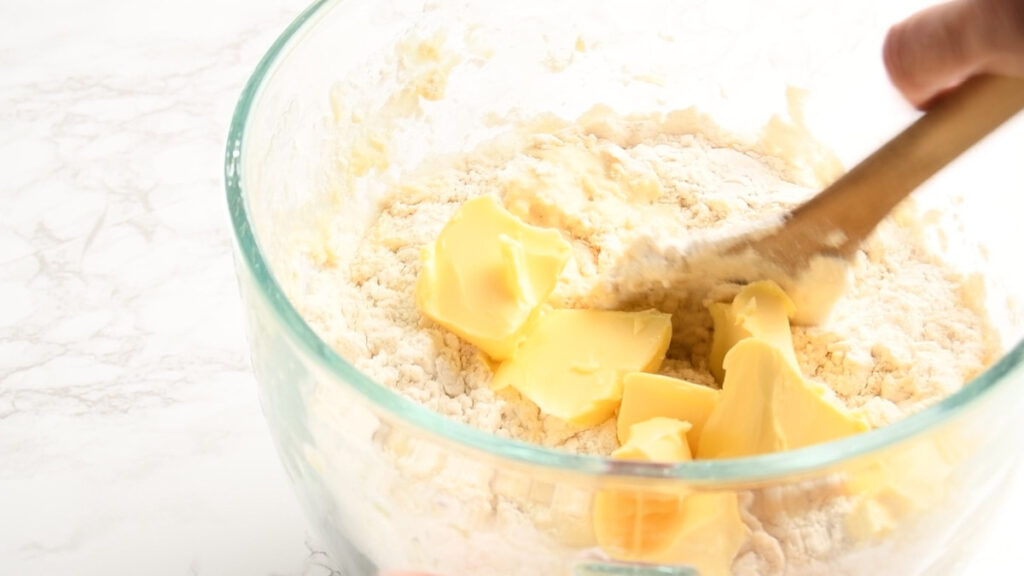
- Now, if you want to do it the “correct way”, leave your dough for 30 minutes for the autolyse. Then add the butter and salt and knead it in.
- I admit I’m way too impatient for this extra step and waiting, so I simply added it right after the first stirring, using my stand mixer on speed 1 for this until I had a smooth dough.
- Cover and allow to rest for 30 minutes.
Note:
The dough is soft and sticky at this point. It won’t necessarily come away from the sides of the bowl. That’s working as intended. It will after a few sets of stretch and fold.
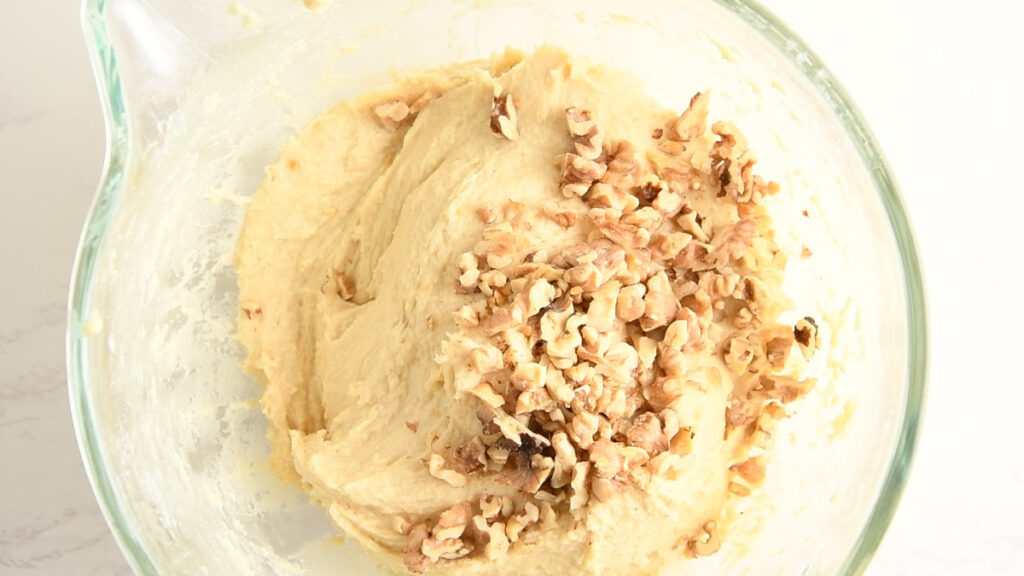
Prepare The Mix-ins
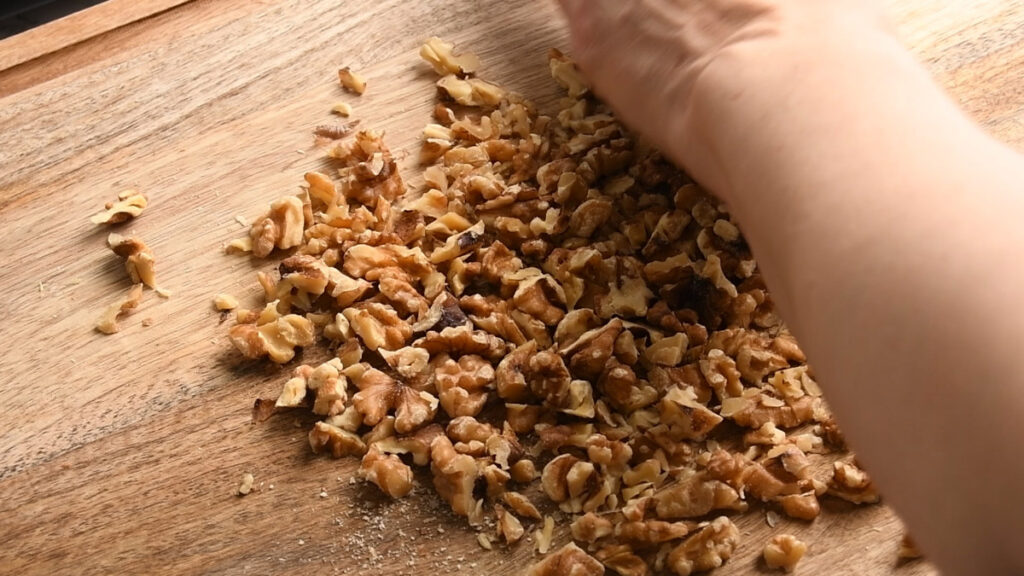
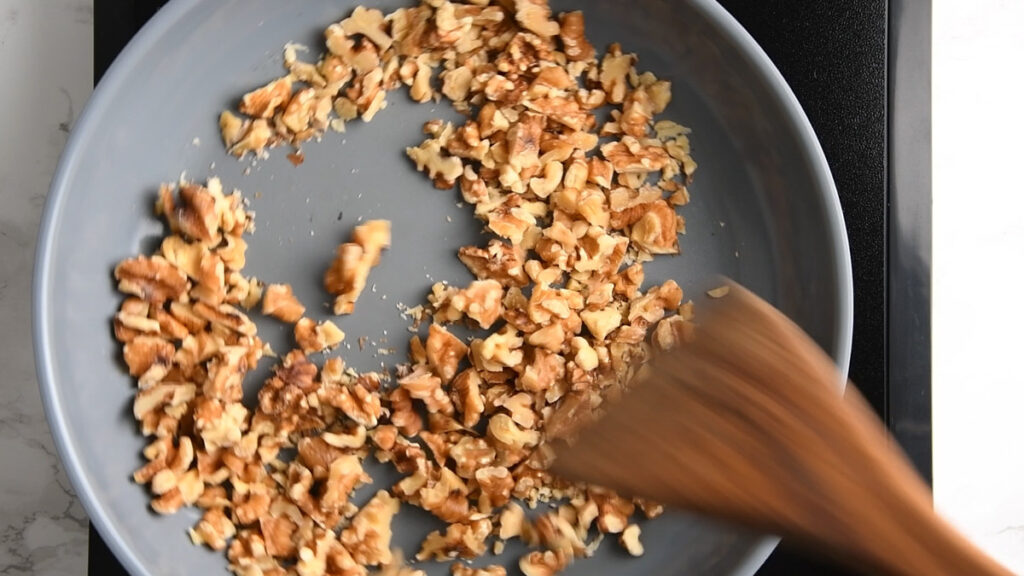
- While your dough is resting, chop the walnuts roughly.
- Toast them in a dry pan on medium-high heat until they smell really lovely. Keep an eye on them, as they burn quickly.
- Transfer to a bowl and let them cool.
- Measure out your raisins.
Stretch And Fold
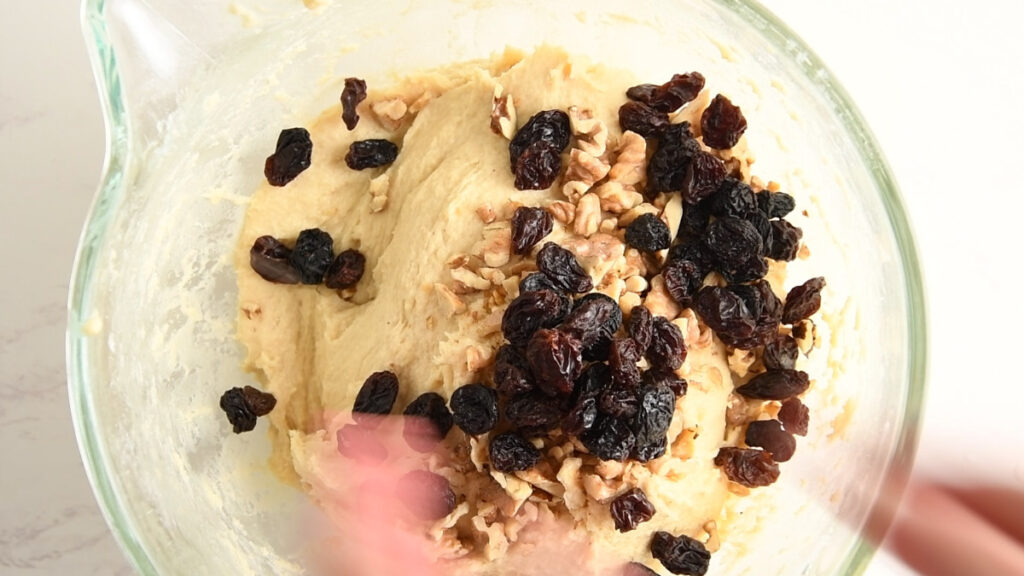
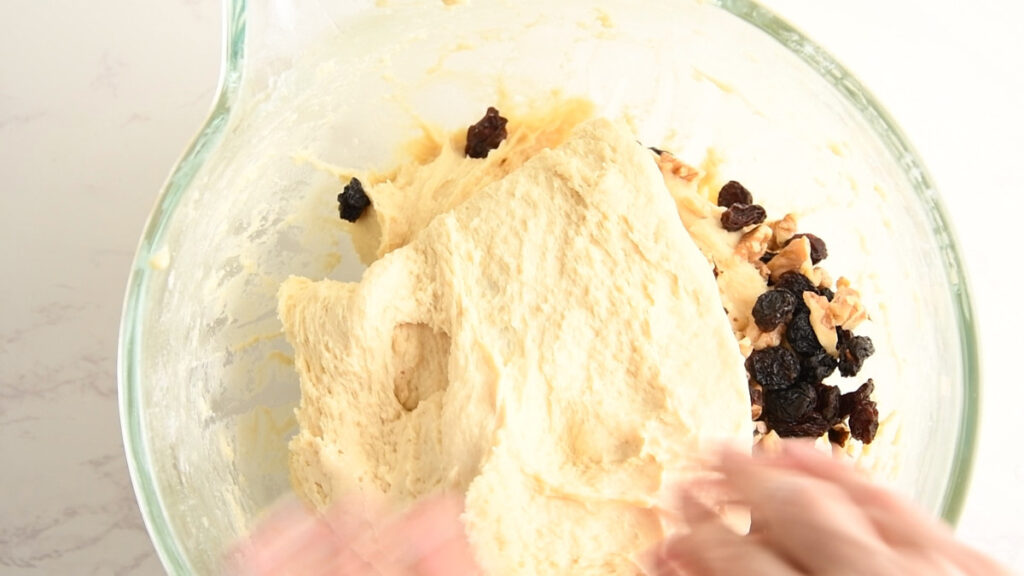


- Once your dough had its first 30minutes of resting, add ½ of the raisins and walnuts on top of the dough.
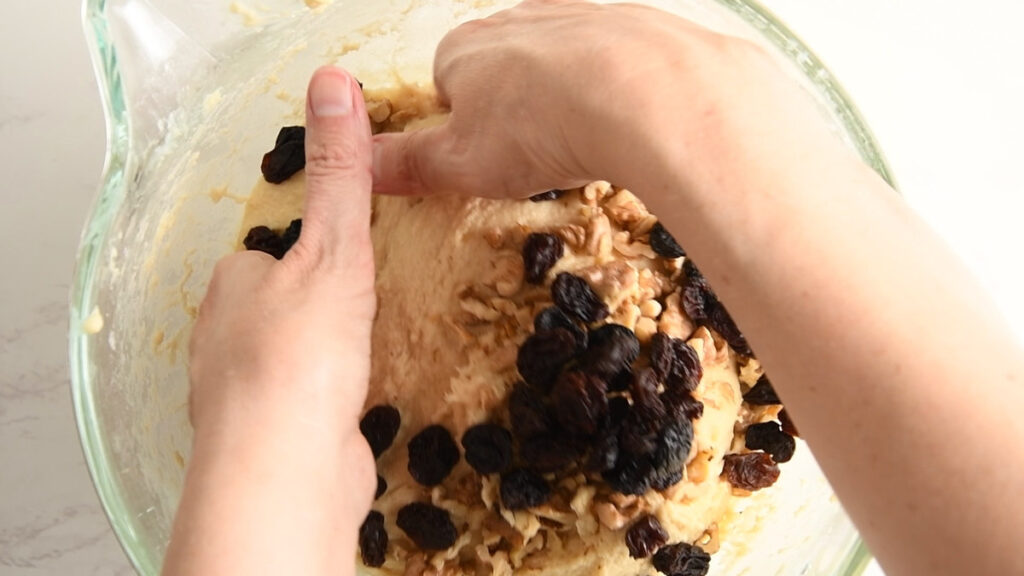
- Wet your hands to prevent sticking, push them under one side of the dough, pull it up and fold it over the mix-ins. Turn the bowl by 90 degrees, repeat. Do this 3-4 times.
- Cover, let it rest for 30 minutes and repeat with the remaining raisins and walnuts.
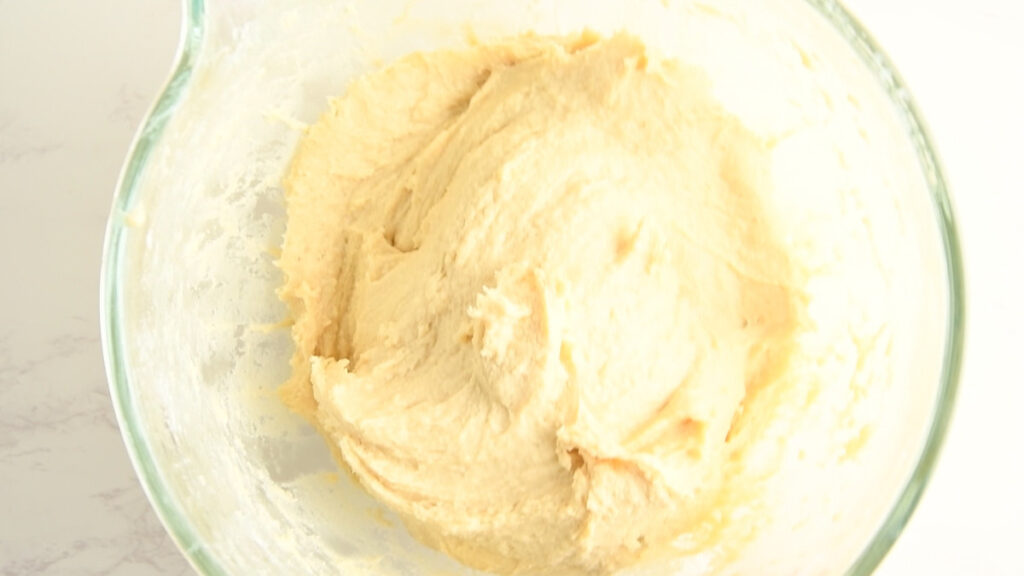
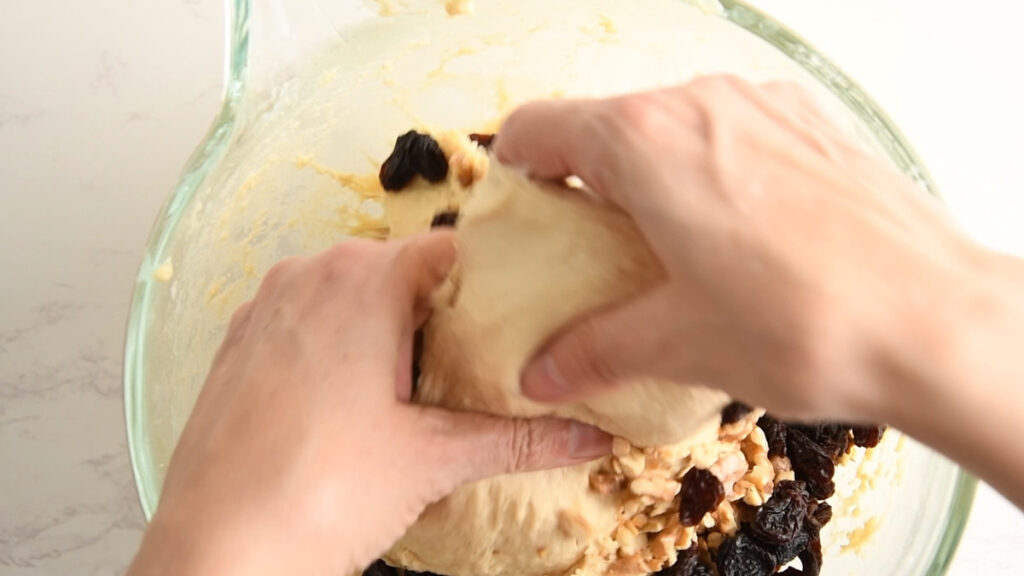
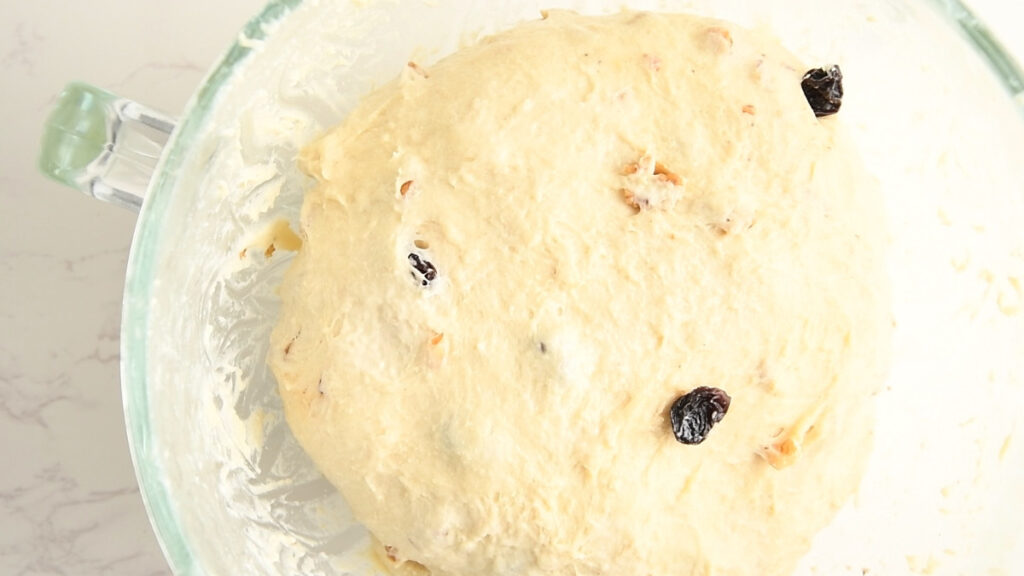
- Do one or two more sets of stretch and folds until your dough is visibly stronger and smoother as you see in the last picture above.
Bulk Ferment
- Now it’s time for the bulk ferment. Take your dough out of the bowl. It should be easy to work with already. Shape it into a neat ball.
- Spray your bowl with a bit of oil and place the dough inside. This makes it easier to take out later.
- Cover the bowl with cling film or a lid. The Kitchen Aid glass bowl has plastic lid that I find pretty ideal for this.
Overnight (or day) Ferment
- Leave your dough in the covered bowl in the fridge overnight or at least 6-8h on the counter until it has doubled in volume.
- Alternatively you could shape it as below the evening before, put it into the loaf tin and let it ferment and rise in there.
- Just note that you’ll have to take it out of the fridge in the morning probably and let it finish rising outside, until it has about doubled in volume.
- If you can’t bake the next day, you can leave it in the fridge for up to 48 hours.
Day 3
The day of Baking (or the evening before, if you go with shaping before overnight fermentation)
Shape And Fill With Cinnamon Sugar
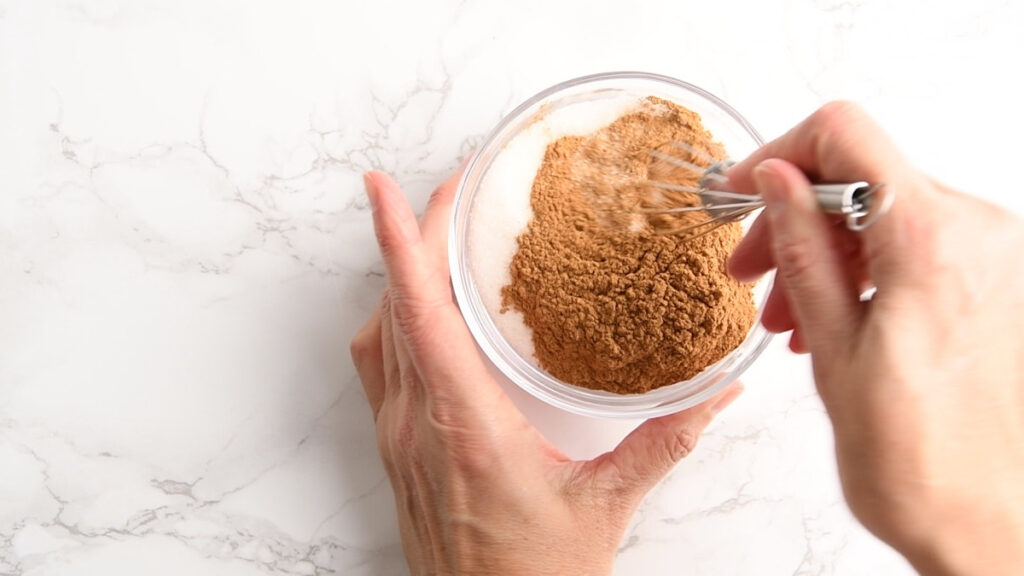
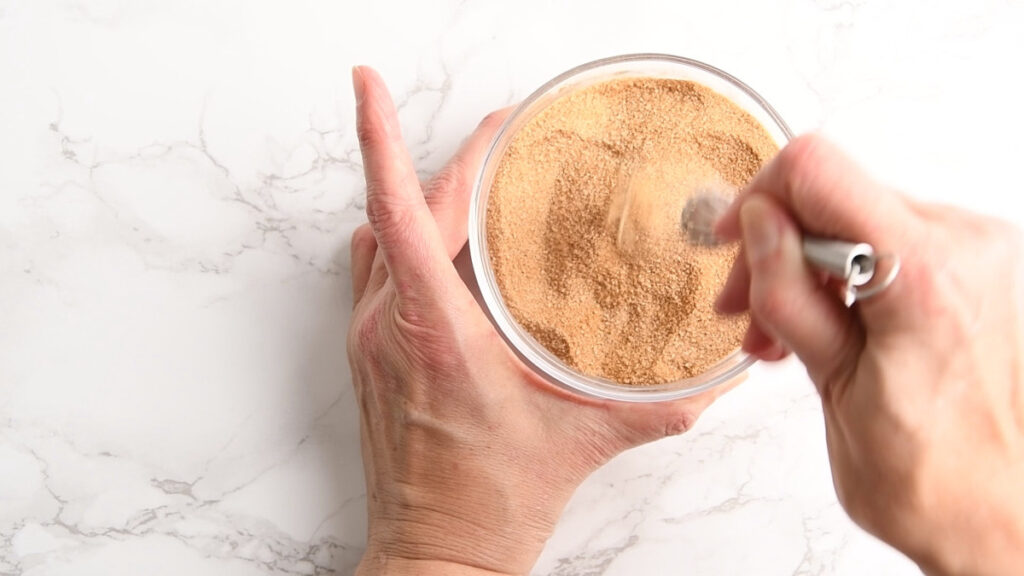
- Mix the cinnamon into the sugar. Both brown and white sugar will work nicely.
- Use a silicone baking mat or lightly flour your worktop. Some flour in an old saltshaker works marvellously for aiming. Especially, if you, like me, are very good at sprinkling your floor with flour while dusting the worktop.
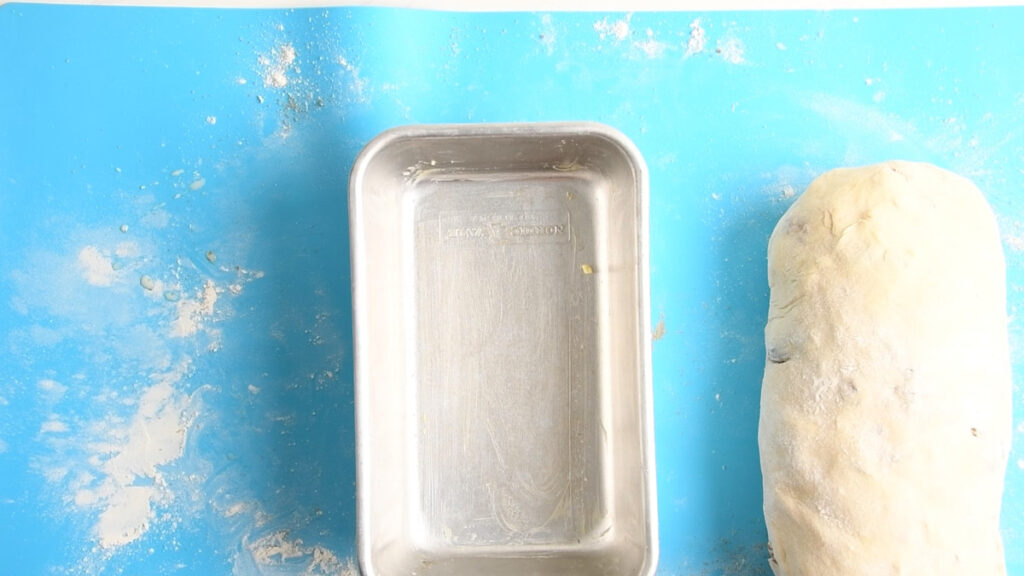
- Get your loaf pan and grease it lightly or line with baking parchment.
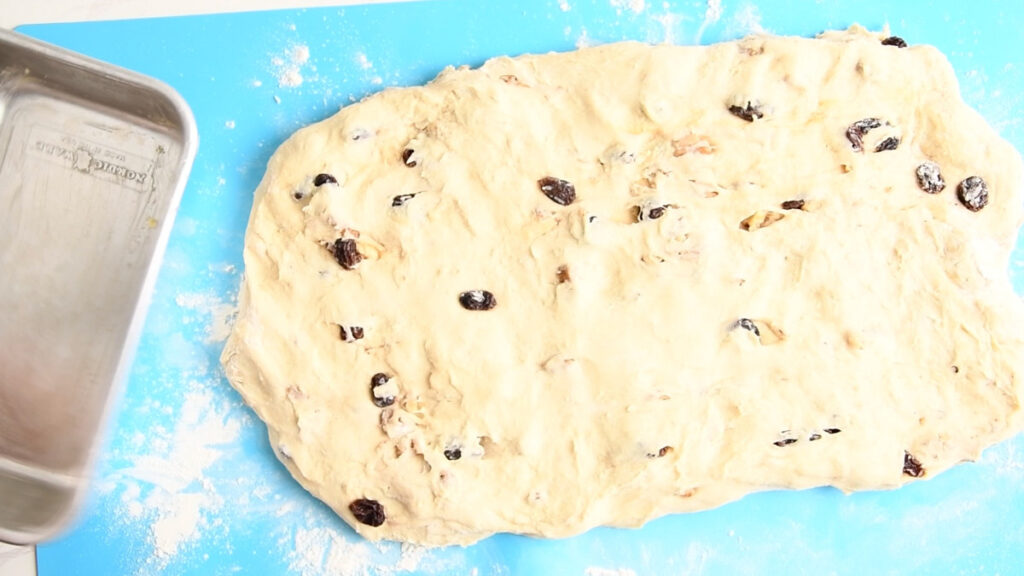
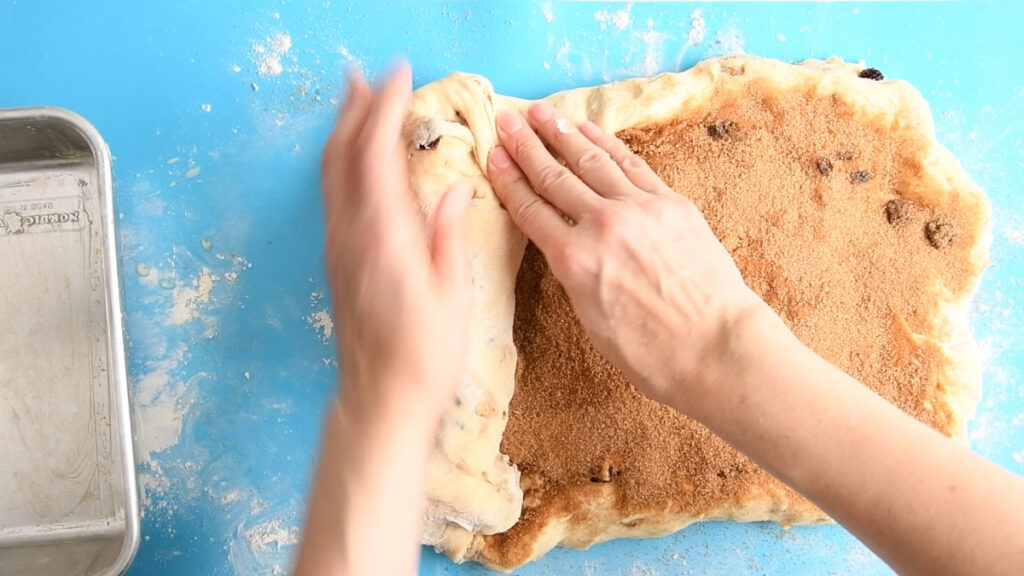
- Push or roll your dough out about 8-10 inches long, and about as wide as the loaf pan. It doesn’t have to be perfect, don’t worry. Check for and big bubbles and pop them. As opposed to classic sourdough bread with its open crumb, we don’t want holes in this bread!

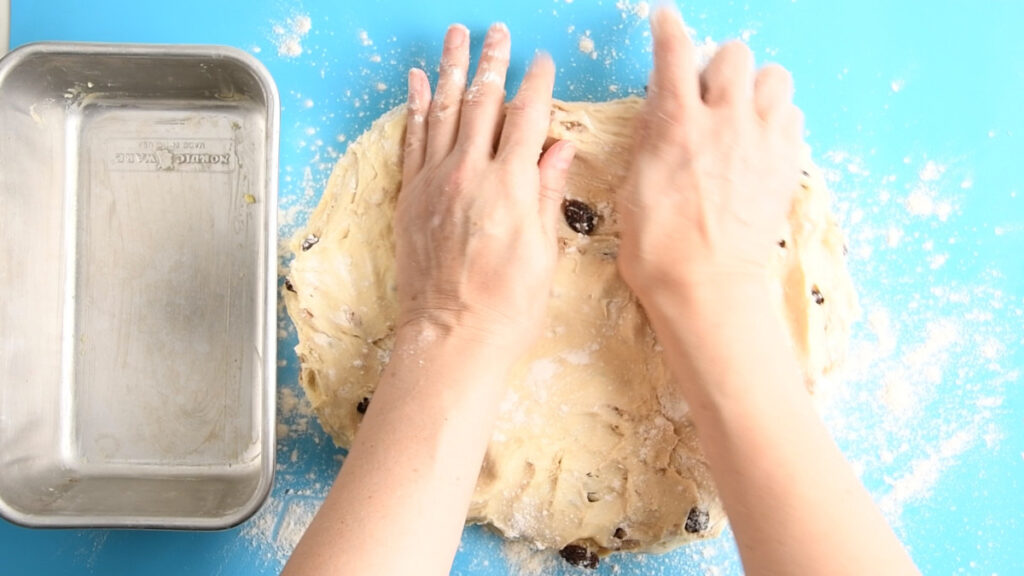
- Brush with a little milk, so the cinnamon swirl sticks and the cinnamon with it’s water absorbing qualities doesn’t pull water from the dough. Opposed to butter, which you’d use in cinnamon rolls, to get pull apart layers, the milk doesn’t have non-stick abilities. This is what you want for a sandwich bread, as you’d like the slices to hold together firmly.
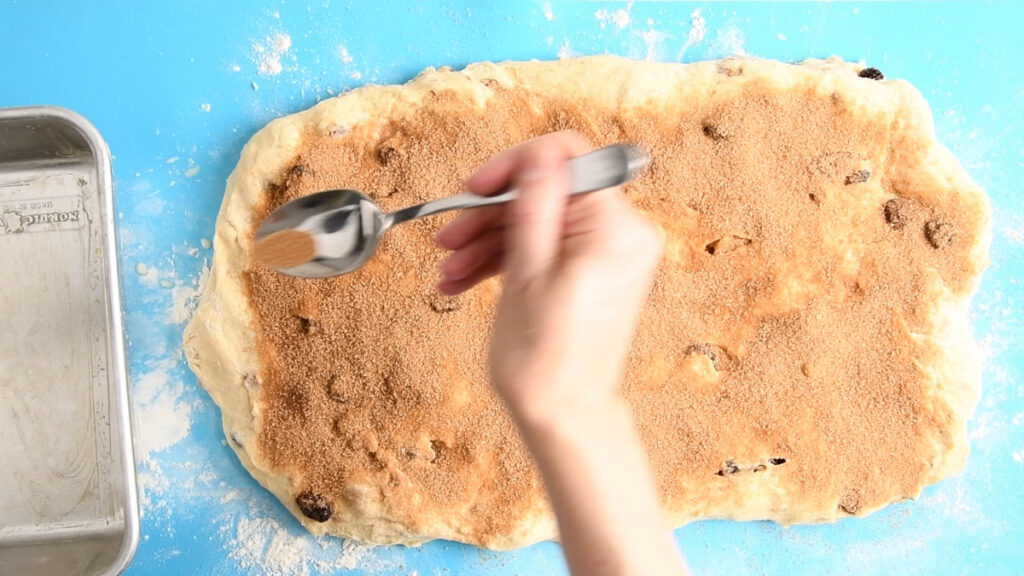
- Sprinkle generously with cinnamon sugar, keeping back 2-3 tbsp for topping the bread if you like a sweet and crispy cinnamon crust.

- Roll into a loaf, starting on the short side. Do this really tightly, so it doesn’t get holes or come apart.
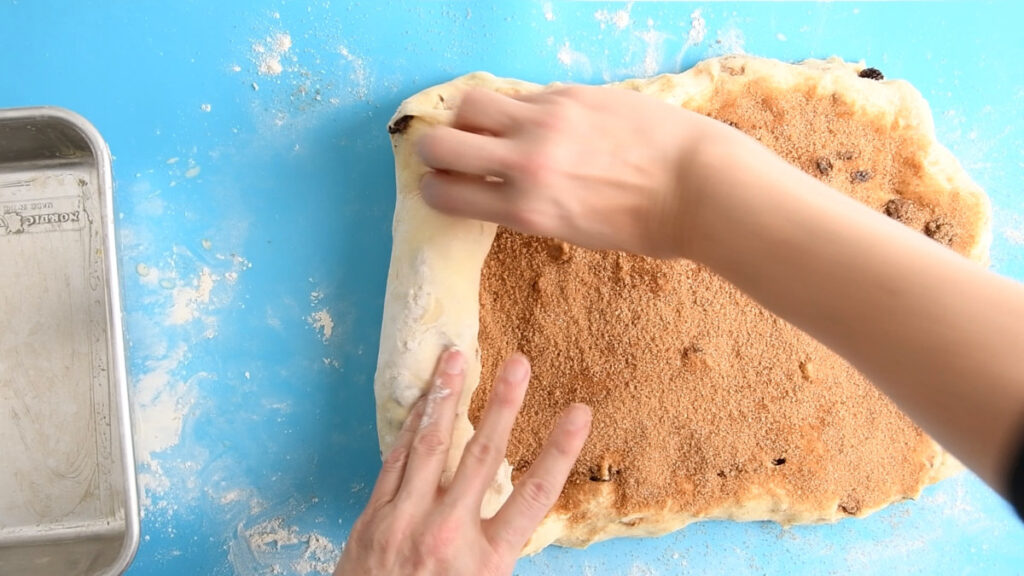
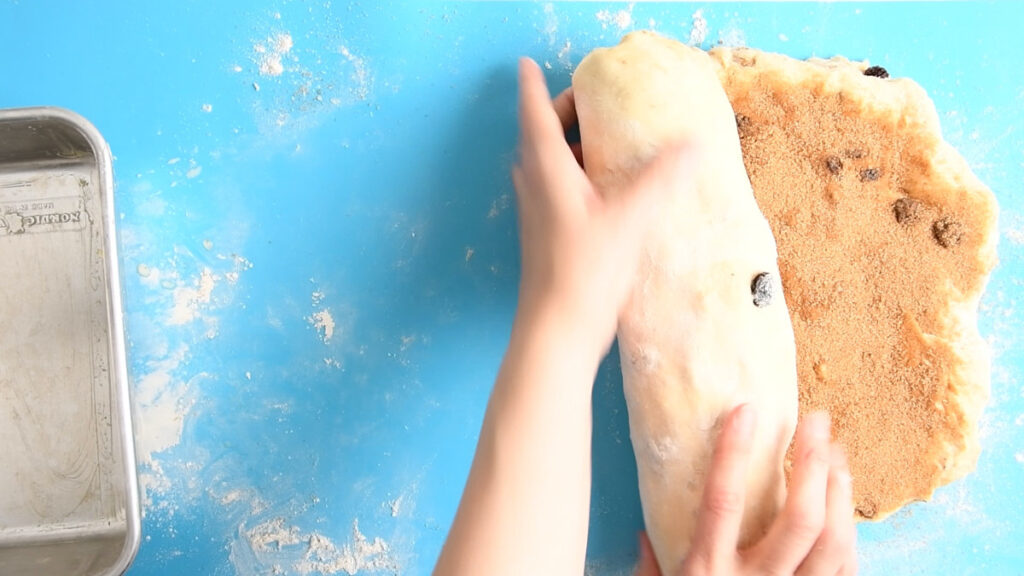
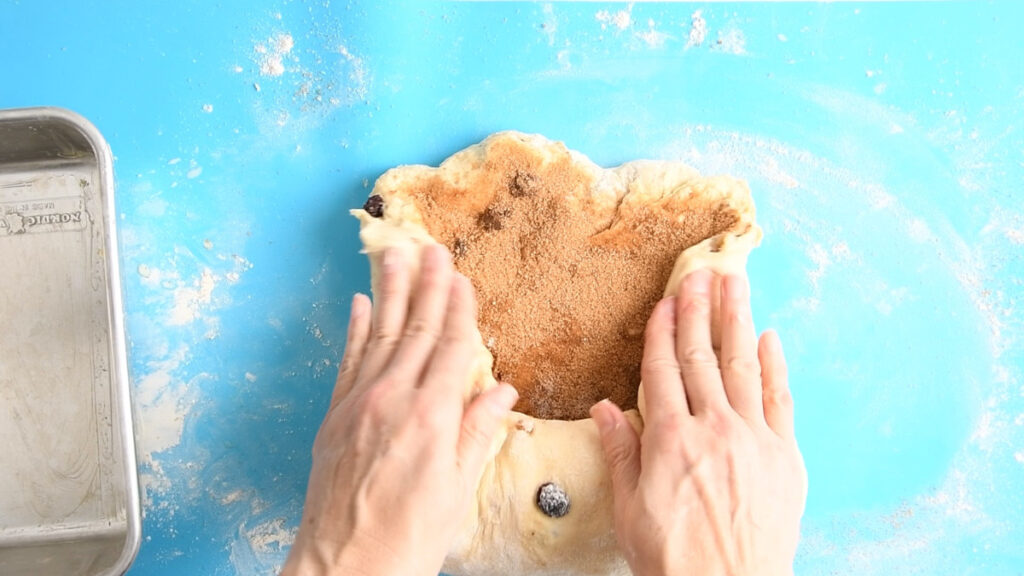
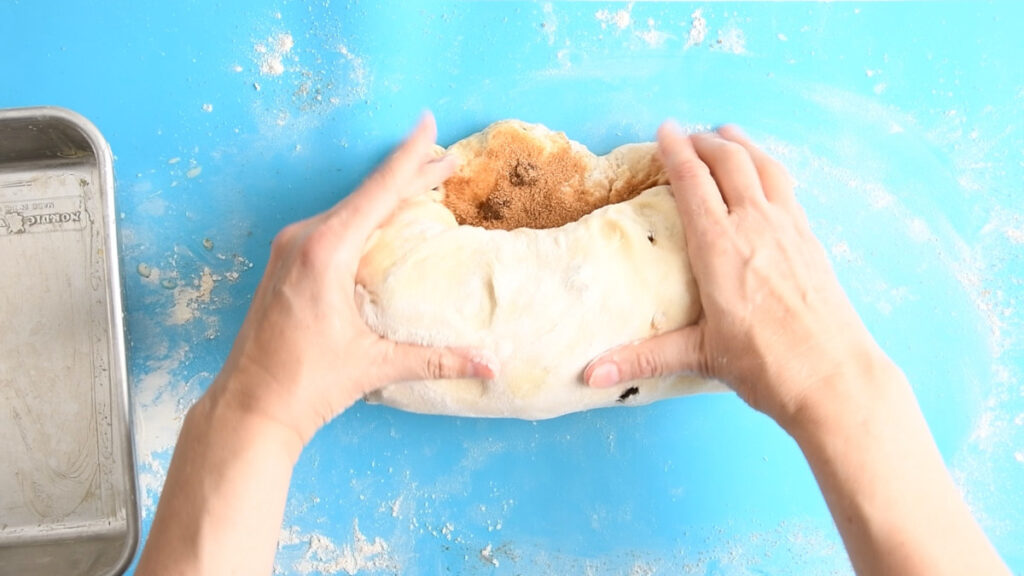

- Fold in the sides a little, keeping the cinnamon sugar in during baking, preventing it from burning.
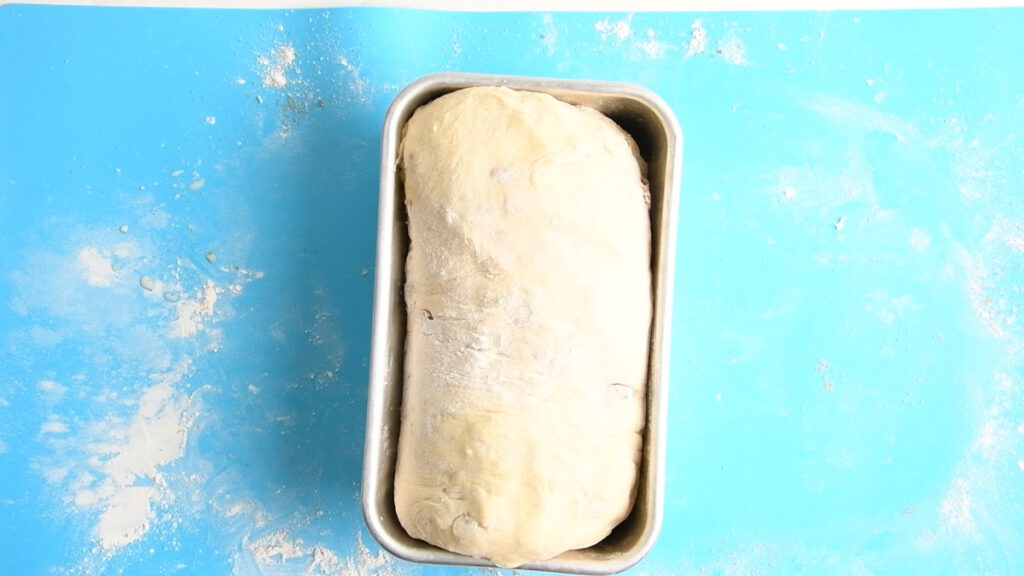
- Place the bread seam side down in your prepared loaf pan and cover loosely with cling film or a damp kitchen towel.
Final Rise
- Allow your Cinnamon Raisin Sourdough Protein Bread to rise for 4-8 hours or overnight in the fridge until visibly puffed up over the top of the loaf tin.
Bake
- Pre-heat your oven to 350°F/175°C, placing a baking rack in the middle.
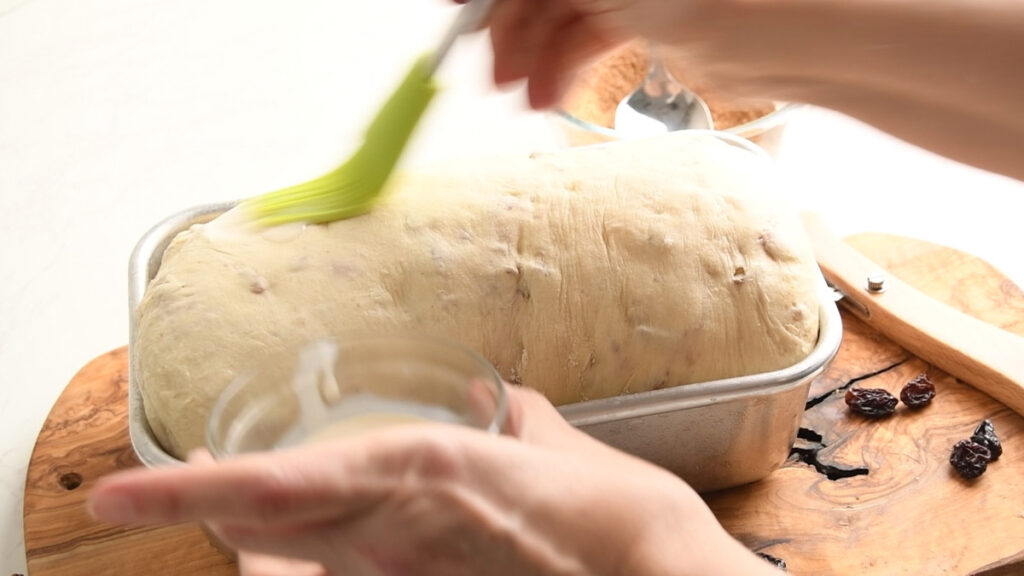
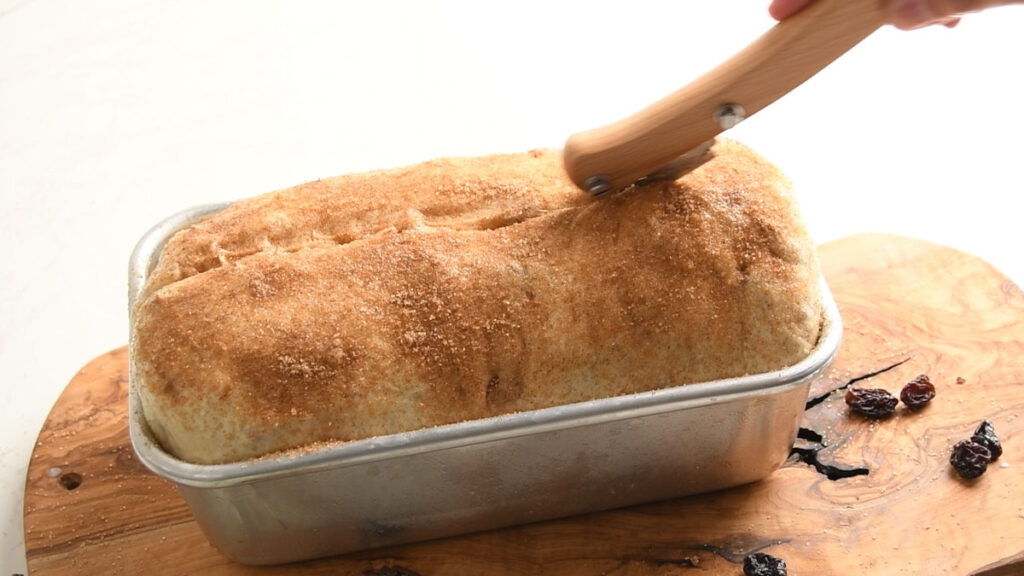
- Brush the loaf with a little more milk, so the cinnamon sugar will stick.
- Sprinkle with the remaining cinnamon sugar or just brush with optional egg wash or milk, if you prefer a softer crust.
- Score your bread dough all the way through the middle with a sharp knife or lame about ½ inch deep. This will allow it to rise more evenly and prevent uncontrolled cracking on the sides.
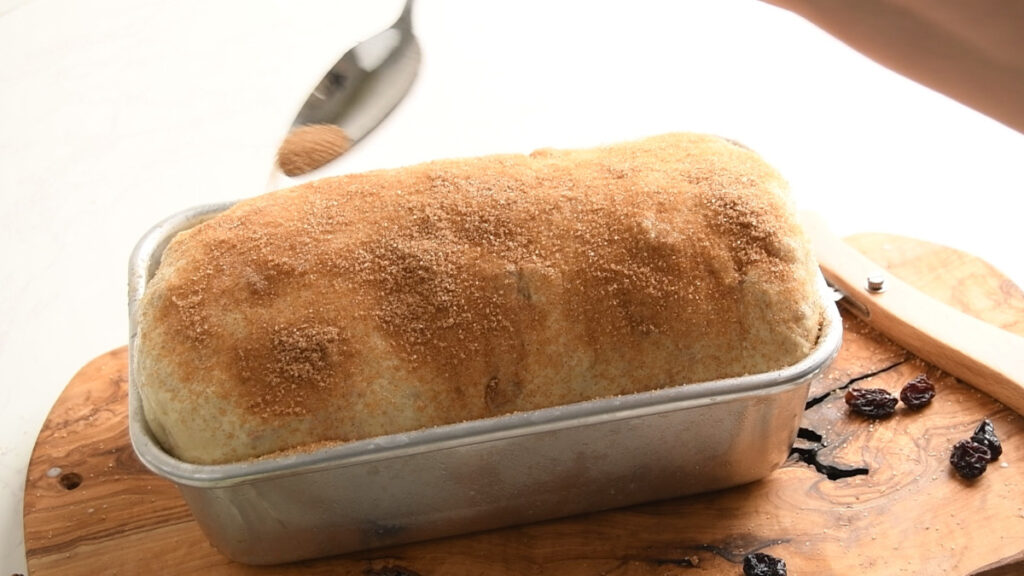
- Once your oven is nice and hot (I usually pre-heat for about 30min to get an even temperature throughout) add your bread and bake for 30 minutes or until nice and golden brown.
- At this point cover it loosely with kitchen foil and bake for another 40 minutes to 1 hour or until it reaches 190°F to 210°F (88°C to 99°C) in the center. Alternatively, if you have no food thermometer, take it out of the loaf tin (using oven gloves) and tap the bottom. It should sound hollow.
- This bread needs a little longer than the top browning would suggest, to get the center baked perfectly.
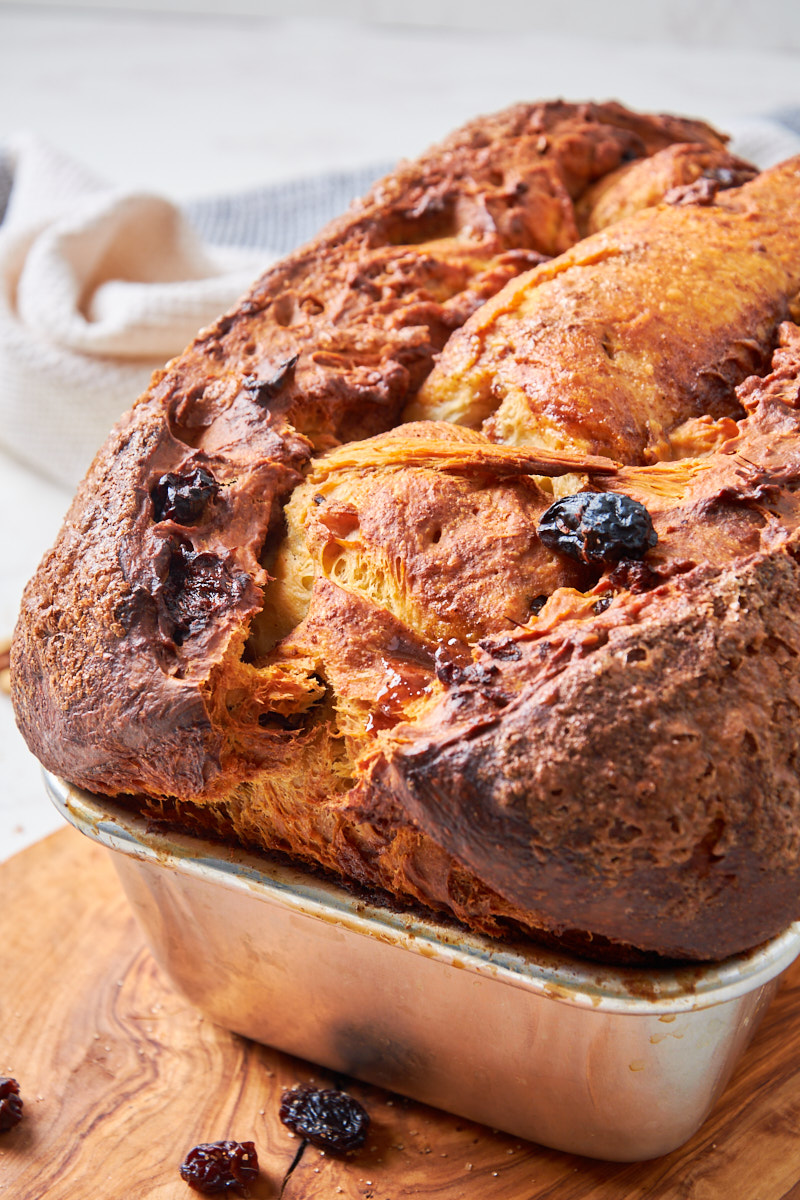
Allow Your Sourdough Cinnamon Raisin Loaf To Cool
- Remove your delicious smelling sourdough brioche with protein from the oven. Let it cool in the tin for about 15 minutes, then carefully transfer it onto a cooling rack to prevent moisture from gathering in the tin while cooling.
- And now you’ll hate me but I’m absolutely serious about this one: Let your bread cool. At least 1h until mostly cooled out.
- I know it’s hard, because it smells and looks just SO good! But trust me you’d regret cutting into it too early. At this point the middle is still finishing to bake and firm up. Cutting into it too early can lead to holes and underbaked centres.
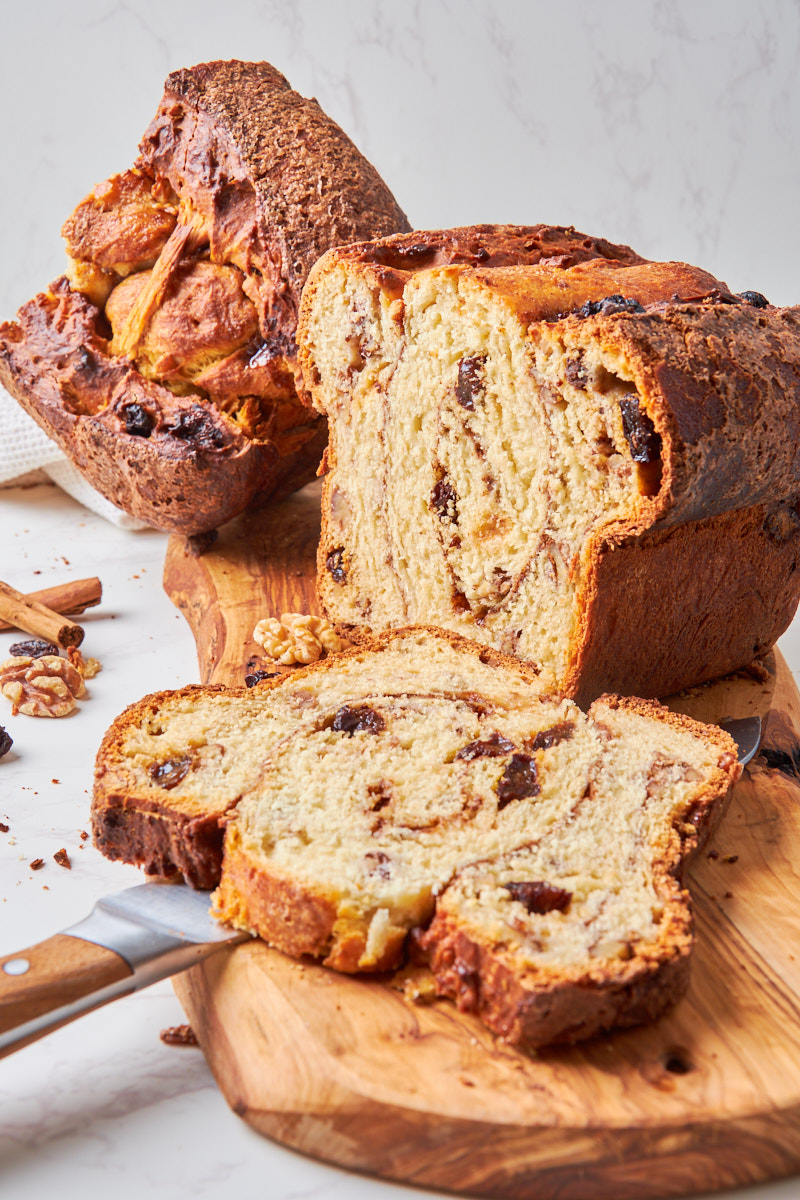
Enjoy Your Homemade Bread
Now that you have patiently waited for your sourdough cinnamon raisin loaf with protein to cool, slice into it. Pat some butter onto it or your favorite jam and enjoy with a nice cuppa.
If for some reason you have leftovers, make French toast or a fabulous bread pudding!
Watch The Video:
How To Store
This bread keeps in a bread tin or airtight container on the counter for about 3 days.
It toasts beautifully and freezes really well for about 6 months.
I love to eat ½ loaf fresh and keep the other half frozen, so it always feels really fresh. You can also pre-slice it and store it separated with baking parchment in a freezer bag, so you can take out a slice whenever the craving hits and toast it.
Now I’d love to hear from you in the comments!
Have you tried this? Did you enjoy it?
What other recipes would you like to see?
And if you enjoyed this recipe, please consider rating, sharing, or leaving a comment – your feedback truly helps my blog grow!
FAQ
I would not recommend it, as cinnamon is both antimicrobial, negatively influencing the sourdough bacteria and hygroscopic, meaning it absorbs moisture, which can alter the dough’s hydration.
Both of these characteristics can influence the rise and structure of the dough, so it’s better to add it as a swirl without kneading it in.
Other recipes you might enjoy

Want an even bigger protein boost?
Try these super fluffy, yet never dry Cottage Cheese Protein Waffles with 20g protein per portion!

Another fabulous cosy baking recipe ideal for fall: My Sourdough Apple Fritter Focaccia with Protein.

Can’t get enough of cinnamon? Me neither. Try these lovely Cinnamon Banana protein muffins to use up your sourdough discard.
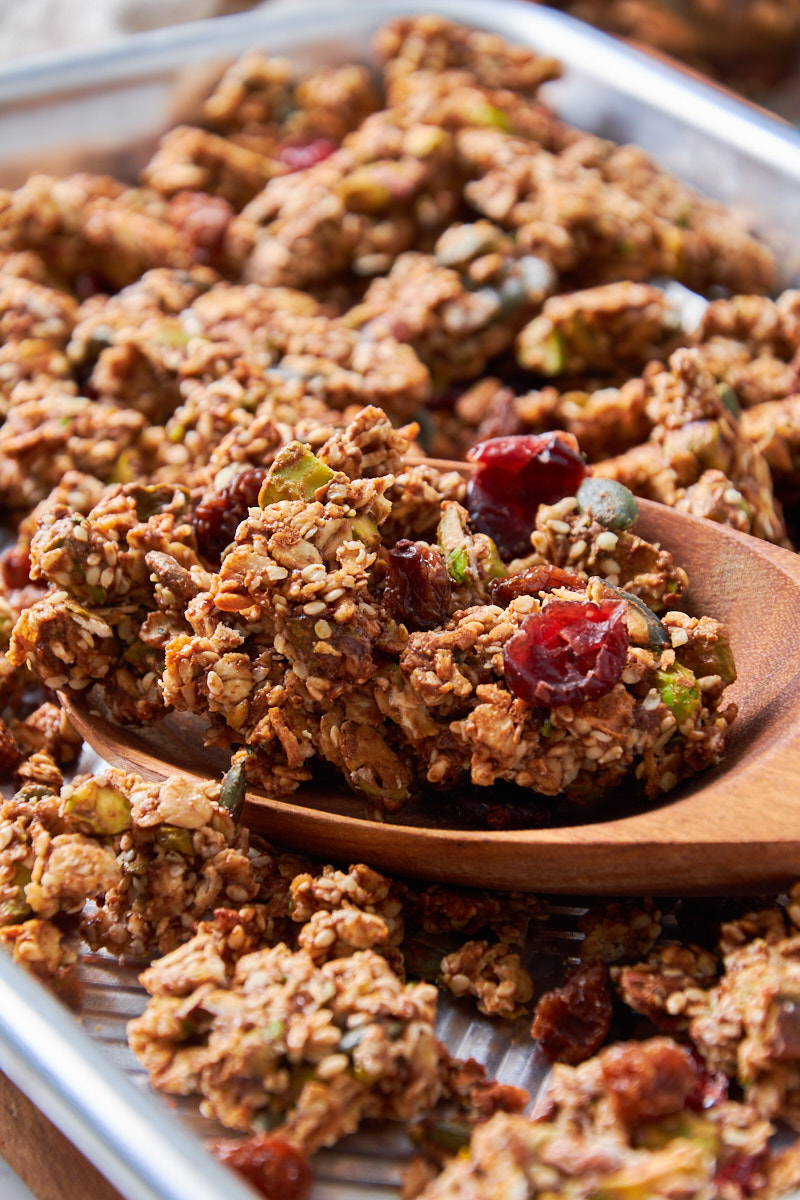
Or use your discard to make these super crunchy High Protein Granola clusters.
Cinnamon Raisin Sourdough Protein Bread
- Total Time: 16 hours 30 minutes
- Yield: 20 slices 1x
Description
Get ready to bake a bread that combines the comfort of German-style raisin bread with the gut-friendly benefits of sourdough. This soft, enriched loaf, packed with a warm cinnamon swirl, fills your home with an irresistible aroma. What makes it truly special is the boost of protein from simple additions like cottage cheese and protein powder, turning a classic treat into a satisfying, everyday staple that’s perfect for toast, sandwiches, and more.
Ingredients
For the Sourdough Starter
- 25g existing sourdough starter
- 140g flour
- 120g water
Dough
- 375g cottage cheese
- 125ml water
- 50g cup granulated sugar
- 60g protein powder (Whey works best)
- 3 large eggs
- 225g active sourdough starter
- 690g strong white flour
- 10g salt
- 125g butter, softened
Add Ins
- 120g raisins
- 120g walnuts
Cinnamon Swirl
- 110g sugar
- 18g ground cinnamon (about 2 tbsp)
- 30ml milk (I used Oatmilk)
Instructions
Day 1
2 days before baking
Make your Sourdough Starter (Levain)
- In an ideal world, you would feed your sourdough 2 days before planning to bake this bread in the evening.
- If you didn’t don’t despair. You can feed it early in the morning, leave it in a warm place for about 4-8 hours, depending on room temperature, and it should be fine. If yours seems to be taking longer, boil some water, pour it into a cup and place it in your oven with just the light switched on. Place your starter jar beside it and you’ll have the perfect temperature for it to thrive.
- The same goes for the dough later, if your house is fairly cold.
- With a very active and freshly fed starter, I managed to mix the bread dough early in the morning and bake in the evening. However it needs at least 2h to cool, so plan with that.
Day 2
1 day before baking
- I usually start my bread in the evening with enough time for a few optional stretch and folds during the bulk ferment. So about 2h before going to bed/settling in with some Netflix.
- Either melt your butter and let it cool completely or let it soften outside the fridge. Just don’t use it either hot or fridge cold. Both versions won’t incorporate well and have different undesirable effects for this particular dough. Put it to the side until you need it.
Blend cottage cheese and protein powder
- Using about ½ cup of the water in the recipe, start by blending the cottage cheese. I usually do this in my Nutribullet, as the Vitamix is a bit too big for the task. But any blender will work. Or in doubt even a food processor. As long as it breaks up the curds into a smooth liquid.
- Add the protein powder and sugar for the dough. Briefly blend again until no lumps are left.
- Now, you might be tempted to throw in the protein powder right with the cottage cheese, but from the experience of the clumped up mess I scraped out of my blender: I wouldn’t advise you to. It becomes perfectly smooth though as soon as the cottage cheese is liquified first.
Mix the wet
- Stir the blended cottage cheese-protein into the remaining water and sourdough starter. I’m using a dough whisk, but a simple spoon, whisk or fork will do just fine.
- Add your eggs and whisk in as well.
Mix the Dry
- Add the salt to your flour and mix it in well, so it doesn’t come into direct contact with the sourdough starter.
- Many sourdough bakers work it into the dough after the autolyse as it can slightly inhibit gluten formation, just as butter (which coats the flour with fat), but personally I tried both methods and didn’t see much of a difference in the resulting bread, yet a fair amount more work. So I add it from the start.
Mix the wet into the dry
- Pour your creamy protein mix into the flour.
- Either use your stand mixer or start stirring with a dough whisk or wooden spoon. Or just use your hands, whatever floats your boat. Mix until you have a shaggy dough.
- Now, if you want to do it the “correct way”, leave your dough for 30 minutes for the autolyse. Then add the butter and knead it in.
- I admit I’m way too impatient for this extra step and waiting and simply added it right after the first stirring, using my Kitchen Aid on speed 1 for this until I had a smooth dough.
- Cover and allow to rest for 30 minutes.
Note:
This is a soft and sticky dough at this point. It won’t necessarily come away from the sides of the bowl. That’s working as intended. It will after a few sets of stretch and fold.
Prepare The Mix-ins
- While your dough is resting, chop the walnuts roughly, then toast them in a dry pan on medium-high heat until they smell really lovely. Keep an eye on them, as they burn quickly.
- Put in a bowl to allow them to cool.
- Measure out your raisins.
Stretch And Fold
- Once your dough had its first 30minutes of resting, add ½ of the raisins and walnuts on top of the dough.
- Wet your hands to prevent sticking, push them under one side of the dough, pull it up and fold it over the mix-ins. Turn the bowl by 90 degrees, repeat. Do this 3-4 times.
- Cover, let it rest for 30 minutes and repeat with the remaining raisins and walnuts.
- Do one or two more sets of stretch and folds until your dough is visibly stronger and smoother.
Bulk Ferment
- Now it’s time for the bulk ferment. Take your dough out of the bowl. It should be easy to work with already. Shape it into a neat ball. Spray your bowl with a bit of oil and place the dough inside. This makes it easier to take out later. Cover the bowl with cling film or a lid. The Kitchen Aid glass bowl has a loose sitting plastic lid that I find pretty ideal for this.
Overnight (or day) Ferment
- Now leave your dough in the covered bowl in the fridge overnight or at least 6-8h on the counter until it has doubled in volume.
- Alternatively you could shape it as below the evening before, put it into the loaf tin and let it ferment and rise in there.
- Just note that you’ll have to take it out of the fridge in the morning probably and let it finish rising outside, until it has about doubled in volume.
- If you can’t bake the next day, you can leave it in the fridge for up to 48 hours.
Day 3
The day of Baking (or the evening before, if you go with shaping before overnight fermentation)
Shape And Fill With Cinnamon Sugar
- Mix the cinnamon into the sugar. Both brown and white sugar will work nicely.
- Get a silicone baking mat or lightly flour your worktop. Some flour in an old saltshaker works marvellously for aiming. Especially, if you, like me, are very good at sprinkling your floor with flour while dusting the worktop.
- Get your loaf pan and grease it lightly or line with baking parchment.
- Push or roll your dough out about 8-10 inches long, and about as wide as the loaf pan. It doesn’t have to be perfect, don’t worry. Check for and big bubbles and pop them. As opposed to classic sourdough bread with its open crumb, we don’t want holes in this bread!
- Sprinkle generously with cinnamon sugar, keeping back 2-3 tbsp for topping the bread if you like a sweet and crispy cinnamon crust.
- Roll into a loaf, starting on the short side. Do this really tightly, so it doesn’t get holes or come apart.
- Fold in the sides a little while rolling, so the cinnamon sugar mix doesn’t seep out during baking, which could cause it to burn.
- Place the bread seam side down in your prepared loaf pan and cover loosely with cling film or a damp kitchen towel.
Final Rise
- Allow your Cinnamon Raisin Sourdough Protein Bread to rise for 4-8 hours or overnight in the fridge until visibly puffed up over the top of the loaf tin.
Bake
- Pre-heat your oven to 350°F/175°C, placing a baking rack in the middle.
- Score your bread dough all the way through the middle with a sharp knife or lame about ½ inch deep. This will allow it to rise more evenly and prevent uncontrolled cracking on the sides.
- Sprinkle with the remaining cinnamon sugar or brush with optional egg wash or milk, if you prefer a softer crust.
- Once your oven is nice and hot (I usually pre-heat for about 30min to get an even temperature throughout) add your bread and bake for 30 minutes or until nice and golden brown.
- At this point cover it loosely with kitchen foil and bake for another 40 minutes to 1 hour or until it reaches 190°F to 210°F (88°C to 99°C) in the center. Alternatively, if you have no food thermometer, take it out of the loaf tin (using oven gloves) and tap the bottom. It should sound hollow.
- This bread, opposed to many others I made, needs a little longer than the top browning would suggest, to get the center baked perfectly.
Allow Your Sourdough Cinnamon Raisin Loaf To Cool
- Remove your delicious smelling sourdough brioche with protein from the oven. Let it cool in the tin for about 15 minutes, then carefully transfer it onto a cooling rack to prevent moisture from gathering in the tin while cooling.
- And now you’ll hate me but I’m absolutely serious about this one: Let your bread cool. At least 1h until mostly cooled out.
- I know it’s hard, because it smells and looks just SO good! But trust me you’d regret cutting into it too early. At this point the middle is still finishing to bake and firm up. Cutting into it too early can lead to holes and underbaked centres.
Enjoy
- Now that you have patiently waited for your Sourdough cinnamon raisin loaf with protein to cool, slice into it. Pat some butter onto it or your favorite jam and enjoy with a nice cuppa.
- If for some reason you have leftovers, make French toast or a fabulous bread pudding!
Notes
How to Store
- This bread keeps in a bread tin or airtight container on the counter for about 3 days.
- It toasts beautifully and freezes really well for about 6 months.
- I love to eat ½ loaf fresh and keep the other half frozen, so it always feels really fresh. You can also pre-slice it and store it separated with baking parchment in a freezer bag, so you can take out a slice whenever the craving hits.
- Prep Time: 1 hour
- Cook Time: 1 hour 30 minutes
- Category: Bread & Sourdough
- Method: Bake
- Cuisine: American


This sourdough bread is incredible! So easy to make and delicious. My family loved it!
I’m so happy to hear that! Hard to find a recipe everyone loves, isn’t it?
I cannot tell you how delicious this was! It made the most heavenly toast too!
Aww, that is so kind of you. Thanks so much for letting me know. 🙂
I highly recommend this recipe if you’re looking for a cozy, nutritious bread that doubles as both a treat and a meal.
Aww, thank you. You really described it in a nutshell. 🙂
As a sourdough baker, I’m always looking for different takes on sourdough bread. This turned out great!
Oh good, thanks so much for letting me know. 🙂
Such a delicious recipe!!! My family loved it toasted for breakfast and it also made incredible French toast!
Thanks so much, makes me so happy to hear that! 🙂
I often just make it, so I can have it as French Toast.