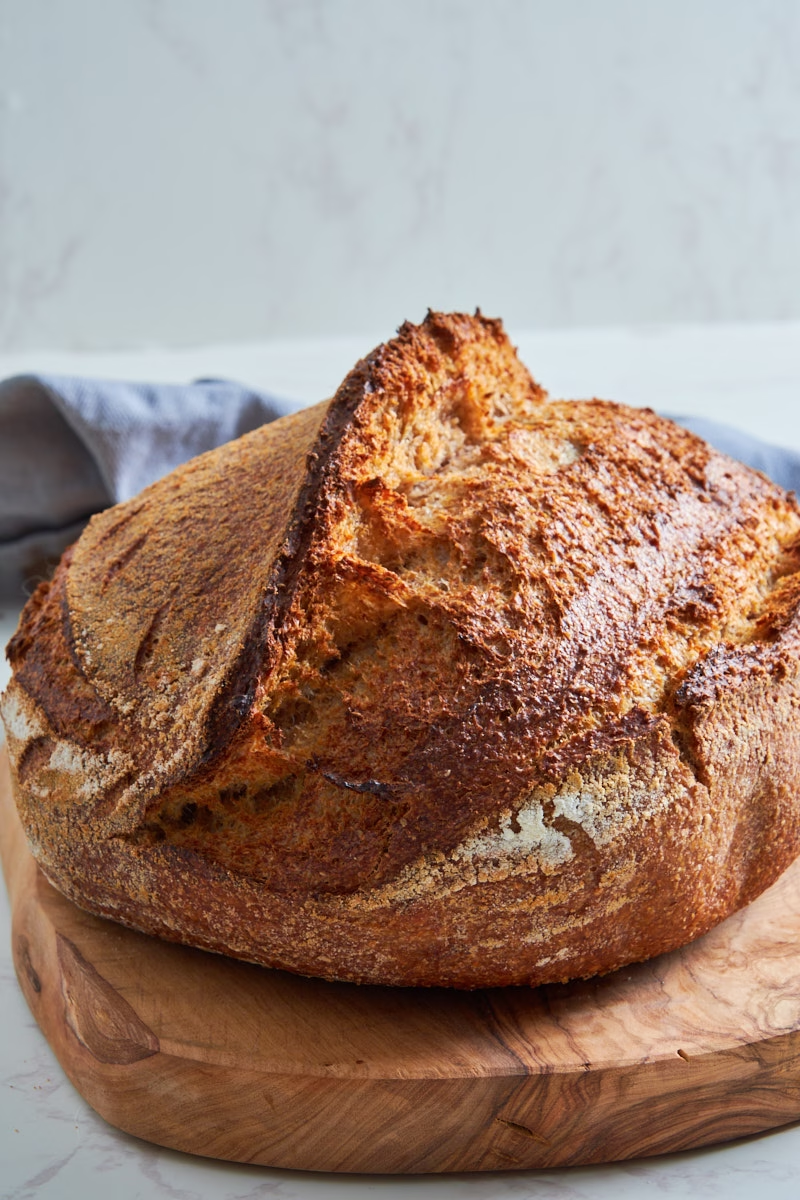
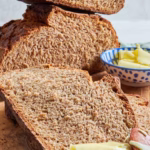
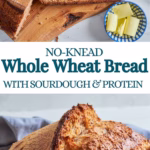
Hearty Whole Wheat Protein Sourdough (High-Fiber & No-Knead)
Finding a whole wheat bread that doesn’t feel dense and uninspiring can be a challenge—and finding one that packs a serious protein punch is even harder. This Whole Wheat High Protein Sourdough Bread bridges the gap perfectly. By combining the gut-friendly benefits of long fermentation with the power of cottage cheese and whey, I’ve created a loaf that is macro-friendly without sacrificing that classic artisan crust and nutty, toasted flavor. Whether you’re a sourdough pro or just looking for a better way to fuel your morning, this easy, no-knead recipe is a game-changer for your breakfast routine and a lovely side for your soup.
This post may contain referral links for products I love.
For The Pleasure Of Eating earns a small commission on these links at no cost to you.
- Why You’ll Love This
- The Ingredients
- Substitutions
- Equipment Used
- How to Make this
- How To Store
- FAQ
- Other Recipes You Might Enjoy
Why You’ll Love This
TL;DR
- High Protein & Fiber: A whopping 12g of protein and nearly 6g of fiber per slice to keep you full for hours.
- Gut-Friendly: Sourdough enzymes help break down protein and gluten, making it much easier on the stomach than a standard protein shake.
- No-Knead Simplicity: Skip the intensive labor; a simple “stretch and fold” method delivers artisan results.
- Real Bread Flavor: No “protein powder” aftertaste—just nutty whole wheat, a classic sourdough tang, and a hint of malty sweetness.
- Sandwich Ready: A sturdy, reliable crumb that won’t let your toppings slide through.
Who Said You Have To Choose Between Sourdough And Whole Wheat?
I mentioned the debate about Whole Wheat vs. Sourdough in my German Black Bread with Protein and Sourdough, and it applies just the same for this one: Why should you have to choose, when it’s so easy to make a delicious whole wheat sourdough bread that comnes with the collective benefits of both?
Over 5g Fiber Per Slice
While googling the healthiest bread recommends around 3g fiber, this one comes with a solid 5.8g per slice at just 219 calories. Together with the sourdough, which breaks down gluten, protein and minerals into better bioavailable molecules and adds all the good fermentation bacteria, making it into a thoroughly gut friendly bread.
And The High Protein?
You might have noticed that digesting protein powder when consumed in form of shakes can be a little tough on your tummy and digestive system. When added to sourdough bread however, the enzymes (Proteases) in sourdough naturally break down the protein, making it easier to digest.
I have written a whole post on the topic of sourdough baking with added protein, including the relevant links to studies and science behind it, which you might find interesting.
So you not only feel fuller for longer due to the macro-friendly stats, but your tummy also has an easier time handling all the good nutrition. Each slice of this bread comes with around 12g protein.
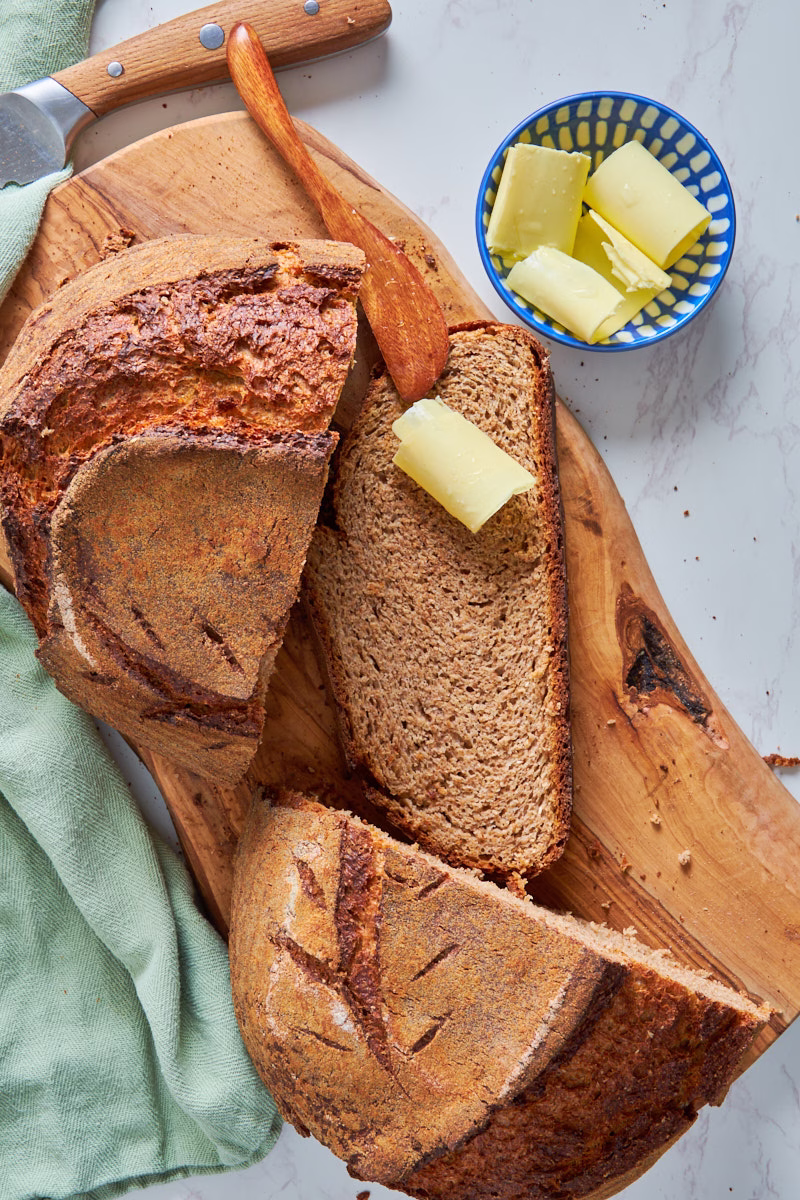
Top it with some mashed avocado, maybe a fried egg (or maybe some crispy fried Halloumi?) and some fresh tomatoes and you have yourself a fabulously balanced breakfast that will keep you happy until lunch. Or, in my case, even until dinner.
With All That Goodness, Won’t it Taste…Healthy?
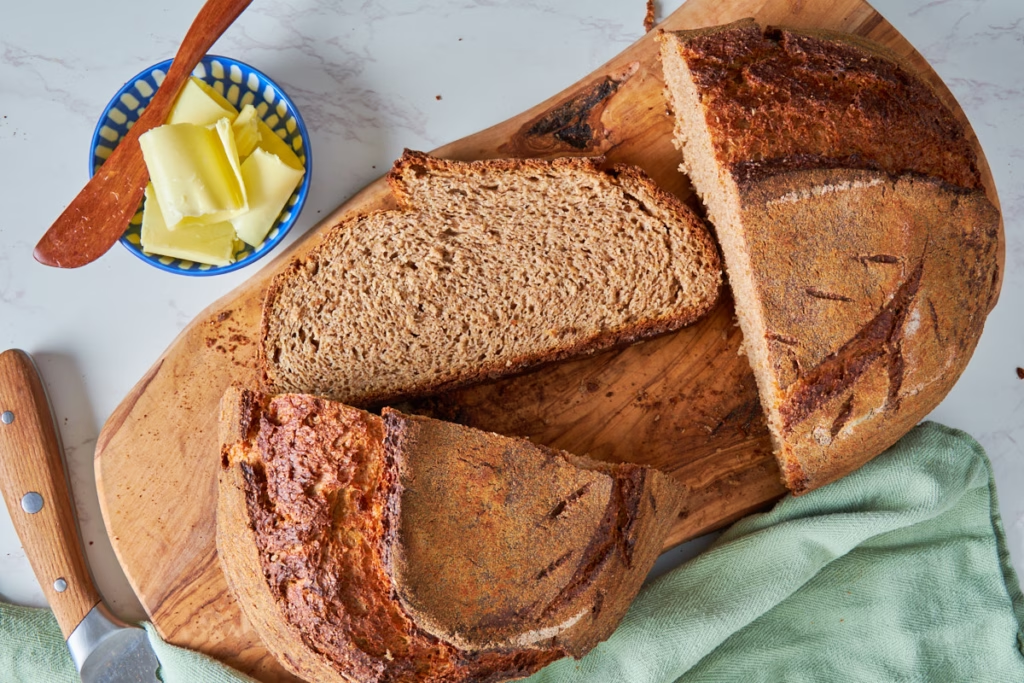
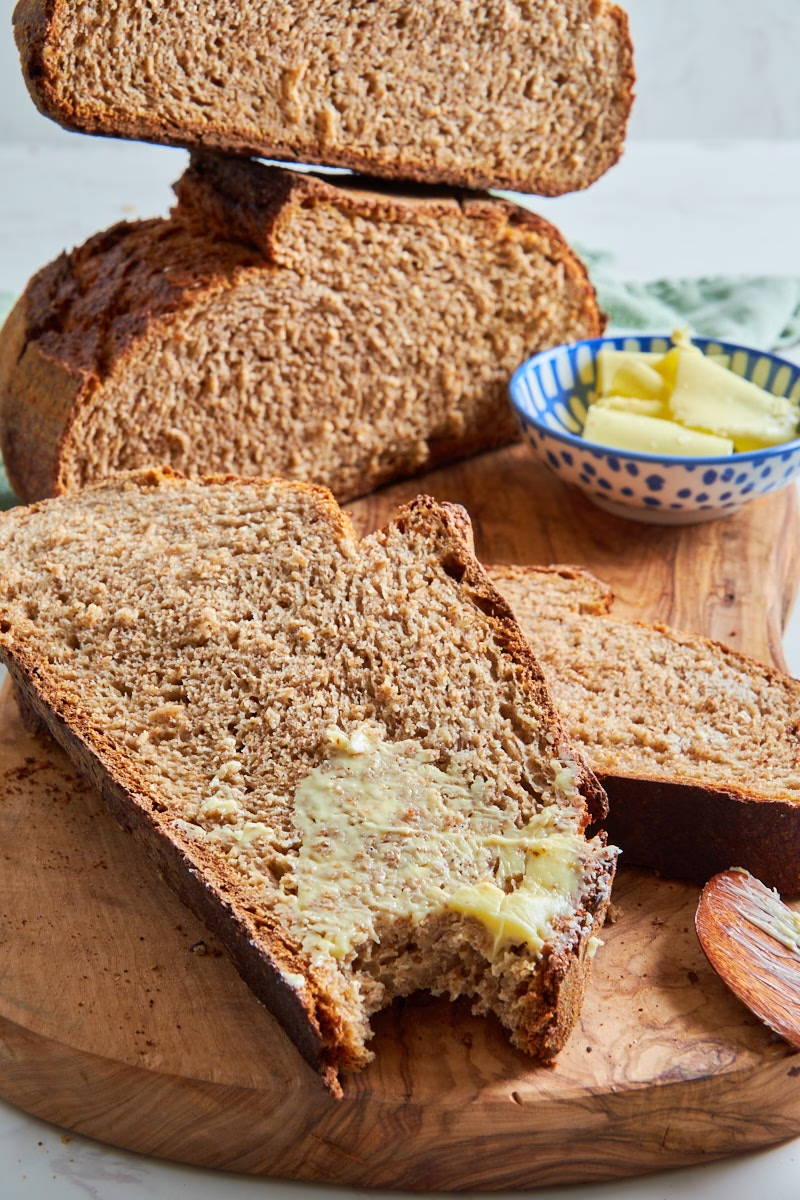
The great thing about whole wheat flour is, that it has much more flavor than white flour. It tastes slightly nutty, with a bit more bite. And while it might not have the open crumb of your typical IG sourdough loaf, it’s much better at holding a sandwich together and not letting all the butter or sauce run over your fingers.
The sourdough adds of course the classic tang and malty notes, while the cottage cheese, as rather unusual addition to bread, gives it a lovely gentle lactic freshness.
Another reason why sourdough and protein together are a dream team, is that sourdough counters the drying effect protein can have on baked goods, keeping it moist and fluffy.
Looks And Tastes Like Good Artisan Bread – No kneading required
As usual with my protein sourdough recipes, I tested it until I liked it enough to want to buy it at an artisan bakery. There is no protein dryness or cottage cheese gummy texture. Just lovely fresh sourdough bread without the need to knead.
I even did a side by side test with two loaves made from the exact same dough. One I kneaded first by hand and then with my stand mixer for about 10 minutes, the other just got a few sets of stretch and fold.
The difference? Negligible. So you can decide if you enjoy the feel of kneading or would rather have a super low effort loaf.
Based On My Most Popular Recipe
This artisan whole grain bread is based on my most popular recipe, the Easy High Protein Sourdough Bread, which uses white flour, to make it the perfect beginner loaf. If you like variety or would like to see how different types of protein powder affect bread, take a look!
If you made that one before, you’ll find the instructions very familiar.
Two Comparison Tests I Did
Whole Wheat Bread Flour vs. Coarse Whole Wheat Flour
I had both whole wheat bread flour and coarse whole wheat flour in my pantry, so I figured I might try how each performs in this recipe, to show you the difference just the flour can have on your outcome.
Frankly I was quite surprised on how much of a difference it made!
Though it makes sense from a logical standpoint.
The whole bread flour made a rather lovely risen loaf with lots of bounce and softness that was pretty easy to work with. A little sticky, sure, but that’s the same with any sourdough.
It won’t rise as much as a white sourdough, since the rougher whole wheat pieces essentially “cut” into the gluten strands when kneading. Frankly I find that texture quite satisfying, as I love a slightly denser bread. If you see my German Sourdough Rye Beer Bread you know what I mean.
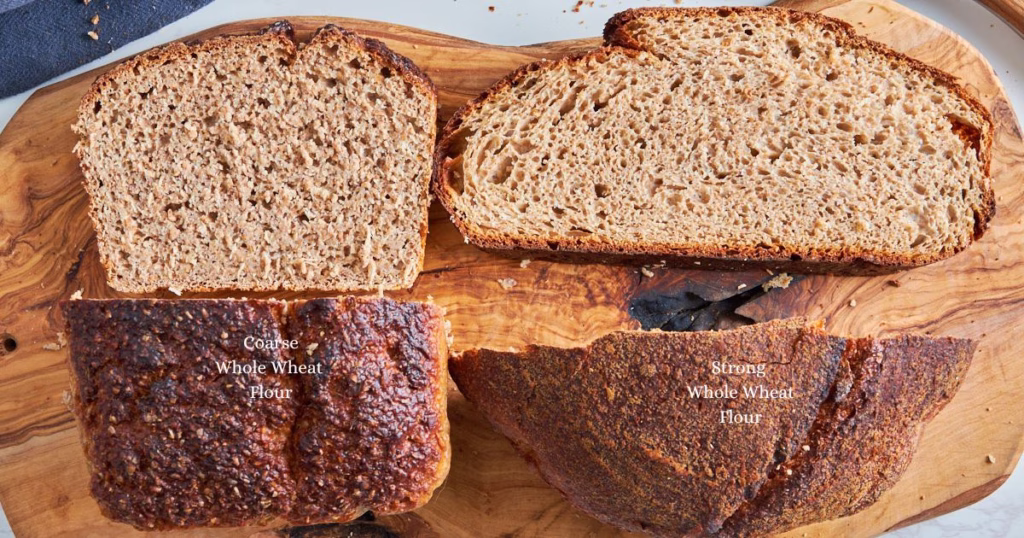
The coarse whole wheat flour however, due to its rather rough texture essentially obliterated the structure, forcing me to bake it in a loaf pan and having a structure closer to soda bread than a fluffy sourdough loaf. Even for a fan of hearty textures, that was a bit too much!
To Knead Or Not To Knead – That Is The Question
In his fabulous video on how to make the perfect whole wheat sourdough bread, Hendrik from “The Bread Code” gave a detailed breakdown of the steps to get that perfectly open crumb even with a whole wheat bread.
I followed the kneading and shaping steps religiously with one half of my dough and simply ignored them for the other half and just gave it a quick stir followed by some rounds of stretch and fold.
The flour I used had 12% protein, which is rather high too, in theory helping with the gluten network being strong.
Now, I have to mention that my recipe is of course quite different to Hendrik’s in that it has both protein powder and cottage cheese added, which make the dough significantly heavier. So I didn’t expect (or want) the super open crumb he was aiming for.
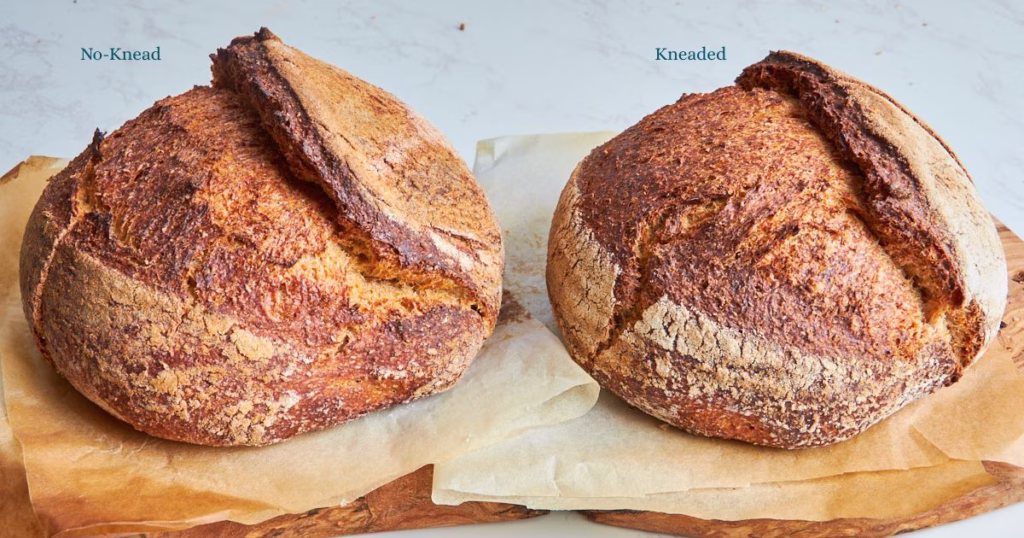
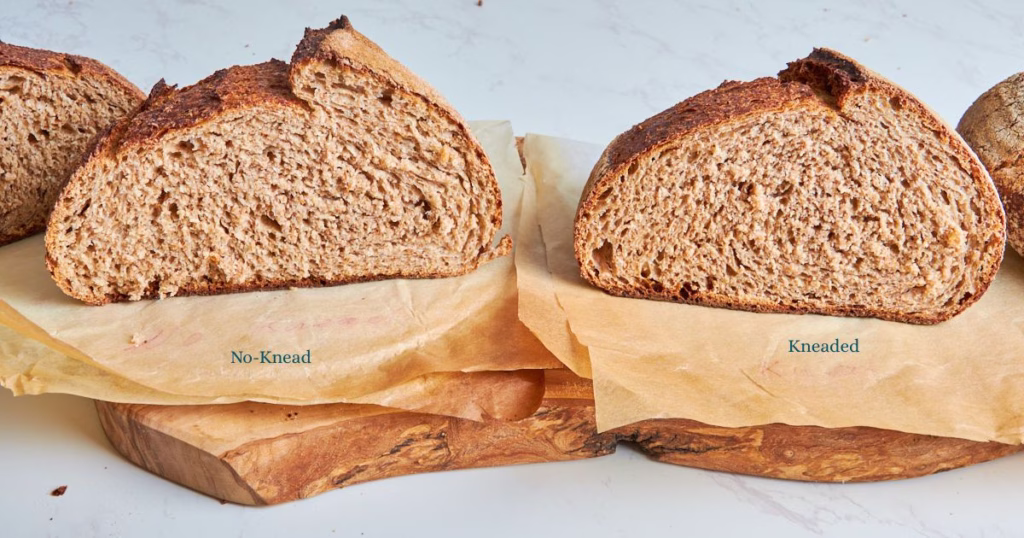
But what surprised me was, how close together the two loaves were in rise and structure. Would you see them both beside each other in a bakery, you wouldn’t notice a difference. Just a tiny bit more rounded rise, maybe a few millimetres, in the kneaded version feel, at least to me, really not worth the effort.
Plus, the classic sourdough “ear” looked better in the no-knead version.
Hence, in the instructions, I went with the easy no-knead process.
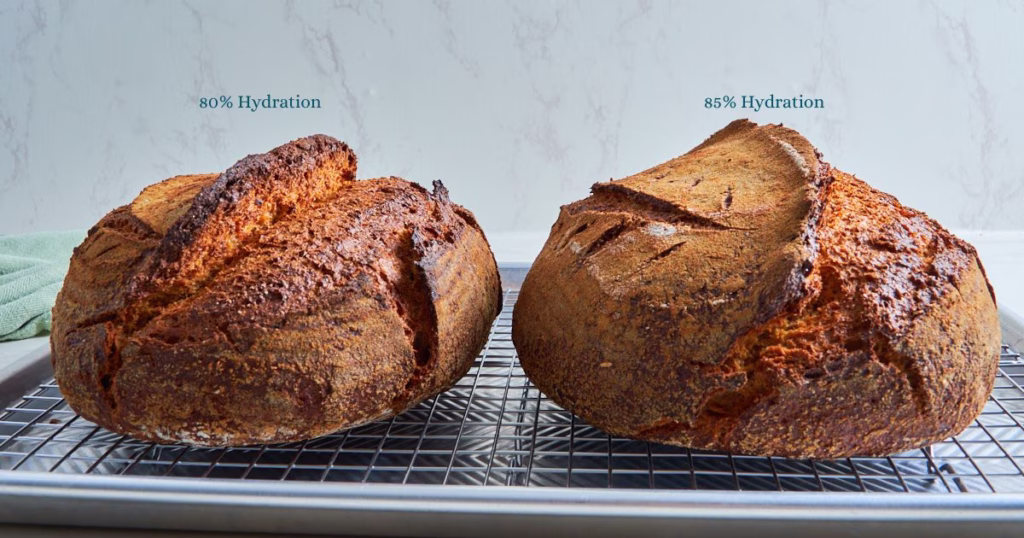
80% or 85% Hydration?
Last but not least I decided to do a side by side comparison between 80% and 85% hydration, to test how much of a difference this tiny bit of water really makes. And once more, the result was quite surprising. The oven spring and rise where a good bit better in the 85% version, so that is what I’m giving you in the recipe.
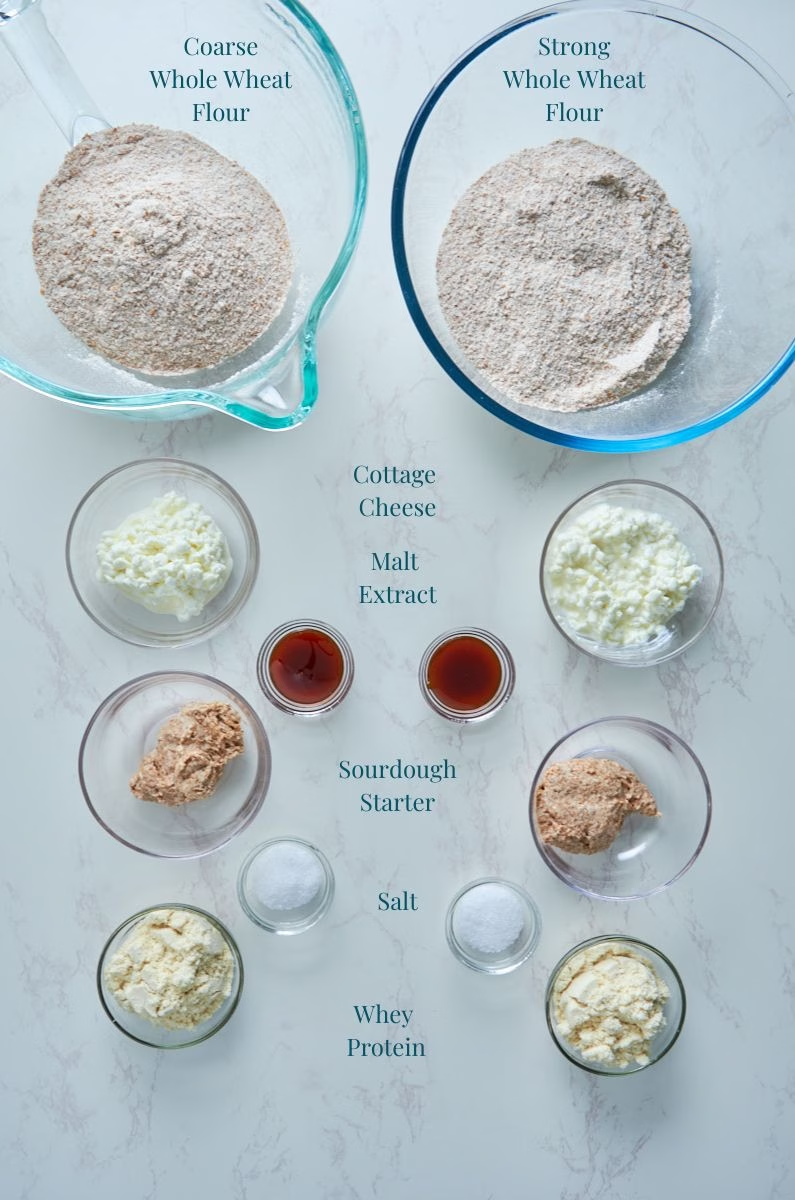
Ingredient Notes
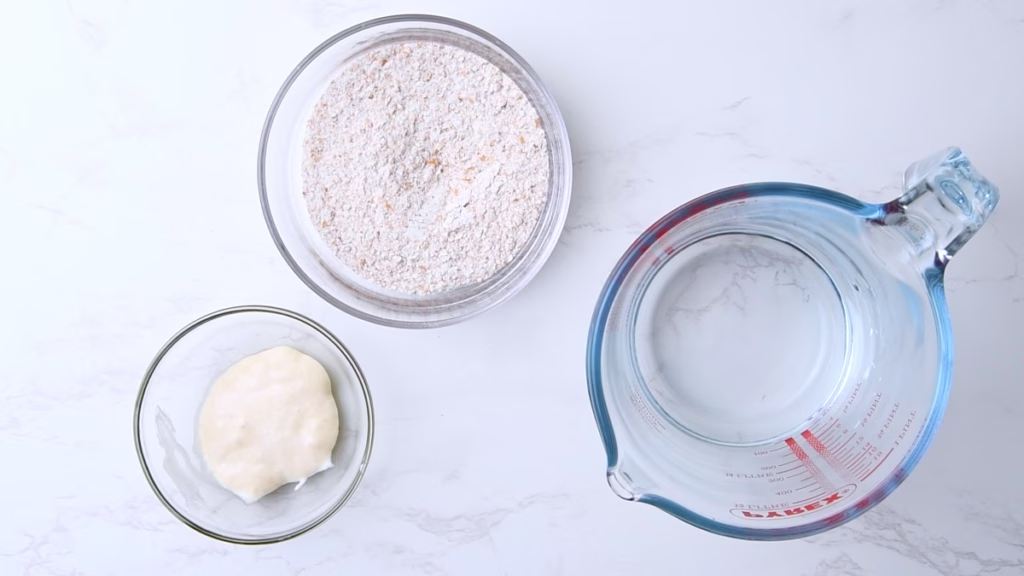
This bread primarily relies on classic sourdough ingredients, enhanced with two key protein components. Here’s a closer look at what you’ll need and why each ingredient is important.
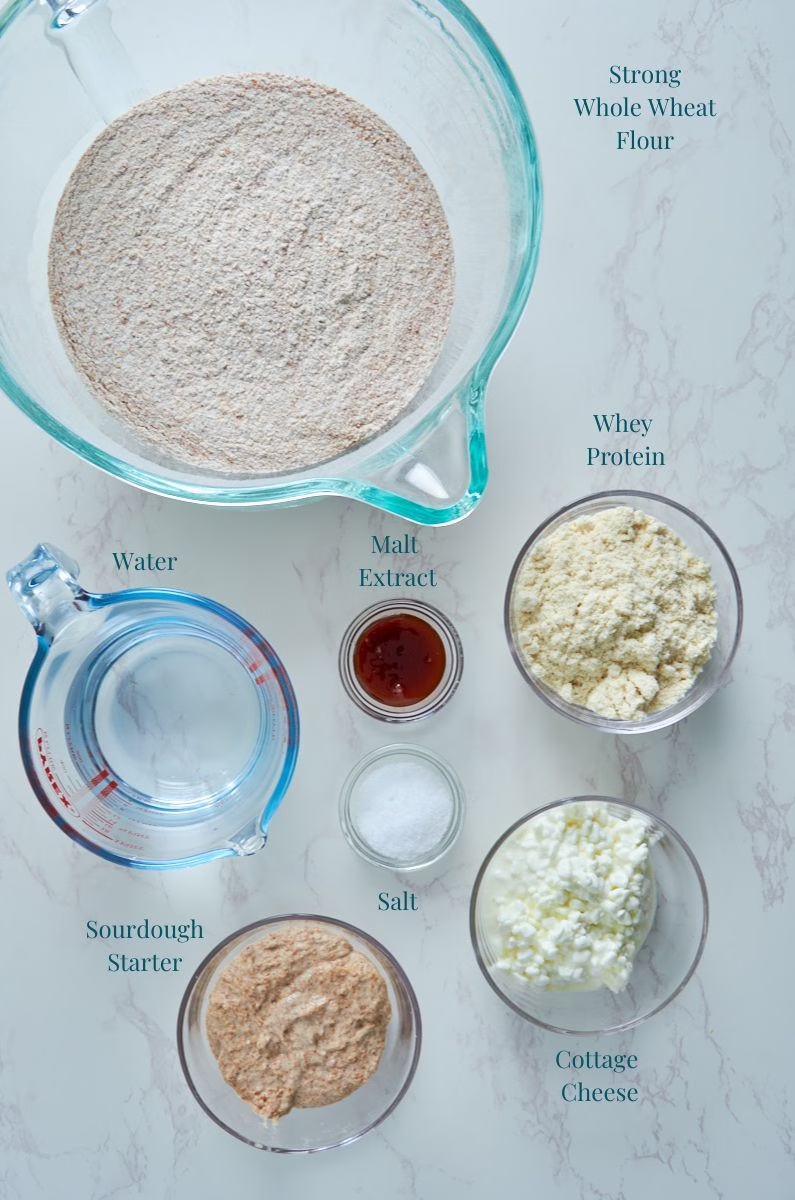
The Dry Whole Wheat Bread Ingredients
- Whole Wheat Bread Flour – Whole Wheat bread flour has a higher protein content fine whole wheat flour made for cakes and lighter baked goods. It forms a stronger gluten network, responsible for the beautiful rise you get in this bread.
- Whey Protein Concentrate – Unflavored. Unless of course you’d like vanilla flavored bread. The other half of the protein increase, the protein powder acts similar to flour in baking, in that it absorbs moisture and lends structure. Too much and you get a very dry loaf. I raised the protein content in this bread by a little under 1 scoop/30g on the amount of flour, compared to my base recipe using white flour. In a white loaf, which you want to be pretty airy, it would weigh things down a bit too much, but in a naturally slightly denser whole wheat loaf it made sense to up the nutrition even further.
- Salt – Not only for flavor (though that’s of course important), but to control the fermentation rate and give it time to develop.
The Wet Whole Wheat Bread Ingredients
- Cottage Cheese – Part of the protein addition here. Gives a lovely fresh flavor to the bread, increases moisture and introduces a tiny bit of fat, keeping the dough supple even when adding protein powder.
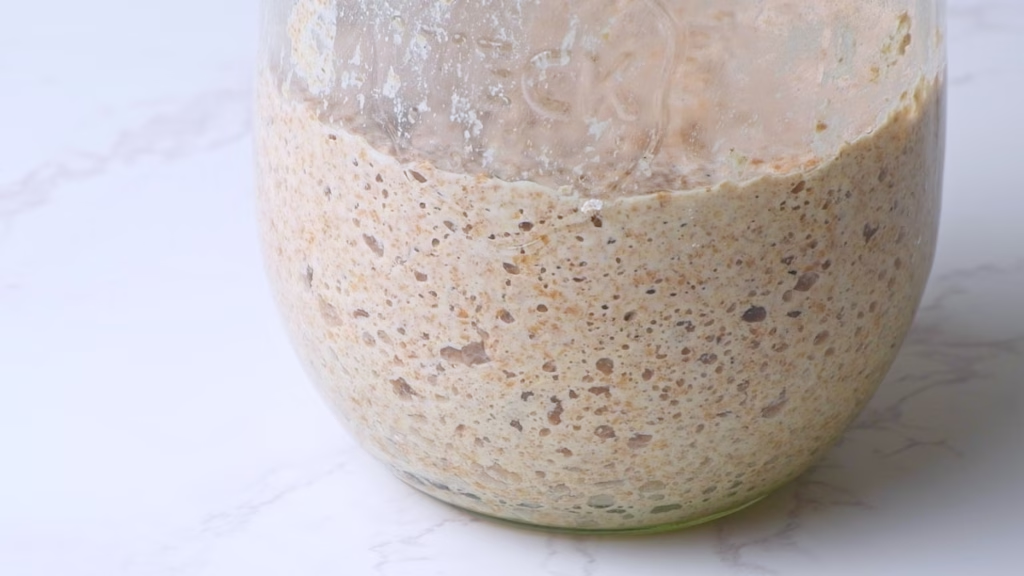
- Sourdough Starter – The key to make this bread work for you. Ideally a well fed and active starter, as whole wheat bread is fairly heavy and needs a starter that’s able to lift it.
- I’ve started using a slightly higher flour to water ratio with only a tablespoon of starter added for a while now (1:7:6 to be exact, instead of the classic 1:1:1), which gives me a much longer activity window for my starter and with that more flexibility in my schedule. It’s also lower in acidity and rather strong, helping with a good oven spring.
- Malt Extract – I love malt extract in many of my breads, which is often sold as “Barley Malt Syrup” since it just gives them even more flavor and enhances the maltiness sourdough adds. It’s not mandatory though. While the sourdough will break down most of the sugars anyway, you could leave it out if you wanted.
substitutions
The Dry Whole Wheat Bread Ingredients
- Whole Wheat Flour – You can use fine whole wheat flour if that’s what you have. Your bread might have a little less structure (read rise) and be more tender, but still delicious
- Protein Powder – Casein and spent barley (for vegans) both work well. I compare the results I got in details in my Easy High Protein Sourdough post https://forthepleasureofeating.com/easy-high-protein-sourdough-bread and how I would modify the recipe for each.
- In short: Casein powder works well, but needs about 1-2 tbsp added water. So does upcycled (unflavored) Barley protein, which needs 1-2 tbsp less water.
- I have not tried to bake with any pea based vegan protein powders, as I deeply dislike the flavor and texture of them to begin with, so I’d rather not have them in my baked goods. If you give it a try, please tell me what you think! You’ll likely need to add 1-2 tbsp water, as they do soak up more than whey concentrate.
- I would not recommend using whey isolate, as it has a much stronger drying effect, since it has none of the fats from whey concentrate, leading to a very dense and dry structure in the final bread.
- If you’d like to make this recipe without protein powder, simply replace 1:1 with more flour.
The Wet Whole Wheat Bread Ingredients
- Cottage Cheese – I have yet to find a vegan source that performs as well as cottage cheese but could imagine vegan Greek yoghurt working in similar ways, if with a little less protein but higher fat content.
- Sourdough Starter – Now in theory you could make this bread with instant yeast. Replace the amount of sourdough with 50g flour, 50g water and 1 tsp instant yeast. Your rising and fermentation time will be about halved. You can still do a cold ferment in the fridge overnight though and it’ll improve even a yeasted dough’s flavor. You may have to add a little more flour if using only yeast, as it can’t handle the amount of moisture sourdough can.
If you try any of the above vegan substitutions, I’d love to hear about your results in the comments!
Top Tips for Success
- This is a high hydration dough, so it will be pretty sticky even when shaping. Do the stretch and fold with wet hands, to prevent dough fingers and only use a little flour during the shaping process.
- I often say don’t apply yeasted dough logic (“knead until it doesn’t stick anymore and comes away from the sides of the bowl”) to sourdough. The two are very different in hydration and handling. Sourdough will always be a little stickier. Think of the goal texture as Jello-like. It should jiggle in the bowl when it has risen. Though whole wheat dough a little less so.
- Ideally I would rather go with longer fermentation times than shorter, as that always gives you better results. But if you are in a hurry and want to skip the overnight cold fermentation, you can shape right after the bulk fermentation and then bake about 2-3h later. Beware that your loaf might not be as flavorful and not rise as high. But it’ll still be delicious.
- Sourdough timing depends a lot on the activity of your individual starter and your room temperature. My house it at a pretty constant 70°F/21°C thanks to air to water heating. If your rooms are colder, it’ll take longer, if they are warmer the process will be faster.
- I tested this recipe using a Dutch oven for baking, which traps steam during the first half of the baking time, leading to a fabulous oven spring and crispy crust. It also allows me to set the oven temperature very high for said first half of the time, giving the bread even more of a boost.
- If you are baking on a stone or sheet pan, pre-heat the oven to 475°F/245°C with a heat proof dish at the bottom that can take rapidly changing temperatures. I usually use my oven tray for this. When adding your bread, drop the temperature immediately to 425°F/220° and pour 1 cup of water into the tray to create some steam. After 25min open the door and let the steam escape to mimic the process of removing the lid from the Dutch oven and regulating the heat. You may have to bake a little longer and cover the bread with aluminium foil if it’s getting too dark.
- Because of the cottage cheese moisture, aim for an internal temperature of 205°F–210°F (96°C–99°C) to ensure the center isn’t gummy.
Equipment Used
- Blender – As for the equipment you need, the only slightly unconventional piece of equipment is this. I used my Nutribullet, but any blender that can transform cottage cheese into a smooth cream will work. A food processor should do the trick too.
- Large bowl – While you could mix the dough in a stand mixer, it doesn’t really need it (see comparison above). So bowl and dough whisk are my tools of choice.
- Spoon or dough whisk – In my trials I found a dough whisk worked best for combining the dry with the wet ingredients. A spoon felt like slightly more work to me. But use what you have.
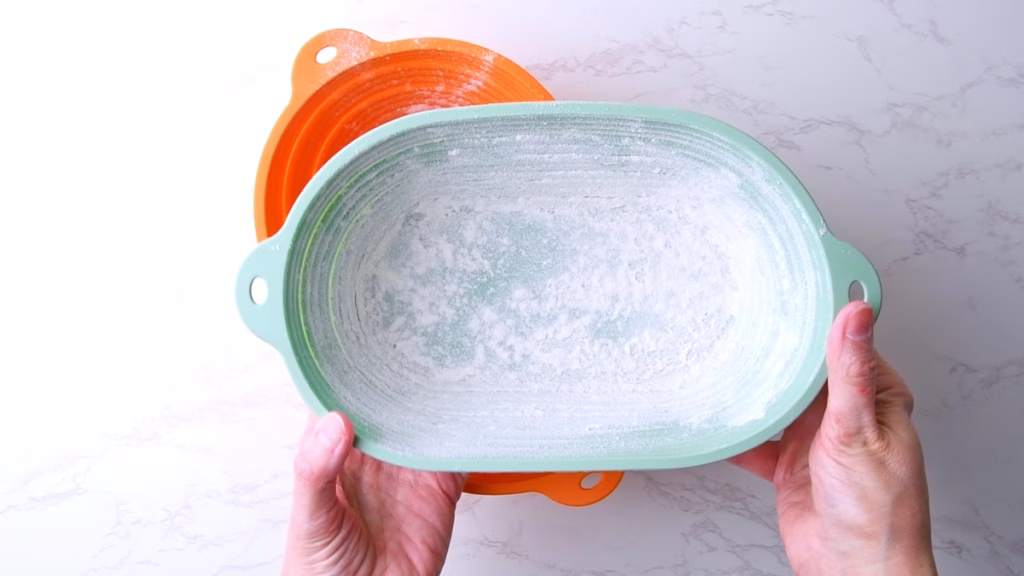
- Banneton – A banneton is lovely if you bake on a regular basis. I particularly adore the silicone ones, as they can go into the dishwasher. The sets of them also often come with above mentioned dough whisk and some silicone baking mats, which are very useful for sticky sourdough bread.
- Lame – or sharp knife for scoring
- Dutch oven – Or any lidded cast iron pot. They heat up together with the oven, to provide the initial heat burst needed for that perfect oven spring. The lid keeps in steam for the first half of baking, meaning you get a shiny crust that is crunchy, but not too hard.
Tip:
If you’d like to know why I chose my particular equipment, how I make my cooking more efficient and what I use as a women with chronic pain to still enjoy baking as much as I do, check out my Page on How to Make Life in the Kitchen Easier!
How to Make this
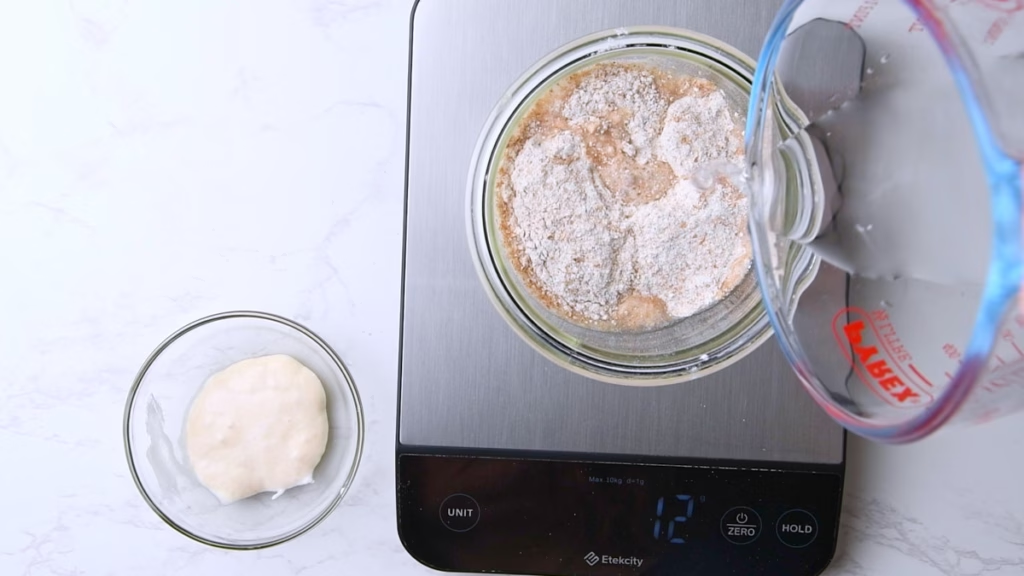
Please Note: For optimal results and accurate ratios, this recipe provides measurements in grams alongside the usual cup measurements. If you have digital food scales, this is the best method to measure your ingredients.
Bread baking, especially sourdough, relies on precise liquid-to-flour ratios, which can be inconsistent when measuring by volume (cups).
Example Baker’s Schedule
| Time | Action | Note |
| Day 1: 9:00 PM | Feed Levain | Mix your starter. Let it sit at room temp overnight. |
| Day 2: 9:00 AM | Mix Dough | Mix wet ingredients with flour, salt, and starter. |
| 10:00 AM | Stretch & Folds | Perform 3–4 sets of folds every 30 minutes. |
| 12:00 PM | Bulk Ferment | Let the dough sit undisturbed (Counter or Fridge). |
| 8:00 PM | Shape | Shape and place in the Pan/on Parchment/In a banneton |
| 8:30 PM | Cold Proof | Put the bread in the “plastic bag tent” or cover with plastic wrap and into the fridge. |
| Day 3: 8:00 AM | Freezer Chill | Move the pan to the freezer for 30 mins to firm up for scoring. |
| 8:30 AM | Score & Bake | Pre-heat the oven, score, and bake! |
Day 1 – Feeding Your Starter (Levain)
Sourdough Starter (Levain)
- Using 1tbsp/15g of your existing starter (Levain), feed it with 1/4 cup/60g whole wheat flour and just under 1/4 cup/50ml water. Leave it loosely covered overnight until it has doubled in volume, is active, and bubbly.
- If you have no starter yet, here is a link on how to make your own. You just need water and flour.
- How strong your starter is depends on your flour. Use good quality flour to feed it for best results. The consistency should be like very thick, stiff pancake batter.
- How long your starter will take depends on the temperature of your house. In winter it might need longer, in summer significantly shorter.
- To determine if it’s ready check if it has doubled in volume, is actively bubbling, you see nice, strong gluten strands if gently pulling it away from the walls of the jar with a spoon.
- Whole wheat starter is a little less bubbly and active than white. That’s fine. It has a harder job to do.
Day 2 – Mixing The Whole Wheat Dough/Bulk Proof
Blend The Wet Ingredients and Protein
- Check if your sourdough starter is ready by adding a dollop of it to the water. If it floats and is nice and bubbly, it’s ready. Ideally it should just have formed a bit of a dome in its jar, when at peak activity. Though if it just collapsed a bit you’ll be fine too.
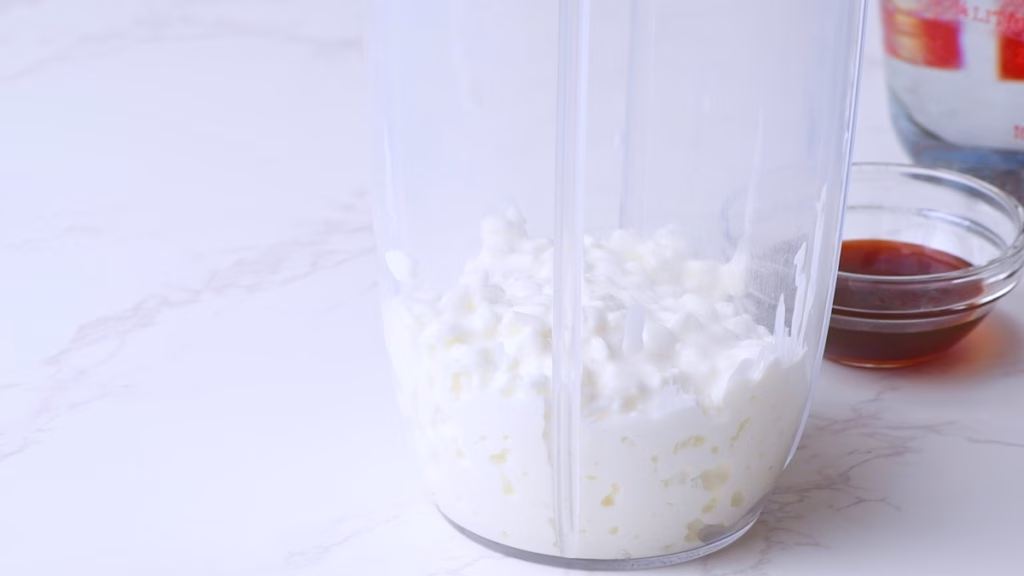
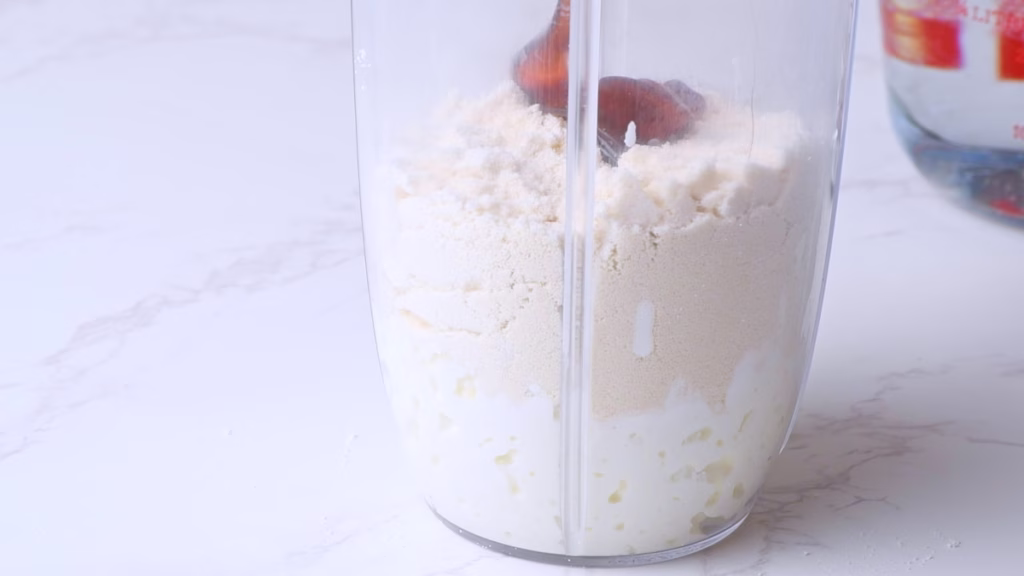
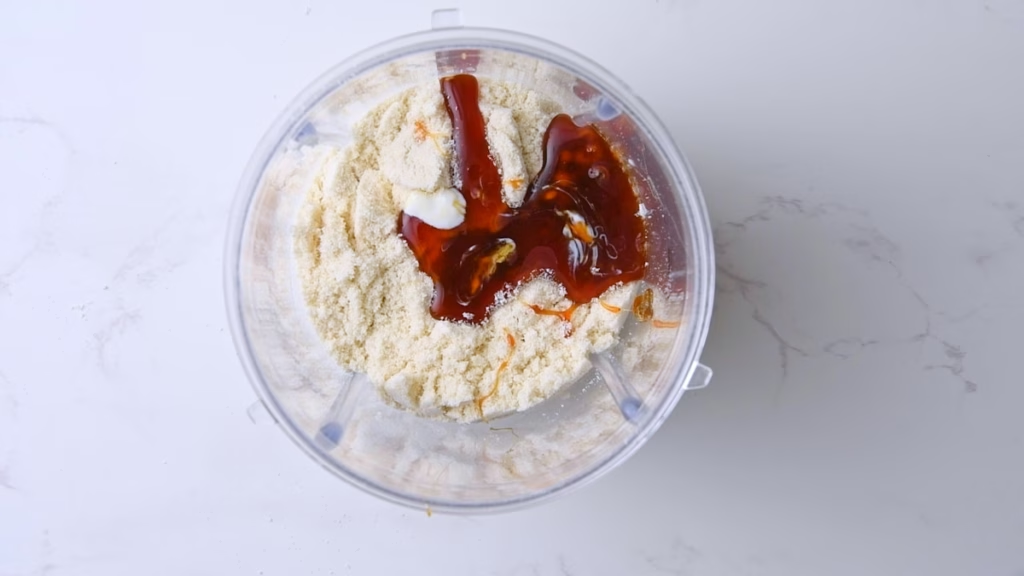
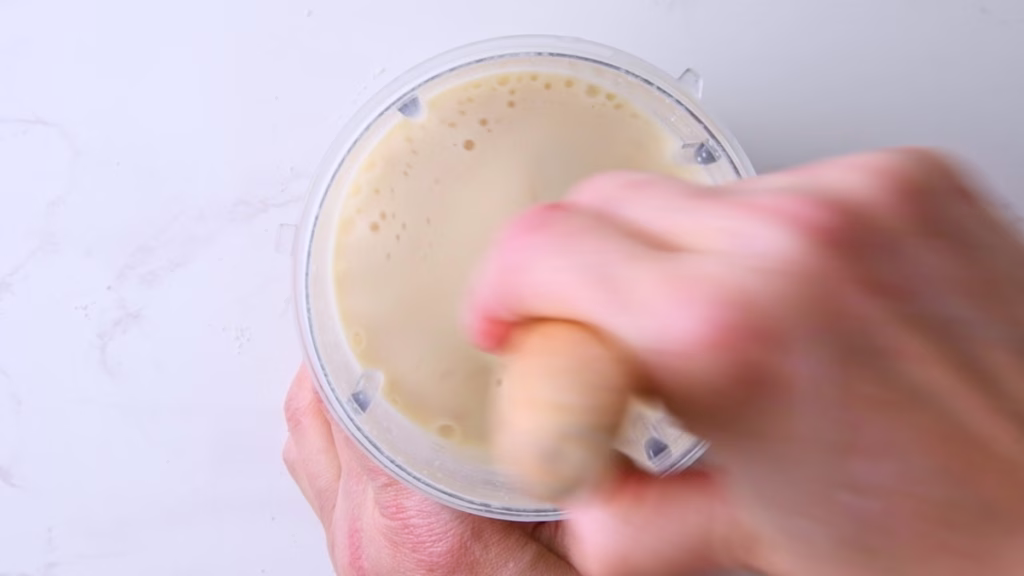
- Blend the cottage cheese and protein powder with some of the water and the malt extract or honey until smooth.

- Add the cottage cheese-protein mix to the sourdough starter together with the remaining water and stir until combined.
Mix the dry ingredients
- In a large bowl stir together the whole wheat bread flour and salt. I’m using kosher salt, which has a higher volume per gram, so for me this is 2 tsp. If you are using sea salt, use 1 tsp.
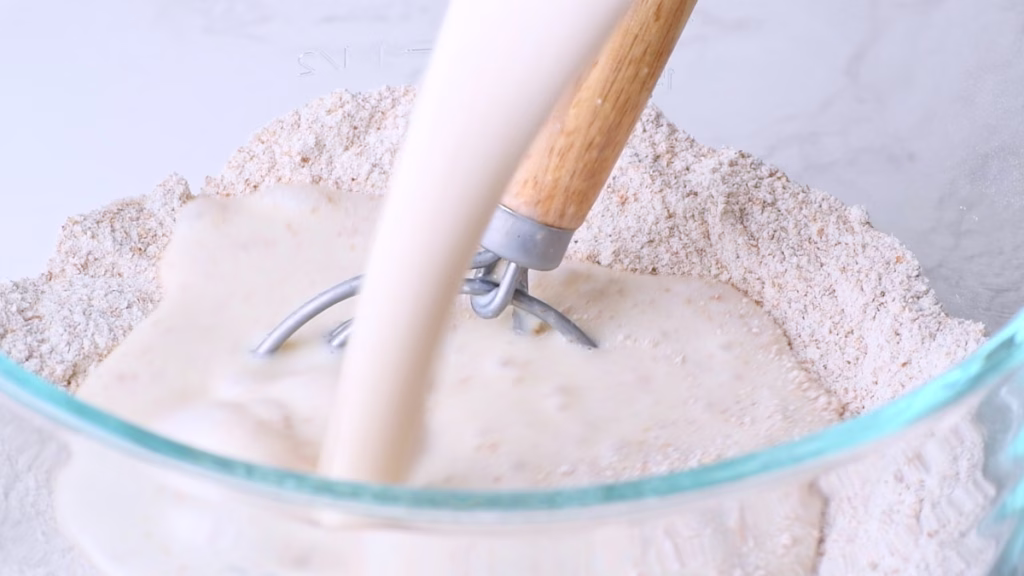
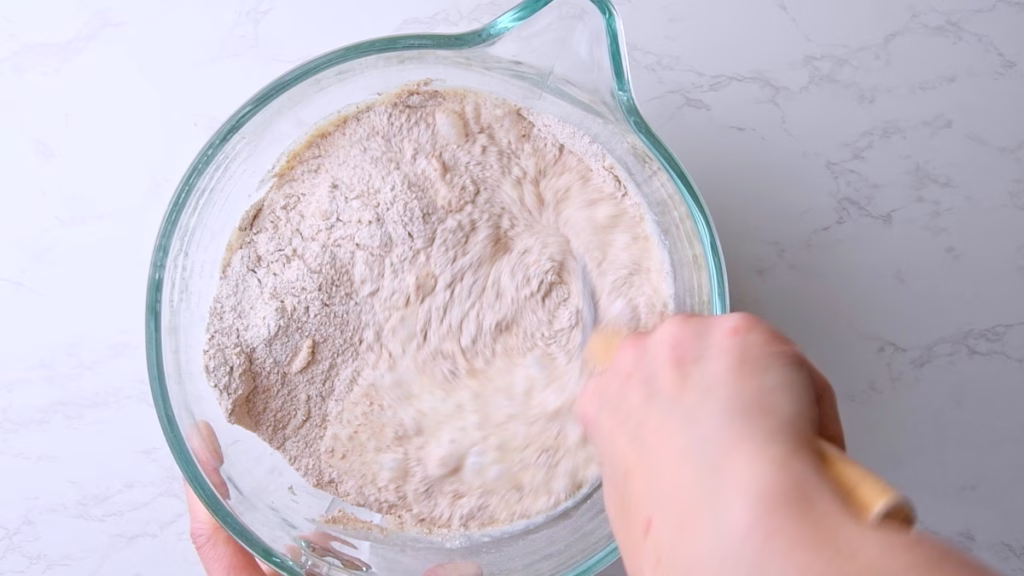

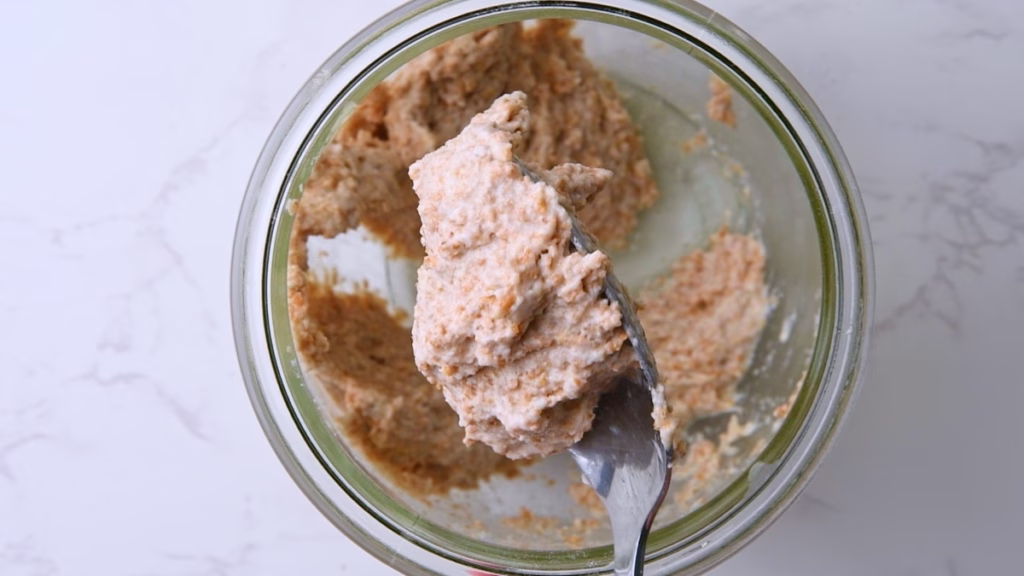
- Stir the wet into the dry ingredients using your dough whisk or spoon, make a little well in the middle of your flour then pour in your wet ingredient blend, stirring as you go. Mix until no dry flour patches remain.
- The dough will be very sticky and lumpy at this point, that’s totally fine.
- Cover and leave it to rest for 30 minutes to 1h for the autolyse, allowing the flour to hydrate.
Tip:
If you only made yeasted bread before, this dough will seem way too wet and sticky and you’ll be tempted to throw a cup of flour into it, thinking the recipe is totally off and can’t work.
Resist the temptation and trust the process.
I sure did add the flour in my first few sourdough attempts and wondered why I kept ending up with “Dwarf Bread” as we called it: Hard as a rock, well suited to smacking intruders over the head, and you always find something better to eat.Sourdough by nature is much wetter, softer and stickier than yeasted dough. But it will get easier to handle as soon as you start the stretch and folds.
Prepare for the magic.
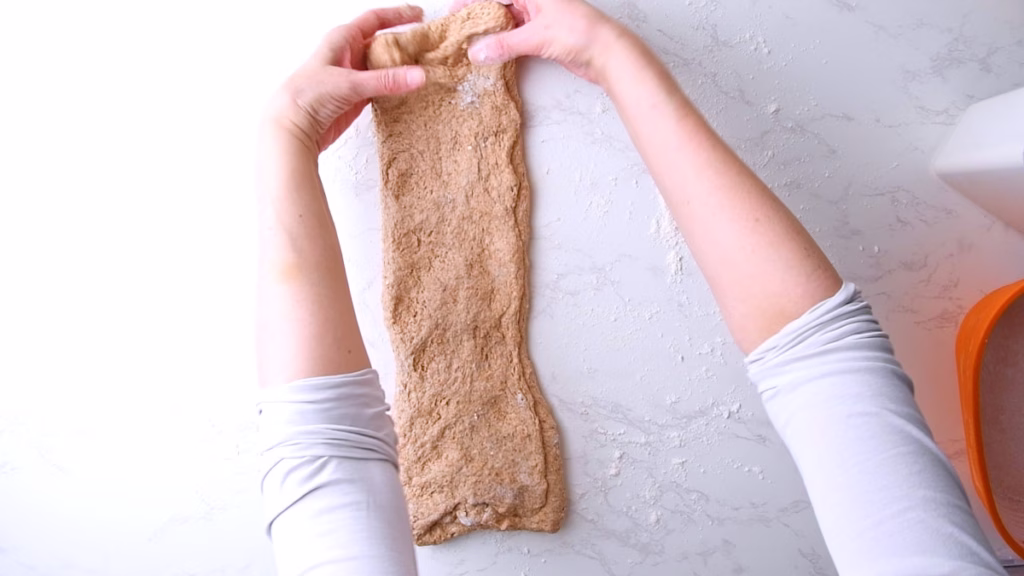
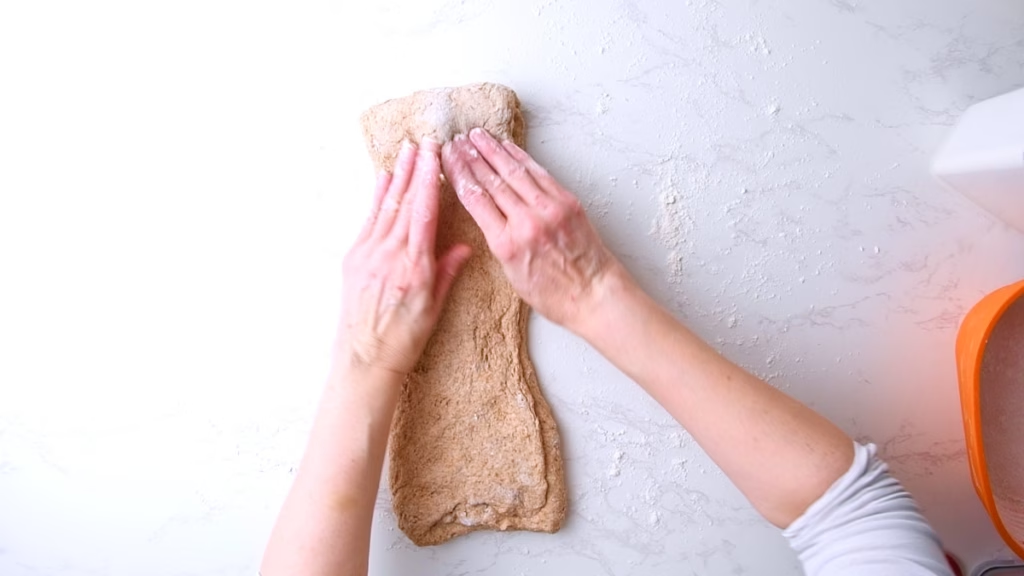
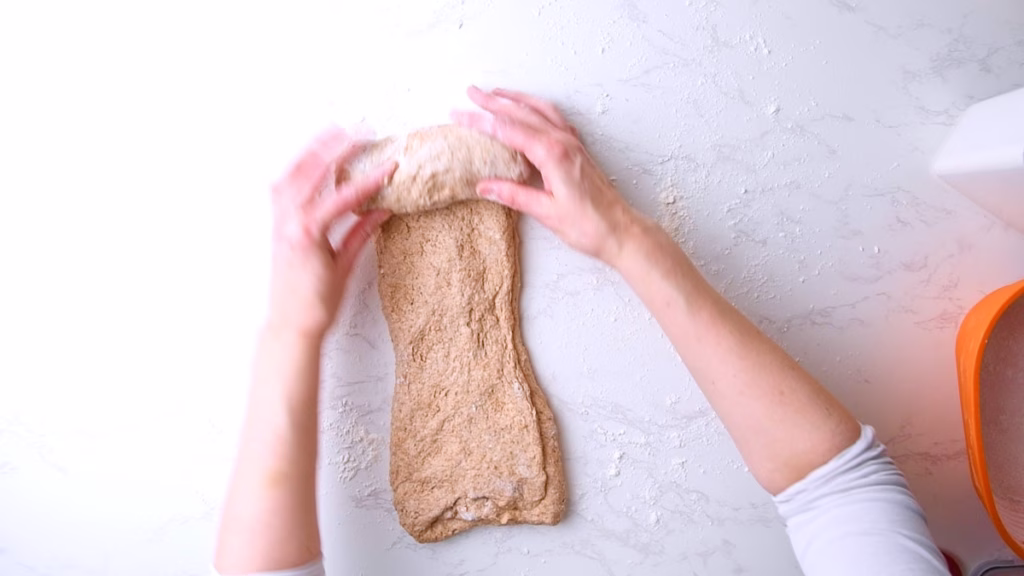
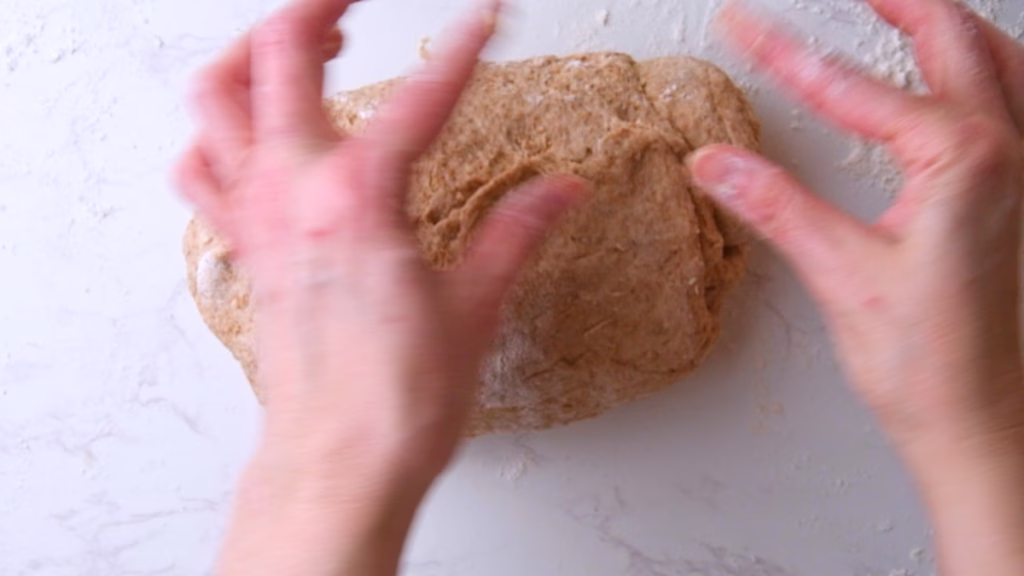
Stretch and Folds: Building Structure
If you read some of my other bread recipes, I sometimes say, especially for doughs that don’t have much gluten to begin with, that you could skip the stretch and folds.
This is not one of those. The stretching and folding helps build a strong gluten structure and will give you great oven spring.
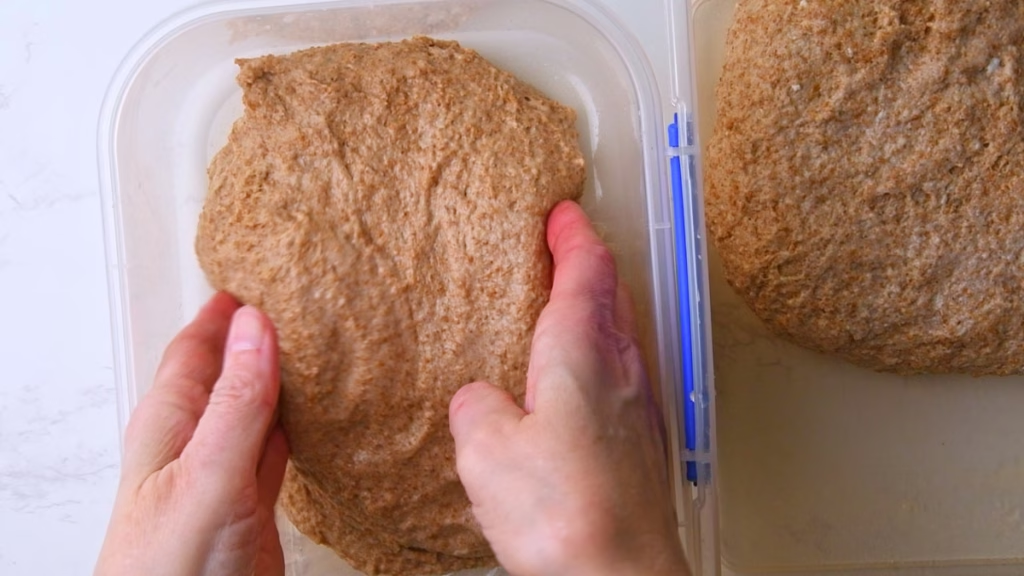
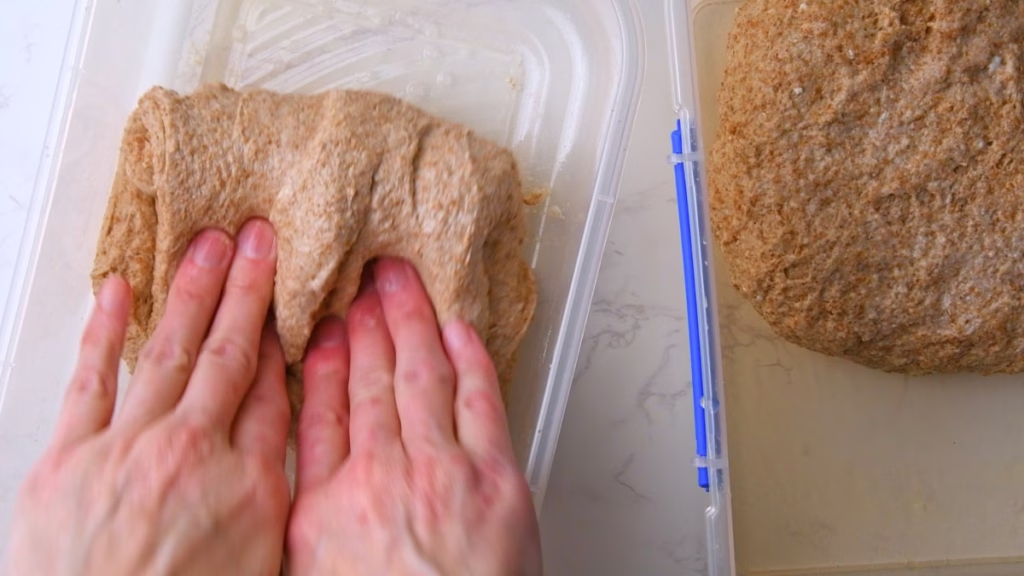
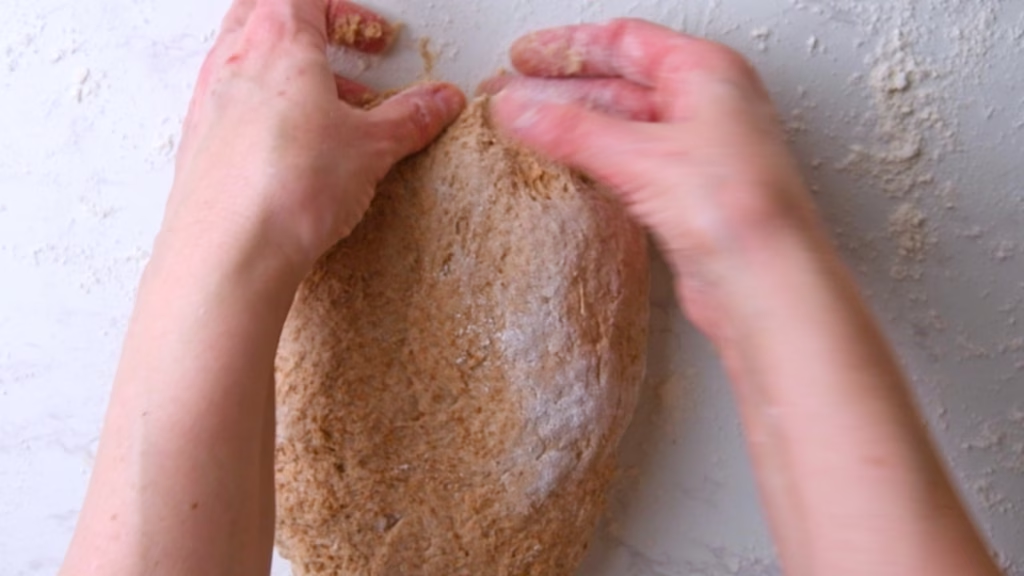
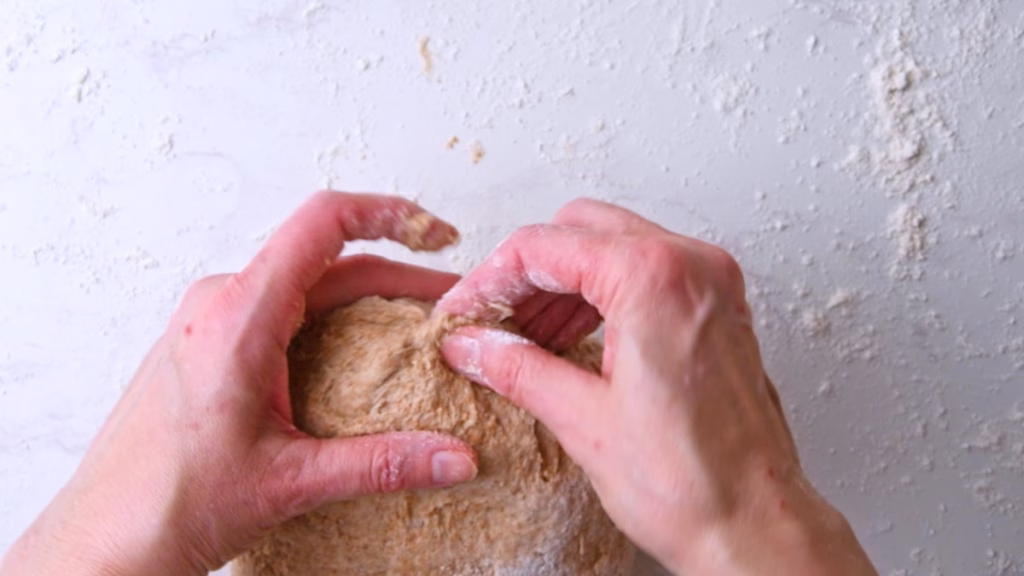
- Wet your hands. This will mostly prevent the sticky dough fingers. Contrary to flour, which makes them worse.
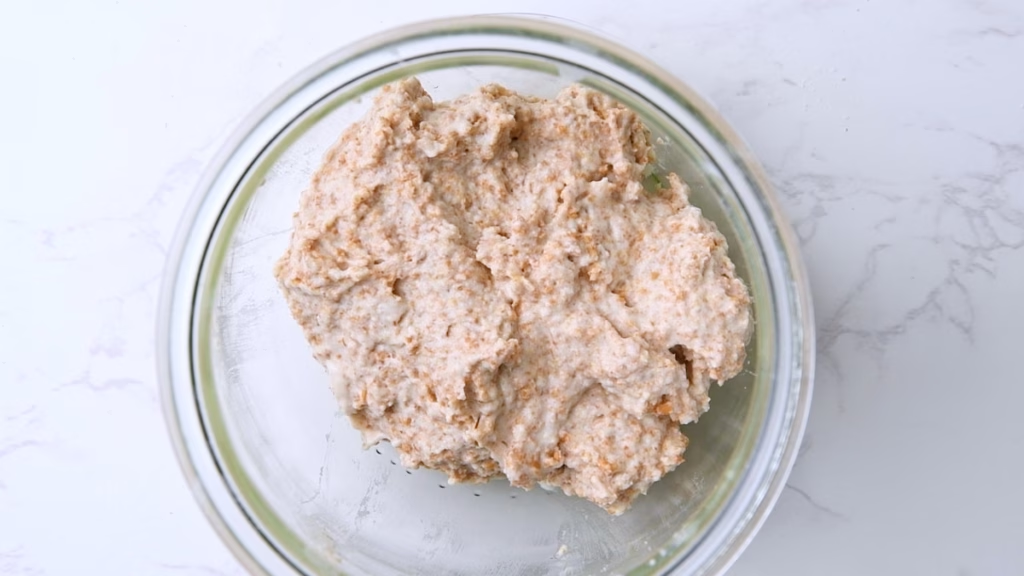
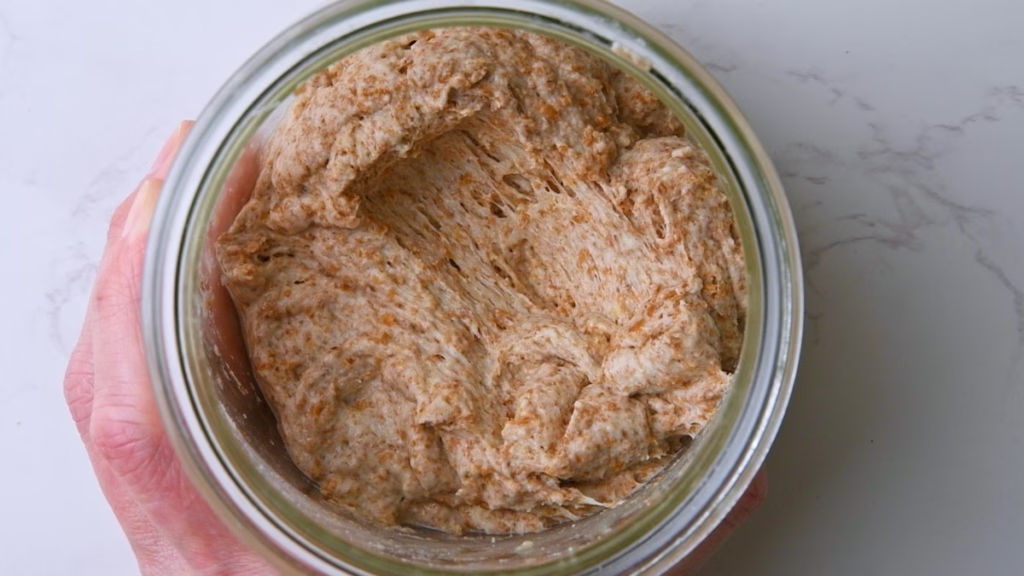
- Push both hands under the dough and lift one side up. Stretch it until nearly the whole dough is lifted out of the bowl, then fold it over itself. Turn the bowl by 90 degrees and repeat. Do this 3-4 times, until the bowl has turned back full circle or the dough feels very resistant to the stretching. You don’t want to rip the gluten strands.
- Cover and allow to rest for another 30 minutes.
- The pictures above are the results right after the first stretch and fold. You can see how fast this develops the gluten structure.
- Repeat the process 2-3 more times after 30 minutes each, until you feel the dough is much smoother, easier to handle and shapes into a neat (if wobbly and sticky) loaf. After the last stretch and fold, either shape or cover and leave to ferment overnight in the fridge.
Shape Your Loaf
I’m shaping this one into an oval loaf and want as much surface tension as possible. So I’m following a similar process to my High Protein Sourdough Sandwich bread, which gets rolled.
You can do this the evening before or on the day of baking. If you do shape on the day of baking your dough will need another hour of resting to puff up again.
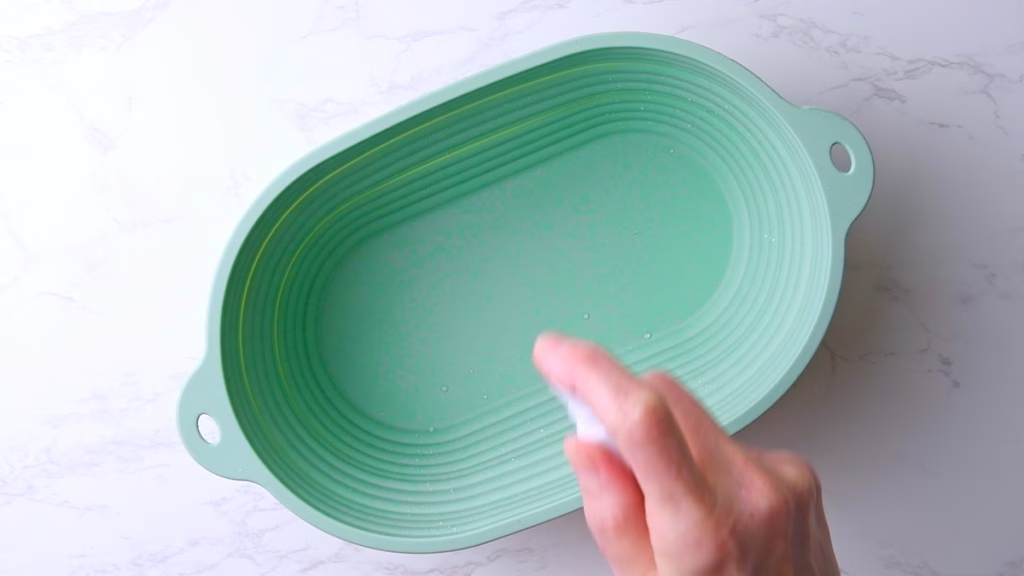
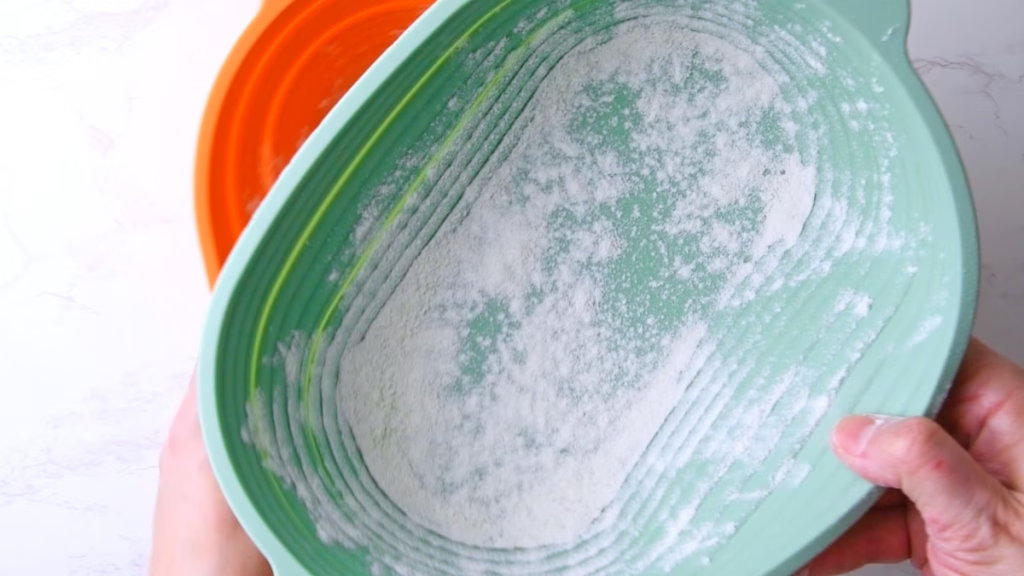
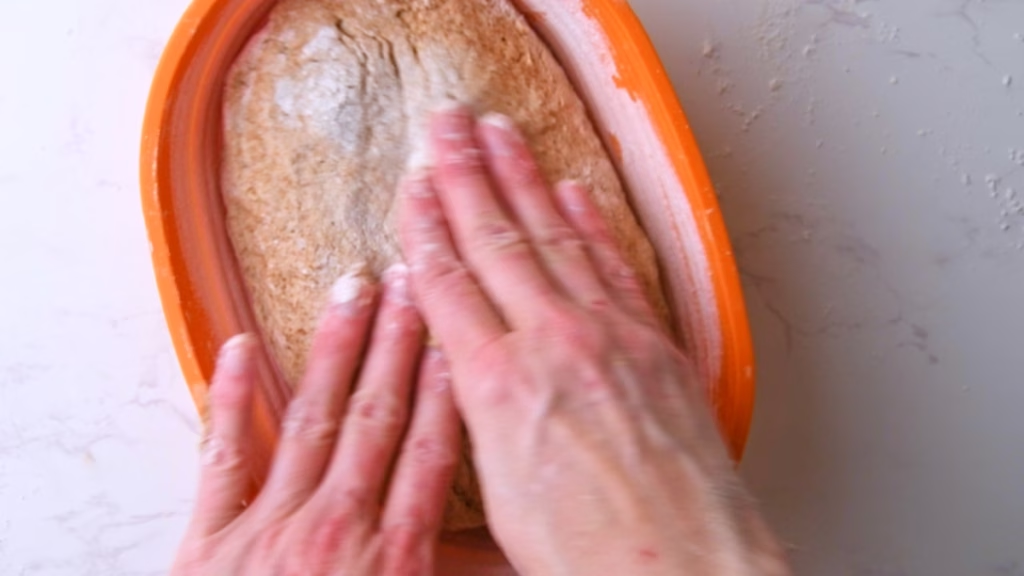
- Prepare a banneton or bowl by misting it with a bit of water and dusting ideally with rice flour. Opposed to wheat flour, this will not be absorbed by the dough and very effectively prevent sticking, giving you those nice and neatly shaped loaves you see.
- On a floured surface, tip your dough out of the bowl.
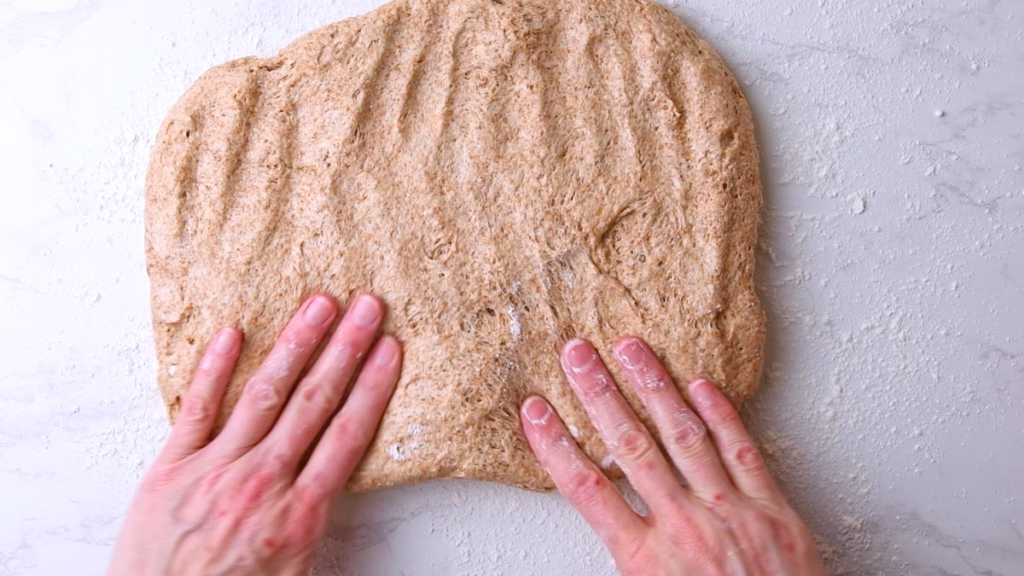
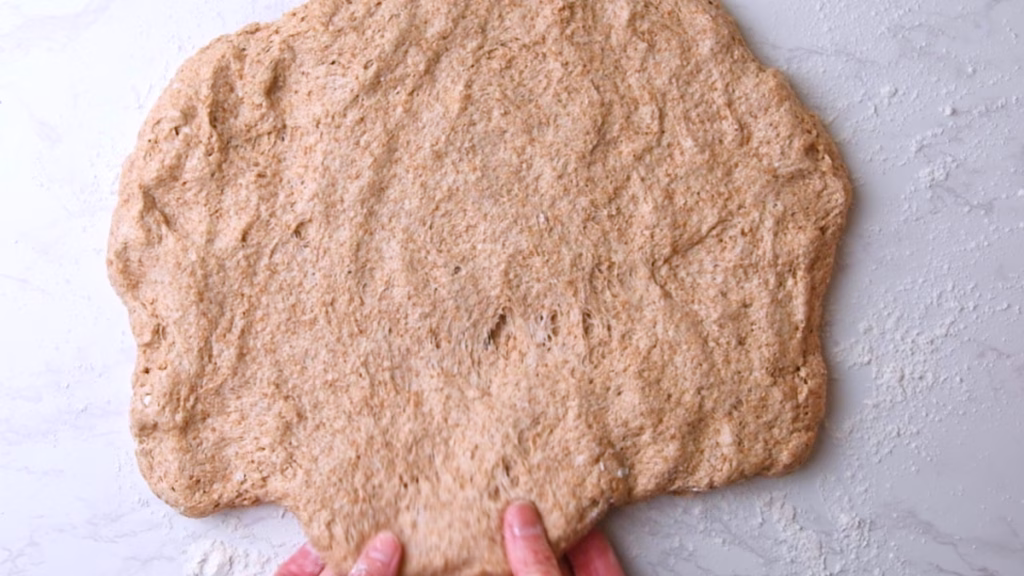
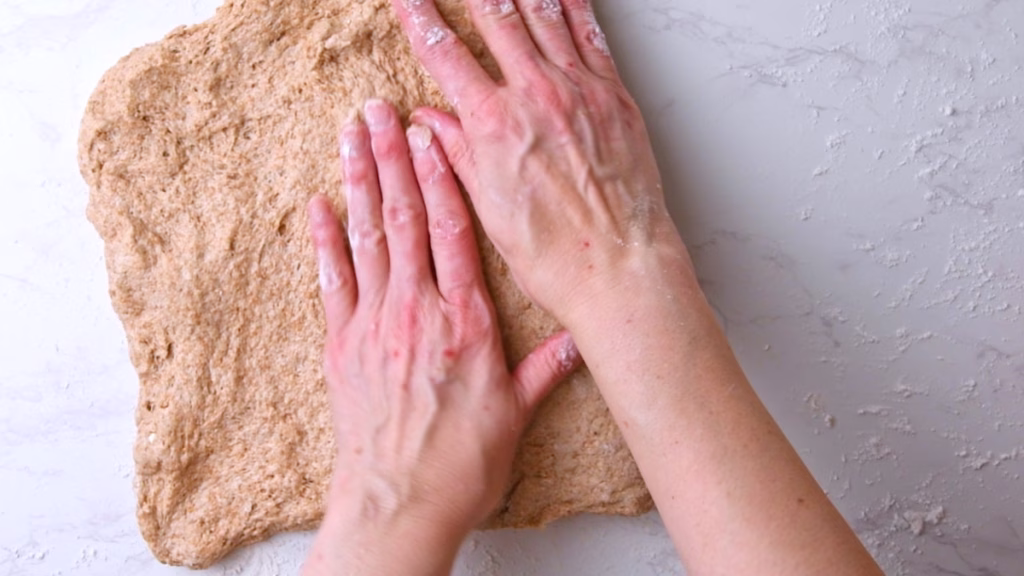
- Gently stretch it into a rough rectangle as much as you can. You want the dough to be fairly thin without ripping.
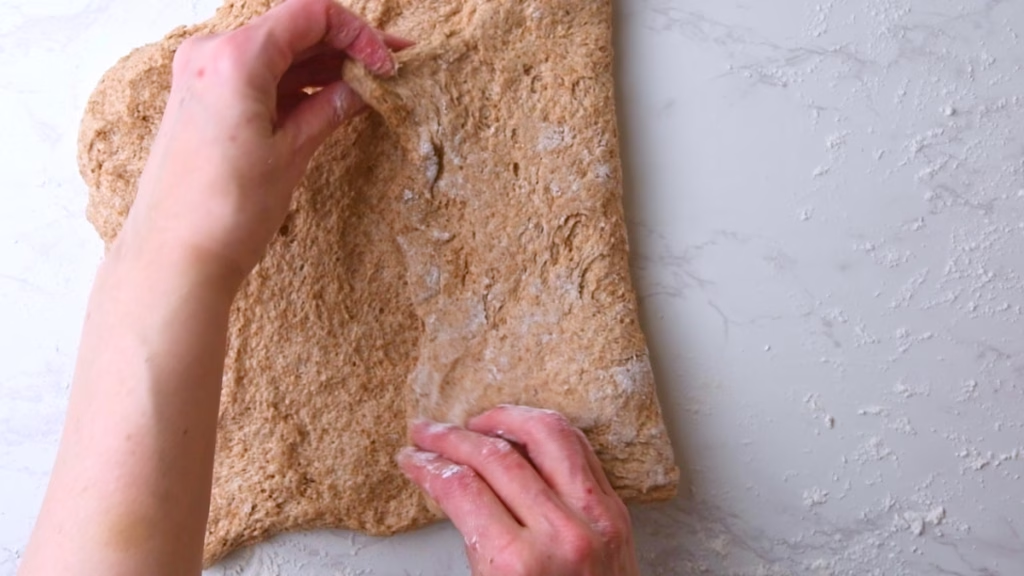
- Do a letter fold by picking up the top two corners from the short side and folding them over the center. Pat gently with your hands, so the dough sticks to itself, preventing any accidental huge air bubbles.
- Pick up the two bottom corners and fold over the center, patting it close again. Gently. You don’t want to squish all the air out, but not leave any big gaps either.
- Turn that “letter” by 90 degrees and gently stretch it a little further. This will have an effect similar to lamination, in that it creates layers and structure in your loaf, stacking all those gluten strands.
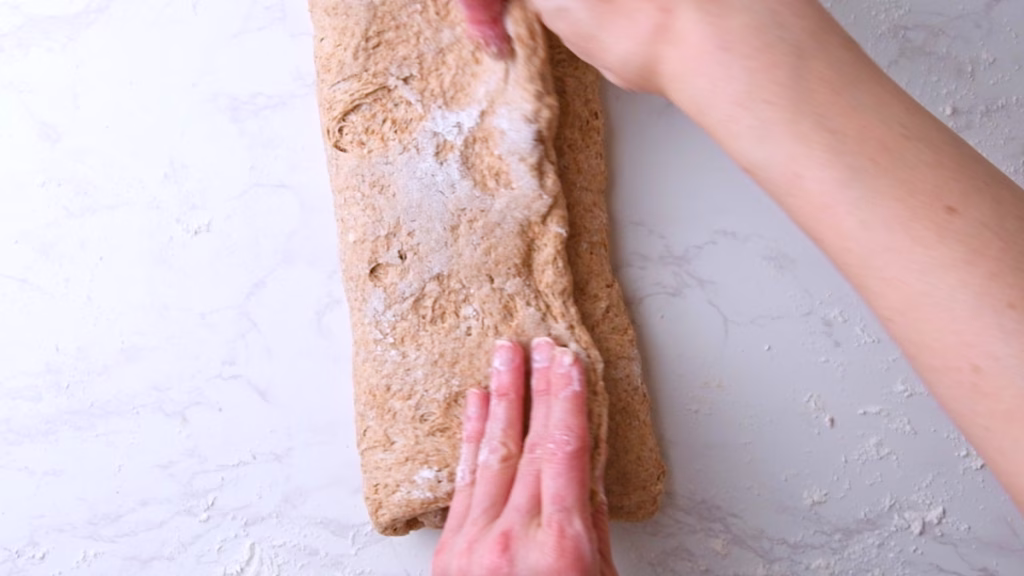
- Starting on either top or bottom short side, start rolling your dough tightly, pulling it a little while doing so, until it is one big and fluffy roll.
- Pinch the seam close with your fingers.
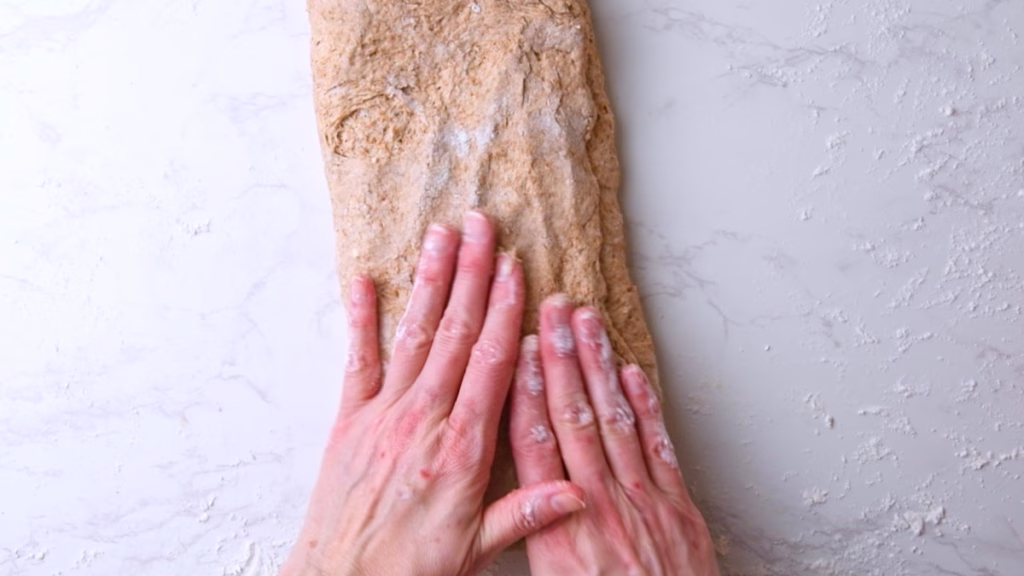
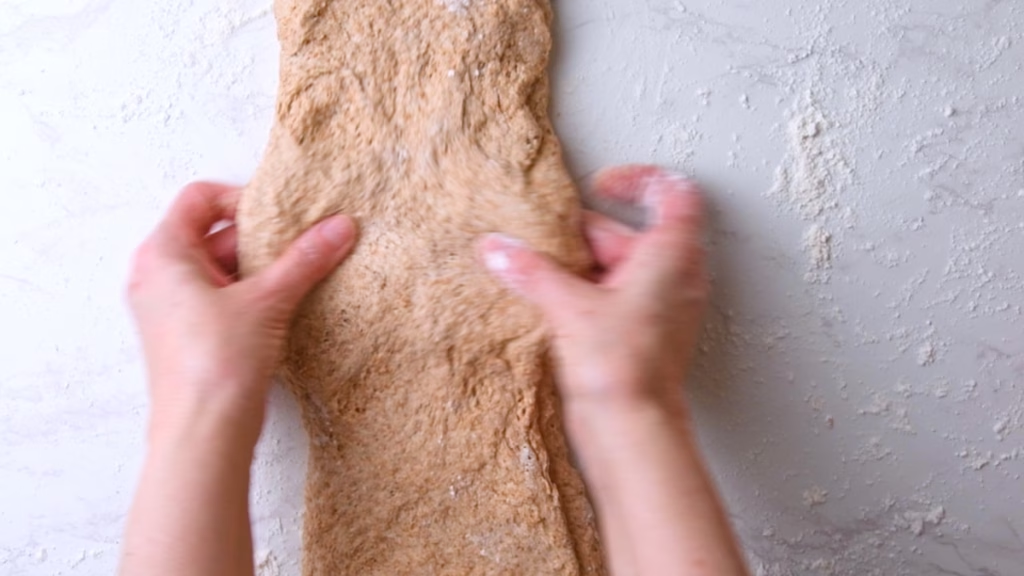
- If you want a bit of a neater loaf, you can now push in the sides where the layers are showing and pinch them closed too.
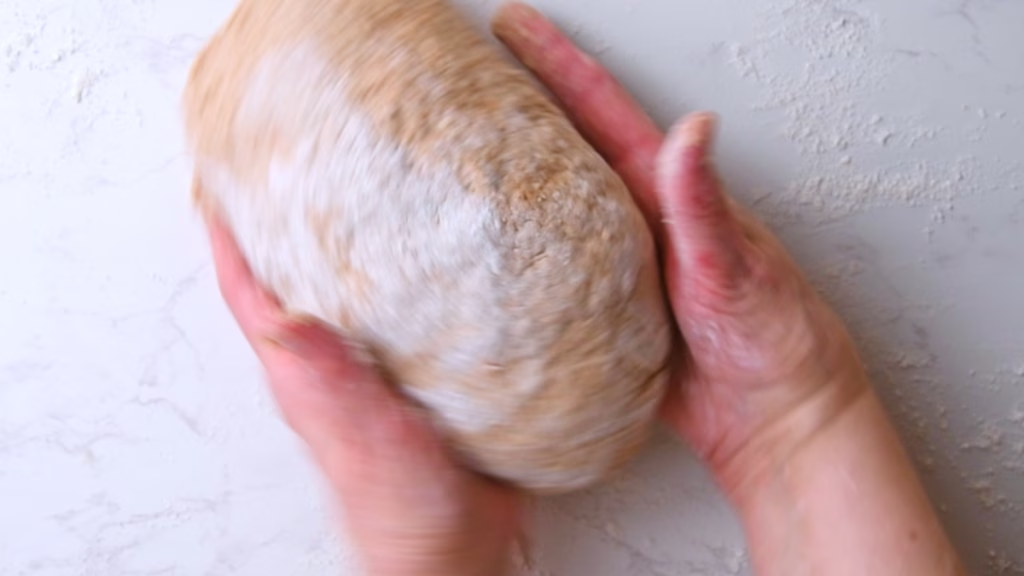
- Using the side of your hands, start rotating the loaf on your work surface, pushing the sides gently under the loaf, creating even more tension.
- Stop when the top looks relatively smooth and domed and feels bouncy.
- Transfer gently into your prepared banneton with the seam side up
Overnight Cold Ferment
- I put my Whole Wheat Sourdough Loaf in the fridge overnight at this point.
- And since I don’t want it to dry out and form a skin, which might bake into a very hard crust later, I use a bit of a trick to keep it moist and in perfect shape while giving it time to rise.
- I found towels decidedly too drying (even when damp) and frustratingly sticky and plastic wrap, no matter how carefully I tried to seal it always had air gaps, leading to dry bits plus was too tight to give my bread enough room to expand.
- Hence I started using (clean) large plastic bags, which works marvellously!

- Push said banneton into a large clean plastic bag, blow a bit of air into it, so it puffs up over the bread and close it with a clip or knot, to get a relatively airtight seal.
- Move into the fridge and allow to cold ferment/proof for at least 8 hours, to get the full flavor. Up to 3 days works perfect, after that it starts to deflate a little.
Day 3 – Baking Your Whole Wheat Protein Sourdough Bread
Pre-heat Oven And Score
- With the Dutch oven inside, pre-heat your oven to 475°F/245°C for 30 minutes to 1h.
- Even if it shows as pre-heated after a shorter time, the longer time is needed to reach the optimal temperature.
- Grab a piece of parchment slightly bigger than your bread loaf.
- If you’d like a really neat scoring, put your plastic bag covered bread loaf into the freezer for about 30 minutes while the oven heats up. This will form a thin, slightly firmer shell that allows you to score very easily without dragging. That’s the trick behind all those pretty scoring patterns you see. Though I admit I rarely bother.
- Carefully tip your dough onto the center of the prepared baking parchment. If necessary, gently push it back into shape. Sprinkle the top with a little flour, then, using a lame or a sharp knife, score your bread.
- You can get as creative or simple as you like.
- One long score, about 1/2 inch/1cm deep, at about a 45-degree angle slightly towards the side of the bread gives you the “classic” opening flap when the bread rises in the oven. Without scoring it would just break wherever it wants under the surface tension and might not rise as high. So one score is a good idea. Anything else is decoration.
Baking Your No-Knead Bread
- Using oven gloves, remove your Dutch Oven from the oven onto a heat proof surface. Take off the lid.
- Be mindful where you put this. I managed to burn a dark ring into a wooden chopping board. Ever since I put it either directly on my stovetop or a baking tray.
- Using the edges of the baking parchment, carefully lower your loaf into the Dutch oven. Close the lid and put it back into the oven.
- Bake for 25 minutes at the high temperature. I found this gives the heavier whole wheat loaves a nice head start in oven spring.
- After that time, lower the temperature to 425°F/220°C take off the lid and bake for 20-30 minutes longer or until deep golden brown with darker edges on the scored parts, where it puffed up.
- If you have an instant read thermometer, aim for an internal temperature of 205°F–210°F (96°C–99°C) to ensure the center isn’t gummy.
- Usually it is baked through at this point, but you can tap the bottom to check: If it sounds hollow your bread is ready. If not, bake for a few minutes longer.
Allow Your Bread To Cool
- Remove the bread from the oven. You can allow it to rest for about 20-30 minutes inside the Dutch oven. After that transfer to a cooling rack to avoid condensation and soggy crust.
- Now comes the hard part. I know this smells really, really good and you want a slice right now!
- But be patient. Leave to cool for at least 2 hours, to get a nice clean cut.
- Enjoy your lovely, nutty bread with some creamy cold butter, knowing you are giving your body the nutrition it needs.
How to Serve
- This whole wheat sourdough bread works fabulous as side for mopping up sauces and soups like this Vegan Tom Kha Soup.
- The less “bubbly” texture is perfect as vehicle for dips like my whipped red pepper tofu dip or the whipped tofu with smoky chili dressing.
- This bread makes a fabulously nutritious and flavorful high protein breakfast sandwich when you top it with some mashed avocado, a fried egg (or crispy fried tofu) and some chili crisp.
- It’s equally good fresh and toasted, emphasizing the nutty flavor with some toasty notes.
- Since I have a rather sweet tooth, I really love this bread freshly baked with some cold butter and honey or some lovely cranberry jam. Though if you want that combined, may I suggest my whipped honey cranberry butter? No need to wait for Christmas. Just make it with jarred cranberry sauce anytime of the year.
How To Store
- Homemade sourdough bread is incredibly meal prep friendly:
- You can prepare it the day before and just push it into the oven in the morning or 3 hours before you’d like to eat it. Or prepare the dough up to 3 days in advance and leave it in the fridge. The sourdough flavor will get more pronounced the longer it ferments.
- All of these breads keep well in a bread tin for about 3 days or up to 5 in the fridge.
- They freeze perfectly for up to 6 months and are excellent toasted.
Now I’d love to hear from you in the comments!
Have you tried this? Did you enjoy it?
What other recipes would you like to see?
And if you enjoyed this recipe, please consider rating, sharing, or leaving a comment – your feedback truly helps my blog grow!
FAQ
You can, but I wouldn’t recommend it if you want that “artisan” look. Blending the cottage cheese is what prevents those little white clumps and creates a smooth, supple dough. If you don’t have a blender, whisk the cottage cheese vigorously with the water first, but expect a slightly more “rustic” (read: lumpy) crumb.
Not at all! Whole wheat flour and protein powder are both very thirsty, but they also create a different kind of stickiness compared to white flour. Use wet hands for your stretch and folds—it makes the process much less frustrating.
Whey isolate is great for shakes, but in baking, it tends to dry out the bread and can result in a texture that’s a bit too close to a kitchen sponge. The small amount of natural fats in the concentrate helps keep the loaf moist and gives it a better “mouthfeel.”
Yes. Between the bran in the whole wheat and the added protein, this loaf won’t have those massive “Instagram bubbles.” It’s designed to be a sturdy, nutritious sandwich bread that actually keeps you full. Think “hearty and soft” rather than “airy and hollow.”
This recipe is optimized for strong whole wheat bread flour. If you use regular all-purpose whole wheat, your loaf might spread a bit more and rise a bit less because the protein content is lower. If you find your dough is too slack, try baking it in a loaf pan for extra support.
Don’t just watch the clock—watch the dough! It should look slightly “inflated,” have a few visible bubbles on the surface (a little less with whole wheat compared to white flour), and when you poke the dough it should slowly bounce back. In a 70°F (21°C) kitchen, this usually takes about 5 to 7 hours, but let the dough be your guide.
In a glass bowl you can easily see the bubbles on the side, since they don’t rise to the surface as easily as in white bread.
Other recipes you might enjoy

Looking for more Sourdough Recipes that are made with Cottage Cheese? Here are 15 of them!

Or maybe you are looking for the perfect sandwich bread? Of course it’s also with both sourdough and protein.

Looking for something to mop up for this bread? Vegetable stew with dumplings might be your new favorite.
Hearty Whole Wheat Protein Sourdough (High-Fiber & No-Knead)
- Total Time: 25 hours 30 minutes
- Yield: 12 slices 1x
Description
Finding a whole wheat bread that doesn’t feel dense and uninspiring can be a challenge—and finding one that packs a serious protein punch is even harder. This Whole Wheat High Protein Sourdough Bread bridges the gap perfectly. By combining the gut-friendly benefits of long fermentation with the power of cottage cheese and whey, I’ve created a loaf that is macro-friendly without sacrificing that classic artisan crust and nutty, toasted flavor. Whether you’re a sourdough pro or just looking for a better way to fuel your morning, this easy, no-knead recipe is a total game-changer for your breakfast routine and a lovely side for your soup.
Ingredients
The Sourdough Starter (Levain Method)
- 15g ripe, existing starter
- 60g whole wheat flour
- 50g water
The Dough
- 180g cottage Cheese
- 60g whey protein concentrate, unflavored
- 330ml water
- 1 tbsp malt extract (or honey)
- 100g sourdough starter
- 600g strong whole wheat flour
- 2 tsp kosher salt
Instructions
Day 1 – Feeding Your Starter (Levain)
Sourdough Starter (Levain)
- Using 1 tbsp/15g of your existing starter (Levain), feed it with 1/4 cup/60g whole wheat flour and just under 1/4 cup/50ml water. Leave it loosely covered overnight until it has doubled in volume, is active, and bubbly.
- If you have no starter yet, here is a link on how to make your own. You just need water and flour.
- How strong your starter is depends on your flour. Use good quality flour to feed it for best results. The consistency should be like very thick, stiff pancake batter.
- How long your starter will take depends on the temperature of your house. In winter it might need longer, in summer significantly shorter.
- To determine if it’s ready check if it has doubled in volume, is actively bubbling, you see nice, strong gluten strands if gently pulling it away from the walls of the jar with a spoon.
- Whole wheat starter is a little less bubbly and active than white. That’s fine. It has a harder job to do.
Day 2 – Mixing The Whole Wheat Dough/Bulk Proof
Blend The Wet Ingredients and Protein
- Check if your sourdough starter is ready by adding a dollop of it to the water. If it floats and is nice and bubbly, it’s ready. Ideally it should just have formed a bit of a dome in its jar, when at peak activity. Though if it just collapsed a bit you’ll be fine too.
- Blend the cottage cheese and protein powder with some of the water and the malt extract or honey until smooth.
- Add the cottage cheese-protein mix to the sourdough starter together with the remaining water and stir until combined.
Mix the dry ingredients
- In a large bowl stir together the whole wheat bread flour and salt. I’m using kosher salt, which has a higher volume per gram, so for me this is 2 tsp. If you are using sea salt, use 1 tsp.
- Stir the wet into the dry ingredients using your dough whisk or spoon, make a little well in the middle of your flour then pour in your wet ingredient blend, stirring as you go. Mix until no dry flour patches remain.
- The dough will be very sticky and lumpy at this point, that’s totally fine.
- Cover and leave it to rest for 30 minutes to 1h for the autolyse, allowing the flour to hydrate.
Stretch and Folds: Building Structure
- If you read some of my other bread recipes, I sometimes say, especially for doughs that don’t have much gluten to begin with, that you could skip the stretch and folds.
- This is not one of those. The stretching and folding helps build a strong gluten structure and will give you great oven spring.
- Wet your hands. This will mostly prevent the sticky dough fingers. Contrary to flour, which makes them worse.
- Push both hands under the dough and lift one side up. Stretch it until nearly the whole dough is lifted out of the bowl, then fold it over itself. Turn the bowl by 90 degrees and repeat. Do this 3-4 times, until the bowl has turned back full circle or the dough feels very resistant to the stretching. You don’t want to rip the gluten strands.
- Cover and allow to rest for another 30 minutes.
- The pictures above are the results right after the first stretch and fold. You can see how fast this develops the gluten structure.
- Repeat the process 2-3 more times after 30 minutes each, until you feel the dough is much smoother, easier to handle and shapes into a neat (if wobbly and sticky) loaf. After the last stretch and fold, either shape or cover and leave to ferment overnight in the fridge.
Shape Your Loaf
- I’m shaping this one into an oval loaf and want as much surface tension as possible. So I’m following a similar process to my High Protein Sourdough Sandwich bread, which gets rolled.
- You can do this the evening before or on the day of baking. If you do shape on the day of baking your dough will need another hour of resting to puff up again.
- Prepare a banneton or bowl by misting it with a bit of water and dusting ideally with rice flour. Opposed to wheat flour, this will not be absorbed by the dough and very effectively prevent sticking, giving you those nice and neatly shaped loaves you see.
- On a floured surface, tip your dough out of the bowl.
- Gently stretch it into a rough rectangle as much as you can. You want the dough to be fairly thin without ripping.
- Do a letter fold by picking up the top two corners from the short side and folding them over the center. Pat gently with your hands, so the dough sticks to itself, preventing any accidental huge air bubbles.
- Pick up the two bottom corners and fold over the center, patting it close again. Gently. You don’t want to squish all the air out, but not leave any big gaps either.
- Turn that “letter” by 90 degrees and gently stretch it a little further. This will have an effect similar to lamination, in that it creates layers and structure in your loaf, stacking all those gluten strands.
- Starting on either top or bottom short side, start rolling your dough tightly, pulling it a little while doing so, until it is one big and fluffy roll.
- Pinch the seam close with your fingers.
- If you want a bit of a neater loaf, you can now push in the sides where the layers are showing and pinch them closed too.
- Using the side of your hands, start rotating the loaf on your work surface, pushing the sides gently under the loaf, creating even more tension.
- Stop when the top looks relatively smooth and domed and feels bouncy.
- Transfer gently into your prepared banneton with the seam side up
Overnight Cold Ferment
- I put my Whole Wheat Sourdough Loaf in the fridge overnight at this point.
- And since I don’t want it to dry out and form a skin, which might bake into a very hard crust later, I use a bit of a trick to keep it moist and in perfect shape while giving it time to rise.
- I found towels decidedly too drying (even when damp) and frustratingly sticky and plastic wrap, no matter how carefully I tried to seal it always had air gaps, leading to dry bits plus was too tight to give my bread enough room to expand.
- Hence I started using (clean) large plastic bags, which works marvellously!
- Push said banneton into a large clean plastic bag, blow a bit of air into it, so it puffs up over the bread and close it with a clip or knot, to get a relatively airtight seal.
- Move into the fridge and allow to cold ferment/proof for at least 8 hours, to get the full flavor. Up to 3 days works perfect, after that it starts to deflate a little.
Day 3 – Baking Your Whole Wheat Protein Sourdough Bread
Pre-heat Oven And Score
- With the Dutch oven inside, pre-heat your oven to 475°F/245°C for 30 minutes to 1h.
- Even if it shows as pre-heated after a shorter time, the longer time is needed to reach the optimal temperature.
- Grab a piece of parchment slightly bigger than your bread loaf.
- If you’d like a really neat scoring, put your plastic bag covered bread loaf into the freezer for about 30 minutes while the oven heats up. This will form a thin, slightly firmer shell that allows you to score very easily without dragging. That’s the trick behind all those pretty scoring patterns you see. Though I admit I rarely bother.
- Carefully tip your dough onto the center of the prepared baking parchment. If necessary, gently push it back into shape. Sprinkle the top with a little flour, then, using a lame or a sharp knife, score your bread.
- You can get as creative or simple as you like.
- One long score, about 1/2 inch/1cm deep, at about a 45-degree angle slightly towards the side of the bread gives you the “classic” opening flap when the bread rises in the oven. Without scoring it would just break wherever it wants under the surface tension and might not rise as high. So one score is a good idea. Anything else is decoration.
Baking Your No-Knead Bread
- Using oven gloves, remove your Dutch Oven from the oven onto a heat proof surface. Take off the lid.
- Be mindful where you put this. I managed to burn a dark ring into a wooden chopping board. Ever since I put it either directly on my stovetop or a baking tray.
- Using the edges of the baking parchment, carefully lower your loaf into the Dutch oven. Close the lid and put it back into the oven.
- Bake for 25 minutes at the high temperature. I found this gives the heavier whole wheat loaves a nice head start in oven spring.
- After that time, lower the temperature to 425°F/220°C take off the lid and bake for 20-30 minutes longer or until deep golden brown with darker edges on the scored parts, where it puffed up.
- If you have an instant read thermometer, aim for an internal temperature of 205°F–210°F (96°C–99°C) to ensure the center isn’t gummy.
- Usually it is baked through at this point, but you can tap the bottom to check: If it sounds hollow your bread is ready. If not, bake for a few minutes longer.
Allow Your Bread To Cool
- Remove the bread from the oven. You can allow it to rest for about 20-30 minutes inside the Dutch oven. After that transfer to a cooling rack to avoid condensation and soggy crust.
- Now comes the hard part. I know this smells really, really good and you want a slice right now!
- But be patient. Leave to cool for at least 2 hours, to get a nice clean cut.
- Enjoy your lovely, nutty bread with some creamy cold butter, knowing you are giving your body the nutrition it needs.


Notes
Tip:
- If you only made yeasted bread before, this dough will seem way too wet and sticky and you’ll be tempted to throw a cup of flour into it, thinking the recipe is totally off and can’t work.
- Resist the temptation and trust the process.
- I sure did add the flour in my first few sourdough attempts and wondered why I kept ending up with “Dwarf Bread” as we called it: Hard as a rock, well suited to smacking intruders over the head, and you always find something better to eat.
- Sourdough by nature is much wetter, softer and stickier than yeasted dough. But it will get easier to handle as soon as you start the stretch and folds.
- Prepare for the magic.
How to Serve
- This whole wheat sourdough bread works fabulous as side for mopping up sauces and soups like this Vegan Tom Kha Soup.
- The less “bubbly” texture is perfect as vehicle for dips like my whipped red pepper tofu dip or the whipped tofu with smoky chili dressing.
- This bread makes a fabulously nutritious and flavorful high protein breakfast sandwich when you top it with some mashed avocado, a fried egg (or crispy fried tofu) and some chili crisp.
- It’s equally good fresh and toasted, emphasizing the nutty flavor with some toasty notes.
- Since I have a rather sweet tooth, I really love this bread freshly baked with some cold butter and honey or some lovely cranberry jam. Though if you want that combined, may I suggest my whipped honey cranberry butter? No need to wait for Christmas. Just make it with jarred cranberry sauce anytime of the year.
How To Store
- Homemade sourdough bread is incredibly meal prep friendly:
- You can prepare it the day before and just push it into the oven in the morning or 3 hours before you’d like to eat it. Or prepare the dough up to 3 days in advance and leave it in the fridge. The sourdough flavor will get more pronounced the longer it ferments.
- All of these breads keep well in a bread tin for about 3 days or up to 5 in the fridge.
- They freeze perfectly for up to 6 months and are excellent toasted.
- Prep Time: 30 minutes
- Fermentation Time: 24 hours
- Cook Time: 1 hour
- Category: Bread, Breakfast, Protein Sourdough
- Method: Baking
- Cuisine: American


Whole wheat with extra protein is so good, I tried it, sourdough make everything tasty.
Sourdough does that indeed!
Glad you like it. 🙂
This no knead recipe was easy and delicious!
Thanks, so happy to hear that. 🙂
“No-knead” are the magic words for me! Haha! I made this bread last weekend and it’s perfect! Thanks for sharing this recipe with all these tips.
Aren’t they just? Same here. I’m always opting for less work if I can.
So happy it helped. 🙂
I made this yesterday and I was really surprised how easy this was to make. Your instructions were really easy to follow and my bread came out amazing and delicious.
Aww, that’s what I like to hear. Thanks so much for letting me know. 🙂
This is a great wheat sourdough recipe. I used to bake sourdough all the time but got out of it. This was a great refresh on how to do it!
Oh good, thanks so much. Happy to hear you are getting back into it. 🙂