Sourdough Protein Bagels
Ever wish your favorite breakfast bagel could be a high-protein powerhouse without sacrificing flavor and texture? Most protein bagels are dense, dry, and lack the flavor of a true artisan bagel. This recipe changes that completely. By combining the natural tenderizing power of sourdough with the moisture from cottage cheese and a boost from protein powder, we’ve created a bagel that’s not only incredibly delicious and chewy but also packs a whopping 17g of protein. It’s the ultimate breakfast or snack to fuel your day and keep you feeling full and satisfied.

This post may contain referral links for products I love.
For The Pleasure Of Eating earns a small commission on these links at no cost to you.
- Why You’ll Love This
- The Ingredients
- Substitutions
- Equipment Used
- How to Make this
- How To Store
- FAQ
- Other Recipes You Might Enjoy
Why You’ll Love This
TL;DR
- 17g of Protein per Bagel: A high-protein option that helps you stay full longer and supports muscle building.
- Soft & Chewy, Never Dry: Cottage cheese and sourdough work together to counteract the drying effect of protein powder, giving you a perfect texture.
- Full of flavor: The slow sourdough fermentation process creates a deep, complex flavor that’s impossible to get with quick, yeast-based recipes.
- Easy to Make: With only about 30 minutes of hands-on time, this recipe fits easily into your busy schedule.
- Gut-Healthy & Digestible: Sourdough’s natural enzymes help reduce phytic acid and make the protein and minerals easier for your body to absorb.
High Protein Satisfying Bagels
Each of these sourdough protein bagels comes with a whopping 17g of protein, making them a particularly great breakfast option for anyone who loves bagels but also wants to stay full longer and get more protein from their meals to build muscle or simply maintain a healthy weight.
The protein content comes from a mix of cottage cheese and protein powder, which adds over 50% compared to a regular sourdough bagel recipe.
Why am I using two different protein sources? Because the cottage cheese balances the drying effect protein powder can have on dough, while the protein powder adds structure and both replaces and acts similar to flour, meaning less carbs, more protein.
I found in many recipes now, that the two together lead to a much better structure and flavor than trying to use only one to reach the desired macros.
Try my Easy High Protein Sourdough Bread, to see the effect in lovely sourdough loaf.
Gut Healthy & Tender By Using Sourdough
Now, if you ever had one of the viral TikTok cottage cheese bagels (yep, I tried them too), you might be a little worried about the texture at this point. But bear with me for a moment, as this recipe is very different!
The viral protein style bagels are made with essentially half flour and half cottage cheese plus some baking powder. Which, at first glance sounds incredibly easy. But there is a price to pay for the easy, which is (at least to me) a jaw-hurting chewiness and an acute lack of flavor. So how to improve them, while still keeping the admittedly good idea of adding cottage cheese as protein source?
By adding sourdough and using a flour to cottage cheese ratio that is much closer to a classic bagel recipe. Sourdough helps with a few things here, aside from its usual benefits of adding gut healthy bacteria, making the cottage cheese bagels easier to digest and lowering the glycemic index:
- Sourdough contains and produces enzymes called proteases. They have the rather marvellous ability to break down protein into smaller molecules during slow fermentation, improving its bioavailability to our body.
- I go into more detail on this in my blog post on why I’m using sourdough in combination with protein in my baking, but in short: When you add protein to sourdough bread (in my case cottage cheese and protein powder) your body can use it easier.
- Sourdough tenderizes and helps dough to retain moisture, meaning it balances the drying effect protein powder can have on dough and counters the chewiness from the cottage cheese.
- It adds an incredible depth of flavor to any baked good. Not sour. More that special something, a slight tang with a hint of maltiness, that makes artisan baked goods so irresistible.
- No yeast or baking powder required. Since I got my sourdough starter, I have rarely used yeast in any of my baked goods. Just in the very beginning, when it wasn’t strong enough yet.
- Sourdough reduces phytic acid, a so called “anti-nutrient”, which binds to minerals reducing their absorption. Neutralising the phytic acid can make minerals like calcium, magnesium and iron easier to absorb for your body. This is particularly helpful for women, who tend to have higher rates of iron deficiency.
Classic Bagel Flavor
Let’s talk about bagel flavor and texture for a moment, shall we?
To me, the ideal bagel is both soft and dense, and a bit chewy with that golden brown, smooth crust with a hint of sweet maltiness to it.
The dough should be flavorful, slightly savory and salty and taste wonderfully moreish. That mysterious “slow fermentation” flavor, which just isn’t achievable with 30 minute “cheat” versions using baking powder. Instead it comes from allowing the sourdough bacteria do their job overnight in the fridge, while you get on with your life. One of the joys of sourdough: It works its magic without much input from you.
Boiled For Perfect Chewy Texture
Classic bagels are always boiled. The New York Style usually has malt extract added to the water, sometimes baking soda. Similar to pretzels, only that pretzel water has a much higher soda concentration.
It’s also said that the particular mineral composition in New Yorks water contributes to the flavor, but that’s hard to replicate, so we stay with soda and malt extract in these homemade bagels.
The boiling achieves a few things:
- It gelatinizes the bagel dough on the outside, locking in moisture and keeping the insides soft
- Creates the typical chewy-soft crust
- Adds shine and a lovely browning from the sugars in the malt syrup that caramelise during baking
- Helps any toppings to adhere to the bagels as it creates a sticky surface for a few minutes after taking them out of the hot water.
Easy to Make
The hands on time for making your own sourdough protein bagels at home is about 30 minutes.
Even shorter if you have a stand mixer.
And the sourdough makes them perfect for meal prep, as you shape them in the evening and they are ready to boil and bake in the morning.
Ingredient Notes
The ingredients list is short, as often with sourdough. So just a few notes here on the most important bits.
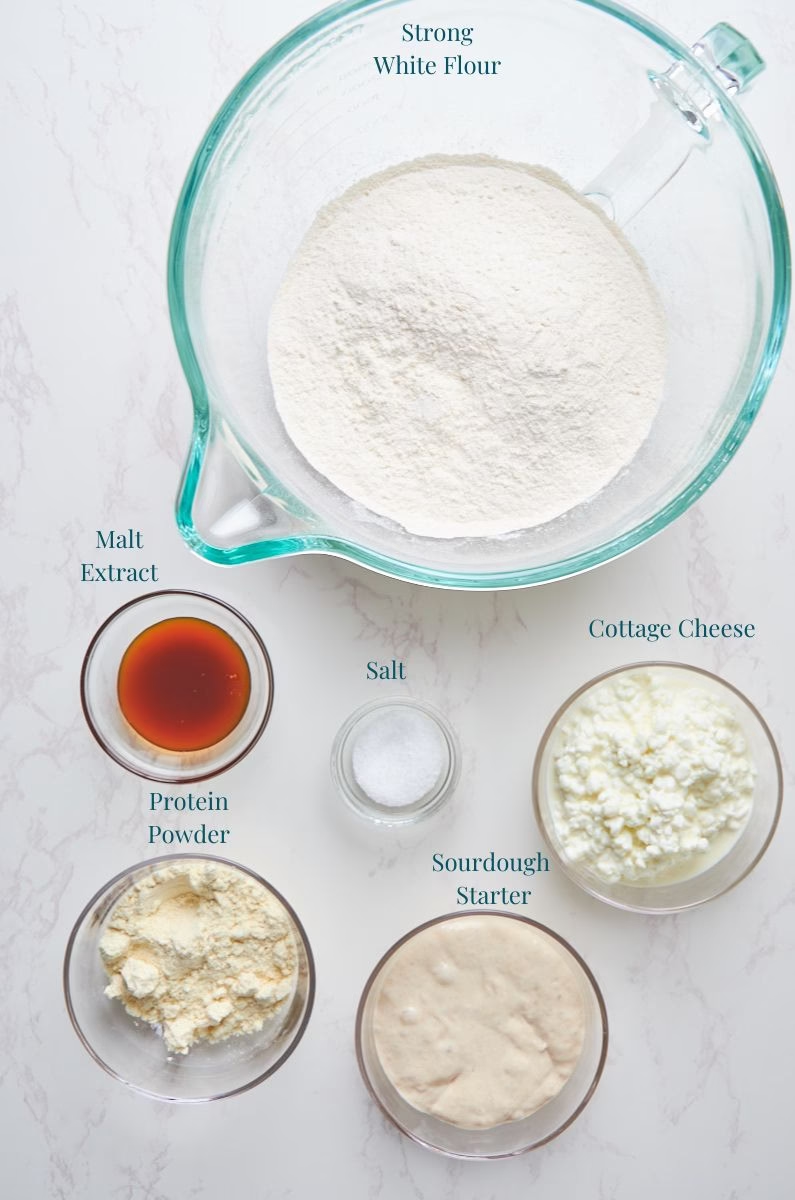
The Dough
- Cottage Cheese – I used a 4% fat variety here, but 2% works well too. The tiny bit of fat in it will counter any potential dryness from the protein powder.
- Protein Powder – My choice for these protein bagels is unflavored whey from MyProtein, which I use in most of my baking. If you plan to make sweet bagels (Cinnamon raisin for example) you could use vanilla flavor. For the savory ones though, make sure no sweetener is added.
- Strong White Flour – Also called Bread flour, has a higher gluten and protein content. This makes for the best bagel structure.
- Salt – I’m using Diamond Crystal kosher salt here. And if you are familiar with my bread recipes, you might be wondering if 5g is too little. But cottage cheese has already salt added and there is nearly a full cup of it in the dough, replacing part of the water. So I reduced the usual salt content by about half, to not oversalt the bagels.
- Malt extract – Also called malt syrup, is a sweetener produced from barley. It gives your bagels the typical New York Style malty flavor. See the Substitutions below, on what to use instead if you don’t have it.
- Sourdough Starter – For bagels, because it’s a very firm, low hydration dough, you want a really active starter. Plan around when you want to bake and calculate backwards. I tend to feed mine the evening before I want to mix the dough.
A few notes on Sourdough Starter:
My best tip is: Get to know your starter and kitchen. How fast it doubles after feeding depends very much on the temperature of your kitchen and how active your starter was to begin with.
If you only use it once a week, it might take a little longer, if you feed it every day, it’ll probably be happy and active within a few hours.That being said, you control your starter and not the other way round. If it’s not absolutely perfect and doubled in volume, or slightly overripe, don’t worry about it. Simply allow your dough to ferment on the counter a little longer.
A lower starter and a slightly higher flour to water ratio that I started playing with recently (I’m talking a ratio of 25g starter to 100g flour to 90g water here roughly to make just about 1 cup) is giving me a much longer active time of my starter than the 100% hydration that is usually recommended.
But if you are in a hurry, 50g starter will get you a quicker activation.
Ingredients for Boiling and Topping
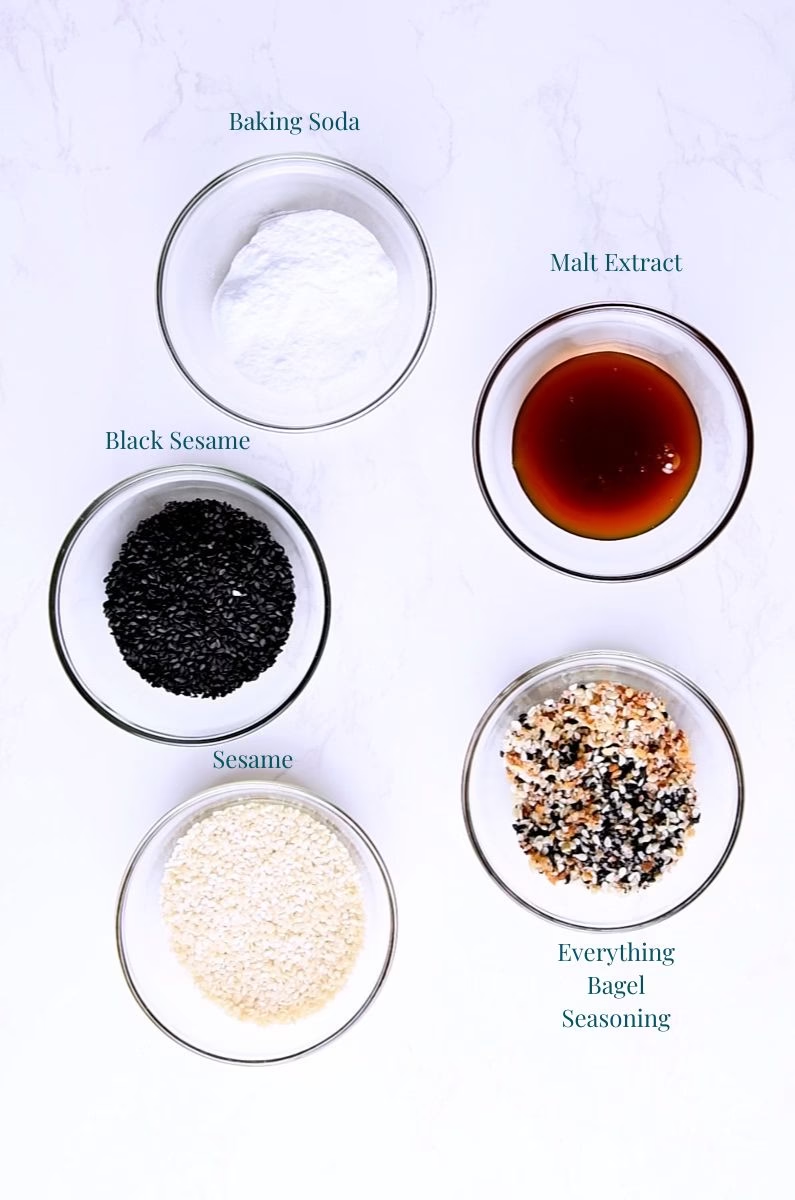
For the boiling I used
- Baking Soda – Just a small amount, to add some shine and a little bit of that pretzel-linke tang.
- Malt Extract – Helps with browning as it caramelises and gives you the classic NY style flavor in the crust.
For Topping
You have a lot of options here. I went with:
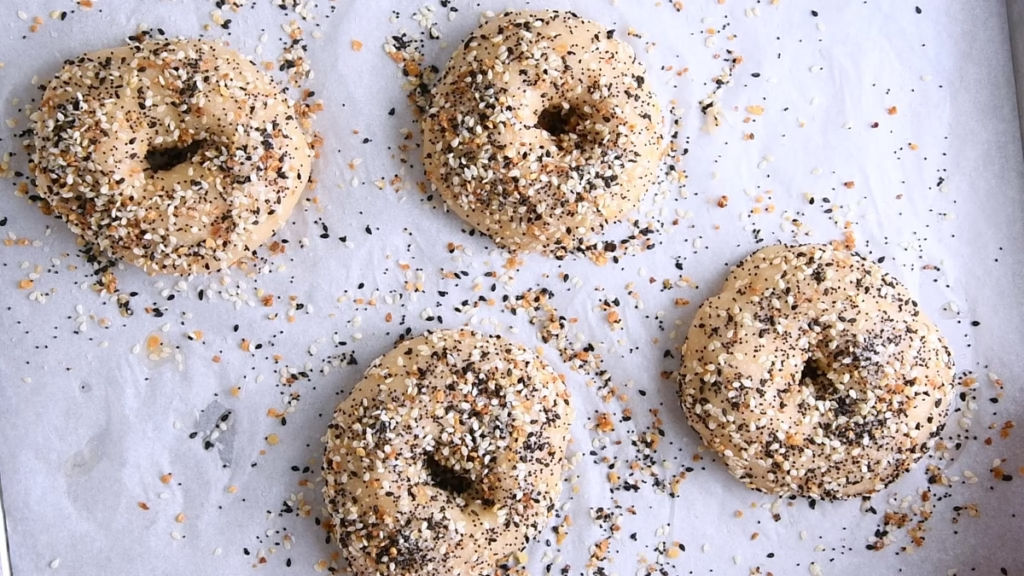
- White sesame seeds
- Black sesame seeds
- Everything Bagel seasoning
Other options:
- Poppy seeds
- Nigella seeds
- Grated cheese
- Cheese and bacon bits
- Crispy onions
- Cinnamon sugar
substitutions
- Cottage Cheese – 4% fat Greek yoghurt works well too here, so would a low fat vegan yoghurt. Though both come with a little less protein.
- Protein Powder – Casein (which digests slower, which helps you feel satisfied for longer) works, but needs about 2 tbsp more water. So does spent barley vegan protein, which adds incredible malty flavor, if you can find an unflavored one. Add 2 tbsp less water if using spent barley protein.
- There are some casein-whey blends made for baking available. They will work well here. The water addition with them depends very much on the mix percentage. Start with the given amount, add more if needed.
- I have not used any of the common pea protein powders in my baking, as I deeply dislike their flavor and mouthfeel.
- Strong White Flour – All purpose flour will work here but give you a less chewy result. You might need a few tablespoons less water, as strong white flour absorbs more of it.
- If you’d like to add a slightly nutty flavor and a bit more fibre, you can replace about 1/3 of the white with strong whole wheat flour. Add 1-2 tbsp of water if you do. Your bagels might be slightly more dense.
- Malt extract – In both dough and water you can replace the malt extract with honey or maple syrup with pretty much the same results except the delicious malty flavor. Molasses would work too, but will darken your dough a bit and add its very own unique flavor (which I personally adore!).
In general: Assess your dough. Different brands of protein, flour and cottage cheese can all have an impact on it. So can, believe it or not, the weather, season or the…well…mood of your sourdough. I found it’s very forgiving, and the more you bake with it, the easier it gets.
Variations
- Make cinnamon raisin protein bagels by adding 1 tsp ground cinnamon to the dough and kneading in ½ cup of raisins. Top with 2 tbsp cinnamon sugar before baking.
- Add ½ cup of blueberries and the grated zest of 1 lemon to the dough for blueberry lemon protein bagels.
- Knead in ½ cup of chocolate chips for chocolate chip bagels.
- Knead in ¼ cup of crispy fried onions and ½ cup of grated cheddar, for ridiculously flavorful cheese and onion protein bagels.
- Add some chopped jalapenos to the cheese instead of the onions, to make Mexican inspired protein sourdough bagels.
- Knead in ½ cup of soft roasted garlic and crispy onions for a garlic& onion bagel.
Equipment Used
- Digital Scales – As in most of my baking recipes I would highly recommend using digital scales, since particularly flour can vary wildly in weight when using cups.
- If you have to use cups, spoon in the flour, fluff it, then level the top of the cup with the back of a knife.
- Blender – To get the cottage cheese perfectly smooth and blended with the protein powder.
- Stand mixer – I used my Kitchen Aid for these bagels on the lowest setting, as it’s a very firm, low hydration dough. Could I have been bothered to drag it out of the cupboard, the Kenwood Major Chef might have made quicker work of it.
- You can absolutely knead this by hand, though it will be a bit of a workout.
- Large Pot – For boiling the bagels
- Sheet pan – For baking
 Buy Now →
  Buy Now →
  Buy Now →
  Buy Now →
  Buy Now →
 How to Make this
Bakers Schedule
2 days before you want to bake your bagels:
- Feed your sourdough starter in the evening.
The day before you want to bake your bagels in the morning:
- Mix the dough and knead it until very smooth.
- Allow to bulk ferment on the counter until doubled in volume.
(3-6 hours, depending on the temperature of your kitchen.) - Shape your bagels and cover to proof until puffed up and about doubled in volume.
- Either boil and bake right away or leave it to cold ferment covered on the sheet pan in the fridge overnight.
The morning of baking (or right after proofing):
- Pre-heat your oven.
- Boil your (cold) bagels and sprinkle with toppings.
- Bake your bagels to perfection.
- (e.g., Approx. 20 minutes baking followed by 15-30 minutes cooling)
While this section might look long, the hands on work is just about 30 minutes and very easy.
Sourdough just loves a lot of undisturbed alone time in between steps. (Don’t we all?)
2 days before baking
Feed Your Starter


- 2 days before you plan to bake your bread (or the morning before, if your kitchen is very warm)
- Take 17g of your existing sourdough starter. Add 70g all-purpose flour(or bread flour) and 60g filtered water (or good quality drinking water). Leave it in a lightly covered container on your kitchen counter until the next day. If your kitchen is particularly warm, especially in summer, preparing it the morning before baking might be best.
- This makes a fairly stiff starter, which will stay active longer, allowing you to use it when it suits you best.
1 day before baking
Blend The Wet Ingredients

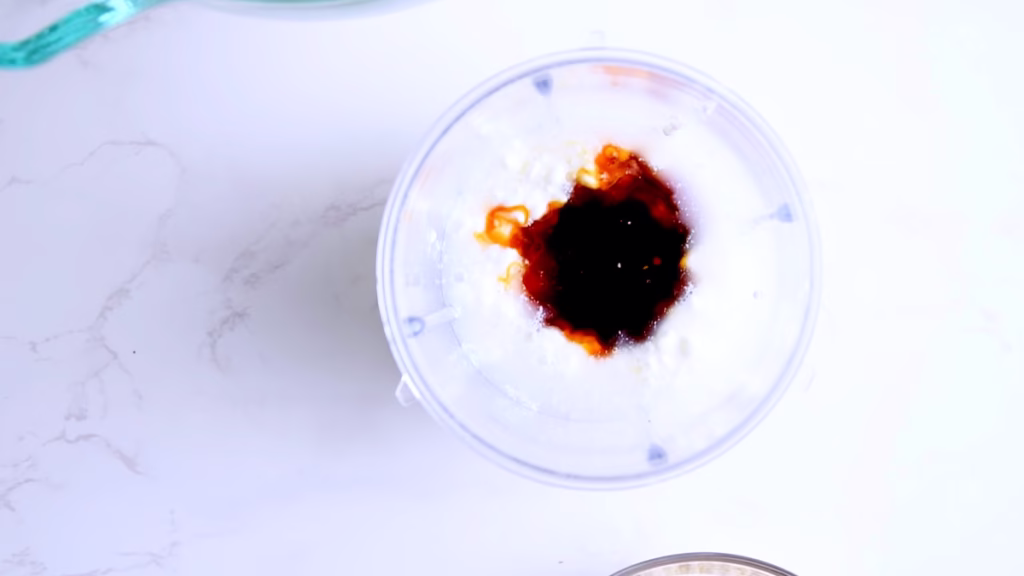
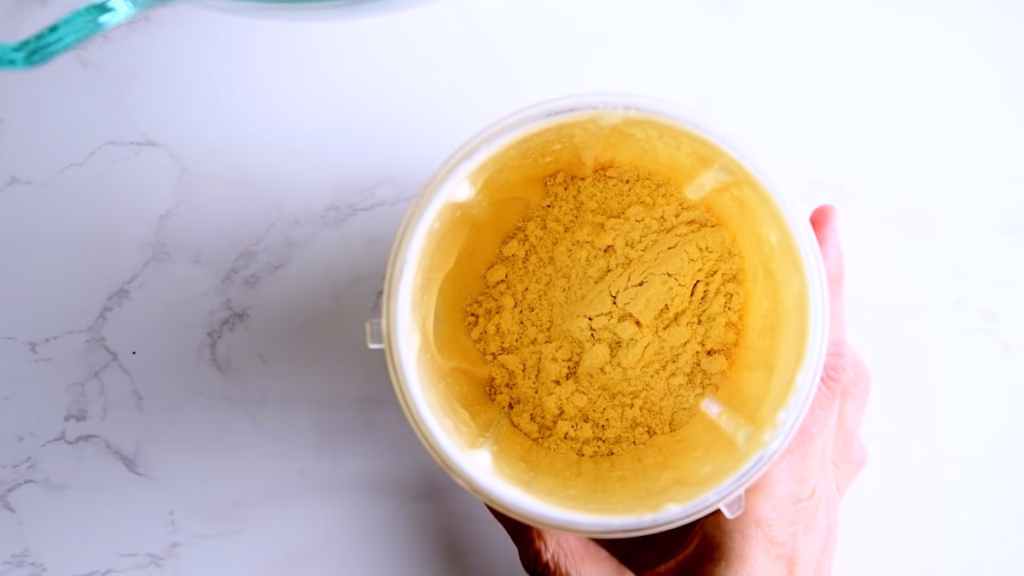
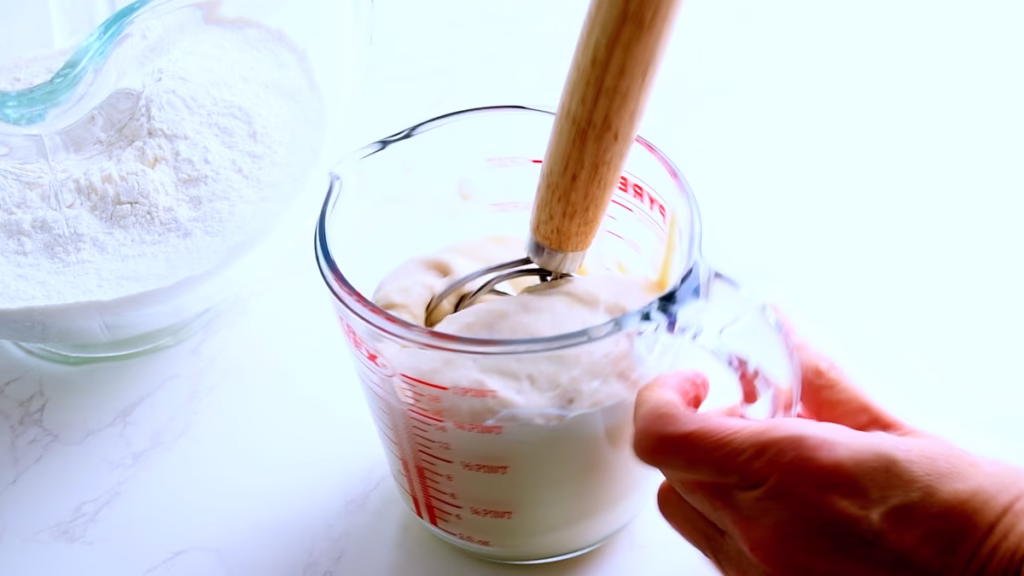
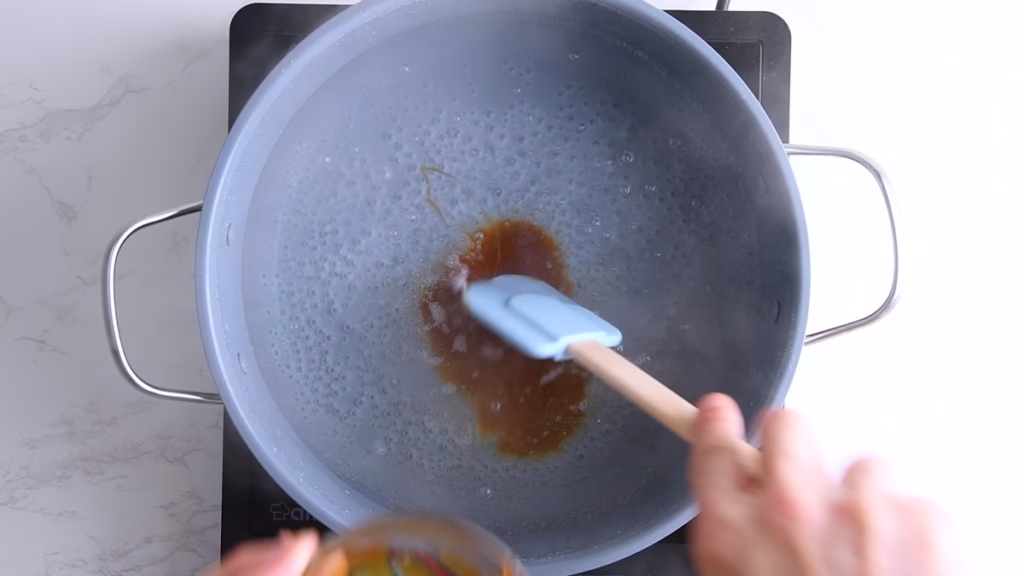
- In the morning, the day before baking, start by blending the cottage cheese with some of the water, malt extract (or honey) and the protein powder until smooth.
- Using a bread whisk, stir in the remaining water and 113g of the sourdough starter.
- You could probably blend it, but I’m trying to be respectful of the little sourdough bacteria and treat them gently. Not everyone appreciates the wild ride in a blender!
- Keep the remaining starter for your next bread. You can keep it in the fridge, and it’ll last for at least a week.
Mix The Dry Ingredients
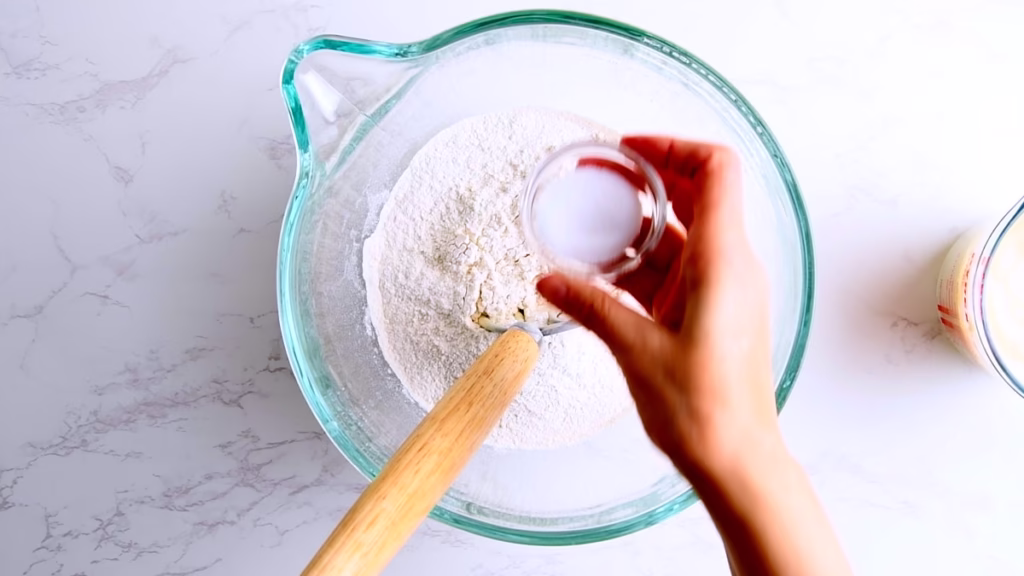
In a large bowl stir together the bread flour and salt. I’m using kosher salt, which has a higher volume per gram, so for me this is 1 tsp. If you are using sea salt, use 1/2 tsp.
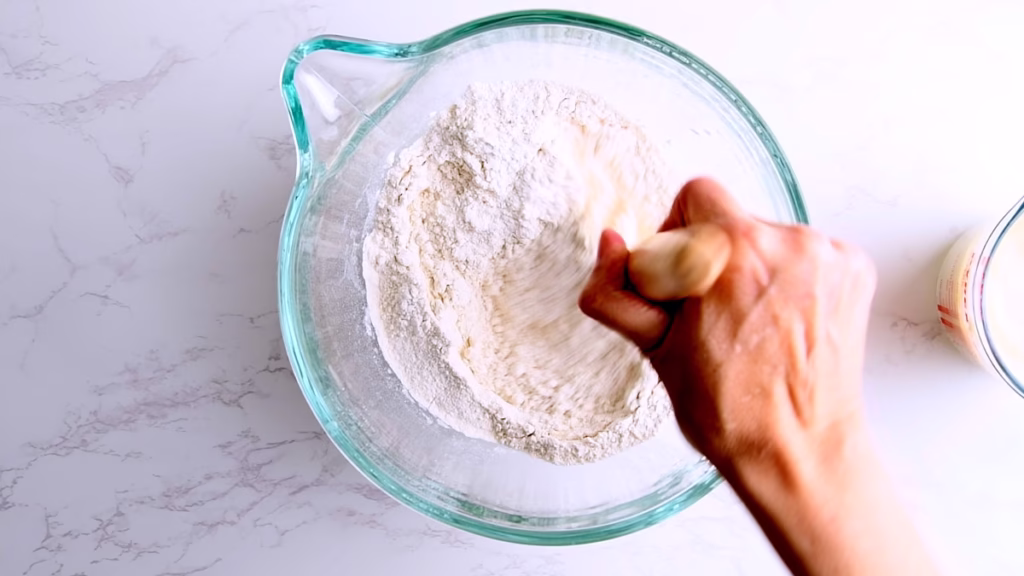
Mix The Dough
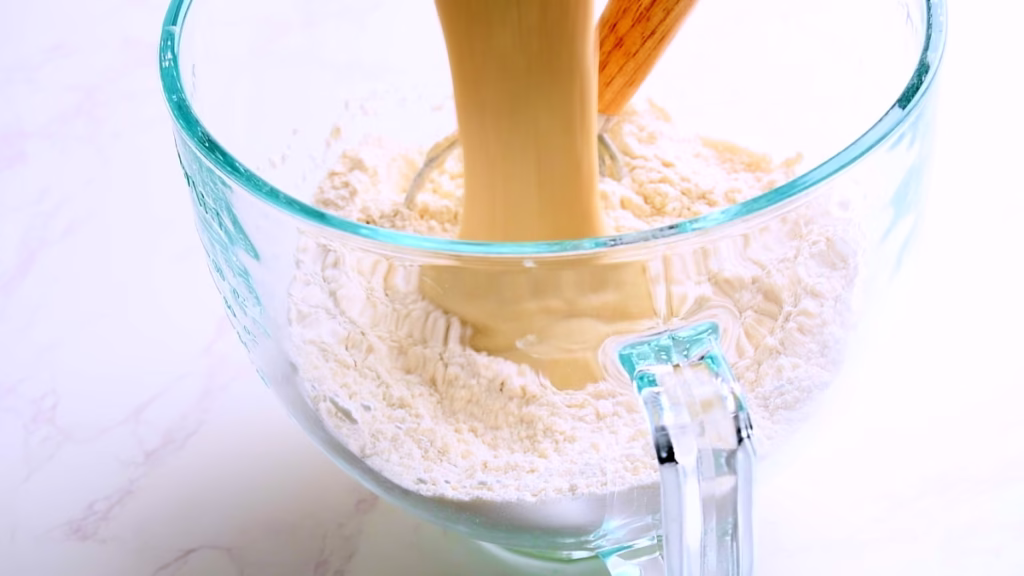
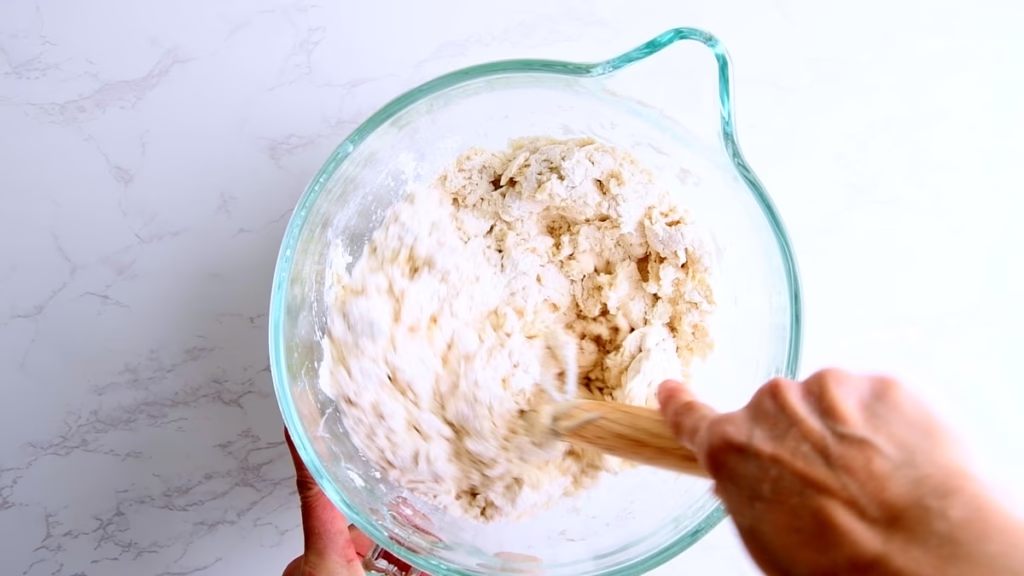
- Stir the wet into the dry ingredients using your dough whisk or spoon, make a little well in the middle of your flour then pour in your wet ingredient blend, stirring as you go. Mix until you have a very roughly mixed mass.
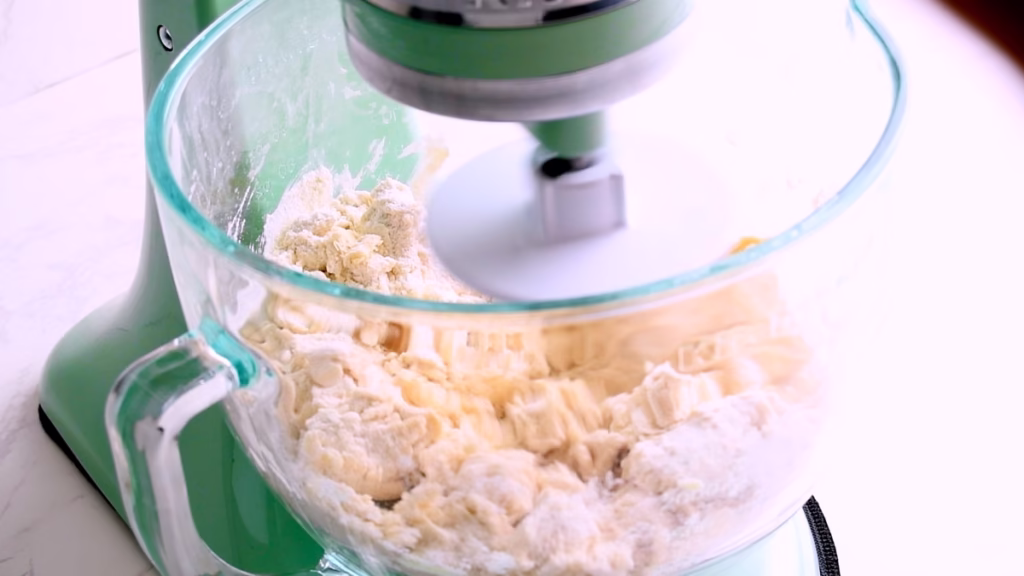
- Now you can use either your stand mixer or knead the dough by hand for about 10 minutes.
- If you’d like to add any mix-ins to your dough, do so during the last minute of kneading.
- I used my stand mixer on low for about 5 minutes, until the dough was very smooth and came away cleanly from the sides of the bowl.
- Assess your dough at this point. It should be fairly firm and smooth, a bit like play-doh, but not so dry that it cracks or doesn’t come together. Add a little flour or water if you think it needs it.
Bulk Fermentation
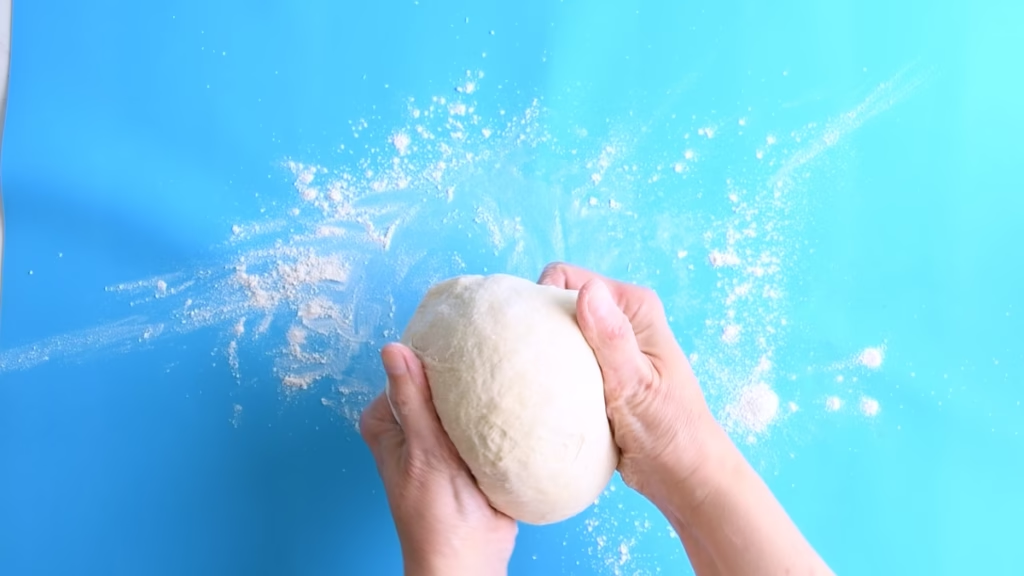
- Use your hands to shape it into a smooth ball.
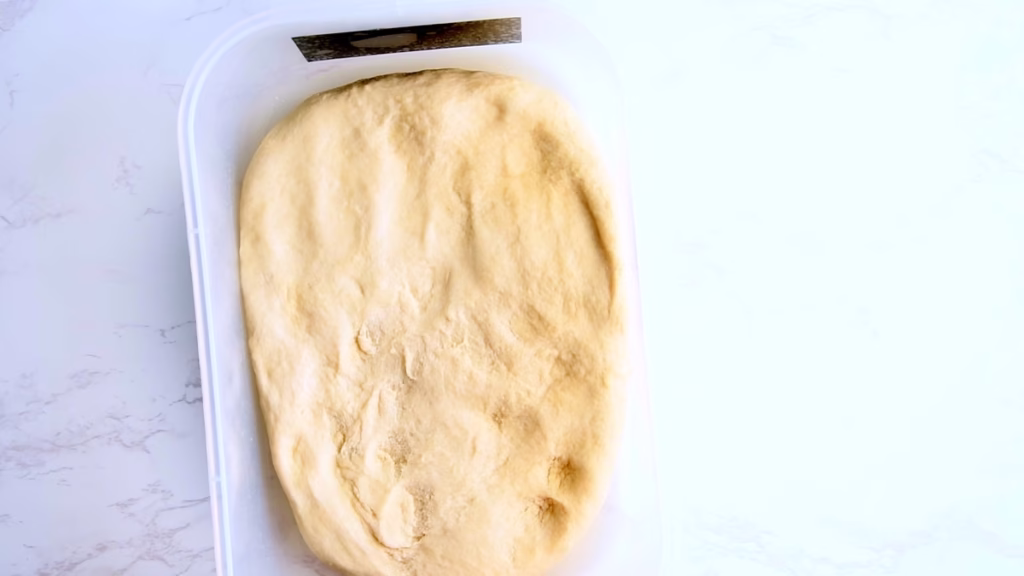
- I like to spray the bowl or box I use for fermenting my dough with a bit of oil at this point, to make it easier to take it out later.
- Cover your bowl or container with a damp towel, a lid (needs to be able to breathe, so no tightly sealed box) or some cling film.
- Leave to rest until about doubled in size. I like to do this in my kitchen, which is at about 70°F/21°C (fluctuating a bit depending on season) and it took about 6 hours.
- If you’d like to speed up the fermentation, you can switch the light of your oven on, put the bowl with your dough in and accompany it by a mug of freshly boiled hot water, which will raise the temperature and moisture to just the perfect environment for sourdough to thrive.
- It is hard to give an exact time, as everyone’s sourdough starter, kitchen temperature and humidity and even height above sea level can influence the time. So just check on your dough occasionally.
- Sourdough is very forgiving though, so no worries if it’s not perfectly doubled.
- Now, if you read my bread recipes, you saw a lot of stretch and folds. But since this dough is kneaded until smooth and elastic, it doesn’t need it.
Shape The Bagels


- Line a sheet pan with baking parchment.
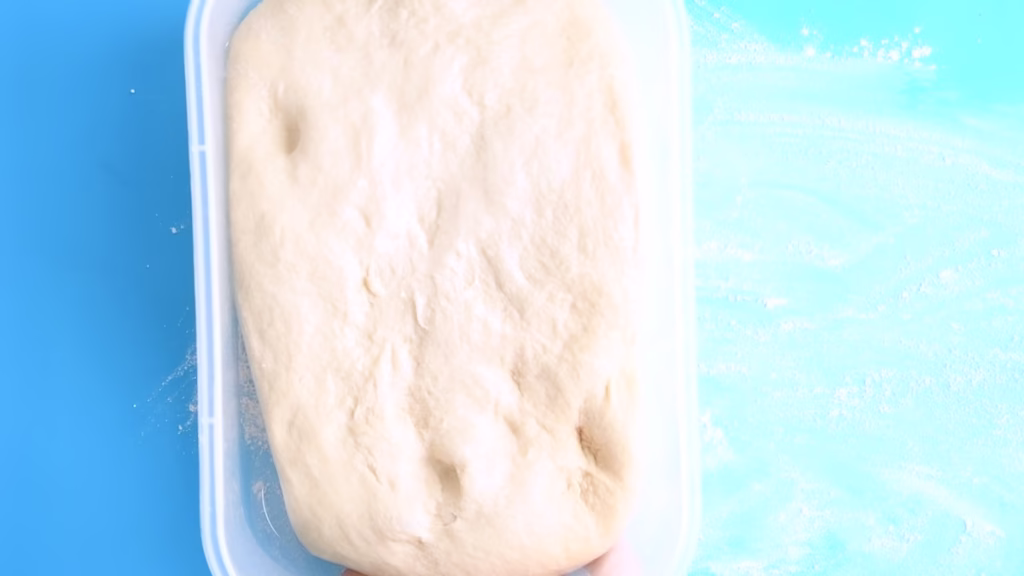
- Once your dough is nice and puffed up, take it out of the bowl onto a lightly floured worktop or silicone mat.
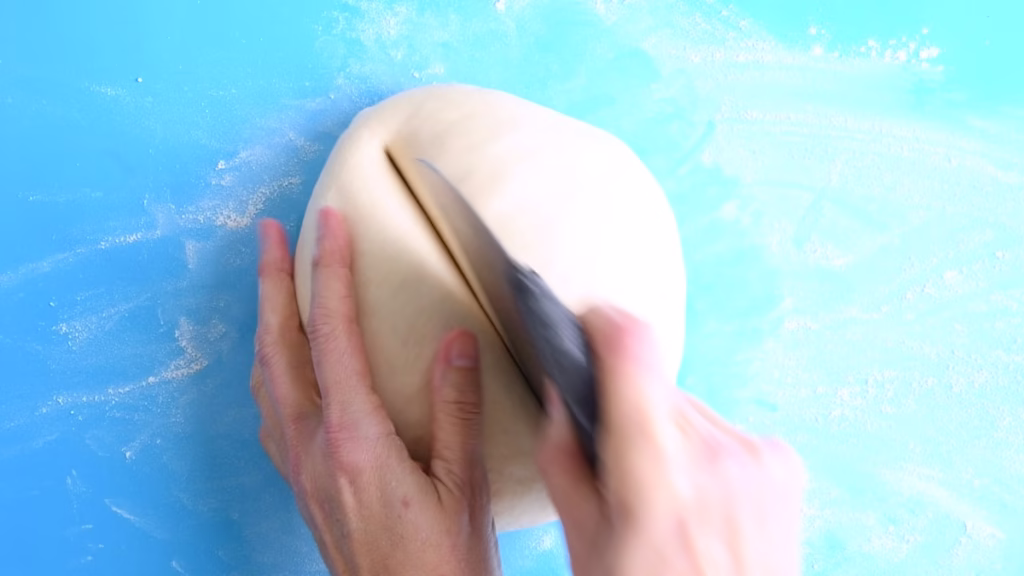
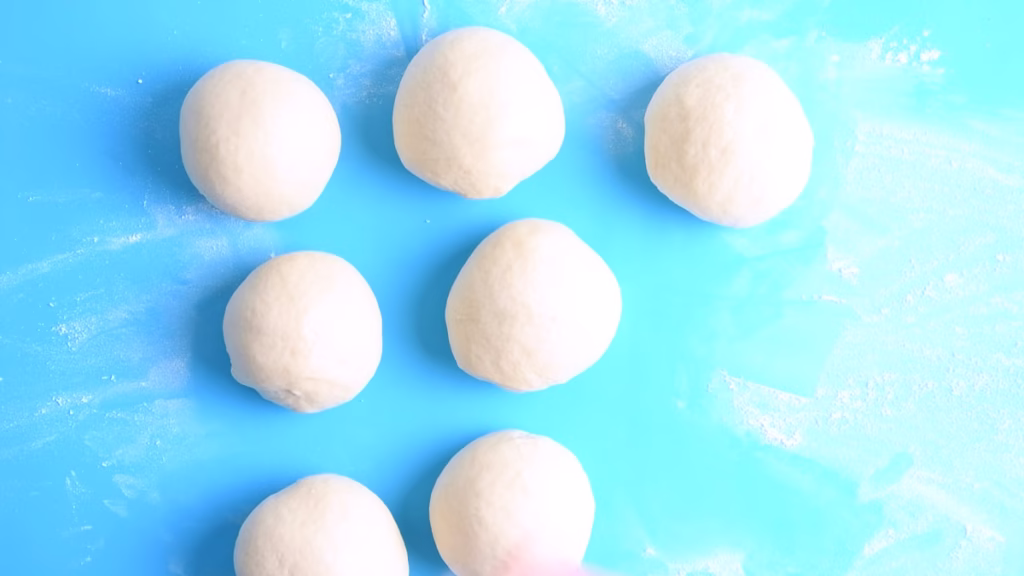
- Gently pat it out a bit and, using a bench scraper or knife, cut it into 6-8 even pieces. I find it’s easiest by cutting it like a pie.
- You could use digital scales to get pieces that are exactly the same size, but frankly I never bother.
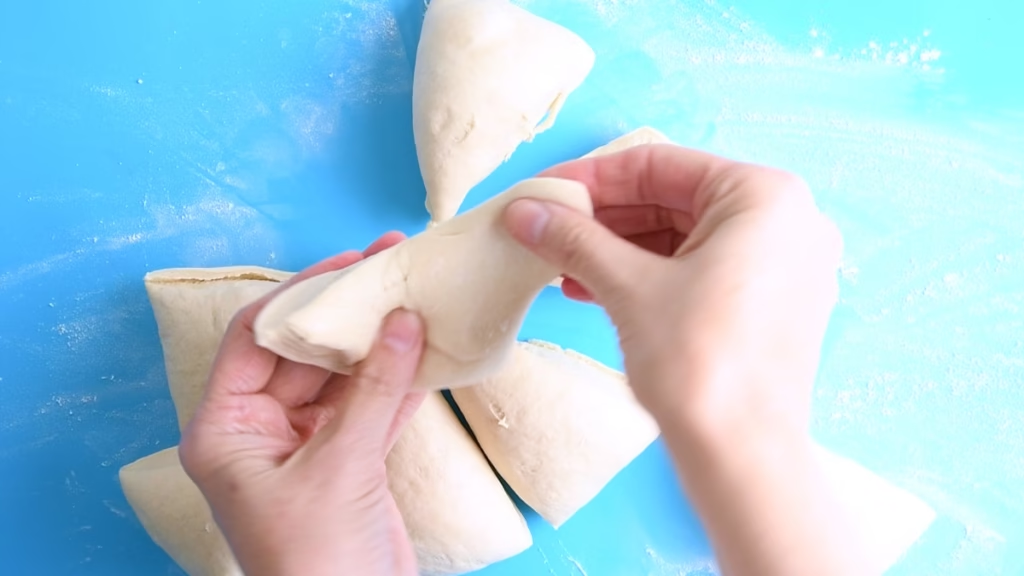
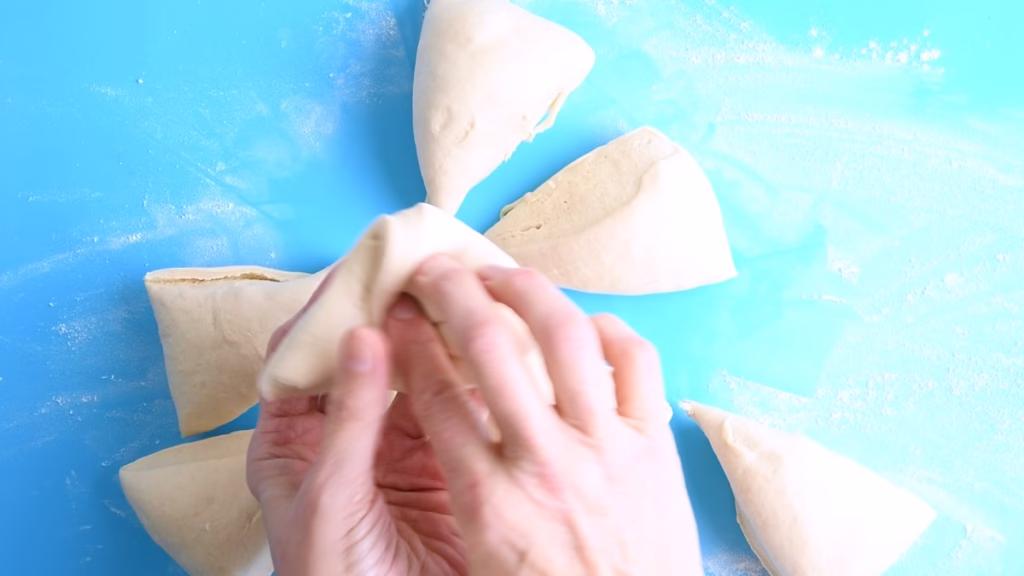
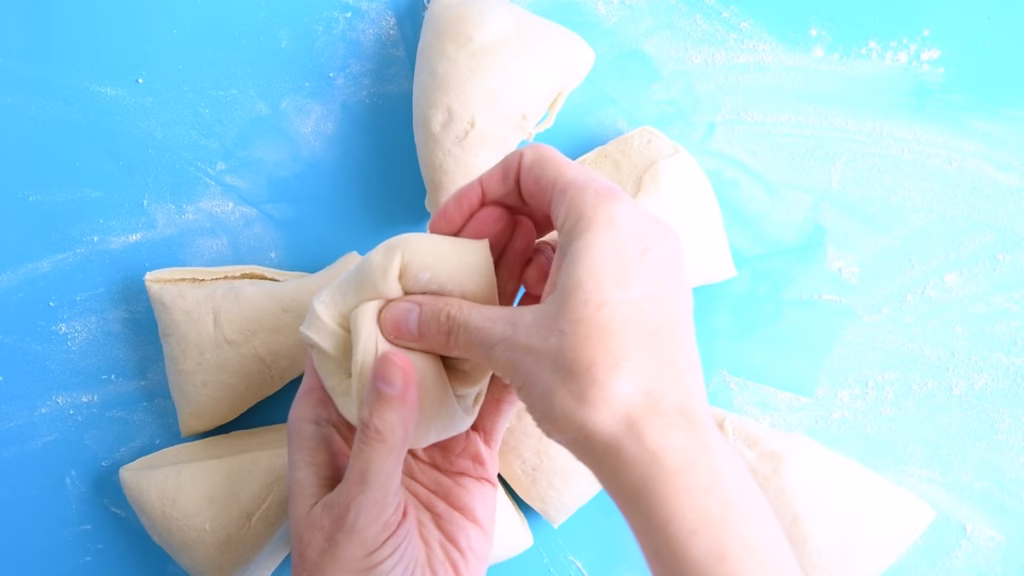
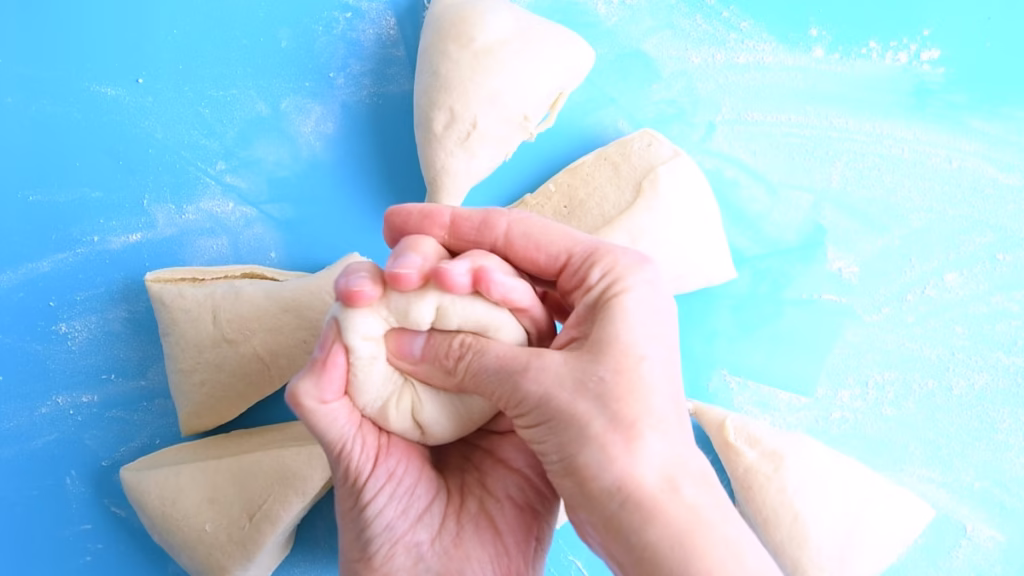
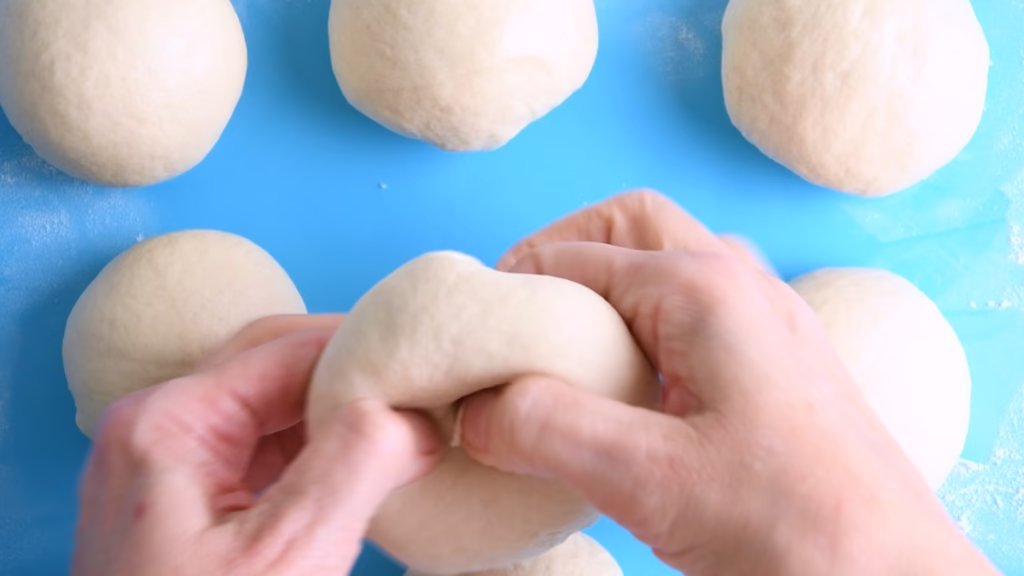
- Now shape each of the dough pieces into a nice, tight ball by grabbing the corners and pulling them into the center, pinching to close, until you see and feel some surface tension. Turn the ball over, so the seam side is in the palm of your bottom hand and roll until smooth.
- Do the same with each of the pieces.
- If you like (and have time and patience) you can let them rise for about 30 minutes until puffed up a bit. I skipped this step.
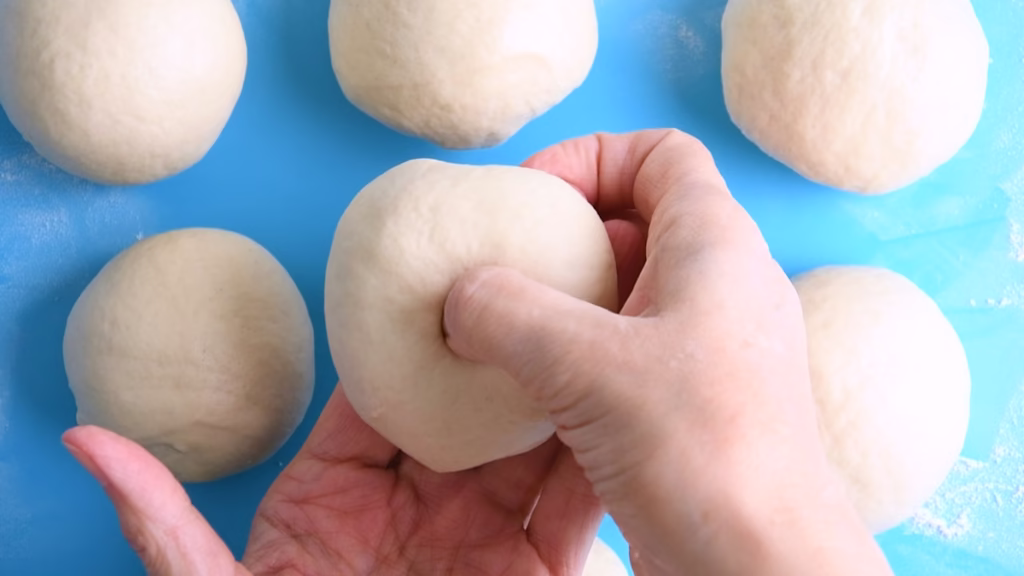

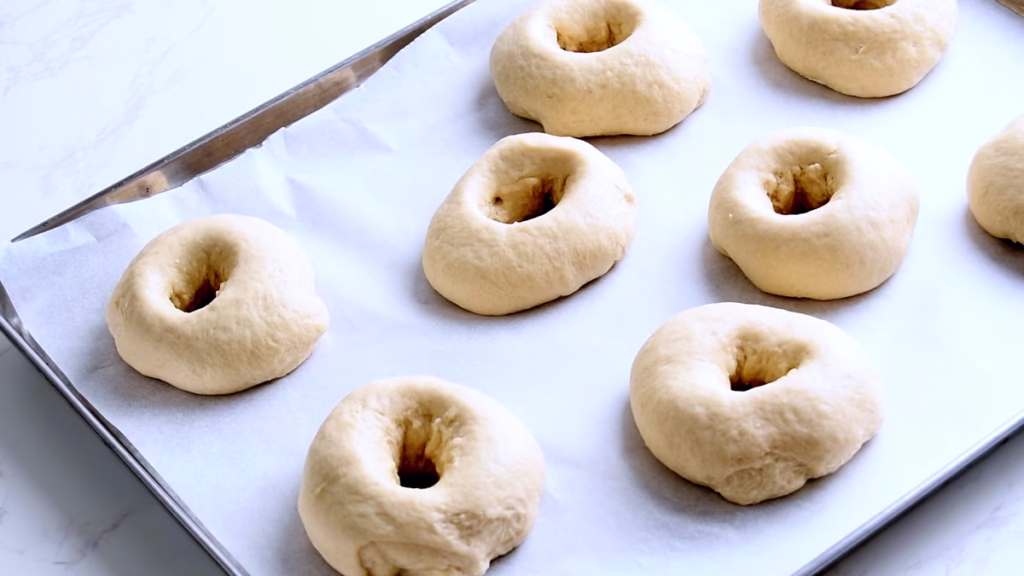
- To get the typical bagel shape with the hole, push your thumb into the middle of a dough ball all the way through. Then widen the gap a bit until both of your index fingers fit into it, one from each side.
- Now twirl the bagel around your fingers, gently stretching and widening the hole, until it is about 2-3in wide and looks decidedly wider than you’d expect it to be later. It will close a good bit during resting, boiling and baking.
- Transfer your bagel to the waiting sheet pan and proceed to shape the remaining dough balls.
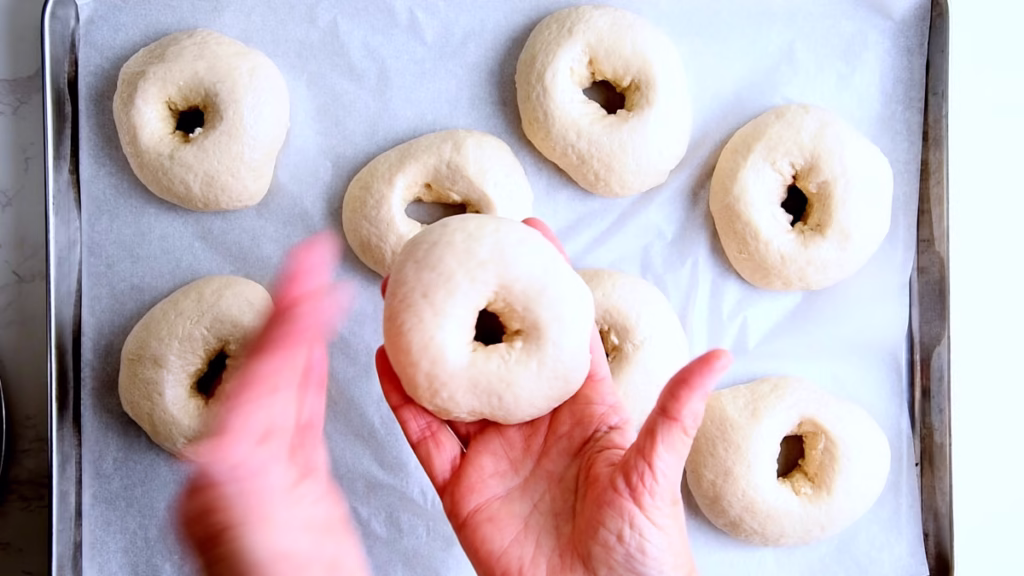
Rest Until Doubled
Cover with a (very) damp tea towel or cling film (I use cling film, as I found towels too drying when left overnight in the fridge) and allow to rest on the counter until your bagels have about doubled in size and look visibly puffed up.
Overnight Fermentation
- Now you can either boil them right away or rest overnight in the fridge. I went with overnight rest, since it leaves them nice and firm for the boiling and deepens the flavor considerably.
- Plus it gives you all the above mentioned benefits of slow fermentation.
- If you don’t get around to baking the next day, don’t worry. You can leave the shaped bagels in the fridge for up to 48h. The sourdough flavor will get more pronounced, which can be a good thing.
Boiling The Protein Bagels
- Preheat your oven to 425°F/220°C.
- Get all your favorite toppings ready. If you like your bagels covered with them all around, you’ll need about 6-8 tbsp in a deep plate.
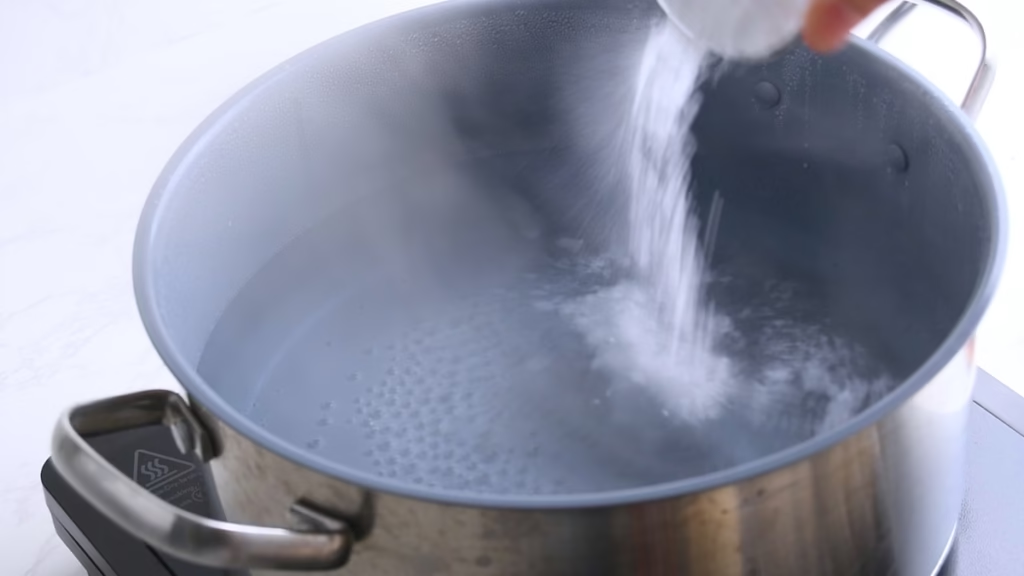
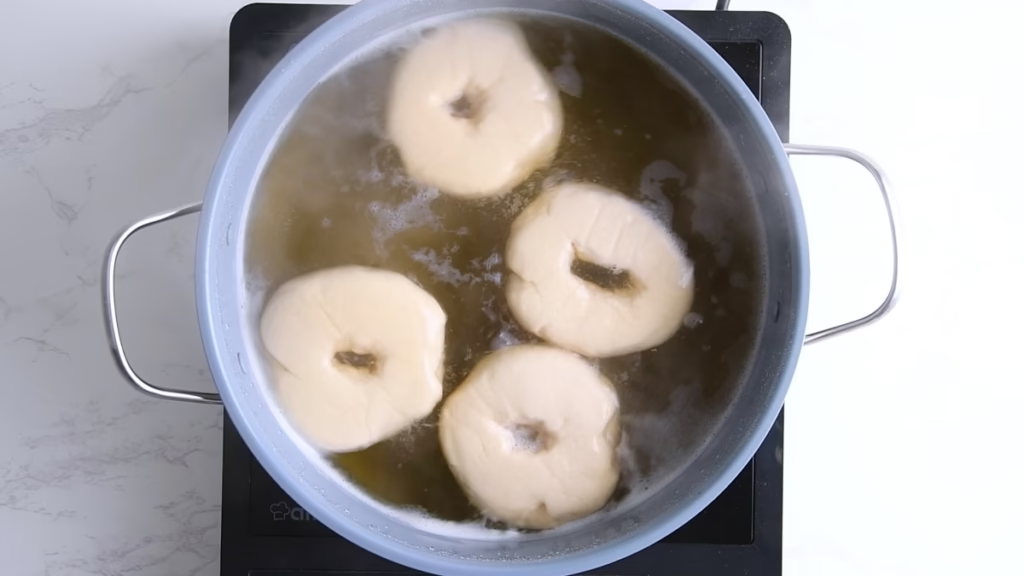
- In the morning (or evening, if you so choose), bring about 2 quart/2 litres water to a rolling boil in a large pot. Add the baking soda (careful, it will foam) and malt syrup or honey.
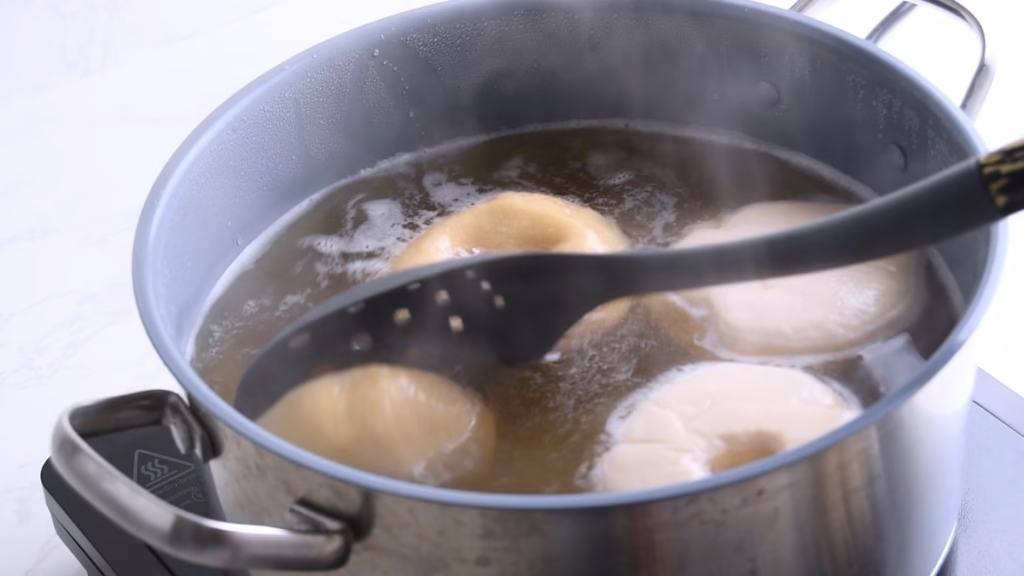
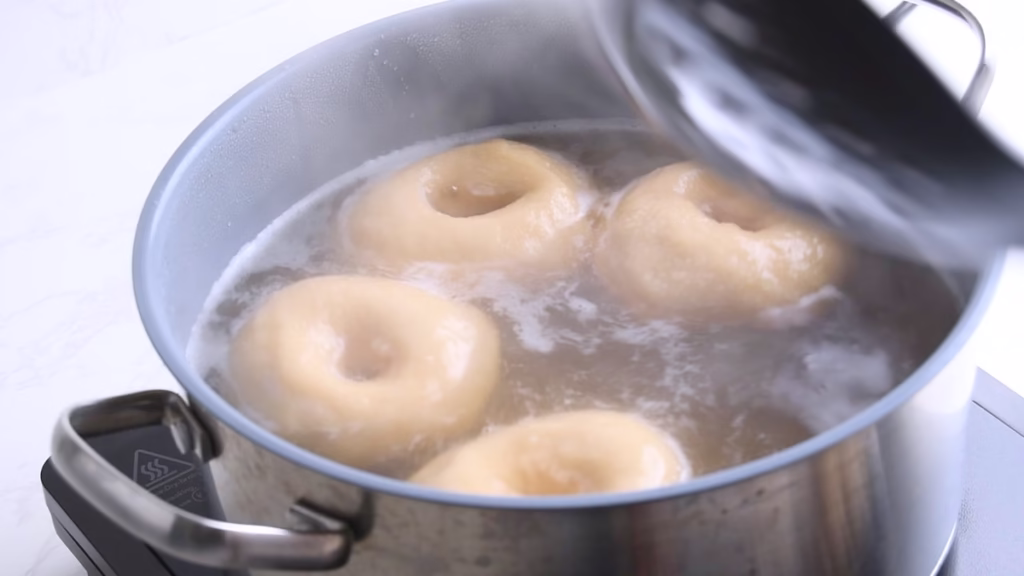
- Using a slotted spoon to lower them into the water, boil the bagels, 2-4 at a time on each side for 30 seconds to 1 minute. This will give them their shiny crust, hold the moisture in for the perfect chew and help with the perfect browning and characteristic flavor of the crust.
- You can boil them for a maximum of 2 minutes per side, but for me they get a bit too chewy at that point.
- Shake off the excess water or rest on a wire rack while you finish the remaining bagels.
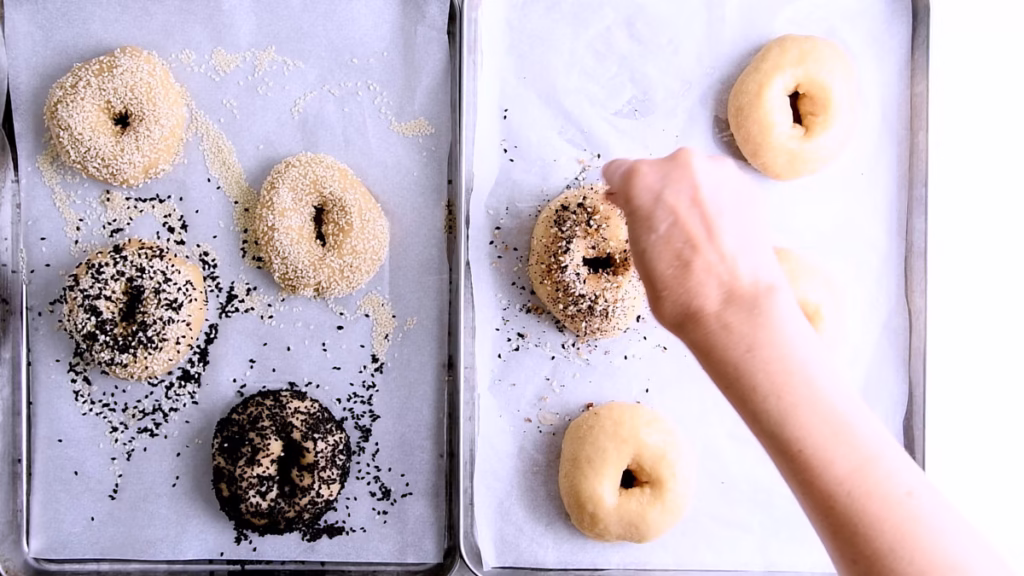
- Now you can either sprinkle on your preferred toppings (I like my lower bagel half topping free, so I sprinkled the top) or you can roll the still wet bagel in the seeds to cover it all over.
Bake Your Sourdough Cottage Cheese Bagels
- Bake your sourdough protein bagels for about 18-22 minutes. If your oven bakes unevenly (like most do), rotate your sheet pan about halfway through the baking time, to get them evenly browned.
- My oven runs fairly hot, so mine were ready after 18 minutes.
- Allow to cool for 15-30 minutes.
- These bagels are particularly good while still slightly warm!
Enjoy with your favorite toppings!

Watch The Video
How To Serve These Easy Sourdough Bagels
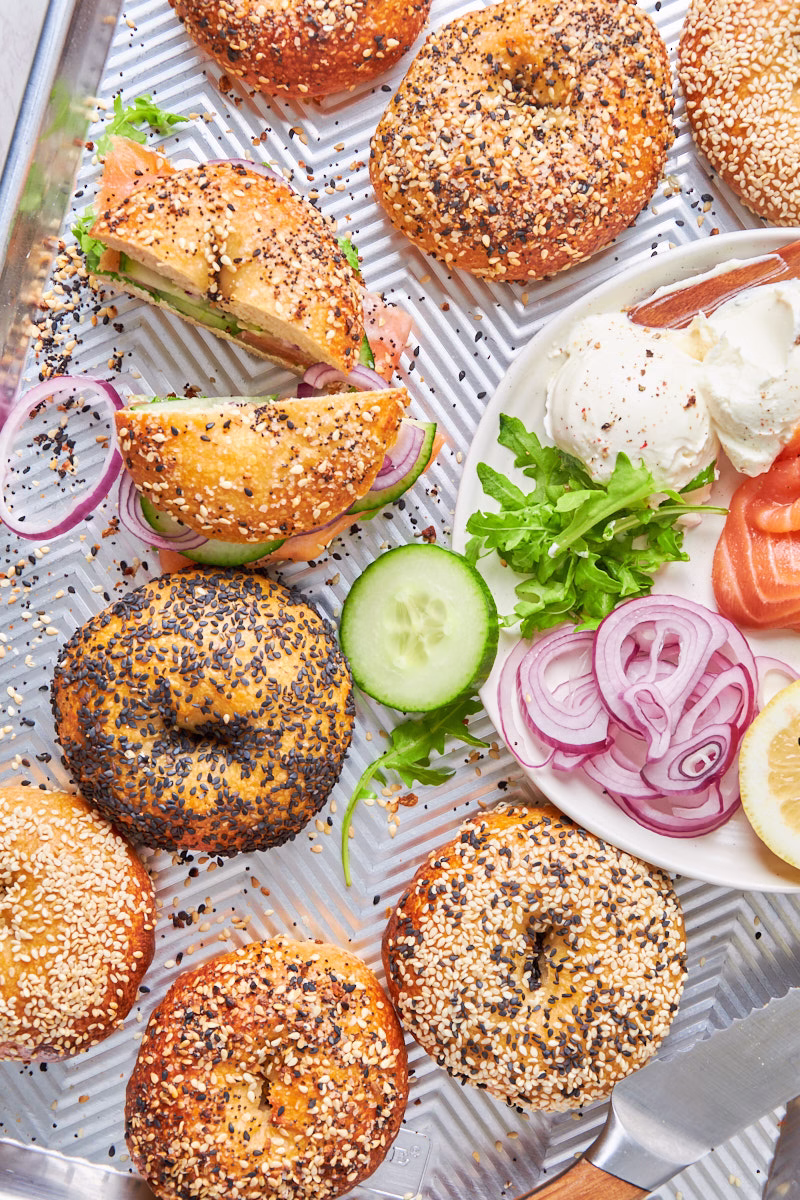
- Cream cheese, cucumber, red onions, smoked salmon, a bit of lemon juice and black pepper and some arugula or fresh basil. Heaven! And even more protein!
- Spread with this super flavorful Whipped Red Pepper Tofu.
- Mashed avocado, a poshed egg and some crispy fried bacon.
- A bit of mayo, smoked ham, Swiss cheese, tomato and crunchy lettuce.
- Tuna and sweetcorn salad.
- Prawns in homemade Mary-rose sauce topped with sliced spring onions.
- Mashed avocado, Swiss cheese, Marmite, cucumber and sliced spring onions.
- Cream cheese, herbs and fried garlic slices.
- Cream cheese and cherry tomatoes (a firm summer favorite).
- Brie, fresh figs, prosciutto, and a drizzle of honey.
- Gorgonzola with sliced pears.
- Peanut butter and Jelly (of course).
- Cream cheese and raspberry jam or fresh berries.
- Nutella and banana.
- Peanut butter and raisins.
- Peanut butter and banana.
- Cold butter, honey & cinnamon.

How To Store
These Sourdough bagels are best eaten fresh but keep in an airtight container for about 2-3 days.
After day 1 you can either slice them in half and toast or, my preferred method, sprinkle them with a bit of water and reheat them in the air fryer at 350°F/175°C for about 5 minutes. They will taste like fresh!
They also freeze incredibly well in freezer proof containers or freezer bags, and you can re-heat them straight from the freezer by sprinkling with a bit of water and baking at 350°F/175°C for about 10-11 minutes.
You could also freeze the shaped and just boiled dough if you like, to bake freshly whenever you crave a bagel.
FAQ
Sometimes you get a gummy texture when the gluten hasn’t developed sufficiently.
Make sure you give the dough plenty of time to ferment.
It can also happen if you slice them while still too hot.
Allow your bagels to cool for 15-30 minutes before cutting open.
I find that one of these bagels keeps me full from my late breakfast until dinner, stopping me quite effectively from snacking. So for me these, together with other protein sourdough bakes, help a lot with weight loss and maintaining weight.
But it really is a bit of a personal journey, to find the things that work for you. Try them. I’m sure the very least you get out of it is a delicious bagel!
Now I’d love to hear from you in the comments!
Have you tried this? Did you enjoy it?
What other recipes would you like to see?
And if you enjoyed this recipe, please consider rating, sharing, or leaving a comment – your feedback truly helps my blog grow!
Other recipes you might enjoy

Looking for more Sourdough Recipes that are made with Cottage Cheese? Here are 15 of them!
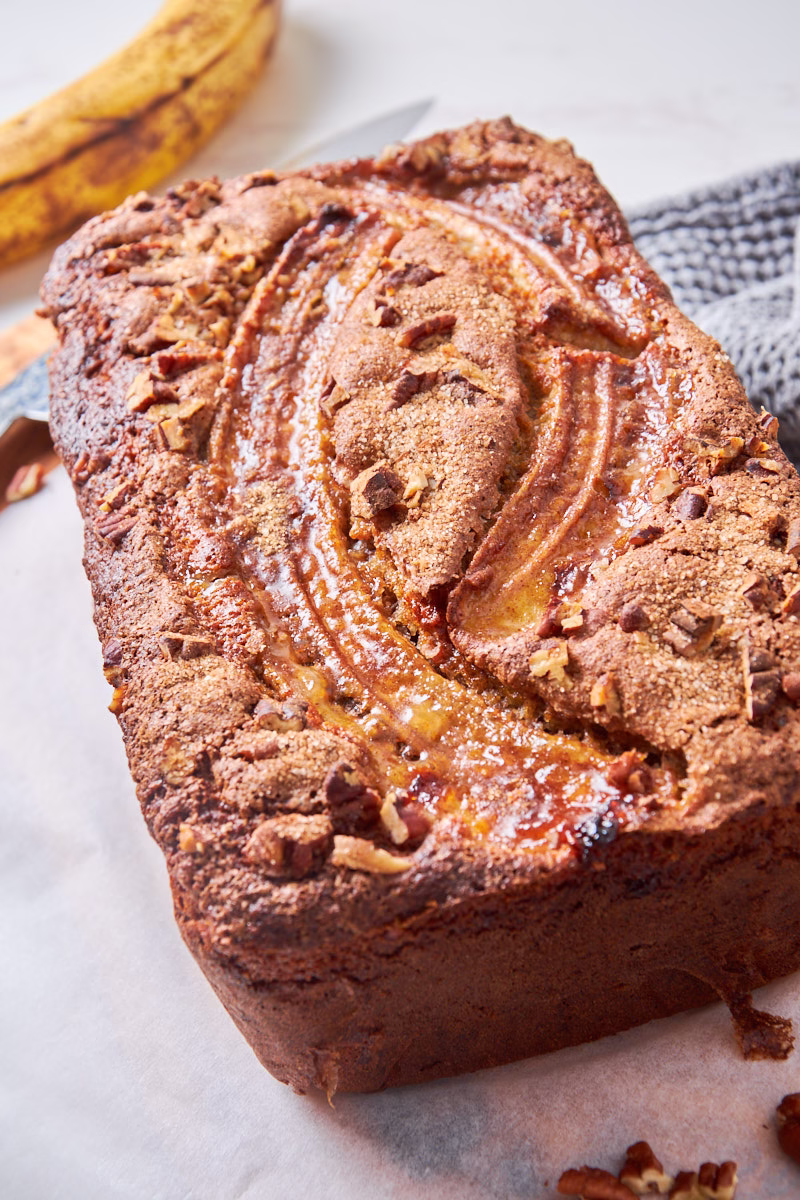
Have overripe bananas looking at you accusingly?
Make this super moist banana-nut bread.
Of course with sourdough and protein.

Muffins for breakfast? You bet!
Protein packed Pistachio-Apricot Muffins.

Sourdough Protein Bagels
- Total Time: 12 hours 50 minutes
- Yield: 6 1x
Description
Ever wish your favorite breakfast bagel could be a high-protein powerhouse without sacrificing flavor and texture? Most protein bagels are dense, dry, and lack the flavor of a true artisan bagel. This recipe changes that completely. By combining the natural tenderizing power of sourdough with the moisture from cottage cheese and a boost from protein powder, we’ve created a bagel that’s not only incredibly delicious and chewy but also packs a whopping 17g of protein. It’s the ultimate breakfast or snack to fuel your day and keep you feeling full and satisfied.
Ingredients
Sourdough Starter (Levain)
Ingredients to make a little more than ½ cup (145g) of Active Sourdough Starter, so you’ll have some left for your next recipe.
- 17g sourdough starter
- 70g flour
- 60ml water
Dough
- 113 g active sourdough starter
- 225 g blended cottage cheese
- 470 g bread flour
- 30 g unflavored protein powder
- 150 g water
- 20 g Malt extract
- 5 g salt
Water Bath
- 8 cups water
- 20 g (2 tbsp) honey/Malt syrup
- 2 tbsp baking soda
Instructions
2 days before baking
Feed Your Starter
- 2 days before you plan to bake your bread (or the morning before, if your kitchen is very warm)
- Take 17g of your existing sourdough starter. Add 70g all-purpose flour (or bread flour) and 60g filtered water (or good quality drinking water). Leave it in a lightly covered container on your kitchen counter until the next day. If your kitchen is particularly warm, especially in summer, preparing it the morning before baking might be best.
- This makes a fairly stiff starter, which will stay active longer, allowing you to use it when it suits you best.
1 day before baking
Blend The Wet Ingredients
- In the morning, the day before baking, start by blending the cottage cheese with some of the water, malt extract (or honey) and the protein powder until smooth.
- Using a bread whisk, stir in the remaining water and 113g of the sourdough starter.
- You could probably blend it, but I’m trying to be respectful of the little sourdough bacteria and treat them gently. Not everyone appreciates the wild ride in a blender!
- Keep the remaining starter for your next bread. You can keep it in the fridge, and it’ll last for at least a week.
Mix The Dry Ingredients
In a large bowl stir together the bread flour and salt. I’m using kosher salt, which has a higher volume per gram, so for me this is 1 tsp. If you are using sea salt, use 1/2 tsp.
Mix The Dough
- Stir the wet into the dry ingredients using your dough whisk or spoon, make a little well in the middle of your flour then pour in your wet ingredient blend, stirring as you go. Mix until you have a very roughly mixed mass.
- Now you can use either your stand mixer or knead the dough by hand for about 10 minutes.
- If you’d like to add any mix-ins to your dough, do so during the last minute of kneading.
- I used my stand mixer on low for about 5 minutes, until the dough was very smooth and came away cleanly from the sides of the bowl.
- Assess your dough at this point. It should be fairly firm and smooth, a bit like play-doh, but not so dry that it cracks or doesn’t come together. Add a little flour or water if you think it needs it.
Bulk Fermentation
- Use your hands to shape it into a smooth ball.
- I like to spray the bowl or box I use for fermenting my dough with a bit of oil at this point, to make it easier to take it out later.
- Cover your bowl or container with a damp towel, a lid (needs to be able to breathe, so no tightly sealed box) or some cling film.
- Leave to rest until about doubled in size. I like to do this in my kitchen, which is at about 70°F/21°C (fluctuating a bit depending on season) and it took about 6 hours.
- If you’d like to speed up the fermentation, you can switch the light of your oven on, put the bowl with your dough in and accompany it by a mug of freshly boiled hot water, which will raise the temperature and moisture to just the perfect environment for sourdough to thrive.
- It is hard to give an exact time, as everyone’s sourdough starter, kitchen temperature and humidity and even height above sea level can influence the time. So just check on your dough occasionally.
- Sourdough is very forgiving though, so no worries if it’s not perfectly doubled.
- Now, if you read my bread recipes, you saw a lot of stretch and folds. But since this dough is kneaded until smooth and elastic, it doesn’t need it.
Shape The Bagels
- Line a sheet pan with baking parchment.
- Once your dough is nice and puffed up, take it out of the bowl onto a lightly floured worktop or silicone mat.
- Gently pat it out a bit and, using a bench scraper or knife, cut it into 6-8 even pieces. I find that easiest by cutting it like a pie.
- You could use digital scales to get pieces that are exactly the same size, but frankly I never bother.
- Now shape each of the dough pieces into a nice, tight ball by grabbing the corners and pulling them into the center, pinching them to close, until you see and feel some surface tension. Turn the ball over, so the seam side is in the palm of your bottom hand and roll until smooth.
- Do the same with each of the pieces.
- If you like (and have time and patience) you can let them rise for about 30 minutes until puffed up a bit. I skipped this step.
- To get the typical bagel shape with the hole, push your thumb into the middle of a dough ball all the way through. Then widen the gap a bit until both of your index fingers fit into it, one from each side.
- Now twirl the bagel around your fingers, gently stretching and widening the hole, until it is about 2-3in wide and looks decidedly wider than you’d expect it to be later. It will close a good bit during resting, boiling and baking.
- Transfer your bagel to the waiting sheet pan and proceed to shape the remaining dough balls.
Rest Until Doubled
Cover with a (very) damp tea towel or cling film (I use cling film, as I found towels too drying when left overnight in the fridge) and allow to rest on the counter until your bagels have about doubled in size and look visibly puffed up.
Overnight Fermentation
- Now you can either boil them right away or rest overnight in thew fridge. I went with overnight rest, since it leaves them nice and firm for the boiling and deepens the flavor considerably.
- Plus it gives you all the above mentioned benefits of slow fermentation.
- If you don’t get around to baking the next day, don’t worry. You can leave the shaped bagels in the fridge for up to 48h. The sourdough flavor will get more pronounced, which can be a good thing.
Boiling The Protein Bagels
- Preheat your oven to 425°F/220°C.
- Get all your favorite toppings ready. If you like your bagels covered with them all around, you’ll need about 6-8 tbsp in a deep plate.
- In the morning (or evening, if you so choose), bring about 2 quart/2 litres water to a rolling boil in a large pot. Add the baking soda (careful, it will foam) and malt syrup or honey.
- Using a slotted spoon to lower them into the water, boil the bagels, 2-4 at a time on each side for 30 seconds to 1 minute. This will give them their shiny crust, hold the moisture in for the perfect chew and help with the perfect browning and characteristic flavor of the crust.
- You can boil them for a maximum of 2 minutes per side, but for me they get a bit too chewy at that point.
- Shake off the excess water or rest on a wire rack while you finish the remaining bagels.
- Now you can either sprinkle on your preferred toppings (I like my lower bagel half topping free, so I sprinkled the top) or you can roll the still wet bagel in the seeds to cover it all over.
Bake Your Sourdough Cottage Cheese Bagels
- Bake your sourdough protein bagels for about 18-22 minutes. If your oven bakes unevenly (like most do), rotate your sheet pan about halfway through the baking time, to get them evenly browned.
- My oven runs fairly hot, so mine were ready after 18 minutes.
- Allow to cool for 15-30 minutes.
- These bagels are particularly good while still warm!
- Enjoy with your favorite toppings.
Notes
How To Store
- These Sourdough bagels are best eaten fresh but keep in an airtight container for about 2-3 days.
- After day 1 you can either slice them in half and toast or, my preferred method, sprinkle them with a bit of water and reheat them in the air fryer at 350°F/175°C for about 5 minutes. They will taste like fresh!
- They also freeze incredibly well in freezer proof containers or freezer bags, and you can re-heat them straight from the freezer by sprinkling with a bit of water and baking at 350°F/175°C for about 10-11 minutes.
- You could also freeze the shaped and just boiled dough if you like, to bake freshly whenever you crave a bagel.
- Prep Time: 30 minutes
- Cook Time: 20 minutes
- Category: Protein Sourdough Recipes
- Method: Bake
- Cuisine: American


I have two boys 18 & 24. They want everything protein so I decided to make this for them.
I only had vanilla flavored protein powder and homemade yogurt I wanted to use so I wasn’t sure how it’ll turn out but it was amazing! It’s nice and fluffy, the protein powder flavor was slightly there but wasn’t overpowering. I will definitely make it again with yogurt and also try the cottage cheese version. I made it plain this time but we are going to try toppings and mix ins. Thank you for this great recipe!
Aww, that makes my day! I’m so glad it worked as intended even with vanilla protein!
Thanks so much for letting me know.:-)
Sourdough protein bagels looks delicious easy to make . I am going to make it again.
Thank you, I’m so happy to hear that.
Love how you’ve made them both nourishing and satisfying. Perfect for meal prep or a hearty breakfast that actually keeps you full.
Thank you, that is so kind! That’s exactly what I was aiming for. 🙂
Finally, a bagel recipe I can feel good about! The protein helps offset the carbs. And they taste great!
That is so good to hear! Thanks a lot for letting me know you like them. 🙂
These bagels make healthy taste amazing — wow! Your instructions are so clear and spot on. I never thought I could conquer homemade bagels, but now I feel unstoppable in the kitchen. 😉
Thanks!!
Wow, unstoppable is fabulous! Thank you so much! Enjoy your new freedom in the Kitchen. 🙂