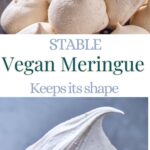
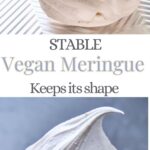
Stable Vegan Meringue
My Stable Vegan Meringue does absolutely everything egg white meringue can do: It’s super airy, fluffy and soft when whipped up into glossy, stiff peaks, bakes into perfectly crisp little meringue cookies, makes a gorgeous Pavlova, and, most importantly, stays put even unbaked on any pie for up to 3 days.

This post may contain referral links for products I love. For The Pleasure Of Eating earns a small commission on these links at no cost to you, and the links will always be marked with an asterisk* or highlighted in pink.
Why You Will Love This
Summary
In short: Boiling down aquafaba and adding xanthan gum to your vegan meringue results in version that is stable for several days, instead of weeping or sliding off your pie.
Read more if you’d like to know how I tested, the exact rations and why I came to the conclusion.
I tested 4 Versions and found the best
Testing 4 different versions of vegan meringue, I set out to find the perfect recipe that remains stable for at least 2 days if kept in the fridge and gives you all the options in your baked goods.
The versions I tested where:
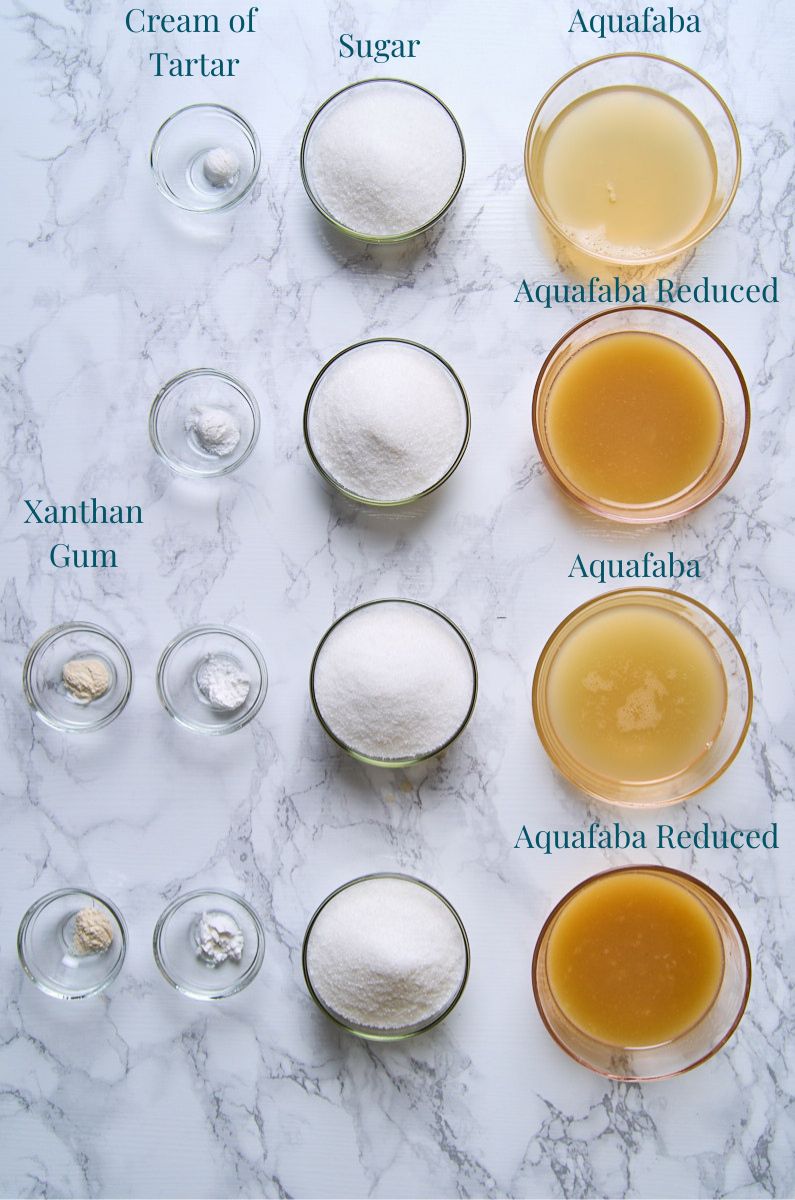
- Basic aquafaba Meringue – Just aquafaba straight from a can of chickpeas, cream of tartar, salt, vanilla and sugar
- Basic aquafaba with Xanthan gum and the same ingredients as above
- Boiled down aquafaba, reduced by half from 2 cans of chickpeas, concentrating the protein. Same ingredients as the basic version.
- Boiled down aquafaba + Xanthan gum plus the ingredients from the basic version.
Tests for the Meringue:
Liquid release test

Initially I planned to make a video of the tests. Turns out: White meringue with teeny tiny bubbles is really hard to see in a video!
I don’t own a macro lens (yet), so I figured I’d rather show you in stills from the video. Which is a bit of a shame, as this was the very first video my new camera woman Hollie filmed and consequently the first I dared to appear in. I mean, sort of. Considering I’m not showing it now for it being not very useful to you.
But back to the testing!
Above you see 4 containers of the different meringue versions. I tipped each of them over above a small glass bowl, showing how much liquid each one releases after a day in the fridge.
Why is this important?
The liquid you see dripping out is what makes your pie soggy and forms a watery film between filling and topping, having the meringue slide off. Which is exactly what I am trying to prevent with my version!
Unsurprisingly, the straight-from-the-can versions release about double the amount of the boiled down version without xanthan gum, which left only a few drops.
However, the version I boiled down AND added xanthan gum to leaked absolutely no moisture after a day in the fridge and was still completely stable. Goal achieved!
Taste Test
All tasted like the soft insides of marshmallow after toasting it.
However, there were distinct differences in the texture, especially after a day in the fridge.
While both unreduced versions left me with the feeling of eating sugary air, both reduced versions had a decidedly creamier mouthfeel with the final version feeling rather cream-like without the grease.
Tests with the final version
Bake into mini meringue cookies/kisses, which worked out beautifully.
A word of caution though: I tried it before without piping, just using an ice cream scoop to plop them onto the baking sheet. All versions deflated while baking, especially in the pavlova shape.
However, when piping it worked perfectly!

Bake into Mini Pavlovas/Meringue Nests
Crispy outsides, slightly chewy inside, minimal cracking. Just as I want my mini pavlovas. Surprisingly easy to handle after baking too. No sticking to the paper or crumbling.

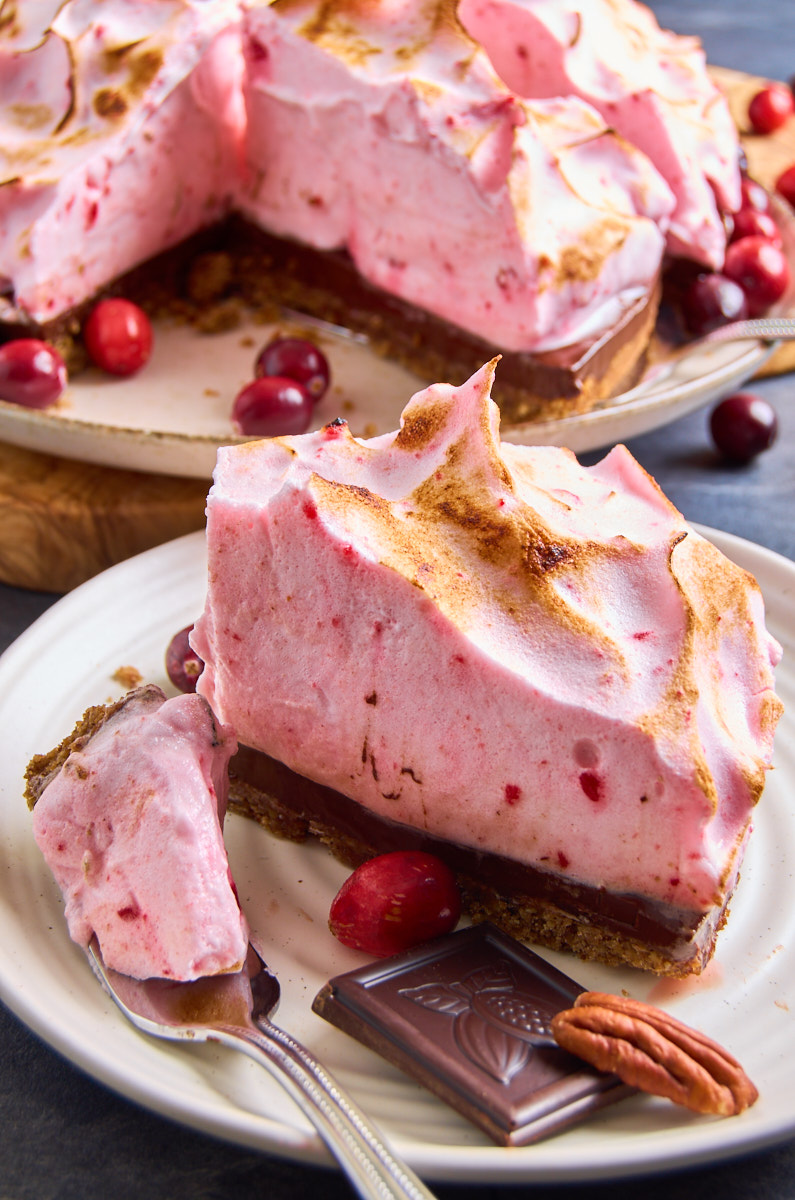
For my final test I made Raspberry Meringue Pies with Pistachio Ganache and a crispy, gluten free pistachio crust. Here is a teaser picture. You’ll get the recipe in my next post. 😊
Day 1

Day 2

Why you want to make Vegan Meringue
Made from Aquafaba
As any vegan meringue, my version is made from aquafaba, the water from a can of unsalted chickpeas. But I have combined 2 steps from different recipes that I found, making this one really durable and easy to use, just as meringue made with egg whites. From the usability and behaves more like Italian meringue, but without the need to add boiling hot sugar syrup.
But I’m not a vegan!
You still want this, trust me!
Cheaper and better for the environment – With the egg prices right now, concerns about chicken welfare, together with the fact that you’d usually pour aquafaba down the drain, there is a really strong point to eggless meringue. Even if you are not a vegan.
Less food waste – Use the “main” product, the chickpeas in all kinds of recipes (check out my super creamy hummus! ) and safe the water for desserts. You can even freeze it in ice cube trays, so you have an easy ingredient on hand anytime you want an airy topping or crisp-chewy Pavlova.
Safer to eat – Raw egg white is a concern for many immunocompromised people (*raises hand), small children and the elderly. This version is much safer to eat than uncooked egg whites. You can give it to your whole family without being worried.
Indistinguishable from egg white meringue – Now, I know eating chickpea water with its weird briny smell doesn’t sound appealing, but once whipped up with sugar and vanilla, no one will be able to tell the difference to egg white meringue. It just tastes like marshmallows!
Near impossible to overwhip – While you can kill an egg based meringue by whipping it too long, that is virtually impossible with the vegan version.
What is different about this recipe?
There are plenty of vegan meringue recipes around, so what did I do different?
Boiled down
Instead of using the aquafaba straight from the can, I boil it down to half it’s volume, removing part of the water content and leaving me with a more concentrated version.
Now, if you have tried your hand at vegan meringues, you might have noticed they whip up lovely and fluffy but deflate a lot faster than the version made from egg whites. This is because the protein structures aren’t as strong. No surprise, considering it’s just the protein that has “leaked out” of chickpeas. Sounds disgusting, right? I know. But stay with me!
Boiling it down doubles up on the protein and leads to both a creamier mouthfeel and less water being available to leak out later.
Yet, even that tiny bit of liquid can lead to soggy pies and your precious cloud of a topping sliding unceremoniously off your pie at the most inconvenient moment, which is when you move it to serve or slice into it.
Add Xanthan Gum
The second step, which on it’s own didn’t do much during my tests, as there was still too much water in the whipped up meringue, proved to work it’s magic in the boiled down version: Adding a tiny bit of Xanthan Gum to stabilise the tiny bubbles and help them stay that way for at least 3 days.
What is Xanthan Gum?
I know, it starts with X, so it can’t be good, right?
Fortunately for us, wrong:
Xanthan gum is literally made by fermenting glucose with the help of tiny bacteria, which convert it into a sticky solution which, once dried and pulverized, functions as stabilizer, emulsifier and thickener. It’s most notable use is in any kind of gluten free product, where it replaces the structure gluten usually provides. It’s also quite common in ice cream (that creamy mouthfeel you get in egg-free ice cream is Xanthan gum) and low fat products.
It’s easy to use and, unless you eat more than 15g per day, which would be multiple tablespoons of this very light powder, completely safe.
In most recipes you will find a tiny amount of it, so you are in no danger, even if you eat, say, the whole meringue recipe all in one day and by yourself, as it only contains 1/8 tsp for the whole portion, it’s that effective.
What can you use this Meringue for?
Anything from cute meringue kisses over Pavlova all the way to the dreamiest S’mores pie topping will work marvellously with this recipe.
I particularly love it on my Raspberry-Pistachio Meringue pies!

And you know what I have been using it for most lately? As a lactose free replacement for cream!
Sounds odd? Look, I know it can’t do everything cream does, but that fluffy mouthfeel, like the inside of a torched marshmallow? Imagine that on your favourite pie!
Talking about torching: It behaves just like the egg based version when torched, leaving you with stunning caramelised streaks.
It’s also really fabulous on ice cream instead of cream!
Think about your favourite ice cream, topped with cream. You dip in your spoon, expecting just airy perfection, but…right there, on top of that scoop, your whipping cream has frozen into greasy shards that just interrupt the melting sensation of a perfect summers day. Ugh!
Vegan meringue will keep its softness even on ice cream, making it the perfect replacement for cream.
Ingredient Notes
Since I showed them already above in the comparison, here just the breakdown:
Aquafaba – Make sure to use the water of unsalted chickpeas or you’ll have a rather…uhm….unusual dessert flavor!
Cream of Tartar – Helps stabilise the meringue. You could use 1 tbsp lemon juice instead
Salt – Stabilises and balances the sweetness. Experiment with how much you like. I found 1/8 tsp kosher salt to be enough. Even a pinch might work.
Sugar – The main ingredient besides the aquafaba. I used simple granulated sugar. Caster sugar will dissolve a bit faster. Don’t use icing sugar, as it usually contains some anti-caking agent, which can leave a weird powdery mouthfeel. Diabetics can try using Xylitol. Mind you, I haven’t tried it myself yet, so if you do, I’d love to hear about it!
Vanilla extract – To get that marshmallow flavor. It’s optional and you could use other extracts such as almond. Just make sure they don’t contain any fatty ingredients to prevent the dreaded deflating.
Xanthan gum – Available in many health food stores, as it’s commonly used in gluten free baking. One pack will last you ages and is super versatile, as you can also use it for example in homemade ice cream or gluten free baking. For example these addictive Pistachio cookies.
How to Make this
Tips & Tricks
During my many repetitions of my vegan meringue I found 3 things to be aware of that can make or break it:
- Grease. Make double and triple sure (just as with egg based meringue) that any tools that touch it, be it bowl, whisk or spatula are absolutely grease free. The tiniest speck of pistachio butter killed one of mine.
- Weather. I’m not kidding. Do not, under any circumstances make meringue when it’s raining. It will collapse. Stable or not, rain kills both egg based and vegan meringue as I had to painfully learn when making this for an event on one of the more typical Irish days.
- Not all aquafaba is created equal. I had the best success with can of organic unsalted chickpeas I got from Lidl. The brand here is Freshona.
Unfortunately the non-organic version did not perform as well and collapsed notably quicker. So if one brand/type doesn’t work, try another one. Just make sure it’s unsalted.
Equipment
I rarely say this, but you will need either a stand mixer or a hand mixer for this. Trust me, you really don’t want to whisk this by hand. Unless you want a serious workout. With a stand mixer it took a few minutes to whip into stiff peaks.
Equipment Needed (one of them):
 Buy Now →
  Buy Now →
 Boiling down the aquafaba
Use the water from 2 cans of chickpeas (I collected mine for weeks and froze it in ice cube trays to try out all 4 versions) and boil it down to about ½ cup/125ml.
Store in a lidded jar in the fridge to cool down. The whipping works best with cold aquafaba.
You can prepare this up to 5 days ahead of time if keeping it in the fridge or up to 3 months if frozen. In case you froze it, defrost overnight, so you have a relatively viscous liquid, similar to the consistency of egg whites.
Whip to soft peaks
In your absolutely grease free bowl, add the cold aquafaba, cream of tartar, a pinch of salt and 1-2 tsp vanilla extract. Start whisking slow, then increase the speed and let your mixer do the work until you have soft peaks. Be patient, this will take a few minutes.
Mix xanthan gum and sugar
I found for best distribution of the xanthan gum, mixing it with the sugar works great. I have added it on its own before, but because it’s such a light powder, it might end up on the sides of the bowl or just puffing up in the air. And the tiny amount makes it hard to calculate how much you lost that way.
So: Tiny whisk it into your sugar.
Slowly add sugar and whisk into glossy, stiff peaks
Now while still whisking, add the sugar-xanthan gum mix in a slow stream to your soft meringue. Keep whisking until you have glossy, stiff peaks and the sugar has dissolved. Rub a small bit between your fingers. If you still feel sugar crystals, keep mixing.
Here are some pictures from the video doing the knife cut test. Essentiall, run a knife through your meringue. If the cut remains visible, it’s ready.


All dissolved?
Fantastic! Now use your meringue however you see fit!
Btw mine has tiny black specks, which is from the real vanilla essence I made at home with some vanilla pods and vodka, simply left for about 6 months, shaking occasionally, before using.

For tiny cookies/Meringue kisses
Pre-heat oven to 212°F/1oo°C
Pipe small portions onto a baking tray lined with parchment.
Bake for about 3-4h, then leave in the closed oven for another 2 or overnight.

Note:
It’s tricky to calculate the exact baking time for meringue kisses/cookies, as every oven is different and everyone likes them different. Plus moisture in the air greatly influences any type of meringue.
So I found baking mine for about 4h gave me perfectly crispy little kisses. But test yours around the 3h mark by taking one out (careful, hot!) letting it cool for a moment and giving it a try.
If you like them on the chewy side, they might need even less time.
Mini Pavlovas
Same as the cookies above, I found 3-4h to be the sweet spot, as you want pavlovas with a bit of a chewy centre. If you make a large one or want perfectly crisp meringue nests, you might need to bake them for around 5-6h.

Lemon Meringue Pie
Use the vegan meringue as it is, unbaked. No Italian version needed, as it’s perfectly safe to eat raw.
Torch the top as you would normally.
I found they keep just as they are in the fridge for at least 3 days. Mine were eaten after that, so I can’t attest for longer.

I just made tiny lemon meringues to see how the versions are doing and found the doubled up solution of boiled down + xanthan gum had a creamier mouthfeel than any of the others. The basic versions just felt like slightly sweet air.
Note on Factors that influence the stability of any meringue
During my many repetitions of making lots of meringue versions, I found three crucial factors that can make or break it:
Grease. Make double and triple sure (with any meringue) that any tools touching it—be it a bowl, whisk, or spatula—are absolutely grease-free. The tiniest speck of pistachio butter killed one of mine!
Weather. I’m not kidding: Do not, under any circumstances, make meringue when it’s raining. It will collapse. Stable or not, rain kills both egg-based and vegan meringue, as I painfully learned when making this for an event on one of the more typical Irish days.
A very hot day isn’t any better to be honest. My best meringues (vegan or not) were created on dry reasonably cool days. I realise that might limit the times you can make it, but I feel better to know in advance than having to deal with a deflated pie at an event.Not all Chickpeas are created equal. I had the best success using cans of organic chickpeas with an aquafaba that was fairly viscous to begin with. If your meringue deflates too fast, it might be the protein content/quality of your aquafaba. Unfortunately, apart from trying it out, there isn’t a way to determine it ahead of time that I know of.
And two bonus points:
The Vegan Raspberry Meringue Pies I made with this kept decidedly longer stable than a version that had no “anchor” on the pie in form of the raspberries.
I do think the freeze dried raspberry powder also helped to absorb some of the moisture, contributing to the stability.So if you make vegan meringue that you’d like to last for a good few days, consider adding some sort of freeze dried fruit powder to it and push something into the pie filling that your meringue can hold onto, in order to not slide off. Fruits, Nuts or maybe just a sprinkling of crust crumbs are likely to work.
How To Store
Vegan Meringue keeps best in the fridge. Uncooked and on pies it remains stable for at maximum 3 days. No need to worry about food poisoning, as it contains no eggs.
It keeps in the freezer and stays fluffy, if a bit firmer and is great as topping for ice cream that way. I wouldn’t leave it longer than a week though, since it starts feeling a bit chewy.
Whenever I bake cookies or pavlovas with it, I put a dry paper towel in the bottom of an airtight container. That will keep them crunchy for well over a week. Probably longer, but…mine are always gone by then.
FAQ
There are multiple possible reasons for this:
The most common one is grease somewhere on the equipment. I lost one of mine due to a tiny speck of pistachio butter on one spoon.
Another possibility is humid weather. No, really. Do not make meringue on a rainy day! (Easier said than done in Ireland!)
Too warm: Keep the unwhipped aquafaba and later the whipped meringue in your fridge. While there is no danger of it spoiling like egg whites would, it’s still sensitive to temperature unless baked.
Yes. However, the texture will change a tiny bit into slightly chewy. Still delicious though. But because it is so airy, I wouldn’t freeze it for more than a week and use it frozen on, say, ice cream. Not necessarily on pie or to bake after freezing.
Now I wouldn’t go as far as claiming it’s healthy, as it contains a lot of sugar for stabilising. So maybe use it as treat or make it with xylitol, which is also a great way diabetics can enjoy this.
Now I’d love to hear from you in the comments!
Have you tried this? Did you enjoy it?
What other recipes would you like to see?
And if you enjoyed this recipe, please consider rating, sharing, or leaving a comment – your feedback truly helps my blog grow!
Other recipes you might enjoy

Here are some Raspberry-Pistachio Meringue Pies I made with this Vegan Meringue:

Make my Brown Sugar Pavlovas with this Vegan Meringue instead of Swiss meringue. No heating needed.
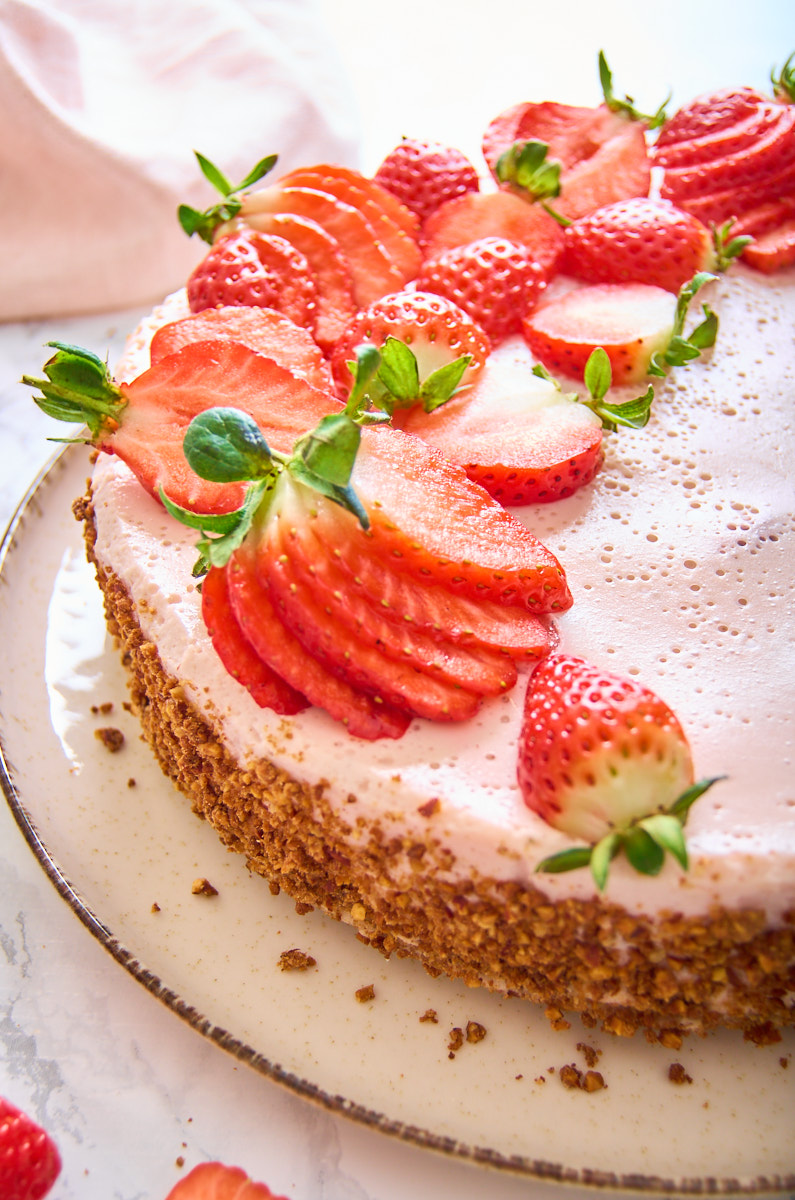
An early summer treat that gives you lots of protein and fresh fruit in form of Strawberry Mousse Pie

Stable Vegan Meringue
- Total Time: 15 minutes
- Yield: 8 1x
- Diet: Vegan
Description
My Stable Vegan Meringue does absolutely everything egg white meringue can do: It’s super airy, fluffy and soft when whipped up into glossy, stiff peaks, bakes into perfectly crisp little meringue cookies, makes a gorgeous Pavlova, and, most importantly, stays put even unbaked on any pie for more than 3 days.
Ingredients
- 1 cup aquafaba ((Water from 2 cans of unsalted chickpeas) boiled down to 1/2 cup)
- 1/4 tsp cream of tartar
- 1/8 tsp kosher salt
- 1/2 cup white sugar
- 1/2 tsp vanilla
- 1/8 tsp xanthan gum
Instructions
Boil and chill the aquafaba:
- Start with the liquid from two cans of chickpeas. Boil it down until you have about 1/2 cup (125 ml) of concentrated aquafaba. Let it cool completely and store it in the fridge. Cold aquafaba whips better. You can store it in the fridge for up to 5 days or freeze it for up to 3 months. If frozen, defrost overnight before using.
Whip to soft peaks:
- Pour the cold aquafaba into your clean mixing bowl. Add the cream of tartar, kosher salt, and vanilla. Begin whisking at a low speed, then increase the speed gradually. Continue whipping until the mixture reaches soft peaks. This may take a few minutes, so be patient.
Mix the sugar and xanthan gum:
- Combine the white sugar and xanthan gum in a small bowl. Whisk them together thoroughly to ensure even distribution. This prevents the xanthan gum from clumping or floating away, since it’s such a fine powder.
Add the sugar mixture slowly and whip to stiff peaks:
- With the mixer running, slowly add the sugar-xanthan gum mixture to the meringue. Continue whipping until the meringue becomes glossy and holds stiff peaks. To test if it’s ready, rub a bit of the mixture between your fingers. If you still feel sugar granules, keep mixing until the sugar is fully dissolved.
Equipment
Buy Now → Notes
The one most important tip for any meringue, which also goes for the vegan version:
Make absolutely sure there is not a hint of grease anywhere on your equipment.
I tend to thoroughly wash my bowls and whipping attachments with hot, soapy water and then wipe everything with a paper towel dipped into vinegar or lemon juice.
Equipment:
You will need either a stand mixer* or a hand mixer for this. Trust me, you really don’t want to whisk this by hand. Unless you want a serious workout. With a stand mixer it took a few minutes to whip into stiff peaks.
- Prep Time: 15 minutes
- Category: Dessert, Ingredient
- Method: Mix
- Cuisine: French
Nutrition
- Calories: 49
- Sugar: 13
- Sodium: 38
- Fat: 0.04
- Carbohydrates: 13
- Fiber: 0.04


I’m very curious to how this would work in vegan marshmallow making!
Apparently it works, as people have recipes up for it. They use agar-agar for the stabilising.
I have not yet tried it myself as I rarely eat marshmallows.
Though when I tried making this into a swiss meringue, it kept collapsing, so clearly I’m missing a step.
Let me know how it works when you try it. 😉
Thank you for your reply! I’ll definitely give it a go. I actually tried to make marshmallow fluff yesterday with a similar xanthan gum meringue recipe but I think it deflated because I didn’t let it whip enough 😜
Unsure. At least if it involved pouring hot syrup into it. Because I whipped mine until literally my KitchenAid ran hot, and still…
I tried 3 times, as I thought I must be doing something wrong.
In theory you whip the basic aquafaba first until very fluffy (that always worked) then very slowly drizzle in the syrup. I did it a million times with egg meringue, but the aquafaba version just did not like it.
If it works for you, do let me know! I’d love to use it in recipes.
Wow, these look perfect! I’ve tried vegan meringue too, and yours have such beautiful peaks. Mine always deflate a bit—any pro tips? 👏🌱
Thank you and yes!
The whole secret is my stable vegan meringue recipe here: https://forthepleasureofeating.com/stable-vegan-meringue/
It’s boiled down aquafaba and xanthan gum that make the huge difference. 🙂
I love this stable vegan meringue I have made it so perfect easy to make also.
Thank you, so happy it worked for you. 🙂
Wow, I never knew you could make a vegan meringue, but your recipe worked perfectly!!! I made cookies and they were a huge hit!
So happy to hear you discovered something new and enjoyed it. 🙂
I have been wanting to find a stable filling for my cream pies and this worked perfect! So simple and tasty, thanks for sharing!
Ahh great, thanks. So glad it worked. 🙂
This recipe is mind blowing!! I couldn’t believe that 2 days later it was still holding shape!
Haha, thank you! I find it so helpful, as I get stressed with things I can’t prepare ahead. 🙂