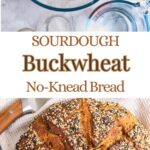
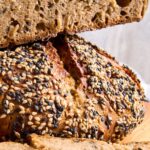
Sourdough Buckwheat No-Knead Bread
A nutty Sourdough Buckwheat No-Knead Bread with crunchy sesame topping, this loaf couldn’t be any easier to make: Stir the ingredients together, let the sourdough bacteria do the hard work for you and enjoy the scent of freshly baked bread wafting through your house the next morning.
The Dutch oven method guarantees the perfect crispy crust and tender crumb, keeping fresh for days.

This post may contain referral links for products I love. For The Pleasure Of Eating earns a small commission on these links at no cost to you, and the links will always be marked with an asterisk* or highlighted in pink.
Why You Will Love This
Summary
- The Vibe: A dense, earthy, “peasant-style” loaf that requires zero kneading skills.
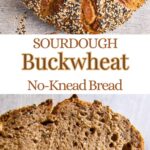
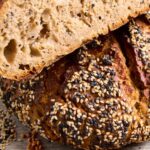
- The Texture: Crispy, crackling crust with a soft, moist crumb (thanks to the buckwheat’s unique hydration).
- The Gut Health: 100% sourdough fermented, making the buckwheat nutrients much easier for your body to absorb.
- Pro Tip: This bread is naturally lower in gluten than all-wheat loaves, so don’t expect a massive “spring”—it’s all about that hearty, nutty flavor.
- Not a fan of Buckwheat? Try my most popular recipe: Easy High Protein Sourdough Bread—it’s the one everyone is talking about!
Sourdough
It’s easy to see why sourdough is constantly gaining popularity, even while we are not being confined to our homes anymore:
Once you got over the first intimidation period, you realise it’s just water and flour brought to live by little diligent yeast bacteria, making it that much easier to get artisan quality bread at home.
And once you start experimenting with it, you’ll find ever more ways to use it in your recipes.
Tip:
Take a look at my Bread and Sourdough category, to find creative ways to use up your sourdough discard.
It also has a whole range of health benefits, starting from making gluten easier to digest (celiacs should still not consume gluten, but if you are just intolerant, this might be your way for finding a way to enjoy bread again), heaving a lower glycemic index to being a gut healthy, fermented food. Which was one of the reasons I started baking more of it while losing weight.
For me, being German, the flavor was always the number 1 reason to make it. Finding good quality artisan bread can be tricky in Ireland. Plus I get to tweak it exactly the way I enjoy it most.
Buckwheat
Which brings me right to the next point: Buckwheat.
Despite its name, it’s not a wheat, as it doesn’t grow on grass, but rather a seed containing no gluten.
It’s high in mineral and antioxidants, making for a great addition to a healthy diet.
Having a nutty taste, with a lovely crunch to it when toasted, buckwheat lends itself to all kinds of recipes, including porridge, grain bowls, the typical French crepes also called “galettes” and, last but not least, bread.
While on its own not giving the much needed gluten for the rise, it works fantastic in combination with white flour.
I’ve been experimenting with it for a while now, the last bread containing some being this festive Cranberry Buckwheat Sourdough Bread with Rosemary and Pumpkin Seeds, which I liked so much that I wanted the nutty flavor in an everyday bread all year round. Bringing me to this super easy no-knead version.
I found very little of the flour is needed to have the malty and earthy notes of it shine. Half a cup on a whole loaf was what I used.
Easy
Using the no-knead method, allowing the sourdough to develop the gluten slowly overnight, means you not just get the whole range of the fermentation benefits, but also have less work. Win/win in my book.
If you look at my German Sourdough Rye Beer Dutch Oven Bread, you’ll see that I tried both the completely hands off method I’m using for this Buckwheat version and the classic stretch and fold method, going back during the first 2h rest every 30 minutes to fold it. There was little to no difference in the outcome when leaving the dough in the fridge overnight, so I figured I might as well be entirely lazy and skip it.
Feel free to play with the dough to your hearts content if you enjoy it though. I know it can be very satisfying. 😉
Secret Ingredients for Extra Flavor and Crust
After years of wondering what on earth was missing from my breads to have them taste like the delicious, malty and crusty loaves I used to get in every German bakery, I stumbled over the secret a few years ago: Diastatic malt.
Apart from adding that delicious, toasty malt flavor to your bread, it helps with rise, extra crispy crust and browning, making it super useful in any type of sourdough bread.
I usually get one bag per year, as you use it in teaspoon amounts, and add it to most of my loaves.
Layering the maltiness, I’m using malt extract* instead of the more typical honey or sugar.
And for an even crispier crust I add Vitamin C powder*, which quickly became firm part of my baking after watching this genius video on Banh Mi Buns from Huy Nguyen.
All three of these ingredients are optional but highly recommended. You can get a perfectly fine bread without them, but “perfectly fine” is not the same as incredible.
Ingredient Notes
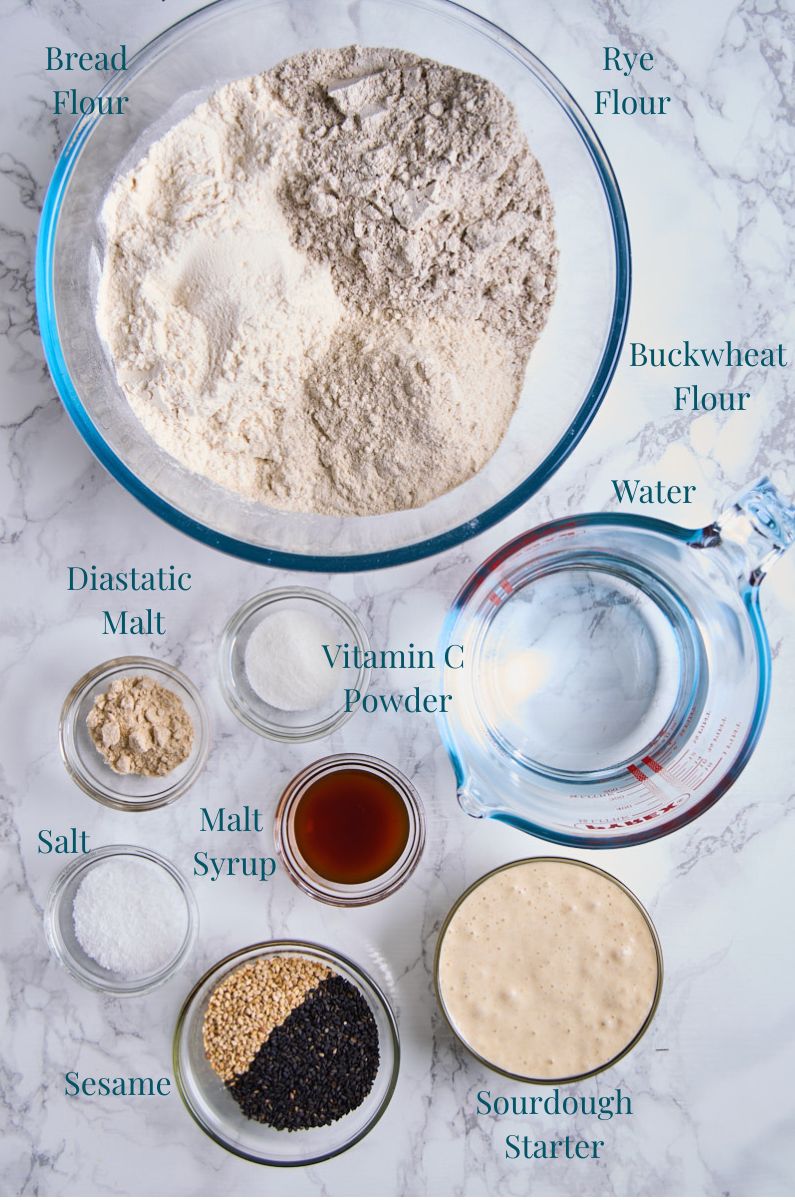
- Sourdough starter – (Called “Levain” among bakers) – If you don’t have one yet, try my recipe for it and you are ready to make your own bread within a week. If you have one, just feed it, so it’s nice and active. Essentially it’s flour and water mixed together at a 1:1 weight ratio and left to ferment. Easy as that.
- Flour – I’m using a little more than half of the total amount of strong white flour, to give the bread enough gluten for a good rise. The rest is made up of rye flour for that typical German bread flavor and buckwheat flour, to add a nutty, malty earthiness to this loaf.
Note:
Cups, due to the possibility of compacting the flour while dragging the container through it, can give you wildly different results. Use a tablespoon to gently fill the cup with flour, then drag the back of a knife over it to level. This should give you the closest to the standard 120g per cup of flour.
Alternatively, if you have kitchen scales, assume 120g flour per cup and weigh it out.
In many of my recipes I will give gram measurements for this reason, but you can always switch to the american measurements in the recipe card.
- Optional but recommended – As mentioned above I’m adding diastatic malt powder, malt extract* and vitamin C powder* to most of my breads, to up the malt flavor plus help to improve crust and rise.
With flours like rye and buckwheat, that contain no gluten, this will give you a fabulous boost to make up for the amount you’d have in white bread. - Sesame Seeds – White and black. These are also optional but encouraged. Aside from imparting the bread with their subtle nutty and slightly sweet flavor, going perfect with the buckwheat, they give each bite a slight crunch and richness. I use them both in the dough and as topping, adding charming little freckles to the crumb.
- Salt – Important for any bread. I’m using kosher. If you use sea salt, add half the given amount.
How to Make this
This may look familiar to you, as it’s the exact same as for most of my sourdough breads. It may need a little bit of pre-planning, but needs only very little in terms of hands on work.
2 days before you plan to bake
Feed your sourdough starter. Add a 1:1 ratio in weight, not volume (100% hydration) of flour to water to get about ¾ cup. ½ will be used for the dough, the last ¼ is your next starter.
I use filtered water and whatever flour I have on hand. So far I’ve tried rye, several types of white and whole wheat and they all worked great.
Some recipes advise a 3 step feeding schedule, but frankly I didn’t find it necessary.
If you want a really open crumb (lots of bubbles) you could go for it, doubling the flour quantities used at each feed, but personally I prefer a finer crumb to keep the butter on the bread, not on my plate and hands. It also seems to stay fresh longer that way. Probably due to less air exposure within the bread structure.
Decide when you would like to bake your bread
I usually prepare my dough in the evening, then leave it in the fridge overnight, to develop the best flavor and give it the lovely rise we all love. I found that to be the most foolproof method, as it gives the little sourdough bacteria plenty of time to work on the fermentation.
The other option is, to prepare it early morning, to bake in the evening. Calculate at least 6h rest outside of the fridge for best results.
Prepare the dough

Mix the wet – sourdough starter, water, malt extract – with diastatic malt if using.
Mix the dry – Stir together the flour, salt, 3 tbsp sesame seeds and vitamin C (if using)
In a large bowl stir the wet into the dry until no dry flour is left. I usually use a sturdy wooden spoon for this and have occasionally outsourced the stirring to a stronger partner without arthritis on particularly bad days. (To promptly get complaints on how hard it is. What shall I say: Kitchen workouts are real!) But honestly, it just takes a few minutes. You’ll be fine, I promise.

If you feel like it, you could of course use your hands for some relaxing dough smashing. I prefer to go the lazy route though. This is no-knead for a reason after all.
Let the Sourdough do the Job for You
Cover your bowl with clingfilm and leave to rest for about 2h outside the fridge to start the fermentation process.
After that either leave it in the fridge overnight or on the counter for at least 6h. The time can vary wildly depending on season and room temperature. Once it has about doubled in volume and is nice and puffy, it’s ready.
Stretch and Fold
For the last rest, you can use either a banneton (bread proofing basket) * or simply a bowl. Either will be protected by the baking parchment we use for shaping the bread on.
Now, let get to the last few steps before you get your well-deserved no-knead bread.
You’ll get to play with the dough now. Just a little.
Take your dough out of the fridge about 2h before you plan to bake, to let it come to room temperature. I usually do that the moment I walk into the kitchen in the morning, before my coffee.
Before coffee! *gasp*. I don’t even talk before coffee, but hey, it’s proper homemade bread I get for it!
Using baking parchment for easier cleanup and a method to lower your loaf into the Dutch oven* later, flour it lightly to prevent sticking.
Then, using either floured hands or a dough scraper (makes working with sticky dough so easy!) stretch the dough out a bit, then fold it like an envelop into itself. Turn by 90 degrees, repeat. Turn again, repeat once more.

Then, flipping the dough onto the seam, use your hands to push any corners underneath, to create a neat loaf and some surface tension.
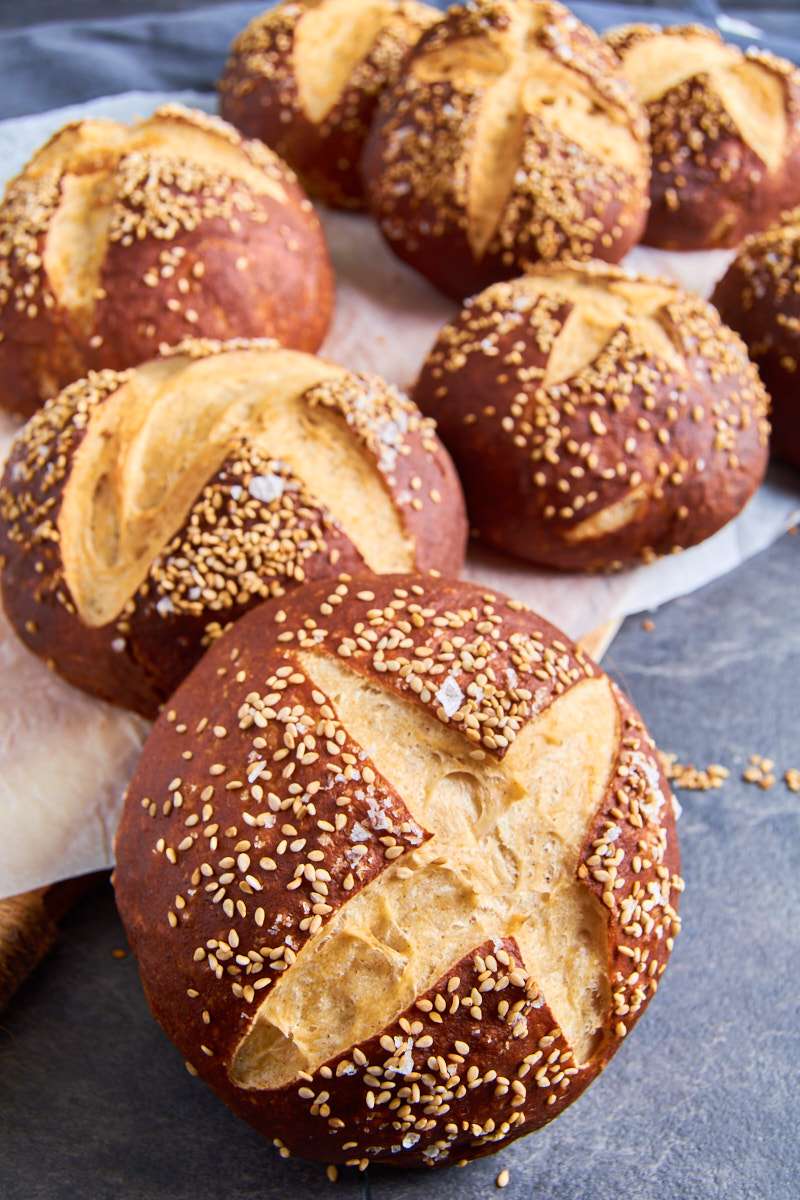
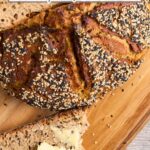
Top with sesame


If you chose to use sesame seeds to top your bread, get a deep plate now, filling the bottom with about 3 tbsp of them. You can use white or black or a mix of both. They will be delicious either way.
Brush the dough with a little water, then roll the top in the sesame covered plate until it is covered. Use as much as you enjoy. I went with a lot, because I’m addicted to the little nuggets of joy. Seriously, biting on sesame seeds is the food equivalent to popping bubble wrap for me!
Rest while you pre-heat the oven
Place your loaf back on the baking parchment and transfer to a bowl or banneton, sesame side up, covering it with a clean kitchen towel for the last hour, to give it the last rise.
Pre-heat your oven to its highest temperature 450°F/230°C and place your Dutch oven or cast iron pot with lid in it to heat as well.
I usually leave it for a minimum of 30min up to 1h, to make sure the pot is really hot. Many ovens fluctuate drastically in temperature even after notifying you their target heat is reached, only stabilising after about an hour.
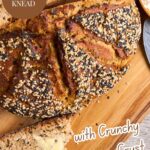
Score
If you’d like to add some pretty scoring patterns to your bread, now is the time. To get them really precise, you can even pre-freeze your bread for half an hour to harden the crust and prevent the dreaded dough dragging.
Use a very sharp knife of bread scoring tool to cut your pattern. Here is a Pinterest link to a whole sheet of patterns.
Bake your Sourdough Buckwheat No-Knead Bread
Take out the Dutch oven using oven gloves. Take off the lid and put it on a heat proof surface like your hob. Please don’t burn a ring into your sink or wooden cutting board (like I did. Both.).
Pick up the corners of your baking parchment and carefully lower your dough into the pot. Cut off the overlapping corners using kitchen scissors, so they won’t let the steam escape.
Put the lid back on (Oven gloves! I’m scatterbrained and forgot it more than once. Ouch!) and push the pot on a rack in the middle of your preheated oven. Close the door and immediately lower the temperature to 425°F/220°C.
Bake for 30 minutes, enjoying the intoxicating scent of baking bread. I think this might be my favourite part of the process.
Remove the lid and bake for another 15-25 minutes, depending on your oven and how dark you like your crust.
Take the pot out of the oven and tip your bread onto a cooling rack. Lightly tap the bottom. Does it sound hollow? That means it’s done.
If not, put it back for another 10 minutes or so.
Equipment used in this recipe
 Buy Now →
  Buy Now →
  Buy Now →
  Buy Now →
  Buy Now →
  Buy Now →
 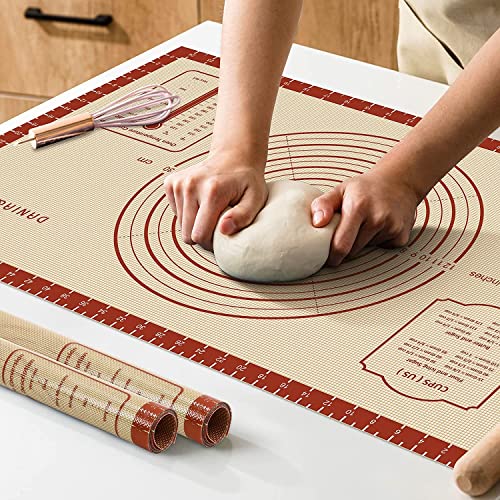 Buy Now →
  Buy Now →
 Leave To Cool
I know, this is hard! But trust me on this, you don’t want the still slightly sticky crumbs all over your bread knife. It’s near impossible to get a clean cut at this stage.
Usually 1-2 hour of cooling will do.

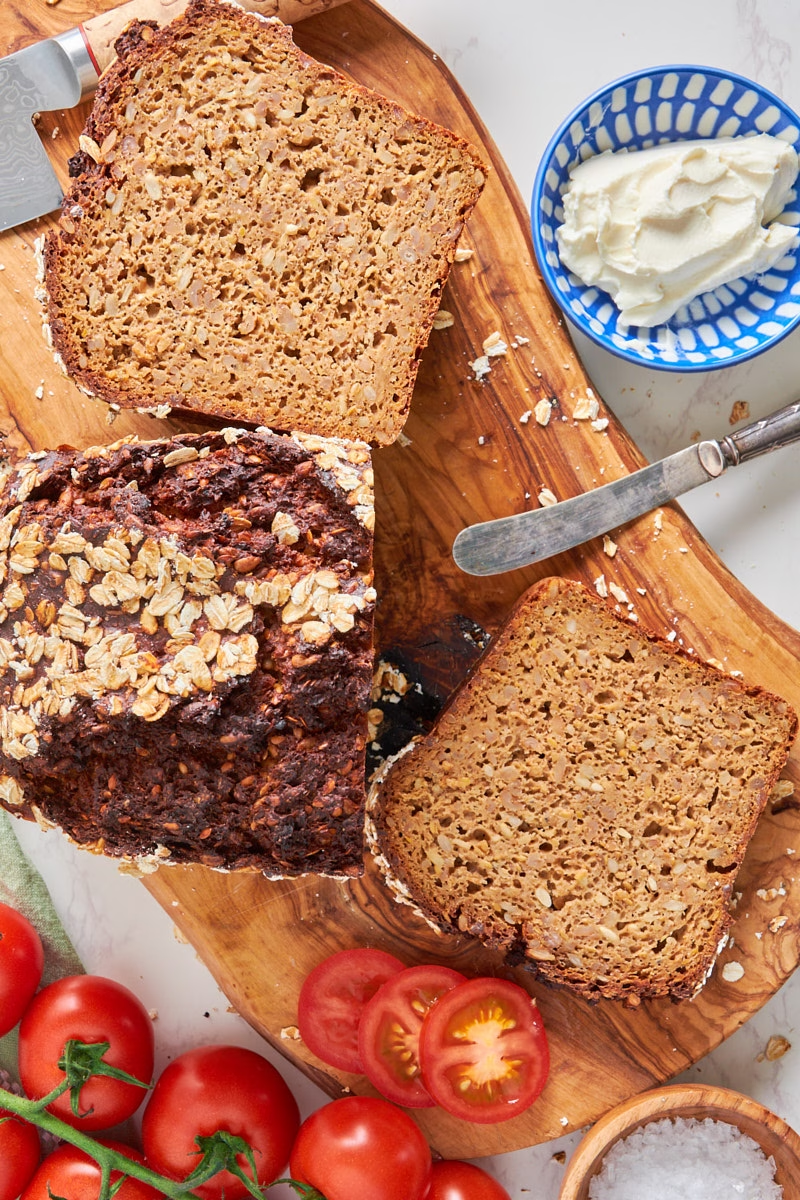
Enjoy your utterly delicious homemade Sourdough Buckwheat No-Knead Bread any way you like.
I adore this in particular with butter and honey, going incredibly well with the nutty sesame and buckwheat.

Meal Prep
The recipe, contrary to most of by bread recipes, which make 2 loaves or one extra-large, makes 1 standard sized loaf.
This bread keeps well in a bread tin for up to 4 days and is delicious toasted.
I usually freeze half of it, as I like my bread really fresh.
If you want to re-crunch the crust, sprinkle with a bit of water (I just tend to swish it really quickly under the tap) and re-bake in the oven or air fryer for about 10-15 minutes. It’ll taste like fresh, particularly good with stews or salads.
Other recipes you might enjoy
Probably the best bread you can eat:
German Black Bread with Protein (Sourdough Schwarzbrot)


Now I’d love to hear from you in the comments!
Have you tried this? Did you enjoy it?
What other recipes would you like to see?
And if you enjoyed this recipe, please consider rating, sharing, or leaving a comment – your feedback truly helps my blog grow!

Sourdough Buckwheat No-Knead Bread
- Total Time: 15 hours 30 minutes
- Yield: 16 slices 1x
- Diet: Vegan
Description
A nutty Sourdough Buckwheat No-Knead Bread with crunchy sesame topping, this loaf couldn’t be any easier to make: Stir the ingredients together, let the sourdough bacteria do the hard work for you and enjoy the scent of freshly baked bread wafting through your house the next morning.
The Dutch oven method guarantees the perfect crispy crust and tender crumb, keeping fresh for days.
Ingredients
Starter
- 1/4 cup sourdough starter
- 1/4 cup water
- 1/4 cup + 2 tbsp flour
Dough
- 1 1/2 cups water
- 1/2 Tbsp malt extract (Can be replaced by Maple Syrup or Honey but adds a nice malty flavour)
- 1 tsp Baking Malt powder (Optional. Gives a lovely colour, malty flavour and adds crunch to the crust)
- 1 tsp Vitamin C powder (Optional. For better rise and crispy, shattering crust)
- 2 cups white bread flour
- 1 cup rye flour
- 1/2 cup buckwheat flour.
- 2 tsp kosher salt
- 3 tbsp sesame (White or black and white. Plus extra for topping.)
Instructions
Prepare Starter (1-2 Days Before Baking):
- Feed your sourdough starter using a 1:1 ratio of water to flour by weight to get 3/4 cup. 1/2 will be used for this bread, 1/4 as your next starter. Use filtered water and any available flour (rye, white, or whole wheat).
Mix the Dough (Evening or Morning Before Baking):
- In a jug, mix wet ingredients: sourdough starter, water, malt extract, and diastatic malt (if using).
- In a separate large bowl, combine dry ingredients: bread flour, rye flour, buckwheat flour, salt, vitamin C powder (if using), and 3 tbsp sesame seeds.
- Gradually stir the wet mixture into the dry ingredients until all flour is hydrated and no dry spots remain. A sturdy wooden spoon works well.
Bulk Fermentation:
- Cover the bowl with cling film and let rest at room temperature for 2 hours.
- Afterward, place the dough in the refrigerator overnight (preferred for flavor) or allow it to ferment on the counter for at least 6 hours until doubled in size and puffy.
Shape the Dough:
- Remove dough from the fridge 2 hours before baking to reach room temperature.
- Lightly flour baking parchment. Gently stretch and fold the dough: stretch one edge and fold it inward, then the opposite side, rotate 90 degrees, and repeat 2 more times.
- Flip the dough seam-side down and shape into a smooth loaf by tucking in edges.
Add Sesame Topping (Optional):
- Brush the loaf with water and roll the top in sesame seeds spread on a plate. Coat generously.
Final Proof:
- Transfer the loaf (on parchment) to a banneton or bowl. Cover with a towel and let rise for 1 hour.
Preheat the Oven:
- Preheat oven to 450°F (230°C) with a Dutch oven or cast-iron pot inside. Allow the pot to heat for at least 30 minutes.
Score and Bake:
- Optionally, score the bread with a sharp knife or scoring tool for decorative patterns.
- Carefully transfer the dough (on parchment) into the hot Dutch oven. Trim excess parchment corners to retain steam.
- Bake covered for 30 minutes, then remove the lid and bake for 15-25 minutes at 425°F (220°C) until the crust is golden brown.
Cool and Enjoy:
- Remove the bread from the oven and let cool on a rack for at least 1 hour before slicing. This allows the crumb to set and flavors to develop.

Notes
The equipment section may contain affiliate links to products I know and love.
The recipe, contrary to most of by bread recipes, which make 2 loaves or one extra-large, this one makes 1 standard sized loaf.
This bread keeps well in a bread tin for up to 4 days and is delicious toasted.
I usually freeze half of it, as I like my bread really fresh.
- Prep Time: 30 minutes
- Cook Time: 1 hour
- Category: Bread, Side Dish
- Method: Bake
- Cuisine: German
Nutrition
- Calories: 101
- Sugar: 0.3
- Sodium: 276
- Fat: 1
- Saturated Fat: 0.2
- Carbohydrates: 20
- Fiber: 2
- Protein: 3
- Cholesterol: 0.04
I have tried so many versions of sourdough bread making n this is foolproof n it tasted so yummy
Yay! That really makes me happy. Thanks so much for taking the time to let me know. 🙂
For the macros it doesn’t say what a serving size is. Do you have that information?
Apologies and thanks for letting me know!
I just moved to a different plugin for the nutrition calculation and didn’t get around to updating all recipes yet. The bread makes about 16 slices (Depending on your slices of course. It’s a little tricky to say with bread!) and the nutrition is per slice. I’ve updated it to the new format now, so it’s easier to see.
Let me know what you think. 🙂
Just figured I should clarify a bit more how it’s calculated: The nutrition of the whole recipe was divided by 16, which is the slices (roughly) I get out of one loaf.
Not sure yet how it’s going to turn out, the dough seemed very stiff and didn’t really rise appreciably over night. I’ve done the following steps–folded and stretched, seeded, placed the parchment and dough for a final rest & rise so we’ll see how it goes.
Hey, thanks for your comment. The dough shouldn’t be stiff to be honest. This usually means there is too much flour. Most of the time this happens when the cup to meassure is dragged through the flour, compacting it in the process, instead of gently spooning and leveling. Unfortunately the American cup system is fairly unsuited for flour, as you can easily get up to 1/4 cup more from this method, which in case of a mainly made from flour bread, with its 3.5 cups in the recipe, can get you to about 3/4 cup more flour all in all.
Let me know how it goes. I think it should still rise in the oven, but might be a bit dry.
I’ll add a note to the recipe with the flour issue, making it clearer. So you helped future bakers. 🙂
sourdough buckwheat no knead bread is perfect, I tried with my starter.
Thank you. 🙂
This sourdough recipe could not have been any easier to make!
Thank you, so happy you found it easy.
I love how this bread turned out—nutty, flavorful, and stays fresh for days! The no-knead process made it a breeze to bake.
Thank you, so glad you liked it. 🙂
Soft, hearty, and so easy—this sourdough buckwheat bread is a winner!
Thank you.