Cranberry Buckwheat Sourdough Bread with Rosemary and Pumpkin Seeds
Buckwheat Cranberry Sourdough Bread with Rosemary and Pumpkin seeds is an easy but impressive festive sourdough bread you can prepare quickly in the evening and put into the oven in the morning, being rewarded with a delicious loaf and a house smelling of fresh bread and rosemary. It’s perfect for breakfast or the breadbasket of your Christmas dinner.

This post may contain referral links for products I love. For The Pleasure Of Eating earns a small commission on these links at no cost to you, and the links will always be marked with an asterisk* or highlighted in pink.
Why You Will Love This
Summary
A festive sourdough loaf using tart dried cranberries, pumpkin seeds and nutty buckwheat that can easily be a no-knead bread if you choose so.
Read on if you’d like to learn what inspired this combination, what makes sourdough so good for you and how to make it.
Seasonal
Since I live in Ireland, I have a bit of a love affair with cranberries, starting every year around late November, when they are finally available in the shops. Their bright red colour, a flavor somewhere between fruity, sour, tart and bitter needs to be tempered by something sweet. They are, of course, closely associated with Christmas around here, even though I love to eat them anytime.
Being from Germany, where a similar type of berry is available as jam all year round, I never realised how much I would miss it when I couldn’t get it in any supermarket.
I had to look the German version up and it was translated into “mountain cranberry” or “lowbush cranberry”. They are much smaller than the type of berries I get here and have a slightly more intense flavor, as I suppose most wild berry versions you would find. Think wild blueberries or the tiny, yet super intense, forest strawberries.
This year said love affair inspired me to make a rather stunning centrepiece of Cranberry Chocolate Meringue Pie with Pecan Crust, a lovely pink cranberry butter, which I’ll post soon, and this delicious Buckwheat Cranberry Sourdough Bread with Rosemary and Pumpkin seeds.
Cranberries of course
In my book, any sort of fruity bread is a win. Raisins? Sure! Cranberries? Absolutely! The next I’ll have to try is dates!
The cranberries in this one give just such juicy little nuggets of sweet – tartness, which makes it incredible with cheese or sweet toppings. The Whipped Honey Cranberry Butter With Orange and Rosemary I made to go with it was my absolute favorite on it so far.
But can I urge you to try it with creamy, milky brie? Or even for dipping into a baked camembert. Heaven on a plate!
Sourdough
I can’t count how many times I’ve said it, but I’ll say it again: Sourdough is really good for you!
Not does the slow fermentation make it easier digestible , there are also studies showing that even people with celiac disease can tolerate it better than for example yeasted bread. Plus sourdough bread, due to the fermentation, raises your bloog sugar slower, making it great at preventing hunger pangs shortly after eating. A fact I used to my advantage while losing 70lb in a year.
And it just has so much more flavor.
Easy and can be prepared ahead of time
I know, some people find sourdough still intimidating, but honestly, it’s just water and flour left to do it’s thing for an extended period of time, leading to a slow fermentation process, developing the classic slightly sour flavor and giving the bread a slow rise. The slowness actually works in our favour here, as it means we can simply mix the dough in the evening, let the little bacteria do their job overnight and bake it freshly in the morning.
Can be no knead
Now I know many of the “serious” sourdough people will hate me for saying this, but personally I found very little benefit in kneading the dough and doing the whole stretch and fold routine. I just found that my bread comes out perfectly fine as long as I leave it overnight in the fridge and then take it out about 2h before baking, shaping it after 1h.
Maybe it helps that I’m a fan of the slightly less open crumbed (read: bubbly) versions, as I feel whatever I put on top of all the bubbles just…well…falls through. So I do love tiny bubbles, which means my butter, jam, honey or whatever I decide to spread on it, stays on the bread, not my hands.
Nutty Buckwheat
To go with the season, cranberries and pumpkin seeds, I’ve added a relatively small amount of buckwheat flour here. This is, contrary to it’s name, not a grain but made from buckwheat berries which are considered a seed. And with that naturally gluten free. Unfortunately that also means it wouldn’t give rise to a bread, so making a whole bread only from buckwheat would give you more of a brick to smash over a burglars head than an edible bread.
In smaller amounts however, buckwheat adds a really lovely nutty flavor, which btw would go fantastic with chocolate. Needless to say, this bread would be great with Nutella. Ahem…organic hazelnut spread I mean. Would I ever eat something as sugary as Nutella? (Yes, yes I totally would. But shhh, don’t tell anyone or it’ll ruin my “healthy food” reputation. 😉)
Ingredient Notes

- Sourdough starter – Mine is many years old and started out as rye sourdough starter but was converted into white for versatility a while ago. It’s roughly 100% hydration, which simply means the same weight of flour to water. And when I say roughly I mean I mostly eyeball it, judging by consistency.
- White bread flour – You can find it in any half decent supermarket these days and it has the high protein content that allows it to rise and give fantastic structure to bread. I order mine in a big bag from Riot Rye (gotta love that name!) . It makes up a bit over half of the flour content, to give the bread a pleasant structure, adding a bit of lightness to the heavier flours.
Note:
Cups, due to the possibility of compacting the flour while dragging the container through it, can give you wildly different results. Use a tablespoon to gently fill the cup with flour, then drag the back of a knife over it to level. This should give you the closest to the standard 120g per cup of flour.
Alternatively, if you have kitchen scales, assume 120g flour per cup and weigh it out.
In many of my recipes I will give gram measurements for this reason, but you can always switch to the american measurements in the recipe card.
- Whole wheat bread flour – You can use standard whole wheat here if you can’t find the higher protein (often called “strong”) bread version. It adds nutrition, fibre and a bit of nutty taste.
- Buckwheat flour – This is where a strong nuttiness is added to the bread, going really nicely with the cranberries and pumpkin seeds. Less is more here, or we risk the bread being too firm.
- Barley malt extract* – I absolutely love using this in baking instead of sugar or honey which is often added to balance the flavors. It gives the perfect malty undercurrent to the bread, which I find lacking in so many shop bought loafs. It’s usually available in health food shops, but if you can’t find it use honey instead. Or, for a deeper flavor, can I suggest molasses?
- Diastatic malt powder – Also called barley malt powder. This can be decidedly trickier to find if you don’t happen to live in Germany. I used to order it about once a year from Amazon.de as I just can’t live without it.
Luckily, I just found it for the first time in Ireland at Kells.
To quote from “The Perfect Loaf” where Diastatic Malt Powder was explained in great detail:
- “Contains diastase enzymes, which break down starches into simpler carbohydrates, Aids in the browning of crust, as well as the sweetness Contains diastase enzymes, which break down starches into simpler carbohydrates
- Aids in the browning of crust, as well as the sweetness of yeasted bakes
- Acts as a food for yeast, which can aid in oven spring, yielding a loftier loaf or roll; as well as a more tender, even crumb.
- Acts as a food for yeast, which can aid in oven spring, yielding a loftier loaf or roll; as well as a more tender, even crumb”
I find the effects most noticeable in the distinct malty flavor it adds and the super crunchy crust, which I was never able to get to quite the level I was used to from German breads until I discovered it.
Now the above states “yeast”, but technically sourdough bacteria are a form of wild yeast. So, it works nicely in sourdough bread.
Again, because it’s so tricky to get in some places, you can simply leave it out.
- Vitamin C powder – I realise we are getting weirder and more exotic by the minute but hear me out. This is, again, optional, but adds even more crispness to the crust and helps the rise. And I’m all for crisp crusts!
- I found it last year while making Banh Mi buns following this brilliant video from Huy Nguyen and used it in bread ever since.
- It’s simply Ascorbic Acid, which you should be able to find in health food stores or even some pharmacies. Vitamin C in its purest form.
- Dried cranberries, pumpkin seeds and rosemary – We are done with the exotic ingredients now, I promise. Back to store cupboard and kitchen basics with the seasonal flavor mix-ins for this bread. The dried cranberries ad juicy, fruity and slightly sour little nuggets of joy to this loaf, while the pumpkin seeds give crunch. The rosemary brings it all together with a subtle, woody herbiness, fitting wonderfully on a festive table and filling your house with the most delicious scent while baking.
- Salt – Whatever you do, do not forget the salt or you’ll have very bland bread! I use kosher salt. Diamond Crystal to be exact. If you use a different one, you will need to half the number of teaspoons I used.
- Liquid – I’ve used water, beer or coffee in sourdough bread with great success. In this one we’ll simply use water, to let the fruity and herby flavors from the flour and mix-ins shine.
Equipment Used
 Buy Now →
  Buy Now →
  Buy Now →
  Buy Now →
  Buy Now →
 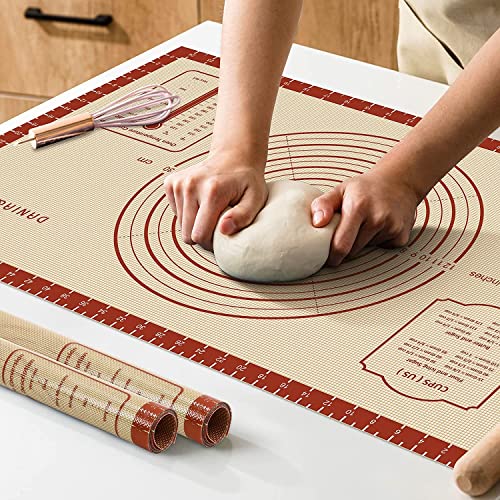 Buy Now →
  Buy Now →
  Buy Now →
 How to Make this
2 Days before baking your Cranberry Buckwheat Sourdough Bread
Feed your sourdough starter.
Do this 2 days before you want to bake the bread. Add the same amount of water and flour in weight, until you have about 1.5 cups of starter. Usually I add about 125g flour and 125g water to my roughly ½ cup of existing starter that lives in a jar in my fridge when not in use.
You will use 1 cup for the bread and keep ½ cup as base for your next starter. Leave it on the counter for a few hours or overnight, until it’s bubbling nicely. If you started a bit too early the day before or just had your bread making delayed, no problem: Just give it a little snack of a spoon of fresh flour and a bit of water to wake it right back up.
1 Day (ideally the evening) before baking
Mix the wet ingredients plus the malt powder if using in a jug.
Mix the dry ingredients in a very large bowl* or your Stand Mixer*. That includes the mix ins. I realise some people add them later, but I found it’s much easier to add them at this point.
Pour the wet into the dry and mix with a wooden spoon or your hands until no dry flour is left.
At this point you have two choices: Just cover the bowl with cling film, leave it out on the counter for about 2h, until is starts to rise a bit, then transfer to the fridge overnight.
Or, if you really love the whole kneading and folding and playing with dough, feel free to do 3 stretch and folds every 30 minutes with wet hands. This is a sticky dough, so wet hands work best. Then continue as above with clingfilm coverage and fridge overnight.
For me both versions worked well, and I couldn’t see a noticeable difference in the handled bread after baking. So, since I’m lazy, I just skip it.

On the Day of baking
Take your bowl of now very bubbly and risen dough out of the fridge about 2h before baking.
Let it come to room temperature for 1h.
Start pre-heating your oven to its highest temperature 450°F/250°C, already adding your Dutch oven* to pre-heat with it. I’m using an old Berndes cast iron pot, similar to Le Creuset. But any reasonably sized Dutch oven with a lid will do. I read some people even used simple stainless steel pots. I haven’t tried it, but if you do, let me know how it goes. Just make sure it’s oven proof, so you don’t end up with cracked lids or molten plastic handles.
Shape your loaf
At this stage prepare your shaping surface. I usually use a large silicon mat* to catch any dough or flour that might escape and cover it with some baking parchment. I know that sounds like an unnecessary step, but the dough will be fairly sticky and I’m way too lazy to clean it from the mat.
Plus, I use the parchment to lower it later into the pot without burning my fingers, sprinkling flour all over the place or having the bread stick to the pot if the dough was just that tiny bit too moist. (I swear it’s moody and goes with the weather! The exact same amount of flour and water had led to different results over time. Always yummy, but sometimes just that tiny bit too sticky!)
Sprinkle some flour or semolina or rice flour over the parchment and over the surface of your dough in the bowl. Use a rubber spatula to pry it loose and tip it onto the parchment.
Now comes the only bit of handling you really have to do. Using either your floured hands or a dough scraper, push under the dough, lift about 1/3 and fold it over. Turn the dough by 90 degrees (or simply rotate the silicone mat) and do it again. Once more the same.
One Large or Two Smaller Breads
Decide if you want one large loaf or 2 smaller ones. If two, divide in half and continue as below with each of them.
Using your hands, turn the dough by pushing slightly underneath it, tucking the edges under itself, shaping it into a round loaf.
In the picture below I added pumpkin seeds and fresh cranberries to the top of this loaf. While the pumpkin seeds worked reasonably well, the cranberries just burned. So, I decided to make the final version with just flour and scoring.

Let it rest
If you have a bread basket*, flour it very well and flip your bread loaf into it, seam side up.
Lacking said basket or being like me and finding them rather questionable with all the possible sticking incidents, get a bowl that has roughly the size of your loaf if it expands by 1/3, simply grab the baking parchment and lift it into the bowl, the seams of the bread pointing down.
Whichever method you use, cover with either a clean kitchen towel or the clingfilm from earlier and let it rise for about 1h.
Transfer to your Dutch oven
Once your oven is really hot, take out your Dutch oven*/cast iron pot, using oven gloves and set it on a heat proof surface. I usually use my hob, as I burned a dark ring into a wooden chopping board with it once.
Take off the lid and gently lower your loaf from the basket, seam side down, into the pot. Or, if you are freaked out by hot pots like me, grab the corners of your baking parchment and lower it like that into the pot. In case or the parchment, you may have to cut of some corners with kitchen scissors carefully, so the lid can close properly.
Score your bread
Using either a small very sharp knife or a bread scorer*, score the top of your Cranberry Buckwheat Sourdough Bread for a better rise. I often just slice once across it in a slight arc. But you can get as artsy as you like.
If you like, sprinkle with pumpkin seeds. I found the get a bit dark for my taste. In one of the pictures you see even some added cranberries on top. Those were fresh ones I experimented with, but found they get way too burned. So I wouldn’t advise to put any on top.
Put the lid back on (Oven gloves! I forgot it once. Ouch!) and push the whole thing onto the rack set to the middle in your oven. Close the door and immediately lower the temperature to 435°F/225°C.
Bake
Bake for 35min with the lid on if you made one large loaf. If you divided into 2 bake for 25min.
Take off the lid using oven gloves and bake for another 20-25 min until your bread is lovely golden to dark brown, depending on your preferences. Take out the pot and flip your bread onto a cooling rack. Briefly knock the bottom. If it sound hollow, your bread is done. Otherwise put it back into the oven for a few more minutes. Every oven is different, so this is not an exact science.

Leave to cool
Look, I love warm bread as much as the next person, but unless you want a sticky mess on your bread knife, you have to let this cool for a while. I know it’s hard! It should be at a maximum hand warm when you slice into it. Completely cooled will give you nicer slices.
Enjoy your Cranberry Buckwheat Sourdough Bread with Rosemary and Pumpkin Seeds!
Whichever topping you choose (and I urge you to try the Whipped Honey Cranberry Butter With Orange and Rosemary), enjoy your delicious homemade loaf of fresh Buckwheat Cranberry Sourdough Bread with Rosemary and Pumpkin seeds.

How To Store
I usually freeze at least half of my freshly baked bread, to have it as fresh as possible.
This will keep in a bread tin for about 3 days or frozen for about 6 months.
It’s extra delicious toasted, emphasizing the buckwheats nuttyness.
FAQ
No, these are all optional. Though I would strongly encourage you to use at least one of the two malt flavor sources, as they give a stunning crust and aroma. If you can’t find malt syrup, use honey, molasses or even sugar. Molasses will make for a darker bread.
This can have many reasons from an inactive starter over a too wet starter to a too cold room. Or your dough being overall too wet. It should be soft, but not to the point of sponge cake batter consistency. If it looks like that, add some flour. But beware, this is not an easy to handle dough that you can knead without getting sticky dough all over your hands. That’s working as intended.
If your room is too cold, may I suggest putting it to bed? Not kidding. Maybe even with a warm water bottle somewhere nearby (not too close) for about 2h, so it can get a nice start before the night in the fridge.
Last solution, if the starter is super inactive, would be to add a teaspoon or two of active dry yeast, dissolved in a little water to the dough and then mix in a few more tablespoons of flour. But if your starter was reasonably bubbly to begin with, that shouldn’t be necessary.
Freeze your dough for about 30 min or so before scoring. It’ll have formed a slightly firmer surface in that time, which can be easily scored.
You could either use more of the whole wheat flour or maybe spelt or rye flour. Both adding a lovely flavor.
I usually freeze at least half of the bread. It’ll last about 3 months in the freezer. The fresh one is kept in a bread box after cooling completely.
This recipe makes either 1 very large loaf that fills pretty much my whole Dutch oven, or 2 smaller ones. In the pictures you see the 2 smaller ones.
Other recipes you might enjoy


An everyday version of this:
Sourdough Buckwheat No-Knead Bread
Now I’d love to hear from you in the comments!
Have you tried this? Did you enjoy it?
What other recipes would you like to see?
If you enjoyed this recipe, please rate, share and/or comment. It helps me a lot!
Print
Cranberry Buckwheat Sourdough Bread with Rosemary and Pumpkin Seeds
- Total Time: 13 hours 30 minutes
- Yield: 50 Slices 1x
- Diet: Vegetarian
Description
Buckwheat Cranberry Sourdough Bread with Rosemary and Pumpkin seeds is an easy but impressive festive sourdough bread you can prepare quickly in the evening and put into the oven in the morning, being rewarded with a delicious loaf and a house smelling of fresh bread and rosemary. It’s perfect for breakfast or the breadbasket of your Christmas dinner.
Ingredients
- 4.5 cups white bread flour
- 2 cup whole wheat flour
- 1.5 cup buckwheat flour (or more whole wheat)
- 3 tsp salt
- 1 cup dried cranberries
- 2 tbsp chopped rosemary
- 6 tbsp pumpkin seeds plus extra for topping if desired
- 1 tsp vitamin C powder (optional, helps with rise and adds crispy crunch to the crust)
- 1 cup sourdough starter (active)
- 2 1/2 cups water
- 2 tbsp malt syrup
- 2 tsp diastatic malt extract (optional, gives a darker crust and a lovely malt flavor)
Instructions
Feed the Starter:
- Combine equal parts flour and water (about 125g each) with your sourdough starter to create 1.5 cups of bubbly, active starter.
- Leave on the counter until active and bubbly, then refrigerate if needed, reviving with a small flour/water addition if baking is delayed.
Mix the Ingredients:
- In a large mixing bowl, combine all the flours, salt, vitamin C powder (if using), cranberries, rosemary, and pumpkin seeds.
- In a separate jug, mix the water, malt syrup, diastatic malt extract (if using), and sourdough starter.
Combine Wet and Dry:
- Pour the wet ingredients into the dry mixture and stir until no dry flour remains.
First Fermentation:
- Cover the dough with cling film and let it rest for 2 hours at room temperature until it starts to rise.
- Optionally, perform three stretch-and-folds every 30 minutes during this time.
Refrigeration:
- Transfer the covered bowl to the fridge and allow the dough to cold-ferment overnight.
Bring to Room Temperature:
- Remove the dough from the fridge 2 hours before baking and let it come to room temperature for 1 hour.
Preheat the Oven:
- Preheat your oven to 500°F (250°C) with a Dutch oven inside.
Shape the Dough:
- Dust a piece of parchment paper with flour or semolina.
- Gently tip the dough onto the parchment and perform three folds to create surface tension. Divide into 2 parts at this stage, if you’d like 2 smaller loafs.
- Shape into a round loaf, place it seam side down on the parchment, or seam side up in a floured proofing basket.
Final Proofing:
- Cover and let the dough rise for 1 hour until slightly puffy.
Prepare for Baking:
- Remove the Dutch oven carefully. If using parchment, lift the dough and place it inside. Otherwise, add some semolina or flour to the pot and gently flip the loaf into the pot seam side down.
- Score the dough with a knife or bread scorer, then sprinkle with extra pumpkin seeds if desired.
Bake:
- Cover the pot and reduce oven temperature to 435°F (225°C).
- For one large loaf, bake for 35 minutes with the lid on. For smaller loaves, bake for 25 minutes.
- Remove the lid and bake for an additional 20–25 minutes until golden brown and crusty.
Cool:
- Remove from the Dutch oven and let the bread cool completely on a wire rack before slicing.
- Enjoy the nutty, fruity, and aromatic flavors of this delightful sourdough bread! Perfect with butter, cheese, or simply on its own.

Notes
I usually freeze at least half of the bread. It’ll last about 3 months in the freezer. The fresh one is kept in a bread box after cooling completely.
This recipe makes either 1 very large loaf that fills pretty much my whole Dutch oven, or 2 smaller ones. In the pictures you see the 2 smaller ones.
- Prep Time: 30 minutes
- Cook Time: 1 hour
- Category: Bread, Breakfast, Dinner, Side Dish, Snack
- Method: Bake
- Cuisine: American, Fusion, German
Nutrition
- Calories: 90
- Sugar: 2
- Sodium: 142
- Fat: 1
- Saturated Fat: 0.2
- Carbohydrates: 18
- Fiber: 1
- Protein: 3


Buckwheat in sourdough that is wonderful idea, I am going to give this one try. I enojy making bread with fresh cranberries.
Thank you. 🙂
This cranberry buckwheat sourdough bread with rosemary and pumpkin seeds turned out amazing. The flavors come together so well, and it’s perfect for breakfast or a snack.
Thank you, so happy you like it!
Loved this bread. It’s hearty, flavorful, and perfect for pairing with just about anything! Specially my homemade orange marmelade. A slice of this with butter and my marmalade was pure heaven. 🙂
Oh my god, homemade orange marmelade! Excellent idea! You don’t happen to have the recipe, no?
We loved this hearty, delicious sourdough bread!! It’s perfect for the season!!
Thank you, it really is. 🙂